
As the leaves turn and the air cools, it’s the perfect time to whip up some comforting autumn entrees. Cozy dishes warm not just the belly but the spirit, creating a delightful backdrop for crisp evening meals. From hearty bakes to savory stews, this collection serves up comfort food that’s sure to satisfy your cravings and fill your home with inviting aromas. Let’s get cooking!
Mushroom and Barley Stuffed Peppers

Mushroom and barley stuffed peppers are a delightful autumn dish that brings warmth and heartiness to your dinner table. The combination of earthy mushrooms and chewy barley creates a satisfying filling, while the vibrant peppers add a pop of color and sweetness. This recipe is simple to make and perfect for cozy evenings.
The flavors meld beautifully, making every bite a comforting experience. Plus, it’s a great way to sneak in some veggies and whole grains into your meal. Enjoy these stuffed peppers as a main course or a side dish, and feel free to customize the filling to your liking!
Ingredients
- 4 medium bell peppers (any color)
- 1 cup pearl barley (180g)
- 2 cups vegetable broth (480ml)
- 1 cup mushrooms, finely chopped (150g)
- 1 onion, diced
- 2 cloves garlic, minced
- 1 teaspoon dried oregano
- 1 teaspoon paprika
- Salt and pepper to taste
- 1 tablespoon olive oil
- Fresh parsley for garnish
Instructions
- Preheat the oven to 375°F (190°C).
- Rinse the barley under cold water and combine it with the vegetable broth in a pot. Bring to a boil, then reduce heat to low, cover, and simmer for about 30 minutes until tender.
- Meanwhile, heat olive oil in a skillet over medium heat. Add the diced onion and garlic, and sauté until softened, about 5 minutes.
- Add the chopped mushrooms to the skillet and cook for another 5 minutes until they’re browned. Stir in the cooked barley, oregano, paprika, salt, and pepper. Mix well and remove from heat.
- Slice the tops off the bell peppers and remove the seeds. Fill each pepper with the barley and mushroom mixture, packing it in gently.
- Place the stuffed peppers upright in a baking dish. Cover with foil and bake for 25-30 minutes. Remove the foil and bake for an additional 10 minutes until the tops are slightly crispy.
- Garnish with fresh parsley before serving. Enjoy!

- The Original Pro Chopper - Our superstar veggie slicer has been creating waves on TikTok! Simple to use,...
- Easy Meal Prep with Rust-Resistant Blades - Our vegetable chopper is perfect for anyone who wants to eat...
- 5-Star Design - The soft-grip TPU handle ensures controlled chopping, while the non-skid rubber base...
Apple Cider Braised Pork Chops
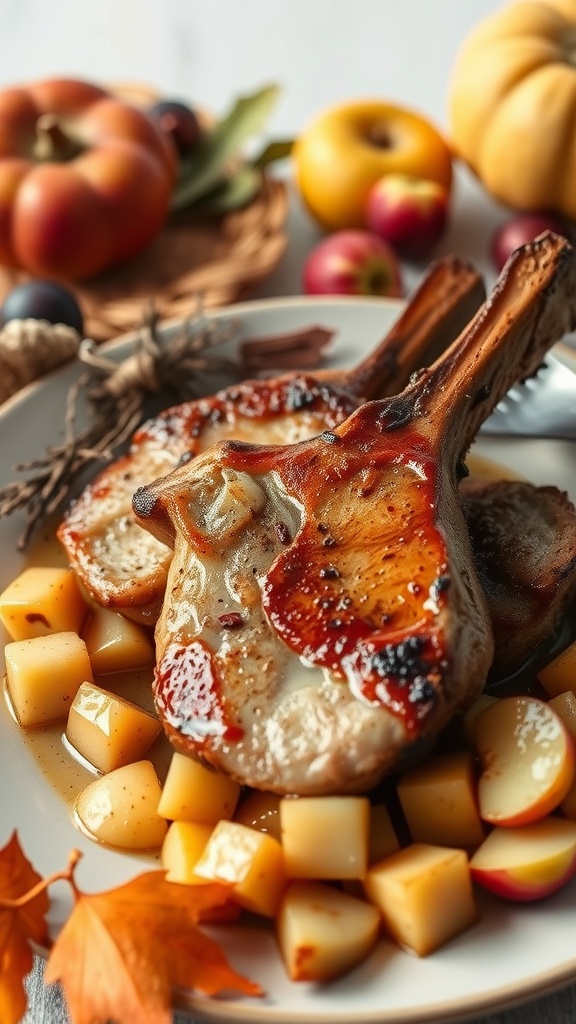
Apple Cider Braised Pork Chops are the perfect dish to warm you up on a chilly evening. The sweet and tangy apple cider beautifully complements the savory flavors of the pork, creating a satisfying meal that feels both hearty and comforting. Plus, this recipe is simple enough for a weeknight dinner but impressive enough for guests.
With just a handful of ingredients, you can whip up these delicious pork chops that are both tender and packed with flavor. Serve them with some roasted vegetables or mashed potatoes for a complete meal!
Ingredients
- 4 bone-in pork chops (about 1 inch thick)
- 2 cups apple cider
- 1 tablespoon olive oil
- 1 medium onion, sliced
- 2 cloves garlic, minced
- 1 teaspoon dried thyme
- 1/2 teaspoon salt
- 1/4 teaspoon black pepper
- 1 tablespoon apple cider vinegar
- 1 cup diced apples (like Granny Smith or Honeycrisp)
Instructions
- Brown the Pork Chops: In a large skillet, heat olive oil over medium-high heat. Season the pork chops with salt and pepper. Sear them in the skillet for about 4-5 minutes on each side until golden brown. Remove from the skillet and set aside.
- Sauté the Aromatics: In the same skillet, add sliced onions and cook until softened, about 3-4 minutes. Stir in the minced garlic and dried thyme, cooking for another minute until fragrant.
- Add Cider and Simmer: Pour in the apple cider and bring it to a simmer. Scrape any brown bits from the bottom of the skillet. Return the pork chops to the skillet, adding the diced apples and apple cider vinegar.
- Braise: Cover the skillet and reduce the heat to low. Cook for about 20-25 minutes, or until the pork reaches an internal temperature of 145°F (63°C) and is tender.
- Serve: Plate the pork chops and spoon some of the apple and onion mixture on top. Enjoy!

- Makes Everything Simple : Just forget your bagged cheese! Only turn the handle for several times and get...
- Premium Material : All parts of the rotary cheese grater are made of food grade ABS material, no BPA. The...
- Three Option Grater : The parmesan cheese grater finishes food preparation with slicing, shredding and...
Butternut Squash and Sage Pasta
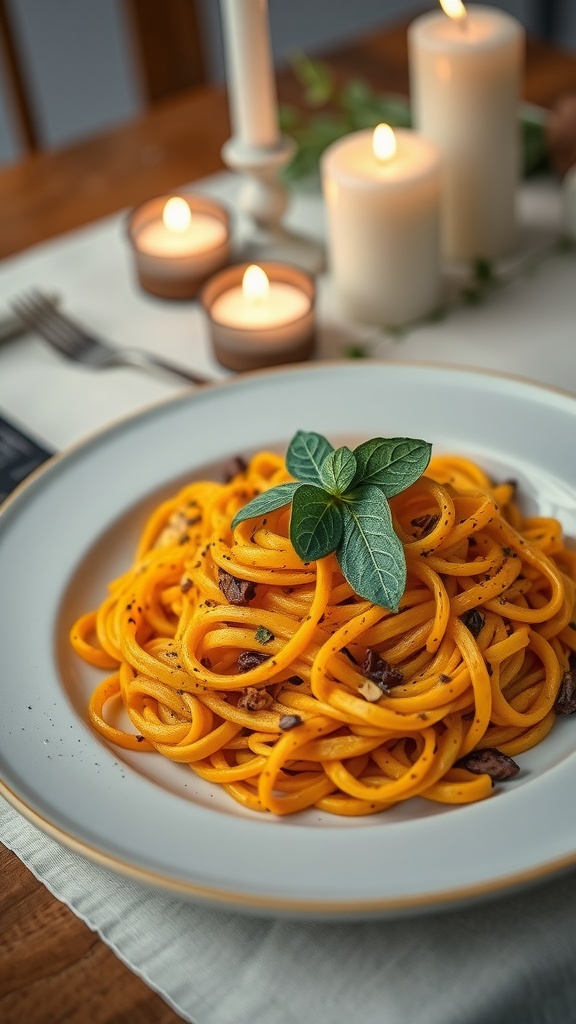
Butternut squash and sage pasta is the perfect dish for cozy autumn evenings. The creamy, earthy flavors of the squash harmonize beautifully with the fragrant sage, creating a comforting meal that’s both satisfying and simple to prepare. This dish is great for a weeknight dinner or a special occasion and can be made in about 30 minutes, making it a go-to option when you’re short on time.
The sweet and slightly nutty flavor of roasted butternut squash pairs wonderfully with al dente pasta, creating a delightful balance of textures. Adding sage enhances the dish with its aromatic qualities, making each bite a warm hug. Whether you’re cooking for family or friends, this pasta is sure to impress with its vibrant color and delicious taste.
Ingredients
- 400g (14 oz) pasta (fettuccine or your choice)
- 500g (1 lb) butternut squash, peeled and diced
- 3 tablespoons olive oil
- Salt and pepper to taste
- 1 small onion, diced
- 2 cloves garlic, minced
- 1 teaspoon fresh sage, chopped (or 1/2 teaspoon dried sage)
- 50g (1/2 cup) grated Parmesan cheese
- Fresh sage leaves for garnish
Instructions
- Preheat the Oven:Preheat your oven to 200°C (400°F).
- Roast the Squash:On a baking sheet, toss the diced butternut squash with 2 tablespoons of olive oil, salt, and pepper. Roast for 20-25 minutes until tender and slightly caramelized.
- Cook the Pasta:While the squash is roasting, cook the pasta according to package instructions until al dente. Reserve 1 cup of pasta water, then drain the rest.
- Sauté the Aromatics:In a large skillet, heat 1 tablespoon of olive oil over medium heat. Add the diced onion and sauté for about 5 minutes until translucent. Stir in the minced garlic and chopped sage, cooking for another minute until fragrant.
- Combine:Add the roasted butternut squash to the skillet and mash it slightly with a fork. Pour in the reserved pasta water gradually to create a creamy sauce.
- Mix in the Pasta:Add the cooked pasta to the skillet, tossing until well combined. Stir in the grated Parmesan cheese and adjust seasoning as needed.
- Serve:Plate the pasta and garnish with fresh sage leaves and extra Parmesan if desired. Enjoy!

- 💰 REDUCE WASTE AND SAVE MONEY: Chef Preserve keeps FOOD FRESH 5 TIMES LONGER than non-vacuum storage...
- ✅ POWERFUL, QUICK & EASY TO USE: Simply press the button to start. The device vacuum seals a bag in 5...
- ♻️ REUSABLE & RESEALABLE BAGS: Chef Preserve comes with dishwasher, freezer, refrigerator, and...
Sweet Potato and Black Bean Chili

Sweet Potato and Black Bean Chili is the perfect dish to warm you up on a crisp autumn evening. This hearty chili combines the sweetness of roasted sweet potatoes with the earthiness of black beans, creating a comforting and satisfying meal. It’s packed with flavor and nutrients, making it a wholesome choice for dinner.
Not only is this chili delicious, but it’s also simple to make. With minimal prep time, you can have a pot of bubbling chili ready to serve in about 30 minutes. It’s a fantastic option for weeknight dinners or cozy gatherings with friends and family.
Ingredients
- 2 tablespoons olive oil
- 1 onion, diced
- 3 cloves garlic, minced
- 1 bell pepper, diced
- 2 medium sweet potatoes, peeled and cubed (about 4 cups)
- 1 can (15 oz) black beans, rinsed and drained
- 1 can (14 oz) diced tomatoes
- 2 cups vegetable broth
- 2 teaspoons chili powder
- 1 teaspoon cumin
- 1/2 teaspoon smoked paprika
- Salt and pepper to taste
- Avocado and cilantro for garnish
Instructions
- Heat the olive oil in a large pot over medium heat. Add the diced onion, garlic, and bell pepper. Sauté for about 5 minutes until the vegetables are softened.
- Add the cubed sweet potatoes to the pot and cook for another 5 minutes, stirring occasionally.
- Stir in the black beans, diced tomatoes (with juices), vegetable broth, chili powder, cumin, smoked paprika, salt, and pepper. Bring to a boil.
- Reduce the heat and simmer for about 20 minutes, until the sweet potatoes are tender.
- Serve hot, garnished with sliced avocado and fresh cilantro.
Kitchen Tools
- Large pot or Dutch oven for even heat distribution
- OXO measuring cups for precision
- Budget-friendly: A basic stainless steel pot will work fine
Pro Tips
- Ingredient Substitutions: Swap black beans for kidney beans or chickpeas for a different flavor.
- Texture Adjustments: For a thicker chili, add a tablespoon of cornstarch mixed with water during the simmering stage.
Nutritional Analysis (per serving, based on 6 servings)
- Total Calories: Approximately 250
- Carbohydrates: 45g
- Protein: 8g
- Fats: 6g
- Micronutrient Highlights: Rich in vitamin A and iron

- Generous Capacity: 7-quart slow cooker that comfortably serves 9+ people or fits a 7-pound roast
- Cooking Flexibility: High or low slow cooking settings, with convenient warm function for ideal serving...
- Convenient: Set it and forget it feature enables you to cook while at work or performing daily tasks
Hearty Pumpkin Risotto

Pumpkin risotto is a warm and comforting dish perfect for chilly autumn evenings. The creamy texture combined with the subtle sweetness of pumpkin creates a delightful flavor that warms the soul. It’s surprisingly simple to make, even if you’ve never tried cooking risotto before!
This dish is rich and satisfying, making it a great option for a cozy dinner. Plus, it pairs well with a variety of sides, making it versatile for any occasion. Let’s get started with making this delicious pumpkin risotto!
Ingredients
- 1 cup Arborio rice
- 2 cups pumpkin puree (canned or fresh)
- 1 onion, finely chopped
- 2 cloves garlic, minced
- 4 cups vegetable broth
- 1 cup dry white wine
- 1/2 cup grated Parmesan cheese
- 2 tablespoons olive oil
- 1 teaspoon dried sage
- Salt and pepper to taste
Instructions
- Prepare the Broth: In a saucepan, heat the vegetable broth over low heat, keeping it warm but not boiling.
- Sauté the Aromatics: In a large skillet, heat the olive oil over medium heat. Add the chopped onion and cook until translucent, about 5 minutes. Stir in the minced garlic and cook for another minute.
- Add the Rice: Pour the Arborio rice into the skillet, stirring to coat it in the oil. Toast the rice for about 2 minutes until slightly translucent.
- Deglaze with Wine: Pour in the white wine and let it simmer until mostly absorbed by the rice, stirring frequently.
- Incorporate the Broth: Start adding the warm vegetable broth, one ladle at a time, stirring constantly. Wait until the liquid is mostly absorbed before adding the next ladle. This should take about 18-20 minutes.
- Mix in Pumpkin: Once the rice is creamy and al dente, stir in the pumpkin puree, dried sage, and Parmesan cheese. Season with salt and pepper to taste.
- Serve: Remove from heat and let it sit for a couple of minutes before serving. Garnish with extra Parmesan or fresh sage leaves if desired.
Kitchen Tools
Essential equipment includes a large skillet for even heat distribution and a wooden spoon for stirring. OXO measuring cups are recommended for precision when measuring ingredients. For budget-friendly alternatives, any sturdy skillet and standard measuring tools will work just fine.
Pro Tips
For a twist, consider replacing the white wine with apple cider for a sweeter flavor. If you prefer a creamier texture, add a splash of heavy cream at the end. Also, you can adjust the thickness by adding more broth if desired.
Nutritional Analysis
This pumpkin risotto serves about four people, with approximately 350 calories per serving. The macronutrient breakdown is about 55g carbs, 10g protein, and 12g fats. It’s a great source of iron and vitamin C, thanks to the pumpkin!

- 100% Leak-proof: Guaranteed no-spill seal and secure latches
- Crystal-clear Tritan Built: Stain-resistant and odor-resistant material for a clear view of contents
- Lightweight & Sturdy: Easy to carry, yet durable for everyday use
Classic Beef Stew with Root Vegetables
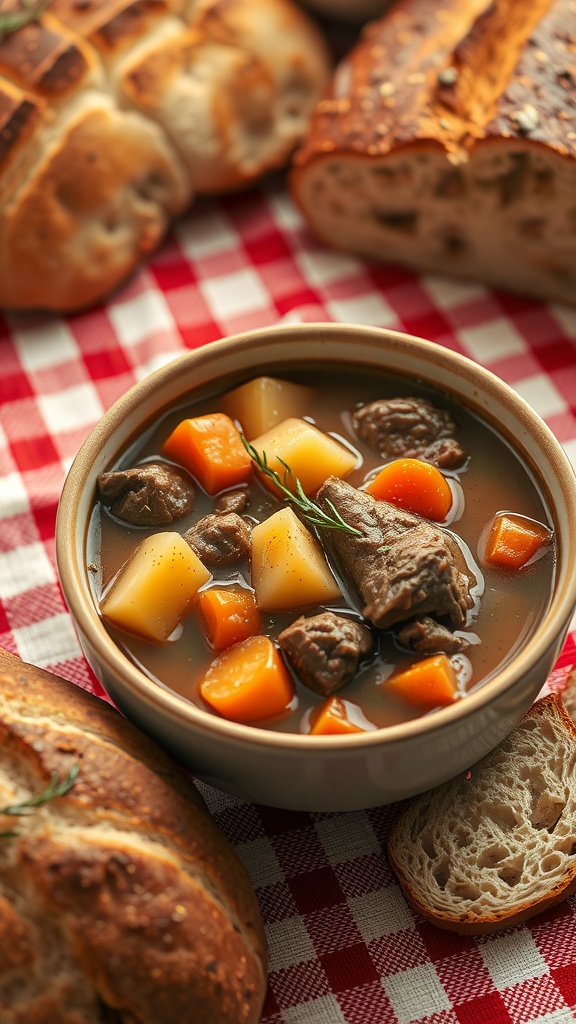
Classic Beef Stew with Root Vegetables is the epitome of comfort food during the chilly autumn months. This hearty dish combines tender beef with a medley of root vegetables, creating a warm and satisfying meal. The rich broth, infused with herbs, creates an unforgettable flavor that warms you from the inside out.
This recipe is quite simple to make, requiring minimal hands-on time while allowing the ingredients to meld beautifully. The slow cooking process transforms the beef into melt-in-your-mouth pieces and enhances the sweetness of the vegetables. Served with some crusty bread, it’s perfect for those crisp evening meals.
Ingredients
- 2 lbs (900 g) beef chuck, cut into 1-inch pieces
- 2 tablespoons vegetable oil
- 4 cups (960 ml) beef broth
- 2 medium onions, chopped
- 3 large carrots, diced
- 3 medium potatoes, peeled and cubed
- 2 stalks celery, diced
- 3 cloves garlic, minced
- 2 tablespoons tomato paste
- 2 teaspoons dried thyme
- 1 teaspoon salt
- 1/2 teaspoon black pepper
- 2 bay leaves
- 1 tablespoon Worcestershire sauce
- Fresh parsley for garnish (optional)
Instructions
- Brown the Beef: In a large pot or Dutch oven, heat the vegetable oil over medium-high heat. Add the beef in batches, browning all sides for about 5-7 minutes. Remove and set aside.
- Sauté the Vegetables: In the same pot, sauté the onions, carrots, and celery until the onions are translucent, about 5 minutes. Add the garlic and cook for an additional minute.
- Add the Broth and Seasoning: Stir in the tomato paste, thyme, salt, pepper, and Worcestershire sauce. Pour in the beef broth and bring to a simmer.
- Combine Ingredients: Return the browned beef to the pot along with the potatoes and bay leaves. Stir to combine everything well.
- Slow Cook: Cover the pot and reduce the heat to low. Allow the stew to simmer for 2-3 hours, or until the beef is tender and the flavors are well developed. Stir occasionally and add more broth or water if needed.
- Serve: Once cooked, remove the bay leaves. Taste and adjust seasoning if necessary. Serve hot, garnished with fresh parsley, alongside crusty bread.
Kitchen Tools
- Large pot or Dutch oven for even heat distribution
- Cutting board and knife for chopping vegetables
- Wooden spoon for stirring
- Measuring cups/spoons (recommended brand: OXO for precision)
- Budget-friendly alternative: Any sturdy pot will suffice
Pro Tips
- For a richer flavor, you can add a splash of red wine before adding the broth.
- If you need a gluten-free option, ensure your beef broth is gluten-free or make your own.
- Add cornstarch mixed with water for a thicker stew if desired.
Nutritional Analysis
- Total Calories: Approximately 450 per serving
- Macronutrients: 30g protein, 20g carbs, 25g fat
- Micronutrients: High in iron and vitamin C

- 𝗘𝗳𝗳𝗼𝗿𝘁𝗹𝗲𝘀𝘀 𝗪𝗲𝗶𝗴𝗵𝗶𝗻𝗴: Supports 5 units...
- 𝗣𝗿𝗲𝗰𝗶𝘀𝗲 𝗥𝗲𝘀𝘂𝗹𝘁𝘀: Accurately weighs up to 11 lb/5 kg with 1 g...
- 𝗦𝗶𝗺𝗽𝗹𝗲 & 𝗖𝗼𝗺𝗽𝗮𝗰𝘁: The small and sleek scale is a perfect fit for...
Cinnamon-Spiced Quinoa Salad

This Cinnamon-Spiced Quinoa Salad is a delightful blend of flavors that perfectly captures the essence of autumn. The nutty quinoa is combined with crisp apples, tart cranberries, and crunchy pecans, all tossed in a warm cinnamon dressing. It’s not only delicious but also simple to prepare, making it an ideal choice for cozy evening meals.
The sweetness from the apples paired with the spiced notes creates a comforting dish that can be served warm or cold. Plus, it’s packed with nutrients, making it a wholesome addition to your autumn repertoire.
Ingredients
- 1 cup quinoa (uncooked)
- 2 cups water or vegetable broth
- 1 large apple, diced
- 1/2 cup dried cranberries
- 1/2 cup pecans, chopped
- 1 tablespoon olive oil
- 1 tablespoon maple syrup
- 1 teaspoon ground cinnamon
- 1/2 teaspoon salt
- 1/4 teaspoon black pepper
- Fresh parsley for garnish
Instructions
- Cook Quinoa: Rinse quinoa under cold water. In a medium saucepan, bring water or broth to a boil. Add quinoa, reduce heat to low, cover, and simmer for about 15 minutes or until all liquid is absorbed. Remove from heat and fluff with a fork.
- Prepare the Dressing: In a small bowl, whisk together olive oil, maple syrup, cinnamon, salt, and black pepper.
- Mix the Salad: In a large bowl, combine cooked quinoa, diced apple, cranberries, and pecans. Pour the dressing over the salad and toss gently to coat all ingredients.
- Serve: Garnish with fresh parsley and serve immediately, or let it chill in the fridge for a refreshing cold salad.

- Instant Read Food Thermometer | Our instant read thermometer features a temperature probe and advanced,...
- Multi-Use | From bbq thermometer to baking thermometer, our digital food thermometer for cooking is...
- Easy-Read Digital Thermometer For Cooking | Large instant thermometer dial with bright blue backlight...
Maple Glazed Brussels Sprouts and Bacon
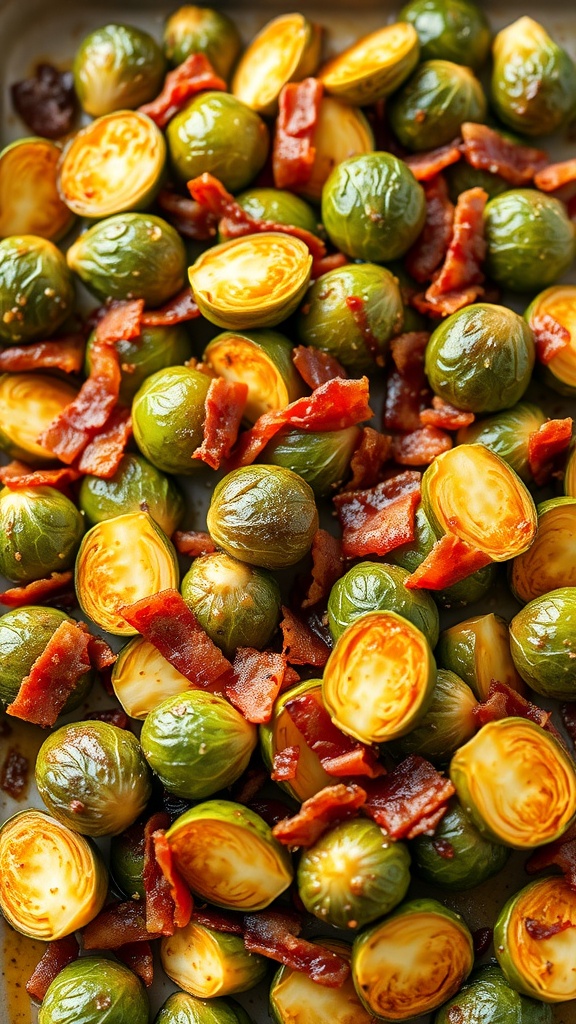
Maple Glazed Brussels Sprouts and Bacon is a delightful dish that perfectly balances sweet and savory flavors. The crispy bacon adds a smoky richness, while the maple syrup brings a touch of sweetness to the naturally earthy Brussels sprouts. It’s an easy recipe to whip up, making it a great option for cozy autumn dinners.
This dish not only warms your heart but also tantalizes your taste buds. It’s perfect as a side or even as a main attraction for your evening meals. Let’s dive into how to make this delicious dish!
Ingredients
- 500g Brussels sprouts, trimmed and halved
- 200g bacon, chopped
- 60ml maple syrup
- 2 tablespoons olive oil
- Salt and pepper to taste
- 1 tablespoon balsamic vinegar (optional)
Instructions
- Preheat the Oven: Start by preheating your oven to 200°C (400°F).
- Prepare the Sprouts: In a large bowl, toss the halved Brussels sprouts with olive oil, salt, and pepper.
- Add Bacon: Mix in the chopped bacon, ensuring it’s evenly distributed.
- Roast: Spread the mixture on a baking sheet in a single layer and roast in the preheated oven for about 20-25 minutes, or until the sprouts are golden and crispy.
- Add Maple Syrup: Drizzle the maple syrup over the sprouts and bacon during the last 5 minutes of roasting for a beautiful glaze.
- Finish: If desired, add balsamic vinegar for an extra layer of flavor just before serving.
- Serve: Enjoy your Maple Glazed Brussels Sprouts and Bacon warm!

- Versatile 54-Piece Collection: Elevate your kitchen with the Home Hero 54-Piece Kitchen Utensil Set, a...
- Durable and Long-Lasting: Crafted from premium stainless steel, these kitchen utensils are designed to...
- Perfect Holiday Gift: Delight your loved ones with this kitchen utensils gift set this festive season....
Creamy Wild Mushroom Risotto

Creamy Wild Mushroom Risotto is the perfect dish to warm you up on a chilly autumn evening. This comforting recipe brings together the earthy flavors of wild mushrooms with creamy Arborio rice, creating a dish that is both hearty and satisfying. It’s surprisingly simple to make and can be enjoyed as a main course or a side dish.
The risotto has a rich, creamy texture with a depth of flavor that is sure to please everyone at the dinner table. With just a few basic ingredients and a bit of patience, you can create a delicious meal that embodies the essence of fall.
Ingredients
- 1 ½ cups Arborio rice
- 4 cups vegetable broth
- 1 cup dry white wine (optional)
- 1 medium onion, finely chopped
- 2 cloves garlic, minced
- 2 cups mixed wild mushrooms, chopped
- ½ cup grated Parmesan cheese
- 2 tablespoons unsalted butter
- 2 tablespoons olive oil
- Salt and pepper to taste
- Fresh parsley, chopped (for garnish)
Instructions
- Prepare the Broth: In a saucepan, bring the vegetable broth to a simmer over low heat.
- Sauté the Aromatics: In a large skillet, heat olive oil and 1 tablespoon of butter over medium heat. Add the chopped onion and garlic, cooking until softened, about 3-4 minutes.
- Add the Mushrooms: Incorporate the wild mushrooms into the skillet and cook until they release their moisture and become tender, around 5-7 minutes.
- Add the Rice: Stir in the Arborio rice, allowing it to toast for about 1-2 minutes until slightly translucent.
- Pour in the Wine: If using, add the white wine and let it simmer until mostly absorbed.
- Add the Broth Gradually: Begin adding the warmed broth, one ladle at a time, stirring frequently. Wait until each addition is absorbed before adding more. This process should take about 18-20 minutes.
- Finish the Risotto: Once the rice is creamy and al dente, remove from heat. Stir in the remaining butter and Parmesan cheese. Season with salt and pepper to taste.
- Serve: Garnish with fresh parsley and additional Parmesan if desired. Enjoy warm!

- 24-ounce insulated stainless-steel water bottle with a FreeSip spout and push-button lid with lock
- Patented FreeSip spout designed for either sipping upright through the built-in straw or tilting back to...
- Protective push-to-open lid keeps spout clean; convenient carry loop doubles as a lock
Pumpkin and Spinach Lasagna

This Pumpkin and Spinach Lasagna is the perfect dish to warm you up on a cool autumn evening. With layers of creamy pumpkin sauce, fresh spinach, and gooey cheese, it brings a delightful twist to a classic favorite. The flavors are rich yet comforting, making it a satisfying meal for both family dinners and gatherings.
Making this lasagna is straightforward, with simple ingredients that combine to create a hearty dish. It’s a great way to incorporate seasonal produce, and you can easily customize it to your taste. Enjoy this delicious recipe that captures the essence of fall!
Ingredients
- 9 to 12 lasagna noodles (cooked and drained)
- 2 cups pumpkin puree (canned or fresh)
- 1 cup ricotta cheese
- 2 cups fresh spinach (washed and chopped)
- 2 cups mozzarella cheese (shredded)
- 1 cup Parmesan cheese (grated)
- 1 teaspoon garlic powder
- 1 teaspoon dried oregano
- 1/2 teaspoon salt
- 1/4 teaspoon black pepper
- 2 cups marinara sauce (store-bought or homemade)
Instructions
- Preheat the oven to 375°F (190°C).
- In a mixing bowl, combine the pumpkin puree, ricotta cheese, garlic powder, oregano, salt, and pepper. Mix until smooth.
- Spread a thin layer of marinara sauce on the bottom of a 9×13 inch baking dish.
- Layer three lasagna noodles over the sauce, then spread half of the pumpkin mixture over the noodles. Add half of the spinach and sprinkle with one-third of the mozzarella.
- Repeat the layers: another three noodles, half of the remaining marinara sauce, the remaining pumpkin mixture, and spinach. Top with another third of mozzarella.
- Add a final layer of noodles, the remaining marinara sauce, and the rest of the mozzarella and Parmesan cheese on top.
- Cover the dish with aluminum foil (avoid touching the cheese) and bake for 25 minutes. Remove the foil and bake for an additional 15-20 minutes, or until the cheese is bubbly and golden.
- Let the lasagna sit for 10 minutes before slicing and serving.
Savory Sausage and Apple Stuffing
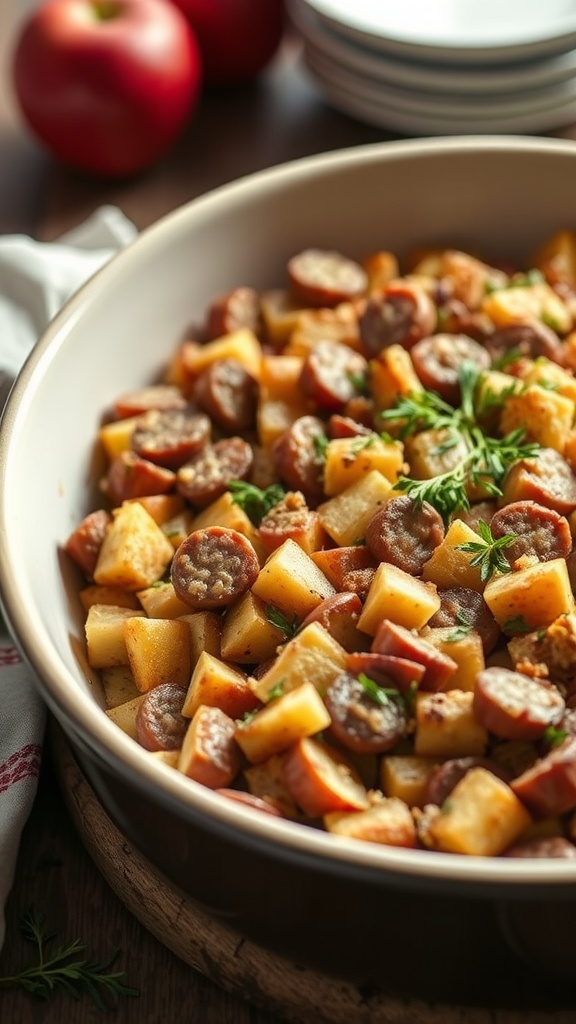
Savory Sausage and Apple Stuffing is a warm and comforting dish, perfect for autumn evenings. The combination of juicy sausage, sweet apples, and aromatic herbs creates a delicious medley of flavors that will have everyone coming back for seconds.
This dish is simple to prepare, making it an ideal choice for both weeknight dinners and special occasions. With just a few ingredients and easy steps, you’ll be able to whip up a hearty stuffing that pairs perfectly with any meal.
Ingredients
- 450g (1 lb) sausage (Italian or your choice)
- 2 medium apples, peeled and diced
- 1 medium onion, chopped
- 2 ribs celery, chopped
- 4 cups bread cubes (preferably day-old)
- 1 cup chicken broth
- 2 teaspoons dried thyme
- 1 teaspoon dried sage
- Salt and pepper to taste
- 2 tablespoons olive oil
- Fresh parsley for garnish
Instructions
- Preheat your oven to 180°C (350°F).
- In a large skillet, heat the olive oil over medium heat. Add the sausage and cook until browned, breaking it up into crumbles.
- Add the chopped onion and celery to the skillet, cooking until the vegetables are tender, about 5 minutes.
- Stir in the diced apples, thyme, and sage, and cook for an additional 3-4 minutes.
- In a large bowl, combine the sausage mixture with the bread cubes. Pour in the chicken broth and mix until well combined. Add salt and pepper to taste.
- Transfer the stuffing mixture to a greased baking dish. Cover with foil and bake for 25 minutes. Remove the foil and bake for another 10-15 minutes until the top is golden brown.
- Garnish with fresh parsley before serving.
Herb-Roasted Chicken with Root Vegetables
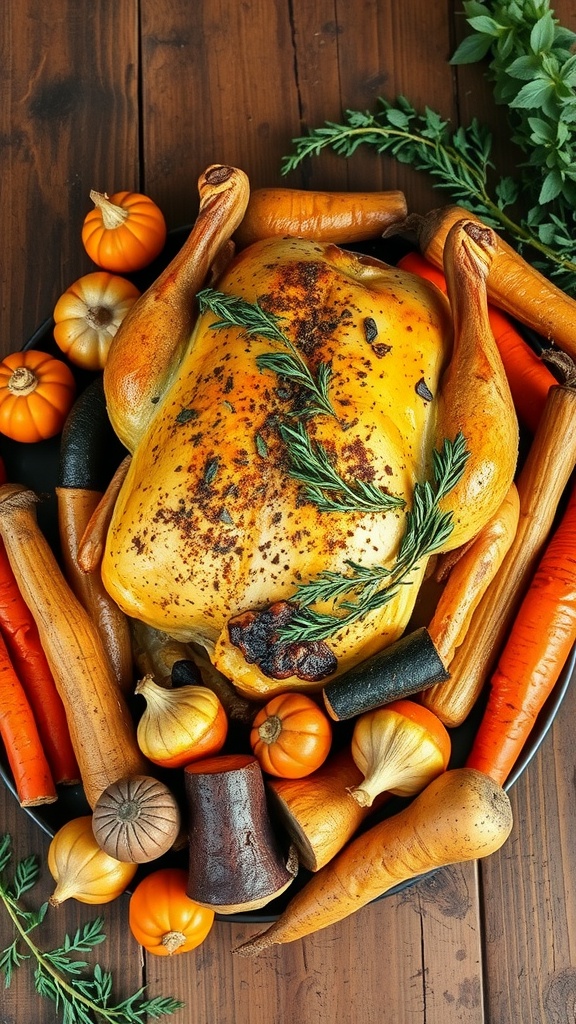
Herb-roasted chicken with root vegetables is a comforting and hearty dish, perfect for those crisp autumn evenings. The combination of tender, juicy chicken seasoned with aromatic herbs alongside a medley of roasted root vegetables creates a warm and inviting meal. Plus, it’s simple to prepare, making it great for both weeknight dinners and special gatherings.
As the chicken roasts, the flavors meld beautifully, resulting in a dish that’s not just delicious but also visually appealing. It’s a one-pan wonder that promises minimal cleanup, allowing you to enjoy more time with loved ones. Now, let’s dive into the recipe!
Ingredients
- 1 whole chicken (about 4-5 pounds / 1.8-2.3 kg)
- 2 tablespoons olive oil
- 1 tablespoon fresh rosemary, chopped
- 1 tablespoon fresh thyme, chopped
- 4 cloves garlic, minced
- Salt and pepper to taste
- 4 large carrots, peeled and cut into chunks
- 2 parsnips, peeled and cut into chunks
- 1 large onion, cut into wedges
- 1 pound (450 g) baby potatoes, halved
- 1 lemon, quartered
Instructions
- Preheat the oven to 425°F (220°C).
- In a small bowl, mix olive oil, rosemary, thyme, garlic, salt, and pepper.
- Pat the chicken dry with paper towels. Rub the herb mixture all over the chicken, including under the skin for extra flavor.
- Place the chicken in a large roasting pan. Arrange the carrots, parsnips, onion, and potatoes around the chicken. Squeeze the lemon over the vegetables and place the lemon quarters in the cavity of the chicken.
- Roast in the preheated oven for about 1 hour and 15 minutes, or until the internal temperature of the chicken reaches 165°F (75°C) and the juices run clear.
- Let the chicken rest for about 10 minutes before carving. Serve the chicken with the roasted vegetables.
Kitchen Tools
- Roasting pan (like the Nordic Ware Natural Aluminum Baker’s Half Sheet)
- Meat thermometer (e.g., ThermoPro TP03A)
- Cutting board and sharp knife
- Mixing bowl for the herb rub
Pro Tips
- For a more intense flavor, brine the chicken in salt water for a few hours before roasting.
- Swap out the vegetables for seasonal options like sweet potatoes or butternut squash.
- For crispy skin, leave the chicken uncovered in the fridge for a few hours before roasting to dry it out.
Nutritional Analysis
- Total calories per serving: Approximately 450 calories
- Macronutrients: Carbohydrates 30g, Protein 35g, Fats 20g
- Micronutrient highlights: Rich in vitamin A (from carrots) and vitamin C (from lemon)
Spiced Lentil and Carrot Soup
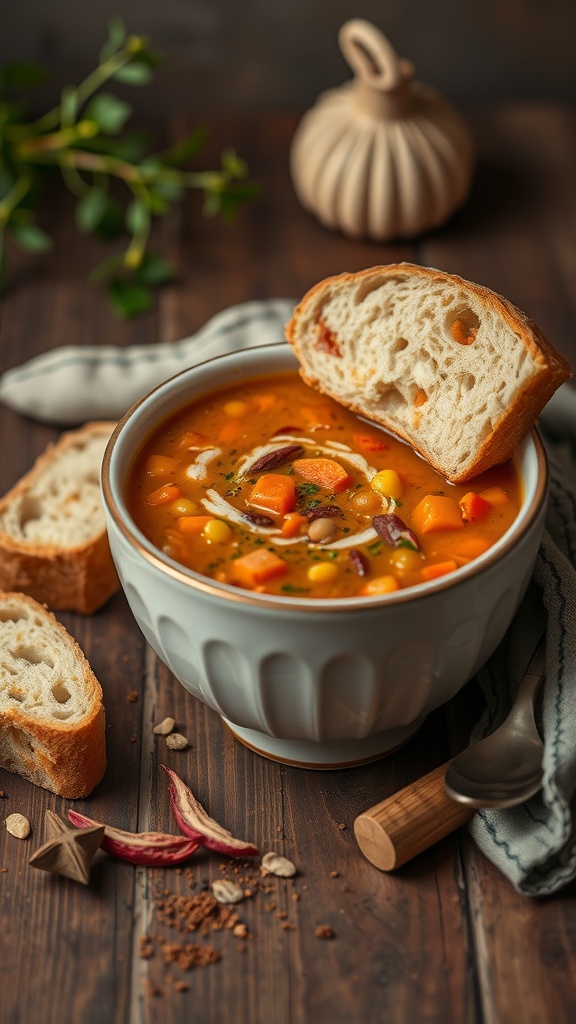
This spiced lentil and carrot soup is the perfect blend of warmth and comfort, ideal for those chilly autumn evenings. Rich in flavor and packed with nutrients, it offers a delightful combination of earthy lentils and sweet carrots, all brought together with aromatic spices.
Not only is it simple to prepare, but it’s also filling and satisfying. With just one pot and minimal ingredients, you can create a hearty meal that warms the soul. Whether you’re cooking for yourself or hosting friends, this soup is sure to impress!
Ingredients
- 1 cup dried green or brown lentils (200g)
- 2 medium carrots, diced
- 1 medium onion, chopped
- 2 cloves garlic, minced
- 1 teaspoon ground cumin
- 1 teaspoon ground coriander
- 1/2 teaspoon smoked paprika
- 4 cups vegetable broth (960ml)
- 1 can diced tomatoes (400g)
- 2 tablespoons olive oil
- Salt and pepper to taste
- Fresh parsley for garnish
Instructions
- Prep the Ingredients: Rinse the lentils under cold water and set aside. Chop the carrots and onion, and mince the garlic.
- Sauté the Vegetables: In a large pot, heat the olive oil over medium heat. Add the chopped onion and sauté for about 5 minutes until translucent. Add the garlic and carrots, cooking for another 3-4 minutes.
- Add Spices: Stir in the cumin, coriander, and smoked paprika, allowing the spices to become fragrant (about 1 minute).
- Combine Everything: Add the lentils, diced tomatoes, and vegetable broth to the pot. Bring to a boil, then reduce to a simmer.
- Simmer the Soup: Cover and let it simmer for about 25-30 minutes, or until the lentils are tender. Stir occasionally and add more broth if necessary.
- Season and Serve: Once cooked, season with salt and pepper to taste. Garnish with fresh parsley before serving.
Kitchen Tools
- Large pot for cooking the soup
- Wooden spoon for stirring
- Measuring cups and spoons
- Recommended Brand: Cuisinart stainless steel cookware for even heat distribution
- Budget-Friendly Alternative: Any large pot will work, as long as it has a lid!
Pro Tips
- For a creamier texture, blend half of the soup with an immersion blender before serving.
- Feel free to substitute lentils with split peas or chickpeas if desired.
- If you like a bit of heat, add a pinch of cayenne pepper!
Nutritional Analysis
- Total Calories per Serving: Approximately 220
- Macronutrient Breakdown: Carbs: 35g, Proteins: 12g, Fats: 5g
- Micronutrient Highlights: Rich in iron and vitamin A from carrots
Roasted Beet and Goat Cheese Salad
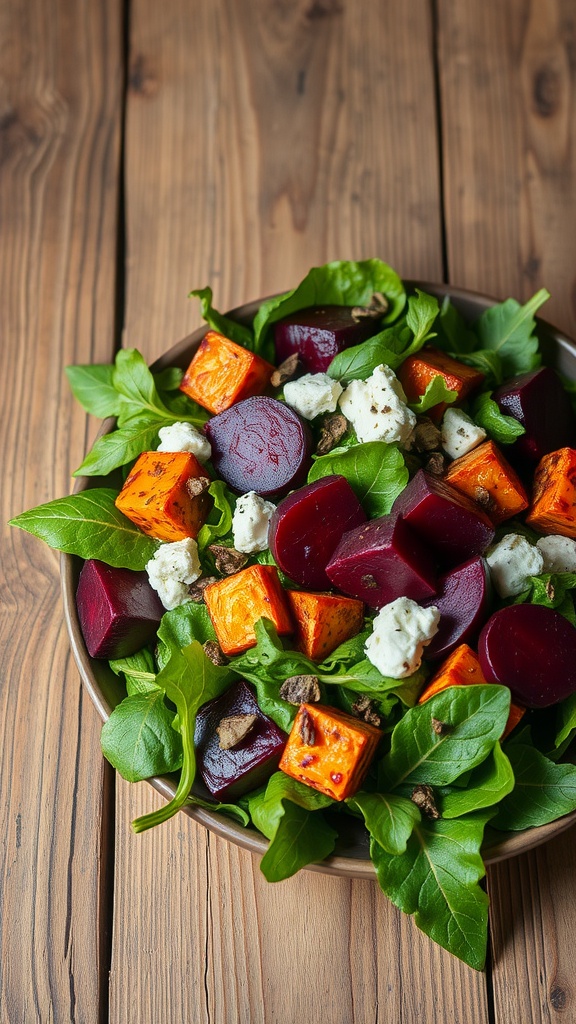
This Roasted Beet and Goat Cheese Salad is the perfect dish for a cozy evening. The earthy sweetness of the roasted beets pairs beautifully with the creamy tang of goat cheese, creating a delightful contrast of flavors. Topped with fresh greens and a light vinaigrette, it’s not only satisfying but also visually appealing.
Making this salad is quite simple! Roasting the beets takes a bit of time, but the hands-on effort is minimal. Whether you’re preparing a light meal or a side dish for your autumn gatherings, this salad is sure to impress.
Ingredients
- 2 medium beets, peeled and cut into cubes (about 300g)
- 1 cup butternut squash, peeled and cubed (about 150g)
- 4 cups mixed greens or arugula (about 120g)
- 1/2 cup goat cheese, crumbled (about 75g)
- 2 tablespoons olive oil
- 1 tablespoon balsamic vinegar
- Salt and pepper to taste
Instructions
- Preheat your oven to 400°F (200°C).
- On a baking sheet, toss the cubed beets and butternut squash with 1 tablespoon of olive oil, salt, and pepper. Spread them out evenly and roast for 25-30 minutes until tender.
- While the vegetables are roasting, prepare the dressing by whisking together the remaining olive oil, balsamic vinegar, salt, and pepper in a small bowl.
- Once the beets and squash are done, let them cool slightly.
- In a large bowl, combine the mixed greens, roasted beets, roasted squash, and crumbled goat cheese.
- Drizzle the vinaigrette over the salad, toss gently, and serve warm or at room temperature.
Cider-Braised Chicken Thighs
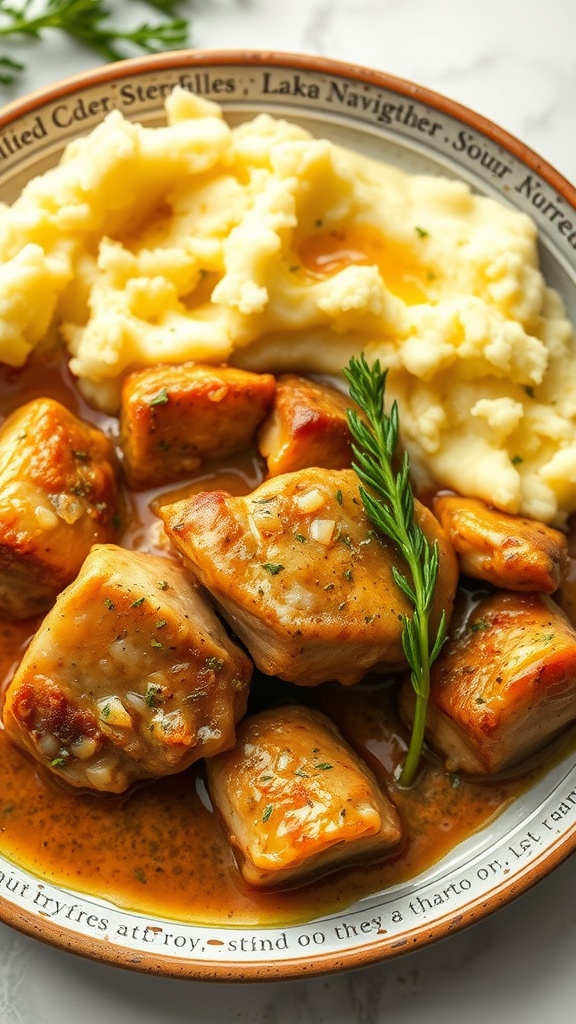
Cider-braised chicken thighs are a comforting dish, perfect for chilly autumn evenings. The chicken becomes tender and flavorful as it cooks slowly in a rich cider-based sauce, bringing a delightful sweet and savory taste that pairs beautifully with sides like mashed potatoes or roasted vegetables.
This recipe is straightforward to make and requires minimal prep time, making it great for both weeknight dinners and special occasions. With just a few ingredients, you can create a meal that feels cozy and warms the soul.
Ingredients
- 4 bone-in, skin-on chicken thighs (about 1.5 lbs or 680 g)
- 1 tablespoon olive oil
- 1 medium onion, diced
- 2 cloves garlic, minced
- 1 cup apple cider (240 ml)
- 1 cup chicken broth (240 ml)
- 2 tablespoons Dijon mustard
- 1 teaspoon fresh thyme (or 1/2 teaspoon dried)
- Salt and pepper to taste
- 1 tablespoon cornstarch (optional, for thickening)
Instructions
- Prepare the Chicken: Season the chicken thighs with salt and pepper on both sides.
- Brown the Chicken: In a large skillet, heat the olive oil over medium-high heat. Add the chicken thighs skin-side down and cook for about 5-7 minutes until golden brown. Flip and cook for an additional 3-4 minutes. Remove the chicken and set aside.
- Sauté the Aromatics: In the same skillet, add the diced onion and cook until translucent, about 3 minutes. Stir in the minced garlic and cook for another minute.
- Add the Liquids: Pour in the apple cider, chicken broth, and Dijon mustard. Stir in the thyme. Bring to a simmer.
- Combine and Cook: Return the chicken thighs to the skillet, skin-side up. Cover and simmer on low heat for 30-40 minutes until the chicken is cooked through and tender.
- Thicken the Sauce (optional): If you prefer a thicker sauce, mix the cornstarch with a little water to create a slurry. Stir it into the sauce and let it cook for an additional 5 minutes until thickened.
- Serve: Enjoy the chicken with mashed potatoes or your favorite side, spooning the delicious sauce over the top.
Kitchen Tools
- Large skillet (cast-iron recommended for even heat distribution)
- Wooden spoon for stirring
- Measuring cups (OXO measuring cups recommended for precision)
- Budget-friendly alternative: Any heavy-bottomed skillet will work
Pro Tips
- Ingredient substitutions: Replace apple cider with apple juice for a sweeter flavor or use white wine for a different profile.
- Texture adjustments: Adding cornstarch helps achieve a thicker sauce; adjust to your preference by adding more or less.
Nutritional Analysis
- Total Calories per serving: Approximately 350 calories
- Macronutrient Breakdown: 20g protein, 15g fat, 30g carbs
- Optional Micronutrient Highlights: Good source of iron and vitamin C depending on side dishes.
Zucchini and Corn Fritters

These zucchini and corn fritters are a warm, comforting dish perfect for crisp autumn evenings. They boast a delightful combination of sweet corn and tender zucchini, creating a subtle sweetness and texture that’s simply wonderful. Not only are they delicious, but they are also easy to whip up, making them a great choice for a weeknight meal.
These fritters can be served as a side or a main dish, paired with a tangy yogurt or sour cream dip. They are crispy on the outside and soft on the inside, making every bite satisfying. Plus, they’re a fantastic way to incorporate seasonal vegetables into your meals!
Ingredients
- 2 medium zucchinis, grated
- 1 cup corn kernels (fresh or frozen)
- 1/2 cup all-purpose flour
- 1/4 cup cornmeal
- 2 large eggs
- 1/4 cup chopped green onions
- 1 teaspoon baking powder
- 1 teaspoon garlic powder
- 1/2 teaspoon salt
- 1/4 teaspoon black pepper
- Oil for frying (vegetable or olive oil)
Instructions
- Prepare the Zucchini: Place the grated zucchini in a clean kitchen towel and squeeze out excess moisture. This helps prevent sogginess in the fritters.
- Mix Ingredients: In a large bowl, combine the drained zucchini, corn, flour, cornmeal, eggs, green onions, baking powder, garlic powder, salt, and black pepper. Mix until well combined.
- Heat Oil: In a large skillet, heat about 1/4 inch of oil over medium heat. You can test if it’s ready by dropping a small amount of batter into the oil; if it sizzles, you’re good to go.
- Form Fritters: Scoop about 1/4 cup of the mixture and flatten it slightly in your hand. Carefully place it in the hot oil. Repeat until the skillet is full but not overcrowded.
- Fry: Cook fritters for about 3-4 minutes on each side or until golden brown and crispy. Adjust heat as necessary to avoid burning.
- Drain and Serve: Remove fritters from the skillet and place them on paper towels to drain excess oil. Serve warm with yogurt or sour cream.
Kitchen Tools
Essential equipment includes a non-stick skillet for even browning. OXO measuring cups can be helpful for precise ingredient measurements, and a budget-friendly alternative is any standard measuring cups. A box grater is essential for the zucchini.
Pro Tips
For ingredient substitutions, you can replace all-purpose flour with gluten-free flour if needed. For a bit more crunch, add a tablespoon of cornstarch to the batter. If you prefer a spicier fritter, consider adding some diced jalapeños or chili flakes.
Nutritional Analysis
Each serving (2 fritters) contains approximately 200 calories, with 25g carbs, 8g protein, and 8g fat. They also provide a good amount of vitamin C and dietary fiber, making them a healthy option for a cozy meal.
Chicken Pot Pie with Flaky Crust

Chicken pot pie is the perfect comfort food, especially during autumn evenings. Its creamy filling, packed with tender chicken and hearty vegetables, is enveloped in a flaky golden crust that crumbles with each bite. This dish is satisfying and evokes a warm, homey feeling, making it ideal for chilly nights.
Making chicken pot pie is easier than it sounds. With simple ingredients and straightforward steps, you can whip up this cozy dish in no time. Whether you’re using leftover chicken or rotisserie chicken, this recipe is adaptable and can be tailored to your tastes.
Ingredients
- 1 lb (450 g) boneless, skinless chicken breast
- 1 cup (240 mL) chicken broth
- 1 cup (150 g) frozen mixed vegetables (carrots, peas, corn)
- 1/2 cup (120 mL) heavy cream
- 1/4 cup (30 g) all-purpose flour
- 1/2 cup (75 g) onion, chopped
- 2 cloves garlic, minced
- 1 teaspoon dried thyme
- 1/2 teaspoon salt
- 1/4 teaspoon black pepper
- 1 tablespoon olive oil
- 1 ready-made pie crust (or homemade)
Instructions
- Cook the Chicken: In a medium pot, bring the chicken broth to a boil. Add chicken breasts and cook for 15-20 minutes until cooked through. Remove chicken, let cool, and shred.
- Sauté Vegetables: In a large skillet, heat olive oil over medium heat. Add onion and garlic, cooking until soft (about 3-4 minutes). Add frozen vegetables and cook for an additional 5 minutes.
- Make the Sauce: Sprinkle flour over the vegetable mixture and stir for 1 minute. Gradually add chicken broth and heavy cream, stirring until the mixture thickens. Add shredded chicken, thyme, salt, and pepper. Mix well and remove from heat.
- Assemble the Pie: Preheat the oven to 425°F (220°C). Pour the chicken filling into a pie dish. Cover with the pie crust, sealing the edges. Cut slits in the top to allow steam to escape.
- Bake: Bake in the preheated oven for 25-30 minutes or until the crust is golden brown. Let cool for a few minutes before serving.
Stuffed Acorn Squash with Quinoa
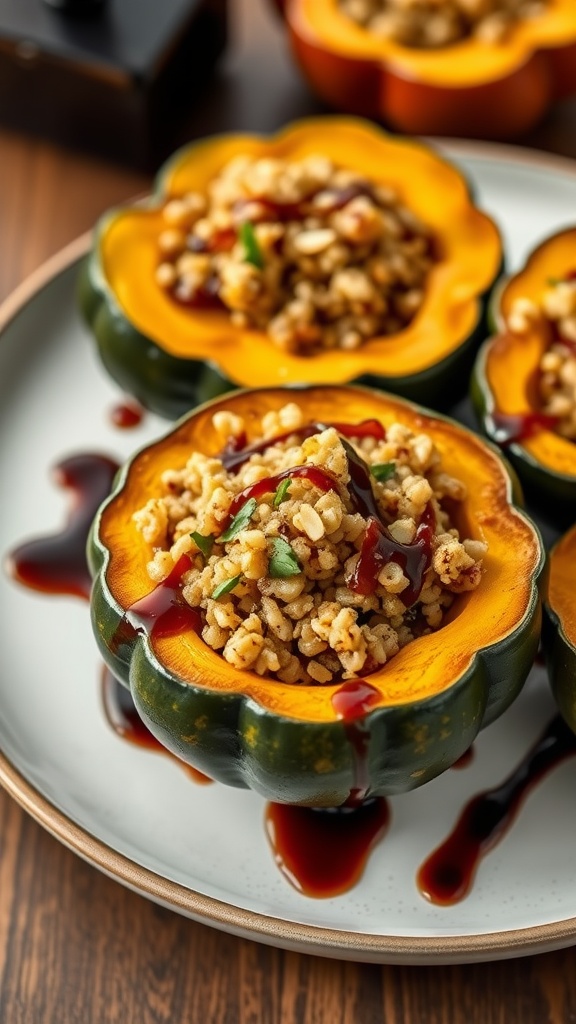
Stuffed acorn squash with quinoa is a delightful dish that perfectly captures the essence of autumn flavors. The sweetness of the roasted squash pairs beautifully with the nutty quinoa, creating a hearty and satisfying meal. It’s simple to make, making it perfect for both weeknight dinners and special occasions.
This recipe is not only delicious but also versatile. You can customize the filling with your favorite vegetables, nuts, or spices to suit your taste. Each bite is a warm hug, making it an ideal choice for crisp evenings.
Ingredients
- 2 medium acorn squashes
- 1 cup quinoa (uncooked)
- 2 cups vegetable broth
- 1 small onion, diced
- 2 cloves garlic, minced
- 1 cup cooked black beans
- 1 bell pepper, diced
- 1 teaspoon cumin
- 1 teaspoon smoked paprika
- Salt and pepper to taste
- 1 tablespoon olive oil
- Fresh parsley or cilantro, for garnish
Instructions
- Preheat the oven to 400°F (200°C).
- Prepare the Squash: Cut the acorn squashes in half and scoop out the seeds. Brush the insides with olive oil and season with salt and pepper. Place them cut side down on a baking sheet and roast for 25-30 minutes until tender.
- Cook the Quinoa: While the squash is roasting, rinse the quinoa under cold water. In a saucepan, bring the vegetable broth to a boil, add the quinoa, reduce heat, cover, and simmer for about 15 minutes until fluffy.
- Sauté the Vegetables: In a skillet, heat olive oil over medium heat. Add the diced onion and bell pepper, cooking until softened, about 5 minutes. Stir in garlic, cumin, smoked paprika, salt, and pepper, cooking for another minute.
- Combine Filling: In a large bowl, mix the cooked quinoa, sautéed vegetables, and black beans. Adjust seasoning if necessary.
- Stuff the Squash: Once the squash is done roasting, remove them from the oven and carefully flip them cut side up. Fill each half with the quinoa mixture, pressing down lightly.
- Bake Again: Return the stuffed squashes to the oven and bake for an additional 10-15 minutes to heat through.
- Serve: Garnish with fresh parsley or cilantro before serving.
Kitchen Tools:
- Essential equipment: Baking sheet for roasting, saucepan for cooking quinoa, skillet for sautéing.
- Recommended brands/models: Calphalon baking sheets for even heat distribution, Cuisinart saucepan for quick cooking.
- Budget-friendly alternatives: Any sturdy baking sheet or saucepan will work if you’re on a budget.
Pro Tips:
- Ingredient substitutions: Swap black beans for chickpeas or lentils for variety.
- Texture adjustments: For extra creaminess, add a dollop of sour cream or Greek yogurt on top before serving.
Nutritional Analysis (per serving):
- Total Calories: 300
- Carbs: 45g, Proteins: 10g, Fats: 8g
- Micronutrient highlights: Rich in iron and vitamin C.
Wild Rice and Cranberry Stuffed Mushrooms
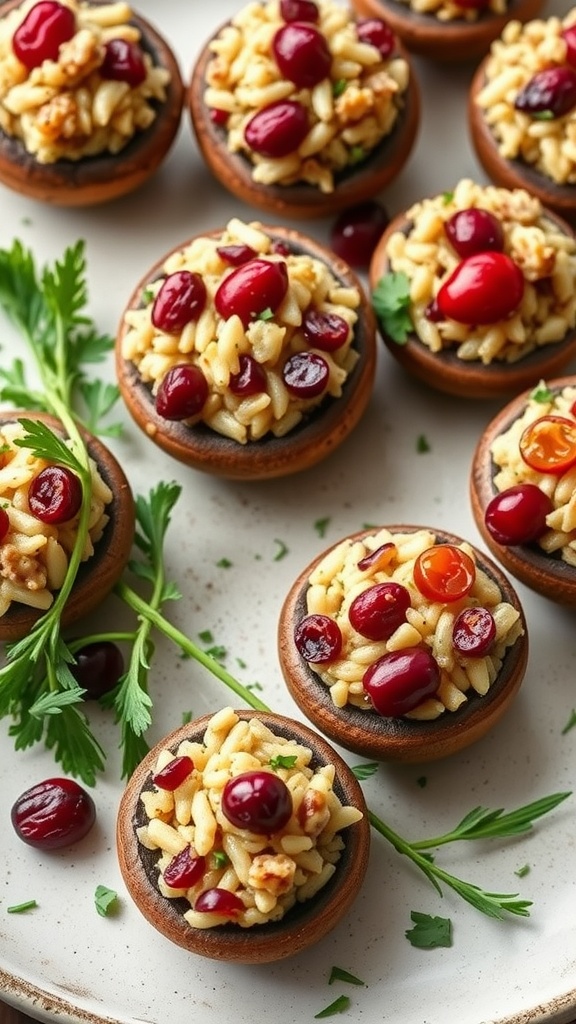
Wild Rice and Cranberry Stuffed Mushrooms are a delightful combination of earthy flavors and seasonal sweetness. These hearty, bite-sized treats are perfect for cozy evenings and make an excellent appetizer or side dish. With a mixture of nutty wild rice and tart cranberries, they offer a satisfying crunch and a pop of color, making them visually appealing as well.
Making these stuffed mushrooms is a breeze, requiring just a few simple steps and ingredients. They are great for impressing guests or simply enjoying a comforting meal at home.
Ingredients
- 12 large portobello mushrooms
- 1 cup wild rice, cooked
- 1/2 cup dried cranberries, chopped
- 1/4 cup walnuts, chopped
- 1 small onion, finely chopped
- 2 cloves garlic, minced
- 1 tablespoon olive oil
- 1/2 teaspoon salt
- 1/4 teaspoon black pepper
- 1/2 teaspoon thyme (fresh or dried)
- 1/4 cup grated Parmesan cheese (optional)
Instructions
- Preheat the oven to 375°F (190°C).
- Prepare the Mushrooms: Clean the portobello mushrooms and remove stems. Place them on a baking sheet, gill side up.
- Cook the Filling: In a skillet, heat olive oil over medium heat. Add the onion and garlic, sautéing until translucent, about 5 minutes.
- Combine Ingredients: Stir in the cooked wild rice, cranberries, walnuts, salt, pepper, and thyme. Mix well and cook for another 2-3 minutes.
- Fill the Mushrooms: Spoon the mixture into each mushroom cap, pressing gently to pack it in. Top with Parmesan cheese if using.
- Bake: Place the baking sheet in the oven and bake for 20-25 minutes, or until the mushrooms are tender and the tops are golden.
- Serve: Remove from the oven, let cool slightly, and serve warm.