Anti-inflammatory microwave recipes offer quick, nutritious options for pain relief. Dishes like Spicy Ginger Turmeric Rice Bowl and Quinoa and Black Bean Salad combine beneficial ingredients such as ginger, turmeric, and black beans. Each recipe is designed for fast preparation, typically requiring around 20 to 25 minutes, ensuring that healthy meals are easily attainable. Incorporating various vegetables and optional proteins can enhance their nutritional value. By exploring these recipes, one can discover even more beneficial meal ideas for reducing inflammation.
Spicy Ginger Turmeric Rice Bowl

The Spicy Ginger Turmeric Rice Bowl is a flavorful and nourishing dish that combines anti-inflammatory ingredients such as ginger and turmeric, making it ideal for anyone looking to improve their diet and overall health.
This recipe is not only quick to prepare, taking approximately 20 minutes, but also offers a hearty and satisfying meal, perfect for busy weekdays or a comforting dinner. With its vibrant colors and aromatic spices, this rice bowl will delight your taste buds while giving you a healthy boost.
Ingredients:
- 1 cup jasmine or basmati rice
- 2 cups water
- 1 tablespoon olive oil
- 1 tablespoon freshly grated ginger
- 1 teaspoon ground turmeric
- 1/2 teaspoon cayenne pepper (adjust for spice preference)
- 1 cup diced bell peppers (red, yellow, or green)
- 1 cup chopped kale or spinach
- Salt and pepper to taste
- Fresh cilantro for garnish
- Optional toppings: avocado, sesame seeds, or a squeeze of lime
Cooking Instructions:
- Rinse the rice under cold water until the water runs clear. This helps to remove excess starch and makes the rice fluffier.
- In a microwave-safe bowl, combine the rinsed rice and water. Cover with a microwave-safe lid or plate. Microwave on high for about 10-12 minutes or until the water is absorbed and the rice is fluffy. Let it sit covered for an additional 5 minutes.
- In a separate microwave-safe dish, combine olive oil, grated ginger, ground turmeric, cayenne pepper, diced bell peppers, and chopped kale or spinach. Season with salt and pepper to taste. Cover and microwave on high for 3-4 minutes until the veggies are tender but still vibrant.
- Fluff the cooked rice with a fork and then mix it into the veggie mixture. Stir thoroughly to combine all the flavors.
- Serve hot, garnished with fresh cilantro and optional toppings like avocado, sesame seeds, or a squeeze of lime juice for added flavor.
Variations and Tips:
- For added protein, consider including cooked chicken, chickpeas, or tofu.
- You can substitute other vegetables based on your preference, such as broccoli, mushrooms, or zucchini.
- To enhance the dish's flavor, add a splash of soy sauce or tamari before serving.
- If you prefer a milder version, reduce the amount of cayenne pepper or omit it entirely.
- This bowl can be stored in the fridge for up to 3 days, making it perfect for meal prep. Simply reheat in the microwave before serving.
- The Original Pro Chopper - Our superstar veggie slicer has been creating waves on TikTok! Simple to use,...
- Easy Meal Prep with Rust-Resistant Blades - Our vegetable chopper is perfect for anyone who wants to eat...
- 5-Star Design - The soft-grip TPU handle ensures controlled chopping, while the non-skid rubber base...
Quinoa and Black Bean Salad
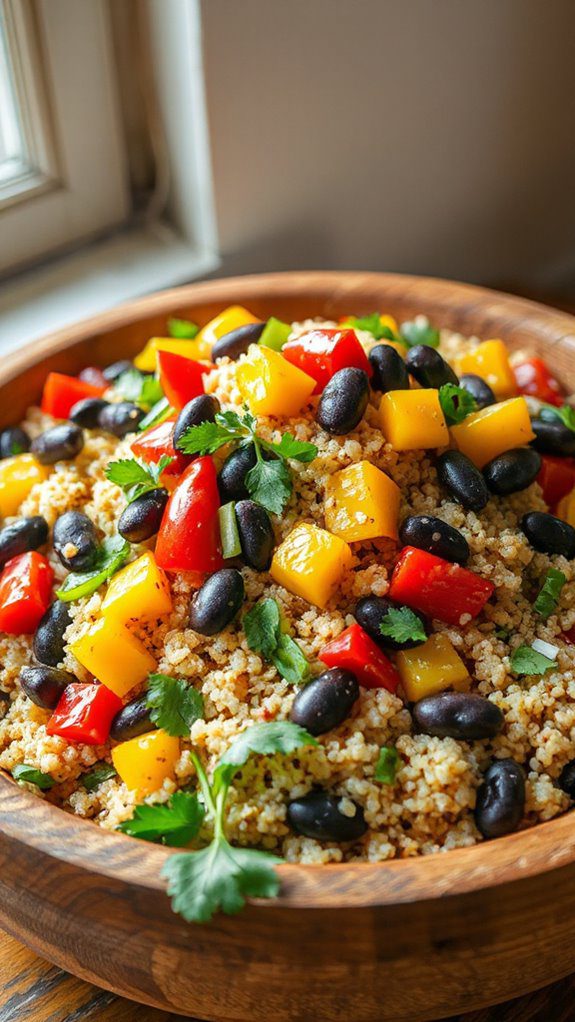
Quinoa and Black Bean Salad is a nutritious and vibrant dish that offers a delightful blend of flavors and textures. It's perfect for health-conscious individuals looking for a filling yet light meal, making it an excellent option for lunch or dinner.
This dish is packed with protein and fiber, making it ideal for vegetarians, vegans, or anyone wanting to improve their diet with anti-inflammatory ingredients. The preparation time is approximately 20 minutes, making it a quick and easy option for busy lifestyles.
Ingredients:
- 1 cup quinoa
- 2 cups water
- 1 can (15 oz) black beans, rinsed and drained
- 1 cup bell peppers (any color), diced
- 1 cup cherry tomatoes, halved
- 1 avocado, diced
- 1/4 cup red onion, finely chopped
- 1/4 cup fresh cilantro, chopped
- Juice of 2 limes
- 2 tablespoons olive oil
- 1 teaspoon cumin
- Salt and pepper to taste
Cooking Steps:
- Rinse the quinoa under cold water to remove any bitter saponin coating.
- In a microwave-safe bowl, combine the quinoa and water. Cover the bowl with a microwave-safe lid or plate. Cook in the microwave on high for about 10-12 minutes, or until the quinoa has absorbed all the water and is fluffy.
- While the quinoa is cooking, prepare the vegetables. In a large mixing bowl, combine black beans, bell peppers, cherry tomatoes, avocado, red onion, and cilantro.
- Once the quinoa is ready, allow it to cool for a few minutes before adding it to the mixing bowl with the vegetables.
- In a separate small bowl, whisk together lime juice, olive oil, cumin, salt, and pepper. Pour this dressing over the quinoa and vegetable mix to combine.
- Toss everything gently but thoroughly to guarantee an even distribution of the dressing and ingredients.
- Serve immediately or refrigerate for 30 minutes to allow the flavors to meld together.
Variations and Tips:
- Feel free to add other ingredients like corn, diced cucumbers, or jalapeños for an extra kick.
- Substitute fresh herbs such as parsley or mint for cilantro if you prefer.
- For added protein, incorporate grilled chicken or shrimp.
- This salad can be made a day in advance; just store it in an airtight container in the refrigerator for best freshness.
- To enhance the anti-inflammatory benefits, consider adding a sprinkle of turmeric or chia seeds.
- Makes Everything Simple : Just forget your bagged cheese! Only turn the handle for several times and get...
- Premium Material : All parts of the rotary cheese grater are made of food grade ABS material, no BPA. The...
- Three Option Grater : The parmesan cheese grater finishes food preparation with slicing, shredding and...
Sweet Potato and Kale Mash
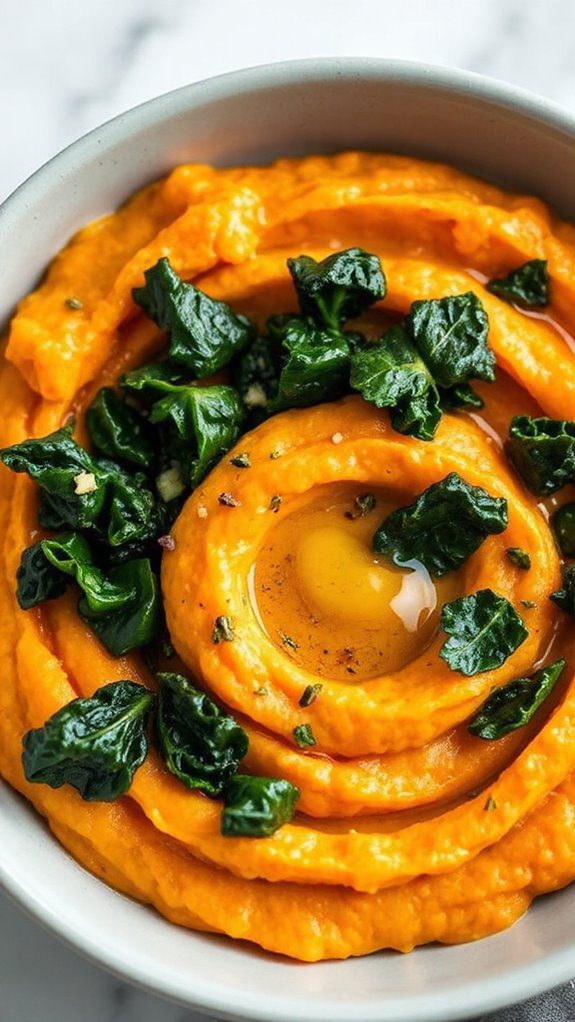
Sweet Potato and Kale Mash is a nutritious, comforting dish that blends the earthy sweetness of sweet potatoes with the vibrant, slightly peppery flavor of kale. This recipe is particularly ideal for those seeking anti-inflammatory meals or anyone looking for a healthy side dish to accompany dinner.
It's a quick preparation that takes about 25 minutes from start to finish, making it an excellent choice for busy weeknights.
Ingredients:
- 2 medium sweet potatoes, peeled and diced
- 2 cups kale, chopped (stems removed)
- 1 tablespoon olive oil
- 1 clove garlic, minced
- 1/4 cup vegetable broth (or water)
- Salt and pepper to taste
- Optional: A squeeze of lemon juice for brightness
Cooking Steps:
- Prepare the Sweet Potatoes: Place the diced sweet potatoes in a microwave-safe dish and add a splash of water. Cover the dish with a microwave-safe lid or plastic wrap, leaving a small vent for steam to escape. Microwave on high for about 8-10 minutes, or until the sweet potatoes are tender.
- Cook the Kale: In a separate microwave-safe bowl, combine the chopped kale, olive oil, minced garlic, and vegetable broth. Cover the bowl and microwave for about 4-5 minutes until the kale is wilted and tender. Stir halfway through for even cooking.
- Mash Together: Once the sweet potatoes and kale are cooked, carefully remove them from the microwave. Drain any excess liquid from the sweet potatoes. In a large bowl, combine the sweet potatoes and kale mixture. Mash together with a potato masher or fork until smooth and fully combined.
- Season and Serve: Season with salt, pepper, and a squeeze of lemon juice if desired. Mix well and taste, adjusting seasoning as needed. Serve warm as a side dish or main component of a meal.
Variations and Tips:
- Additions: Consider adding cooked quinoa or lentils for added protein.
- Herbs and Spices: Enhance flavor with herbs such as thyme or rosemary, or spices like cumin or paprika.
- Texture Variation: For a creamier mash, mix in a dollop of Greek yogurt or a splash of almond milk.
- Storage: Leftovers can be stored in an airtight container in the refrigerator for up to 3 days, making it a great meal prep option.
Enjoy this delicious Sweet Potato and Kale Mash as part of your anti-inflammatory eating journey!
- 💰 REDUCE WASTE AND SAVE MONEY: Chef Preserve keeps FOOD FRESH 5 TIMES LONGER than non-vacuum storage...
- ✅ POWERFUL, QUICK & EASY TO USE: Simply press the button to start. The device vacuum seals a bag in 5...
- ♻️ REUSABLE & RESEALABLE BAGS: Chef Preserve comes with dishwasher, freezer, refrigerator, and...
Mediterranean Chickpea Stew
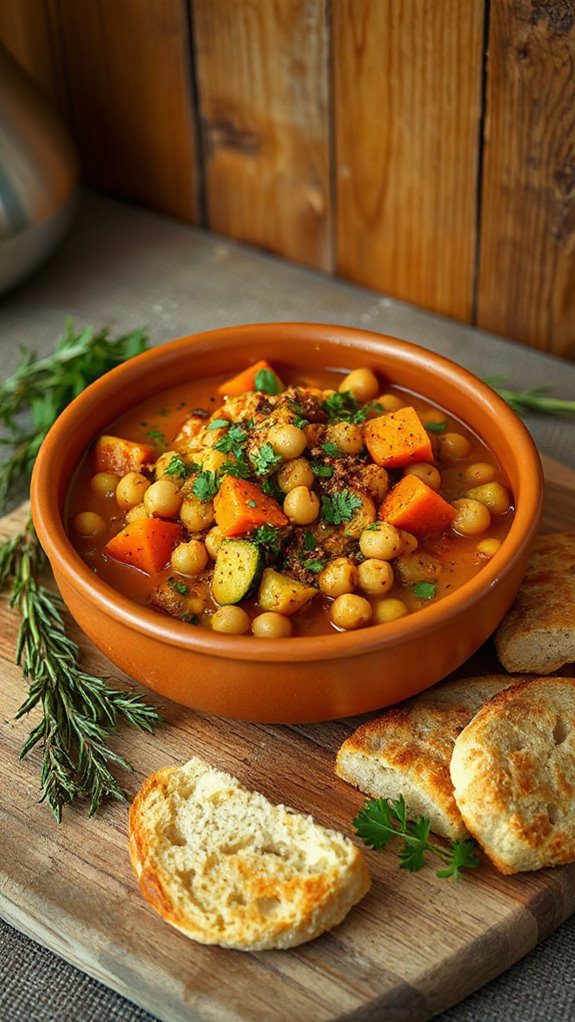
Mediterranean Chickpea Stew is a hearty, nutritious dish that combines the wholesome flavors of Mediterranean cuisine with the health benefits of chickpeas, making it an ideal meal for vegetarians, those on a plant-based diet, or anyone seeking anti-inflammatory foods.
Packed with protein, fiber, and vitamins, this dish is perfect for a cozy dinner or a satisfying lunch. With a preparation time of about 10 minutes and a cooking time of 20 minutes, it's quick enough to whip up on a busy day while being hearty enough to warm you up.
Ingredients:
- 1 can (15 oz) chickpeas, drained and rinsed
- 1 tablespoon olive oil
- 1 onion, chopped
- 2 cloves garlic, minced
- 1 bell pepper, chopped
- 1 can (14 oz) diced tomatoes
- 1 teaspoon ground cumin
- 1 teaspoon smoked paprika
- 1 teaspoon dried oregano
- 1 cup vegetable broth
- Salt and pepper to taste
- Fresh parsley or cilantro for garnish (optional)
Cooking Steps:
- In a microwave-safe bowl, combine the olive oil, onion, garlic, and bell pepper. Microwave on high for 3-4 minutes until the vegetables are softened.
- Add the chickpeas, diced tomatoes, ground cumin, smoked paprika, dried oregano, vegetable broth, salt, and pepper to the bowl. Stir well to combine all ingredients.
- Cover the bowl with a microwave-safe lid or plate, leaving a small gap for steam to escape. Microwave on high for an additional 10-12 minutes, stirring halfway through the cooking time, until everything is heated through and flavors meld.
- Carefully remove the bowl from the microwave (it will be hot!), and stir the stew again. Adjust seasoning if needed.
- Serve warm, garnished with fresh parsley or cilantro if desired.
Variations and Tips:
- For added heat, incorporate a pinch of red pepper flakes or a diced jalapeño.
- Feel free to add other vegetables like zucchini, spinach, or carrots according to your preference.
- To make it heartier, serve the stew over cooked quinoa or brown rice.
- Store leftovers in an airtight container in the refrigerator for up to 3 days, and reheat thoroughly before serving.
- Generous Capacity: 7-quart slow cooker that comfortably serves 9+ people or fits a 7-pound roast
- Cooking Flexibility: High or low slow cooking settings, with convenient warm function for ideal serving...
- Convenient: Set it and forget it feature enables you to cook while at work or performing daily tasks
Zucchini Noodles With Avocado Sauce
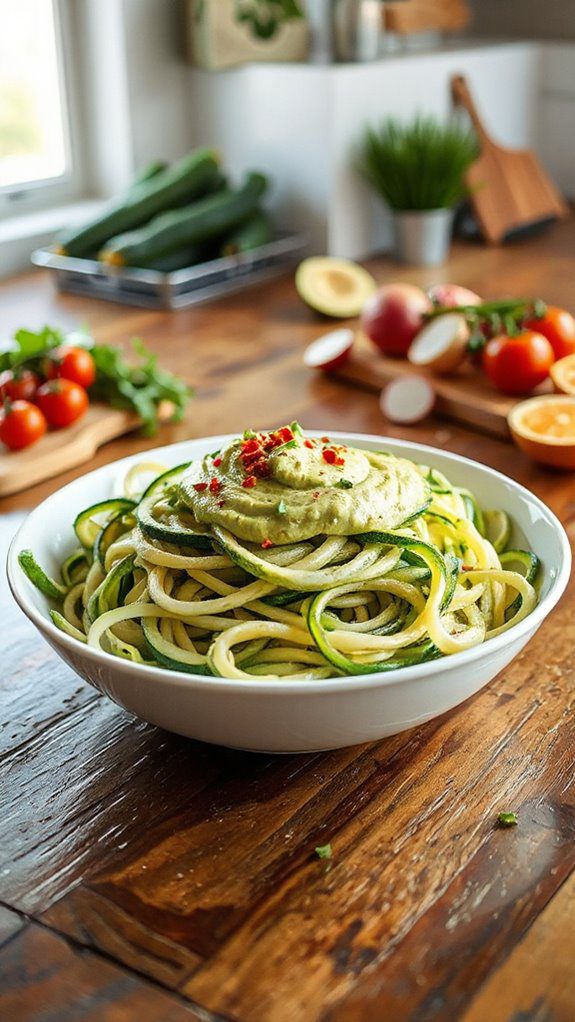
Zucchini Noodles with Avocado Sauce is a delightful, light dish that falls under the category of healthy, anti-inflammatory meals. This dish is particularly ideal for anyone looking to incorporate more plant-based foods into their diet, whether you're a vegetarian, health-conscious individual, or simply someone seeking a revitalizing dish. The prep time is quick, taking about 20 minutes, making it a perfect choice for a speedy lunch or dinner.
Ingredients:
- 2 medium zucchinis
- 1 ripe avocado
- 1 clove of garlic, minced
- 2 tablespoons of fresh lemon juice
- 2 tablespoons of extra-virgin olive oil
- Salt and pepper to taste
- Red pepper flakes (optional, for a kick)
- Fresh basil or parsley for garnish
Cooking Steps:
- Start by spiralizing the zucchinis to create the noodle shapes. If you don't have a spiralizer, you can use a vegetable peeler to create long strips resembling noodles.
- Place the zucchini noodles in a microwave-safe bowl and microwave on high for 2-3 minutes until slightly softened. Avoid overcooking to maintain some crunch.
- In a blender or food processor, combine the ripe avocado, minced garlic, lemon juice, olive oil, salt, and pepper. Blend until smooth. Adjust seasoning as desired.
- Toss the cooked zucchini noodles with the avocado sauce until well coated.
- Serve immediately, garnished with red pepper flakes and fresh herbs for added flavor.
Variations and Tips:
- For added protein, consider tossing in some cooked chickpeas, grilled chicken, or shrimp.
- You can substitute the avocado with a cashew cream for a different flavor; just soak cashews and blend them with garlic and lemon juice.
- Experiment by adding fresh vegetables like cherry tomatoes, spinach, or bell peppers into the mix for extra nutrition and color.
- If you prefer a cold dish, you can skip the microwave step and serve the zucchini noodles raw, as they are delicious.
- Make sure to use ripe avocados for the best creamy texture in the sauce.
- 100% Leak-proof: Guaranteed no-spill seal and secure latches
- Crystal-clear Tritan Built: Stain-resistant and odor-resistant material for a clear view of contents
- Lightweight & Sturdy: Easy to carry, yet durable for everyday use
Curried Lentil and Carrot Soup

Curried Lentil and Carrot Soup is a comforting and nutritious dish that brings vibrant flavors and plenty of health benefits to the table. This hearty soup is packed with protein-rich lentils and the natural sweetness of carrots, combined with aromatic spices such as curry powder. It's a perfect meal for those seeking an anti-inflammatory diet or anyone looking for a warming dish on a chilly day. The preparation time is quick, taking about 10 minutes, while cooking in the microwave will take around 20 minutes, making it ideal for busy individuals or families.
Ingredients:
- 1 cup dried green or brown lentils, rinsed
- 2 large carrots, diced
- 1 small onion, chopped
- 1 clove garlic, minced
- 4 cups vegetable or chicken broth
- 1 tablespoon curry powder
- 1 teaspoon ground cumin
- 1 tablespoon olive oil
- Salt and pepper to taste
- Fresh cilantro or parsley, for garnish (optional)
Cooking Steps:
- In a large microwave-safe bowl, heat the olive oil in the microwave for about 30 seconds, or until warm.
- Add the chopped onion and minced garlic to the bowl and microwave on high for 2-3 minutes, or until the onion is translucent.
- Stir in the diced carrots, rinsed lentils, curry powder, and ground cumin. Mix well to incorporate the spices.
- Pour in the broth and season with salt and pepper. Stir again to combine all ingredients.
- Cover the bowl loosely with a microwave-safe lid or plastic wrap (leaving a small gap for steam to escape) and cook on high for 15-20 minutes, or until the lentils are tender.
- Once cooked, carefully remove the bowl from the microwave and let it sit for a couple of minutes to cool slightly.
- Use an immersion blender to puree the soup to your desired consistency, or leave it chunky if preferred. If you don't have an immersion blender, you can transfer it in batches to a regular blender.
- Serve hot, garnished with fresh cilantro or parsley if desired.
Variations and Tips:
- For added creaminess, stir in a splash of coconut milk just before serving.
- Add some spinach or kale during the last few minutes of cooking for extra nutrition.
- Swap lentils with split peas for a different flavor profile.
- To enhance the flavor, consider adding a squeeze of lemon juice just before serving to brighten the dish.
- This soup can be stored in the refrigerator for 3-4 days and also freezes well for up to 3 months. Just reheat in the microwave when ready to enjoy!
- 𝗘𝗳𝗳𝗼𝗿𝘁𝗹𝗲𝘀𝘀 𝗪𝗲𝗶𝗴𝗵𝗶𝗻𝗴: Supports 5 units...
- 𝗣𝗿𝗲𝗰𝗶𝘀𝗲 𝗥𝗲𝘀𝘂𝗹𝘁𝘀: Accurately weighs up to 11 lb/5 kg with 1 g...
- 𝗦𝗶𝗺𝗽𝗹𝗲 & 𝗖𝗼𝗺𝗽𝗮𝗰𝘁: The small and sleek scale is a perfect fit for...
Berry and Spinach Smoothie
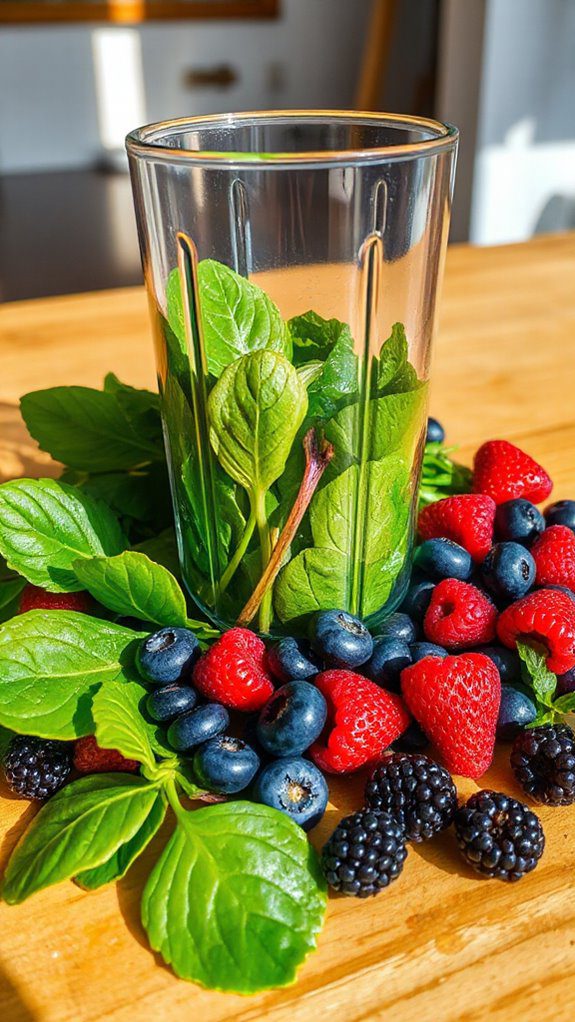
The Berry and Spinach Smoothie is a rejuvenating and nutrient-packed beverage that combines the natural sweetness of berries with the earthy flavor of spinach. This smoothie is perfect for anyone looking to boost their antioxidant intake and fight inflammation while enjoying a delicious drink.
It requires only about 10 minutes of preparation time, making it an ideal quick breakfast or a post-workout snack for busy individuals or health enthusiasts.
Ingredients:
- 1 cup fresh spinach
- 1 cup mixed berries (strawberries, blueberries, raspberries)
- 1 banana
- 1 cup almond milk (or any plant-based milk)
- 1 tablespoon honey or maple syrup (optional)
- 1 tablespoon chia seeds (optional)
- Ice cubes (optional)
Cooking Instructions:
- Start by rinsing the fresh spinach and mixed berries under cold water.
- In a microwave-safe blender, combine the spinach, mixed berries, banana, and almond milk.
- If you like your smoothie a bit sweeter, add honey or maple syrup to taste. For added nutrition, toss in the chia seeds.
- Blend all the ingredients on high until smooth and creamy. If you prefer a colder smoothie, you can add a few ice cubes and blend again until the desired consistency is reached.
- Taste and adjust sweetness or thickness by adding more milk or sweetener if needed.
- Pour the smoothie into a glass and enjoy immediately for the best flavor and nutritional benefits.
Variations and Tips:
- Fruit Options: Feel free to substitute or add other fruits, such as mango, pineapple, or kiwi, for different flavors and nutrients.
- Green Boost: Add a small piece of avocado or a scoop of protein powder for an extra creamy texture and added nutrients.
- Meal Prep: You can prepare smoothie packs by portioning out the spinach, berries, and banana in freezer bags. Just add your liquid and blend when ready to eat.
- Dietary Adjustments: This recipe is easily adaptable for different dietary preferences—use any non-dairy milk or skip the sweetener if you prefer a lower sugar option.
- Storage: While smoothies are best enjoyed fresh, you can store leftovers in an airtight container in the fridge for up to 24 hours. Just give it a good shake or stir before consuming as separation may occur.
- Instant Read Food Thermometer | Our instant read thermometer features a temperature probe and advanced,...
- Multi-Use | From bbq thermometer to baking thermometer, our digital food thermometer for cooking is...
- Easy-Read Digital Thermometer For Cooking | Large instant thermometer dial with bright blue backlight...
Avocado Toast With Cherry Tomatoes
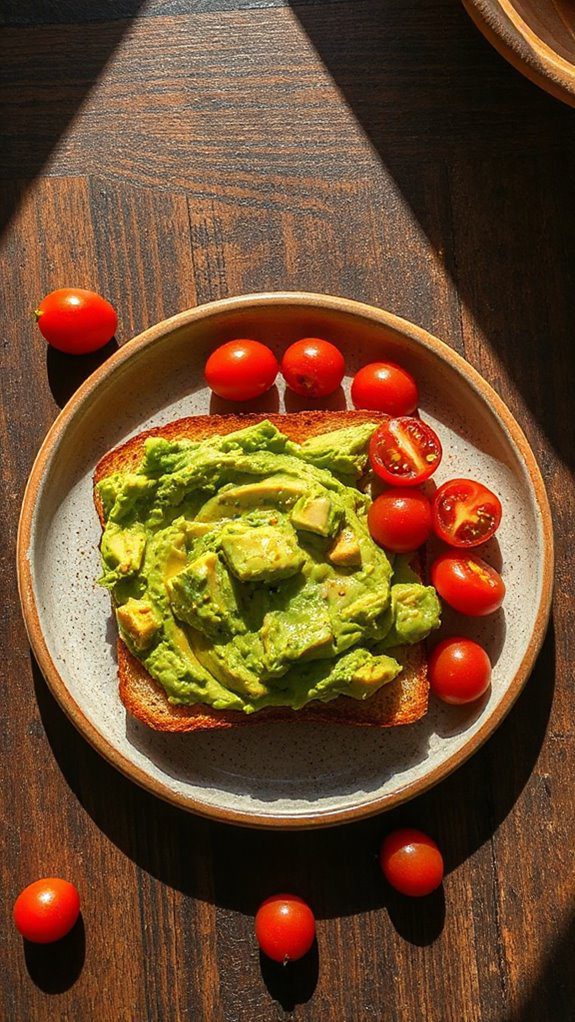
Avocado Toast with Cherry Tomatoes is a delicious, healthy dish that is perfect for breakfast, brunch, or a light snack. This meal is ideal for those looking to incorporate more anti-inflammatory foods into their diet, as it is rich in avocados, which are packed with healthy fats and antioxidants.
Preparation time is approximately 10 minutes, making it a quick and easy option for any time of the day.
Ingredients:
- 1 ripe avocado
- 2 slices of whole grain bread
- 1 cup cherry tomatoes, halved
- Salt and pepper to taste
- 1 tablespoon olive oil
- Fresh basil leaves (optional)
- Red pepper flakes (optional)
- Lemon juice (optional)
Cooking Steps:
- Slice the whole grain bread into two pieces, then place them in the microwave on a microwave-safe plate. Heat them for 30-40 seconds until warm.
- While the bread is heating, cut the avocado in half, remove the pit, and scoop the flesh into a bowl.
- Mash the avocado with a fork, adding a pinch of salt and pepper to taste. For an extra zing, add a squeeze of lemon juice.
- Once the bread is ready, spread the mashed avocado evenly over each slice.
- Top the avocado with the halved cherry tomatoes, drizzling a small amount of olive oil on top for added flavor.
- Finish with fresh basil leaves, red pepper flakes, or additional salt and pepper if desired.
Variations and Tips:
- For added protein, consider adding a poached or fried egg on top of the avocado toast.
- Experiment with different types of bread, such as sourdough or rye, for unique flavors and textures.
- If you love spices, try adding a sprinkle of smoked paprika or garlic powder to the mashed avocado for an extra kick.
- For a heartier version, add sliced radishes or cucumbers on top of the cherry tomatoes.
- Customize your toast with different herbs or greens, such as arugula or cilantro, for a fresh twist.
- Versatile 54-Piece Collection: Elevate your kitchen with the Home Hero 54-Piece Kitchen Utensil Set, a...
- Durable and Long-Lasting: Crafted from premium stainless steel, these kitchen utensils are designed to...
- Perfect Holiday Gift: Delight your loved ones with this kitchen utensils gift set this festive season....
Cauliflower and Broccoli Gratin

Cauliflower and Broccoli Gratin is a delicious, creamy dish that combines the health benefits of both vegetables, ideal for anyone looking to incorporate more anti-inflammatory foods into their diet. This rich and comforting side dish can be served alongside roasted meats or enjoyed as a main vegetarian entrée.
The preparation time is approximately 15 minutes, with a cook time of about 15 minutes in the microwave, making it a quick and satisfying option for busy weeknights.
Ingredients:
- 1 cup cauliflower florets
- 1 cup broccoli florets
- 1 cup shredded low-fat cheddar cheese
- 1/2 cup plain Greek yogurt
- 1/4 cup milk (or a dairy-free alternative)
- 1 clove garlic, minced
- 1/2 teaspoon onion powder
- 1/4 teaspoon black pepper
- Salt to taste
- 1/4 cup breadcrumbs (optional for topping)
- Fresh parsley for garnish (optional)
Cooking Instructions:
- Begin by washing and cutting the cauliflower and broccoli into small florets. Place them in a microwave-safe bowl with a splash of water. Cover with a microwave-safe lid or plastic wrap, leaving a small vent for steam to escape.
- Microwave on high for about 5 minutes, or until the vegetables are tender but still bright in color. Carefully remove from the microwave and drain any excess water.
- In a separate bowl, mix together the shredded cheddar cheese, Greek yogurt, milk, minced garlic, onion powder, black pepper, and salt until well combined.
- Add the steamed cauliflower and broccoli to the cheese mixture. Stir until the vegetables are fully coated in the creamy sauce.
- Pour the mixture into a microwave-safe dish. If desired, sprinkle breadcrumbs on top for a crunchy texture.
- Microwave the gratin on high for 8-10 minutes, or until the cheese is melted and bubbling. If using breadcrumbs, allow an additional minute to brown them lightly.
- Carefully remove from the microwave and let it sit for a couple of minutes. Garnish with fresh parsley if desired before serving.
Variations and Tips:
- For added flavor, try mixing in some cooked chicken or turkey for a heartier dish.
- You can substitute different types of cheese, such as mozzarella or Gruyère, depending on your preference.
- Add spices like paprika, cayenne, or nutmeg to enhance the flavor profile.
- Consider incorporating other vegetables such as spinach, kale, or mushrooms for added nutrition.
- If you're looking for a creamier texture, increase the amount of Greek yogurt or milk in the recipe.
- 24-ounce insulated stainless-steel water bottle with a FreeSip spout and push-button lid with lock
- Patented FreeSip spout designed for either sipping upright through the built-in straw or tilting back to...
- Protective push-to-open lid keeps spout clean; convenient carry loop doubles as a lock
Lemon Garlic Shrimp With Asparagus
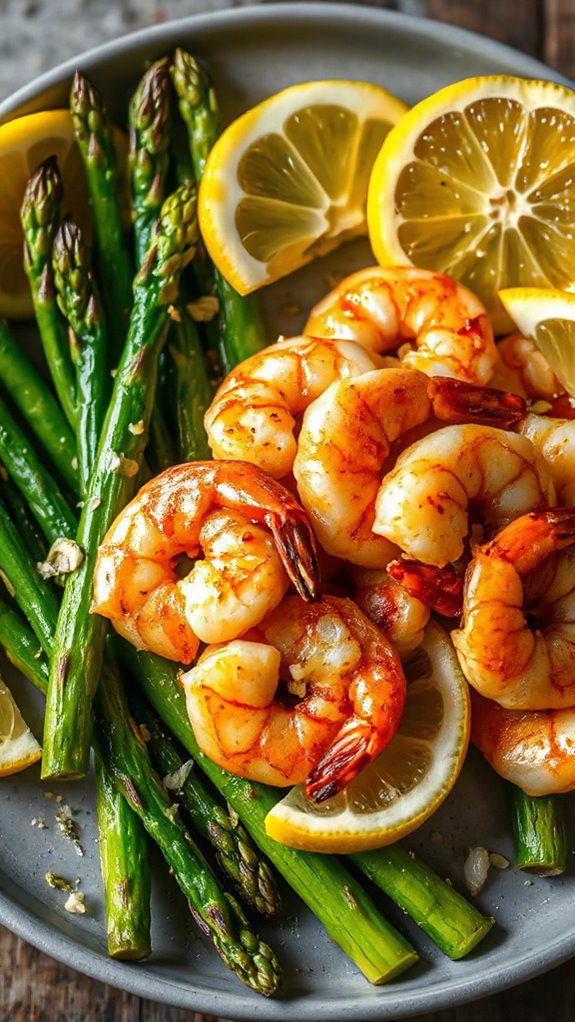
Lemon Garlic Shrimp With Asparagus is a light and flavorful dish that combines the zestiness of lemon with the savory taste of garlic and tender shrimp. This anti-inflammatory meal is ideal for seafood lovers and those looking to add nutritious ingredients to their diet.
It's also a quick option for busy weeknights, with a preparation time of just 15 minutes, and can be cooked in the microwave in under 5 minutes!
Ingredients:
- 1 pound shrimp, peeled and deveined
- 1 bunch asparagus, trimmed and cut into 2-inch pieces
- 2 tablespoons olive oil
- 3 garlic cloves, minced
- 1 lemon, juiced and zested
- Salt and pepper, to taste
- Red pepper flakes (optional, for added heat)
- Fresh parsley, chopped (for garnish)
Cooking Instructions:
- In a microwave-safe bowl, combine the olive oil, minced garlic, lemon juice, lemon zest, salt, and pepper. Mix well to create a marinade for the shrimp.
- Add the shrimp to the bowl, making sure they are well coated with the marinade. Let it sit for about 5 minutes to absorb the flavors.
- In another microwave-safe dish, place the asparagus and add a splash of water. Cover with a microwave-safe lid or plastic wrap, leaving a small vent for steam to escape.
- Microwave the asparagus on high for about 2 minutes, or until tender-crisp. Check and add additional time if needed.
- After the asparagus is cooked, drain any excess water and add the marinated shrimp to the dish. Toss together gently.
- Microwave the shrimp and asparagus mixture on high for 2-3 minutes, or until the shrimp is opaque and cooked through. Stir halfway through for even cooking.
- Remove from the microwave, and sprinkle with red pepper flakes and fresh parsley before serving.
Variations and Tips:
- For a gluten-free option, confirm that any additional seasonings used are gluten-free.
- You can substitute asparagus with other vegetables like broccoli, snap peas, or zucchini based on your preference.
- For a protein-packed addition, consider mixing in cooked quinoa or brown rice.
- If you prefer a creamier texture, add a dollop of Greek yogurt or a splash of coconut cream before serving.
- Always adjust cooking times based on the wattage of your microwave; keeping an eye on the dish while it cooks will help guarantee peak results.
Coconut Curry Butternut Squash

Coconut Curry Butternut Squash is a vibrant and creamy dish that combines the natural sweetness of butternut squash with the rich flavor of coconut milk and warm spices. This hearty meal is perfect for those looking for comforting, anti-inflammatory foods, as it is packed with nutrients and antioxidants.
Ideal for vegetarians or anyone seeking to add more plant-based meals into their diet, this dish can be prepared in just 30 minutes!
Ingredients:
- 1 medium butternut squash, peeled and diced
- 1 can (400ml) coconut milk
- 2 tablespoons red curry paste
- 1 onion, chopped
- 3 cloves garlic, minced
- 1 tablespoon fresh ginger, minced
- 1 tablespoon olive oil
- 1 cup vegetable broth
- 1 tablespoon lime juice
- Salt and pepper, to taste
- Fresh cilantro, for garnish
Cooking Steps:
- In a microwave-safe bowl, combine diced butternut squash and a splash of water. Cover with a microwave-safe lid or plastic wrap, and microwave on high for about 8-10 minutes until tender. Stir halfway through cooking.
- In a large microwave-safe dish, heat olive oil on high for 1-2 minutes. Add chopped onion, garlic, and ginger. Microwave for another 2-3 minutes until the onions are soft and translucent.
- Stir in the red curry paste and cook for an additional minute to release the flavors.
- Add the cooked butternut squash, coconut milk, vegetable broth, lime juice, salt, and pepper to the dish. Stir well to combine.
- Microwave on high for around 5-7 minutes, checking and stirring every two minutes until everything is heated through and well mixed.
- Adjust seasoning to taste and serve hot, garnished with fresh cilantro.
Variations & Tips:
- For a spicier version, add minced jalapeños or a dash of cayenne pepper.
- You can incorporate other vegetables such as bell peppers, spinach, or peas for added nutrition and flavor.
- Serve the dish over cooked rice or quinoa for a complete meal.
- To enhance the creaminess, you could add a tablespoon of nut butter, such as almond or peanut butter, during the cooking process.
- This dish keeps well in the refrigerator, making it perfect for meal prep or leftovers. Simply reheat in the microwave.
Chickpea and Spinach Stew
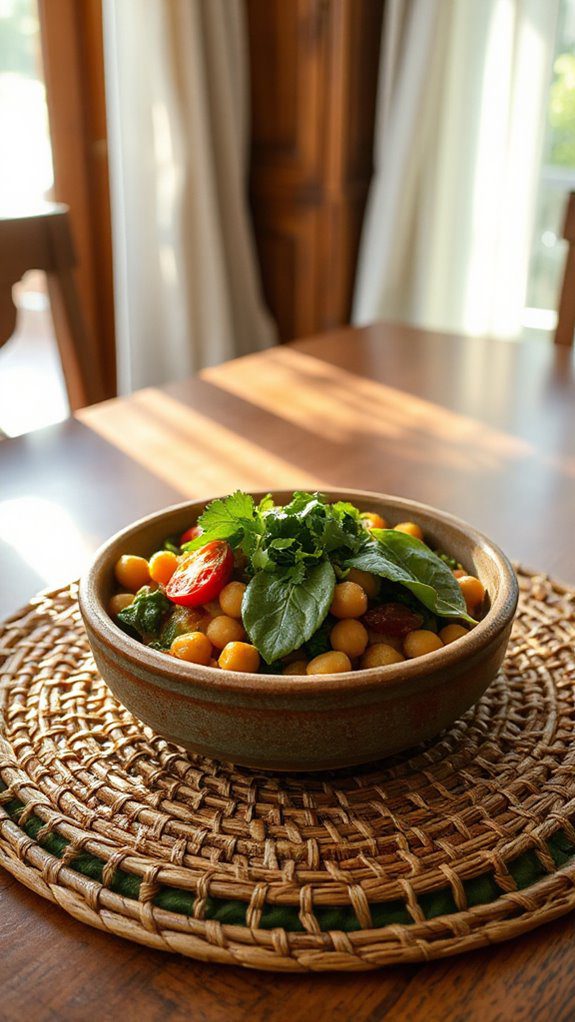
Chickpea and Spinach Stew is a hearty, nutritious dish that combines the richness of chickpeas with the vibrant taste of spinach, making it an ideal meal for vegetarians and anyone seeking a healthy, anti-inflammatory option.
This comforting stew can be prepared in just 30 minutes, making it a perfect choice for weeknight dinners or meal prep for the week ahead. Enjoy it alone or serve it with a side of whole grain bread for a complete meal.
Ingredients:
- 1 can (15 oz) chickpeas, drained and rinsed
- 3 cups fresh spinach, chopped
- 1 medium onion, diced
- 2 cloves garlic, minced
- 1 can (14 oz) diced tomatoes
- 1 teaspoon ground cumin
- 1 teaspoon turmeric
- 1 teaspoon paprika
- 1 tablespoon olive oil
- Salt and pepper to taste
- Fresh lemon juice (optional for serving)
Cooking Steps:
- Prepare the base: In a microwave-safe bowl, combine the diced onion and minced garlic with the olive oil. Cover the bowl with a microwave-safe lid or wrap and microwave for 3-4 minutes until the onion is translucent and fragrant.
- Add the chickpeas and seasonings: Stir in the drained chickpeas, diced tomatoes (with their juice), ground cumin, turmeric, paprika, salt, and pepper. Mix well to combine.
- Cook the stew: Cover the bowl again and microwave on high for 5-6 minutes, stirring halfway through to guarantee even heating.
- Incorporate spinach: Carefully remove the bowl from the microwave (it will be hot). Stir in the chopped spinach and cover again. Microwave for an additional 2-3 minutes until the spinach wilts.
- Final touches: Taste and adjust seasoning if necessary. If desired, squeeze fresh lemon juice over the stew just before serving for added brightness.
Variations and Tips:
- For added protein, consider adding diced tofu or shredded chicken.
- You can substitute fresh spinach with frozen spinach; just be sure to thaw and squeeze out excess water before adding it to the stew.
- If you like a bit of heat, add a pinch of red pepper flakes or a splash of hot sauce during the cooking steps.
- This stew can be refrigerated for up to 3 days or frozen for up to 2 months, making it great for meal prep.
- Serve the stew over quinoa or brown rice for a more filling option.
Apple Cinnamon Oatmeal
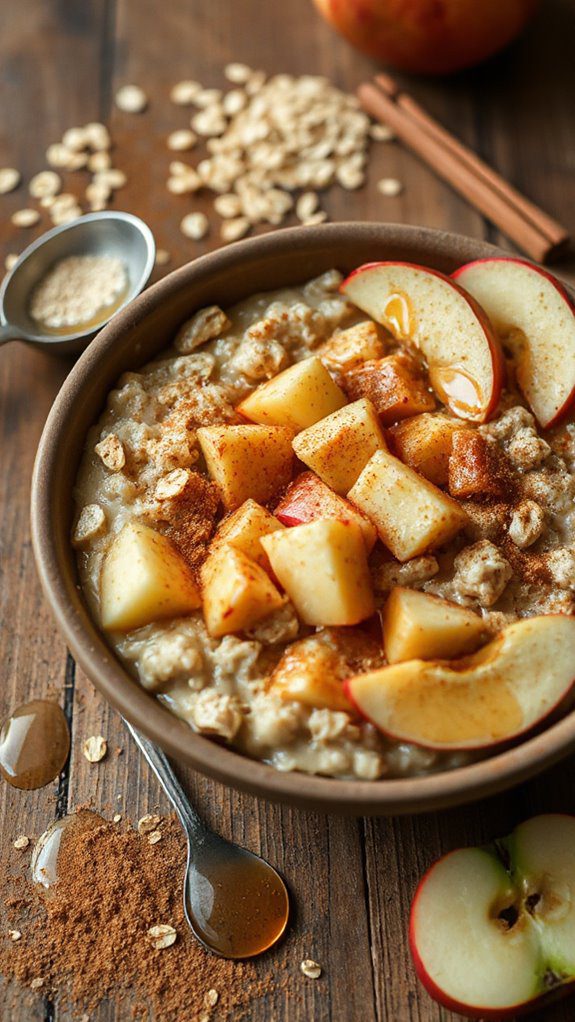
Apple Cinnamon Oatmeal is a wholesome and comforting dish that combines the natural sweetness of apples with the warm, spicy flavor of cinnamon.
This nutritious breakfast is perfect for those looking to reduce inflammation and start their day off with an energy boost. The preparation time for this microwave recipe is quick and easy, taking about 5 minutes to prepare and cook.
Ingredients:
- 1 cup rolled oats
- 2 cups water or milk (dairy or non-dairy)
- 1 medium apple, diced
- 1 teaspoon ground cinnamon
- 1 tablespoon honey or maple syrup (optional)
- Pinch of salt
- Chopped nuts (optional, for topping)
Instructions:
- In a microwave-safe bowl, combine the rolled oats and salt.
- Pour in the water or milk and stir to combine.
- Add the diced apple and ground cinnamon to the bowl, mixing well.
- Microwave on high for about 2-3 minutes, stopping to stir halfway through to guarantee even cooking.
- After cooking, let the oatmeal sit for a minute to thicken. If it's too thick, add a bit more water or milk to reach your desired consistency.
- Sweeten to taste with honey or maple syrup, if desired, and top with chopped nuts for added texture and nutrition.
Variations and Tips:
- For an extra boost of flavor, add a teaspoon of vanilla extract before microwaving.
- Substitute with pears or berries for a different fruity twist.
- Top with a dollop of yogurt for creaminess and additional protein.
- Make it more filling by mixing in a spoonful of nut butter or seeds after cooking.
- Prepare a larger batch and store leftovers in the refrigerator for a quick breakfast option on busy mornings. Reheat with a splash of milk or water to restore consistency.
Mixed Berry Chia Pudding
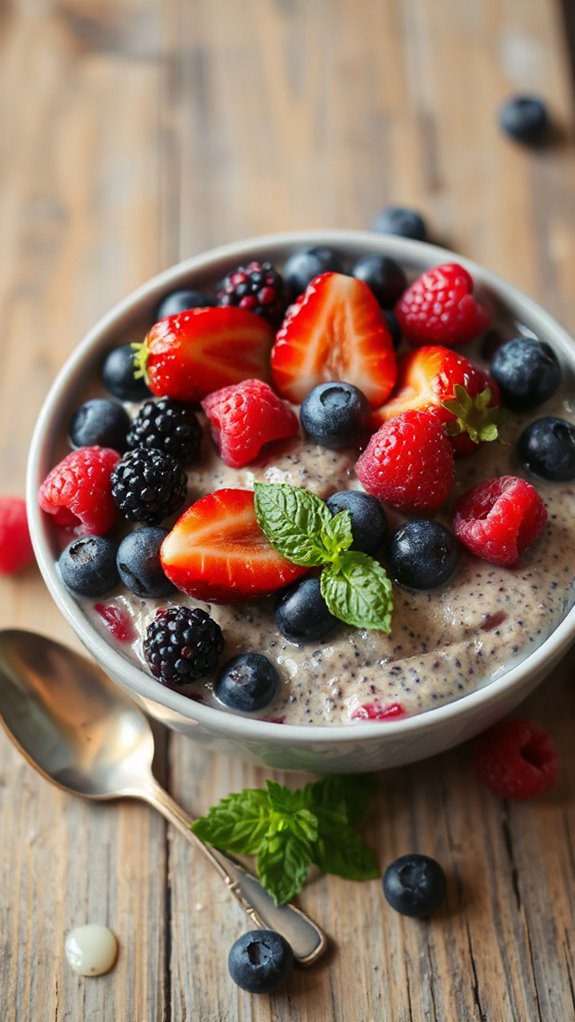
Mixed Berry Chia Pudding is a nutritious and delicious dish perfect for breakfast or a revitalizing snack. With its vibrant colors and rich flavors, this pudding is ideal for anyone looking to boost their anti-inflammatory diet or simply enjoy a tasty treat.
Preparation time is quick, taking only about 10 minutes to whip up, plus a few hours for the pudding to set in the refrigerator.
Ingredients:
- 1 cup almond milk (or any milk of choice)
- 1/4 cup chia seeds
- 2 tablespoons maple syrup (or honey)
- 1 teaspoon vanilla extract
- 1/2 teaspoon cinnamon (optional)
- 1 cup mixed berries (fresh or frozen)
- Additional berries and mint leaves for topping (optional)
Cooking Steps:
- In a mixing bowl, combine the almond milk, chia seeds, maple syrup, vanilla extract, and cinnamon (if using).
- Whisk the ingredients together until the chia seeds are evenly distributed throughout the mixture.
- Let the mixture sit for about 5 minutes, then whisk again to prevent clumping of the chia seeds.
- Cover the bowl and place it in the refrigerator for at least 2-4 hours, or overnight for a thicker consistency.
- Once the pudding is set, give it a good stir and divide it into serving bowls or jars.
- Top each serving with mixed berries and garnish with additional mint leaves, if desired.
- Enjoy chilled as a satisfying breakfast or snack!
Variations and Tips:
- For a creamier texture, try blending the almond milk and chia seeds together before letting it sit.
- Experiment with different fruits like mango, banana, or kiwi for varied flavors.
- Add a scoop of Greek yogurt for extra protein.
- If you prefer a sweeter pudding, feel free to adjust the amount of maple syrup or honey to your taste.
- Chia pudding can be stored in the refrigerator for up to 5 days, making it a great make-ahead option for busy mornings.
Garlic Roasted Mushrooms
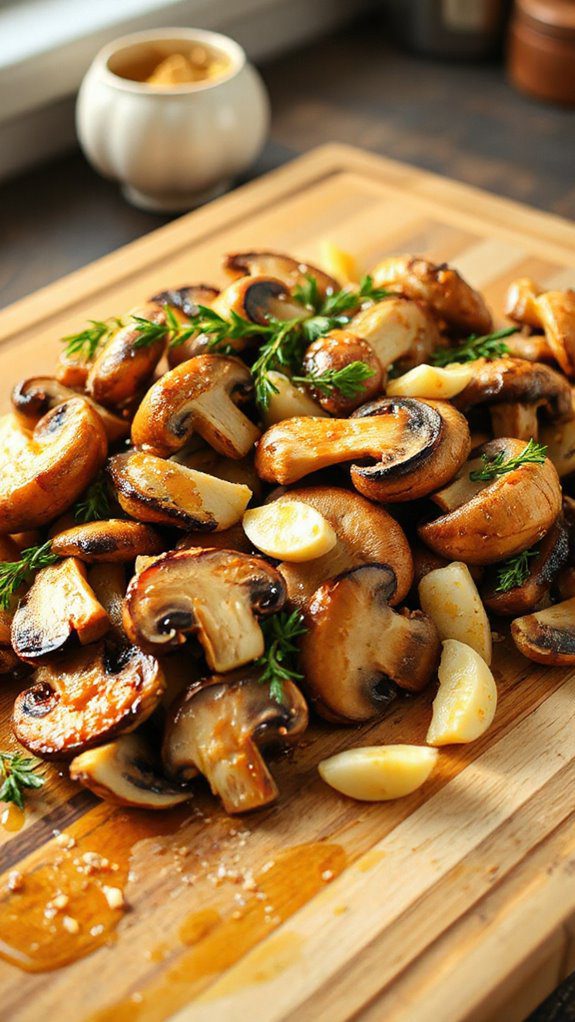
Garlic Roasted Mushrooms are a delightful and nutritious side dish that perfectly pairs with a variety of main courses. Rich in flavor and packed with antioxidants, this dish is ideal for anyone looking to incorporate more anti-inflammatory foods into their diet.
With a preparation time of just 10 minutes and a cooking time of around 15 minutes, these mushrooms are perfect for busy weeknights or an easy addition to gatherings.
Ingredients:
- 1 pound of fresh mushrooms (button or cremini)
- 3 tablespoons of olive oil
- 4 cloves of garlic, minced
- 1 teaspoon of dried thyme (or fresh if available)
- Salt and pepper, to taste
- Fresh parsley, chopped (for garnish)
Cooking Instructions:
- Prep the Mushrooms: Clean the mushrooms with a damp cloth and remove the stems if desired. If using larger varieties, you may want to slice them in half or quarters for even cooking.
- Mix Ingredients: In a large bowl, combine the mushrooms, olive oil, minced garlic, thyme, salt, and pepper. Toss everything together until the mushrooms are well-coated in the oil and seasonings.
- Cook in Microwave: Arrange the seasoned mushrooms in a single layer in a microwave-safe dish. Cover with a microwave-safe lid or with plastic wrap (leave a small portion open for steam to escape). Microwave on high for about 5-7 minutes, or until the mushrooms are tender and juicy. Stir halfway through for even cooking.
- Garnish and Serve: Once done, carefully remove the dish from the microwave (it will be hot). Sprinkle fresh parsley on top for an added burst of flavor and color. Serve warm as a side dish or a topping for salads and grain bowls.
Variations and Tips:
- Cheesy Twist: For a cheesy flavor, add 1/4 cup of grated Parmesan cheese to the mushrooms before microwaving.
- Spice It Up: Add a pinch of red pepper flakes for a spicy kick.
- Herb Swap: Feel free to replace thyme with rosemary, oregano, or any other favorite herbs.
- Add Lemon: Squeeze fresh lemon juice over the mushrooms after cooking for a zesty finish.
- Storage: Leftovers can be stored in an airtight container in the refrigerator for up to 3 days. Reheat in the microwave before serving.
These Garlic Roasted Mushrooms are not only quick to prepare but also versatile and packed with flavor, making them a perfect choice for health-conscious eaters. Enjoy!
Spicy Roasted Chickpeas
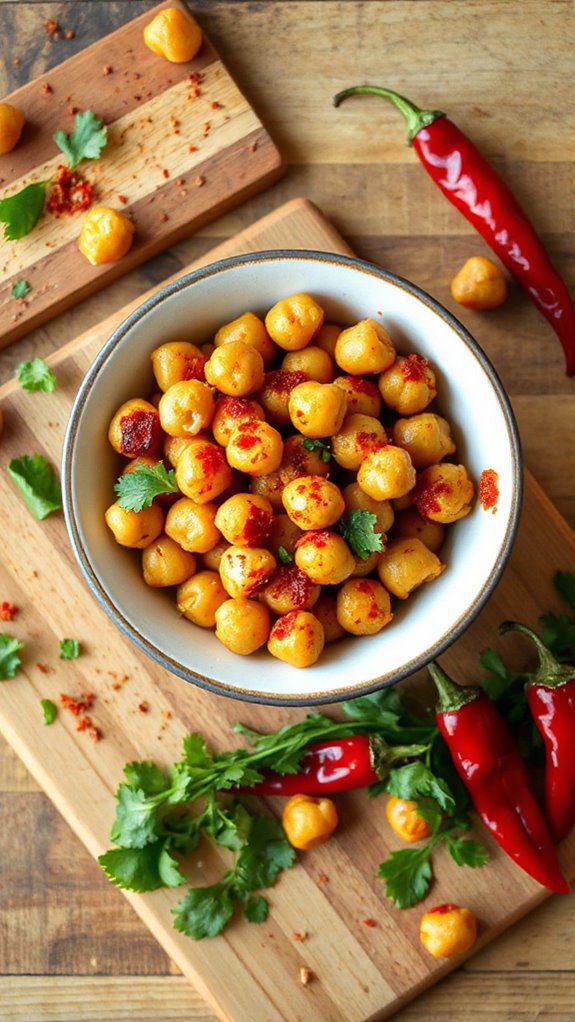
Spicy roasted chickpeas are a delightful and nutritious snack that offers a satisfying crunch while benefiting from their anti-inflammatory properties. They are perfect for anyone looking to incorporate healthy snacks into their diet, especially those seeking plant-based options rich in fiber and protein.
Preparation time is approximately 10 minutes, plus an additional 20-30 minutes for roasting in the microwave.
Ingredients:
- 1 can (15 oz) chickpeas, drained and rinsed
- 2 tablespoons olive oil
- 1 teaspoon paprika
- 1 teaspoon ground cumin
- 1/2 teaspoon garlic powder
- 1/2 teaspoon cayenne pepper (adjust to taste)
- Salt to taste
- Optional: 1 teaspoon lemon juice for added flavor
Cooking Instructions:
1. Prep the Chickpeas: After draining and rinsing the chickpeas, spread them out on a clean kitchen towel and pat them dry to remove excess moisture.
2. Seasoning Mixture: In a medium bowl, combine the olive oil, paprika, ground cumin, garlic powder, cayenne pepper, and salt. Mix well to create your spice blend.
3. Coat the Chickpeas: Add the dried chickpeas to the bowl and toss them in the spice mixture until they are evenly coated.
4. Microwave Roasting: Spread the seasoned chickpeas in a single layer on a microwave-safe plate. Microwave on high for 3 minutes, then stir.
Continue microwaving in 1-minute increments, stirring in between, for an additional 5-10 minutes or until crispy. Keep an eye on them to prevent burning.
5. Final Touch and Serve: If desired, drizzle with lemon juice before serving for an extra burst of flavor. Let them cool before enjoying.
Variations and Tips:
- Spice Level: Adjust the amount of cayenne pepper for a milder or spicier snack according to your preference.
- Different Flavors: Experiment with other herbs and spices such as smoked paprika, chili powder, Italian herbs, or even some nutritional yeast for a cheesy flavor.
- Storage: Store leftover roasted chickpeas in an airtight container at room temperature. They are best enjoyed fresh but can last for a few days.
- Microwave Alternatives: For a crispier texture, consider using a conventional oven. Spread the chickpeas on a baking sheet and roast at 400°F (200°C) for 20-30 minutes, stirring occasionally.
Savory Quinoa and Egg Bake
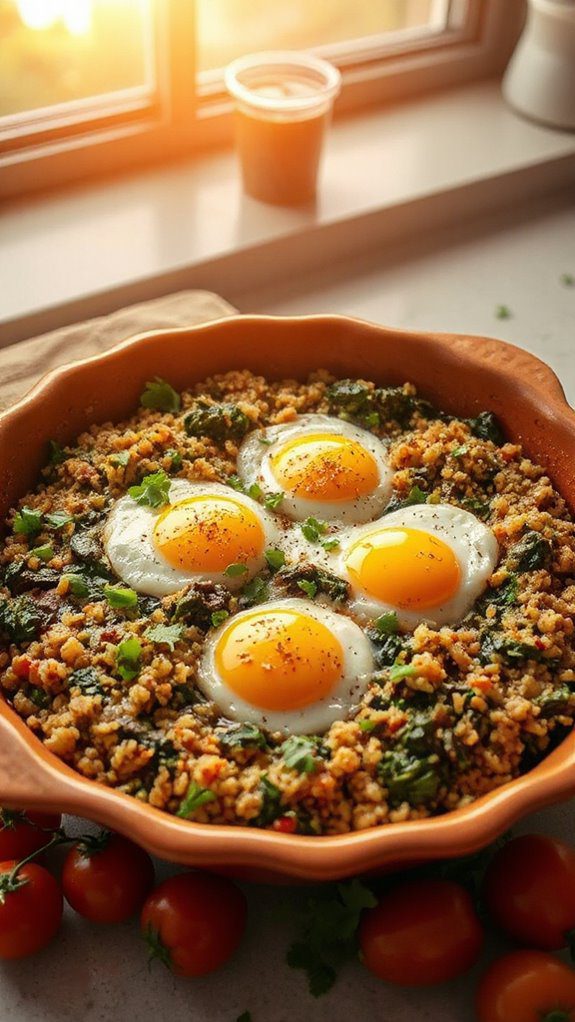
This Savory Quinoa and Egg Bake is a nutritious, protein-packed dish that combines the wholesome goodness of quinoa with the richness of eggs, making it a perfect meal for breakfast or brunch.
Ideal for health-conscious individuals or families looking for a hearty but simple dish, the preparation time is approximately 15 minutes, with an additional 30 minutes for cooking, allowing for a convenient and satisfying meal option.
Ingredients:
- 1 cup cooked quinoa
- 4 large eggs
- 1 cup spinach, chopped
- 1/2 cup cherry tomatoes, halved
- 1/2 cup feta cheese, crumbled
- 1/4 cup red onion, diced
- 1/2 teaspoon garlic powder
- 1/2 teaspoon paprika
- Salt and pepper, to taste
- Olive oil spray (for greasing)
Cooking Instructions:
- Preheat your microwave oven to 350°F (175°C) if it has a bake function (otherwise, use a microwave-safe dish for steaming).
- In a large mixing bowl, combine the cooked quinoa, chopped spinach, halved cherry tomatoes, crumbled feta cheese, diced red onion, garlic powder, paprika, salt, and pepper. Mix well to guarantee all ingredients are evenly distributed.
- In another bowl, whisk the eggs until well beaten. Pour the beaten eggs into the quinoa mixture and stir until everything is combined.
- Grease a microwave-safe baking dish with olive oil spray. Pour the quinoa and egg mixture into the dish, spreading it evenly.
- If using a microwave with a bake function, place the dish in the microwave and cook for about 30 minutes or until the eggs are set and the top is lightly golden. If using a standard microwave, you may need to cover the dish with a microwave-safe lid or plate and steam for about 10-15 minutes, checking for doneness.
- Once cooked, let it cool for a few minutes before slicing into squares and serving warm.
Variations and Tips:
- Feel free to swap in your favorite vegetables such as bell peppers, zucchini, or mushrooms for added flavor.
- Experiment with different cheese varieties, like cheddar or goat cheese, for a unique twist.
- To add a protein boost, consider mixing in cooked chicken or turkey sausage.
- This dish can be made ahead of time and reheated in the microwave, making it an excellent option for meal prep.
- For a gluten-free option, confirm your quinoa is certified gluten-free.
Enjoy this delightful Savory Quinoa and Egg Bake packed with anti-inflammatory ingredients!
Creamy Tomato Basil Soup

Creamy tomato basil soup is a warm and comforting dish that combines the rich flavors of fresh tomatoes and aromatic basil, making it an ideal choice for anyone looking to enjoy a nutritious, anti-inflammatory meal.
This comforting vegan-friendly recipe can be enjoyed on its own or paired with crusty bread for a heartier meal. With a preparation time of just 15 minutes and a cooking time of 10 minutes in the microwave, it's perfect for those busy weeknights when time is short, yet you want to nourish your body with wholesome ingredients.
Ingredients:
- 2 cups canned diced tomatoes (or fresh tomatoes, chopped)
- 1 cup vegetable broth
- 1 cup unsweetened almond milk (or any non-dairy milk)
- 1 small onion, diced
- 2 cloves garlic, minced
- 1 tablespoon olive oil
- 1 teaspoon dried oregano
- 1/2 teaspoon salt
- 1/4 teaspoon black pepper
- 1/2 cup fresh basil leaves, chopped
- Optional: red pepper flakes for a spicy kick
Cooking Steps:
- In a microwave-safe bowl, combine the diced tomatoes, onion, garlic, vegetable broth, olive oil, oregano, salt, and black pepper.
- Microwave on high for 5 minutes, or until the onions are soft and the mixture is bubbling.
- Carefully remove the bowl from the microwave and add the almond milk and chopped basil leaves. Stir to combine.
- Return the bowl to the microwave and heat for an additional 2-3 minutes, until warmed through.
- Use an immersion blender to puree the soup until smooth (or carefully transfer to a blender in batches).
- Taste and adjust seasoning, adding more salt, pepper, or red pepper flakes as desired.
- Serve hot, garnished with additional fresh basil if desired.
Variations and Tips:
- For a richer flavor, roast the tomatoes and garlic in the microwave before adding them to the soup.
- Add a tablespoon of nutritional yeast for a cheesy flavor boost without dairy.
- Incorporate additional vegetables like carrots or celery for added nutrition.
- If you prefer a chunkier soup, reserve some tomatoes before blending and stir them back in after blending.
- This soup can be stored in the refrigerator for up to 4 days, or frozen for longer storage. Reheat before serving.
Cilantro Lime Brown Rice
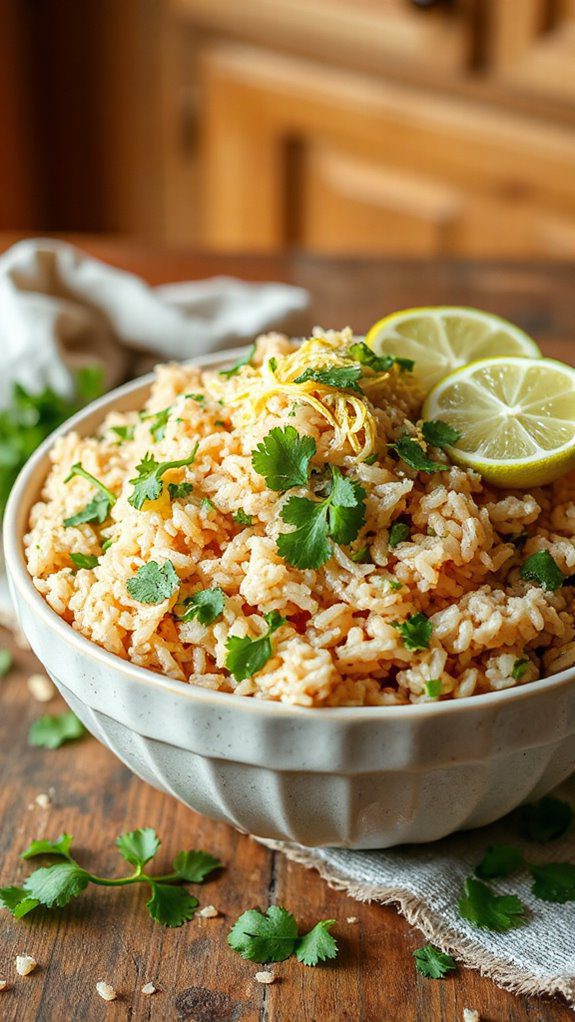
Cilantro Lime Brown Rice is a nutritious and flavorful side dish that complements a variety of meals, especially for those looking to incorporate anti-inflammatory ingredients into their diet. Perfect for families and busy professionals alike, this recipe can be prepared in just 20 minutes, making it an ideal choice for a quick weeknight dinner.
The zesty combination of cilantro and lime elevates the earthy flavors of the brown rice, bringing a revitalizing twist to your plate.
Ingredients:
- 1 cup brown rice
- 2 cups vegetable broth or water
- 1 tablespoon olive oil
- 1/4 cup fresh cilantro, chopped
- Juice of 1 lime
- Zest of 1 lime
- Salt, to taste
- Pepper, to taste
Cooking Steps:
- In a microwave-safe bowl, combine the brown rice and vegetable broth or water. Stir to guarantee the rice is evenly distributed.
- Cover the bowl with a microwave-safe lid or plate, leaving a small gap for steam to escape.
- Microwave on high for 12-15 minutes, or until the rice is fully cooked and all liquid is absorbed. Check for doneness and microwave for an additional 1-2 minutes if necessary.
- Once cooked, remove the rice from the microwave and let it sit covered for another 5 minutes.
- Fluff the rice with a fork and stir in the olive oil, chopped cilantro, lime juice, and lime zest.
- Season with salt and pepper to taste. Mix well until everything is combined.
Variations and Tips:
- For added flavor, consider adding minced garlic or chopped green onions to the rice while it cooks.
- You can substitute the brown rice with quinoa for a protein-packed alternative.
- Try experimenting with different herbs like parsley or mint for a unique twist on the dish.
- Serve alongside grilled chicken, fish, or a fresh salad for a complete and balanced meal.
- Store any leftovers in an airtight container in the fridge for up to 3 days, and reheat in the microwave with a splash of water to keep it moist.
Chocolate Avocado Mousse
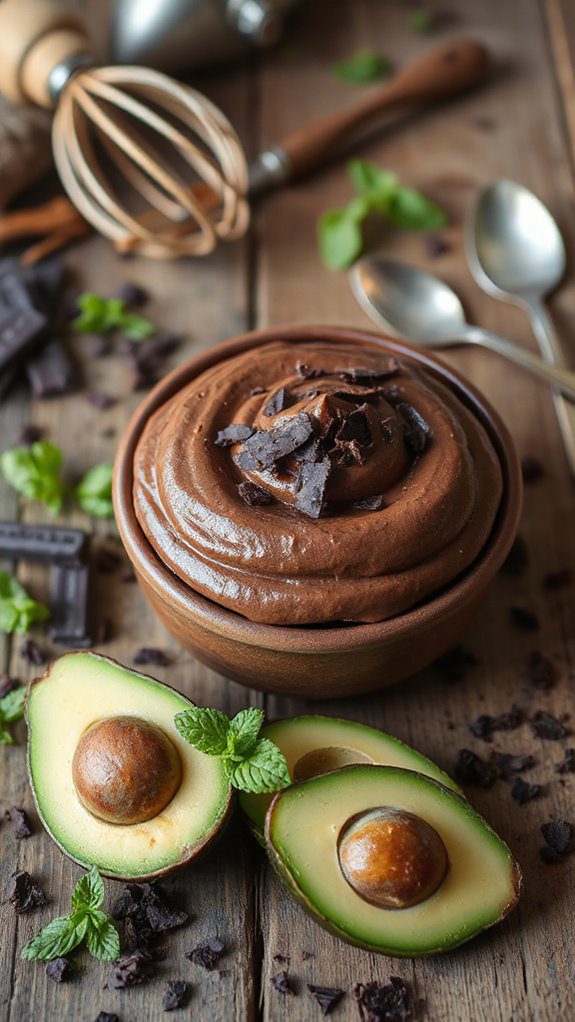
Chocolate Avocado Mousse is a decadent yet healthy dessert that combines the rich creaminess of avocado with the indulgent taste of chocolate. This dish is perfect for those seeking a dairy-free and gluten-free dessert option that is also packed with healthy fats and antioxidants.
It takes approximately 15 minutes to prepare, making it a quick and impressive treat for any occasion, especially for those who are health-conscious or looking to add more anti-inflammatory foods to their diet.
Ingredients:
- 2 ripe avocados
- 1/2 cup unsweetened cocoa powder
- 1/4 cup maple syrup (or honey)
- 1/4 cup almond milk (or any preferred non-dairy milk)
- 1 teaspoon vanilla extract
- A pinch of sea salt
- Optional toppings: fresh berries, chopped nuts, or coconut whipped cream
Cooking Instructions:
- Begin by cutting the avocados in half, removing the pits, and scooping the flesh into a microwave-safe bowl.
- Add the cocoa powder, maple syrup, almond milk, vanilla extract, and sea salt to the bowl with the avocado.
- Microwave the mixture on high for 30 seconds to one minute, just until slightly warmed (not hot), to help blend the ingredients smoothly. This step is optional but can enhance the flavor.
- Use a hand blender or a food processor to mix until you achieve a smooth, creamy consistency. Pause occasionally to scrape down the sides to guarantee even mixing.
- Taste the mousse and adjust sweetness if desired by adding more maple syrup.
- Transfer the mousse into serving bowls or glasses and refrigerate for at least 30 minutes to chill and allow flavors to meld.
- Serve chilled and garnish with your choice of fresh berries, chopped nuts, or coconut whipped cream.
Variations and Tips:
- For a sweeter or different flavor profile, try adding 1-2 tablespoons of nut butter or a splash of espresso for a mocha flavor.
- To make this dessert with a higher protein content, consider adding a scoop of your favorite plant-based protein powder during the blending step.
- If you want to avoid using a microwave, you can simply use ripe avocados straight from the fridge as they'll blend well with the other ingredients.
- Experiment with different sweeteners such as agave syrup or stevia if you're looking for a low-sugar alternative.
- For an added crunch, serve the mousse in a small glass over crushed graham crackers or nuts.
Ginger-Citrus Infused Water

Ingredients:
- 1-inch piece of fresh ginger, peeled and sliced
- 1 lemon, thinly sliced
- 1 orange, thinly sliced
- 1 lime, thinly sliced
- Fresh mint leaves (optional)
- 8 cups of water
- Ice cubes (optional)
Cooking Steps and Tips:
- In a large pitcher, add the sliced ginger, lemon, orange, lime, and fresh mint leaves if using.
- Pour in the 8 cups of water over the ingredients in the pitcher.
- Allow the mixture to infuse for at least 2 hours in the refrigerator, or overnight for a more intense flavor.
- When ready to serve, pour the ginger-citrus infused water into glasses. For a reviving touch, add ice cubes.
- Feel free to strain the water if you prefer a smoother drink or leave the ingredients in for added visual appeal.
- For variations, experiment with different citrus fruits such as grapefruit or tangerines, or try adding berries for an additional flavor twist.
Tips:
- The longer you let the ingredients steep, the stronger the flavors will be.
- This drink can be made in bulk and stored in the refrigerator, but it's best consumed within 3 days for ideal freshness.
- You can also warm the infused water slightly to create a soothing ginger-citrus tea. Enjoy!
Spicy Pumpkin and Bean Chili
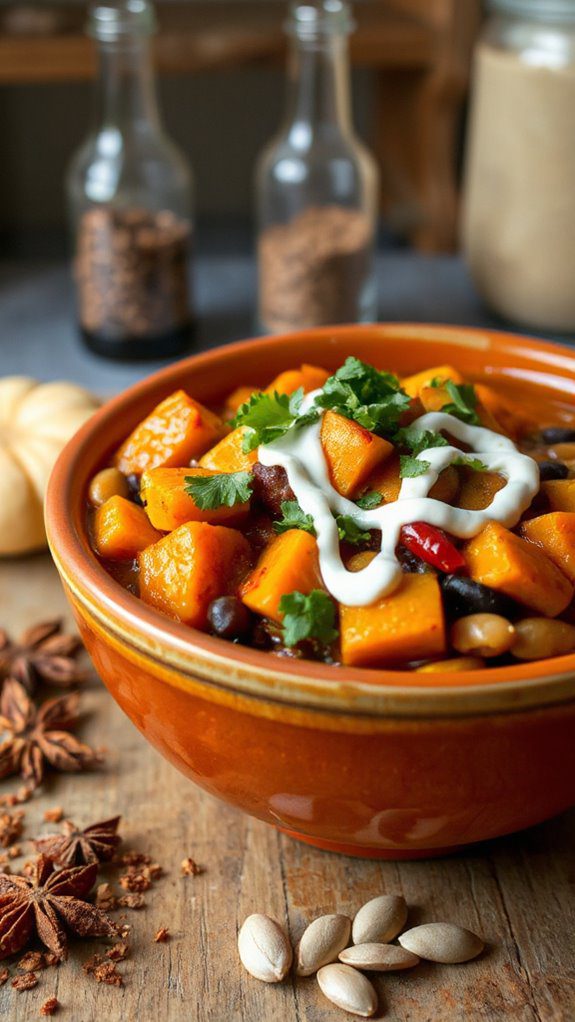
Spicy Pumpkin and Bean Chili is a hearty, flavorful dish that combines the warmth of spices with the comforting texture of pumpkins and beans. Perfect for those looking to incorporate anti-inflammatory foods into their diet, this chili is great for chilly evenings or a healthy meal prep option. It takes about 30 minutes to prepare and cook, making it an excellent choice for a quick, nutritious weeknight dinner.
Ingredients:
- 1 can (15 oz) pumpkin puree
- 1 can (15 oz) black beans, drained and rinsed
- 1 can (15 oz) kidney beans, drained and rinsed
- 1 small onion, diced
- 2 cloves garlic, minced
- 1 bell pepper (any color), diced
- 1 can (14.5 oz) diced tomatoes
- 1-2 tablespoons chili powder (adjust to taste)
- 1 teaspoon cumin
- 1 teaspoon smoked paprika
- 1/2 teaspoon cayenne pepper (optional, adjust to taste)
- Salt and pepper to taste
- 2 tablespoons olive oil
- Fresh cilantro or avocado for garnish (optional)
Cooking Steps:
- In a microwave-safe bowl, combine the olive oil, diced onion, and minced garlic. Microwave on high for 2-3 minutes or until the onion is translucent.
- Add the diced bell pepper to the bowl and microwave for an additional 2 minutes.
- Stir in the pumpkin puree, black beans, kidney beans, diced tomatoes, chili powder, cumin, smoked paprika, cayenne pepper (if using), salt, and pepper. Mix well until all ingredients are combined.
- Cover the bowl with a microwave-safe lid or plastic wrap (leaving a small vent) and cook on high for 8-10 minutes, stirring halfway through. Cook until the mixture is bubbly and heated throughout.
- Taste the chili and adjust seasonings as needed. If you prefer a thicker consistency, microwave for an additional 2-3 minutes uncovered.
- Once ready, let it sit for a couple of minutes before serving. Garnish with fresh cilantro or avocado if desired.
Variations and Tips:
- For a vegan protein boost, consider adding cooked quinoa or lentils to the chili.
- If you prefer a chunky texture, add fresh diced tomatoes instead of canned.
- For added flavor, mix in a tablespoon of cocoa powder or dark chocolate for a deeper richness.
- Serve with cornbread, tortilla chips, or over rice for a heartier meal.
- Store leftovers in an airtight container in the fridge for up to a week, or freeze for a quick meal anytime.
Maple Glazed Brussels Sprouts
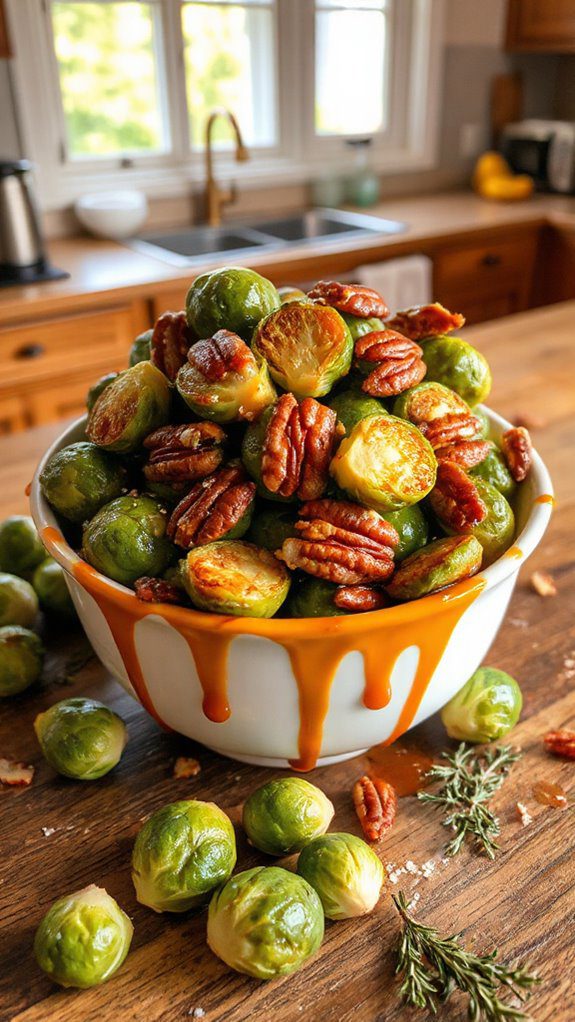
Maple Glazed Brussels Sprouts are a delightful side dish that combines the earthy flavors of Brussels sprouts with the sweet richness of maple syrup, making it an ideal accompaniment to roasted meats or a standalone vegetarian delight.
This dish is perfect for those looking for a healthy, anti-inflammatory option that's both easy to prepare and impressive enough for guests. In just 15 minutes, you can have a warm, flavorful serving of these glazed sprouts ready to enjoy.
Ingredients:
- 1 pound Brussels sprouts, trimmed and halved
- 2 tablespoons olive oil
- 2 tablespoons pure maple syrup
- Salt and pepper, to taste
- 1 teaspoon balsamic vinegar (optional)
- 1/4 cup chopped pecans or walnuts (optional)
- Fresh parsley, chopped (for garnish, optional)
Cooking Steps:
- Place the halved Brussels sprouts in a microwave-safe bowl. Drizzle with olive oil and toss to coat evenly.
- Sprinkle salt and pepper to taste over the Brussels sprouts and mix well.
- Cover the bowl with a microwave-safe lid or plastic wrap, leaving a small vent for steam to escape.
- Microwave on high for about 5-7 minutes, or until the Brussels sprouts are tender but still vibrant in color. Check them halfway through to verify even cooking.
- Carefully remove the bowl from the microwave and uncover it (watch out for steam).
- Drizzle the maple syrup over the cooked Brussels sprouts and, if using, the balsamic vinegar. Toss gently to combine.
- If desired, mix in the chopped nuts for added crunch.
- Return the bowl to the microwave for another 1-2 minutes to warm through and allow the flavors to meld.
- Garnish with fresh parsley before serving.
Variations and Tips:
- For a spicy kick, add a pinch of red pepper flakes before microwaving.
- Try adding other vegetables like carrots or sweet potatoes, adjusting the cooking time as necessary.
- For an even richer flavor, sauté minced garlic with the Brussels sprouts before drizzling on the maple syrup.
- If you prefer a more caramelized flavor, you can finish the dish in a skillet on medium heat for a few minutes after microwaving.
Turmeric and Ginger Tea

Turmeric and Ginger Tea is a comforting, flavorful drink known for its anti-inflammatory properties, making it an excellent choice for those seeking natural remedies for aches and wellness support.
With a preparation time of just about 10 minutes, this tea is ideal for anyone looking to boost their immune system or simply enjoy a soothing beverage at any time of day.
Ingredients:
- 1 cup water
- 1 teaspoon turmeric powder
- 1 teaspoon fresh ginger, grated or sliced
- 1 tablespoon honey (optional)
- Juice of half a lemon (optional)
- A pinch of black pepper (optional, for enhanced absorption)
Cooking Steps:
- In a microwave-safe cup or mug, combine the water, turmeric powder, and grated or sliced ginger.
- Microwave on high for 2-3 minutes, or until the water reaches a boil.
- Carefully remove the cup from the microwave, as it will be hot.
- Strain the tea into another cup to remove the ginger pieces if desired.
- Stir in honey and lemon juice to taste, and add a pinch of black pepper if you want to enhance the anti-inflammatory properties.
- Serve warm and enjoy the soothing benefits of this tea.
Variations and Tips:
- For a creamier texture, consider adding a splash of almond milk or coconut milk after straining the tea.
- You can experiment with other spices, such as cinnamon or cardamom, to add different flavors and benefits.
- If you prefer a cold version, allow the tea to cool, then add ice and enjoy it as an iced beverage.
- Always consult your healthcare provider if you have any health conditions or are on medications, especially if you are considering adding high doses of turmeric or ginger to your diet.
Nutty Seed Energy Bites
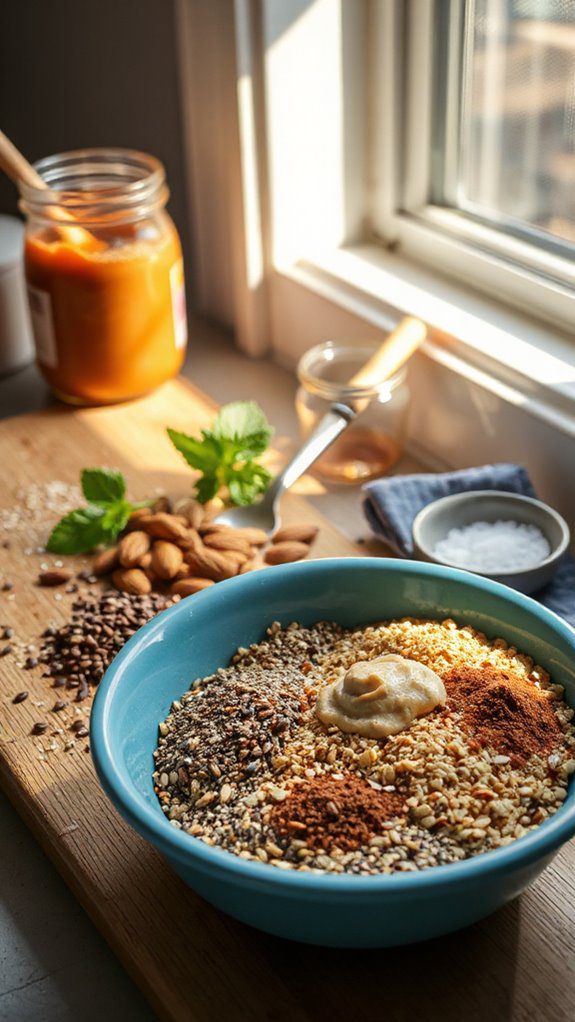
Nutty Seed Energy Bites are a delicious, no-bake snack that harnesses the power of healthy fats, protein, and fiber from a variety of nuts and seeds.
These bite-sized treats are perfect for anyone looking for a quick energy boost, whether you're an athlete, busy professional, or simply in need of a nutritious pick-me-up throughout the day.
With a preparation time of just 15 minutes and minimal cleanup, they are ideal for on-the-go munching or a post-workout treat.
Ingredients:
- ½ cup rolled oats
- ¼ cup nut butter (peanut, almond, or sunflower seed butter)
- ¼ cup honey or maple syrup
- ¼ cup chia seeds
- ¼ cup flaxseeds
- ¼ cup pumpkin seeds
- ¼ cup sunflower seeds
- ¼ cup mini dark chocolate chips (optional)
- 1 teaspoon vanilla extract
- Pinch of sea salt
Instructions:
- In a mixing bowl, combine the rolled oats, chia seeds, flaxseeds, pumpkin seeds, and sunflower seeds. Stir until evenly mixed.
- In a separate bowl, blend together the nut butter, honey or maple syrup, vanilla extract, and pinch of sea salt until smooth.
- Pour the wet ingredients into the dry mixture and stir until everything is well combined. If desired, fold in the mini dark chocolate chips for added sweetness.
- With clean hands, take small portions of the mixture and roll them into bite-sized balls, approximately 1 inch in diameter.
- Place the energy bites on a parchment-lined baking sheet or plate, and refrigerate for at least 30 minutes to allow them to firm up.
- Store the energy bites in an airtight container in the fridge for up to one week, or freeze for longer storage.
Variations and Tips:
- Feel free to substitute any seeds or nuts you prefer or have on hand; almonds, walnuts, or pecans work well.
- To enhance the flavor, consider adding spices like cinnamon, or cocoa powder if you prefer a chocolatey taste.
- For a nut-free version, replace the nut butter with sunflower seed butter or tahini.
- If you want a chewier texture, add shredded coconut or dried fruit (like cranberries or apricots) to the mixture.
- These energy bites also make excellent homemade gifts! Simply package them in a decorative jar and share with friends or family.


