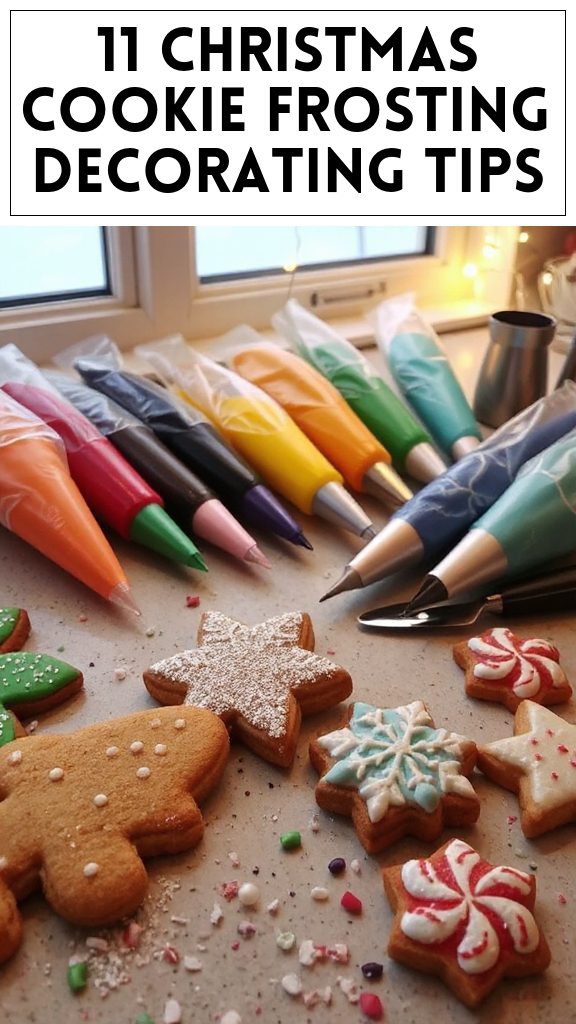
Choose the Right Frosting Consistency

When it comes to decorating Christmas cookies, one of the most vital aspects is the frosting consistency. The frosting should have a smooth texture that allows for easy spreading and outlining, yet thick enough to hold its shape. This recipe will guide you through creating both a royal icing ideal for detailed work and a thicker fondant-like icing suitable for covering cookies.
| Ingredients | Quantity |
|---|---|
| Powdered sugar | 4 cups |
| Meringue powder | 4 tablespoons |
| Water | 5 to 8 tablespoons |
| Corn syrup | 1 tablespoon |
| Vanilla extract (optional) | 1 teaspoon (for flavor) |
| Food coloring (optional) | As needed |
Instructions:
- Prepare Your Ingredients: Start by gathering all your ingredients on a clean workspace. Verify your mixing bowl and utensils are dry, as moisture can affect the frosting consistency.
- Mix the Dry Ingredients: In a medium mixing bowl, combine the powdered sugar and meringue powder. Whisk them together until they are well blended and free of lumps.
- Add Water: Gradually add 5 tablespoons of water to the dry mixture. Start mixing with a hand mixer or a whisk on low speed. Avoid overmixing at this stage.
- Check Consistency: As you mix, observe the consistency. For outlining, the frosting should be thick enough to hold its shape but thin enough to squeeze out of a piping bag. If needed, add more water, one tablespoon at a time, until you reach the desired piping consistency.
- Chill to Firm Up: Once you have the ideal consistency, let the frosting rest for about 5 minutes. This will allow air bubbles to escape and fine-tune the texture.
- Color Your Frosting: If you want to create colored decorations, divide the icing into several bowls and add food coloring to each, mixing thoroughly. Achieve your preferred shades.
- Adjust for Flooding: If you’re creating a smoother surface for flooding, add a little more water (1-2 tablespoons) to a portion of the icing to create a thinner consistency, allowing it to flow smoothly across the cookie.
- Frost and Decorate Your Cookies: Use a piping bag with a small round tip for outlining. Once the outlines are firm, fill in with the thinned icing for a smooth surface. Allow to dry completely before adding additional decorations or layering colors.
- Storage: If there are leftovers, store your icing in an airtight container at room temperature for up to a week. If it hardens, simply add a few drops of water and mix again to restore consistency.
Following these steps will help you create the perfect frosting consistency for all your Christmas cookie decorating needs! Enjoy the creativity of decorating and the delightful treats you’ll produce.

- The Original Pro Chopper - Our superstar veggie slicer has been creating waves on TikTok! Simple to use,...
- Easy Meal Prep with Rust-Resistant Blades - Our vegetable chopper is perfect for anyone who wants to eat...
- 5-Star Design - The soft-grip TPU handle ensures controlled chopping, while the non-skid rubber base...
Use Quality Ingredients

Using quality ingredients in your Christmas cookie decorating process is crucial to achieving not only beautiful results but also great flavors. The right choice of ingredients can elevate your cookies from ordinary to extraordinary. Focus on fresh, high-quality butter, pure vanilla extract, and all-natural food colorings. Below is a simple guide to baking the perfect Christmas cookies that are not only delightful to decorate but also delicious to eat.
| Ingredients | Quantity |
|---|---|
| All-purpose flour | 3 cups |
| Baking soda | 1 teaspoon |
| Baking powder | 1 teaspoon |
| Salt | ½ teaspoon |
| Unsalted butter | 1 cup (softened) |
| Granulated sugar | 1 ½ cups |
| Brown sugar | ½ cup (packed) |
| Eggs | 2 large |
| Pure vanilla extract | 2 teaspoons |
| Almond extract (optional) | ½ teaspoon |
Instructions:
- Preheat the Oven: Begin by preheating your oven to 350°F (175°C). This guarantees that your cookies bake evenly.
- Mix Dry Ingredients: In a medium bowl, whisk together the all-purpose flour, baking soda, baking powder, and salt. Set this mixture aside as you’ll use it later.
- Cream Butter and Sugars: In a large mixing bowl, use a hand mixer or stand mixer to cream together the softened unsalted butter, granulated sugar, and brown sugar. Beat the mixture on medium speed until it becomes light and fluffy, approximately 2-3 minutes.
- Add Eggs and Extracts: Next, add the eggs one at a time, mixing well after each addition. Then, add the pure vanilla extract and almond extract (if using). Continue to beat the mixture until everything is well combined.
- Incorporate Dry Ingredients: Gradually add the flour mixture to the wet ingredients, mixing on low speed. Combine until just incorporated. Be careful not to overmix, as this can lead to tough cookies.
- Chill the Dough: If time allows, cover the bowl with plastic wrap and refrigerate the dough for about 30 minutes. This will help the cookies hold their shape better when baking.
- Prepare Baking Sheets: Line your baking sheets with parchment paper. This prevents sticking and makes for easy cleanup.
- Shape the Cookies: Using a cookie scoop or tablespoon, drop rounded balls of dough onto the prepared baking sheets, leaving about 2 inches of space between each cookie.
- Bake the Cookies: Place the baking sheets in the preheated oven and bake for 8-10 minutes or until the edges are golden brown but the centers remain soft.
- Cool the Cookies: Once baked, allow the cookies to cool on the baking sheets for a few minutes before transferring them to a wire rack to cool completely.
- Ready for Decorating: After cooling, your cookies are now ready to be decorated with your choice of frosting or icing made from quality ingredients. Enjoy the process of creating beautiful holiday treats!

- Makes Everything Simple : Just forget your bagged cheese! Only turn the handle for several times and get...
- Premium Material : All parts of the rotary cheese grater are made of food grade ABS material, no BPA. The...
- Three Option Grater : The parmesan cheese grater finishes food preparation with slicing, shredding and...
Color Your Frosting Wisely

Coloring frosting can transform your Christmas cookies from plain to playful and festive. Using the right colors and techniques will guarantee your cookies stand out on any holiday table. Whether you want pastel shades or vibrant hues, selecting high-quality food colorings and mixing them correctly will add to the excitement of your cookie decorating.
| Ingredients | Quantity |
|---|---|
| Powdered sugar | 4 cups |
| Unsalted butter | 1 cup (softened) |
| Heavy cream or milk | 2–4 tablespoons |
| Pure vanilla extract | 1 teaspoon |
| Food coloring (gel or liquid) | As desired |
Instructions:
- Prepare the Base Frosting: In a large mixing bowl, combine the softened unsalted butter and powdered sugar. Using a hand mixer or stand mixer, beat the mixture on low speed until well blended. Gradually increase to medium speed and continue to mix until the frosting is smooth and creamy, approximately 2-3 minutes.
- Add Cream and Vanilla: Slowly add 2 tablespoons of heavy cream (or milk) and the vanilla extract to the frosting mixture. Beat on medium speed until fully incorporated. If the frosting is too thick, add more cream a tablespoon at a time until you reach your desired consistency.
- Divide the Frosting: If you plan to use multiple colors, divide the frosting into separate bowls according to the number of colors you want to create.
- Color the Frosting: Add a small amount of food coloring to each bowl. Start with a drop or two of gel color or a small amount of liquid color, and mix well. Keep adding more coloring gradually until you achieve your desired shade. Remember that colors may deepen slightly as they sit.
- Adjust Consistency: If the frosting gets too thin after adding color, simply mix in a little more powdered sugar until you achieve the right thickness for spreading or piping.
- Use or Store: Once your frostings are colored and have the desired consistency, use them immediately to decorate your cookies. If you need to store them, place them in airtight containers and refrigerate. Allow them to come to room temperature and re-whip before using if stored.

- 💰 REDUCE WASTE AND SAVE MONEY: Chef Preserve keeps FOOD FRESH 5 TIMES LONGER than non-vacuum storage...
- ✅ POWERFUL, QUICK & EASY TO USE: Simply press the button to start. The device vacuum seals a bag in 5...
- ♻️ REUSABLE & RESEALABLE BAGS: Chef Preserve comes with dishwasher, freezer, refrigerator, and...
Invest in Proper Tools

Creating beautifully decorated Christmas cookies is a delightful experience, and having the right tools can make all the difference. Proper tools not only enhance your decorating precision but also streamline the process and spark joy in your baking. From spatulas to piping bags, each tool serves a specific purpose, guaranteeing that your creativity shines through in every cookie.
| Ingredients | Quantity |
|---|---|
| Decorating bags (piping bags) | 1-2 (disposable or reusable) |
| Piping tips (various sizes) | Set of 5-10 (including round, star, and leaf tips) |
| Cookie spatula | 1 (offset spatula recommended) |
| Squeeze bottles | 1-2 (for flooding and fine details) |
| Food-safe paintbrush | 1 (for luster dust and edible paint) |
| Turntable (optional) | 1 (for easy decorating) |
| Wax paper or parchment | As needed (for piping practice) |
| Small angled spatula | 1 (for smoothing icing) |
| Scraper or bench scraper | 1 (for cutting dough and smoothing surfaces) |
Instructions:
- Gather Your Tools: Begin by collecting all the necessary tools listed in the ingredients table. Having everything in one place will promote a smoother decorating process.
- Prepare Your Workspace: Clear a space on your countertop and cover it with wax paper or parchment. This protects your surface and makes cleanup easy.
- Fill Piping Bags: Cut the ends of your piping bags and fit them with your chosen piping tips. Fill the bags with your colored frosting, guaranteeing there are no air bubbles. Twist the top of the bag to keep the frosting contained.
- Practice Piping: Before decorating your cookies, pipe on wax paper to practice various techniques such as lines, swirls, and dots. This practice can help you gain confidence and control.
- Use the Turntable (if available): If you have a turntable, place a cookie on it for easy access from all angles. This allows you to decorate without moving around too much, maintaining a more consistent design.
- Start Decorating: Begin with the base layer of icing on your cookies. Use a round piping tip to outline the edges and provide a border. Then fill the interior using the flooding technique—adding a bit more frosting that spreads and fills the area.
- Layer Your Designs: Once the base layer has set for a few minutes, you can add additional decorations, such as flowers, stars, or other shapes using various piping tips. Change tips as needed to create different textures and designs.
- Clean and Maintain Your Tools: After decorating, wash your tools promptly. Soak piping bags and tips in warm soapy water to guarantee that no frosting remnants stay stuck. For reusable bags, thoroughly clean them and allow them to dry completely.
- Store Leftover Tools Properly: If you have extra icing in your decorating bags, seal them tightly or store them in airtight containers, ideally in the refrigerator. Just re-whip them to restore consistency before the next use.

- Generous Capacity: 7-quart slow cooker that comfortably serves 9+ people or fits a 7-pound roast
- Cooking Flexibility: High or low slow cooking settings, with convenient warm function for ideal serving...
- Convenient: Set it and forget it feature enables you to cook while at work or performing daily tasks
Master Piping Techniques

Mastering piping techniques is essential for beautifully decorating your Christmas cookies. This dish involves creating stunning designs using royal icing or buttercream frosting, allowing your cookies to not only taste delightful but also look festive and appealing. By developing your piping skills, you can add intricate details and personal touches to your holiday treats, impressing family and friends alike.
| Ingredients | Quantity |
|---|---|
| Royal icing (prepared) | 1 batch |
| Food coloring | As desired (various colors) |
| Piping bags (disposable) | 2-3 |
| Piping tips | Various (round, star, etc.) |
| Edible glitter or sprinkles | As desired |
| Clean cloth or paper towels | As needed |
Instructions:
- Prepare Royal Icing: If using a recipe, start by preparing a batch of royal icing. Verify it is at the right consistency: stiff for piping decorations and thinning it slightly with water if you need a softer icing for flooding.
- Divide and Color: Once your royal icing is ready, divide it into separate bowls based on the number of colors you want to use. Add a few drops of food coloring to each bowl and mix until you achieve the desired shades.
- Fill Piping Bags: Cut the tips of your piping bags to fit the various piping tips you have chosen. Fill each piping bag with the corresponding colored royal icing. If necessary, twist and close the top of the bag to avoid leaks.
- Practice Basic Techniques: Before starting on your cookies, practice a few basic piping techniques on wax paper. For instance, create dots, lines, and swirls to get a feel for the pressure you need to apply to the piping bags.
- Start with Outlines: When you are ready to decorate your cookies, begin by using a small round piping tip to outline your designs. Gently squeeze the piping bag while moving it along the edges of the cookie, forming borders and designs.
- Flooding the Cookies: After allowing the outline to dry for a few minutes, use a thinner consistency icing in another piping bag to fill in the outlined areas. Do this by squeezing the icing from the center of the area and using a toothpick or a small spatula to spread the icing to the edges.
- Add Details: Once the base layer has dried for about 30 minutes, you can add intricate details. Use different piping tips for varying effects—like leaves, stars, or flowers—and layer colors for added depth.
- Finish with Decorative Touches: To enhance your cookie designs, sprinkle edible glitter or sprinkles over the icing while it’s still wet. Allow all the decorated cookies to dry completely for several hours or overnight to confirm the icing sets properly.
- Clean Your Tools: After decorating, remember to clean your piping bags and tips immediately with warm, soapy water to prevent the icing from hardening. Enjoy your beautifully decorated Christmas cookies!

- 100% Leak-proof: Guaranteed no-spill seal and secure latches
- Crystal-clear Tritan Built: Stain-resistant and odor-resistant material for a clear view of contents
- Lightweight & Sturdy: Easy to carry, yet durable for everyday use
Experiment With Different Textures

Experimenting with different textures can elevate your Christmas cookie decorating skills and make your treats visually stunning. By incorporating varied textures into your designs, you can create depth and interest that will captivate your guests. Whether it’s through using different piping techniques, adding edible elements, or combining various icing consistencies, the possibilities for adding beautiful textures are endless.
| Ingredients | Quantity |
|---|---|
| Royal icing (prepared) | 1 batch |
| Food coloring | As desired |
| Piping bags (disposable) | 2-3 |
| Piping tips | Various (e.g., round, star) |
| Edible glitter or sprinkles | As desired |
| Cornstarch or powdered sugar | For dusting |
| Textured elements (like crushed cookies, nuts, or shredded coconut) | As desired |
Instructions:
1. Prepare Base Icing: Start by preparing a batch of royal icing. Make certain you achieve the right consistency for piping—thicker for outlining and slightly thinner for flooding.
2. Color Your Icing: Divide your royal icing into separate bowls based on the textures you plan to create. Add food coloring to achieve your desired colors, mixing well.
3. Prepare Piping Bags: Fill the piping bags with your various colored icings, using different piping tips according to the effects you wish to create. Remember to twist the top of the bag to prevent leaks.
4. Experiment with Textures:
- Piping Techniques: Use the star tip to create raised textures on your cookie surface or a leaf tip to make leaf shapes. Practice these techniques on a piece of wax paper before decorating.
- Add Bulk: After flooding a cookie with thinner icing, sprinkle crushed cookies, nuts, or shredded coconut on top while the icing is still wet. This will adhere the extra texture to the icing.
- Layering Icing: Allow the first layer of icing to dry for about 30 minutes, then pipe additional colors over it to create a raised effect.
5. Incorporate Edible Elements: After applying your icing designs, sprinkle edible glitter or colored sprinkles while the icing is still wet, adding sparkle and texture to your cookies.
6. Final Touches: Once all techniques and elements have been applied to your cookies, let them dry fully for several hours or overnight. This will firm up the textures and guarantee they hold their shape.
7. Store or Serve: Once completely dried, your beautifully decorated cookies are ready to be showcased on your holiday table or packed as gifts. Store them in an airtight container at room temperature to maintain their texture and design.

- 𝗘𝗳𝗳𝗼𝗿𝘁𝗹𝗲𝘀𝘀 𝗪𝗲𝗶𝗴𝗵𝗶𝗻𝗴: Supports 5 units...
- 𝗣𝗿𝗲𝗰𝗶𝘀𝗲 𝗥𝗲𝘀𝘂𝗹𝘁𝘀: Accurately weighs up to 11 lb/5 kg with 1 g...
- 𝗦𝗶𝗺𝗽𝗹𝗲 & 𝗖𝗼𝗺𝗽𝗮𝗰𝘁: The small and sleek scale is a perfect fit for...
Layering for Depth

Layering for Depth involves creating beautiful, eye-catching designs on your Christmas cookies by using multiple layers of icing. This technique allows you to add dimension and complexity to your cookie art, making it more visually appealing. Whether you’re going for vibrant colors or subtle shades, layering will enhance the overall aesthetic of your decorated cookies.
| Ingredients | Quantity |
|---|---|
| Royal icing (prepared) | 1 batch |
| Food coloring | As desired |
| Piping bags (disposable) | 2-3 |
| Piping tips | Various (round, star, leaf) |
| Cornstarch or powdered sugar | For dusting |
| Cookie base (baked and cooled) | As desired |
Instructions:
- Prepare Your Base Icing: Make a batch of royal icing according to your favorite recipe. Adjust the consistency based on how you plan to layer the icing—thicker for outlining and a slightly thinner consistency for flooding.
- Color Your Icing: Divide the royal icing into separate bowls for each layer you plan to create. Add food coloring to each bowl, mixing it well to achieve the colors you desire.
- Prepare Piping Bags: Fill the piping bags with your colored icing. Use appropriate piping tips for the designs you want to create. Remember to twist the top of each bag to keep icing from leaking out.
- Create the First Layer: Take one cookie and apply a base layer of icing using a piping bag with a round tip. This layer should be relatively smooth to serve as the foundation for further layers. Allow it to dry for about 30–60 minutes until set.
- Add Additional Layers: Once the first layer is dry, use a different color or consistency of icing for your next layer. You can create borders, outlines, or even designs on top of the first layer. Use a star tip or a leaf tip to add raised textures that stand out.
- Allow to Set Again: Allow the second layer to dry thoroughly before adding any additional layers. This step is vital for preventing colors from bleeding into each other and for maintaining the integrity of your designs.
- Final Layer and Details: After your last layer is fully dry, you can pipe on any final details or additional designs. This could include fine lines, polka dots, or other decorative accents using different colors of icing.
- Drying Period: Once all layers and details have been applied, let the cookies dry completely, ideally overnight. This will guarantee the icing hardens and creates a beautiful, sharp finish to your decorated cookies.
With these steps, you can master the art of layering for depth in your Christmas cookie decorating, turning simple cookies into stunning edible masterpieces!

- Instant Read Food Thermometer | Our instant read thermometer features a temperature probe and advanced,...
- Multi-Use | From bbq thermometer to baking thermometer, our digital food thermometer for cooking is...
- Easy-Read Digital Thermometer For Cooking | Large instant thermometer dial with bright blue backlight...
Add Edible Decorations

Adding edible decorations to your Christmas cookies can take your designs from simple to stunning! Incorporating sprinkles, edible glitter, or sugar decorations not only enhances the visual appeal but also adds texture and flavor to your cookies. Whether you’re using store-bought decorations or making your own, these embellishments will make your holiday treats stand out.
| Ingredients | Quantity |
|---|---|
| Christmas-themed sprinkles | As desired |
| Edible glitter | As desired |
| Sugar pearls | As desired |
| Candy canes, crushed | 1-2 for garnish |
| Edible marker | 1 for writing |
| Chocolate chips | As desired |
| Royal icing (from previous steps) | As needed |
Instructions:
- Prepare Your Cookies: Start with baked and cooled cookies that have already been decorated with a base layer of royal icing, as discussed in the previous steps.
- Select Your Decorations: Choose the edible decorations you plan to use. You can mix and match different types, like sprinkles, edible glitter, or sugar pearls, depending on your design theme.
- Apply Royal Icing for Adherence: If your decorations require additional attachment, use a piping bag filled with a slightly thinned royal icing to add dots or lines where you intend to place your decorations. This will act as glue to hold them in place.
- Add Sprinkles and Sugar Decorations: Before the royal icing dries, sprinkle your chosen decorations over the wet icing. For an even look, hold the sprinkles over the cookie and gently shake or tap to let them fall evenly.
- Incorporate Shimmer: If you’re using edible glitter, lightly dust it over the areas where you’ve applied royal icing. Be mindful of not overdoing it; a little glitter goes a long way!
- Create Additional Texture with Candy: For a fun touch, crush candy canes into smaller pieces and sprinkle them onto the wet icing. They not only add a festive flair but also a minty flavor.
- Use Edible Markers for Details: Allow the previous layers and decorations to dry completely. Once set, take an edible marker to write names, holiday greetings, or tiny designs that personalize your cookies. This adds a unique touch to each cookie.
- Finalize Your Decorations: If using melted chocolate chips for drizzling, melt them in the microwave in short bursts until smooth. Use a piping bag to drizzle the chocolate over the decorated cookies for added richness and visual appeal.
- Drying Period: Allow all added decorations to dry thoroughly before packaging or serving your beautifully decorated cookies. This confirms that everything stays in place and looks perfect.
With these steps, your Christmas cookies will not only look festive but are sure to be a hit at any holiday gathering!

- Versatile 54-Piece Collection: Elevate your kitchen with the Home Hero 54-Piece Kitchen Utensil Set, a...
- Durable and Long-Lasting: Crafted from premium stainless steel, these kitchen utensils are designed to...
- Perfect Holiday Gift: Delight your loved ones with this kitchen utensils gift set this festive season....
Practice Patience

Baking sugar cookies is a delightful way to spend time in the kitchen, especially during the holiday season. However, crafting beautifully decorated cookies requires a bit of patience and attention to detail. This recipe not only guides you through the steps to make delicious sugar cookies but also stresses the importance of taking your time for the best results.
| Ingredients | Quantity |
|---|---|
| All-purpose flour | 2 ¾ cups |
| Granulated sugar | 1 cup |
| Unsalted butter | 1 cup (softened) |
| Baking powder | 1 teaspoon |
| Salt | ½ teaspoon |
| Vanilla extract | 2 teaspoons |
| Egg | 1 large |
| Royal icing (for decoration) | As needed |
| Edible decorations (optional) | As desired |
Instructions:
- Prepare Your Ingredients: Gather all your ingredients and measure them out. This will streamline the process and prevent any interruptions while you bake.
- Make the Cookie Dough: In a large mixing bowl, cream together the softened butter and granulated sugar until the mixture is light and fluffy. This may take about 3-4 minutes. Patience is key here, as over-mixing can incorporate too much air.
- Add Wet Ingredients: Beat in the egg and vanilla extract until well combined. You’ll want to ascertain these ingredients are fully mixed into the butter and sugar mixture.
- Combine Dry Ingredients: In a separate bowl, whisk together the flour, baking powder, and salt. This helps evenly distribute the baking powder and salt throughout the flour.
- Mix Dry with Wet: Gradually add the dry ingredients to the wet mixture, stirring until just combined. Be careful not to overmix; this is where patience comes in — it’s better to stop mixing while there are still a few flour streaks visible.
- Chill the Dough: Once your dough is combined, divide it into two discs, wrap each in plastic wrap, and refrigerate for at least 1 hour. This chilling period is essential as it makes rolling out the dough easier and helps keep the cookies from spreading too much while baking.
- Preheat the Oven: Preheat your oven to 350°F (175°C) while your dough is chilling.
- Roll Out the Dough: After chilling, take one disc of dough out of the fridge. On a floured surface, roll out the dough to about ¼ inch thickness. Keep your tools floured as you work to prevent sticking.
- Cut the Cookies: Use cookie cutters to cut out shapes from the rolled dough. Carefully transfer the cookies to a baking sheet lined with parchment paper. Leave some space between the cookies as they will expand while baking.
- Bake the Cookies: Place the baking sheet in the preheated oven and bake for 8-10 minutes or until the edges are lightly golden. Keep a close eye on them; this is where patience pays off, as overbaking can make cookies tough.
- Cool the Cookies: Once baked, remove the cookies from the oven and let them cool on the baking sheet for about 5 minutes before transferring them to a wire rack to cool completely.
- Decorate: After your cookies have cooled, use royal icing to decorate as desired. Take your time and enjoy the process of decorating — practice patience and let each layer dry before adding additional details.
Enjoy your beautifully crafted sugar cookies, and remember that the journey of baking is just as rewarding as the delicious treats you create!

- 24-ounce insulated stainless-steel water bottle with a FreeSip spout and push-button lid with lock
- Patented FreeSip spout designed for either sipping upright through the built-in straw or tilting back to...
- Protective push-to-open lid keeps spout clean; convenient carry loop doubles as a lock
Keep It Fun and Creative

Decorating Christmas cookies is not only a festive activity but also an opportunity to release your imagination in the kitchen. Whether you’re using royal icing, sprinkles, or fondant, the goal is to have fun and be creative while bringing your cookie designs to life. Use seasonal colors and playful designs to make each cookie a unique treat that delights both the eyes and the taste buds.
| Ingredients | Quantity |
|---|---|
| Royal icing | As needed |
| Food coloring | Various colors |
| Edible decorations (sprinkles, nonpareils, etc.) | As desired |
| Piping bags and tips | Several |
| Fondant (optional) | As needed |
| Cookie cutters | Various shapes |
Instructions:
- Prep Your Workspace: Begin by setting up a clean, flat workspace. Lay out parchment paper or silicone mats to catch any icing drips, and gather all your ingredients and tools.
- Prepare Royal Icing: If you’re making your own royal icing, combine powdered sugar, meringue powder, and water in a bowl. Mix until smooth and glossy. Divide the icing into separate bowls for each color you want to use, adding food coloring and mixing until you reach your desired shades.
- Fill Piping Bags: Once your icing is colored, fill piping bags with the royal icing. Use different piping tips for various decorative effects, such as a fine tip for detailed work and a wider tip for filling in larger areas.
- Begin Decorating: Start with the base layer of your designs. Using the piping bag, outline the edges of your cookie with a thin line of icing to create a border. This will help contain the flooded icing later.
- Flood the Cookie: After outlining, thin your royal icing with a little water if necessary for flooding. Use a small spatula or a toothpick to fill in the outlined area. This technique creates a smooth surface for further decoration. Allow your base layer to dry before adding additional detail (ideally a few hours).
- Add Decorative Elements: Once the base layer is dry, use a contrasting colored icing to pipe designs, such as flowers, stars, or other festive motifs. Get creative and try different techniques like polka dots or stripes.
- Incorporate Edible Decorations: While the icing is still wet, sprinkle edible decorations, like sugar sprinkles or nonpareils, onto the cookies for added texture and flair.
- Finalize with Fondant (Optional): If using fondant, roll it out and use cookie cutters to create shapes to place on top of your decorated cookies. This adds another layer of creativity and texture.
- Let the Cookies Dry: Allow your decorated cookies to dry completely at room temperature. Depending on the humidity, this may take several hours.
- Enjoy Your Masterpieces: Once dry, your cookies are ready to be enjoyed or gifted. Display them at holiday gatherings or place them in decorative boxes as delightful gifts.
Store Your Cookie Masterpieces Correctly

Storing your beautifully decorated Christmas cookies correctly is essential to preserve their freshness and maintain their visual appeal. Proper storage not only keeps your cookies delicious but also prevents them from becoming stale or losing their vibrant decorations. Follow these steps to guarantee your cookie masterpieces stay in perfect condition until it’s time to enjoy them.
| Ingredients | Quantity |
|---|---|
| Decorated Christmas cookies | As many as you have |
| Airtight containers | Several, as needed |
| Parchment paper or wax paper | As needed |
| Plastic wrap | As needed |
| Silica gel packets (optional) | As needed |
Instructions:
- Choose the Right Container: Pick an airtight container that is spacious enough to hold your decorated cookies without squishing or damaging them. You may need multiple containers depending on the quantity of cookies you have.
- Prepare the Base Layer: Line the bottom of the container with parchment paper or wax paper. This will prevent the cookies from sticking and help absorb any moisture.
- Layer the Cookies: Place the cookies in a single layer, making sure they are not touching each other to avoid smudging the decorations. If you have multiple layers of cookies, add parchment paper between each layer to keep them safe.
- Seal the Container: Once all cookies are placed in the container, seal it tightly with the lid. Make sure there are no gaps that could allow air to enter, which can cause cookies to become stale.
- Consider Moisture Control: If you’re concerned about moisture, add silica gel packets to the container to help control humidity levels, especially in warmer environments.
- Store in a Cool, Dry Place: Place the airtight container in a cool, dry area of your kitchen, away from sunlight and heat sources. Avoid storing the cookies in the refrigerator, as this can introduce moisture.
- Check for Freshness: Before serving, always check the freshness of the cookies. If any cookies start to show signs of staleness or fading decorations, it might be time to enjoy them sooner rather than later.
- Enjoy Your Cookies: When it’s time to serve, carefully remove the cookies from the container, and present them on a festive platter. Enjoy the fruits of your labor and share the joy of your Christmas cookie creations with friends and family!