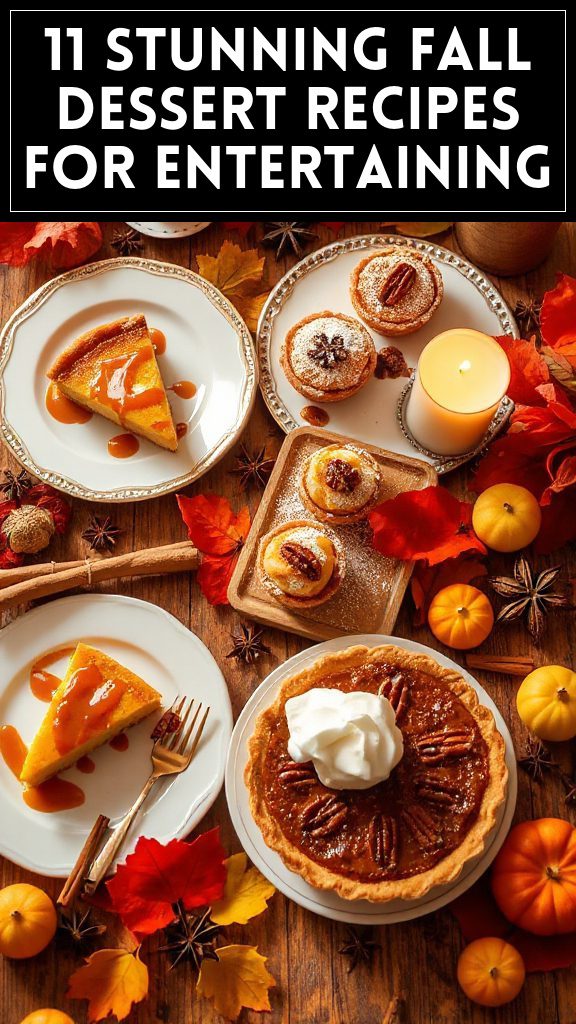
Spiced Pumpkin Cheesecake Bars

Spiced Pumpkin Cheesecake Bars are a delicious fusion of creamy cheesecake and seasonal pumpkin flavors, perfect for fall gatherings or cozy nights at home. These bars deliver a delightful blend of spices that complement the richness of the cheesecake, all resting on a buttery graham cracker crust. Easy to slice and serve, they make a stunning addition to any dessert table.
| Ingredients | Quantity |
|---|---|
| Graham cracker crumbs | 1 ½ cups |
| Granulated sugar | ⅓ cup |
| Unsalted butter, melted | ½ cup |
| Cream cheese, softened | 2 (8 oz) packages |
| Pumpkin puree | 1 cup |
| Eggs | 2 large |
| Brown sugar | ¾ cup |
| Vanilla extract | 1 tsp |
| Ground cinnamon | 1 tsp |
| Ground nutmeg | ½ tsp |
| Ground ginger | ½ tsp |
| Salt | ¼ tsp |
| Whipped cream (optional) | For serving |
Cooking Steps:
- Preheat your oven to 350°F (175°C) and line a 9×13 inch baking dish with parchment paper.
- In a bowl, combine the graham cracker crumbs, granulated sugar, and melted butter. Press this mixture firmly into the bottom of the prepared baking dish to create the crust.
- In another bowl, beat the cream cheese until smooth, then add in the pumpkin puree, brown sugar, eggs, vanilla extract, cinnamon, nutmeg, ginger, and salt. Mix until well combined.
- Pour the pumpkin cheesecake mixture over the crust, spreading it into an even layer.
- Bake for 30-35 minutes or until the center is set and slightly jiggles when shaken.
- Once baked, let it cool to room temperature, then refrigerate for at least 4 hours or overnight.
- Slice into bars and serve chilled, topped with whipped cream if desired. Enjoy!

- The Original Pro Chopper - Our superstar veggie slicer has been creating waves on TikTok! Simple to use,...
- Easy Meal Prep with Rust-Resistant Blades - Our vegetable chopper is perfect for anyone who wants to eat...
- 5-Star Design - The soft-grip TPU handle ensures controlled chopping, while the non-skid rubber base...
Maple Pecan Tart With Bourbon Whipped Cream

Maple Pecan Tart with Bourbon Whipped Cream is a rich and indulgent dessert that perfectly captures the essence of fall. The sweet and nutty flavors of maple syrup and toasted pecans combine to create a delectable filling tucked inside a buttery tart shell. This treat is elevated with a luscious bourbon-flavored whipped cream, making it an impressive centerpiece for holiday gatherings or cozy family meals.
| Ingredients | Quantity |
|---|---|
| All-purpose flour | 1 ½ cups |
| Unsalted butter, chilled | ½ cup (1 stick) |
| Granulated sugar | ⅓ cup |
| Salt | ¼ tsp |
| Ice water | 3-4 tbsp |
| Light brown sugar | 1 cup |
| Maple syrup | ¾ cup |
| Eggs | 3 large |
| Vanilla extract | 1 tsp |
| Chopped pecans | 1 ½ cups |
| Heavy whipping cream | 1 cup |
| Bourbon | 1 tbsp |
| Powdered sugar | 2 tbsp |
Cooking Steps:
- Preheat the oven to 350°F (175°C) and prepare a tart pan with a removable bottom by greasing it lightly.
- In a bowl, mix the flour, sugar, and salt. Cut in the chilled butter until the mixture resembles coarse crumbs. Stir in ice water until the dough forms.
- Press the dough into the tart pan evenly and prick with a fork. Bake for about 15 minutes or until lightly golden, then allow to cool.
- In a mixing bowl, whisk together the brown sugar, maple syrup, eggs, and vanilla until smooth. Stir in the chopped pecans.
- Pour the filling into the baked tart shell and bake for 25-30 minutes until set.
- While the tart cools, whip the heavy cream with powdered sugar and bourbon until soft peaks form.
- Serve slices of the tart with a generous dollop of bourbon whipped cream. Enjoy!

- Makes Everything Simple : Just forget your bagged cheese! Only turn the handle for several times and get...
- Premium Material : All parts of the rotary cheese grater are made of food grade ABS material, no BPA. The...
- Three Option Grater : The parmesan cheese grater finishes food preparation with slicing, shredding and...
Caramel Apple Galette With Thyme

Caramel Apple Galette with Thyme is a delightful rustic dessert that celebrates the flavors of fall. This open-faced pastry features thinly sliced apples caramelized with a hint of thyme, nestled in a flaky, buttery crust. It’s an easy yet impressive addition to any autumn gathering, delivering the perfect balance of sweet and savory in every bite.
| Ingredients | Quantity |
|---|---|
| All-purpose flour | 1 ½ cups |
| Unsalted butter, softened | ½ cup (1 stick) |
| Granulated sugar | ¼ cup |
| Salt | ¼ tsp |
| Ice water | 3-4 tbsp |
| Apples (peeled and sliced) | 3 medium |
| Brown sugar | ½ cup |
| Heavy cream | 1 tbsp |
| Fresh thyme, minced | 1 tbsp |
| Ground cinnamon | ½ tsp |
| Lemon juice | 1 tbsp |
| Egg (for egg wash) | 1 large |
Cooking Steps:
- Preheat the oven to 400°F (200°C) and line a baking sheet with parchment paper.
- In a large bowl, combine the flour, sugar, and salt. Cut in the butter until the mixture resembles coarse crumbs. Stir in ice water until a dough forms.
- Roll out the dough on a floured surface into a rough circle and transfer it to the prepared baking sheet.
- In another bowl, toss the sliced apples with brown sugar, thyme, cinnamon, and lemon juice until well coated.
- Arrange the apple mixture in the center of the dough, leaving a 2-inch border. Fold the edges of the dough over the apples.
- Brush the dough with beaten egg and sprinkle with sugar. Bake for 30-35 minutes or until the apples are tender and the crust is golden.
- Let cool slightly before serving warm. Enjoy your Caramel Apple Galette with a scoop of vanilla ice cream or whipped cream!

- 💰 REDUCE WASTE AND SAVE MONEY: Chef Preserve keeps FOOD FRESH 5 TIMES LONGER than non-vacuum storage...
- ✅ POWERFUL, QUICK & EASY TO USE: Simply press the button to start. The device vacuum seals a bag in 5...
- ♻️ REUSABLE & RESEALABLE BAGS: Chef Preserve comes with dishwasher, freezer, refrigerator, and...
Sweet Potato Brownies With Dark Chocolate

Sweet Potato Brownies with Dark Chocolate are a deliciously rich and fudgy dessert that provides a unique twist on traditional brownies. Incorporating naturally sweet sweet potatoes not only adds a moist texture but also boosts the nutritional profile of this classic treat. These brownies are perfect for fall gatherings or cozy nights in, offering a perfect balance of indulgence and wholesome ingredients.
| Ingredients | Quantity |
|---|---|
| Mashed sweet potatoes | 1 cup |
| Dark chocolate chips | 1 cup |
| Unsweetened cocoa powder | ½ cup |
| All-purpose flour | ½ cup |
| Granulated sugar | ½ cup |
| Brown sugar | ¼ cup |
| Eggs | 2 large |
| Vanilla extract | 1 tsp |
| Baking powder | ½ tsp |
| Salt | ¼ tsp |
| Chocolate chunks (optional) | ½ cup |
Cooking Steps:
- Preheat your oven to 350°F (175°C) and grease an 8×8-inch baking pan.
- In a microwave-safe bowl, melt the dark chocolate chips until smooth. Allow to cool slightly.
- In a large bowl, combine the mashed sweet potatoes, melted chocolate, eggs, vanilla extract, granulated sugar, and brown sugar until well mixed.
- Stir in the cocoa powder, flour, baking powder, and salt until just combined. If desired, fold in chocolate chunks.
- Pour the batter into the prepared baking pan and spread evenly.
- Bake for 20-25 minutes or until a toothpick inserted into the center comes out mostly clean.
- Allow to cool before slicing into squares and enjoy your Sweet Potato Brownies with a scoop of ice cream or a dollop of whipped cream!

- Generous Capacity: 7-quart slow cooker that comfortably serves 9+ people or fits a 7-pound roast
- Cooking Flexibility: High or low slow cooking settings, with convenient warm function for ideal serving...
- Convenient: Set it and forget it feature enables you to cook while at work or performing daily tasks
Cinnamon Roll Bread Pudding

Cinnamon Roll Bread Pudding is a warm, comforting dessert that combines the classic flavors of cinnamon rolls with the soft, custardy texture of bread pudding. This decadent treat is perfect for cozy gatherings during the fall season, offering a delightful sweetness and aromatic spice that will leave everyone wanting more.
| Ingredients | Quantity |
|---|---|
| Cinnamon rolls (pre-baked) | 4-5 rolls |
| Eggs | 4 large |
| Milk | 2 cups |
| Heavy cream | 1 cup |
| Granulated sugar | ½ cup |
| Vanilla extract | 1 tsp |
| Ground cinnamon | 1 tsp |
| Salt | ¼ tsp |
| Cream cheese (softened) | 4 oz |
| Confectioners’ sugar (for drizzle) | For serving |
Cooking Steps:
- Preheat your oven to 350°F (175°C) and grease a 9×13-inch baking dish.
- Cut the cinnamon rolls into bite-sized pieces and spread them evenly in the dish.
- In a large bowl, whisk together the eggs, milk, heavy cream, granulated sugar, vanilla extract, ground cinnamon, and salt until well combined.
- Pour the custard mixture over the cinnamon roll pieces, gently pressing them down to soak.
- Bake for 30-35 minutes or until the top is golden and the custard is set.
- Allow to cool slightly before drizzling with softened cream cheese and confectioners’ sugar, then serve warm. Enjoy your Cinnamon Roll Bread Pudding!

- 100% Leak-proof: Guaranteed no-spill seal and secure latches
- Crystal-clear Tritan Built: Stain-resistant and odor-resistant material for a clear view of contents
- Lightweight & Sturdy: Easy to carry, yet durable for everyday use
Chai Latte Snickerdoodles

Chai Latte Snickerdoodles are a delightful twist on the classic snickerdoodle cookie, infused with the warm, spicy flavors of chai tea. These cookies are soft, chewy, and perfectly spiced, making them an ideal treat for the fall season when aromatic spices are in full demand. The hint of chai not only elevates the traditional flavor profile but also brings a cozy vibe, perfect for enjoying with a warm cup of tea or coffee.
| Ingredients | Quantity |
|---|---|
| All-purpose flour | 2 ¾ cups |
| Baking soda | 2 tsp |
| Ground cinnamon | 2 tsp |
| Ground ginger | 1 tsp |
| Ground cardamom | 1 tsp |
| Ground cloves | ½ tsp |
| Salt | ½ tsp |
| Unsalted butter (softened) | 1 cup |
| Granulated sugar | 1 ½ cups |
| Brown sugar | ½ cup |
| Eggs | 2 large |
| Vanilla extract | 2 tsp |
| Cinnamon sugar (for rolling) | ⅓ cup granulated sugar + 1 tbsp ground cinnamon |
Cooking Steps:
- Preheat the oven to 350°F (175°C) and line baking sheets with parchment paper.
- In a bowl, whisk together flour, baking soda, spices, and salt; set aside.
- In a large bowl, cream together softened butter, granulated sugar, and brown sugar until light and fluffy.
- Beat in the eggs one at a time, followed by the vanilla extract.
- Gradually add the dry ingredients to the wet mixture, mixing until just combined.
- In a small bowl, mix the cinnamon sugar for rolling.
- Scoop dough into balls, roll them in the cinnamon sugar, and place them on the prepared baking sheets.
- Bake for 10-12 minutes, until slightly golden and set. Let cool on wire racks before enjoying.

- 𝗘𝗳𝗳𝗼𝗿𝘁𝗹𝗲𝘀𝘀 𝗪𝗲𝗶𝗴𝗵𝗶𝗻𝗴: Supports 5 units...
- 𝗣𝗿𝗲𝗰𝗶𝘀𝗲 𝗥𝗲𝘀𝘂𝗹𝘁𝘀: Accurately weighs up to 11 lb/5 kg with 1 g...
- 𝗦𝗶𝗺𝗽𝗹𝗲 & 𝗖𝗼𝗺𝗽𝗮𝗰𝘁: The small and sleek scale is a perfect fit for...
Cranberry Orange Upside-Down Cake

Cranberry Orange Upside-Down Cake is a delightful fall dessert that combines the tartness of fresh cranberries with the bright citrus flavor of oranges. This cake showcases a beautiful presentation with the cranberries and orange slices caramelized on top, creating a sumptuous treat that’s perfect for holiday gatherings or cozy family dinners. Serve it warm with a scoop of vanilla ice cream or a dollop of whipped cream for an extra indulgent experience.
| Ingredients | Quantity |
|---|---|
| Fresh cranberries | 2 cups |
| Granulated sugar | ¾ cup |
| Unsalted butter (softened) | ½ cup |
| Brown sugar | ½ cup |
| Orange zest | 1 tbsp |
| Orange juice | ¼ cup |
| All-purpose flour | 1 ½ cups |
| Baking powder | 1 ½ tsp |
| Baking soda | ½ tsp |
| Salt | ¼ tsp |
| Eggs | 2 large |
| Vanilla extract | 1 tsp |
Cooking Steps:
- Preheat your oven to 350°F (175°C) and grease a 9-inch round cake pan.
- In a small saucepan, melt ¼ cup of brown sugar and ¼ cup of butter over medium heat until bubbly; stir in cranberries and remove from heat.
- Pour the cranberry mixture into the prepared cake pan, distributing evenly, and top with orange slices.
- In a mixing bowl, cream together the remaining butter and sugar, then add eggs, vanilla, orange juice, and zest.
- In another bowl, combine flour, baking powder, baking soda, and salt; gradually mix into the wet ingredients until just combined.
- Pour the batter over the cranberries and orange slices, smoothing the top.
- Bake for 35-40 minutes or until a toothpick inserted in the center comes out clean.
- Let cool for a few minutes before inverting the cake onto a serving platter; serve warm.

- Instant Read Food Thermometer | Our instant read thermometer features a temperature probe and advanced,...
- Multi-Use | From bbq thermometer to baking thermometer, our digital food thermometer for cooking is...
- Easy-Read Digital Thermometer For Cooking | Large instant thermometer dial with bright blue backlight...
Nutty Pear and Ginger Crumble

Nutty Pear and Ginger Crumble is a warm and comforting dessert that perfectly captures the essence of fall. This delightful treat features juicy ripe pears combined with a hint of spicy ginger, topped with a crunchy nut and oat crumble. It’s ideal for serving at cozy gatherings or as a satisfying end to a family meal. Enjoy it warm, ideally accompanied by a scoop of vanilla ice cream or a drizzle of caramel sauce.
| Ingredients | Quantity |
|---|---|
| Ripe pears | 4 medium |
| Fresh ginger, grated | 2 tbsp |
| Granulated sugar | ½ cup |
| Lemon juice | 1 tbsp |
| All-purpose flour | ½ cup |
| Rolled oats | ½ cup |
| Brown sugar | ¼ cup |
| Unsalted butter (melted) | ¼ cup |
| Chopped nuts (walnuts or pecans) | ½ cup |
| Ground cinnamon | ½ tsp |
| Salt | ¼ tsp |
Cooking Steps:
- Preheat your oven to 350°F (175°C) and grease a baking dish.
- Peel, core, and slice the pears, then place them in a large bowl. Toss with grated ginger, sugar, and lemon juice.
- Spread the pear mixture evenly in the prepared baking dish.
- In another bowl, combine flour, oats, brown sugar, chopped nuts, cinnamon, and salt. Pour in melted butter and mix until crumbly.
- Sprinkle the crumble mixture evenly over the pears.
- Bake for 30-35 minutes or until the topping is golden brown and the pears are bubbly.
- Allow to cool slightly before serving; enjoy warm.

- Versatile 54-Piece Collection: Elevate your kitchen with the Home Hero 54-Piece Kitchen Utensil Set, a...
- Durable and Long-Lasting: Crafted from premium stainless steel, these kitchen utensils are designed to...
- Perfect Holiday Gift: Delight your loved ones with this kitchen utensils gift set this festive season....
Vegan Pumpkin Muffins With Chocolate Chips

Vegan Pumpkin Muffins with Chocolate Chips are a delightful fall treat that combines the warm and comforting flavors of pumpkin spice with the indulgent sweetness of chocolate. These muffins are not only easy to prepare but also perfect for breakfast, a snack, or dessert, making them a versatile addition to your fall baking repertoire.
| Ingredients | Quantity |
|---|---|
| Pure pumpkin puree | 1 cup |
| Almond milk | ½ cup |
| Maple syrup | ⅓ cup |
| Coconut oil (melted) | ⅓ cup |
| All-purpose flour | 1 ½ cups |
| Baking powder | 1 tsp |
| Baking soda | ½ tsp |
| Ground cinnamon | 1 tsp |
| Ground nutmeg | ½ tsp |
| Ground ginger | ½ tsp |
| Salt | ½ tsp |
| Vegan chocolate chips | ½ cup |
Cooking Steps:
- Preheat your oven to 350°F (175°C) and line a muffin tin with paper liners.
- In a large bowl, whisk together the pumpkin puree, almond milk, maple syrup, and melted coconut oil until smooth.
- In another bowl, mix the flour, baking powder, baking soda, spices, and salt.
- Gradually fold the dry ingredients into the wet ingredients until just combined; be careful not to over-mix.
- Gently fold in the vegan chocolate chips.
- Pour the batter into the prepared muffin tins, filling each cup about ¾ full.
- Bake for 20-25 minutes or until a toothpick inserted into the center comes out clean.
- Allow to cool in the tin for a few minutes before transferring to a wire rack to cool completely. Enjoy!

- 24-ounce insulated stainless-steel water bottle with a FreeSip spout and push-button lid with lock
- Patented FreeSip spout designed for either sipping upright through the built-in straw or tilting back to...
- Protective push-to-open lid keeps spout clean; convenient carry loop doubles as a lock
Matcha and Maple Meringue Pie

Matcha and Maple Meringue Pie is a unique and elegant dessert that perfectly captures the essence of fall. The combination of earthy matcha green tea and sweet maple syrup creates a delightful filling, while a light and fluffy meringue topping adds a touch of sophistication. This pie is an impressive choice for any fall gathering or festive occasion.
| Ingredients | Quantity |
|---|---|
| Matcha powder | 2 tbsp |
| Maple syrup | ½ cup |
| Almond milk | ¾ cup |
| Cornstarch | 2 tbsp |
| Vanilla extract | 1 tsp |
| Salt | ½ tsp |
| Aquafaba (chickpea brine) | ¾ cup |
| Cream of tartar | ¼ tsp |
| Sugar | 1 cup |
| Pie crust (pre-baked) | 1 |
Cooking Steps:
- In a saucepan, whisk together the matcha powder, maple syrup, almond milk, cornstarch, vanilla extract, and salt over medium heat until thickened. Remove from heat.
- Pour the matcha filling into the pre-baked pie crust and let it cool.
- In a separate bowl, whip the aquafaba and cream of tartar until stiff peaks form. Gradually add the sugar, continuing to whip until glossy and well combined.
- Spread the meringue over the cooled matcha filling, swirling it for a decorative effect.
- Bake the pie at 350°F (175°C) for about 10 minutes or until the meringue is lightly browned. Allow it to cool before serving. Enjoy!
Dulce De Leche Pumpkin Roll

Dulce De Leche Pumpkin Roll is a delightful fall dessert that combines the warm flavors of pumpkin and spices with the rich sweetness of dulce de leche. This rolled cake is not only visually impressive but also offers a moist and tender texture that is perfect for autumn gatherings and special occasions.
| Ingredients | Quantity |
|---|---|
| Pumpkin puree | 1 cup |
| All-purpose flour | 1 cup |
| Granulated sugar | 1 cup |
| Eggs | 3 large |
| Baking powder | 1 tsp |
| Baking soda | 1 tsp |
| Pumpkin pie spice | 2 tsp |
| Salt | ½ tsp |
| Ground cinnamon | 1 tsp |
| Dulce de leche | 1 cup |
| Cream cheese | 8 oz |
| Powdered sugar | 1 cup |
| Vanilla extract | 1 tsp |
| Chopped pecans (optional) | ½ cup |
| Powdered sugar (for dusting) | As needed |
Cooking Steps:
- Preheat the oven to 375°F (190°C) and line a baking sheet with parchment paper.
- In a bowl, beat the eggs and sugar until well combined, then stir in the pumpkin puree.
- In another bowl, whisk together the flour, baking powder, baking soda, pumpkin pie spice, salt, and cinnamon; then mix this into the pumpkin mixture until just combined.
- Spread the batter evenly onto the prepared baking sheet and bake for 15-20 minutes or until a toothpick comes out clean.
- Remove from the oven and immediately roll the cake in the parchment paper, letting it cool completely.
- In a bowl, mix the cream cheese, dulce de leche, powdered sugar, and vanilla until smooth.
- Once the cake has cooled, unroll it, spread the dulce de leche filling, re-roll it gently, and chill for at least an hour.
- Dust with powdered sugar before serving, and slice to enjoy this festive treat!