Classic Danish Butter Cookies
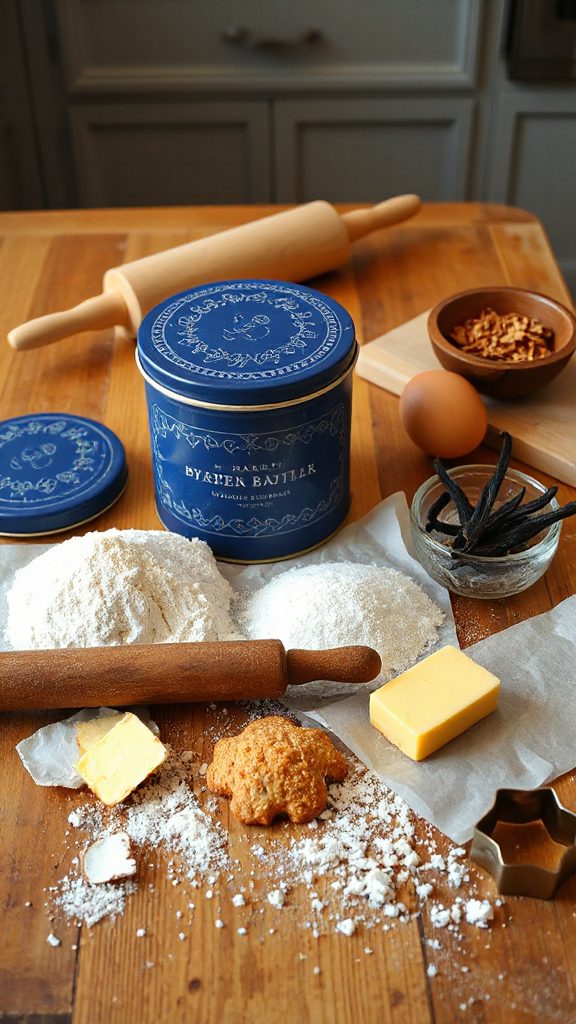
Classic Danish Butter Cookies are a delightful treat known for their rich, buttery flavor and crumbly texture. These cookies are often adorned with simple decorations like chocolate or sprinkles and are perfect for tea time or as a thoughtful gift during holidays. With a minimal number of ingredients, they are easy to make and yield a satisfying batch that will surely impress family and friends.
| Ingredients | Quantity |
|---|---|
| Unsalted butter | 1 cup (226g) |
| Granulated sugar | 1/2 cup (100g) |
| All-purpose flour | 2 cups (240g) |
| Vanilla extract | 1 teaspoon |
| Salt | 1/4 teaspoon |
| Egg | 1 large |
Cooking Instructions:
- Preheat the Oven: Begin by preheating your oven to 350°F (175°C). Line a baking sheet with parchment paper for easy cookie release.
- Cream the Butter and Sugar: In a large mixing bowl, add 1 cup of unsalted butter (softened at room temperature) along with 1/2 cup of granulated sugar. Using an electric mixer or a wooden spoon, cream the butter and sugar together on medium speed until the mixture is light and fluffy.
- Add Egg and Vanilla: Beat in 1 large egg and 1 teaspoon of vanilla extract into the butter-sugar mixture until fully combined. Make sure to scrape down the sides of the bowl to incorporate all ingredients evenly.
- Mix Dry Ingredients: In a separate bowl, whisk together 2 cups of all-purpose flour and 1/4 teaspoon of salt. Gradually add the dry mixture to the wet mixture, stirring with a spatula or wooden spoon until a smooth dough forms.
- Shape the Cookies: Spoon the dough into a piping bag fitted with a star-shaped nozzle. Alternatively, you can use a cookie scoop. Pipe or scoop small dots onto the prepared baking sheet, spacing them about 2 inches apart.
- Decorate (Optional): If desired, you can decorate the tops of the cookies with colorful sprinkles or chocolate chips to add a personal touch.
- Bake the Cookies: Place the baking sheet in the preheated oven and bake the cookies for 12-15 minutes, or until the edges are lightly golden. Keep a close eye on them to avoid over-baking.
- Cool and Store: Once baked, remove the cookies from the oven and allow them to cool on the baking sheet for 5 minutes before transferring them to a wire rack to cool completely. Once cooled, store them in an airtight container to maintain freshness.
Enjoy your homemade Classic Danish Butter Cookies!
- The Original Pro Chopper - Our superstar veggie slicer has been creating waves on TikTok! Simple to use,...
- Easy Meal Prep with Rust-Resistant Blades - Our vegetable chopper is perfect for anyone who wants to eat...
- 5-Star Design - The soft-grip TPU handle ensures controlled chopping, while the non-skid rubber base...
Chocolate-Dipped Danish Butter Cookies
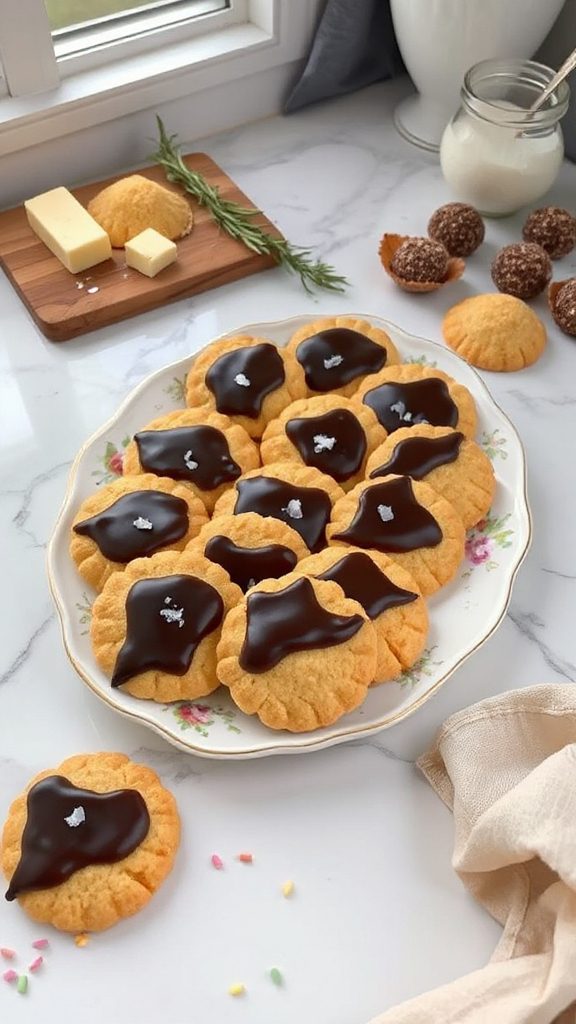
Chocolate-Dipped Danish Butter Cookies are an exquisite twist on the classic treat, combining the rich, buttery flavor of traditional Danish cookies with a luscious layer of chocolate. These cookies are not only visually appealing but also offer a delightful contrast between the crumbly texture of the cookie and the smoothness of the chocolate. Perfect for special occasions or simply as a sweet indulgence, they are certain to be a hit among friends and family.
| Ingredients | Quantity |
|---|---|
| Unsalted butter | 1 cup (226g) |
| Granulated sugar | 1/2 cup (100g) |
| All-purpose flour | 2 cups (240g) |
| Vanilla extract | 1 teaspoon |
| Salt | 1/4 teaspoon |
| Egg | 1 large |
| Semi-sweet chocolate chips | 1 cup (170g) |
| Optional toppings (sprinkles or nuts) | As desired |
Cooking Instructions:
- Preheat the Oven: First, preheat your oven to 350°F (175°C). Line two baking sheets with parchment paper to guarantee easy removal of the cookies after baking.
- Cream the Butter and Sugar: In a large mixing bowl, combine 1 cup of unsalted butter (softened at room temperature) and 1/2 cup of granulated sugar. Using an electric mixer or a wooden spoon, cream the butter and sugar together on medium speed until smooth, creamy, and light in color.
- Incorporate Egg and Vanilla: Add 1 large egg and 1 teaspoon of vanilla extract to the creamed mixture. Beat until fully incorporated, scraping down the sides of the bowl to ascertain all ingredients are combined.
- Combine Dry Ingredients: In a separate bowl, whisk together 2 cups of all-purpose flour and 1/4 teaspoon of salt. Gradually incorporate the dry ingredients into the wet mixture, stirring gently with a spatula or wooden spoon until a smooth dough forms.
- Shape the Cookies: Using a piping bag fitted with a star tip, or a cookie scoop, pipe or scoop small mounds of dough onto the prepared baking sheets, spacing them about 2 inches apart to allow for spreading during baking.
- Bake the Cookies: Place the baking sheets in the preheated oven and bake for 12-15 minutes or until the edges are lightly golden. Watch closely to avoid over-baking, as you want them to remain tender.
- Cool the Cookies: Once baked, remove the cookies from the oven and let them cool on the baking sheets for about 5 minutes. After that, transfer them to a wire rack to cool completely.
- Melt the Chocolate: While the cookies are cooling, melt 1 cup of semi-sweet chocolate chips in a microwave-safe bowl. Heat in 20-second intervals, stirring between each interval until completely melted and smooth.
- Dip the Cookies: Once the cookies are cool, dip the bottoms of each cookie into the melted chocolate, allowing any excess chocolate to drip off. Place the dipped cookies back onto the parchment-lined baking sheet.
- Add Toppings (Optional): If desired, sprinkle the tops of the chocolate-dipped cookies with sprinkles or chopped nuts while the chocolate is still wet for added flair.
- Set the Chocolate: Allow the chocolate to set at room temperature for about 30 minutes or place the cookies in the refrigerator for quicker setting.
- Store and Enjoy: Once the chocolate has hardened, store the cookies in an airtight container to maintain freshness. Enjoy your delicious Chocolate-Dipped Danish Butter Cookies with a cup of tea or coffee!
- Makes Everything Simple : Just forget your bagged cheese! Only turn the handle for several times and get...
- Premium Material : All parts of the rotary cheese grater are made of food grade ABS material, no BPA. The...
- Three Option Grater : The parmesan cheese grater finishes food preparation with slicing, shredding and...
Almond-Infused Danish Butter Cookies
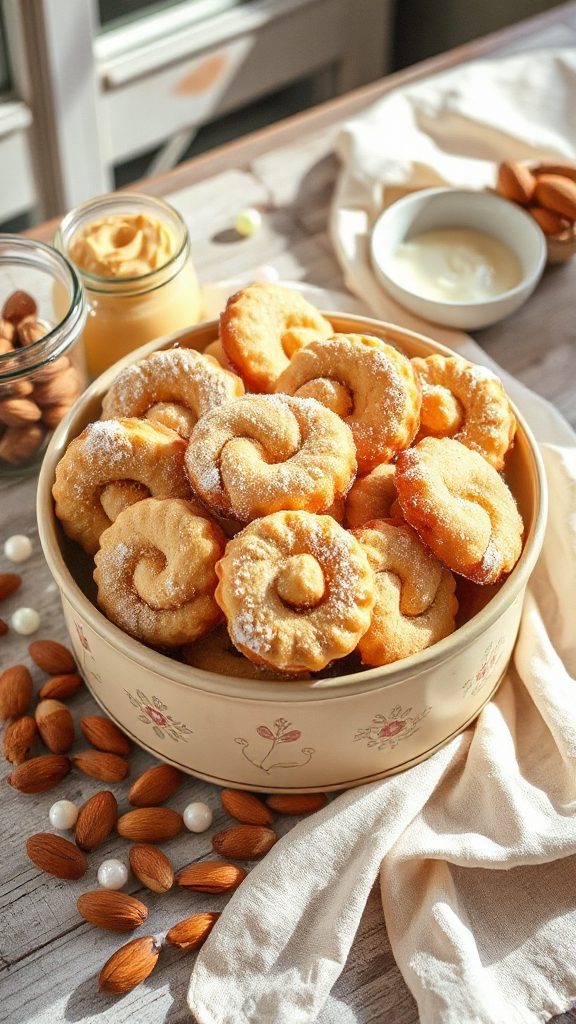
Almond-Infused Danish Butter Cookies are a delightful variation of the classic Danish treat, offering a subtle nutty flavor that enhances the buttery richness of the cookie. These cookies are perfect for baking during the holidays or for enjoying at any time of the year, and they are sure to impress with their elegant taste and melt-in-your-mouth texture.
| Ingredients | Quantity |
|---|---|
| Unsalted butter | 1 cup (226g) |
| Granulated sugar | 1/2 cup (100g) |
| All-purpose flour | 2 cups (240g) |
| Almond extract | 1 teaspoon |
| Salt | 1/4 teaspoon |
| Egg | 1 large |
| Sliced almonds (for topping) | 1/4 cup |
Cooking Instructions:
- Preheat the Oven: Begin by preheating your oven to 350°F (175°C) and lining two baking sheets with parchment paper to prevent sticking during baking.
- Cream the Butter and Sugar: In a large bowl, take 1 cup of unsalted butter (at room temperature) and 1/2 cup of granulated sugar. Use an electric mixer or a whisk to cream them together until the mixture is light, fluffy, and pale in color.
- Add Egg and Almond Extract: Incorporate 1 large egg and 1 teaspoon of almond extract into the creamed butter and sugar mixture. Beat everything together until well blended, ensuring to scrape down the sides of the bowl to mix thoroughly.
- Combine Dry Ingredients: In another bowl, whisk together 2 cups of all-purpose flour and 1/4 teaspoon of salt. Gradually add this dry mixture to the wet ingredients, mixing gently with a spatula until a soft dough forms.
- Shape the Cookies: Using a cookie scoop or your hands, shape the dough into small balls (about 1 inch in diameter). Place the dough balls on the prepared baking sheets, ensuring they are spaced about 2 inches apart. For an added touch, gently press a few sliced almonds on the top of each cookie.
- Bake: Put the baking sheets in the preheated oven and bake for 12-15 minutes, or until the edges are lightly golden. Be careful not to over-bake; you want the cookies to be tender and slightly golden.
- Cool the Cookies: After baking, remove the cookies from the oven and allow them to cool on the baking sheets for about 5 minutes. Then, transfer them to a wire rack to cool completely before serving.
Enjoy your delicious Almond-Infused Danish Butter Cookies with a cup of tea or coffee!
- 💰 REDUCE WASTE AND SAVE MONEY: Chef Preserve keeps FOOD FRESH 5 TIMES LONGER than non-vacuum storage...
- ✅ POWERFUL, QUICK & EASY TO USE: Simply press the button to start. The device vacuum seals a bag in 5...
- ♻️ REUSABLE & RESEALABLE BAGS: Chef Preserve comes with dishwasher, freezer, refrigerator, and...
Coconut Danish Butter Cookies
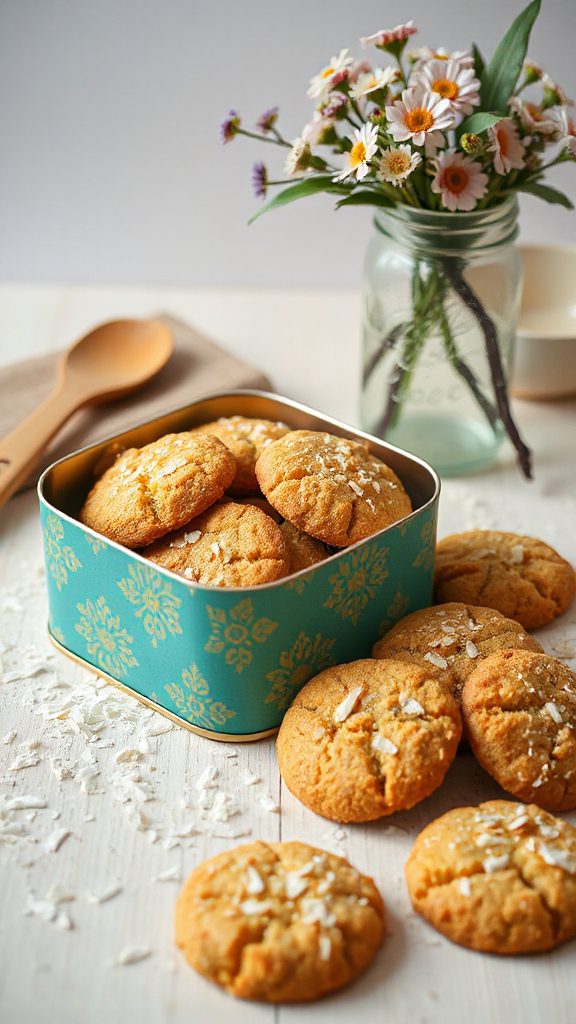
Coconut Danish Butter Cookies are a delightful tropical twist on the traditional Danish butter cookie, providing a chewy texture and aromatic coconut flavor that will transport you to a sunny beach with every bite. These cookies are perfect for any occasion and make great gifts, especially for those who love the taste of coconut.
| Ingredients | Quantity |
|---|---|
| Unsalted butter | 1 cup (226g) |
| Granulated sugar | 3/4 cup (150g) |
| All-purpose flour | 2 cups (240g) |
| Shredded sweetened coconut | 1 cup (100g) |
| Salt | 1/4 teaspoon |
| Egg | 1 large |
| Vanilla extract | 1 teaspoon |
Cooking Instructions:
- Preheat the Oven: Start by preheating your oven to 350°F (175°C). Prepare two baking sheets by lining them with parchment paper to guarantee the cookies do not stick while baking.
- Cream Butter and Sugar: In a large mixing bowl, take 1 cup of unsalted butter (softened to room temperature) and 3/4 cup of granulated sugar. Use an electric mixer or a whisk to beat these ingredients together until the mixture is light and fluffy, which should take about 2-3 minutes.
- Incorporate Egg and Vanilla: Add 1 large egg and 1 teaspoon of vanilla extract to the creamed mixture. Mix well until everything is combined and the mixture is smooth, scraping down the sides of the bowl as needed.
- Mix Dry Ingredients: In a separate bowl, combine 2 cups of all-purpose flour, 1/4 teaspoon of salt, and 1 cup of shredded sweetened coconut. Whisk these dry ingredients together until they are evenly mixed.
- Combine Wet and Dry Ingredients: Gradually add the dry mixture to the wet ingredients, mixing gently with a spatula or wooden spoon until a soft dough forms. Be careful not to over-mix; just combine everything until you no longer see any dry flour.
- Shape the Cookies: Using a cookie scoop or your hands, form small balls of dough (about 1 inch in diameter). Place the dough balls on the prepared baking sheets, making sure to leave about 2 inches of space between each cookie.
- Bake: Place the baking sheets in the preheated oven and bake the cookies for 12-15 minutes, or until the edges start to turn golden brown. Keep a close eye on them to avoid over-baking; you want them to remain soft in the center.
- Cool the Cookies: Once baked, remove the cookies from the oven and let them cool on the baking sheets for about 5 minutes. Afterward, transfer the cookies to a wire rack to cool completely.
Enjoy your Coconut Danish Butter Cookies as a sweet treat with coffee or tea, or share them with friends and family for a taste of the tropics!
- Generous Capacity: 7-quart slow cooker that comfortably serves 9+ people or fits a 7-pound roast
- Cooking Flexibility: High or low slow cooking settings, with convenient warm function for ideal serving...
- Convenient: Set it and forget it feature enables you to cook while at work or performing daily tasks
Lemon Zest Danish Butter Cookies

Lemon Zest Danish Butter Cookies are a revitalizing take on the classic Danish butter cookie, infused with bright lemon flavor and a delightful crisp texture. These cookies are perfect for spring gatherings or as a sunny snack any time of the year. The zesty lemon elevates the traditional buttery goodness, making each bite feel like a little taste of sunshine.
| Ingredients | Quantity |
|---|---|
| Unsalted butter | 1 cup (226g) |
| Granulated sugar | 3/4 cup (150g) |
| All-purpose flour | 2 cups (240g) |
| Lemon zest | 2 tablespoons |
| Salt | 1/4 teaspoon |
| Egg | 1 large |
| Vanilla extract | 1 teaspoon |
Cooking Instructions:
- Preheat the Oven: Begin by preheating your oven to 350°F (175°C). Line two baking sheets with parchment paper to facilitate easy removal of the cookies after baking.
- Cream Butter and Sugar: In a large mixing bowl, add 1 cup of softened unsalted butter and 3/4 cup of granulated sugar. Using an electric mixer or a whisk, beat the mixture until it becomes light and fluffy, about 2 to 3 minutes.
- Add Egg, Vanilla, and Lemon Zest: To the creamed butter and sugar, add 1 large egg, 1 teaspoon of vanilla extract, and 2 tablespoons of lemon zest. Mix well until fully incorporated and the mixture is smooth, making sure to scrape down the sides of the bowl as necessary.
- Mix Dry Ingredients: In a separate bowl, whisk together 2 cups of all-purpose flour, 1/4 teaspoon of salt, and any remaining lemon zest if desired. This will promote an even distribution of the dry ingredients.
- Combine Mixtures: Gradually add the dry mixture to the wet mixture, stirring gently with a spatula or wooden spoon until a soft dough forms. Take care not to over-mix; simply combine until there are no dry ingredients visible.
- Shape the Cookies: Using a cookie scoop or your hands, form the dough into small balls, roughly 1 inch in diameter. Place these dough balls on the lined baking sheets, leaving about 2 inches of space between each cookie to allow for spreading.
- Bake: Place the baking sheets in the preheated oven and bake for 12-15 minutes, or until the edges of the cookies are lightly golden. Keep a close eye on them to make sure they don’t over-bake, as you want them to stay soft in the center.
- Cool the Cookies: Once baked, remove the cookies from the oven and allow them to cool on the baking sheets for a few minutes. Then, carefully transfer them to a wire rack to cool completely. Enjoy your Lemon Zest Danish Butter Cookies!
- 100% Leak-proof: Guaranteed no-spill seal and secure latches
- Crystal-clear Tritan Built: Stain-resistant and odor-resistant material for a clear view of contents
- Lightweight & Sturdy: Easy to carry, yet durable for everyday use
Maple Pecan Danish Butter Cookies

Maple Pecan Danish Butter Cookies combine the rich flavors of maple syrup with the crunch of toasted pecans, resulting in a delightful treat that’s perfect for any occasion. These cookies have a beautifully tender crumb and a sweet, nutty essence that is certain to impress family and friends alike. Ideal for holiday gatherings or cozy afternoons with tea, the warm flavors of these cookies will make them a favorite.
| Ingredients | Quantity |
|---|---|
| Unsalted butter | 1 cup (226g) |
| Granulated sugar | 3/4 cup (150g) |
| Maple syrup | 1/4 cup (60ml) |
| All-purpose flour | 2 cups (240g) |
| Chopped pecans | 1 cup (120g) |
| Salt | 1/4 teaspoon |
| Egg | 1 large |
| Vanilla extract | 1 teaspoon |
Cooking Instructions:
- Preheat the Oven: Start by preheating your oven to 350°F (175°C). Prepare two baking sheets by lining them with parchment paper for easy cookie removal after baking.
- Cream Butter and Sugar: In a large bowl, place 1 cup of softened unsalted butter and 3/4 cup of granulated sugar. Use an electric mixer or whisk to cream these ingredients together until they are light and fluffy, which should take about 2 to 3 minutes.
- Add Maple Syrup, Egg, and Vanilla: Mix in 1/4 cup of maple syrup, 1 large egg, and 1 teaspoon of vanilla extract to the creamed butter and sugar. Beat until everything is fully combined, affirming a smooth mixture and scraping down the sides of the bowl as needed.
- Mix Dry Ingredients: In a separate bowl, combine 2 cups of all-purpose flour, 1/4 teaspoon of salt, and 1 cup of chopped pecans. Stir the dry ingredients together to affirm even distribution.
- Combine Wet and Dry Mixtures: Gradually add the dry mixture to the wet mixture. Use a spatula or wooden spoon to gently fold everything together until the dough starts to come together. Be careful not to over-mix; stop when there are no more dry ingredients visible.
- Scoop and Shape the Cookies: With a cookie scoop or your hands, form the dough into small balls, approximately 1 inch in diameter. Arrange the dough balls on the prepared baking sheets, leaving about 2 inches of space between each cookie to allow for spreading during baking.
- Bake the Cookies: Place the baking sheets in the preheated oven and bake for 12-15 minutes, or until the edges of the cookies are golden. Keep an eye on them to prevent over-baking, as you want them to maintain a soft center.
- Cool the Cookies: Once baked, remove the cookies from the oven and allow them to cool on the baking sheets for a few minutes. Then, transfer them to a wire rack to cool completely before serving.
Enjoy your Maple Pecan Danish Butter Cookies as a sweet treat or share them with friends and family!
- 𝗘𝗳𝗳𝗼𝗿𝘁𝗹𝗲𝘀𝘀 𝗪𝗲𝗶𝗴𝗵𝗶𝗻𝗴: Supports 5 units...
- 𝗣𝗿𝗲𝗰𝗶𝘀𝗲 𝗥𝗲𝘀𝘂𝗹𝘁𝘀: Accurately weighs up to 11 lb/5 kg with 1 g...
- 𝗦𝗶𝗺𝗽𝗹𝗲 & 𝗖𝗼𝗺𝗽𝗮𝗰𝘁: The small and sleek scale is a perfect fit for...
Spiced Ginger Danish Butter Cookies
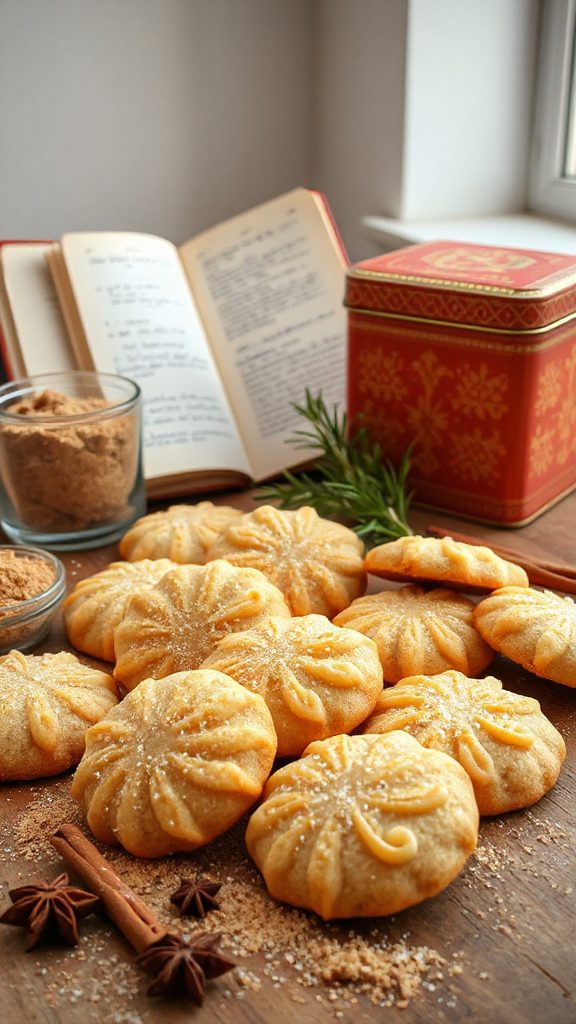
Spiced Ginger Danish Butter Cookies deliver a warm, comforting flavor that beautifully combines the richness of butter with the spiciness of ginger and molasses. Perfect for fall and winter gatherings, these cookies are not only delicious but also evoke a cozy feeling with their aromatic blend of cinnamon and nutmeg. With a tender, melt-in-your-mouth texture, they are sure to become a beloved treat among friends and family.
| Ingredients | Quantity |
|---|---|
| Unsalted butter | 1 cup (226g) |
| Granulated sugar | 3/4 cup (150g) |
| Brown sugar | 1/4 cup (50g) |
| Molasses | 1/4 cup (60ml) |
| All-purpose flour | 2 cups (240g) |
| Ground ginger | 2 teaspoons |
| Ground cinnamon | 1 teaspoon |
| Ground nutmeg | 1/2 teaspoon |
| Baking soda | 1 teaspoon |
| Salt | 1/4 teaspoon |
| Egg | 1 large |
| Vanilla extract | 1 teaspoon |
Cooking Instructions:
- Preheat the Oven: Begin by preheating your oven to 350°F (175°C). Prepare two baking sheets by lining them with parchment paper to facilitate easy cookie removal after baking.
- Cream Butter and Sugars: In a large mixing bowl, combine 1 cup of softened unsalted butter, 3/4 cup of granulated sugar, and 1/4 cup of brown sugar. Using an electric mixer or stand mixer, beat the ingredients together on medium speed until the mixture is light and fluffy, which should take about 3-4 minutes.
- Add Molasses, Egg, and Vanilla: Pour in 1/4 cup of molasses, add 1 large egg, and stir in 1 teaspoon of vanilla extract. Beat until everything is smoothly combined and well-incorporated, making certain to scrape the bowl as needed to mix thoroughly.
- Mix Dry Ingredients: In another bowl, whisk together 2 cups of all-purpose flour, 2 teaspoons of ground ginger, 1 teaspoon of ground cinnamon, 1/2 teaspoon of ground nutmeg, 1 teaspoon of baking soda, and 1/4 teaspoon of salt. Make certain all the dry ingredients are evenly mixed.
- Combine Wet and Dry Mixtures: Gradually add the dry mixture to the wet mixture, using a spatula or wooden spoon to fold the ingredients together. Mix until just combined, taking care not to over-mix. The dough should be soft and slightly sticky.
- Scoop and Shape the Cookies: Using a cookie scoop or tablespoon, scoop the dough and form small balls, about 1 inch in diameter. Place the dough balls on the prepared baking sheets, leaving about 2 inches of space between each cookie to allow for spreading.
- Bake the Cookies: Place the baking sheets in the preheated oven and bake for 10-12 minutes, or until the edges are set and the tops look slightly cracked. Be mindful not to overbake them, as they will continue to firm up after being removed from the oven.
- Cool and Enjoy: Once baked, take the sheets out of the oven and let the cookies cool on the baking sheets for about 5 minutes before transferring them to a wire rack to cool completely. Serve and enjoy these delightful Spiced Ginger Danish Butter Cookies with a cup of tea or coffee!
- Instant Read Food Thermometer | Our instant read thermometer features a temperature probe and advanced,...
- Multi-Use | From bbq thermometer to baking thermometer, our digital food thermometer for cooking is...
- Easy-Read Digital Thermometer For Cooking | Large instant thermometer dial with bright blue backlight...
Raspberry Jam Danish Butter Cookies

Raspberry Jam Danish Butter Cookies are a delightful treat that beautifully combines the richness of buttery cookies with the sweet-tart flavor of raspberry jam. These cookies feature a classic Danish butter cookie base, which is perfectly crisp around the edges while remaining tender in the center. A dollop of raspberry jam in the center adds a burst of flavor that complements the buttery goodness, making them perfect for any occasion, whether you’re hosting a gathering or enjoying a cozy afternoon with tea.
| Ingredients | Quantity |
|---|---|
| Unsalted butter | 1 cup (226g) |
| Granulated sugar | 3/4 cup (150g) |
| Powdered sugar | 1/4 cup (30g) |
| All-purpose flour | 2 cups (240g) |
| Baking powder | 1 teaspoon |
| Salt | 1/4 teaspoon |
| Egg | 1 large |
| Vanilla extract | 1 teaspoon |
| Raspberry jam | 1/2 cup (120ml) |
Cooking Instructions:
- Preheat the Oven: Start by preheating your oven to 350°F (175°C). Line two baking sheets with parchment paper to guarantee easy cleanup and prevent sticking.
- Cream Butter and Sugars: In a large mixing bowl, combine 1 cup of softened unsalted butter, 3/4 cup of granulated sugar, and 1/4 cup of powdered sugar. Using an electric mixer or stand mixer, cream the ingredients on medium speed until the mixture is light, fluffy, and well combined, which should take about 3-4 minutes.
- Add Egg and Vanilla: Add 1 large egg and 1 teaspoon of vanilla extract into the butter and sugar mixture. Beat until fully incorporated and smooth, making sure to scrape the sides of the bowl to mix thoroughly.
- Combine Dry Ingredients: In a separate bowl, whisk together 2 cups of all-purpose flour, 1 teaspoon of baking powder, and 1/4 teaspoon of salt until evenly combined.
- Mix Wet and Dry Ingredients: Gradually add the flour mixture into the wet mixture, stirring gently with a spatula or wooden spoon until the dough comes together. Avoid over-mixing; the dough should be soft and slightly sticky.
- Scoop and Shape Cookies: With a cookie scoop or tablespoon, scoop the dough and form balls about 1 inch in diameter. Place the cookie balls on the prepared baking sheets, spaced about 2 inches apart.
- Make Indentations for Jam: Using your thumb or the back of a spoon, gently press down in the center of each cookie ball to create a small indentation that will hold the raspberry jam.
- Add Raspberry Jam: Spoon about 1/2 teaspoon of raspberry jam into the indentation of each cookie.
- Bake Cookies: Place the baking sheets in the preheated oven and bake for 12-15 minutes, or until the edges are lightly golden. Keep an eye on them to verify they do not overbake.
- Cool: Once baked, remove the cookies from the oven and let them cool on the baking sheets for 5 minutes before transferring them to a wire rack to cool completely.
Enjoy your homemade Raspberry Jam Danish Butter Cookies with a hot cup of tea or coffee!
- Versatile 54-Piece Collection: Elevate your kitchen with the Home Hero 54-Piece Kitchen Utensil Set, a...
- Durable and Long-Lasting: Crafted from premium stainless steel, these kitchen utensils are designed to...
- Perfect Holiday Gift: Delight your loved ones with this kitchen utensils gift set this festive season....
Pistachio Danish Butter Cookies
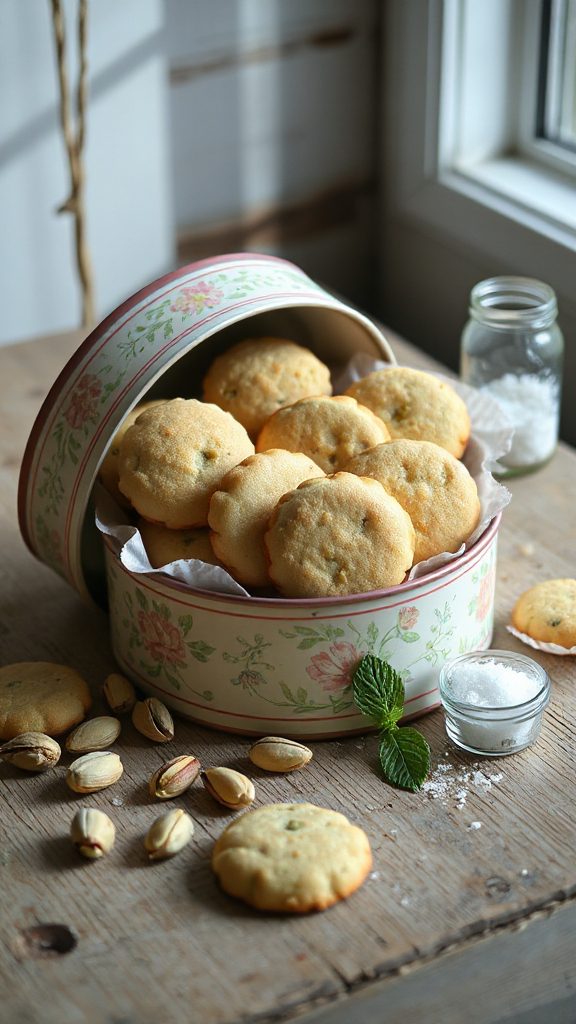
Pistachio Danish Butter Cookies are a delightful variation of the classic butter cookie, incorporating the unique flavor and crunch of finely chopped pistachios. These cookies are not only beautiful with their green flecks, but they are also rich, buttery, and slightly nutty, making them an irresistible treat for any cookie lover. Whether enjoyed with a cup of tea or as a sweet gift for a friend, these cookies are sure to impress.
| Ingredients | Quantity |
|---|---|
| Unsalted butter | 1 cup (226g) |
| Granulated sugar | 3/4 cup (150g) |
| Powdered sugar | 1/4 cup (30g) |
| All-purpose flour | 2 cups (240g) |
| Baking powder | 1 teaspoon |
| Salt | 1/4 teaspoon |
| Egg | 1 large |
| Vanilla extract | 1 teaspoon |
| Finely chopped pistachios | 1/2 cup (60g) |
Cooking Instructions:
- Preheat the Oven: Preheat your oven to 350°F (175°C). Line two baking sheets with parchment paper to facilitate easy removal of cookies and cleanup afterward.
- Cream Butter and Sugars: In a large mixing bowl, combine 1 cup of softened unsalted butter, 3/4 cup of granulated sugar, and 1/4 cup of powdered sugar. Use an electric mixer or stand mixer to cream these ingredients together on medium speed until the mixture is pale, light, and fluffy, which should take about 3-4 minutes.
- Add Egg and Vanilla: Crack in 1 large egg and pour in 1 teaspoon of vanilla extract. Beat the mixture until smooth and fully incorporated, ensuring to scrape down the sides of the bowl for even mixing.
- Combine Dry Ingredients: In another bowl, whisk together 2 cups of all-purpose flour, 1 teaspoon of baking powder, and 1/4 teaspoon of salt until well combined.
- Mix in Pistachios and Dry Ingredients: Gradually add the flour mixture to the wet ingredients, mixing gently with a spatula or wooden spoon. Once combined, fold in 1/2 cup of finely chopped pistachios. Avoid over-mixing; the dough should be soft and slightly sticky.
- Scoop and Shape Cookies: Using a cookie scoop or a tablespoon, portion the dough into balls about 1 inch in diameter. Place the dough balls on the prepared baking sheets, allowing for about 2 inches of space between each.
- Flatten Cookies: With the bottom of a glass or your fingers, gently flatten each cookie dough ball slightly for an even baking surface. This will help the cookies maintain a nice shape during baking.
- Bake the Cookies: Place the baking sheets in the preheated oven and bake for 12-15 minutes, or until the edges are lightly golden and the centers appear set.
- Cool the Cookies: Once baked, remove the cookies from the oven and allow them to cool on the baking sheets for about 5 minutes. Then, transfer them to wire racks to cool completely.
- Enjoy: Once the cookies have cooled, serve them immediately or store them in an airtight container for later enjoyment. These delightful pistachio Danish butter cookies are perfect for sharing or savoring on your own!
- 24-ounce insulated stainless-steel water bottle with a FreeSip spout and push-button lid with lock
- Patented FreeSip spout designed for either sipping upright through the built-in straw or tilting back to...
- Protective push-to-open lid keeps spout clean; convenient carry loop doubles as a lock
Vanilla Bean Danish Butter Cookies
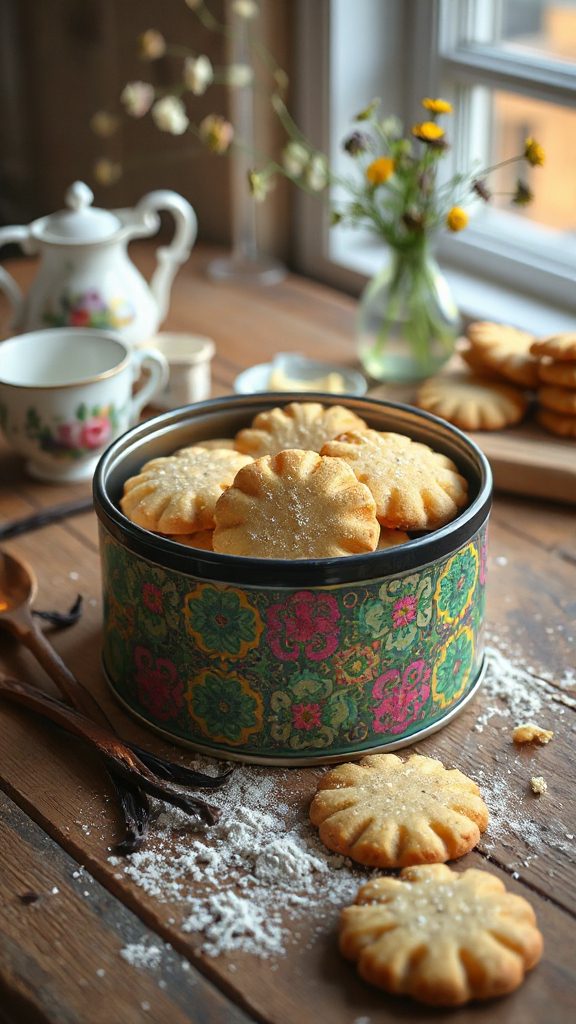
Vanilla Bean Danish Butter Cookies are a classic treat that embodies the rich, buttery flavor paired with the fragrant aroma of real vanilla beans. These delicate cookies are crisp on the outside and tender inside, making them perfect for enjoying with a cup of coffee or tea. The unmistakable flecks of vanilla bean speckled throughout add a touch of elegance and flavor to these delightful confections.
| Ingredients | Quantity |
|---|---|
| Unsalted butter | 1 cup (226g) |
| Granulated sugar | 3/4 cup (150g) |
| Powdered sugar | 1/4 cup (30g) |
| All-purpose flour | 2 cups (240g) |
| Baking powder | 1 teaspoon |
| Salt | 1/4 teaspoon |
| Egg | 1 large |
| Vanilla bean | 1 (seeds scraped) |
| Vanilla extract | 1 teaspoon |
Cooking Instructions:
- Preheat the Oven: Begin by preheating your oven to 350°F (175°C). Line two baking sheets with parchment paper for easy cookie removal and to prevent sticking.
- Cream Butter and Sugars: In a large mixing bowl, combine 1 cup of softened unsalted butter, 3/4 cup of granulated sugar, and 1/4 cup of powdered sugar. Use an electric mixer on medium speed to cream these ingredients together until the mixture is fluffy and light in color, about 3-4 minutes.
- Add Egg and Vanilla: Crack 1 large egg into the creamed butter mixture. Then, scrape the seeds from 1 vanilla bean and add those to the bowl along with 1 teaspoon of vanilla extract. Beat the mixture until everything is well combined and smooth, remembering to scrape down the sides of the bowl.
- Combine Dry Ingredients: In a separate bowl, whisk together 2 cups of all-purpose flour, 1 teaspoon of baking powder, and 1/4 teaspoon of salt until well combined.
- Mix Dry Ingredients into Wet Ingredients: Gradually add the dry ingredient mixture into the wet ingredients, mixing gently with a spatula or wooden spoon until just combined. Be careful not to over-mix; the dough should be soft.
- Scoop and Shape Cookies: Using a cookie scoop or tablespoon, portion the dough into balls approximately 1 inch in diameter. Place these dough balls onto the prepared baking sheets, allowing for sufficient spacing (about 2 inches apart) between each cookie.
- Flatten Cookies: Using the bottom of a glass or your fingers, gently flatten each cookie dough ball to create an even baking surface. This aids in achieving a consistent bake and enhances the appearance of the cookies.
- Bake the Cookies: Place the baking sheets in the preheated oven and bake for 12-15 minutes or until the edges of the cookies turn lightly golden. The centers may seem a bit soft, but they’ll continue to firm up as they cool.
- Cool the Cookies: Once baked, remove the cookies from the oven and allow them to cool on the baking sheets for about 5 minutes. Then, transfer them to a wire rack to cool completely.
Enjoy your delightful Vanilla Bean Danish Butter Cookies with tea, coffee, or simply as a sweet snack anytime!
Orange Cardamom Danish Butter Cookies

Orange Cardamom Danish Butter Cookies are a delightful variation of the classic Danish butter cookie, infused with the bright and zesty flavor of fresh orange zest and the warm, aromatic spice of cardamom. These cookies offer a perfect balance of sweet and spicy that makes them ideal for enjoying during the holiday season or any special occasion. With a tender, melt-in-your-mouth texture, they are sure to impress anyone who takes a bite.
| Ingredients | Quantity |
|---|---|
| Unsalted butter | 1 cup (226g) |
| Granulated sugar | 3/4 cup (150g) |
| Powdered sugar | 1/4 cup (30g) |
| All-purpose flour | 2 cups (240g) |
| Baking powder | 1 teaspoon |
| Ground cardamom | 1 teaspoon |
| Salt | 1/4 teaspoon |
| Egg | 1 large |
| Orange zest | 1 tablespoon |
| Orange extract | 1 teaspoon |
Cooking Instructions:
- Preheat the Oven: Start by preheating your oven to 350°F (175°C) and lining two baking sheets with parchment paper to guarantee easy cookie removal.
- Cream Butter and Sugars: In a large mixing bowl, combine 1 cup of softened unsalted butter, 3/4 cup of granulated sugar, and 1/4 cup of powdered sugar. Use an electric mixer on medium speed to cream these ingredients together until light and fluffy, which should take about 3-4 minutes.
- Add Egg, Zest, and Extract: Crack 1 large egg into the butter mixture. Then, add 1 tablespoon of freshly grated orange zest and 1 teaspoon of orange extract. Beat together until the mixture is well combined and smooth, making sure to scrape down the bowl’s sides.
- Combine Dry Ingredients: In a separate bowl, whisk together 2 cups of all-purpose flour, 1 teaspoon of baking powder, 1 teaspoon of ground cardamom, and 1/4 teaspoon of salt until well mixed.
- Mix Dry Ingredients into Wet Ingredients: Gradually add the dry ingredient mixture to the wet ingredients, mixing gently with a spatula or wooden spoon until just combined. Be cautious not to over-mix; the dough should remain soft and cohesive.
- Scoop and Shape Cookies: Using a cookie scoop or tablespoon, portion out the dough into balls of about 1 inch in diameter. Place the dough balls on the prepared baking sheets, making sure there is ample spacing (approximately 2 inches apart) between each cookie.
- Flatten Cookies: Lightly flatten each dough ball with the palm of your hand or the bottom of a glass. This will help create a consistent baking surface.
- Bake: Place the baking sheets in the preheated oven and bake the cookies for 10-12 minutes, or until they are lightly golden around the edges but still soft in the center.
- Cool: Remove the baking sheets from the oven and let the cookies cool on the sheets for about 5 minutes before transferring to a wire rack to cool completely.
Enjoy these freshly baked Orange Cardamom Danish Butter Cookies with a cup of tea or coffee for a delightful treat!
Seasalt Caramel Danish Butter Cookies

Seasalt Caramel Danish Butter Cookies are a luxurious twist on the classic butter cookie, combining the rich, buttery flavor with a delightful swirl of sweet caramel and a sprinkle of sea salt. These cookies offer a perfect blend of sweet and salty, making them a decadent treat that is ideal for gifting or enjoying during special occasions. With a tender texture and a rich flavor profile, they are sure to satisfy any sweet tooth.
| Ingredients | Quantity |
|---|---|
| Unsalted butter | 1 cup (226g) |
| Granulated sugar | 3/4 cup (150g) |
| Brown sugar | 1/2 cup (100g) |
| All-purpose flour | 2 cups (240g) |
| Baking powder | 1 teaspoon |
| Baking soda | 1/2 teaspoon |
| Salt | 1/4 teaspoon |
| Egg | 1 large |
| Vanilla extract | 1 teaspoon |
| Caramel sauce | 1/2 cup (120ml) |
| Sea salt | Flaky, for topping |
Cooking Instructions:
- Preheat the Oven: Begin by preheating your oven to 350°F (175°C) and prepare two baking sheets by lining them with parchment paper.
- Cream Butter and Sugars: In a large mixing bowl, cream together 1 cup of softened unsalted butter, 3/4 cup of granulated sugar, and 1/2 cup of brown sugar using an electric mixer on medium speed. Beat the mixture until it is light and fluffy, approximately 3-4 minutes.
- Add Egg and Vanilla: Crack 1 large egg into the butter mixture and add 1 teaspoon of vanilla extract. Beat the mixture until fully incorporated and smooth, making sure to scrape down the sides of the bowl.
- Combine Dry Ingredients: In a separate bowl, whisk together 2 cups of all-purpose flour, 1 teaspoon of baking powder, 1/2 teaspoon of baking soda, and 1/4 teaspoon of salt until well blended.
- Mix Dry into Wet Ingredients: Gradually add the dry ingredients to the wet mixture. Use a spatula or wooden spoon to mix until just combined, being careful not to over-mix.
- Fold in Caramel Sauce: Gently fold in 1/2 cup of caramel sauce, creating swirls in the dough while still leaving some of the caramel visible.
- Scoop and Shape Cookies: Using a cookie scoop or tablespoon, scoop out the dough and form it into balls about 1 inch in diameter. Place the dough balls on the prepared baking sheets, ensuring there is enough space (approximately 2 inches apart) between each cookie.
- Add Sea Salt: Before baking, sprinkle a small pinch of flaky sea salt on each cookie dough ball to enhance the sweet-salty flavor.
- Bake Cookies: Place the baking sheets in the preheated oven and bake for 10-12 minutes, or until the edges are lightly golden. The cookies may appear soft in the center but will set as they cool.
- Cool and Serve: Once baked, remove the cookies from the oven and allow them to cool on the baking sheets for about 5 minutes before transferring them to a wire rack to cool completely. Enjoy your delicious Seasalt Caramel Danish Butter Cookies!
Marbled Chocolate Danish Butter Cookies
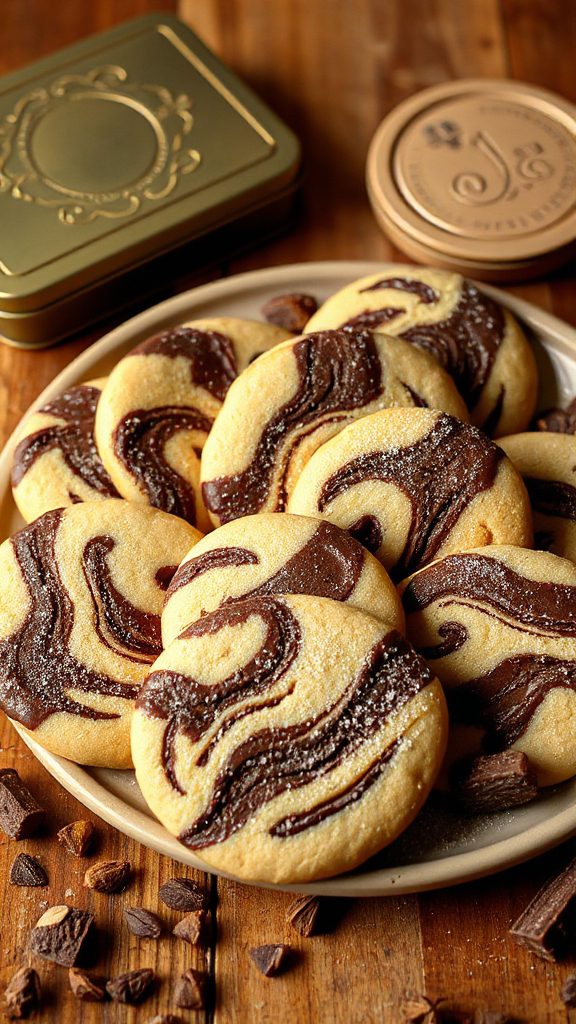
Marbled Chocolate Danish Butter Cookies are a delectable twist on the traditional butter cookie, offering a beautiful visual appeal along with a delightful flavor combination. These cookies feature a rich chocolate dough swirled with classic vanilla butter dough, creating an elegant marbled effect. Perfect for dessert trays or special occasions, these cookies are certain to impress anyone who takes a bite.
| Ingredients | Quantity |
|---|---|
| Unsalted butter | 1 cup (226g) |
| Granulated sugar | 3/4 cup (150g) |
| Brown sugar | 1/2 cup (100g) |
| All-purpose flour | 2 cups (240g) |
| Baking powder | 1 teaspoon |
| Baking soda | 1/2 teaspoon |
| Salt | 1/4 teaspoon |
| Egg | 1 large |
| Vanilla extract | 1 teaspoon |
| Unsweetened cocoa powder | 1/3 cup (40g) |
| Milk | 1 tablespoon |
Cooking Instructions:
- Preheat the Oven: Start by preheating your oven to 350°F (175°C). Line two baking sheets with parchment paper to prevent the cookies from sticking.
- Cream Butter and Sugars: In a large mixing bowl, combine 1 cup of softened unsalted butter, 3/4 cup of granulated sugar, and 1/2 cup of brown sugar. Use an electric mixer on medium speed to cream them together until light and fluffy, about 3-4 minutes.
- Add Egg and Vanilla: Crack 1 large egg into the mixture and add 1 teaspoon of vanilla extract. Mix until well combined, scraping down the sides of the bowl as necessary to guarantee everything is evenly incorporated.
- Combine Dry Ingredients: In a separate bowl, whisk together 2 cups of all-purpose flour, 1 teaspoon of baking powder, 1/2 teaspoon of baking soda, and 1/4 teaspoon of salt. Mix well to guarantee the leavening agents are evenly distributed.
- Mix Dry Ingredients Into Wet Ingredients: Gradually add the dry ingredients to the creamed butter mixture, stirring just until combined to avoid over-mixing.
- Prepare Chocolate Dough: Divide the cookie dough in half. In one half, mix in 1/3 cup of unsweetened cocoa powder until fully integrated. If the dough feels too dry, add 1 tablespoon of milk to help bind it together.
- Create the Marble Effect: Take small portions of both vanilla and chocolate dough and place them on a clean surface. Use a spatula or your hands to gently knead the two doughs together, being careful not to overwork it—you want a marbled effect, not a fully blended dough.
- Scoop and Shape Cookies: Use a cookie scoop or tablespoon to scoop out dough portions. Shape them into balls and place them on the prepared baking sheets, ensuring to leave enough space (about 2 inches apart) between each ball.
- Bake the Cookies: Place the baking sheets in the preheated oven and bake for 10-12 minutes, or until the cookies are lightly golden around the edges. The centers may appear slightly soft, but they will firm up as they cool.
- Cool the Cookies: Remove the baking sheets from the oven and let the cookies cool on the sheets for a few minutes before transferring them to a wire rack to cool completely. Enjoy your delicious Marbled Chocolate Danish Butter Cookies!
Red Velvet Danish Butter Cookies

Red Velvet Danish Butter Cookies are a festive twist on the classic butter cookie, combining the rich flavors of red velvet cake with the buttery crunch of traditional Danish cookies. These striking cookies, with their vibrant red color and cream cheese frosting, are ideal for special occasions or any time you want to add a little flair to your dessert table. Their tender texture and subtle cocoa flavor are sure to delight everyone who tries them.
| Ingredients | Quantity |
|---|---|
| Unsalted butter | 1 cup (226g) |
| Granulated sugar | 1 cup (200g) |
| Brown sugar | 1/2 cup (100g) |
| All-purpose flour | 2 1/2 cups (300g) |
| Cocoa powder | 2 tablespoons (15g) |
| Baking powder | 1 teaspoon |
| Baking soda | 1/2 teaspoon |
| Salt | 1/4 teaspoon |
| Egg | 1 large |
| Vanilla extract | 1 teaspoon |
| Red food coloring | 2 tablespoons |
| Cream cheese (for frosting) | 4 oz (113g) |
| Powdered sugar (for frosting) | 1 cup (120g) |
| Milk (for frosting) | 1-2 tablespoons |
Cooking Instructions:
- Preheat the Oven: Begin by preheating your oven to 350°F (175°C) and line two baking sheets with parchment paper to prevent sticking.
- Cream Butter and Sugars: In a large mixing bowl, combine 1 cup of softened unsalted butter, 1 cup of granulated sugar, and 1/2 cup of brown sugar. Use an electric mixer on medium speed to beat them together until the mixture is light and fluffy, approximately 3-4 minutes.
- Add Egg, Vanilla, and Food Coloring: Crack 1 large egg into the creamed mixture, add 1 teaspoon of vanilla extract, and stir in 2 tablespoons of red food coloring. Mix until fully combined and the color is even throughout the batter.
- Combine Dry Ingredients: In a separate bowl, whisk together 2 1/2 cups of all-purpose flour, 2 tablespoons of cocoa powder, 1 teaspoon of baking powder, 1/2 teaspoon of baking soda, and 1/4 teaspoon of salt. Make sure the dry ingredients are well mixed.
- Incorporate Dry Mixture into Wet Mixture: Gradually add the dry ingredients into the wet mixture. Stir gently until just combined, being careful not to over-mix which could lead to tougher cookies.
- Scoop and Shape the Cookies: Using a cookie scoop or tablespoon, portion out the dough onto the prepared baking sheets, spacing them about 2 inches apart. Gently flatten the tops with the back of a spoon or your fingertips.
- Bake the Cookies: Place the baking sheets in the preheated oven and bake for 10-12 minutes until the edges are set and the tops appear slightly cracked. Remove from the oven and allow the cookies to cool on the baking sheets for a few minutes before transferring them to a wire rack to cool completely.
- Prepare the Cream Cheese Frosting: While the cookies are cooling, in a mixing bowl, combine 4 oz of softened cream cheese with 1 cup of powdered sugar and 1-2 tablespoons of milk. Mix until the frosting is smooth and spreadable.
- Frost the Cookies: Once the cookies are completely cooled, use a knife or spatula to spread a generous layer of cream cheese frosting on top of each cookie.
- Serve and Enjoy: Arrange the frosted cookies on a serving platter. Enjoy their delightful flavors with family and friends!
Lavender Honey Danish Butter Cookies

Lavender Honey Danish Butter Cookies are a delicate and aromatic treat that combines the floral notes of lavender with the sweetness of honey. These cookies embody the spirit of Scandinavian baking, offering a buttery texture and a unique flavor profile that is perfect for afternoon tea or as a delightful gift. The infusion of lavender gives these cookies a distinct and invigorating taste that is both sophisticated and comforting.
| Ingredients | Quantity |
|---|---|
| Unsalted butter | 1 cup (226g) |
| Granulated sugar | 3/4 cup (150g) |
| Honey | 1/4 cup (85g) |
| All-purpose flour | 2 cups (240g) |
| Dried culinary lavender | 2 tablespoons |
| Baking powder | 1 teaspoon |
| Salt | 1/4 teaspoon |
| Egg | 1 large |
| Vanilla extract | 1 teaspoon |
| Milk (for brushing) | 1 tablespoon |
Cooking Instructions:
- Preheat the Oven: Start by preheating your oven to 350°F (175°C) and lining two baking sheets with parchment paper to make sure the cookies do not stick.
- Cream Butter and Sugars: In a large mixing bowl, combine 1 cup of softened unsalted butter, 3/4 cup of granulated sugar, and 1/4 cup of honey. Use an electric mixer on medium speed to cream these ingredients together until the mixture is light and fluffy, about 3-4 minutes.
- Add Egg and Vanilla: Crack 1 large egg into the creamed mixture and add 1 teaspoon of vanilla extract. Mix until fully combined, making sure the egg is fully incorporated.
- Prepare Dry Ingredients: In a separate bowl, whisk together 2 cups of all-purpose flour, 2 tablespoons of dried culinary lavender, 1 teaspoon of baking powder, and 1/4 teaspoon of salt. Be certain the dry ingredients are evenly mixed.
- Combine Wet and Dry Mixtures: Gradually add the dry mixture to the wet mixture, stirring gently to combine. Be careful not to over-mix, as this can result in tougher cookies.
- Shape the Cookies: Using a cookie scoop or a tablespoon, portion out the dough onto the prepared baking sheets, leaving about 2 inches of space between each cookie to allow for spreading.
- Brush with Milk: Lightly brush the tops of the cookies with 1 tablespoon of milk to help achieve a golden color when baking.
- Bake the Cookies: Place the baking sheets in the preheated oven and bake for 12-15 minutes, or until the edges are lightly golden. The centers may still look slightly underbaked, but they will firm up as they cool.
- Cool and Enjoy: Once baked, remove the cookies from the oven and let them cool on the baking sheets for about 5 minutes before transferring them to a wire rack to cool completely. Enjoy your Lavender Honey Danish Butter Cookies with your favorite beverage!
