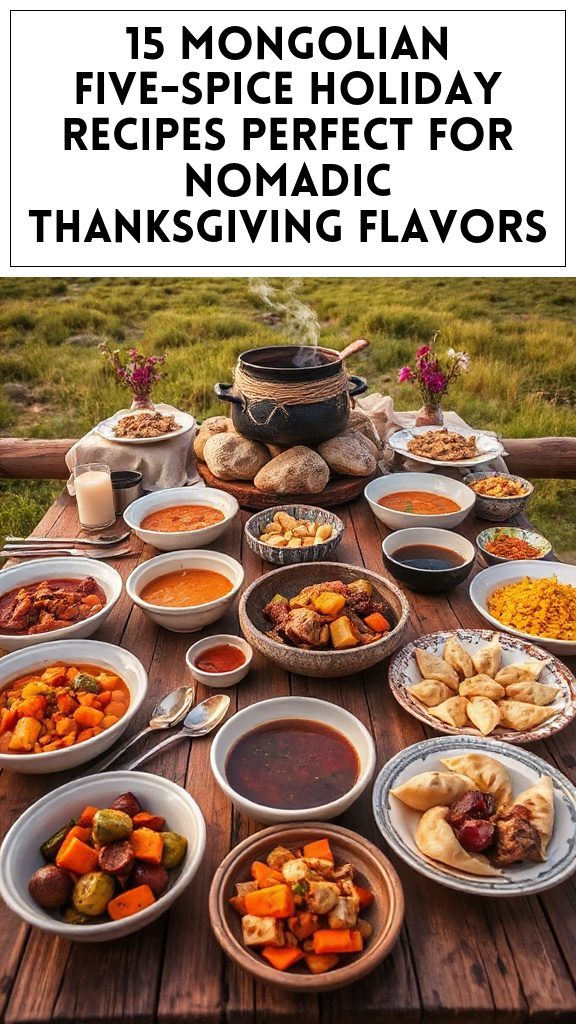
Discover 15 mouthwatering dinner recipes that are sure to please everyone. From the creamy richness of Garlic Tuscan Chicken to the comforting flavors of Classic Beef Stroganoff, each dish offers unique tastes. Vegetarians will enjoy the hearty Stuffed Peppers, while seafood lovers can savor the sweet Honey Garlic Shrimp. There's also a vibrant One-Pan Lemon Herb Chicken with Asparagus. Each recipe is crafted to satisfy diverse palates. There's even more to explore for dinner inspiration.
Creamy Garlic Tuscan Chicken
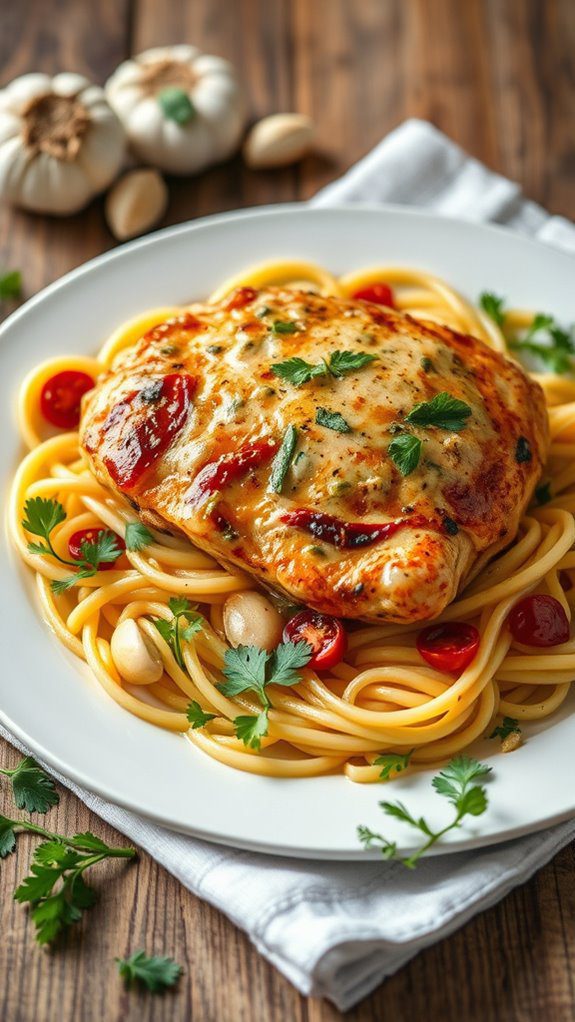
Creamy Garlic Tuscan Chicken is a rich and flavorful dish that features tender chicken breasts simmered in a luscious creamy sauce infused with garlic, sun-dried tomatoes, and spinach. This dish is perfect for a weeknight dinner or a special occasion when you want to impress your guests with minimal fuss.
With a preparation time of around 10 minutes and a cooking time of 20-25 minutes, you can have this delicious meal on the table in under an hour.
Ingredients:
- 4 boneless, skinless chicken breasts
- Salt and pepper, to taste
- 2 tablespoons olive oil
- 4 cloves garlic, minced
- 1 cup chicken broth
- 1 cup heavy cream
- 1 cup spinach, chopped
- 1/2 cup sun-dried tomatoes, chopped
- 1/2 cup grated Parmesan cheese
- Fresh basil, for garnish
Cooking Steps:
- Season the chicken breasts with salt and pepper on both sides.
- In a large skillet, heat the olive oil over medium-high heat. Add the chicken breasts and cook for about 5-7 minutes on each side, or until golden brown and cooked through. Remove the chicken from the skillet and set aside.
- In the same skillet, add the minced garlic and sauté for about 1 minute until fragrant, taking care not to burn it.
- Pour in the chicken broth and let it simmer for 2-3 minutes, scraping the bottom of the pan to incorporate all the flavors.
- Reduce the heat to low and stir in the heavy cream, chopped spinach, sun-dried tomatoes, and Parmesan cheese. Mix until the cheese has melted and the sauce is creamy.
- Return the cooked chicken breasts to the skillet, spooning the sauce over the top. Let everything simmer together for an additional 5 minutes to meld the flavors.
- Serve hot, garnished with fresh basil.
Variations and Tips:
- You can add other vegetables like mushrooms or bell peppers for additional flavor and nutrients.
- For a lighter version, you can substitute the heavy cream with Greek yogurt or a dairy-free cream alternative.
- If you prefer a spicy kick, add red pepper flakes to the sauce while it simmers.
- Pair this dish with rice, pasta, or a side of crusty bread to soak up the delicious sauce.
- The Original Pro Chopper - Our superstar veggie slicer has been creating waves on TikTok! Simple to use,...
- Easy Meal Prep with Rust-Resistant Blades - Our vegetable chopper is perfect for anyone who wants to eat...
- 5-Star Design - The soft-grip TPU handle ensures controlled chopping, while the non-skid rubber base...
Classic Beef Stroganoff
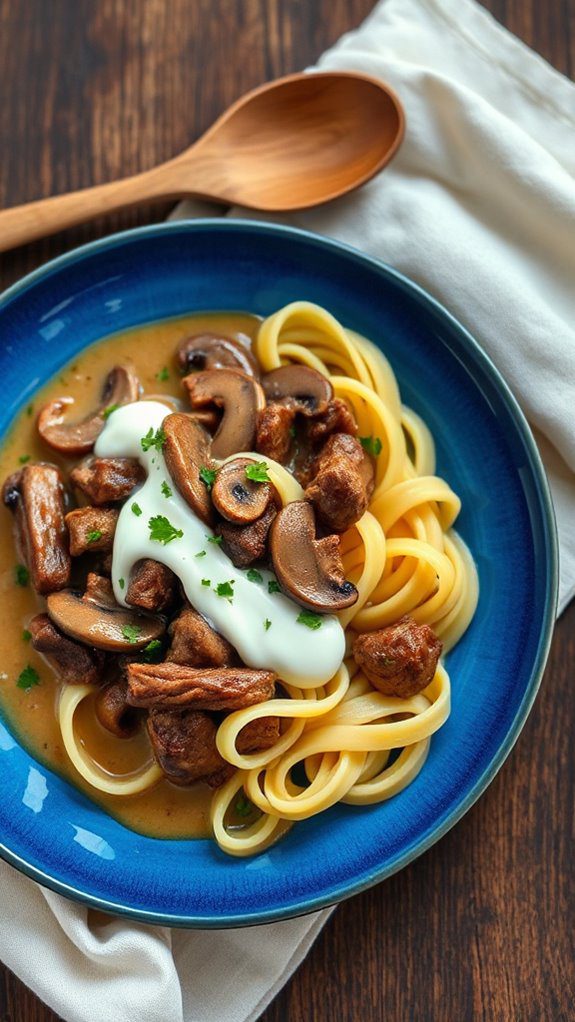
Classic Beef Stroganoff is a rich and creamy dish that combines tender strips of beef with mushrooms, onions, and a savory sauce, typically served over egg noodles or rice. This comforting meal is perfect for family dinners or gatherings, offering a warm and satisfying experience.
The preparation time is about 30 minutes, making it an excellent choice for a weeknight dinner without sacrificing flavor.
Ingredients:
- 1 pound beef sirloin, thinly sliced
- 2 tablespoons olive oil
- 1 medium onion, finely chopped
- 8 ounces mushrooms, sliced
- 2 cloves garlic, minced
- 2 tablespoons all-purpose flour
- 1 cup beef broth
- 1 tablespoon Worcestershire sauce
- 1 teaspoon Dijon mustard
- 1 cup sour cream
- Salt and pepper, to taste
- Fresh parsley, chopped (for garnish)
- 8 ounces egg noodles or rice (for serving)
Cooking Steps:
- In a large skillet, heat the olive oil over medium-high heat. Add the thinly sliced beef and season with salt and pepper. Sear the meat until browned, about 2-3 minutes, then remove it from the skillet and set aside.
- In the same skillet, add the chopped onion and cook for about 3-4 minutes until softened. Add the sliced mushrooms and garlic, cooking until the mushrooms are tender and any liquid has evaporated, approximately 5 minutes.
- Sprinkle the flour over the mushroom mixture, stirring to combine for 1 minute. Gradually pour in the beef broth while continuously stirring to prevent lumps from forming.
- Stir in the Worcestershire sauce and Dijon mustard. Allow the sauce to simmer and thicken for about 5 minutes.
- Reduce the heat to low and stir in the sour cream until fully incorporated. Add the cooked beef back into the skillet, stirring to coat it in the creamy sauce. Cook for an additional 2-3 minutes, ensuring everything is heated through.
- Serve the beef stroganoff over cooked egg noodles or rice, garnished with fresh parsley.
Variations & Tips:
- For a lighter version, you can substitute Greek yogurt or light sour cream for the regular sour cream.
- Add vegetables like bell peppers or spinach for added nutrition and flavor.
- If you prefer a richer flavor, use a splash of red wine in the sauce.
- To save time, opt for pre-sliced beef or use a slow cooker for an even more tender result.
- Don't forget to adjust seasoning as needed, tasting along the way for the perfect balance.
- Makes Everything Simple : Just forget your bagged cheese! Only turn the handle for several times and get...
- Premium Material : All parts of the rotary cheese grater are made of food grade ABS material, no BPA. The...
- Three Option Grater : The parmesan cheese grater finishes food preparation with slicing, shredding and...
Vegetarian Stuffed Peppers
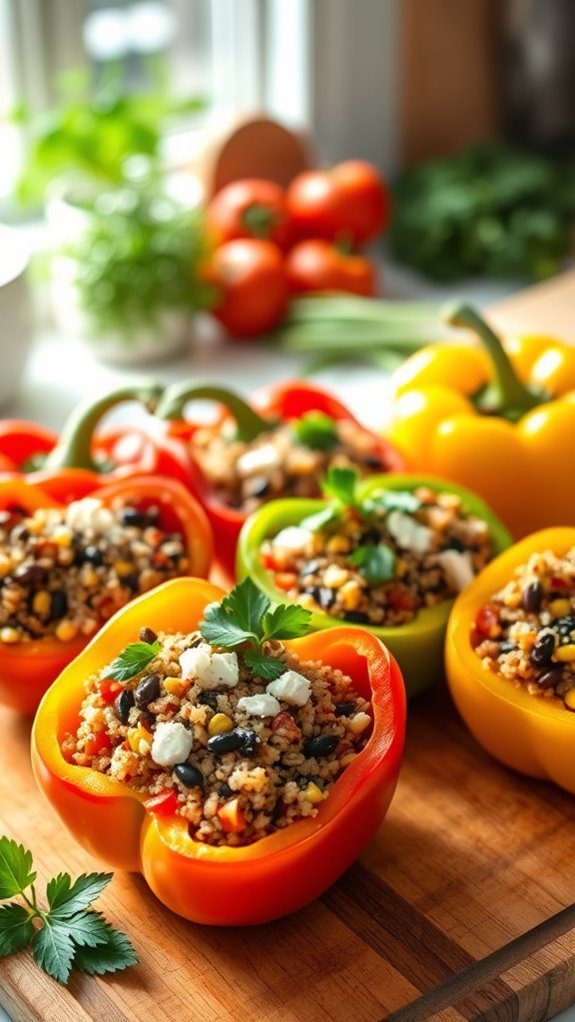
Vegetarian stuffed peppers are a vibrant and wholesome dish that serves as a perfect main course for plant-based eaters or a great side for any meal. They are packed with flavor, nutrients, and colorful vegetables, making them a delightful addition to any dinner table.
This dish takes approximately 30 minutes of preparation time and 30 minutes of cooking time, yielding a delightful and satisfying meal for family or guests.
Ingredients:
- 4 large bell peppers (any color)
- 1 cup cooked quinoa
- 1 can (15 oz) black beans, drained and rinsed
- 1 cup corn (fresh, frozen, or canned)
- 1 cup diced tomatoes
- 1 teaspoon chili powder
- 1 teaspoon cumin
- 1 teaspoon garlic powder
- Salt and pepper to taste
- 1 cup shredded cheese (cheddar or mozzarella)
- Fresh cilantro or parsley for garnish (optional)
Cooking Steps:
- Preheat your oven to 375°F (190°C).
- Cut the tops off the bell peppers and remove the seeds and membranes. Place them upright in a baking dish.
- In a large bowl, combine the cooked quinoa, black beans, corn, diced tomatoes, chili powder, cumin, garlic powder, salt, and pepper. Mix well to combine all the ingredients.
- Stuff each bell pepper with the quinoa mixture, pressing down lightly to pack the filling.
- Top each pepper with shredded cheese.
- Cover the baking dish with aluminum foil and bake in the preheated oven for 25 minutes.
- After 25 minutes, remove the foil and bake for an additional 5-10 minutes, or until the cheese is melted and bubbly.
- Remove from the oven and let cool for a few minutes before serving. Garnish with fresh cilantro or parsley if desired.
Variations & Tips:
- Feel free to add other vegetables like zucchini, spinach, or mushrooms to the filling for added nutrition.
- For a spicier kick, include diced jalapeños or a dash of hot sauce in the filling.
- To make it gluten-free, verify that the quinoa is certified gluten-free and choose gluten-free cheese options.
- You can prepare the filling ahead of time and store it in the fridge, then stuff the bell peppers just before baking.
- Leftover stuffed peppers can be stored in the refrigerator for up to 3 days, making them perfect for meal prep!
- 💰 REDUCE WASTE AND SAVE MONEY: Chef Preserve keeps FOOD FRESH 5 TIMES LONGER than non-vacuum storage...
- ✅ POWERFUL, QUICK & EASY TO USE: Simply press the button to start. The device vacuum seals a bag in 5...
- ♻️ REUSABLE & RESEALABLE BAGS: Chef Preserve comes with dishwasher, freezer, refrigerator, and...
Honey Garlic Shrimp and Broccoli
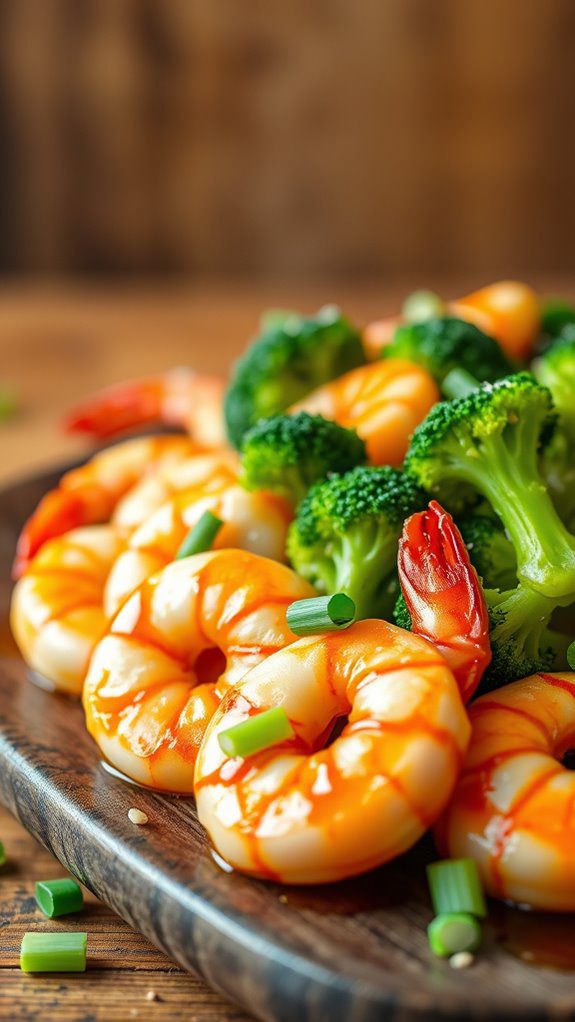
Honey Garlic Shrimp and Broccoli is a delightful, flavorful dish that combines tender shrimp with vibrant broccoli in a sweet and savory sauce. This quick and easy recipe is perfect for busy weeknights or a cozy dinner for two.
With a preparation time of just 20 minutes, it's not only delicious but also provides a healthy serving of protein and vegetables that everyone will love.
Ingredients:
- 1 lb large shrimp, peeled and deveined
- 2 cups broccoli florets
- 3 tablespoons honey
- 3 tablespoons soy sauce
- 2 cloves garlic, minced
- 1 tablespoon olive oil
- 1 teaspoon grated ginger (optional)
- Salt and pepper to taste
- Cooked rice (for serving, optional)
- Sesame seeds for garnish (optional)
Cooking Instructions:
1. Prepare the Sauce: In a small bowl, whisk together honey, soy sauce, minced garlic, and grated ginger (if using). Set aside.
2. Cook the Broccoli: In a large skillet, heat olive oil over medium-high heat. Add the broccoli florets and a splash of water, then cover the skillet to steam the broccoli for 3-4 minutes until bright green and tender-crisp.
Remove the lid and cook for an additional minute to evaporate any remaining water. Season with salt and pepper, then transfer the broccoli to a plate and set aside.
3. Cook the Shrimp: In the same skillet, add the shrimp and cook for 2-3 minutes on one side until pink, then flip and cook for another 1-2 minutes on the other side until fully cooked.
4. Combine Ingredients: Pour the prepared honey garlic sauce over the cooked shrimp and broccoli, tossing everything together to evenly coat.
Cook for another 1-2 minutes, allowing the sauce to slightly thicken.
5. Serve: Serve hot over cooked rice if desired, and garnish with sesame seeds for an added crunch.
Variations and Tips:
- Add Vegetables: Feel free to add bell peppers, snap peas, or carrots to the stir-fry for more variety.
- Protein Options: Swap shrimp for chicken, tofu, or tempeh for a different protein source.
- Gluten-Free Option: Use tamari instead of soy sauce for a gluten-free version.
- Spicy Kick: Add a pinch of red pepper flakes or sriracha to the sauce if you prefer a little heat.
- Meal Prep: This dish can be made in advance and stored in the fridge for up to two days; just reheat gently in a skillet before serving.
- Generous Capacity: 7-quart slow cooker that comfortably serves 9+ people or fits a 7-pound roast
- Cooking Flexibility: High or low slow cooking settings, with convenient warm function for ideal serving...
- Convenient: Set it and forget it feature enables you to cook while at work or performing daily tasks
One-Pan Lemon Herb Chicken and Asparagus

Ingredients:
- 4 bone-in, skin-on chicken thighs
- 1 bunch of asparagus, trimmed
- 3 tablespoons olive oil
- 2 tablespoons fresh lemon juice
- Zest of 1 lemon
- 3 cloves garlic, minced
- 1 teaspoon dried oregano
- 1 teaspoon dried thyme
- Salt and pepper, to taste
- Lemon wedges, for serving
- Fresh parsley, for garnish (optional)
Cooking Steps:
- Preheat your oven to 400°F (200°C).
- In a small bowl, whisk together olive oil, lemon juice, lemon zest, minced garlic, oregano, thyme, salt, and pepper.
- In a large oven-safe skillet, add the chicken thighs skin side up and drizzle half of the marinade over them, making sure they are well coated.
- Place the asparagus around the chicken in the skillet and pour the remaining marinade over the asparagus.
- Bake in the preheated oven for 25-30 minutes, or until the chicken's internal temperature reaches 165°F (75°C) and the skin is golden and crispy.
- Remove from oven, let rest for a few minutes, then serve with lemon wedges and a sprinkle of fresh parsley if desired.
Variations & Tips:
- For a low-carb variation, you can swap out asparagus for another vegetable like broccoli or green beans.
- Add cherry tomatoes or bell peppers for extra color and flavor.
- If you're short on time, you can marinate the chicken for just 15 minutes while you preheat the oven.
- Serve over quinoa, rice, or a salad for a complete meal.
- To make it a one-pan meal, consider adding potatoes or sweet potatoes, adjusting the cooking time accordingly to make sure everything is cooked through.
- 100% Leak-proof: Guaranteed no-spill seal and secure latches
- Crystal-clear Tritan Built: Stain-resistant and odor-resistant material for a clear view of contents
- Lightweight & Sturdy: Easy to carry, yet durable for everyday use
Spaghetti Aglio E Olio

Spaghetti Aglio E Olio is a classic Italian pasta dish that embodies simplicity and bold flavors. Perfect for a quick weeknight dinner or a late-night snack, this dish is a favorite among garlic lovers.
With a preparation time of around 20 minutes, it pairs beautifully with a glass of white wine and can easily be prepared for one or a group of friends.
Ingredients:
- 400g spaghetti
- 6 cloves garlic, thinly sliced
- ½ cup extra virgin olive oil
- 1 teaspoon red pepper flakes (adjust to taste)
- Salt, to taste
- Fresh parsley, chopped (for garnish)
- Grated Parmesan cheese (optional)
- Lemon zest (optional)
Cooking Steps:
- Boil the Pasta: Bring a large pot of salted water to a boil. Add the spaghetti and cook according to package instructions until al dente. Reserve about 1 cup of pasta water, then drain the spaghetti.
- Prepare the Garlic Oil: In a large skillet over medium heat, add the olive oil and sliced garlic. Sauté for 2-3 minutes until the garlic turns golden brown. Be careful not to burn it, as burnt garlic can become bitter.
- Add the Red Pepper Flakes: Once the garlic is ready, add the red pepper flakes and stir for about 30 seconds to release their flavor.
- Combine Pasta and Sauce: Add the drained spaghetti to the skillet and toss to combine with the garlic oil. If the pasta seems dry, gradually add the reserved pasta water until you reach the desired consistency.
- Season and Serve: Season with salt to taste and toss in the fresh parsley. For added flavor, you can sprinkle grated Parmesan cheese on top or lemon zest for a fresh twist. Serve immediately.
Variations and Tips:
- Protein Addition: You can enhance this dish by adding sautéed shrimp or grilled chicken for extra protein.
- Vegetarian Option: For a vegetarian twist, consider adding spinach or cherry tomatoes to the garlic oil just before adding the spaghetti.
- Extra Flavor: A touch of white wine can elevate the dish; just add it to the skillet after the garlic and red pepper flakes, allowing it to simmer for a minute before adding the pasta.
- Make it Vegan: Skip the Parmesan cheese or use a dairy-free alternative.
- Storage: Leftover spaghetti can be stored in an airtight container in the refrigerator for up to 3 days. Reheat gently on the stove with a splash of olive oil or pasta water.
- 𝗘𝗳𝗳𝗼𝗿𝘁𝗹𝗲𝘀𝘀 𝗪𝗲𝗶𝗴𝗵𝗶𝗻𝗴: Supports 5 units...
- 𝗣𝗿𝗲𝗰𝗶𝘀𝗲 𝗥𝗲𝘀𝘂𝗹𝘁𝘀: Accurately weighs up to 11 lb/5 kg with 1 g...
- 𝗦𝗶𝗺𝗽𝗹𝗲 & 𝗖𝗼𝗺𝗽𝗮𝗰𝘁: The small and sleek scale is a perfect fit for...
Chickpea Curry With Spinach
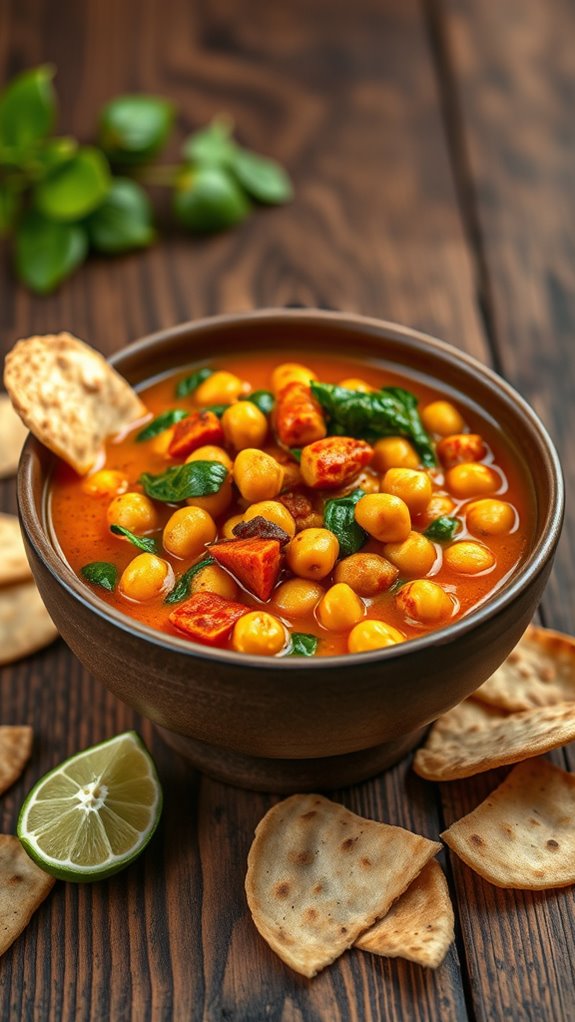
Chickpea Curry with Spinach is a hearty, flavorful vegetarian dish that showcases the vibrant spices of Indian cuisine. This recipe is perfect for those looking for a nutritious meal packed with protein and fiber, making it ideal for vegetarians, vegans, or anyone wanting to incorporate healthier options into their diet.
With a preparation time of about 10 minutes and a cooking time of 25 minutes, this dish can be ready to serve in just 35 minutes, perfect for a busy weeknight dinner.
Ingredients:
- 1 can (15 oz) chickpeas, drained and rinsed
- 2 cups fresh spinach, washed and roughly chopped
- 1 medium onion, diced
- 2 cloves garlic, minced
- 1-inch piece of ginger, grated
- 1 can (14 oz) coconut milk
- 1 tablespoon curry powder
- 1 teaspoon cumin
- 1 teaspoon turmeric
- 2 tablespoons vegetable oil
- Salt and pepper to taste
- Fresh cilantro (optional, for garnish)
- Cooked rice or quinoa (for serving)
Cooking Instructions:
- In a large skillet or saucepan, heat the vegetable oil over medium heat. Add the diced onion and sauté for about 5 minutes, or until translucent.
- Stir in the minced garlic and grated ginger, cooking for an additional 1-2 minutes until fragrant.
- Add the curry powder, cumin, and turmeric to the skillet, stirring well to coat the onions and cook for another minute.
- Pour in the coconut milk and bring to a simmer. Allow it to cook for about 5 minutes, stirring occasionally.
- Add the drained chickpeas and chopped spinach to the mixture. Stir well and let it simmer for an additional 10 minutes until the spinach is wilted and the flavors meld together.
- Season with salt and pepper to taste. If desired, garnish with fresh cilantro before serving.
- Serve the chickpea curry over cooked rice or quinoa for a complete meal.
Variations and Tips:
- For added heat, consider incorporating chopped green chilies or red pepper flakes.
- Experiment with adding other vegetables like bell peppers, zucchini, or carrots to the curry.
- If you prefer a thicker consistency, let the curry simmer longer with the lid off.
- This dish can be easily made in advance and stored in the refrigerator for up to 3 days. Reheat on the stove or in the microwave before serving.
- For extra richness, a squeeze of lime juice can be added right before serving to brighten the flavors.
- Instant Read Food Thermometer | Our instant read thermometer features a temperature probe and advanced,...
- Multi-Use | From bbq thermometer to baking thermometer, our digital food thermometer for cooking is...
- Easy-Read Digital Thermometer For Cooking | Large instant thermometer dial with bright blue backlight...
BBQ Chicken Quesadillas
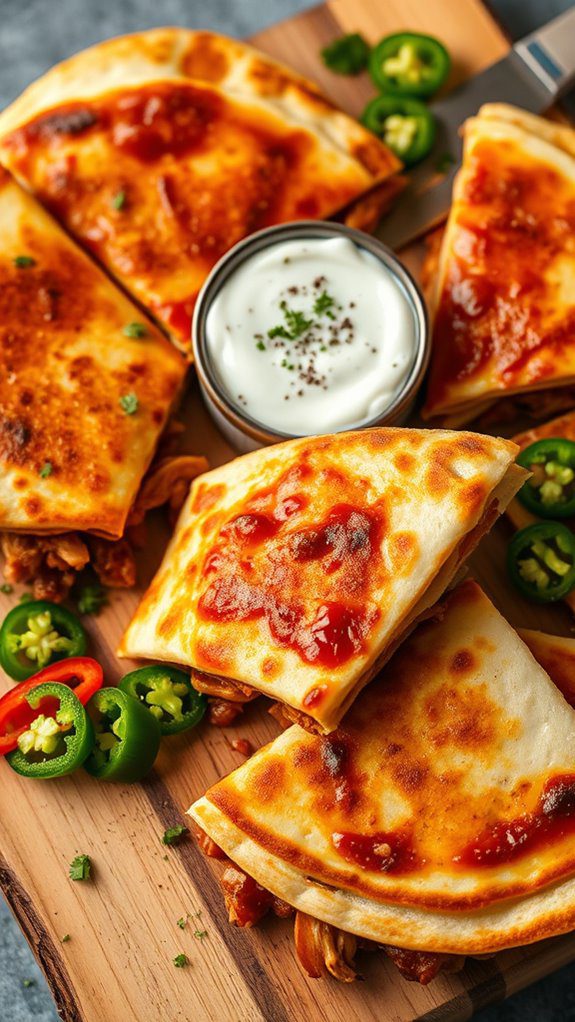
BBQ Chicken Quesadillas are a flavorful, satisfying dish perfect for family dinners or casual gatherings with friends.
With a preparation time of just 15 minutes and a cook time of about 10 minutes, these quesadillas are quick to whip up, making them ideal for busy weeknights or when you need a tasty meal on the table in no time. The BBQ sauce adds a smoky sweetness that pairs perfectly with tender shredded chicken and melted cheese, creating a delightful medley of flavors that everyone will love.
Ingredients:
- 2 cups cooked, shredded chicken
- 1 cup BBQ sauce
- 1 1/2 cups shredded cheddar cheese
- 1 cup shredded mozzarella cheese
- 4 large flour tortillas
- 2 tablespoons olive oil
- Fresh cilantro (optional, for garnish)
- Sour cream or guacamole (for serving)
Cooking Instructions:
- In a bowl, combine the shredded chicken and BBQ sauce, mixing well until the chicken is thoroughly coated.
- Heat a large skillet over medium heat and add 1 tablespoon of olive oil.
- Place one tortilla in the skillet and sprinkle half of the cheddar and mozzarella cheese over the tortilla.
- Evenly spread half of the BBQ chicken mixture on top of the cheese layer.
- Add an additional layer of cheese on top of the chicken and then place another tortilla on top.
- Cook for about 3-4 minutes or until the bottom tortilla is golden brown and the cheese starts to melt.
- Carefully flip the quesadilla using a spatula and add the remaining tablespoon of olive oil if needed. Cook the other side for another 3-4 minutes until golden brown and cheese is fully melted.
- Remove from the skillet and let it rest for a minute before cutting it into wedges.
- Repeat with the remaining ingredients.
- Serve warm, garnished with fresh cilantro and alongside sour cream or guacamole as a dip.
Variations and Tips:
- For a spicy twist, add jalapeño slices or a dash of hot sauce to the chicken mixture.
- You can also include sautéed onions, bell peppers, or corn for extra flavor and texture.
- Experiment with different types of cheese, such as pepper jack or feta, for unique taste profiles.
- These quesadillas can be made on a grill for a smoky flavor; just verify they are pressed down to get those nice grill marks.
- Leftover BBQ chicken can be frozen for future use, making meal prep even easier.
- Versatile 54-Piece Collection: Elevate your kitchen with the Home Hero 54-Piece Kitchen Utensil Set, a...
- Durable and Long-Lasting: Crafted from premium stainless steel, these kitchen utensils are designed to...
- Perfect Holiday Gift: Delight your loved ones with this kitchen utensils gift set this festive season....
Baked Ziti With Italian Sausage
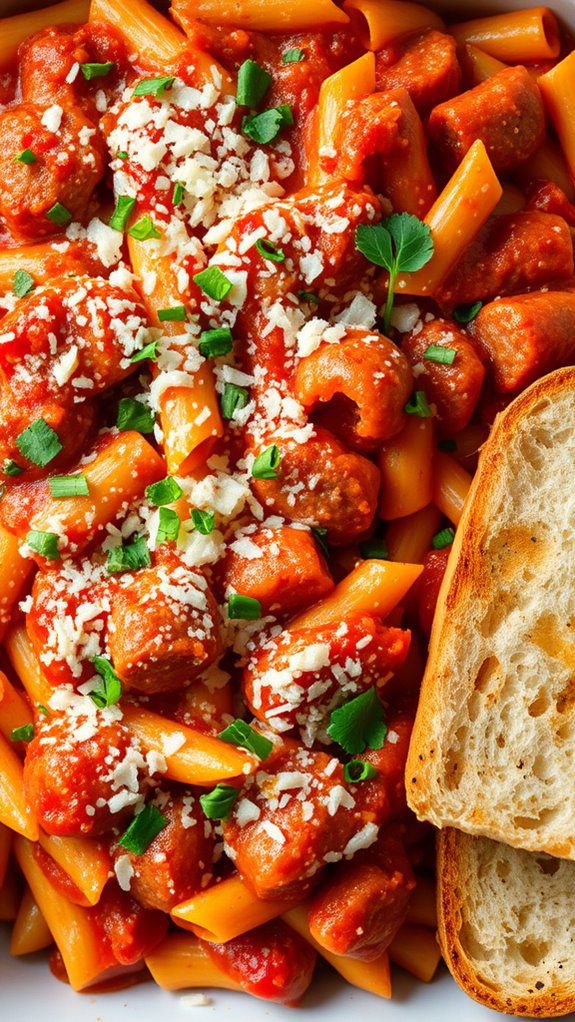
Baked Ziti with Italian Sausage is a delicious, comforting dish that's perfect for family dinners or gatherings with friends.
This Italian-American classic features pasta tossed with flavorful Italian sausage, marinara sauce, and a blend of gooey cheeses, all baked to perfection. With a prep time of about 20 minutes and a total cook time of around 40 minutes, this hearty meal is not only simple to prepare but also sure to satisfy everyone at the table.
Ingredients:
- 1 pound ziti pasta
- 1 pound Italian sausage (mild or spicy)
- 2 cups marinara sauce
- 1 cup ricotta cheese
- 2 cups shredded mozzarella cheese
- 1 cup grated Parmesan cheese
- 2 cloves garlic, minced
- 1 teaspoon Italian seasoning
- Salt and pepper to taste
- Fresh basil or parsley for garnish (optional)
Cooking Steps:
- Preheat your oven to 375°F (190°C).
- Cook the pasta: In a large pot of salted boiling water, cook the ziti according to package instructions until al dente. Drain and set aside.
- Cook the sausage: In a large skillet over medium heat, add the Italian sausage, breaking it apart with a spoon. Cook until browned and cooked through, about 5-7 minutes. Add the minced garlic and Italian seasoning, cooking for another minute until fragrant.
- Combine ingredients: In a large bowl, combine the cooked ziti, sausage mixture, marinara sauce, ricotta cheese, half of the mozzarella cheese, and salt and pepper. Mix until well combined.
- Assemble the dish: Pour the ziti mixture into a greased 9×13 inch baking dish. Spread evenly and top with the remaining mozzarella cheese and Parmesan cheese.
- Bake: Cover the dish with aluminum foil and bake for 20 minutes. Remove the foil and bake for an additional 10-15 minutes, or until the cheese is bubbly and golden brown.
- Garnish and serve: Let the baked ziti cool for a few minutes before garnishing with fresh basil or parsley (if desired) and serving.
Variations and Tips:
- Vegetarian Option: Substitute Italian sausage with sautéed mushrooms, zucchini, and bell peppers for a delicious vegetarian version.
- Cheese Variations: Feel free to use different types of cheese like provolone, fontina, or a blend of Italian cheeses for added flavor.
- Make Ahead: You can prepare the entire dish in advance and refrigerate it for up to a day before baking. Just let it sit at room temperature for about 30 minutes before placing it in the oven.
- Freezing: This dish freezes well; cover it tightly and store it in the freezer for up to 3 months. When ready to eat, thaw in the refrigerator overnight before baking.
- Extra Crunch: For a crunchy topping, consider mixing breadcrumbs with a little olive oil and sprinkling it over the cheese before baking.
- 24-ounce insulated stainless-steel water bottle with a FreeSip spout and push-button lid with lock
- Patented FreeSip spout designed for either sipping upright through the built-in straw or tilting back to...
- Protective push-to-open lid keeps spout clean; convenient carry loop doubles as a lock
Thai Peanut Noodle Salad
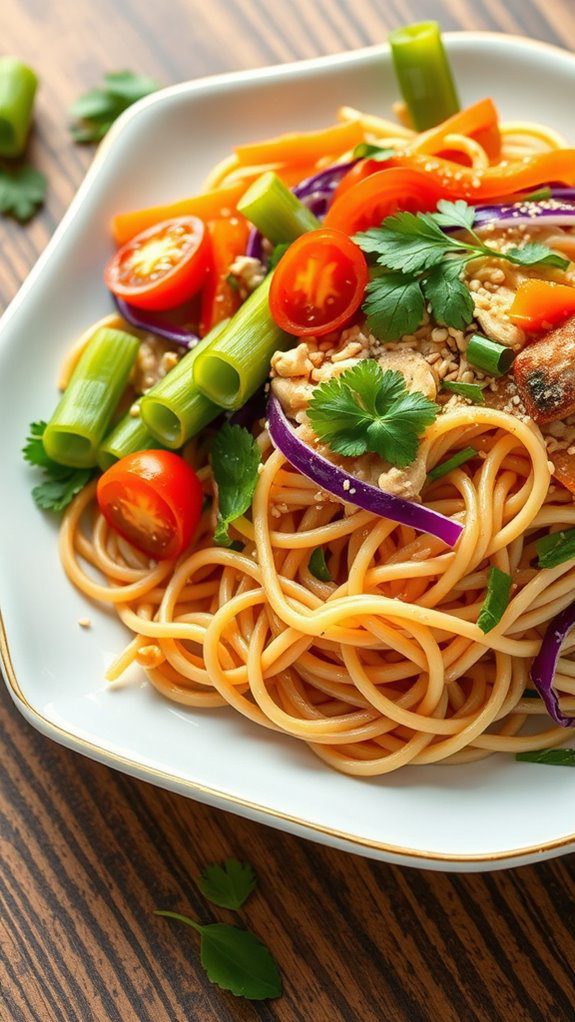
Thai Peanut Noodle Salad is a vibrant, flavorful dish that combines the nuttiness of peanuts with fresh vegetables and tender noodles, making it a perfect meal for warm weather or a quick weeknight dinner.
This dish is ideal for those who crave bold flavors and enjoy the balance of sweet, savory, and spicy notes. It can be made in just 30 minutes and serves as an excellent vegetarian option, suitable for gatherings, picnics, or light lunches.
Ingredients:
- 8 ounces rice noodles
- 1 cup shredded carrots
- 1 bell pepper, thinly sliced
- 1 cucumber, julienned
- 1 cup red cabbage, shredded
- 1/4 cup green onions, chopped
- 1/2 cup fresh cilantro, chopped
- 1/2 cup creamy peanut butter
- 3 tablespoons soy sauce
- 2 tablespoons lime juice
- 2 tablespoons honey or maple syrup
- 1 teaspoon sesame oil
- 1 teaspoon Sriracha (optional)
- Chopped peanuts for garnish
Cooking Steps:
- Cook the rice noodles according to package instructions. Drain and rinse under cold water to stop the cooking process. Set aside.
- In a large bowl, combine the shredded carrots, sliced bell pepper, julienned cucumber, shredded red cabbage, green onions, and chopped cilantro.
- In a separate bowl, whisk together the peanut butter, soy sauce, lime juice, honey (or maple syrup), sesame oil, and Sriracha (if using) until smooth and well combined.
- Add the drained noodles to the bowl of vegetables and pour the peanut dressing over the top. Toss gently to coat everything evenly in the dressing.
- Serve the salad in individual bowls, garnishing with chopped peanuts and additional cilantro if desired.
Variations & Tips:
- For a protein boost, add grilled chicken, shrimp, or tofu to the salad.
- You can substitute rice noodles with whole grain or soba noodles for a different flavor profile.
- If you prefer a crunchy texture, add bean sprouts or snap peas to the salad.
- Adjust the level of spiciness by adding more or less Sriracha based on your taste preference.
- This salad can be prepared in advance; simply store the dressing separately and toss before serving to keep the noodles and vegetables fresh.
Easy Beef Tacos

Beef tacos are a quintessential dish enjoyed by many, offering a delicious blend of flavors and textures wrapped in a warm tortilla. This recipe is perfect for a family dinner or a casual gathering with friends. With a preparation time of just 20 minutes, you can whip up a tasty meal that appeals to both adults and kids alike.
Ingredients:
- 1 pound ground beef
- 1 small onion, chopped
- 2 cloves garlic, minced
- 1 packet taco seasoning mix
- 2/3 cup water
- 8 taco shells (soft or hard)
- 1 cup shredded lettuce
- 1 cup diced tomatoes
- 1 cup shredded cheese (cheddar or your preference)
- 1/2 cup sour cream
- Optional: sliced jalapeños, salsa, avocado
Cooking Steps:
- In a skillet over medium heat, cook the chopped onion until translucent, about 3 minutes.
- Add minced garlic and ground beef to the skillet. Cook, breaking the beef up with a spatula, until browned and no pink remains, about 5-7 minutes.
- Drain excess fat if necessary, then stir in taco seasoning mix and water. Bring to a simmer, then reduce heat to low and let it cook for about 5 minutes until thickened.
- While the beef mixture is thickening, warm taco shells according to package instructions.
- To assemble tacos, fill each shell with the beef mixture. Top with shredded lettuce, diced tomatoes, shredded cheese, and a dollop of sour cream.
- Add any additional toppings such as jalapeños, salsa, or avocado as desired.
Variations and Tips:
- For a healthier option, substitute ground turkey or chicken for beef.
- Experiment with spices or add diced bell peppers and corn for an extra kick.
- You can use lettuce wraps instead of taco shells for a low-carb version.
- Set up a taco bar to let everyone customize their own tacos with their favorite toppings.
Vegetable Stir-Fry With Tofu
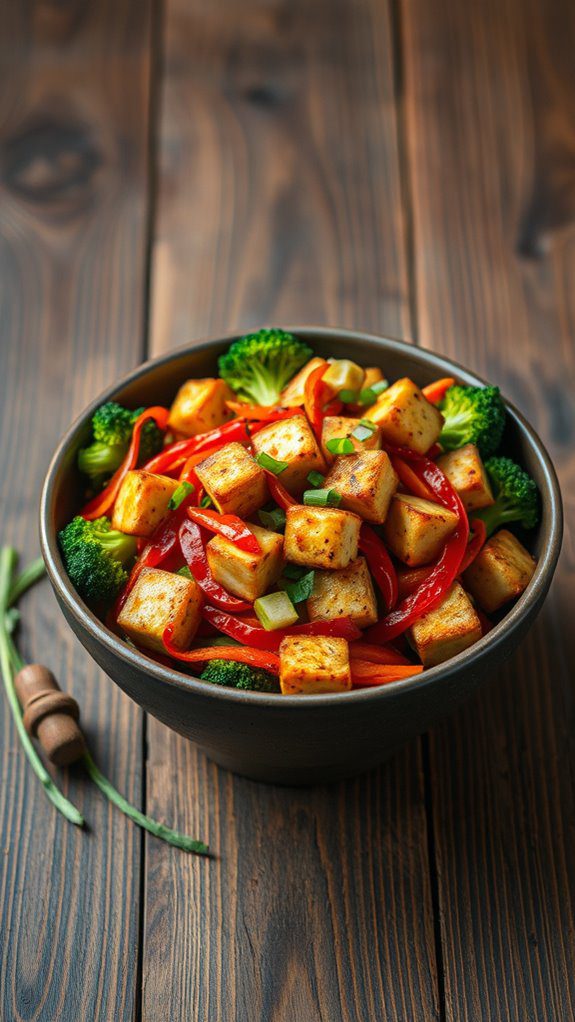
Vegetable Stir-Fry With Tofu is a vibrant and healthy dish that features a variety of colorful vegetables sautéed with crisp tofu and flavored with a delicious sauce. This dish is ideal for vegetarians, vegans, or anyone looking to add more plant-based meals to their diet.
It's quick to prepare, with a total cooking time of around 30 minutes, making it perfect for weeknight dinners or when you're short on time but still want a hearty and nutritious meal.
Ingredients:
- 1 block of firm tofu (14 oz), pressed and cubed
- 2 tablespoons soy sauce
- 1 tablespoon sesame oil
- 1 tablespoon vegetable oil
- 2 cloves garlic, minced
- 1-inch piece of ginger, minced
- 1 bell pepper, sliced
- 1 medium carrot, julienned
- 1 cup broccoli florets
- 1 cup snap peas
- 1 cup baby corn, sliced
- 2 green onions, chopped
- Sesame seeds for garnish (optional)
Cooking Instructions:
- Begin by pressing the tofu for about 15 minutes to remove excess moisture. Once pressed, cut the tofu into 1-inch cubes.
- In a large skillet or wok, heat the vegetable oil over medium-high heat. Add the cubed tofu and sauté until golden and crispy on all sides, about 8-10 minutes. Remove the tofu from the skillet and set aside.
- In the same skillet, add the sesame oil. Add the garlic and ginger, sautéing for about 30 seconds until fragrant.
- Add the sliced bell pepper, carrot, broccoli, snap peas, and baby corn to the skillet. Stir-fry the vegetables for about 5-7 minutes until they are tender but still crisp.
- Return the crispy tofu to the skillet and pour in the soy sauce, tossing everything together for another 2-3 minutes until heated through and well combined.
- Remove from heat and garnish with chopped green onions and sesame seeds if desired. Serve hot over steamed rice or noodles.
Variations and Tips:
- For a spicy kick, add red pepper flakes or sriracha sauce to the stir-fry.
- Substitute any vegetables you have on hand, like zucchini or mushrooms, for the ones listed in the recipe.
- You can marinate the tofu in soy sauce or your favorite marinade for 20 minutes prior to cooking for added flavor.
- For added protein, consider tossing in a handful of cooked chickpeas or edamame.
- If you're in a hurry, pre-cut frozen stir-fry vegetable mixes can be a great time-saver.
Wild Mushroom Risotto
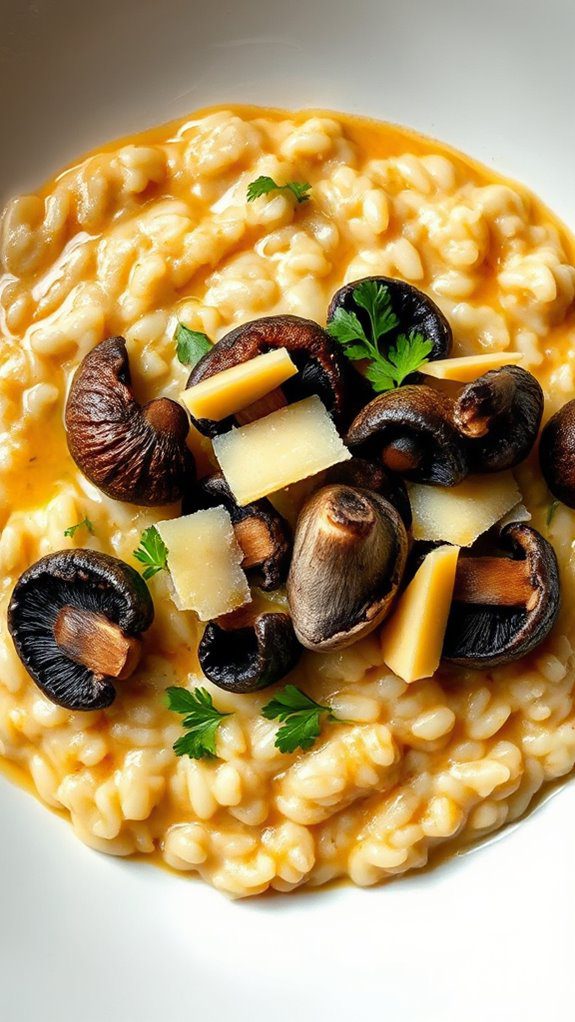
Wild Mushroom Risotto is a creamy, comforting Italian dish that brings together the earthiness of assorted mushrooms and the richness of Arborio rice. Ideal for mushroom lovers and anyone looking for a gourmet meal that feels fancy yet is surprisingly easy to prepare, this dish takes about 30 to 40 minutes to make.
Perfect for a dinner party or a cozy family meal, it's sure to impress with its luscious texture and deep flavors.
Ingredients:
- 1 cup Arborio rice
- 4 cups vegetable or chicken broth
- 1 cup wild mushrooms (such as shiitake, chanterelles, or oyster mushrooms), cleaned and sliced
- 1 medium onion, finely chopped
- 2 cloves garlic, minced
- 1/2 cup dry white wine
- 1/2 cup grated Parmesan cheese
- 2 tablespoons olive oil
- 1 tablespoon butter
- Salt and pepper, to taste
- Fresh parsley, chopped, for garnish
Cooking Steps:
- In a saucepan, heat the broth over low heat to keep it warm while you cook the risotto.
- In a large skillet, heat the olive oil and butter over medium heat. Add the chopped onion and cook until translucent, about 4-5 minutes.
- Stir in the minced garlic and sliced mushrooms, cooking until the mushrooms are tender and any liquid has evaporated, about 5-7 minutes.
- Add the Arborio rice to the skillet, stirring for about 1-2 minutes until the grains are coated and slightly toasted.
- Pour in the white wine, allowing it to simmer and absorb into the rice, stirring occasionally.
- Begin adding the warm broth, one ladle at a time, to the rice. Stir continuously, allowing the rice to absorb the liquid before adding more. This process should take about 18-20 minutes until the rice is al dente and creamy.
- Once the rice is cooked, remove from heat and stir in the Parmesan cheese, seasoning with salt and pepper to taste.
- Serve hot, garnished with fresh chopped parsley.
Variations and Tips:
- Mushroom Types: Feel free to mix and match different mushrooms based on availability or preference. Dried mushrooms can also be used; just rehydrate them in boiling water before adding.
- Flavor Boost: Adding a splash of truffle oil just before serving can elevate the dish and offer a luxurious flavor.
- Vegetarian Option: Use vegetable broth instead of chicken broth, and omit any non-vegetarian garnishes.
- Additional Ingredients: Consider adding cooked peas or asparagus for added color and nutrition. Sautéed spinach can also be a great option for extra greens.
- Reheating: Risotto is best served fresh, but if you have leftovers, reheat it on low heat with a splash of broth to restore the creamy texture.
Teriyaki Salmon With Rice

Teriyaki Salmon with Rice is a flavorful and nutritious dish that seamlessly combines tender salmon fillets marinated in a sweet and savory teriyaki sauce, paired with fluffy rice. This dish is perfect for a quick weeknight dinner or to impress guests at a gathering.
With a preparation time of about 30 minutes, it's an easy, healthy option that packs delicious flavors that will satisfy any seafood lover.
Ingredients:
- 4 salmon fillets
- 1/2 cup teriyaki sauce
- 2 cups cooked rice (white or brown)
- 2 tablespoons vegetable oil
- 1 tablespoon sesame seeds (optional, for garnish)
- 2 green onions, sliced (optional, for garnish)
- Steamed broccoli or mixed vegetables (optional, for serving)
Cooking Steps:
- Marinate the Salmon: In a zip-top bag or shallow dish, combine the salmon fillets with 1/2 cup of teriyaki sauce. Verify the fillets are well-coated. Marinate in the refrigerator for at least 15 minutes (up to 1 hour for more flavor).
- Cook the Rice: While the salmon is marinating, prepare the rice according to package instructions.
- Heat the Oil: In a large skillet, heat the vegetable oil over medium heat.
- Cook the Salmon: Remove the salmon from the marinade (reserve the marinade) and place the fillets in the hot skillet, skin-side down. Cook for about 4-5 minutes, then flip the fillets and cook for an additional 3-4 minutes, or until the salmon is cooked through and flakes easily with a fork.
- Add Marinade: Pour the reserved marinade over the cooked salmon and cook for another 1-2 minutes, allowing the sauce to thicken slightly and coat the fish.
- Plate the Dish: Serve the teriyaki salmon over a bed of warm rice. Drizzle any remaining teriyaki sauce from the skillet over the top.
- Garnish: Sprinkle with sesame seeds and sliced green onions for added flavor and presentation. Serve with steamed broccoli or mixed vegetables on the side if desired.
Variations and Tips:
- Add Spice: For a spicy kick, add a splash of sriracha or some crushed red pepper flakes to the marinade.
- Alternate Proteins: This recipe works well with chicken or tofu for a different protein source.
- Vegetable Medley: Toss in bell peppers, snap peas, or carrots in the skillet to stir-fry along with the salmon for a one-pot meal.
- Make Ahead: Marinate the salmon in the morning or the night before for a deeper flavor.
- Storage: Leftover salmon can be stored in an airtight container in the fridge for up to 2 days; reheat gently to avoid drying out.
Enjoy your delicious Teriyaki Salmon with Rice, a dish that's sure to please!
Chicken Alfredo Pasta Bake

Chicken Alfredo Pasta Bake is a creamy, comforting dish that combines tender pasta, savory chicken, and a rich Alfredo sauce, all baked to golden perfection. This dish is ideal for families and gatherings, as it serves well and is packed with flavor that appeals to both adults and children.
The preparation time is approximately 20 minutes, with an additional 30 minutes for baking, making it perfect for weeknight dinners or meal prep for the week ahead.
Ingredients:
- 2 cups cooked pasta (penne or rotini work well)
- 2 cups cooked, shredded chicken
- 2 cups Alfredo sauce (store-bought or homemade)
- 1 cup shredded mozzarella cheese
- 1 cup grated Parmesan cheese
- 1 teaspoon garlic powder
- 1 teaspoon Italian seasoning
- Salt and pepper to taste
- Fresh parsley for garnish (optional)
Cooking Steps:
- Preheat your oven to 350°F (175°C).
- In a large mixing bowl, combine the cooked pasta, shredded chicken, Alfredo sauce, garlic powder, Italian seasoning, and salt and pepper. Stir until everything is well coated.
- Transfer the mixture into a greased 9×13-inch baking dish. Spread it out evenly.
- Top the pasta mixture with shredded mozzarella and grated Parmesan cheese.
- Bake in the preheated oven for 25-30 minutes, until the cheese is bubbly and golden brown.
- Remove from the oven and let it cool for a few minutes before serving. Garnish with fresh parsley, if desired.
Variations:
- Vegetarian Option: Substitute the chicken with roasted vegetables or sautéed mushrooms for a vegetarian dish.
- Add Spice: For those who enjoy a kick, add red pepper flakes or hot sauce to the mixture before baking.
- Different Sauces: Try using a basil pesto sauce instead of Alfredo for a different flavor profile.
Tips:
- If you're using leftover chicken, this dish is a great way to repurpose it and save time.
- Confirm your pasta is cooked al dente as it will continue to cook while baking.
- For creamier results, you can add a splash of heavy cream or milk to the Alfredo sauce before mixing in the pasta and chicken.
- Leftovers can be stored in an airtight container in the fridge for up to three days and make for an easy reheat!


