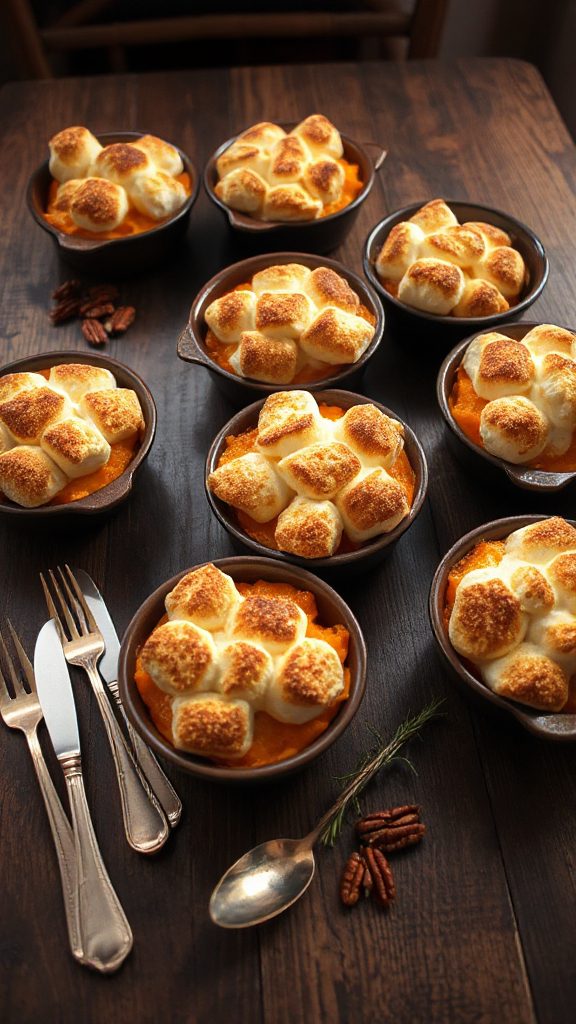
College students often turn to microwave meals for quick and satisfying options. Favorites include Microwave Mac and Cheese, which can be whipped up in just a few minutes, and Instant Ramen Noodles, ideal for busy nights. Other popular choices feature microwave quesadillas, veggie steamer bag meals, and nachos. These meals require minimal ingredients and equipment, making them perfect for dorm life. For a wider array of easy meal ideas, the possibilities are endless.
Microwave Mac and Cheese
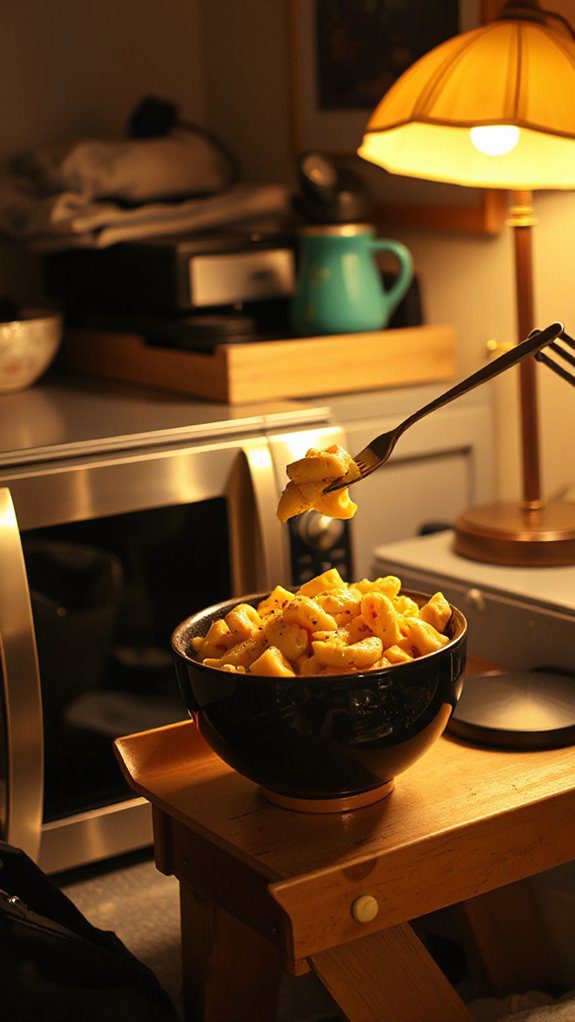
Microwave Mac and Cheese is a quick and easy dish that’s perfect for college students living in dorm rooms.
It’s a comfort food classic that satisfies cravings without requiring extensive cooking skills or kitchen equipment.
With a preparation time of just about 5 to 10 minutes, this single-serving meal will keep you fueled for those late-night study sessions or busy days on campus.
Ingredients:
- 1/2 cup elbow macaroni
- 1/2 cup water
- 1/4 cup shredded cheddar cheese
- 1 tablespoon milk (optional)
- Salt and pepper to taste
- Optional toppings (e.g., crushed red pepper, bacon bits, or chopped scallions)
Cooking Steps:
1. In a microwave-safe bowl, combine the elbow macaroni and water.
Make sure the water covers the pasta completely.
2. Microwave on high for about 2 to 3 minutes, checking for doneness.
If necessary, cook in additional 30-second intervals until the macaroni is tender.
3. Carefully remove the bowl from the microwave (it will be hot).
Stir in the shredded cheddar cheese and milk, if using.
4. Return the bowl to the microwave and heat for an additional 30 seconds until the cheese is melted.
Stir to combine.
5. Season with salt and pepper to taste.
Add any optional toppings if desired. Serve warm and enjoy!
Variations and Tips:
- For a creamier version, increase the amount of milk to 2 tablespoons.
- Mix in cooked vegetables like peas or broccoli for added nutrition.
- Experiment with different cheese types such as mozzarella, pepper jack, or a cheese blend for varied flavors.
- Add protein like cooked diced chicken or canned tuna for a more filling meal.
- Use flavored or specialty mac and cheese varieties if you want to switch things up.
- The Original Pro Chopper - Our superstar veggie slicer has been creating waves on TikTok! Simple to use,...
- Easy Meal Prep with Rust-Resistant Blades - Our vegetable chopper is perfect for anyone who wants to eat...
- 5-Star Design - The soft-grip TPU handle ensures controlled chopping, while the non-skid rubber base...
Instant Ramen Noodles
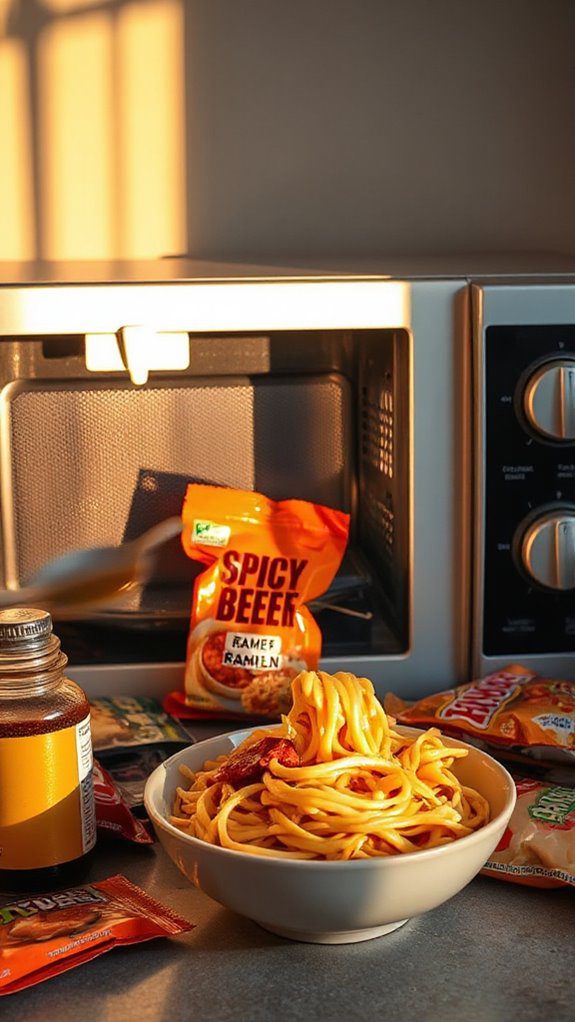
Instant Ramen Noodles are a quintessential go-to meal for college students, offering quick, satisfying sustenance with minimal effort required. With a preparation time of just 3-5 minutes, this dish is perfect for those busy study nights or late-night cravings.
Using a microwave, you can enhance the classic ramen experience by adding flavor boosters or toppings that are easily accessible in a dorm room setting.
Ingredients:
- 1 package of instant ramen noodles (any flavor)
- 2 cups water
- Optional toppings (e.g. sliced green onions, a boiled egg, cooked vegetables, hot sauce, or cheese)
- Soy sauce or seasoning packet (included in ramen package)
Cooking Instructions:
- Prepare the Water: Pour 2 cups of water into a microwave-safe bowl.
- Add Noodles: Add the ramen noodles to the water, ensuring they are submerged.
- Microwave: Set the microwave to high heat and cook for about 3-4 minutes. Watch closely to prevent boil-over.
- Stir: Carefully remove the bowl from the microwave (it will be hot!). Use a spoon to gently stir the noodles to separate them.
- Add Seasoning: Add the seasoning packet from the ramen package to the noodles and mix well. If desired, add soy sauce for extra flavor.
- Add Toppings: Incorporate any optional toppings you like and stir them in.
- Let It Sit: Allow the noodles to cool for 1-2 minutes before eating.
Variations and Tips:
- Protein Boost: Scramble an egg in a separate bowl and microwave it for about 30 seconds before mixing it into your ramen for added protein.
- Vegetable Delight: Toss in frozen or fresh vegetables such as peas, carrots, or spinach at the start of cooking for a nutritious upgrade.
- Spicy Kick: For those who enjoy heat, add a dash of hot sauce or sriracha to your ramen.
- Cheesy Indulgence: Stir in a slice of cheese or a handful of shredded cheese after removing the bowl from the microwave for a creamy texture.
- Make it a Meal: Pair your ramen with a side of fruit or yogurt to create a well-rounded meal.
With these simple steps and tips, you can elevate your instant ramen noodles from a basic dish to a more satisfying and fulfilling meal right from your dorm room!
- Makes Everything Simple : Just forget your bagged cheese! Only turn the handle for several times and get...
- Premium Material : All parts of the rotary cheese grater are made of food grade ABS material, no BPA. The...
- Three Option Grater : The parmesan cheese grater finishes food preparation with slicing, shredding and...
Microwave Quesadilla
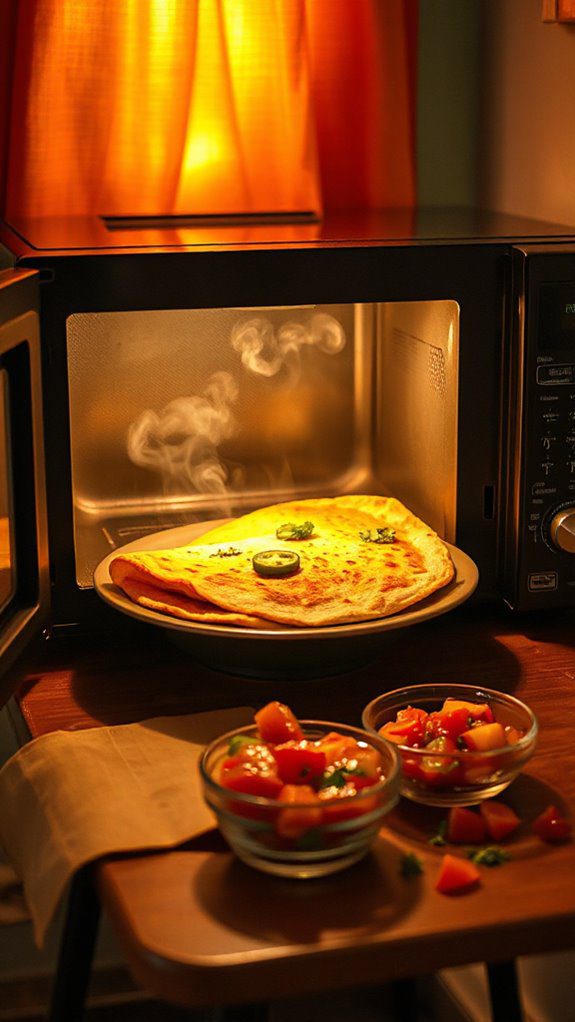
Microwave quesadillas are a quick and easy meal option perfect for busy college students craving a delicious snack or lunch. They can be made in just about 5 minutes with minimal ingredients, making them a fantastic go-to for those late-night cravings or a quick meal between classes.
This versatile dish allows for creativity, letting you mix and match ingredients based on your preferences or what you have on hand.
Ingredients:
- 1 large flour tortilla
- 1 cup shredded cheese (cheddar, mozzarella, or a blend)
- Optional fillings: cooked chicken, black beans, bell peppers, onions, jalapeños, or corn
- Salsa or sour cream for serving
Cooking Steps:
- Lay the flour tortilla flat on a microwave-safe plate.
- Sprinkle the shredded cheese evenly over half of the tortilla.
- Add your choice of optional fillings on top of the cheese.
- Fold the tortilla in half, covering the fillings.
- Microwave on high for about 1-2 minutes, or until the cheese is melted and the tortilla is warm.
- Carefully remove the plate from the microwave (it may be hot!) and let it cool for a few seconds.
- Cut the quesadilla into wedges and serve with salsa or sour cream.
Variations and Tips:
- Experiment with different types of cheese for unique flavors, like pepper jack for a spicy kick.
- Use leftover cooked meats or beans to make the quesadilla more filling.
- Add fresh herbs like cilantro or green onions after cooking for extra freshness.
- If you have a non-microwave option, consider using a skillet for a crispy finish.
- Feel free to customize your quesadilla with your favorite toppings or dips to suit your taste preferences.
- 💰 REDUCE WASTE AND SAVE MONEY: Chef Preserve keeps FOOD FRESH 5 TIMES LONGER than non-vacuum storage...
- ✅ POWERFUL, QUICK & EASY TO USE: Simply press the button to start. The device vacuum seals a bag in 5...
- ♻️ REUSABLE & RESEALABLE BAGS: Chef Preserve comes with dishwasher, freezer, refrigerator, and...
Veggie Steamer Bag Meal

A veggie steamer bag meal is a quick, healthy, and convenient option for college students looking to whip up a nutritious dish in their dorm room. This recipe is particularly ideal for those who want to load up on vegetables without spending too much time cooking or cleaning, taking only about 10-15 minutes of total preparation and cooking time.
Using steamable bags allows you to preserve the flavors and nutrients of the vegetables, making it a delicious and health-conscious choice.
Ingredients:
- 1 steamer bag of mixed vegetables (such as broccoli, carrots, and cauliflower)
- 1 tablespoon of olive oil (optional)
- Salt and pepper, to taste
- Optional seasonings (like garlic powder, onion powder, or lemon juice)
- Grated cheese, nuts, or seeds for topping (optional)
Cooking Instructions:
- Begin by removing the steamer bag from its packaging and placing it in a microwave-safe bowl.
- If desired, drizzle the olive oil over the vegetables in the bag for added flavor.
- Season the vegetables with salt, pepper, and any additional spices or seasonings you prefer.
- Seal the bag according to the package instructions, typically folding the top over to prevent steam from escaping.
- Place the bowl in the microwave and cook on high for 4-6 minutes, depending on your microwave’s wattage and how tender you want the vegetables to be.
- Carefully remove the bowl from the microwave (it will be hot!), and let it sit for a minute to avoid burns from escaping steam.
- Open the bag, stir the veggies gently, and transfer to a serving plate. Top with grated cheese or nuts/seeds if you like.
- Serve warm and enjoy!
Variations and Tips:
- You can mix different steamer bags, such as adding a steamer bag of rice or quinoa for a more filling meal.
- Experiment with various seasonings like soy sauce, balsamic vinegar, or hot sauce for a flavor twist.
- Consider adding pre-cooked protein like grilled chicken, tofu, or beans to make it a complete meal.
- When preparing a larger batch, be sure to adjust the cooking time accordingly and use multiple bags as needed.
- Check your microwave’s wattage; if it’s lower than average, you may need to increase cooking time slightly.
- Generous Capacity: 7-quart slow cooker that comfortably serves 9+ people or fits a 7-pound roast
- Cooking Flexibility: High or low slow cooking settings, with convenient warm function for ideal serving...
- Convenient: Set it and forget it feature enables you to cook while at work or performing daily tasks
Microwaveable Rice Bowls
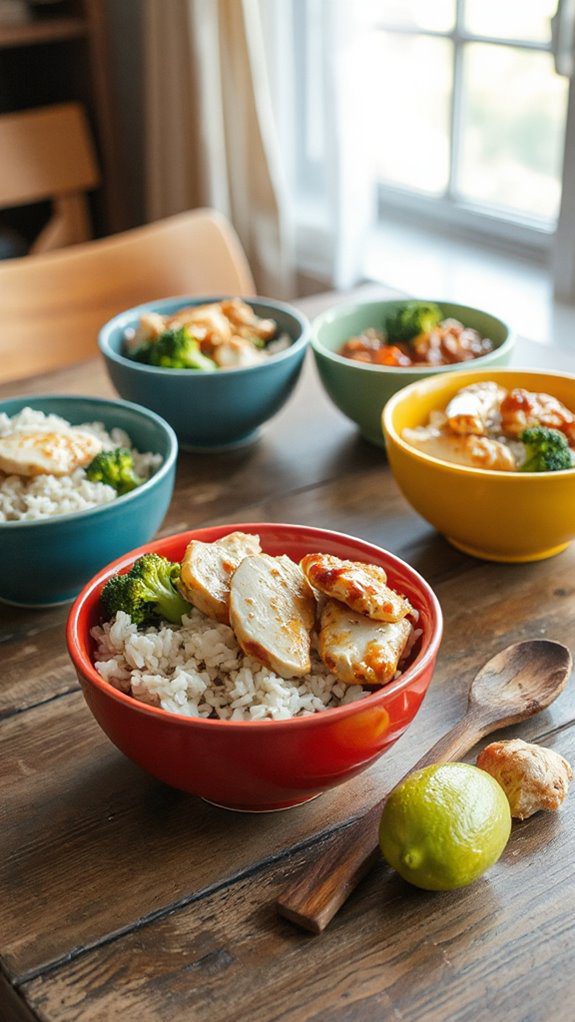
Microwaveable rice bowls are a quick and convenient meal option perfect for college students living in dorms. These one-dish meals are nutrient-rich and can be customized to suit varied tastes and dietary preferences. With minimal preparation time, typically around 5 to 10 minutes, rice bowls are ideal for students looking for satisfying meals without the hassle of extensive cooking.
Ingredients:
- 1 cup instant brown or white rice
- 1 cup water or broth (vegetable, chicken, or beef)
- 1 cup mixed frozen vegetables (e.g., peas, carrots, corn, bell peppers)
- ½ cup cooked protein (e.g., diced chicken, tofu, or beans)
- 2 tablespoons soy sauce or teriyaki sauce
- Optional toppings: sliced green onions, sesame seeds, sriracha, or hot sauce
Cooking Steps:
- In a microwave-safe bowl, combine the instant rice and water or broth. Stir briefly to verify the rice is evenly dispersed.
- Cover the bowl with a microwave-safe lid or vented plastic wrap to prevent splatter.
- Microwave on high for 4-5 minutes, or until the water is absorbed and the rice is tender.
- Carefully remove the bowl from the microwave (it will be hot) and fluff the rice with a fork.
- Add the mixed frozen vegetables and cooked protein to the rice, and drizzle with soy sauce or teriyaki sauce.
- Cover the bowl again and microwave for an additional 2-3 minutes, or until the vegetables are heated through.
- Stir everything together for even distribution.
- Top with optional ingredients such as sliced green onions, sesame seeds, or a drizzle of sriracha before serving.
Variations and Tips:
- Vegetarian/Vegan Option: Replace meat with additional beans, lentils, or chickpeas for protein without the meat.
- Spice It Up: Add spices like garlic powder, ginger, or red pepper flakes to give your rice bowl an extra kick.
- Flavor Enhancement: Use flavored broth instead of water, or consider adding a tablespoon of peanut butter for a creamy texture and flavor.
- Pre-Preparation: Cook and store proteins or vegetables in advance to save time during the week. You can also prepare larger batches of rice to use across several meals.
- Meal Prep: Create a week’s worth of rice bowls by prepping ingredients in advance and storing them in separate containers; just mix and heat when you’re ready to eat!
- 100% Leak-proof: Guaranteed no-spill seal and secure latches
- Crystal-clear Tritan Built: Stain-resistant and odor-resistant material for a clear view of contents
- Lightweight & Sturdy: Easy to carry, yet durable for everyday use
Scrambled Eggs in a Mug
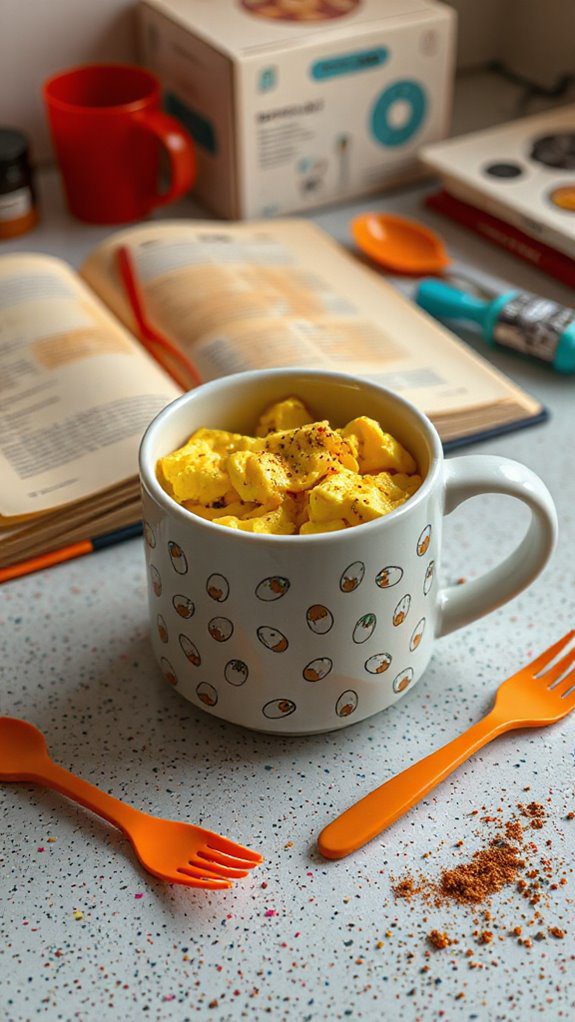
Scrambled Eggs in a Mug is a quick, protein-packed dish that’s perfect for college students looking for a fast and nutritious meal option in their dorm rooms.
Ready in just 2-3 minutes, this simple microwave recipe is excellent for breakfast, lunch, or even a late-night snack. Not only is it easy to make, but it’s also customizable with a variety of add-ins to suit your taste preferences.
Ingredients:
- 2 large eggs
- 2 tablespoons milk (or water)
- Salt and pepper to taste
- Optional toppings: shredded cheese, diced vegetables (e.g., bell peppers, spinach, tomatoes), cooked ham or bacon, herbs (e.g., chives, parsley)
Cooking Steps:
- In a microwave-safe mug, crack the two eggs, and add the milk or water.
- Using a fork, whisk the eggs and liquid together until fully combined. Add a pinch of salt and pepper according to your taste.
- If you are adding any optional toppings, stir them into the egg mixture at this point.
- Place the mug in the microwave and cook on high for 30 seconds.
- After 30 seconds, remove the mug and give the eggs a good stir.
- Return the mug to the microwave and cook for another 30 seconds.
- Check if the eggs are done; they should be fluffy and fully cooked. If necessary, microwave for an additional 10-15 seconds until they reach your desired consistency.
- Carefully remove the mug from the microwave (it will be hot) and let it cool for a minute before enjoying your scrambled eggs.
Variations & Tips:
- To give your scrambled eggs a spicy kick, add a dash of hot sauce or diced jalapeños before cooking.
- For a creamier texture, substitute the milk with cream or sour cream.
- Experiment with different cheeses for varied flavors—cheddar, feta, or mozzarella work particularly well.
- Make sure to keep an eye on the mug while microwaving to prevent any egg overflow, as microwaves can vary in power.
- 𝗘𝗳𝗳𝗼𝗿𝘁𝗹𝗲𝘀𝘀 𝗪𝗲𝗶𝗴𝗵𝗶𝗻𝗴: Supports 5 units...
- 𝗣𝗿𝗲𝗰𝗶𝘀𝗲 𝗥𝗲𝘀𝘂𝗹𝘁𝘀: Accurately weighs up to 11 lb/5 kg with 1 g...
- 𝗦𝗶𝗺𝗽𝗹𝗲 & 𝗖𝗼𝗺𝗽𝗮𝗰𝘁: The small and sleek scale is a perfect fit for...
Mug Pizza

Mug pizza is a quick and satisfying dish perfect for college students craving a delicious pizza fix without the hassle of ordering delivery.
This microwave meal takes just about 5-10 minutes to prepare and cook, making it an ideal snack or meal for busy students looking for an easy and tasty treat.
With its customizable toppings and simple ingredients, you can enjoy a personal-sized pizza that fits right in your dorm room mug!
Ingredients:
- 4 tablespoons all-purpose flour
- ¼ teaspoon baking powder
- ¼ teaspoon salt
- 3 tablespoons milk
- 1 tablespoon olive oil
- 2 tablespoons pizza sauce
- 2 tablespoons shredded mozzarella cheese
- Toppings of choice (e.g., pepperoni, bell peppers, olives, mushrooms, etc.)
Cooking Steps:
- In a microwave-safe mug, combine the flour, baking powder, and salt. Mix well.
- Add the milk and olive oil to the dry ingredients, stirring until you have a smooth batter. Confirm there are no lumps.
- Spoon the pizza sauce into the mug, spreading it evenly over the batter.
- Sprinkle the shredded mozzarella cheese over the sauce and then add your desired toppings.
- Place the mug in the microwave and cook on high for about 1 to 1.5 minutes. Keep an eye on it to avoid overflowing; microwave times may vary.
- Once done, let it cool for a minute before enjoying your delicious mug pizza!
Variations and Tips:
- Experiment with different cheeses like cheddar or feta for a unique flavor twist.
- For a spicier kick, add crushed red pepper flakes or jalapeños as toppings.
- Consider precooking any raw toppings (like sausage or vegetables) if they require longer cooking times.
- Serve with a side salad or some crunchy veggies for a balanced meal.
- Always use a large enough mug to prevent overflowing, as the pizza will rise while cooking.
- Instant Read Food Thermometer | Our instant read thermometer features a temperature probe and advanced,...
- Multi-Use | From bbq thermometer to baking thermometer, our digital food thermometer for cooking is...
- Easy-Read Digital Thermometer For Cooking | Large instant thermometer dial with bright blue backlight...
Popcorn

Popcorn is a classic snack that’s perfect for college students looking for a quick, easy, and satisfying treat between classes or late-night study sessions. This microwave popcorn recipe can be prepared in just about 5 minutes, making it an ideal choice for those with busy schedules who still want a delicious and crunchy snack.
Whether you’re hosting a movie night or just craving something salty, this simple dish is always a favorite.
Ingredients:
- 1/4 cup popcorn kernels
- 1 tablespoon vegetable oil (optional)
- Salt (to taste)
- Butter (melted, optional)
- Additional seasonings (optional, such as cheese powder, garlic powder, or cinnamon sugar)
Cooking Steps:
- Place the popcorn kernels in a microwave-safe bowl. If you want a richer flavor, add the vegetable oil and stir to coat the kernels.
- Cover the bowl with a microwave-safe plate or use a microwave popcorn lid to prevent the kernels from popping out.
- Microwave on high for about 2-4 minutes. Listen closely for the popping to slow down to 2-3 seconds between pops, then stop the microwave to avoid burning the popcorn.
- Carefully remove the bowl from the microwave (it will be hot), and let it sit for a minute.
- Once cooled slightly, uncover and season with salt or drizzle with melted butter, as desired.
- Toss the popcorn to guarantee even coverage of seasonings. Enjoy!
Variations & Tips:
- Experiment with different flavorings by adding seasonings before microwaving. Try adding chocolate chips for a sweet twist or taco seasoning for a savory kick.
- For a healthy option, pop the corn without oil and season with your favorite herbs and spices post-cooking.
- If you don’t have popcorn kernels, many grocery stores also offer microwave popcorn bags that are pre-seasoned for even quicker convenience; just follow the package instructions.
- To store leftovers, place any uneaten popcorn in an airtight container to maintain freshness.
Enjoy your homemade snack anytime!
- Versatile 54-Piece Collection: Elevate your kitchen with the Home Hero 54-Piece Kitchen Utensil Set, a...
- Durable and Long-Lasting: Crafted from premium stainless steel, these kitchen utensils are designed to...
- Perfect Holiday Gift: Delight your loved ones with this kitchen utensils gift set this festive season....
Microwave Sweet Potato

Microwave Sweet Potato is a simple and nutritious dish that serves as an excellent meal or side for college students looking for a healthy option that fits into their busy schedules.
This dish is perfect for those who want a filling and wholesome meal in just a matter of minutes, with a preparation time of about 5 minutes and a cooking time of around 5-7 minutes. Sweet potatoes are rich in vitamins, fiber, and antioxidants, making them an ideal choice for a quick, satisfying, and health-conscious meal.
Ingredients:
- 1 medium sweet potato
- Salt (to taste)
- Freshly ground black pepper (optional)
- Olive oil or butter (optional)
- Cinnamon (optional, for a sweet version)
- Toppings of choice (e.g., Greek yogurt, marshmallows, nuts, etc.)
Cooking Steps:
- Start by thoroughly washing the sweet potato under running water to remove any dirt. Pat it dry with a paper towel.
- Using a fork, poke several holes into the sweet potato to allow steam to escape during cooking.
- Place the sweet potato on a microwave-safe plate and microwave on high for 5-7 minutes, flipping it halfway through the cooking time. The sweet potato is done when you can easily pierce it with a fork.
- Carefully remove the sweet potato from the microwave (it will be hot!) and let it cool for a minute.
- Slice the sweet potato lengthwise and gently fluff the insides with a fork.
- Add a pinch of salt, pepper, and your preferred toppings. If you’d like to make it sweet, sprinkle some cinnamon on top and add marshmallows or a dollop of yogurt for additional flavor.
Variations and Tips:
- For a savory twist, try adding black beans, salsa, and cheese for a complete meal.
- If you’re in the mood for something sweeter, top your sweet potato with honey and chopped nuts.
- Sweet potatoes can also be prepped in advance. Simply microwave in bulk and store them in the fridge for quick meals throughout the week.
- If you’re looking for a bit of a kick, consider mixing in some chili powder or cayenne pepper before microwaving.
- 24-ounce insulated stainless-steel water bottle with a FreeSip spout and push-button lid with lock
- Patented FreeSip spout designed for either sipping upright through the built-in straw or tilting back to...
- Protective push-to-open lid keeps spout clean; convenient carry loop doubles as a lock
Instant Oatmeal
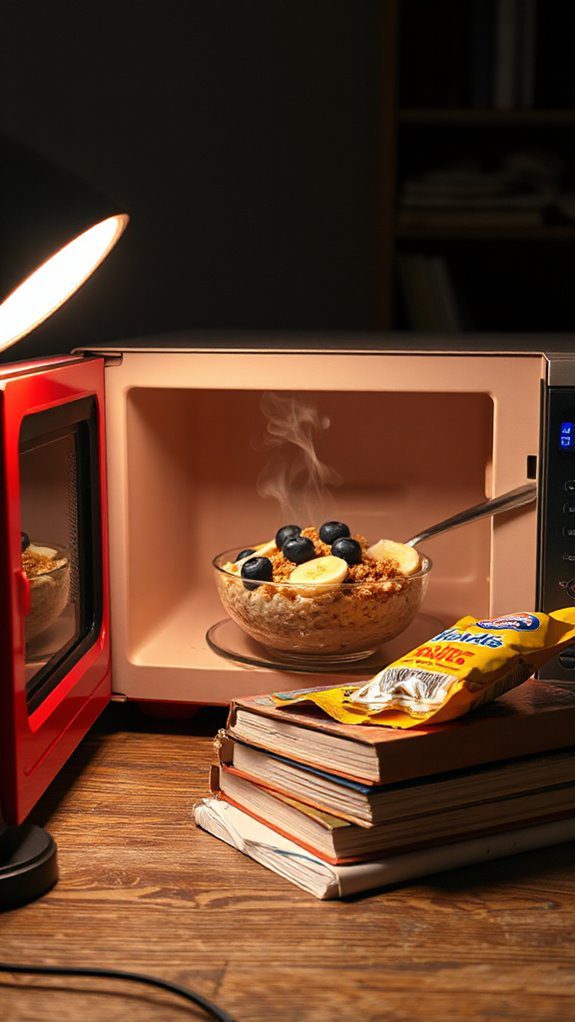
Instant oatmeal is a quick and nutritious meal option perfect for busy college students who need a speedy breakfast or snack. With minimal preparation time of just 5 minutes, it’s a versatile dish that can be customized to your taste with various toppings and mix-ins.
Whether you’re fueling up for a day of classes or looking for a comforting evening snack, instant oatmeal is a satisfying choice.
Ingredients:
- 1 packet of instant oatmeal
- 1 cup of water or milk
- Optional toppings (e.g., fresh fruit, nuts, honey, cinnamon, peanut butter)
Cooking Steps:
- Pour 1 cup of water or milk into a microwave-safe bowl.
- Add the packet of instant oatmeal to the bowl and stir to combine.
- Microwave on high for 1-2 minutes, depending on your microwave’s wattage and personal preference for consistency.
- Carefully remove the bowl from the microwave (it may be hot!). Stir the oatmeal well.
- Let it cool for a minute, then add your favorite toppings like slices of banana, a sprinkle of cinnamon, or a spoonful of peanut butter.
Variations and Tips:
- Fruit Flavors: Mix in dried or fresh fruits like berries or slices of apples for added sweetness and nutrition.
- Nutty and Crunchy: Add a handful of nuts or seeds (such as almonds, walnuts, or chia seeds) for a protein boost and crunch.
- Flavor Boosts: Experiment with different flavors of oatmeal packets or add spices such as nutmeg or vanilla extract for extra flavor.
- Overnight Oats: If you have a bit more time, consider soaking the oats in milk overnight in a sealed jar; just add the toppings in the morning for a quick grab-and-go option.
- Don’t Overcook: Keep an eye on the microwave; overcooking oatmeal can make it rubbery and dry. A quick stir and monitoring will help you achieve the perfect texture.
Microwave Chili
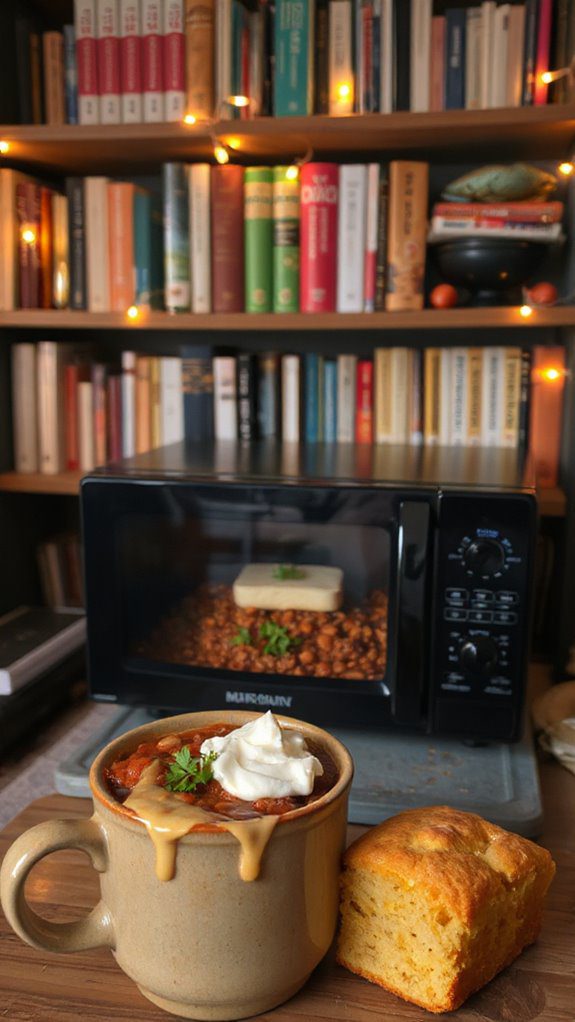
Microwave chili is a hearty and comforting meal that is perfect for college students looking for a quick and satisfying dish. This easy-to-make recipe takes only about 15 minutes to prepare, making it ideal for busy weeknights or a cozy study session. Packed with protein and flavor, microwave chili can be enjoyed on its own or used as a topping for baked potatoes, nachos, or even served with rice.
Ingredients:
- 1 can (15 oz) kidney beans, drained and rinsed
- 1 can (15 oz) black beans, drained and rinsed
- 1 can (15 oz) diced tomatoes with green chilies
- 1 cup frozen corn
- 1 packet taco seasoning
- 1 cup shredded cheese (optional)
- Sour cream (optional for topping)
- Chopped green onions (optional for topping)
Cooking Steps:
- In a microwave-safe bowl, combine the drained kidney beans, black beans, diced tomatoes with green chilies, and frozen corn.
- Sprinkle the taco seasoning over the mixture and stir until everything is well combined.
- Cover the bowl with a microwave-safe lid or plastic wrap, leaving a small gap for steam to escape.
- Microwave on high for 5-7 minutes, or until the mixture is heated through and bubbly. Stir halfway through cooking for even heating.
- If using, sprinkle the shredded cheese on top of the chili and microwave for an additional 1 minute, or until the cheese is melted.
- Carefully remove the bowl from the microwave (it will be hot!). Add sour cream and chopped green onions as desired before serving.
Variations and Tips:
- For a meatier chili, add cooked ground beef, turkey, or chicken to the mixture before heating.
- Spice it up by adding chopped jalapeños or a dash of hot sauce.
- If you prefer a thicker chili, reduce the amount of tomatoes or add a cornstarch slurry (1 tablespoon cornstarch mixed with 2 tablespoons of water) before microwaving.
- To make it vegetarian, make certain that your taco seasoning is meat-free or make your own with a mix of spices like cumin, chili powder, and paprika.
- Microwave chili can be stored in the refrigerator for up to 3 days, making it great for meal prep!
Stuffed Bell Peppers
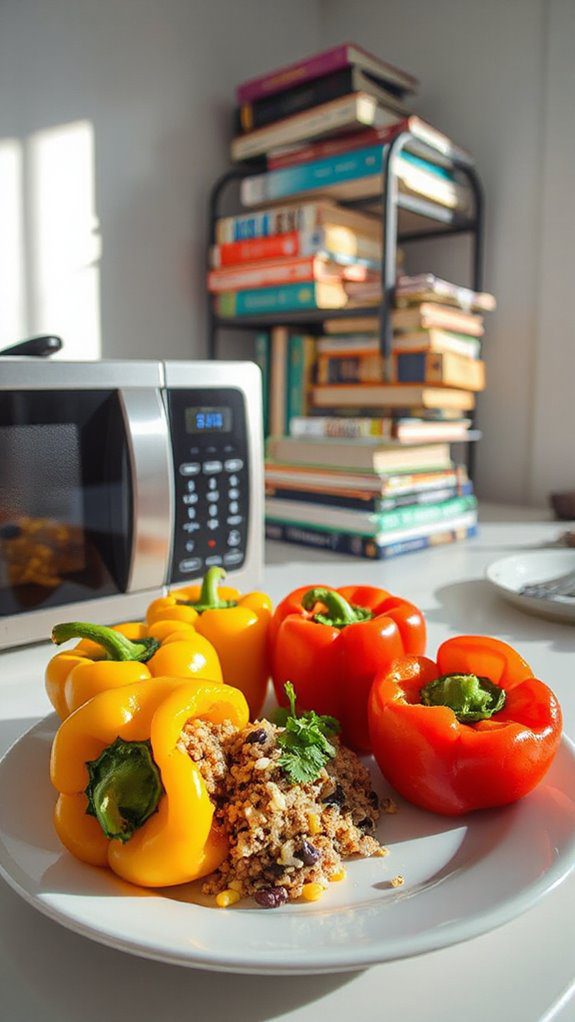
Stuffed bell peppers are a colorful and nutritious dish that’s perfect for college students seeking a satisfying meal with minimal kitchen equipment. These vibrant peppers are filled with a mix of protein, veggies, and grains, making them filling and healthy. The preparation time is about 10-15 minutes, and after cooking in the microwave for a mere 10 minutes, you’ll have a delicious meal ready to enjoy, ideal for a quick lunch or dinner after a long day of classes.
Ingredients:
- 2 large bell peppers (any color)
- 1 cup cooked rice (or quinoa)
- 1/2 cup cooked ground meat (beef, turkey, or optional plant-based protein)
- 1/2 cup canned black beans, drained and rinsed
- 1/2 cup corn (canned or frozen)
- 1/2 cup salsa or diced tomatoes
- 1 cup shredded cheese (cheddar or mozzarella)
- Salt and pepper to taste
- Optional toppings: avocado, sour cream, or fresh herbs
Cooking Steps:
- Prepare the Peppers: Wash the bell peppers and slice them in half lengthwise. Remove the seeds and membranes to create a vessel for the filling.
- Mix the Filling: In a microwave-safe bowl, combine the cooked rice, ground meat (if using), black beans, corn, salsa or diced tomatoes, salt, and pepper. Stir until well mixed.
- Stuff the Peppers: Spoon the filling mixture evenly into each halved pepper. Press down lightly to pack the filling.
- Add Cheese: Sprinkle shredded cheese on top of each stuffed pepper.
- Cook: Place the stuffed peppers upright in a microwave-safe dish. Cover the dish loosely with microwave-safe plastic wrap or a microwave-safe lid to retain moisture. Microwave for about 8-10 minutes, or until the peppers are tender and the cheese is melted.
- Serve: Allow them to cool for a minute before serving. Top with optional ingredients like avocado, sour cream, or fresh herbs.
Variations and Tips:
- Vegetarian Option: Replace the meat with more beans, lentils, or chopped vegetables like zucchini or mushrooms.
- Grain Substitute: Swap out rice for quinoa, barley, or farro for a different flavor and texture.
- Cooking Time: Cooking times may vary based on the power of your microwave, so check for doneness; the peppers should be tender but still hold their shape.
- Make Ahead: These stuffed peppers can be prepared in advance and stored in the refrigerator before cooking. Just increase cooking time if they are chilled.
- Freezing: You can also freeze the unbaked stuffed peppers for a quick meal later. Just make sure to wrap them tightly to avoid freezer burn.
This microwave-friendly dish hits all the right notes for nutritious, satisfying, and convenient meals, perfect for busy students!
Mini Meatloaf
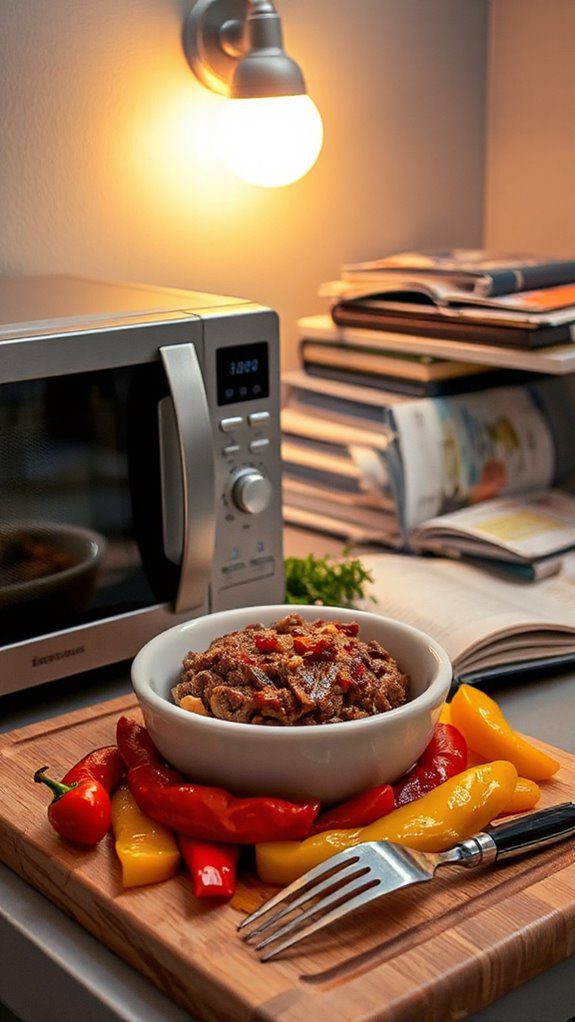
Mini meatloaf is a delicious and convenient dish that is perfect for college students looking for a hearty meal they can prepare in their dorm rooms. This recipe allows you to whip up individual servings in a microwave, making it an ideal option for those late-night study sessions or quick dinners between classes. With a preparation time of just 10 minutes, this mini meatloaf brings all the flavor of traditional meatloaf without the hassle, ensuring that you can enjoy a home-cooked meal even in a small space.
Ingredients:
- 1 pound ground beef (or ground turkey)
- 1/2 cup breadcrumbs
- 1/4 cup milk
- 1/4 cup ketchup
- 1/4 cup diced onion (fresh or frozen)
- 1 egg
- 1 teaspoon garlic powder
- 1 teaspoon salt
- 1/2 teaspoon black pepper
- Additional ketchup or BBQ sauce for topping (optional)
Cooking Steps:
- In a large bowl, combine the ground beef, breadcrumbs, milk, ketchup, diced onion, egg, garlic powder, salt, and black pepper. Mix well using your hands or a fork until all ingredients are well incorporated.
- Lightly grease a microwave-safe dish or ramekins. Form the meat mixture into individual-sized mini loaves and place them into the dish or ramekins.
- If desired, spread additional ketchup or BBQ sauce on top of each mini meatloaf for extra flavor.
- Cover the dish loosely with a microwave-safe lid or wrap to prevent splatters.
- Microwave on high for 5-7 minutes, or until the meatloaf is cooked through (internal temperature should be 160°F/70°C). Cooking time may vary depending on your microwave’s wattage.
- Once finished, let the mini meatloaf rest for a couple of minutes before serving.
Variations and Tips:
- For a twist, add your favorite seasonings like Italian herbs, or mix in grated cheese for added flavor.
- Incorporate vegetables like diced bell peppers or shredded carrots for a nutritional boost.
- This mini meatloaf also freezes well: cook it fully, let it cool, and wrap in foil or plastic wrap for later meals.
- Experiment with different meats or alternative proteins, such as lentils or chickpeas for a vegetarian option.
- Pair with steamed veggies or a simple salad for a complete meal.
Vegetable Fried Rice
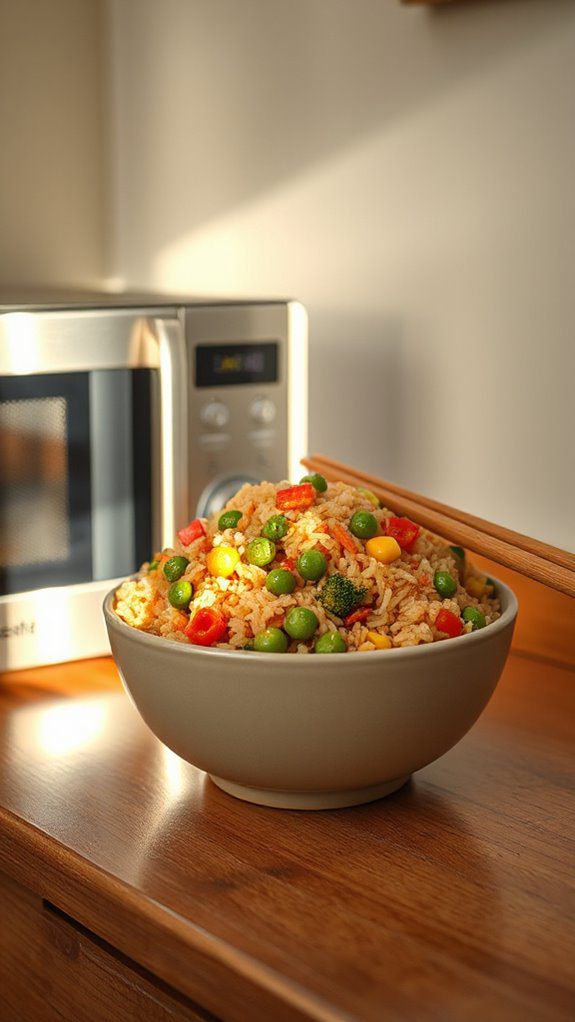
Vegetable Fried Rice is a quick and satisfying dish, perfect for busy college students who are looking for a budget-friendly meal that can be made in a microwave. This one-bowl dish is not only delicious but can also be customized with your favorite vegetables and seasonings. With a preparation time of just 10-15 minutes, it’s an easy go-to when you need a nutritious meal after a long day of classes.
Ingredients:
- 1 cup of precooked rice (day-old rice works best)
- 1/2 cup mixed frozen vegetables (peas, carrots, corn, etc.)
- 2 tablespoons soy sauce
- 1 tablespoon vegetable oil or sesame oil
- 1 clove garlic, minced (optional)
- 1/4 teaspoon ginger, grated (optional)
- 1 green onion, chopped (for garnish)
- Salt and pepper to taste
Cooking Steps:
- In a microwave-safe bowl, combine the precooked rice and frozen mixed vegetables.
- Add the vegetable or sesame oil, soy sauce, minced garlic, and grated ginger (if using). Mix well to combine all ingredients.
- Cover the bowl with a microwave-safe lid or plate, leaving a small gap for steam to escape.
- Microwave on high for about 2-3 minutes, or until the vegetables are heated through and the rice is hot. Stir halfway through to guarantee even heating.
- Once ready, remove from the microwave carefully (the bowl will be hot) and give the rice a good stir. Season with salt and pepper to taste.
- Garnish with chopped green onions before serving.
Variations and Tips:
- Add cooked protein like leftover chicken, shrimp, or tofu for extra sustenance.
- Experiment with different sauces like teriyaki or sweet chili for unique flavors.
- Use a mix of fresh and frozen vegetables for a fresher taste and more nutrients.
- For a spicier kick, add a splash of sriracha or a pinch of red pepper flakes.
- If using leftover rice, try to dry it out in the fridge overnight; this helps the grains separate when frying.
Enjoy your homemade Vegetable Fried Rice, perfect for a quick meal that fits easily into any busy college lifestyle!
Microwave Pancakes
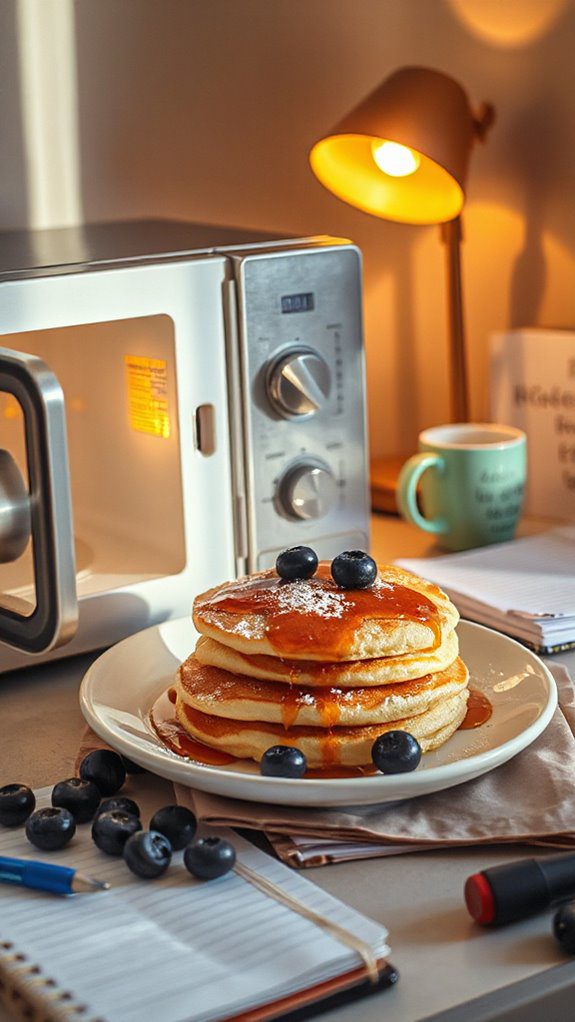
Microwave pancakes are a quick and easy breakfast option perfect for busy college students who may not have access to a full kitchen.
These fluffy, delicious pancakes can be made in just 5 minutes, making them ideal for those rushed mornings before class or when you need a simple meal in your dorm room. With minimal ingredients and equipment, you can enjoy a homemade stack of pancakes without the hassle.
Ingredients:
- 1/2 cup all-purpose flour
- 1 tablespoon sugar
- 1/2 teaspoon baking powder
- 1/4 teaspoon baking soda
- 1/4 teaspoon salt
- 1/2 cup milk
- 1 tablespoon vegetable oil or melted butter
- 1/2 teaspoon vanilla extract (optional)
Cooking Instructions:
- In a microwave-safe bowl, combine the flour, sugar, baking powder, baking soda, and salt. Mix well.
- Add the milk, vegetable oil (or melted butter), and vanilla extract (if using) to the dry ingredients. Stir until just combined. Be careful not to overmix; a few lumps are okay.
- Let the batter rest for about 1 minute. This allows the ingredients to meld and results in fluffier pancakes.
- Microwave the batter for about 1 minute on high. Check for doneness; the pancakes should be firm to the touch and cooked through. If necessary, microwave for additional 10-15 second intervals until properly cooked.
- Remove from the microwave (the bowl may be hot) and let cool for a minute. Serve warm with your favorite toppings such as syrup, fruit, nuts, or chocolate chips.
Variations and Tips:
- Add mix-ins like chocolate chips, blueberries, or chopped bananas into the batter before microwaving for extra flavor.
- For a healthier take, substitute half the all-purpose flour with whole wheat flour and use almond milk instead of regular milk.
- If you’d like to make mini-pancakes, divide the batter into smaller portions and reduce the cooking time.
- Experiment with different extracts, like almond or maple, for unique flavors.
- Store any leftovers in an airtight container in the fridge for a quick breakfast fix later in the week. Reheat in the microwave for about 15-20 seconds before serving.
Macaroni and Tuna Salad
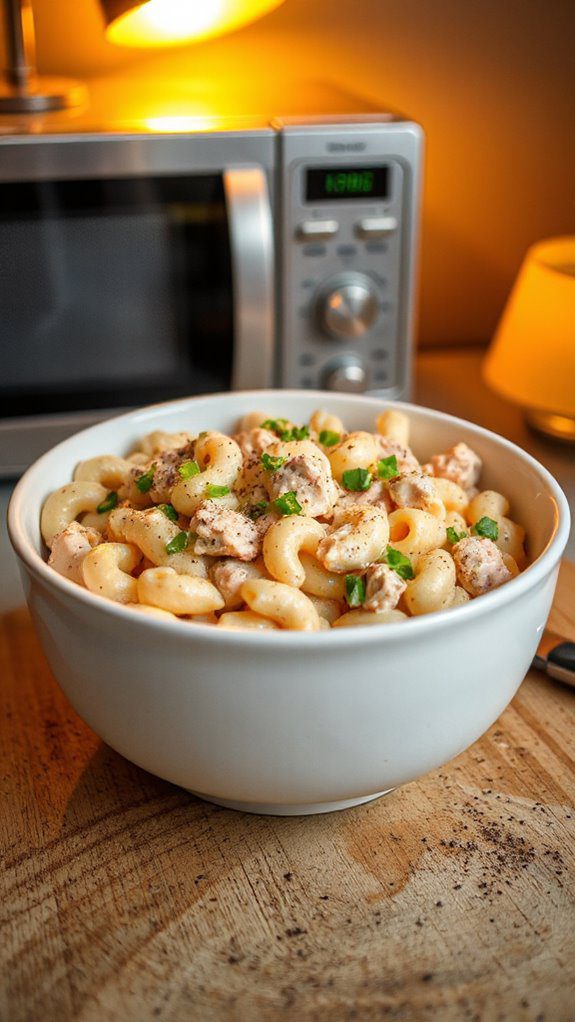
Macaroni and Tuna Salad is a simple and satisfying dish that perfectly combines protein and carbohydrates, making it ideal for busy college students looking for a quick, nutritious meal. This dish can be prepared in about 15 minutes with minimal effort, making it perfect for those late-night study sessions or after a long day of classes.
It’s invigorating, can be eaten cold, and provides a good source of energy.
Ingredients:
- 1 cup elbow macaroni
- 1 can (5 oz) tuna in water, drained
- 1/2 cup mayonnaise
- 1/4 cup sweet pickle relish
- 1/4 cup diced celery (optional)
- 1/4 cup diced onion (optional)
- Salt and pepper to taste
- 1 tablespoon lemon juice (optional)
- Fresh parsley or dill for garnish (optional)
Cooking Steps:
- Cook the Macaroni: In a microwave-safe bowl, add 1 cup of elbow macaroni and cover with water, ensuring there’s about an inch of water above the pasta. Microwave on high for 5-7 minutes, or until the macaroni is tender. Stir every couple of minutes and check for doneness. Drain the pasta using a microwave-safe colander or strainer.
- Combine Ingredients: In a large mixing bowl, add the drained tuna, mayonnaise, sweet pickle relish, and any optional ingredients like celery and onion. Mix well.
- Add Macaroni: Stir in the cooked macaroni into the tuna mixture until everything is well combined.
- Season: Add salt, pepper, and lemon juice (if using) to taste. Mix until evenly coated.
- Chill (Optional): For an invigorating taste, you can chill the macaroni and tuna salad in the refrigerator for about 10 minutes before serving.
- Serve: Spoon the salad onto plates or into containers and garnish with fresh parsley or dill if desired. Enjoy!
Variations and Tips:
- Add Veggies: Feel free to toss in other veggies like peas, bell peppers, or corn for added flavor and nutrition.
- Opt for Greek Yogurt: For a healthier twist, substitute mayonnaise with Greek yogurt.
- Protein Boost: Consider adding hard-boiled eggs or shredded cheese to enhance the protein content.
- Serve on Lettuce: For a low-carb option, serve the tuna salad over a bed of lettuce or spinach.
- Storage: This dish can be stored in an airtight container in the refrigerator for up to 2 days. Make sure to give it a good stir before serving again as ingredients may settle.
Microwaveable Burritos
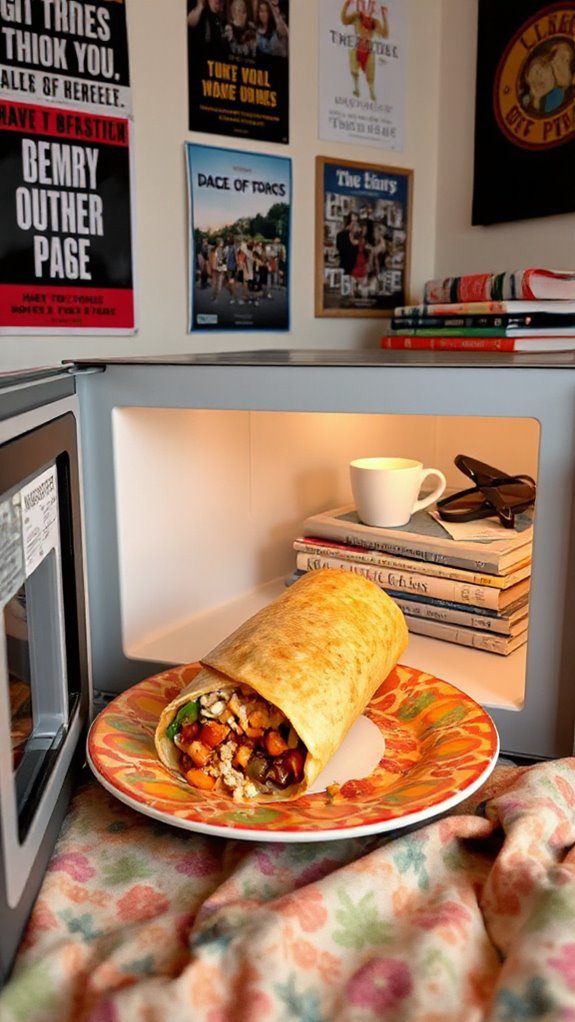
Microwaveable burritos are a quick, convenient meal option for college students looking for a tasty and filling dish that can be prepared in mere minutes.
These burritos are great for busy days, late-night study sessions, or when you simply don’t feel like cooking a full meal. In just about 2-3 minutes, you can have a satisfying burrito ready to eat, making them an ideal choice for anyone living in a dorm room with limited cooking resources.
Ingredients:
- Frozen burritos (your choice of filling, such as bean and cheese, chicken, or beef)
- Optional toppings: shredded cheese, salsa, sour cream, guacamole, or diced jalapeños
Cooking Instructions:
- Unwrap the frozen burrito from its packaging and place it on a microwave-safe plate.
- Microwave the burrito on high for 1 minute and 30 seconds.
- After 1 minute and 30 seconds, carefully flip the burrito over to guarantee even heating.
- Microwave again for an additional 1 minute.
- After microwaving, let the burrito sit for about 30 seconds to cool slightly before slicing it open to check the center is hot.
- Serve with your choice of toppings, such as shredded cheese, salsa, sour cream, guacamole, or diced jalapeños.
Variations and Tips:
- For an extra kick, you can add extra spices to the burrito filling before microwaving.
- If you like your burrito with a crispy texture, try wrapping it in a paper towel and microwaving it in 30-second intervals until it reaches the desired temperature.
- You can create a burrito bowl by adding the contents of the burrito onto a bed of rice or lettuce and topping it with your choice of toppings.
- Consider placing some chopped veggies like bell peppers or onions on the plate with the burrito for added nutrition.
Tomato Soup With Grilled Cheese

Tomato soup with grilled cheese is a classic comfort food that is perfect for college students looking for a quick, satisfying meal in their dorm rooms. This dish combines the warmth of creamy tomato soup with the crispy, gooey delight of a grilled cheese sandwich, making it an ideal choice for cold days or late-night snacks. You can whip it up in just 15 minutes, making it perfect for busy schedules.
Ingredients:
- 1 can of tomato soup
- 1 cup of water or milk (for creamier soup)
- Salt and pepper, to taste
- 2 slices of bread (your choice)
- 2 slices of cheese (cheddar, American, or your favorite)
- Butter or margarine
Cooking Steps:
- In a microwave-safe bowl, pour the can of tomato soup and add water or milk. Stir well to combine.
- Microwave the soup on high for 2-3 minutes, stirring halfway through, until heated through.
- While the soup is heating, prepare the grilled cheese. Spread butter or margarine on one side of each slice of bread.
- Place one slice of bread, butter-side down, in a microwave-safe plate. Layer the cheese on top, then place the second slice of bread, butter-side up.
- Microwave the sandwich for about 1-2 minutes, checking frequently until the cheese is melted and the bread is slightly crisp. You may need to flip the sandwich halfway through to achieve even cooking.
- Remove the grilled cheese from the microwave and let it cool for a minute. Cut it in half and serve alongside the tomato soup.
Variations and Tips:
- For added flavor, mix in spices such as basil, oregano, or crushed red pepper to the soup before heating.
- Experiment with different types of cheese in your grilled cheese, such as mozzarella or pepper jack for a different twist.
- Add some cooked bacon, ham, or veggies like spinach or tomatoes to the sandwich for extra nutrition and taste.
- If you like your soup chunkier, consider adding some canned diced tomatoes or fresh herbs before microwaving.
- Always monitor your microwave cooking time to prevent overcooking or burning your sandwich.
- Consider pairing the meal with a side salad or some crunchy crackers for a fuller dining experience.
Egg Fried Rice
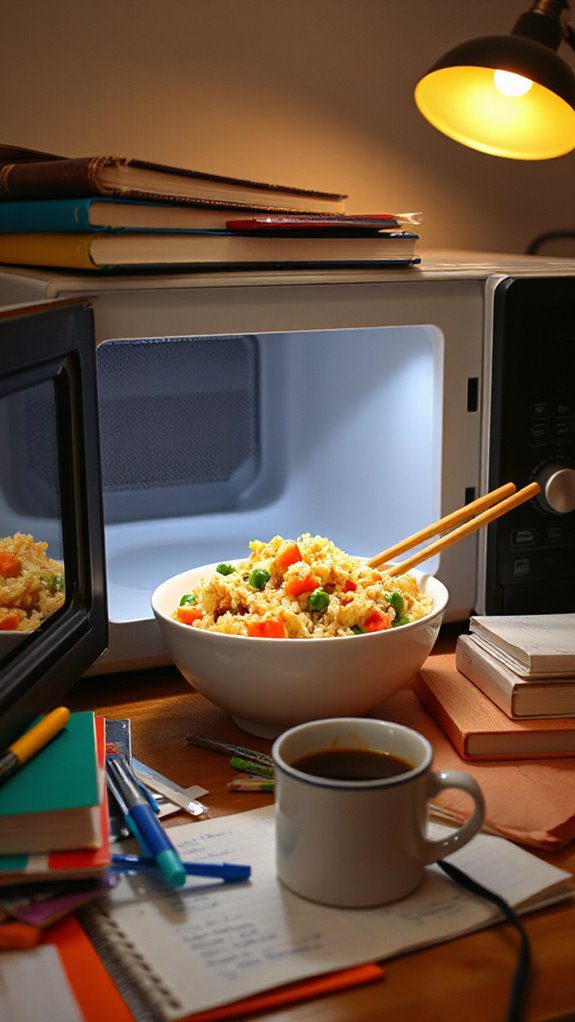
Egg fried rice is a quick and delicious dish that is perfect for college students looking for a satisfying meal with minimal effort. This microwave meal is not only easy to prepare but also customizable, making it a versatile option for those who want to use leftover rice or any extra vegetables they may have.
In just about 10-15 minutes, you can whip up this filling dish that’s ideal for busy weeknights or study sessions.
Ingredients:
- 1 cup cooked rice (preferably chilled)
- 1 egg
- 1 tablespoon soy sauce
- 1 tablespoon vegetable oil or butter
- 1/4 cup frozen peas and carrots mix
- 1 green onion, chopped (optional)
- Salt and pepper to taste
Cooking Instructions:
- In a large microwave-safe bowl, combine the cooked rice and frozen peas and carrots. Stir to mix.
- In a small bowl, beat the egg and add soy sauce, salt, and pepper.
- Pour the egg mixture over the rice combination in the microwave-safe bowl.
- Drizzle the vegetable oil or butter on top.
- Use a fork to mix everything together gently.
- Microwave on high for 2 minutes. Check and stir the mixture to guarantee even cooking.
- Continue microwaving in 1-minute increments until the egg is fully cooked and the rice is heated through, usually taking about 4-5 minutes total.
- Once cooked, stir in the chopped green onion, if using, and serve hot.
Variations and Tips:
- Feel free to add any leftover meats, such as chicken, shrimp, or ham, for extra protein.
- Incorporate different vegetables like bell peppers, broccoli, or corn for added flavor and nutrients.
- For a spicy kick, add a splash of sriracha or chili sauce when mixing in the egg.
- Cooking time may vary based on the wattage of your microwave, so keep an eye on it to prevent overcooking.
- Using day-old rice can help achieve the perfect texture, as it won’t be too sticky.
Chocolate Mug Cake

Chocolate Mug Cake is a quick and decadent dessert perfect for busy college students looking to satisfy their sweet tooth without much fuss. This microwave treat can be whipped up in just about 5 minutes, making it an ideal late-night snack or study break indulgence for anyone craving a rich chocolate cake experience without the need for an oven.
Ingredients:
- 4 tablespoons all-purpose flour
- 4 tablespoons granulated sugar
- 2 tablespoons unsweetened cocoa powder
- 1/8 teaspoon baking powder
- 1/8 teaspoon salt
- 3 tablespoons milk
- 2 tablespoons vegetable oil (or melted butter)
- 1/4 teaspoon vanilla extract
- Optional: chocolate chips, nuts, or whipped cream for topping
Instructions:
- In a microwave-safe mug, combine the flour, sugar, cocoa powder, baking powder, and salt. Mix the dry ingredients well with a fork or spoon until evenly combined.
- Add the milk, vegetable oil (or melted butter), and vanilla extract to the dry ingredients. Stir until the batter is smooth and free of lumps, making sure to reach the edges of the mug for even cooking.
- If desired, fold in a few chocolate chips or nuts for an extra treat.
- Microwave the mug on high for 1 minute and 30 seconds. Cooking times may vary depending on the microwave, so start checking at 1 minute and add additional time in 15-second increments until the cake is set but still moist.
- Allow the mug cake to cool for a minute before adding your favorite toppings, such as whipped cream or more chocolate chips.
Variations and Tips:
- For a moister cake, try adding an extra tablespoon of milk.
- Substitute half of the all-purpose flour for almond flour to introduce a nutty flavor.
- Experiment by adding different flavors like peppermint extract or a pinch of cinnamon for a unique twist.
- Be cautious not to overcook, as the cake can become rubbery; it’s better to slightly undercook than overcook.
- Serve with a scoop of ice cream for a deliciously indulgent dessert experience!
Microwaveable Quinoa
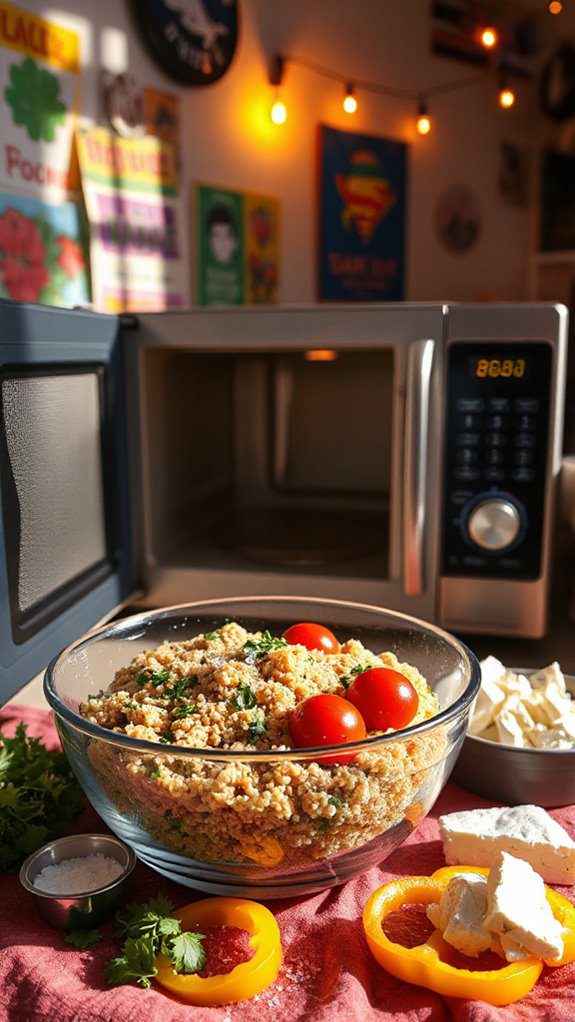
Microwaveable quinoa is a versatile and nutritious dish that can be a great meal solution for busy college students looking to maintain a balanced diet. With its quick preparation time of just about 10 minutes, it provides a hearty base for various toppings and flavors.
Quinoa is a complete protein, making it an excellent choice for vegetarian and health-conscious individuals. This simple microwaveable recipe elevates the often bland grain into a flavorful meal, perfect for a quick lunch or dinner in your dorm room.
Ingredients:
- 1 cup quinoa
- 2 cups water or vegetable broth
- 1/2 teaspoon salt (optional)
- 1 tablespoon olive oil or butter
- 1/2 teaspoon garlic powder (optional)
- Fresh or frozen vegetables (e.g., spinach, bell peppers, peas)
- Your choice of protein (e.g., canned beans, chickpeas, shredded chicken)
- Spices and herbs (e.g., cumin, paprika, parsley, or basil), to taste
Cooking Steps:
- Rinse the quinoa under cold water in a fine mesh strainer to remove its natural coating, which can be bitter.
- In a large microwave-safe bowl, combine the rinsed quinoa, water or vegetable broth, and salt if using. Stir to mix well.
- Cover the bowl with a microwave-safe lid or plate, leaving a small gap to allow steam to escape.
- Microwave on high for about 6-8 minutes. Check the quinoa after 6 minutes—if the water is absorbed and the quinoa is tender, it’s done. Otherwise, microwave in additional 1-minute increments.
- Once cooked, carefully remove the bowl from the microwave (it will be hot!) and let it sit, covered, for an additional 2 minutes to allow it to fluff up.
- Stir in the olive oil or butter, garlic powder, and any vegetables you prefer. If using fresh vegetables, you may want to microwave them separately for 1-2 minutes before mixing in.
- Add your chosen protein and spices/herbs for extra flavor. Mix well and enjoy your nutritious and filling meal!
Variations & Tips:
- Experiment with different flavored broths for added taste. You can try chicken broth, vegetable broth, or even a bouillon cube dissolved in your water.
- For a Mediterranean twist, mix in some cherry tomatoes, feta cheese, and olives.
- Add a squeeze of lemon juice and some chopped fresh herbs like parsley or cilantro for a revitalizing touch.
- Top with a dollop of hummus or a sprinkle of nutritional yeast for a creamy texture and extra nutrients.
- For a heartier option, serve alongside rotisserie chicken or sautéed tofu.
- Always be cautious of steam when uncovering the bowl after microwaving; it can be very hot!
Nachos
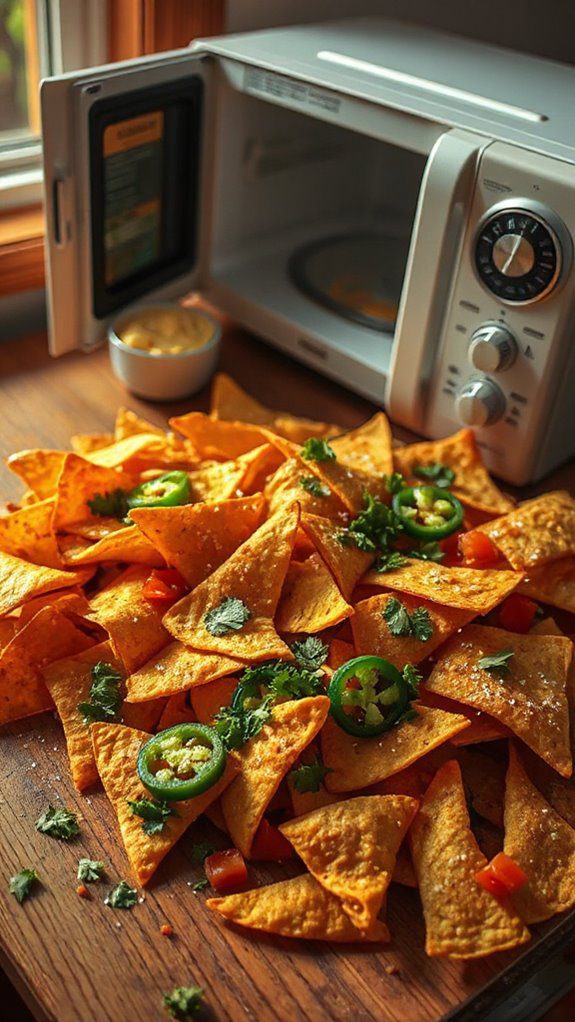
Nachos are a delicious and versatile snack or meal, making them a perfect choice for college students looking for something quick and satisfying. This dish consists of tortilla chips topped with melted cheese and a variety of toppings, which can suit any taste preference.
Ideal for late-night study sessions or sharing with friends during a movie night, nachos only take about 5-10 minutes to prepare in a microwave, making them a go-to option for busy student life.
Ingredients
- Tortilla chips
- Shredded cheese (cheddar, Monterey Jack, or your preference)
- Jalapeños (sliced)
- Black beans (canned, drained, and rinsed)
- Salsa or pico de gallo
- Sour cream (optional)
- Guacamole (optional)
- Chopped green onions (optional)
Cooking Steps
- Prepare: On a microwave-safe plate, spread a generous layer of tortilla chips evenly.
- Layer: Sprinkle shredded cheese evenly over the chips.
- Add Toppings: Add sliced jalapeños, black beans, and any other desired toppings, such as salsa or pico de gallo.
- Microwave: Heat in the microwave on high for 1-2 minutes, or until the cheese is melted and bubbly. Check at 1 minute to avoid over-melting.
- Serve: Carefully remove the plate from the microwave (it may be hot) and let it cool slightly. Drizzle with sour cream and guacamole, and garnish with chopped green onions if desired.
- Enjoy: Dig in with a fork or just plunge in with your hands!
Variations and Tips
- Protein Boost: Add cooked chicken, shredded beef, or turkey for added protein.
- Veggie Delight: Include diced bell peppers, corn, or olives for a veggie-rich option.
- Cheesy Twist: Mix different types of cheese for a unique flavor profile.
- Spicy Kick: Use spicy salsa or add diced chili peppers for an extra kick.
- Portion Control: If sharing, feel free to divide the nachos into smaller portions on separate plates for everyone.
- Keep it Clean: Place a paper towel under the plate to catch any melting cheese or toppings that might spill over while microwaving.
With this quick and flexible nacho recipe, you can enjoy a tasty dish customized to your cravings and dietary needs!
Vegetable Omelette
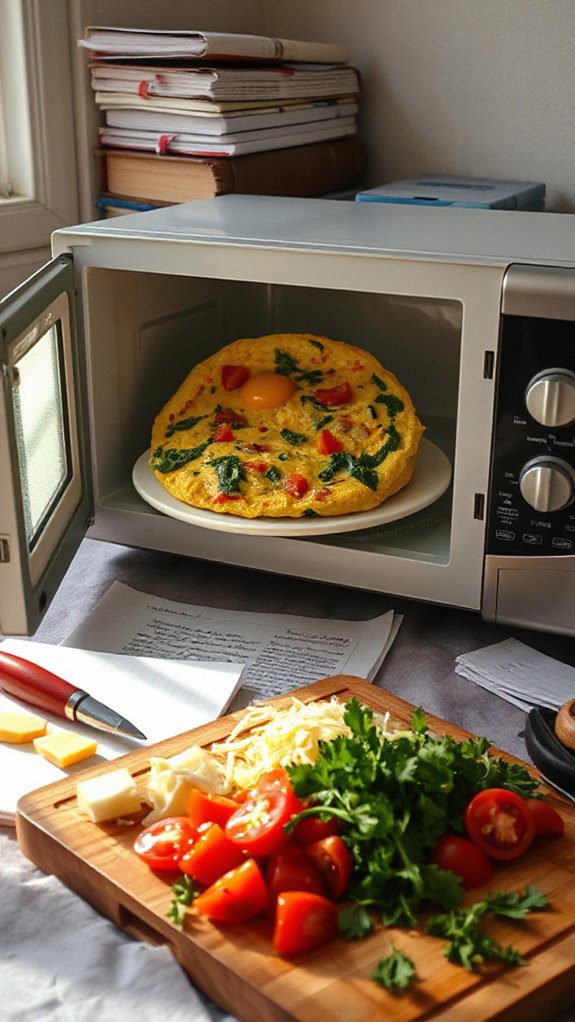
The Vegetable Omelette is a quick and nutritious meal, perfect for college students who seek a satisfying dish that can be prepared easily in a dorm room microwave. This microwave-friendly omelette combines eggs with your favorite vegetables for a protein-packed breakfast, lunch, or dinner. It takes only about 5-10 minutes to prepare, making it an ideal choice for busy students on the go.
Ingredients:
- 2 large eggs
- 2 tablespoons milk (optional)
- Salt and pepper to taste
- 1/4 cup chopped bell peppers
- 1/4 cup chopped spinach or kale
- 1/4 cup diced tomatoes
- 1/4 cup shredded cheese (optional)
- Non-stick cooking spray
Cooking Instructions:
- Start by greasing a microwave-safe bowl or mug with non-stick cooking spray.
- In a separate bowl, whisk together the eggs, milk (if using), salt, and pepper until well combined.
- Stir in the chopped vegetables and cheese (if using) into the egg mixture.
- Pour the egg and vegetable mixture into the greased bowl or mug.
- Microwave on high for 1 minute, then stir gently to guarantee even cooking.
- Return to the microwave for another 30-60 seconds, or until the eggs are set and fully cooked. Be careful not to overcook, as the eggs will continue to cook after being taken out.
- Let it cool for a minute, and enjoy your simple and hearty vegetable omelette!
Variations & Tips:
- Feel free to experiment with different vegetables such as mushrooms, zucchini, or broccoli based on your preferences or what you have on hand.
- For added flavor, try mixing in herbs like parsley, basil, or chives.
- If you want a spicier kick, add a pinch of chili flakes or some chopped jalapeños.
- Using a larger mug or bowl can help prevent overflow during cooking.
- Pair with toast or a side of fruit for a complete meal!
Peanut Butter and Banana Toast
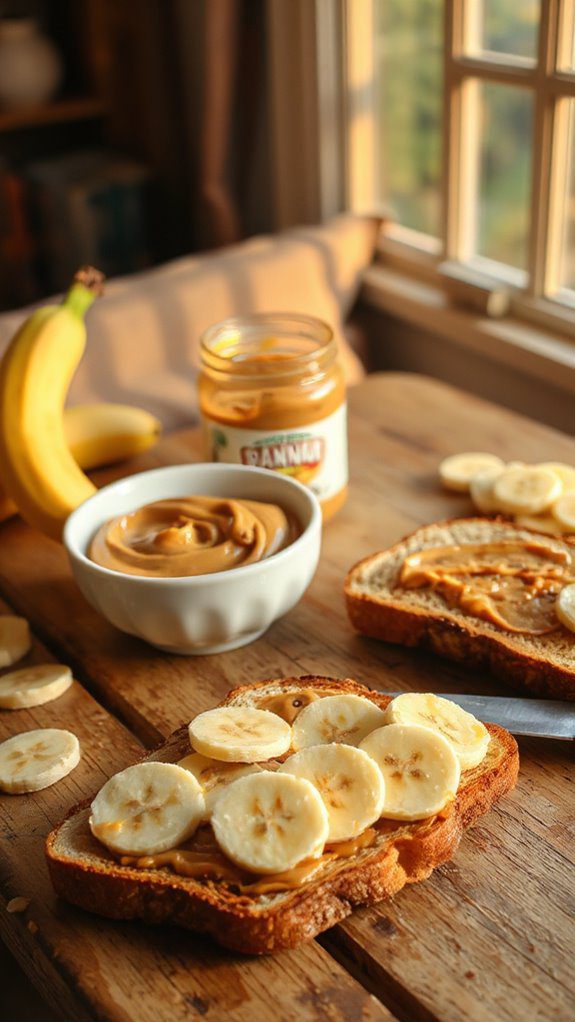
Peanut Butter and Banana Toast is a quick and nutritious meal perfect for college students seeking a tasty breakfast, snack, or even a light lunch. This dish combines the wholesome goodness of whole grain bread with the rich, creamy texture of peanut butter and the natural sweetness of bananas. It takes only about 5 minutes to prepare, making it an ideal option for busy students or anyone looking for a satisfying meal without taking too much time.
Ingredients:
- 2 slices of whole grain bread
- 2 tablespoons of peanut butter
- 1 ripe banana
- Honey (optional)
- Cinnamon (optional)
- Chopped nuts or granola (optional)
Cooking Steps:
- Begin by toasting the slices of whole grain bread to your desired level of crispiness. You can use a toaster or an oven if you have access to one in your dorm.
- While the bread is toasting, peel the banana and slice it into thin rounds.
- Once the bread is toasted, spread 1 tablespoon of peanut butter evenly on each slice.
- Layer the banana slices on top of the peanut butter-covered toast.
- For an extra touch of sweetness, drizzle some honey over the bananas if desired.
- If you enjoy a bit of warmth and flavor, sprinkle a pinch of cinnamon on top.
- For added crunch, feel free to top with chopped nuts or a sprinkle of granola.
Variations and Tips:
- Try using different types of nut butters, such as almond or cashew butter, for a change.
- Experiment with different toppings like shredded coconut, berries, or even apple slices.
- For a chocolate twist, add dark chocolate chips or cocoa powder on top of the peanut butter.
- If you’re in a hurry, you can skip toasting the bread and go for fresh, soft bread instead.
- Consider preparing your toast as an open-faced sandwich for a stylish presentation.
Microwaveable Casserole
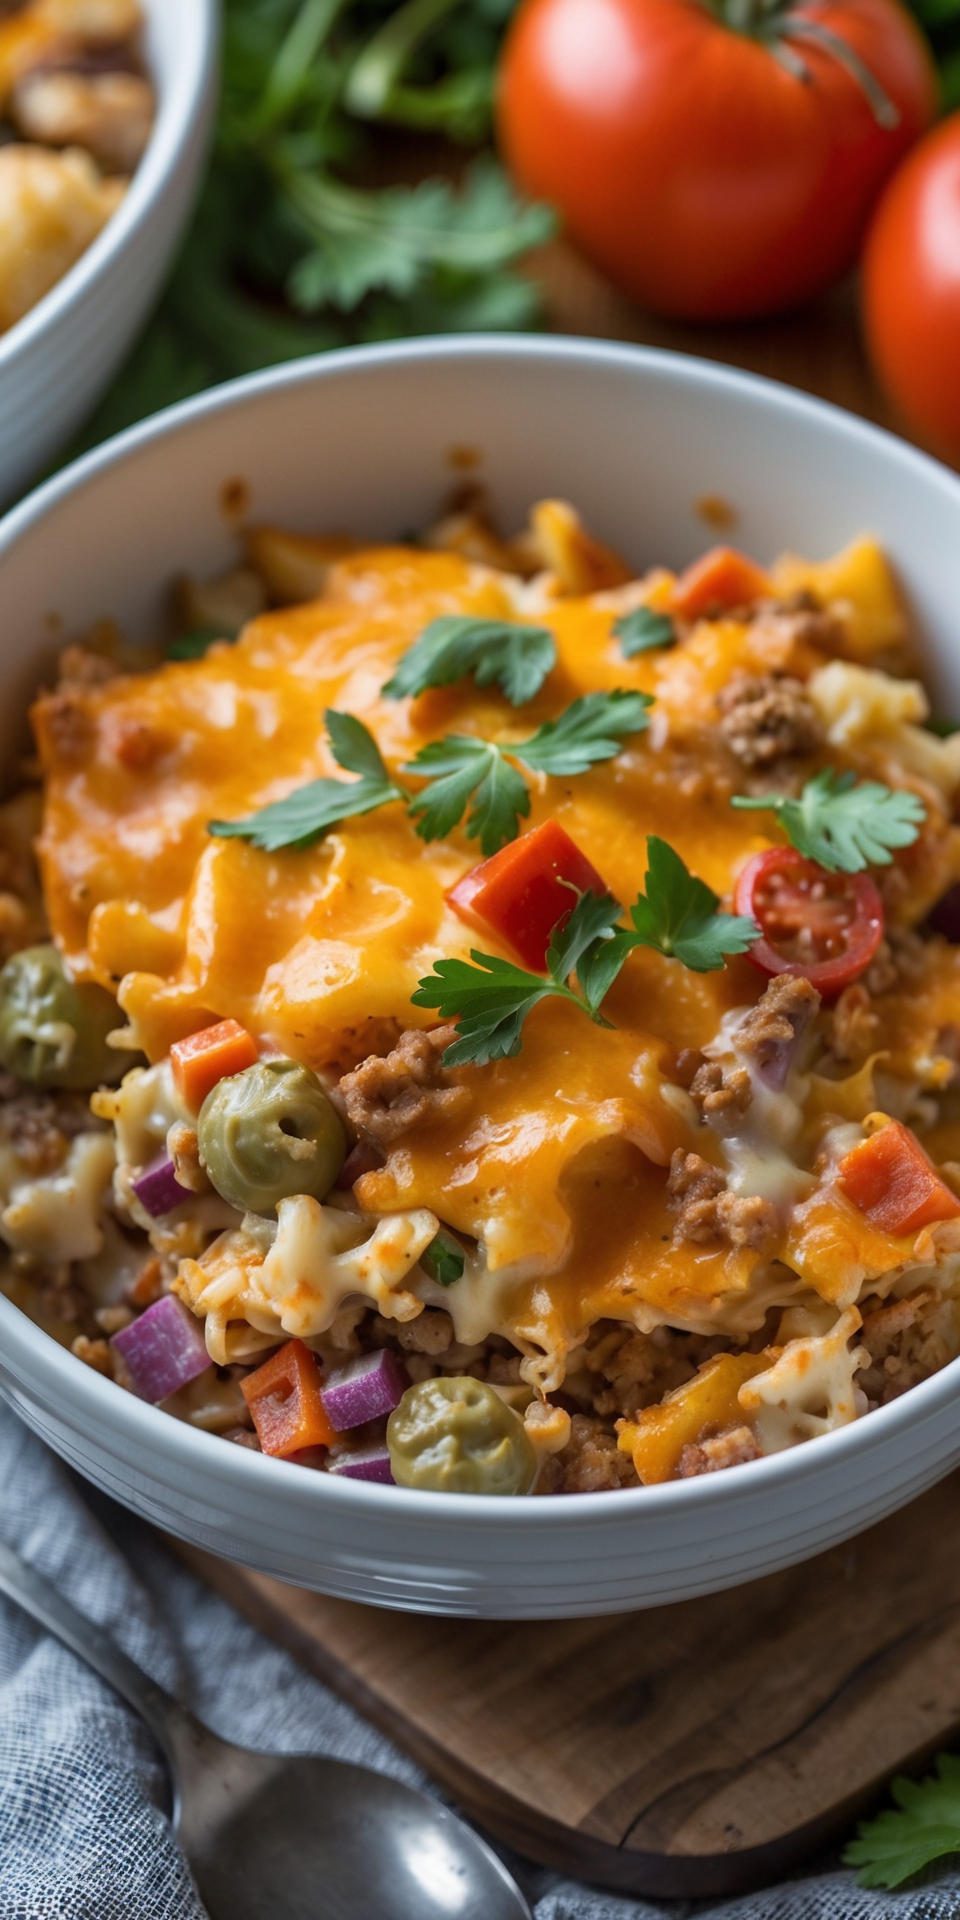
Microwaveable casseroles are a versatile and hearty option, perfect for busy college students craving a warm, comforting meal without the hassle of traditional oven cooking. This dish mixes your favorite ingredients into a satisfying one-bowl meal that’s ready in just 15 minutes! Ideal for those late-night study sessions or quick dinners, you can customize it to fit your dietary preferences with ease.
Ingredients:
- 1 cup uncooked instant rice
- 1 can (15 oz) black beans, rinsed and drained
- 1 cup frozen mixed vegetables (carrots, peas, corn)
- 1 cup shredded cheese (cheddar or mozzarella)
- 1 cup salsa
- 1 teaspoon garlic powder
- 1 teaspoon onion powder
- Salt and pepper to taste
- Optional toppings: sour cream, avocado, or cilantro
Cooking Steps:
- In a large microwave-safe bowl, combine the uncooked rice and 1½ cups of water. Cover the bowl with a microwave-safe lid or plate.
- Microwave on high for 5 minutes, then let it sit covered for another 5 minutes.
- Once the rice is cooked and fluffy, add in the black beans, frozen mixed vegetables, shredded cheese, salsa, garlic powder, onion powder, salt, and pepper. Mix well to combine.
- Cover the bowl again and microwave for an additional 3-4 minutes until the mixture is hot and the cheese is melted.
- Stir the casserole to combine the ingredients thoroughly, and add extra seasoning if needed.
- Serve hot, and top with optional toppings such as sour cream, avocado, or cilantro for added flavor.
Variations & Tips:
- You can easily swap out ingredients based on your preferences. Try using quinoa instead of rice, different canned beans like kidney or chickpeas, or tailor the vegetables to include your favorites.
- For a heartier version, add cooked chicken, ground meat, or tofu to the mix before microwaving.
- Experiment with different cheeses or spices to create your unique flavor profile.
- If you have leftovers, store them in an airtight container in the fridge. Reheat in the microwave for a quick meal later in the week!


