Easter grazing platters offer a fantastic way to celebrate with loved ones. Options include a vibrant Spring Vegetable Medley Platter, a classic Charcuterie Board with meats and cheeses, and a Cheesy Delight featuring artisan cheeses. Fresh Fruit Fiesta and a Mediterranean Hummus and Olive Platter can enhance the mix, alongside Crunchy Veggie Dips and a Decadent Chocolate Fondue Station. Each selection brings its own charm, making gatherings relaxed and enjoyable. More inspirations await to elevate any occasion.
Spring Vegetable Medley Platter
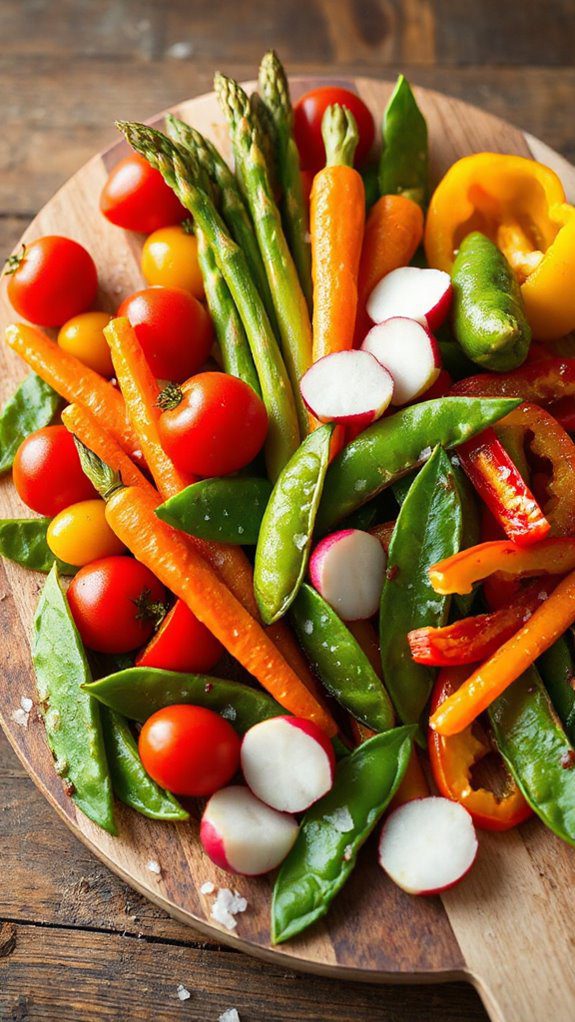
The Spring Vegetable Medley Platter is a vibrant and invigorating dish that celebrates the flavors of spring by combining a variety of fresh seasonal vegetables. Perfect for hosting gatherings or enhancing your Easter grazing platter, this dish not only looks beautiful when presented, but it's also healthy and full of essential nutrients.
Preparation time is about 20 minutes, making it a quick and easy addition to your festive spread.
Ingredients:
- Asparagus, trimmed
- Baby carrots, peeled
- Snap peas, ends trimmed
- Radishes, halved
- Cherry tomatoes
- Bell peppers (red, yellow, and orange), sliced
- Olive oil
- Sea salt
- Freshly ground black pepper
- Fresh herbs (such as parsley or dill), for garnish
- Lemon wedges, for serving
Cooking Steps:
- Prepare the Vegetables: Rinse all the vegetables under cold water. Pat them dry with a paper towel. Trim, peel, and slice them as necessary, ensuring they are all similar in size for even cooking.
- Sauté the Vegetables: In a large skillet, heat 2 tablespoons of olive oil over medium heat. Add the asparagus, carrots, and snap peas, and sauté for about 4-5 minutes until they begin to soften but still retain some crunch.
- Add the Other Vegetables: Stir in the radishes, cherry tomatoes, and bell peppers. Continue to cook for an additional 2-3 minutes until all vegetables are tender-crisp. Season with sea salt and freshly ground black pepper to taste.
- Garnish and Serve: Transfer the sautéed vegetable medley to a large serving platter. Garnish with fresh herbs and serve with lemon wedges on the side for an extra zesty touch.
Variations and Tips:
- Grill Instead of Sauté: For a smokier flavor, consider grilling your vegetables on an outdoor grill instead. Toss them with olive oil and seasonings beforehand, then grill until charred and tender.
- Add Dip Options: Incorporate a few dips such as hummus, tzatziki, or a yogurt-based sauce on the side to enhance flavors and provide variety.
- Include Cheese: For an added element, sprinkle feta or goat cheese over the vegetables before serving.
- Season to Taste: Feel free to experiment with different herbs and spices; thyme, oregano, or a pinch of red pepper flakes can add a unique twist.
- Make it a Meal: Transform this platter into a main dish by adding roasted chickpeas or grilled chicken skewers for protein.
This Spring Vegetable Medley Platter is not only delicious but also a great way to celebrate the season's fresh produce, making it an eye-catching centerpiece for your Easter gathering.
- The Original Pro Chopper - Our superstar veggie slicer has been creating waves on TikTok! Simple to use,...
- Easy Meal Prep with Rust-Resistant Blades - Our vegetable chopper is perfect for anyone who wants to eat...
- 5-Star Design - The soft-grip TPU handle ensures controlled chopping, while the non-skid rubber base...
Classic Charcuterie Board
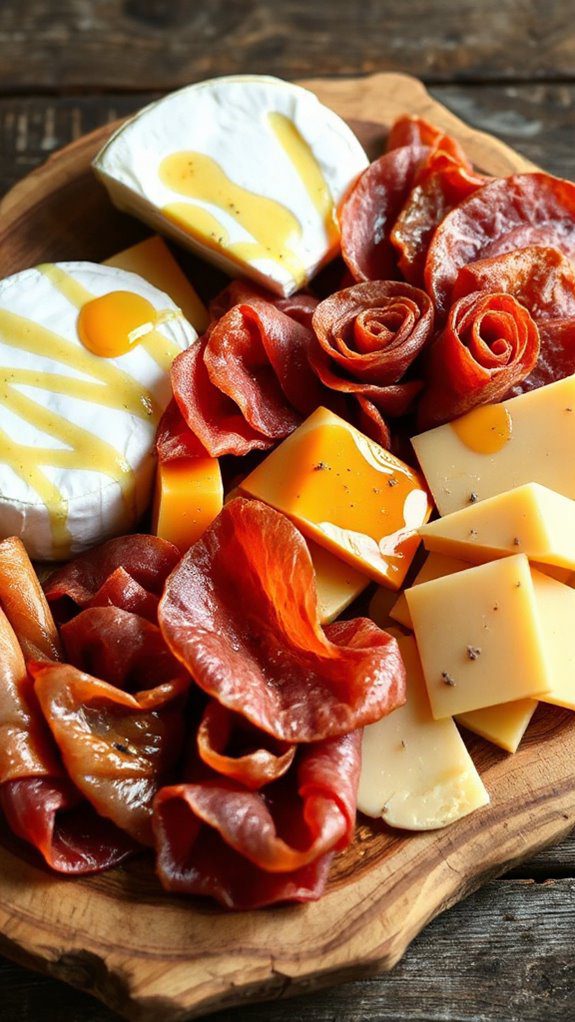
The Classic Charcuterie Board is a delightful assortment of cured meats, cheeses, fruits, nuts, and other complementary bites, making it a perfect centerpiece for any gathering, especially during festive occasions like Easter. This dish is ideal for entertaining guests or serving as an appetizer before a main meal, and the preparation time is approximately 30 minutes, allowing for plenty of creativity as you curate your selection based on personal tastes and seasonal availability.
Ingredients:
- Assorted cured meats (e.g., salami, prosciutto, chorizo)
- A variety of cheeses (e.g., brie, sharp cheddar, gouda)
- Fresh fruits (e.g., grapes, berries, apples)
- Dried fruits (e.g., apricots, figs)
- Nuts (e.g., almonds, walnuts)
- Spreads (e.g., honey, fig jam, mustard)
- Crackers and/or bread (e.g., baguette slices, breadsticks)
- Fresh herbs for garnish (e.g., rosemary, thyme)
Instructions:
- Select a Platter: Begin by choosing a large wooden board or a decorative platter to serve as the base for your charcuterie display.
- Arrange the Cheeses: Start by placing the cheeses on the board, selecting 2-4 different types. Cut some into slices and leave others whole for variety.
- Add the Meats: Next to the cheeses, arrange the cured meats. You can fold or roll them for an appealing presentation. Aim for a mix of textures and flavors.
- Incorporate Fruits: Place fresh fruits around the meats and cheeses, creating visual balance. Scatter dried fruits in small mounds to add color and sweetness.
- Include Nuts and Spreads: Fill in any gaps with nuts and small bowls of spreads. Nut flavors pair well with both cheeses and meats.
- Fill with Crackers and Bread: Place an assortment of crackers and slices of bread around the board to allow guests to build their own bites.
- Garnish: Finish by garnishing with fresh herbs for a pop of green and added aroma.
Tips and Variations:
- Seasonal Choices: Adapt your selection based on what's in season or celebrate the holiday by incorporating seasonal ingredients, like spring berries or edible flowers.
- Dietary Restrictions: Consider the dietary preferences of your guests by offering gluten-free crackers, vegan cheese, or plant-based meats.
- Themed Charcuterie: To add a fun twist, you can create a themed board, such as Mediterranean (adding olives, hummus, and pita) or Italian (incorporating bruschetta and roasted peppers).
- Presentation: Use small bowls for spreads to create a tidy look and give guests easy access. Always make sure you have plenty of napkins and utensils for serving.
- Taste Pairings: Encourage guests to try different combinations of meats, cheeses, and fruits to discover fun flavor pairings.
Creating a Classic Charcuterie Board offers endless possibilities for customization and is sure to impress your guests during your Easter celebrations!
- Makes Everything Simple : Just forget your bagged cheese! Only turn the handle for several times and get...
- Premium Material : All parts of the rotary cheese grater are made of food grade ABS material, no BPA. The...
- Three Option Grater : The parmesan cheese grater finishes food preparation with slicing, shredding and...
Cheesy Delight: A Selection of Artisan Cheeses
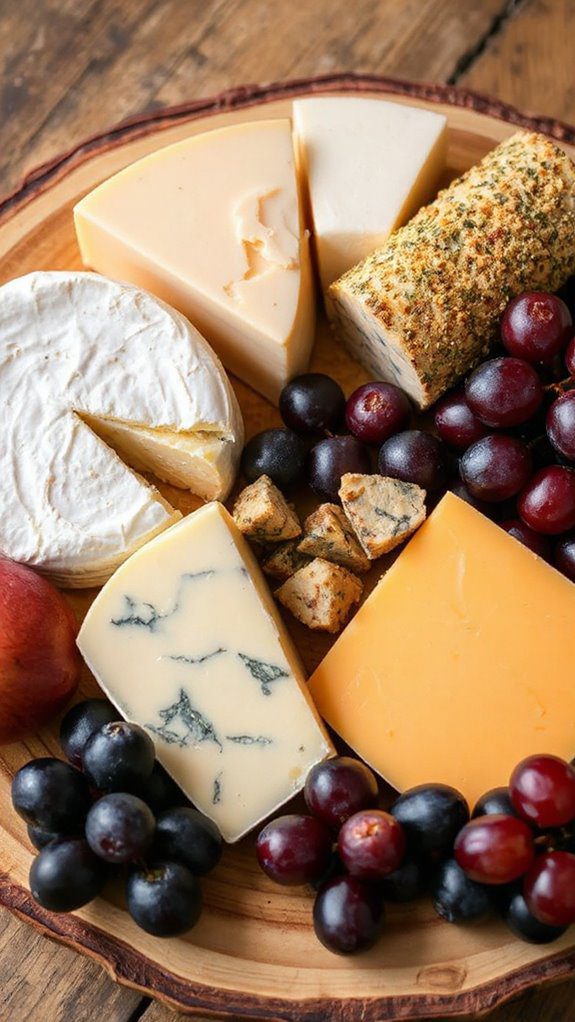
This Cheesy Delight dish is a beautifully arranged platter featuring a selection of artisan cheeses, perfect for gatherings, Easter celebrations, or a cozy evening snack with friends and family.
The combination of various textures and flavors allows guests to indulge in their favorites while trying new cheeses. This delightful platter takes about 15 minutes to prepare and can be easily customized to suit different tastes.
Ingredients:
- 1 wheel of Brie cheese
- 1 block of aged cheddar cheese
- 1 log of goat cheese
- 1 wedge of blue cheese
- 1 piece of gouda cheese
- Fresh fruits (e.g., grapes, figs, or apple slices)
- A handful of mixed nuts (e.g., almonds, walnuts, or pecans)
- Assorted crackers (e.g., water crackers, breadsticks, or crostini)
- Honey or fig jam for drizzling
- Fresh herbs for garnish (e.g., rosemary or thyme)
Instructions:
- Select Your Cheeses: Choose a variety of cheeses with different textures and flavors. Aim for a balance of creamy, aged, and tangy cheeses.
- Prepare the Platter: Start with a large wooden board or a serving platter. Place the larger wheels and blocks of cheese in different corners, leaving enough space in the center for other accompaniments.
- Add Accompaniments: Fill the gaps with fresh fruits, mixed nuts, and assorted crackers. Arrange them aesthetically, making sure colors and shapes complement one another.
- Drizzle and Garnish: Add a small bowl of honey or fig jam on the platter for a sweet touch. You can drizzle a bit of honey over the cheese for extra flavor.
- Garnish: Garnish with fresh herbs to add a touch of greenery.
- Serving: Provide cheese knives and small tasting forks for guests to serve themselves, allowing them to mix and match flavors as they please.
Variations and Tips:
- Cheese Selection: Feel free to include other artisan cheeses like Manchego, Roquefort, or Camembert based on your preference.
- Seasonal Fruits: Incorporate seasonal fruits such as berries in summer or pomegranates in winter to enhance the presentation.
- Make It Sweet: For a sweet touch, consider adding chocolate-covered almonds or dried fruits such as apricots and cranberries.
- Pairing Suggestions: Offer a selection of wines that pair well with your cheese choices—white wines typically pair nicely with creamy cheeses, while reds go well with aged cheeses.
- Presentation: Use small bowls for jams, dried fruits, and nuts to create neat sections and enhance the visual appeal of the platter.
This Cheesy Delight platter is sure to impress your guests, providing a delightful experience for cheese lovers and a beautiful centerpiece for your Easter grazing.
Enjoy!
- 💰 REDUCE WASTE AND SAVE MONEY: Chef Preserve keeps FOOD FRESH 5 TIMES LONGER than non-vacuum storage...
- ✅ POWERFUL, QUICK & EASY TO USE: Simply press the button to start. The device vacuum seals a bag in 5...
- ♻️ REUSABLE & RESEALABLE BAGS: Chef Preserve comes with dishwasher, freezer, refrigerator, and...
Fresh Fruit Fiesta
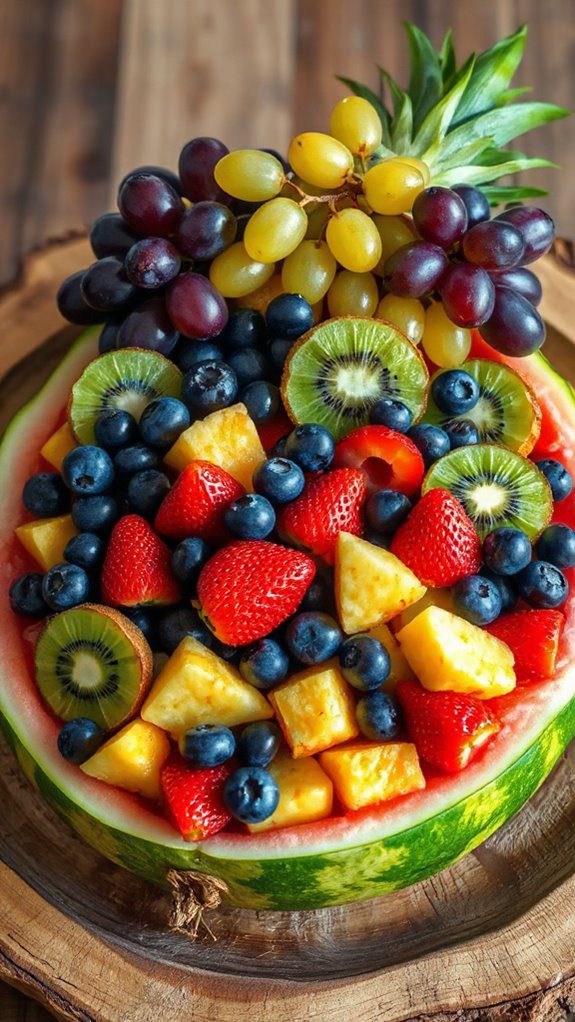
The Fresh Fruit Fiesta is a vibrant and colorful dish that's perfect for Easter gatherings, picnics, or brunches with family and friends. This stunning platter features a variety of seasonal fruits that not only burst with flavor but also provide a healthy and invigorating option for your guests.
Preparation time is minimal, typically around 15-20 minutes, making it an easy yet impressive addition to your Easter grazing table.
Ingredients:
- 1 small watermelon
- 1 pint strawberries, hulled and halved
- 1 cup blueberries
- 2 ripe kiwis, peeled and sliced
- 2 cups pineapple chunks
- 1 cup grapes (red or green)
- 1 mango, peeled and diced
- Fresh mint leaves for garnish
- Optional: yogurt or honey for dipping
Instructions:
- Prepare the Base: Begin by slicing the watermelon in half. Use one half as the base for your fruit platter. Scoop out some of the flesh from the center to create more space for other fruits or set aside the removed flesh for another use.
- Arrange the Fruits: In the empty half of the watermelon, start arranging the fruit in colorful sections. Begin with the pineapple chunks, followed by the strawberries, kiwi slices, mango, grapes, and blueberries. Aim for a vibrant rainbow presentation to make the dish eye-catching.
- Garnish: Finish your platter by placing fresh mint leaves throughout for added freshness and a pop of color.
- Optional Dip: If desired, place a small bowl of yogurt or honey on the side for dipping. This provides an additional layer of flavor that can be delightful with the fruits.
Variations:
- Swap out any fruits you don't prefer or that are out of season. Alternatives like peaches, cherries, or coconuts can be great additions.
- For a tropical twist, consider adding lime juice and zest over the fruit for an extra zing.
- Include a few edible flowers for an elegant touch.
Tips:
- Choose fruits that are ripe and in season for the best flavor and to confirm they are at the peak of freshness.
- For easier serving, consider using toothpicks or skewers to create fruit kabobs from the assorted pieces.
- To keep the fruit fresh, consider painting a mixture of lemon juice and water on exposed flesh, which helps prevent browning, especially for sliced fruits.
With this Fresh Fruit Fiesta, you're sure to impress your guests with a dish that's as beautiful as it is delicious!
- Generous Capacity: 7-quart slow cooker that comfortably serves 9+ people or fits a 7-pound roast
- Cooking Flexibility: High or low slow cooking settings, with convenient warm function for ideal serving...
- Convenient: Set it and forget it feature enables you to cook while at work or performing daily tasks
Mediterranean Inspiration: Hummus and Olive Platter
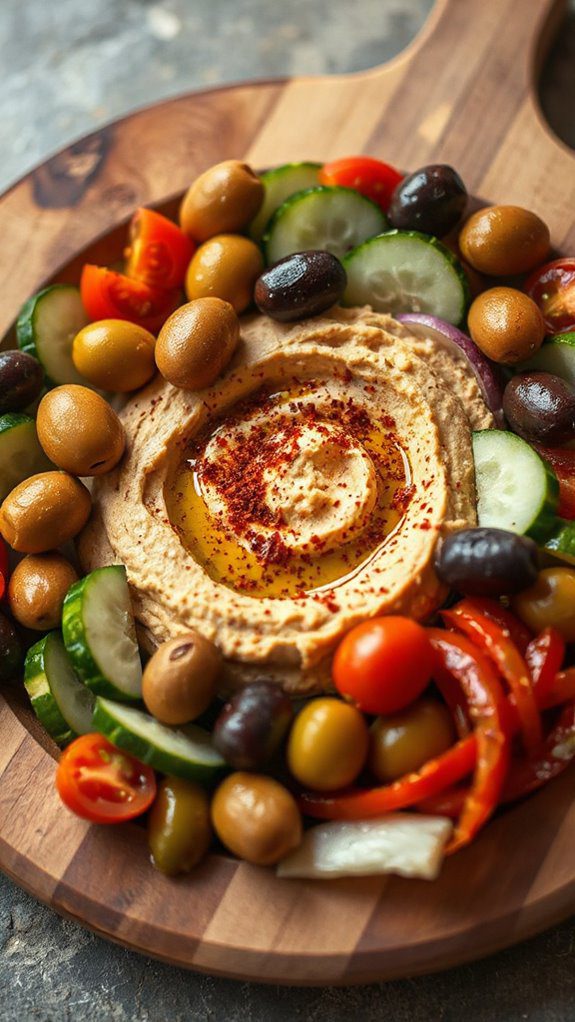
A Mediterranean-inspired hummus and olive platter is a delightful dish perfect for gatherings and parties, especially during festive occasions like Easter. This dish is vegetarian and can easily accommodate vegan diets, making it an ideal choice for diverse dietary preferences.
With a preparation time of just 20 minutes, you can create a vibrant and flavorful platter that's sure to impress your guests with its colorful array of ingredients.
Ingredients:
- 1 cup of hummus (store-bought or homemade)
- 1 cup of mixed olives (green, black, kalamata)
- 1 small cucumber, sliced
- 1 cup of cherry tomatoes, halved
- 1 red bell pepper, sliced
- 1 small bunch of fresh parsley, chopped
- 1 tablespoon of olive oil
- 1 teaspoon of paprika
- Pita bread or crackers for serving
Cooking Steps:
- Prepare the Base: If using homemade hummus, blend cooked chickpeas, tahini, lemon juice, garlic, and olive oil in a food processor until smooth, seasoning with salt to taste. For store-bought hummus, simply scoop it onto the center of your serving platter.
- Create the Olive Mix: In a small bowl, combine the mixed olives and drizzle them with a little olive oil. Toss to coat and then add to the platter next to the hummus.
- Arrange the Vegetables: Neatly arrange the cucumber slices, cherry tomatoes, and bell pepper slices around the hummus and olives, creating a colorful display.
- Garnish: Sprinkle the chopped parsley and paprika over the hummus for an extra splash of color and flavor.
- Serve: Add the pita bread or crackers in a basket or on the side of the platter for dipping.
Variations and Tips:
- Add More Dips: Consider including tzatziki or baba ganoush on the platter for added variety.
- Spice It Up: For a spicy kick, mix in some roasted red pepper flakes or jalapeños into your hummus.
- Seasonal Twist: Adapt the vegetables according to the season. Roasted vegetables can also be a delicious addition.
- Presentation: Use a large wooden board or a circular platter for an impressive presentation and make sure to arrange everything in a visually appealing way.
- Pairing: Complement the platter with wines such as Sauvignon Blanc or a light Rosé for an invigorating pairing.
With these steps and variations, your Mediterranean-inspired hummus and olive platter will be a stunning and delicious centerpiece for your Easter gathering!
- 100% Leak-proof: Guaranteed no-spill seal and secure latches
- Crystal-clear Tritan Built: Stain-resistant and odor-resistant material for a clear view of contents
- Lightweight & Sturdy: Easy to carry, yet durable for everyday use
Easter Egg-themed Sweet Treats

Easter Egg-themed Sweet Treats are delightful no-bake desserts that will add a touch of whimsy to any Easter grazing platter. These colorful, egg-shaped confections are perfect for kids and adults alike, making them a fun family activity leading up to the holiday.
With a preparation time of only 30 minutes, you can whip up these sweet treats in no time, allowing for plenty of enjoyment during Easter celebrations.
Ingredients:
- 2 cups of shredded coconut
- 1 cup of powdered sugar
- 1 cup of white chocolate chips
- 2 tablespoons of unsweetened cocoa powder
- 1 teaspoon of vanilla extract
- Food coloring (various pastel colors)
- Mini chocolate eggs or candy-coated chocolates (for decoration)
- Cooking spray or parchment paper (for easy handling)
Instructions:
- Prepare the Base: In a large mixing bowl, combine the shredded coconut and powdered sugar. Mix well to incorporate the sugar evenly into the coconut.
- Melt the Chocolate: In a microwave-safe bowl, melt the white chocolate chips in 30-second intervals, stirring in between until smooth. Be careful not to overheat the chocolate.
- Combine Ingredients: Once melted, add the vanilla extract to the melted chocolate, then pour the mixture into the bowl with the coconut and powdered sugar. Stir until all ingredients are thoroughly combined.
- Divide and Color: Take the mixture and divide it into several smaller bowls, depending on how many colors you want. Use food coloring to tint each portion to your desired pastel shades. Mix well to achieve an even color.
- Shape the Eggs: Lightly grease your hands with cooking spray or use parchment paper for easy handling. Take spoonfuls of the colored coconut mixture and shape them into egg shapes. Place them on a baking sheet lined with parchment paper.
- Decorate: Press a mini chocolate egg or candy-coated chocolate on top of each coconut egg for decoration.
- Chill: Put the tray in the refrigerator for at least 30 minutes to set.
Variations and Tips:
- Flavor Additions: You can add a teaspoon of almond extract or coconut extract for additional flavor.
- Coconut Alternatives: If you or your guests are not fans of coconut, consider using crushed graham crackers or crushed Oreos as the base for a similar treat.
- Colorful Coating: After forming the eggs, you can roll them in crushed nuts or sprinkles for added texture and fun.
- Make It a Family Activity: Involve kids in the coloring and shaping process to make it a fun Easter tradition!
- Storage: Store leftovers in an airtight container in the refrigerator for up to a week.
- 𝗘𝗳𝗳𝗼𝗿𝘁𝗹𝗲𝘀𝘀 𝗪𝗲𝗶𝗴𝗵𝗶𝗻𝗴: Supports 5 units...
- 𝗣𝗿𝗲𝗰𝗶𝘀𝗲 𝗥𝗲𝘀𝘂𝗹𝘁𝘀: Accurately weighs up to 11 lb/5 kg with 1 g...
- 𝗦𝗶𝗺𝗽𝗹𝗲 & 𝗖𝗼𝗺𝗽𝗮𝗰𝘁: The small and sleek scale is a perfect fit for...
Savory Spinach and Feta Pinwheels
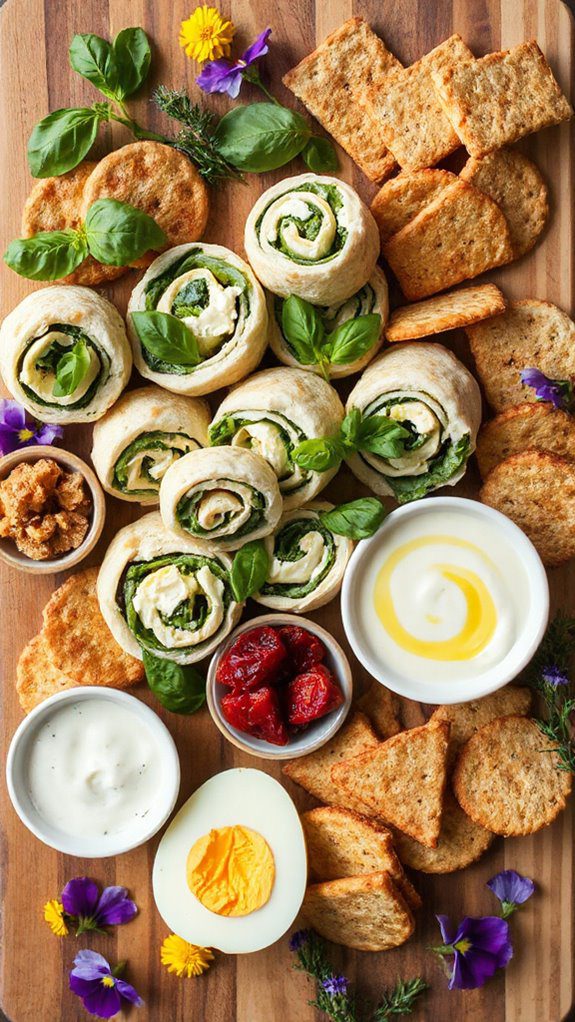
Savory Spinach and Feta Pinwheels are a delightful and elegant appetizer perfect for any Easter grazing platter. These bite-sized treats combine the rich flavors of spinach and tangy feta cheese, all rolled up in a thin tortilla wrap. They are ideal for gatherings, allowing guests to enjoy a burst of flavor with minimal fuss.
With a preparation time of around 15-20 minutes, this recipe is quick to make and can be prepared ahead of time, making it a stress-free addition to your holiday spread.
Ingredients:
- 1 cup fresh spinach, chopped
- 1 cup feta cheese, crumbled
- 1/2 cup cream cheese, softened
- 1/4 cup sun-dried tomatoes, chopped
- 1 teaspoon garlic powder
- 1 teaspoon dried oregano
- 4 large flour tortillas (spinach or plain)
- Olive oil (for brushing)
- Salt and pepper, to taste
Instructions:
- In a mixing bowl, combine the chopped spinach, crumbled feta cheese, softened cream cheese, chopped sun-dried tomatoes, garlic powder, dried oregano, salt, and pepper. Mix until all ingredients are well incorporated.
- Lay one tortilla flat on a clean surface. Spread a generous layer of the spinach and feta mixture evenly over the tortilla, leaving a small border around the edges.
- Starting from one end, carefully roll the tortilla up tightly into a log shape. Make sure it's firm to maintain the shape once cut.
- Repeat the process for the remaining tortillas until the filling is used up.
- Once all tortillas are rolled, use a sharp knife to slice each log into 1-inch thick pinwheels.
- For an extra touch, brush the tops of the pinwheels with a bit of olive oil and sprinkle a pinch of dried oregano before serving.
Variations and Tips:
- To add a spicy kick, mix in some crushed red pepper flakes to the filling.
- Experiment with different kinds of cheese, such as goat cheese or mozzarella, for a variation in flavor.
- Substitute the sun-dried tomatoes with roasted red peppers for a sweeter twist.
- For a gluten-free option, use gluten-free tortillas instead of flour ones.
- These pinwheels can be made a day in advance; simply cover them tightly with plastic wrap and store them in the refrigerator. Slice just before serving to maintain freshness.
Serve these Savory Spinach and Feta Pinwheels on your grazing platter alongside dips, crackers, and other finger foods for a delicious and visually appealing spread that your guests will love!
- Instant Read Food Thermometer | Our instant read thermometer features a temperature probe and advanced,...
- Multi-Use | From bbq thermometer to baking thermometer, our digital food thermometer for cooking is...
- Easy-Read Digital Thermometer For Cooking | Large instant thermometer dial with bright blue backlight...
Colorful Antipasto Spread
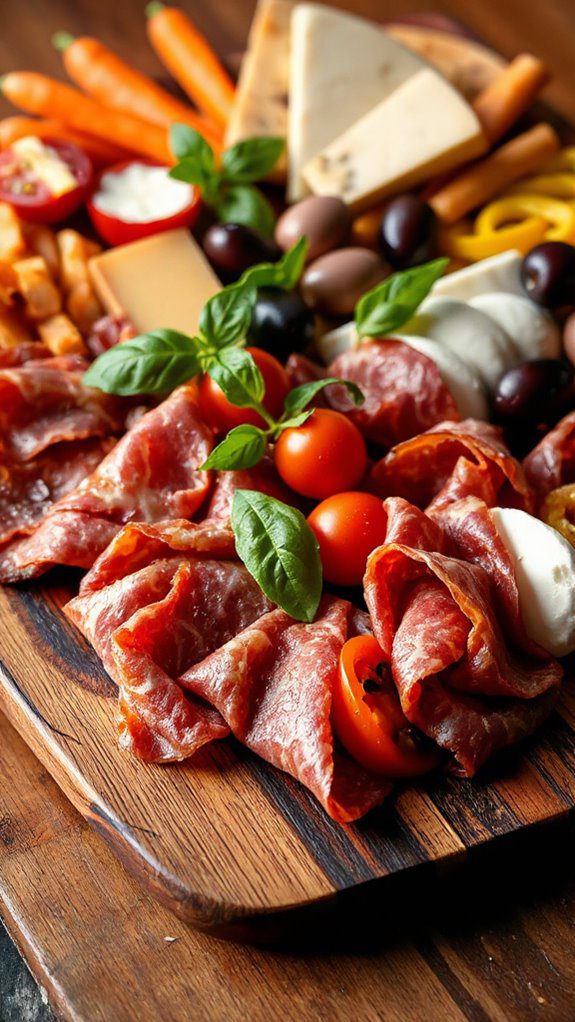
A colorful antipasto spread is a vibrant and inviting dish perfect for any Easter gathering or springtime celebration. This platter is ideal for sharing among family and friends, featuring a variety of cured meats, cheeses, fresh vegetables, olives, and bread. The preparation time is about 30 minutes, making it a quick yet impressive addition to your feast that can be beautifully arranged on a large platter or board.
Ingredients:
- Assorted cured meats (salami, prosciutto, pepperoni)
- Variety of cheeses (mozzarella, cheddar, gouda, feta)
- Cherry tomatoes
- Bell peppers (red, yellow, green) – sliced
- Cooked artichoke hearts
- Olives (green and black)
- Baby carrots
- Cucumber, sliced
- Fresh basil leaves
- Balsamic glaze
- Olive oil
- Crackers or sliced baguette
Cooking Steps:
- Prepare the Ingredients: Begin by washing and slicing the vegetables—cherry tomatoes in half, bell peppers into strips, and cucumbers into rounds. Arrange them in separate bowls for easy access.
- Arrange the Meats and Cheeses: On a large platter or cheese board, start by layering the assorted cured meats. Fold or roll the meats for an appealing presentation. Next, add cubes or wedges of cheeses in various spots around the platter.
- Add the Veggies: Fill in the empty spaces with the prepared cherry tomatoes, sliced bell peppers, cucumber, baby carrots, and artichoke hearts, ensuring an assortment of colors and textures.
- Incorporate Olives: Scatter both green and black olives in small bowls or on the platter, adding a briny contrast to the remaining ingredients.
- Garnish: Tuck fresh basil leaves throughout the spread for a touch of freshness. Drizzle olive oil and balsamic glaze over the platter for added flavor and elegance.
- Serve with Bread and Crackers: Place your choice of crackers or sliced baguette around the antipasto spread, allowing guests to create their own combinations.
Variations and Tips:
- Experiment with different cheeses and meats based on personal preferences or seasonal availability.
- For a vegetarian option, replace meats with grilled or marinated vegetables such as zucchini or eggplant.
- Incorporate pickled vegetables for a tangy twist.
- Consider adding dips like hummus or pesto for additional flavors.
- Serve with wine or sparkling beverages for an enhanced dining experience.
This colorful antipasto spread will not only look beautiful on the table but also satisfy a variety of palates, making it a delightful addition to your Easter celebration.
- Versatile 54-Piece Collection: Elevate your kitchen with the Home Hero 54-Piece Kitchen Utensil Set, a...
- Durable and Long-Lasting: Crafted from premium stainless steel, these kitchen utensils are designed to...
- Perfect Holiday Gift: Delight your loved ones with this kitchen utensils gift set this festive season....
Seafood Selection: Shrimp and Smoked Salmon

This delightful Shrimp and Smoked Salmon Platter is a sophisticated choice for your Easter gathering, perfect for seafood lovers. This appetizer combines the sweetness of shrimp with the rich, smoky flavors of salmon, making it a treat for your guests.
With a preparation time of just 20 minutes, this platter is not only quick to assemble but also visually stunning, bringing elegance to your Easter grazing table.
Ingredients:
- 1 pound of large shrimp, peeled and deveined
- 8 ounces of smoked salmon, sliced
- 1 lemon, sliced into wedges
- Fresh dill, for garnish
- 1/4 cup of cocktail sauce
- 1/4 cup of capers
- Optional: 1 avocado, sliced
- Optional: Cream cheese or herbed spread
Cooking Steps:
- Cook the Shrimp: In a large pot, bring water to a boil. Add the shrimp and cook for about 2-3 minutes, or until they turn pink and opaque. Drain and immediately transfer the shrimp to a bowl of ice water to stop the cooking process. Once cooled, drain again and pat dry.
- Prepare the Platter: On a large serving platter or board, arrange the smoked salmon slices elegantly. You may fold them or roll them for a beautiful presentation.
- Add the Shrimp: Arrange the cooked shrimp around the smoked salmon on the platter.
- Garnish: Scatter lemon wedges, fresh dill, and capers across the platter for both flavor and decoration.
- Serve with Dips: Place cocktail sauce in a small bowl in the center, and if using, add slices of avocado and dollops of cream cheese or herbed spread to complement the seafood.
Variations and Tips:
- Heat Option: For an extra touch, consider grilling or sautéing the shrimp with garlic and lemon butter before adding them to the platter for a warm version.
- Herbed Cream Cheese: Mix cream cheese with fresh herbs like chives or parsley for a flavorful spread on crackers.
- Garnish: Other garnishes such as radishes or thin cucumber slices can add color and vibrancy to your platter.
- Pairing: Serve this seafood platter with a crisp white wine or sparkling water for a rejuvenating touch during your Easter celebration.
This shrimp and smoked salmon platter is sure to impress your guests and make your Easter table a feast for the eyes and the palate!
- 24-ounce insulated stainless-steel water bottle with a FreeSip spout and push-button lid with lock
- Patented FreeSip spout designed for either sipping upright through the built-in straw or tilting back to...
- Protective push-to-open lid keeps spout clean; convenient carry loop doubles as a lock
Whimsical Bunny-themed Cake Pops

Whimsical bunny-themed cake pops are delightful little treats that capture the essence of Easter in a fun and creative way.
These bite-sized desserts are perfect for kids' parties, Easter celebrations, or just to add a sprinkle of joy to your dessert table.
With a prep time of about 30 minutes and a chilling time of at least 1 hour, these cake pops are both easy to make and visually appealing.
Imagine fluffy cake encased in chocolate and decorated to resemble cute bunnies—it's a treat that's sure to bring smiles to everyone!
Ingredients:
- 1 box of cake mix (any flavor)
- 1 cup of frosting (matching cake flavor)
- 12 oz of white chocolate or candy coating
- Lollipop sticks
- Food coloring (pink and black)
- Mini chocolate chips (for eyes)
- Pink jelly beans or marshmallows (for bunny noses)
- Sprinkles or edible glitter (optional)
Instructions:
1. Bake the Cake: Prepare and bake the cake according to package instructions. Allow it to cool completely.
2. Crumble the Cake: Once cooled, crumble the cake into a large bowl until it resembles fine crumbs.
3. Mix in Frosting: Gently mix in the frosting until the mixture is moist and holds together when rolled into a ball.
4. Shape the Cake Pops: Roll the mixture into small balls (about 1 inch in diameter) and place them on a parchment-lined baking sheet.
5. Insert Lollipop Sticks**: Melt a small amount of white chocolate (or candy coating) in a microwave-safe bowl. Dip the tip of each lollipop stick into the melted chocolate** and then insert it into the center of each cake ball. This will help hold the stick in place.
6. Chill: Refrigerate the cake pops for at least 30 minutes, or until firm.
7. Coat with Chocolate: Melt the remaining white chocolate and let it cool slightly. Dip each cake pop into the melted chocolate, making sure to coat it evenly. Allow any excess to drip off.
8. Decorate as Bunnies: Before the chocolate sets, decorate the pops! Use mini chocolate chips for the eyes and a jelly bean or mini marshmallow for the nose.
For the bunny ears, you can decorate with pink food coloring applied with a toothpick or use small pieces of fondant.
9. Allow to Set: Place the decorated cake pops upright in a block of Styrofoam or floral foam to set.
10. Serve and Enjoy: Once the chocolate has hardened, your whimsical bunny-themed cake pops are ready to be enjoyed!
Variations and Tips:
- Flavor Variations: Feel free to use different cake flavors such as carrot, chocolate, or vanilla for different taste experiences.
- Sprinkling Fun: Add colorful sprinkles or edible glitter for extra flair.
- Storage: Keep the cake pops refrigerated in an airtight container if not consumed immediately; they can last for up to a week.
- Make it Personal: For an added touch, customize the decorations according to your party theme or colors.
- Use Different Shaping Techniques: For an added touch and to create variety, consider shaping some cake pops into different Easter-themed shapes, like eggs or chicks, while maintaining the bunny decor style.
These whimsical bunny-themed cake pops will surely be a hit wherever they are served, combining taste and artistry in every bite!
Mini Quiches and Savory Pastries

Mini quiches and savory pastries are delightful additions to an Easter grazing platter, perfect for brunch gatherings with family and friends. These bite-sized wonders can be filled with a variety of ingredients to cater to different palates, making them ideal for any crowd.
With a preparation time of around 30 minutes and a cooking time of 20 minutes, you can whip up these delicious treats in no time, ensuring everyone enjoys a savory snack alongside their Easter celebrations.
Ingredients:
- 6 large eggs
- 1 cup milk
- 1 cup shredded cheese (cheddar, mozzarella, or your choice)
- 1 cup chopped vegetables (spinach, bell peppers, onions, or mushrooms)
- 1 cup diced cooked meat (ham, bacon, or sausage optional)
- 1 package of pre-made pastry dough, phyllo dough, or puff pastry
- Salt and pepper to taste
- Cooking spray or oil for greasing
- Fresh herbs (thyme, parsley, or chives for garnish, optional)
Cooking Steps:
- Preheat the oven to 375°F (190°C).
- Roll out the pastry dough on a lightly floured surface and cut it into small circles or squares, depending on your chosen shape. Use a cookie cutter or a glass to help with even sizing.
- Lightly grease a muffin tin or pastry tray with cooking spray or oil.
- Press the pastry circles into the muffin cups, ensuring they cover the base and sides properly to hold in the filling.
- In a mixing bowl, whisk together the eggs, milk, salt, and pepper until well combined.
- Evenly distribute the chopped vegetables and diced cooked meat (if using) among the pastry-lined muffin cups.
- Pour the egg mixture over the fillings in each cup until nearly full, being careful not to overflow.
- Sprinkle shredded cheese on top of each mini quiche.
- Bake in the preheated oven for 17-20 minutes or until the egg is set and the pastry is golden brown.
- Remove from the oven and let cool for a few minutes before serving. Garnish with fresh herbs if desired.
Variations and Tips:
- For a vegetarian option, omit the meat and add additional vegetables like zucchini or sun-dried tomatoes instead.
- Spice it up by adding chopped jalapeños or herbs like basil or oregano to the egg mixture.
- If you prefer a lighter version, use egg whites and low-fat milk.
- Mini quiches can be made ahead of time; simply bake them, allow to cool, and store in the refrigerator. Reheat in the oven before serving for the best texture.
- You can also use store-bought mini pastry shells as a shortcut to save time.
Crunchy Veggie Dips With Flavorful Spreads
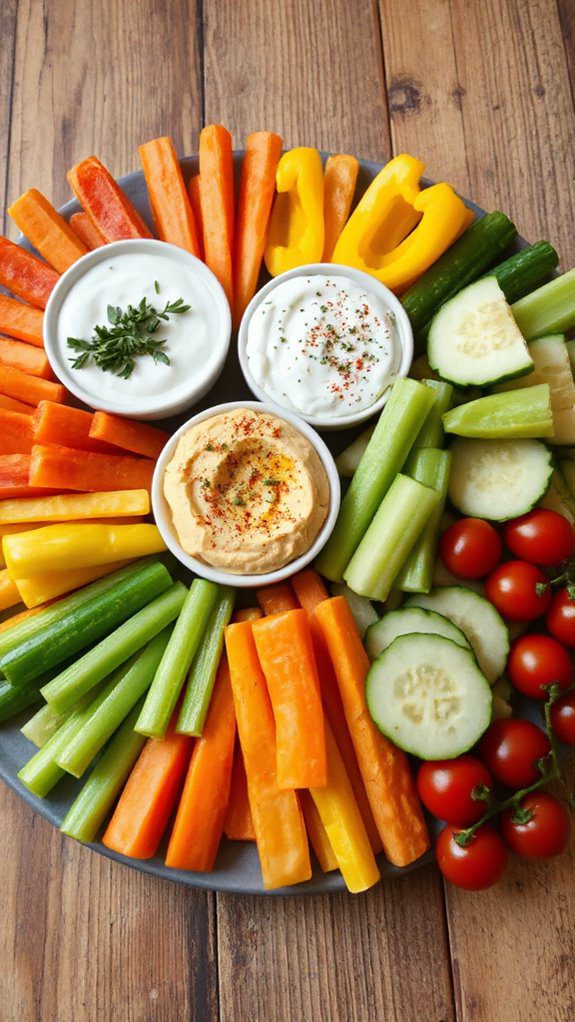
Crunchy veggie dips with flavorful spreads are a fresh and vibrant addition to any Easter grazing platter. Perfect for gatherings with family and friends, these dips are not only delicious but also offer a healthy option amidst the indulgent treats of the holiday.
This dish takes about 15 minutes to prepare, making it an easy appetizer that will impress your guests and encourage them to munch on colorful and nutritious veggies.
Ingredients:
- 1 cup plain Greek yogurt
- 1 tablespoon lemon juice
- 1 teaspoon garlic powder
- 1 teaspoon onion powder
- 1 teaspoon dried dill weed
- Salt and pepper to taste
- 1 cup hummus (store-bought or homemade)
- 1 cup assorted fresh vegetables (carrots, bell peppers, celery, cucumbers, cherry tomatoes, etc.)
- Optional: 1 tablespoon of chopped fresh herbs (parsley, chives, or cilantro)
Cooking Steps:
- In a medium mixing bowl, combine the Greek yogurt, lemon juice, garlic powder, onion powder, dried dill, salt, and pepper. Mix until smooth. This will be your creamy veggie dip.
- In a separate bowl, place the hummus. If you wish, add a tablespoon of your choice of chopped fresh herbs to enhance the flavor.
- Arrange the assorted fresh vegetables on a large serving platter, creating an appealing visual of colors and shapes.
- Serve the creamy dip and hummus in small bowls on the platter alongside the veggies. You can optionally garnish each dip with a sprinkle of additional herbs for added texture and freshness.
- Encourage your guests to dip the veggies into the flavorful spreads, enjoying a mix of crunchy textures and delicious flavors.
Variations and Tips:
- Experiment with different spices in the yogurt dip, such as paprika or cumin, for a unique twist.
- For a spicy kick, try adding a few drops of sriracha or a pinch of cayenne pepper to the yogurt dip.
- Consider using bean dips or avocado spreads instead of hummus for variety.
- If you're short on time, pre-packaged vegetable trays can be a convenient option, allowing you to focus on preparing the dips.
- Arrange the platter in a rainbow format to make it visually appealing, which adds a festive touch to your Easter celebration!
Decadent Chocolate Fondue Station
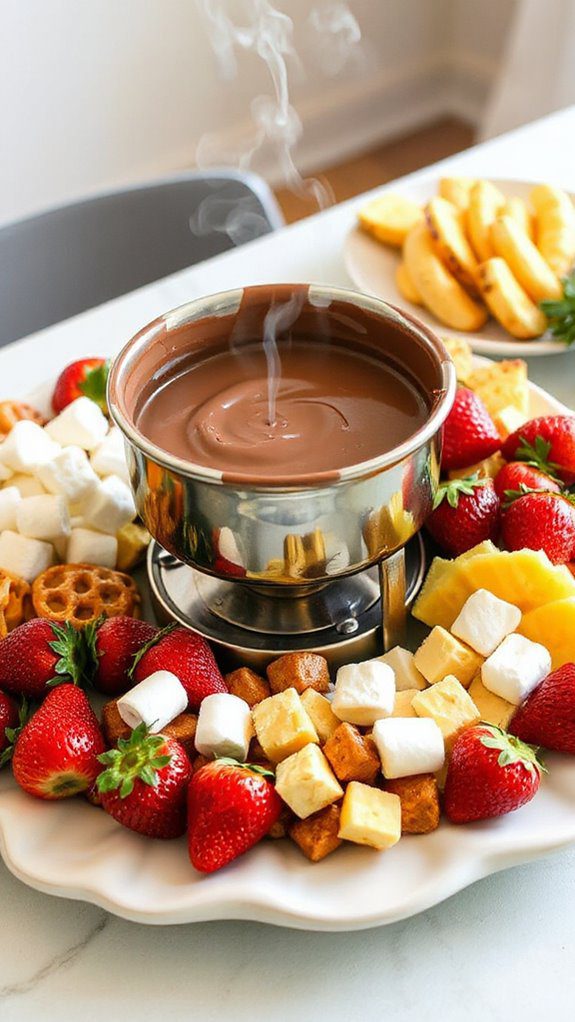
A decadent chocolate fondue station is the ultimate centerpiece for any Easter gathering, perfect for both kids and adults who indulge in sweet treats.
This interactive dessert allows guests to dip a variety of fruits, marshmallows, and snacks into warm, melted chocolate, creating a personalized dessert experience. Preparation takes about 15-20 minutes, making it a quick yet impressive treat for your Easter grazing platter.
Ingredients:
- 2 cups semi-sweet chocolate chips (or dark chocolate)
- 1 cup heavy cream
- 1 teaspoon vanilla extract
- Fresh strawberries
- Banana slices
- Marshmallows
- Pretzel bites
- Pineapple chunks
- Rice crispy treats
- Wooden skewers or fondue forks
- Optional: assorted nuts or sprinkles for extra toppings
Instructions:
- Prep the Chocolate: In a medium saucepan over low heat, combine the chocolate chips and heavy cream. Stir continuously until the chocolate is fully melted and the mixture is smooth. Remove from heat and stir in the vanilla extract.
- Set Up the Fondue Station: Pour the melted chocolate into a fondue pot or a heat-proof serving bowl. If using a fondue pot, keep it on a low setting to maintain the warmth. Arrange all dipping items on a large platter surrounding the fondue.
- Serve: Provide skewers or fondue forks for guests to dip their chosen items into the melted chocolate. Encourage them to mix and match different items for unique flavor combinations.
Variations and Tips:
- Chocolate Variety: Experiment with different types of chocolate such as milk chocolate, white chocolate, or flavored options like caramel or mint.
- Flavor Enhancements: Add a pinch of salt or a splash of your favorite liqueur (like Kahlua or Grand Marnier) to the chocolate for additional depth of flavor.
- Dipping Options: Beyond fruit and marshmallows, consider adding pound cake cubes, Oreos, or graham crackers for a fun twist.
- Keep Warm: If the chocolate starts to cool down too much, reheat gently on the stove or microwave in short intervals, stirring in between to maintain a smooth consistency.
- Garnish: Offer toppings such as crushed nuts, toffee bits, or colored sprinkles to elevate the experience and add some crunch.
Enjoy this delightful and interactive chocolate fondue station as a highlight of your Easter celebration!
Homemade Bread and Butter Pairings
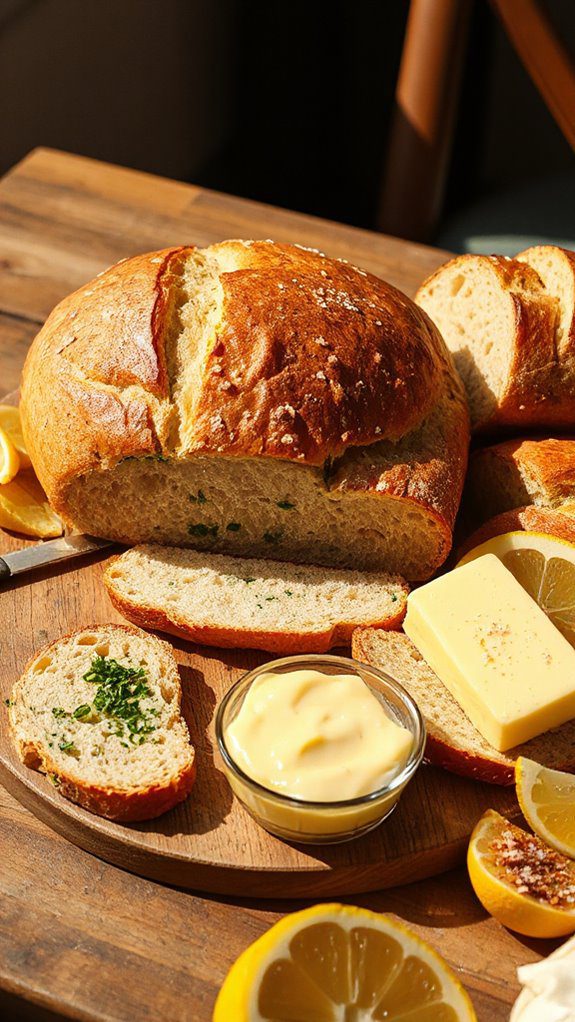
Homemade bread and butter pairings make for a delightful addition to any grazing platter, especially during Easter celebrations. This dish showcases the art of creating fresh, warm bread combined with a selection of flavored butters that enhance the overall dining experience. Perfect for family gatherings or intimate dinners, this dish can be prepared in about 2 hours, including baking time and cooling.
Ingredients
- 3 ½ cups all-purpose flour
- 1 packet (2 ¼ teaspoons) active dry yeast
- 1 tablespoon sugar
- 1 teaspoon salt
- 2 tablespoons unsalted butter, melted
- 1 ½ cups warm water (110°F)
- Flavored butters:
- ½ cup unsalted butter, softened
- 2 tablespoons fresh herbs (parsley, chives, or thyme)
- 1 tablespoon honey
- 1 teaspoon garlic powder
- Zest of 1 lemon
Cooking Steps
- Prepare the Dough: In a large mixing bowl, combine 1 cup of warm water, sugar, and active dry yeast. Let it sit for about 5 minutes until the mixture is frothy.
- Mix Ingredients: Add the melted butter, salt, and 2 cups of flour to the yeast mixture. Start mixing until combined, then gradually add the remaining flour until the dough begins to form.
- Knead the Dough: Turn the dough out onto a floured surface and knead for about 8-10 minutes until smooth and elastic.
- First Rise: Place the dough in a greased bowl, cover it with a clean kitchen towel, and let it rise in a warm place for about 1 hour or until doubled in size.
- Shape the Loaf: Once risen, punch down the dough and shape it into a loaf or rolls. Place in a greased baking pan.
- Second Rise: Cover again and let it rise for another 30-45 minutes until puffed.
- Bake: Preheat your oven to 375°F (190°C). Bake the bread for 25-30 minutes, or until golden brown. It should sound hollow when tapped on the bottom.
- Cool: Let the bread cool on a wire rack for at least 15 minutes before slicing.
Variations and Tips
- Flavored Butter: For herb butter, mix ½ cup softened butter with your choice of fresh herbs, salt, and pepper. For honey butter, blend softened butter with honey and a pinch of salt. For lemon garlic butter, combine softened butter with garlic powder, lemon zest, and a bit of salt.
- Add Ingredients: Feel free to customize your bread by adding ingredients like chopped olives, sundried tomatoes, or cheese into the dough before the first rise.
- Storage: Store leftover bread wrapped in plastic or in an airtight container at room temperature for up to two days, or freeze for longer preservation.
- Serving Suggestion: Serve the warmed bread with a selection of flavored butters on a beautiful platter for a stunning presentation.
These homemade bread and butter pairings will not only enhance your Easter grazing platter but also bring warmth and comfort to your festive table. Enjoy experimenting with different flavors and styles!
Refreshing Spring Salads in Jars

Spring is the perfect time to enjoy invigorating salads, and what better way to serve them than in jars? These colorful, layered salads not only look beautiful but are also convenient for meal prep or picnic outings.
Ideal for busy individuals, families, or those looking to impress at potlucks, each jar can be customized according to taste preferences. With a preparation time of only about 20 minutes, these salads are a delightful way to embrace the fresh flavors of the season.
Ingredients:
- 1 cup cherry tomatoes, halved
- 1 cucumber, diced
- 1 cup bell peppers, chopped (any color)
- 1 cup corn kernels (fresh or canned)
- 1 cup cooked quinoa or couscous
- 1 avocado, diced
- 1/2 cup feta cheese or goat cheese, crumbled (optional)
- 1/4 cup red onion, finely chopped
- 1 cup mixed greens (spinach, arugula, etc.)
- 1/4 cup balsamic dressing or vinaigrette of choice
- Salt and pepper to taste
Instructions:
1. Layering the Jar: Start by adding the dressing to the bottom of the jar. This prevents the greens from getting soggy.
2. Add Ingredients: Next, layer the ingredients in the jar in the following order:
- Corn kernels
- Red onion
- Cherry tomatoes
- Cucumber
- Bell peppers
- Quinoa or couscous
- Avocado
- Feta or goat cheese (if using)
- Finish with mixed greens on top.
3. Seasoning: Sprinkle salt and pepper on top of the greens.
4. Seal and Store: Close the jars tightly with lids and store in the refrigerator for up to 4 days. When ready to eat, simply shake the jar to distribute the dressing and enjoy directly or pour onto a plate.
Variations and Tips:
- Protein Boost: Add grilled chicken, shrimp, or chickpeas for additional protein.
- Nutty Flavor: Include a handful of chopped nuts or seeds (like sunflower seeds or walnuts) for added crunch.
- Vegan Option: Omit cheese and use a plant-based dressing to make this dish vegan-friendly.
- Herb Infusion: Use fresh herbs like basil, parsley, or mint between the layers for extra flavor.
- Color Play: Mix and match vegetables according to seasonal availability and personal taste for a vibrant jar of goodness.
With these creative and versatile salad jars, you'll have a healthy and appealing option for any gathering or simply as a meal prep solution!


