Easter gatherings are brightened by pickled vegetables, providing a tangy delight. Classic pickled cucumbers and spicy pickled carrots offer vibrant flavors. Tangy pickled radishes and sweet and sour pickled beets add color and taste. For a fresh twist, vibrant pickled cauliflower and sweet-and-spicy pickled jalapeños enhance any dish. Pickled cherry tomatoes bring an extra zing. Consider incorporating herbed pickled zucchini or colorful mixed vegetables for variety. Discover a range of vibrant recipes to complement festive meals.
Classic Pickled Cucumbers
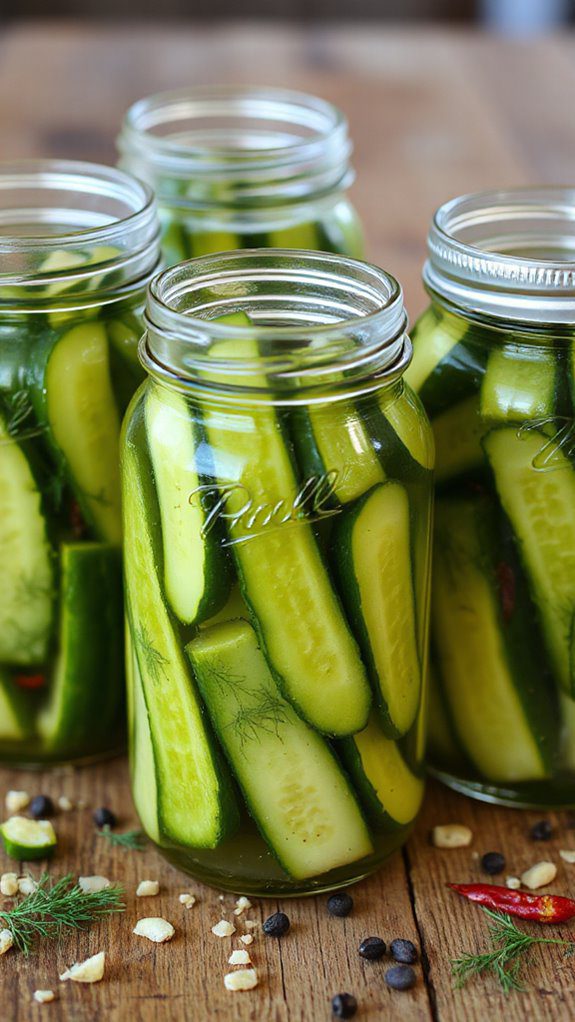
Classic pickled cucumbers, often referred to as dill pickles, are a revitalizing and tangy accompaniment that can elevate any meal. Perfect for picnics, barbecues, or simply as a snack, these crunchy delights are easy to make and can be enjoyed by everyone, especially those who love a burst of flavor in their foods.
The preparation time for this dish is approximately 30 minutes, plus an overnight steeping period for peak taste.
Ingredients:
- 4 medium-sized cucumbers (Kirby or pickling cucumbers are best)
- 1 cup white vinegar
- 1 cup water
- 1/4 cup granulated sugar
- 1 tablespoon salt
- 3 cloves garlic, crushed
- 1 tablespoon dill weed or 1 bunch fresh dill
- 1 teaspoon mustard seeds
- 1 teaspoon black peppercorns
- 1/2 teaspoon red pepper flakes (optional)
Cooking Steps:
- Prepare the Cucumbers: Wash the cucumbers thoroughly and slice them into spears or rounds, depending on your preference.
- Make the Brine: In a medium saucepan, combine the white vinegar, water, sugar, and salt. Heat over medium heat, stirring until the sugar and salt are fully dissolved. Remove from heat and allow to cool slightly.
- Pack the Jars: In clean glass jars, layer the cucumber slices with garlic, dill, mustard seeds, peppercorns, and red pepper flakes if using. Make sure to pack them tightly but not too tightly to prevent bruising.
- Pour the Brine: Once the brine has cooled to room temperature, pour it over the cucumbers in the jars, ensuring that all the cucumbers are submerged. Leave a little space at the top of the jars.
- Seal and Refrigerate: Seal the jars with lids and place them in the refrigerator. Allow the pickles to marinate for at least 24 hours before consuming for best results.
Variations and Tips:
- Add Spices: Experiment with different spices and herbs such as coriander seeds, bay leaves, or even slices of onion for additional flavor.
- Sweet Pickles: If you prefer your pickles on the sweeter side, increase the sugar to 1/2 cup.
- Quick Version: For a quicker pickling process, try a smaller batch by halving the recipe and using smaller jars.
- Storage: These pickles can last in the refrigerator for up to 1 month, but they are best enjoyed within the first week for maximum crispness.
- Hot Pickles: For a spicy kick, add fresh sliced jalapeños or other hot peppers to the jar along with the cucumbers.
Enjoy your homemade classic pickled cucumbers as a crunchy snack or a zesty addition to your favorite dishes!
- The Original Pro Chopper - Our superstar veggie slicer has been creating waves on TikTok! Simple to use,...
- Easy Meal Prep with Rust-Resistant Blades - Our vegetable chopper is perfect for anyone who wants to eat...
- 5-Star Design - The soft-grip TPU handle ensures controlled chopping, while the non-skid rubber base...
Spicy Pickled Carrots
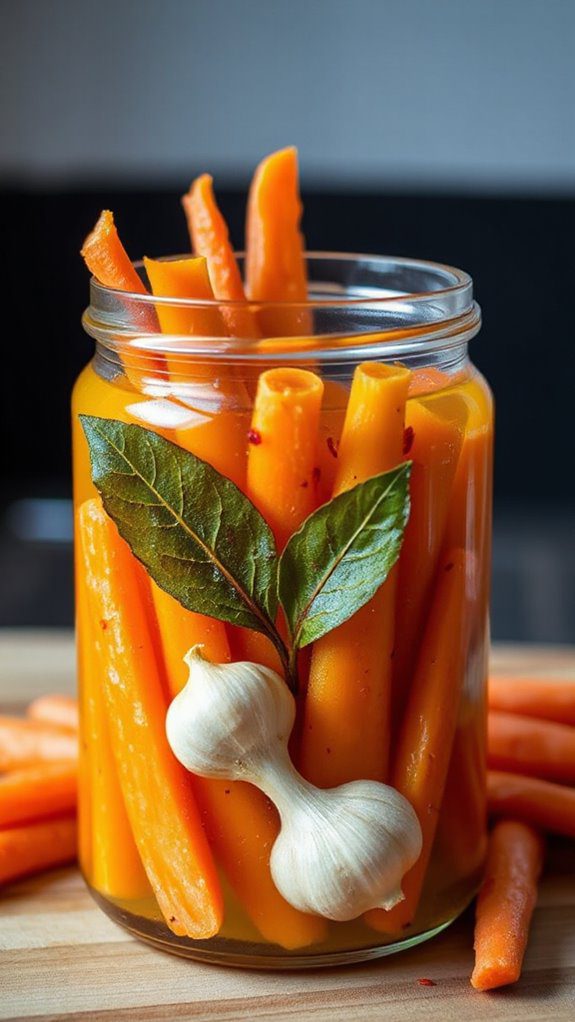
Spicy pickled carrots are a vibrant and zesty side dish that adds a kick to any meal. Ideal for those who enjoy bold flavors, these pickled vegetables are perfect for topping tacos, enhancing salads, or as a rejuvenating snack. With a preparation time of about 30 minutes, and a minimum steeping time of 24 hours, you can whip up this dish quickly and let it develop its flavors over time for the best results.
Ingredients:
- 1 pound of carrots, peeled and cut into sticks
- 1 cup white vinegar
- 1 cup water
- 3 tablespoons sugar
- 1 tablespoon salt
- 2 cloves garlic, smashed
- 1 teaspoon red pepper flakes (adjust to taste)
- 1 teaspoon mustard seeds
- 1 teaspoon coriander seeds
- 1 bay leaf
Cooking Steps:
- In a medium saucepan, combine the white vinegar, water, sugar, and salt. Heat the mixture over medium heat, stirring occasionally until the sugar and salt are fully dissolved.
- Add the smashed garlic, red pepper flakes, mustard seeds, coriander seeds, and bay leaf to the saucepan. Bring the mixture to a gentle boil, then remove from heat.
- Meanwhile, pack the carrot sticks tightly into a clean glass jar or airtight container.
- Pour the hot pickling liquid over the carrots, making sure they are completely submerged. Allow the mixture to cool to room temperature.
- Once cooled, seal the jar or container and refrigerate for at least 24 hours to let the flavors develop. The carrots will be best after 3-4 days but can last for several weeks in the refrigerator.
Variations & Tips:
- For an extra kick, add sliced jalapeños or habaneros to the jar along with the carrot sticks.
- Try experimenting with different spices, such as dill or black pepper, for unique flavor profiles.
- These spicy pickled carrots pair excellently with grilled meats or can be served as part of a cheese and charcuterie board.
- Remember to always use sterilized jars to prolong shelf life and guarantee the best flavor.
- Makes Everything Simple : Just forget your bagged cheese! Only turn the handle for several times and get...
- Premium Material : All parts of the rotary cheese grater are made of food grade ABS material, no BPA. The...
- Three Option Grater : The parmesan cheese grater finishes food preparation with slicing, shredding and...
Tangy Pickled Radishes

Tangy pickled radishes are a vibrant and zesty addition to any meal, making them a perfect accompaniment to Easter brunch or a colorful side dish for spring gatherings.
This fresh and crunchy pickle balances the natural spiciness of radishes with a tangy vinegar brine, resulting in a bright flavor that can enhance salads, tacos, or simply be enjoyed on their own. The preparation time for this recipe is approximately 15 minutes, plus a few hours for marinating.
Ingredients:
- 1 bunch of radishes (about 8-10 radishes)
- 1 cup of water
- 1 cup of white vinegar
- 2 tablespoons of sugar
- 1 tablespoon of salt
- 1 teaspoon of peppercorns
- 2 cloves of garlic, sliced
- 1 teaspoon of red pepper flakes (optional)
- 1 tablespoon of fresh dill or a few sprigs of dill weed (optional)
Cooking Steps:
- Rinse and trim the radishes, removing any greens and tails. Slice them thinly into rounds or wedges, depending on your preference.
- In a saucepan, combine the water, white vinegar, sugar, salt, peppercorns, fresh garlic slices, and red pepper flakes (if using). Bring the mixture to a boil, stirring occasionally to dissolve the sugar and salt.
- Once the brine is boiling, remove it from heat and let it cool for a few minutes.
- Pack the sliced radishes into a clean glass jar. If using dill, add it to the jar with the radishes.
- Pour the warm brine over the radishes until they are fully submerged, leaving a little space at the top of the jar.
- Seal the jar with a lid and let it cool to room temperature before transferring it to the refrigerator.
- Allow the radishes to pickle for at least 2 hours before serving; they taste even better if marinated overnight!
Variations and Tips:
- For a sweeter pickled radish, increase the sugar to 3 tablespoons.
- If you like a more intricate flavor, consider adding spices such as mustard seeds, coriander seeds, or even a slice of fresh ginger to the brine.
- These pickled radishes can last in the refrigerator for up to two weeks, making them a great make-ahead option for parties.
- Serve them atop tacos, mixed into a salad, or as part of a charcuterie board for a delightful crunch.
- 💰 REDUCE WASTE AND SAVE MONEY: Chef Preserve keeps FOOD FRESH 5 TIMES LONGER than non-vacuum storage...
- ✅ POWERFUL, QUICK & EASY TO USE: Simply press the button to start. The device vacuum seals a bag in 5...
- ♻️ REUSABLE & RESEALABLE BAGS: Chef Preserve comes with dishwasher, freezer, refrigerator, and...
Sweet and Sour Pickled Beets
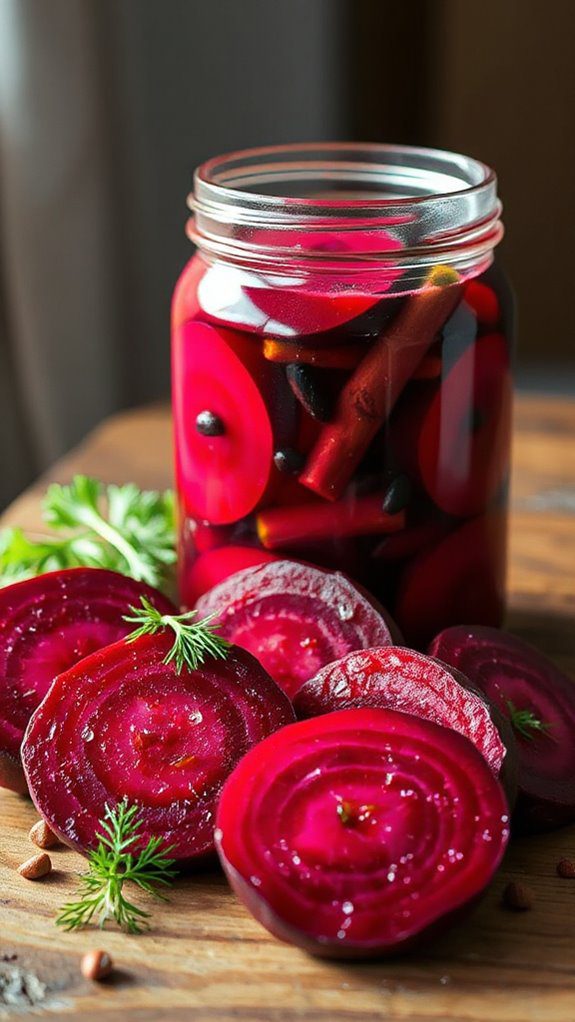
Sweet and sour pickled beets are a vibrant and delicious side dish that combines the earthiness of beets with a tangy-sweet brine, making them perfect for Easter feasts, potlucks, or simply as a delightful addition to your meals throughout the spring season.
This dish is ideal for those who love a balance of flavors and can be enjoyed by vegetarians and vegans alike.
With a total preparation time of about 1 hour, including cooking and cooling, these pickled beets are both easy to make and visually appealing.
Ingredients:
- 4 medium-sized beets
- 1 cup apple cider vinegar
- 1 cup water
- 1 cup granulated sugar
- 1 teaspoon salt
- 1 teaspoon whole cloves
- 1 teaspoon allspice berries
- 1 cinnamon stick
- 1 bay leaf
Cooking Steps:
1. Start by rinsing the beets thoroughly and trimming off any greens or roots.
Place the beets in a large pot, cover them with water, and bring to a boil. Cook for approximately 30-40 minutes or until they are tender when pierced with a fork.
2. Once the beets are cooked, remove them from the water and let them cool until they can be handled.
Peel the beets by rubbing off the skins under cold running water or using your fingers.
3. Slice the peeled beets into thin rounds or wedges, depending on your preference.
4. In a saucepan, combine the apple cider vinegar, water, sugar, salt, cloves, allspice berries, cinnamon stick, and bay leaf.
Bring this mixture to a boil over medium heat, stirring until the sugar and salt are dissolved.
5. Once the brine is boiling, add the sliced beets to the pot and remove it from heat.
Let the beets steep in the brine for about 15 minutes.
6. Using tongs or a slotted spoon, transfer the beets into sterilized jars, packing them firmly but not crushing them.
7. Pour the warm brine over the beets in the jars, ensuring they are completely covered.
Seal the jars with lids and let them cool to room temperature before refrigerating.
Variations and Tips:
- For a spicy kick, add a few sliced jalapeños or a dash of red pepper flakes to the brine.
- You can experiment with different vinegar types, such as white wine vinegar or rice vinegar, to create unique flavor profiles.
- The pickled beets can be stored in the refrigerator for up to 2 weeks, allowing the flavors to develop even further with time.
- Serve them chilled as a side dish, or toss them into salads for a pop of color and flavor.
- Generous Capacity: 7-quart slow cooker that comfortably serves 9+ people or fits a 7-pound roast
- Cooking Flexibility: High or low slow cooking settings, with convenient warm function for ideal serving...
- Convenient: Set it and forget it feature enables you to cook while at work or performing daily tasks
Vibrant Pickled Cauliflower

Vibrant pickled cauliflower is a colorful and tangy dish that adds a delightful crunch to any meal, making it perfect for Easter celebrations or festive gatherings. This dish is ideal for those looking to enhance their appetizer spread or simply enjoy a zingy side dish packed with flavor.
The preparation time is approximately 15 minutes, with a recommended chilling time of at least 24 hours to allow the flavors to fully develop.
Ingredients:
- 1 medium head of cauliflower, cut into florets
- 1 cup white vinegar
- 1 cup water
- 1 tablespoon sugar
- 1 tablespoon salt
- 2 cloves garlic, crushed
- 1 teaspoon mustard seeds
- 1 teaspoon red pepper flakes (adjust to taste)
- 1/2 teaspoon turmeric powder
- Fresh dill sprigs (optional, for added flavor)
Cooking Steps:
1. Prepare the Cauliflower: Thoroughly wash and cut the cauliflower into small florets. Blanch them in boiling water for about 2-3 minutes, then quickly transfer them to an ice bath to stop the cooking process. Drain well and set aside.
2. Make the Pickling Brine: In a medium saucepan, combine the white vinegar, water, sugar, salt, crushed garlic, mustard seeds, red pepper flakes, and turmeric. Bring the mixture to a boil over medium heat, stirring occasionally until the sugar and salt have dissolved.
Remove from heat and let it cool slightly.
3. Combine: In a clean glass jar, place the blanched cauliflower florets, adding dill sprigs if desired. Pour the warm pickling brine over the cauliflower, ensuring it is fully submerged. If necessary, add more water or vinegar in equal parts until the cauliflower is covered.
4. Chill: Seal the jar tightly and refrigerate for at least 24 hours before serving. For the best flavor, let the cauliflower pickle for 2-3 days.
Variations and Tips:
- Spicy Kick: Add sliced jalapeños or habaneros to the jar for an extra heat level.
- Herbs: Experiment with other herbs such as thyme or cilantro to personalize your pickling brine.
- Storage: Keep the pickled cauliflower stored in the refrigerator for up to 3 weeks.
- Serving Suggestions: Serve as a colorful appetizer, or alongside grilled meats and sandwiches for a revitalizing crunch.
- 100% Leak-proof: Guaranteed no-spill seal and secure latches
- Crystal-clear Tritan Built: Stain-resistant and odor-resistant material for a clear view of contents
- Lightweight & Sturdy: Easy to carry, yet durable for everyday use
Zesty Pickled Green Beans

Zesty pickled green beans are a delightful and tangy treat perfect for adding a crunchy bite to any meal or serving as a revitalizing snack during your Easter festivities.
These vibrant green beans are not only visually appealing but also burst with flavor, making them ideal for anyone who enjoys pickled vegetables. The preparation time is relatively quick, taking around 15 minutes, with an additional marinating time of at least 24 hours before they're ready to be enjoyed.
Ingredients:
- 1 pound fresh green beans, trimmed
- 1 cup white vinegar
- 1 cup water
- 1 tablespoon salt
- 2 tablespoons sugar
- 2 cloves garlic, sliced
- 1 teaspoon red pepper flakes (adjust for spice preference)
- 1 teaspoon black peppercorns
- 1 teaspoon dill seeds (or 1-2 fresh dill sprigs)
- Optional: 1 teaspoon mustard seeds for extra flavor
Cooking Steps:
1. Prepare the Green Beans: Blanch the green beans in boiling water for about 2-3 minutes until they are bright green and slightly tender.
Immediately transfer them to a bowl of ice water to stop the cooking process. Drain and pat dry the beans.
2. Make the Pickling Brine**: In a medium saucepan, combine the white vinegar**, water, salt, and sugar. Bring the mixture to a boil, stirring until the salt and sugar are completely dissolved.
3. Pack the Jars: In sterilized mason jars, layer the blanched green beans with sliced garlic, red pepper flakes, black peppercorns, and dill seeds.
Pack them tightly, leaving some space at the top.
4. Add the Brine: Pour the hot pickling brine over the green beans in the jars, making sure the beans are fully submerged.
Leave about half an inch of headspace at the top of each jar.
5. Seal and Refrigerate: Wipe the rims of the jars to remove any residue, then seal with the lids.
Allow the jars to cool to room temperature before transferring them to the refrigerator.
6. Marinate: Let the pickled green beans Marinate in the fridge for at least 24 hours to allow the flavors to meld.
They can be stored for up to 2-3 weeks, although they're usually best consumed within the first week.
Variations and Tips:
- Vary the Spices: Experiment with different spices such as coriander seeds or bay leaves for a unique twist.
- Add Other Vegetables: Consider adding sliced carrots or radishes for added color and texture in your jars.
- Storage: If you prefer long-term storage, process the jars in a boiling water bath for 10-15 minutes to create a shelf-stable product.
Be sure to use clean jars and lids to promote safety.
These zesty pickled green beans will make a fantastic addition to your Easter table, offering a unique taste that complements a variety of dishes! Enjoy!
- 𝗘𝗳𝗳𝗼𝗿𝘁𝗹𝗲𝘀𝘀 𝗪𝗲𝗶𝗴𝗵𝗶𝗻𝗴: Supports 5 units...
- 𝗣𝗿𝗲𝗰𝗶𝘀𝗲 𝗥𝗲𝘀𝘂𝗹𝘁𝘀: Accurately weighs up to 11 lb/5 kg with 1 g...
- 𝗦𝗶𝗺𝗽𝗹𝗲 & 𝗖𝗼𝗺𝗽𝗮𝗰𝘁: The small and sleek scale is a perfect fit for...
Garlic Dill Pickles
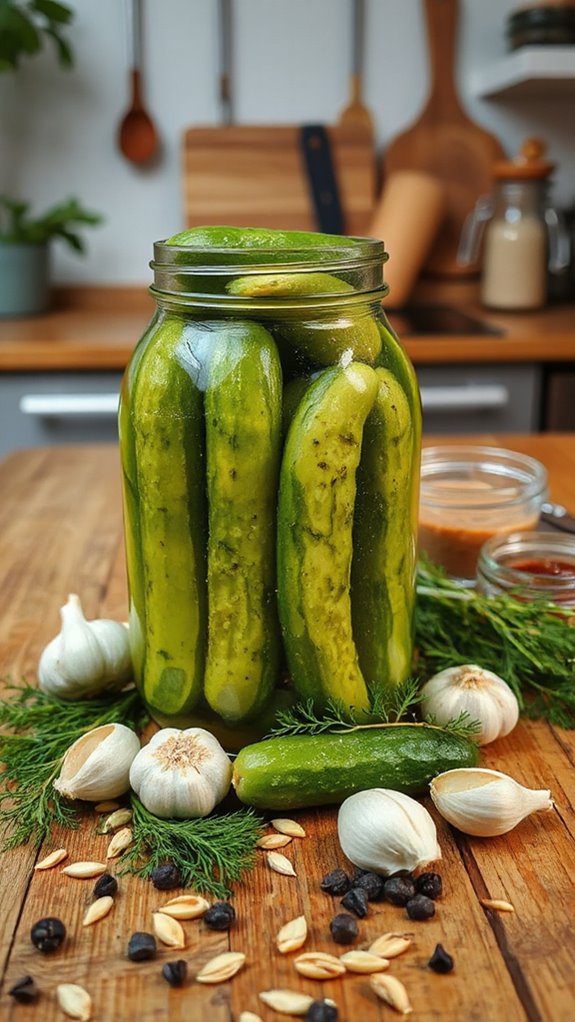
Garlic dill pickles are a classic and invigorating addition to any meal or snack platter. They boast a perfect balance of garlicky flavor and tangy dill, making them an ideal choice for pickle lovers and those looking to add a zesty crunch to their dishes.
This recipe is easy to follow and takes about 30 minutes of active prep time, though you will need to let the pickles sit for at least 24 hours before savoring their full flavor. Perfect for gatherings, barbecues, or simply a tasty treat to enjoy at home!
Ingredients:
- 4-6 small cucumbers (Kirby or pickling cucumbers)
- 4 cloves of garlic (smashed)
- 2 cups water
- 1 cup white vinegar
- 3 tablespoons sea salt
- 1 tablespoon dill seeds
- 1 teaspoon black peppercorns
- 1 teaspoon crushed red pepper flakes (optional)
Cooking Steps:
- Begin by washing the cucumbers thoroughly and cutting off the ends. You can slice them into spears, rounds, or leave them whole, depending on your preference.
- In a medium saucepan, combine the water, white vinegar, and sea salt. Bring the mixture to a simmer over medium heat, stirring until the salt is fully dissolved.
- Once dissolved, remove the saucepan from heat and let the brine cool to room temperature.
- In a clean, sterilized jar (or jars), layer the cucumbers with smashed garlic cloves, dill seeds, black peppercorns, and crushed red pepper flakes (if using).
- Pour the cooled brine over the cucumbers, ensuring they are fully submerged. If needed, use a clean weight or a smaller jar inside the larger jar to keep the cucumbers submerged.
- Seal the jar(s) with a lid and place them in the refrigerator. Allow them to pickle for at least 24 hours – the longer you let them sit, the more flavorful they will become. They can last for up to 2 weeks in the refrigerator.
Variations and Tips:
- For a sweeter pickle, add 1-2 tablespoons of sugar to the brine mix.
- Experiment with other spices such as mustard seeds, coriander seeds, or bay leaves to create unique flavor profiles.
- If you prefer a crunchier pickle, check the cucumbers for freshness and minimize the time in the brine.
- These garlic dill pickles are a wonderful addition to burgers, sandwiches, or cheese boards, providing that ideal zing!
- Instant Read Food Thermometer | Our instant read thermometer features a temperature probe and advanced,...
- Multi-Use | From bbq thermometer to baking thermometer, our digital food thermometer for cooking is...
- Easy-Read Digital Thermometer For Cooking | Large instant thermometer dial with bright blue backlight...
Sweet Pickled Peppers
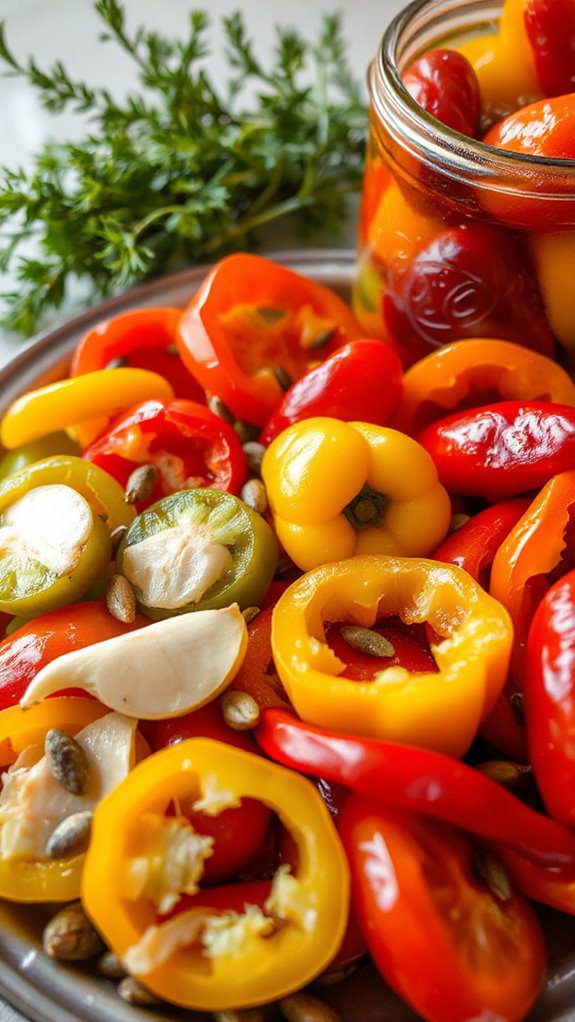
Sweet pickled peppers are a delightful way to preserve the flavor of fresh peppers while adding a touch of sweetness. This dish is perfect for anyone looking to add a zingy, colorful element to their meals, be it sandwiches, salads, or a charcuterie board. They are generally enjoyed by people of all ages, making them an ideal treat for gatherings or holiday dinners.
The preparation time is approximately 30 minutes, plus time for pickling.
Ingredients:
- 1 pound of bell peppers (any color)
- 1 cup white vinegar
- 1 cup water
- ½ cup granulated sugar
- 1 tablespoon salt
- 1 teaspoon mustard seeds
- 1 teaspoon celery seeds
- ½ teaspoon black peppercorns
- 2 cloves garlic, sliced
- 1 bay leaf
Instructions:
- Prepare the Peppers: Wash the bell peppers, remove the stems and seeds, and slice them into rings or strips according to your preference.
- Make the Brine: In a medium saucepan, combine the white vinegar, water, granulated sugar, salt, mustard seeds, celery seeds, black peppercorns, garlic, and bay leaf. Bring the mixture to a boil over medium heat, stirring occasionally until the sugar and salt have dissolved.
- Pack the Jars: Place the sliced peppers into clean, sterilized jars. Pour the hot brine over the peppers, ensuring they are fully submerged. Leave about half an inch of headspace at the top of each jar.
- Seal the Jars: Wipe the rims of the jars with a clean cloth and seal them with lids. Allow the jars to cool to room temperature before transferring them to the refrigerator.
- Pickling Time: For best flavor, let the jars sit in the refrigerator for at least 24 hours before consuming. The sweet pickled peppers will continue to develop flavors for up to two weeks.
Variations and Tips:
- Spicy Kick: Add sliced jalapeños or crushed red pepper flakes to the brine for a spicy version of sweet pickled peppers.
- Herb Infusion: Consider adding fresh herbs like thyme or dill to the jars for added flavor.
- Different Vinegars: Experiment with different types of vinegar, such as apple cider vinegar or rice vinegar, to explore varying flavors.
- Serving Suggestions: Use sweet pickled peppers on sandwiches, in salads, or as a topping for grilled meats. They also make a great snack on their own!
- Storage: These pickled peppers can be stored in the refrigerator for up to three weeks. Always check for any off smells or signs of spoilage before consuming.
This recipe captures the essence of sweet pickled peppers and presents a simple way to enjoy them year-round!
- Versatile 54-Piece Collection: Elevate your kitchen with the Home Hero 54-Piece Kitchen Utensil Set, a...
- Durable and Long-Lasting: Crafted from premium stainless steel, these kitchen utensils are designed to...
- Perfect Holiday Gift: Delight your loved ones with this kitchen utensils gift set this festive season....
Pickled Asparagus
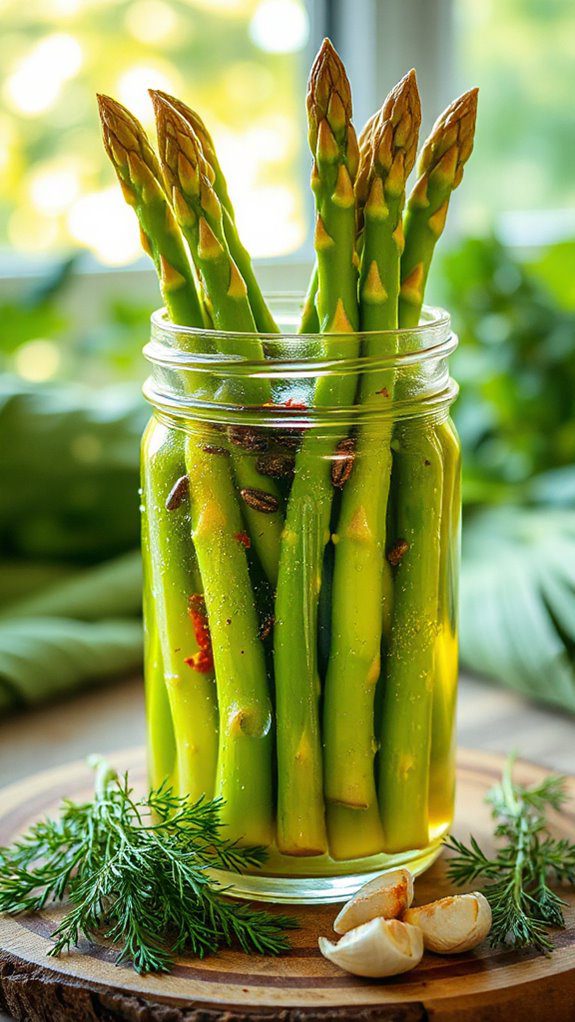
Pickled asparagus is a delightful and tangy treat that elevates any meal and makes for a fantastic addition to your Easter table. This invigorating dish is perfect for those who enjoy vibrant flavors and want to add a crunchy, pickled bite to their appetizers or salads.
The preparation time is approximately 15 minutes, and the wait time for the flavors to meld is about 24 hours, making it a quick and easy make-ahead dish.
Ingredients:
- 1 lb fresh asparagus, trimmed
- 1 cup white vinegar
- 1 cup water
- 1 tablespoon sugar
- 1 tablespoon salt
- 2 cloves garlic, peeled and smashed
- 1 teaspoon black peppercorns
- 1 teaspoon dill seeds (or fresh dill sprigs)
- 1/2 teaspoon red pepper flakes (optional)
- 1 sterile pint jar with lid
Cooking Steps:
- Prepare the Asparagus: Start by trimming the tough ends off the asparagus. Choose asparagus spears that are similar in size for even pickling.
- Blanch the Asparagus: Bring a pot of water to a boil and prepare an ice bath. Add the asparagus spears to the boiling water and blanch for 2-3 minutes until bright green. Immediately transfer them to the ice bath to stop the cooking process. Drain well.
- Make the Brine: In a small saucepan, combine the white vinegar, water, sugar, salt, garlic, peppercorns, dill seeds, and red pepper flakes (if using). Bring to a gentle simmer over medium heat, stirring until the sugar and salt dissolve. Remove from heat and let the brine cool slightly.
- Pack the Jar: Place the blanched asparagus upright in the sterile pint jar. Pour the cooled brine over the asparagus until fully submerged, leaving about 1/2 inch of space at the top.
- Seal and Refrigerate: Seal the jar tightly and refrigerate. Allow the asparagus to pickle for at least 24 hours before serving, though 2-4 days is recommended for maximum flavor.
Variations & Tips:
- Spiced Pickles: Add slices of jalapeños or other spices like mustard seeds or coriander seeds for a unique flavor.
- Herb Infusion: Experiment with other herbs such as thyme, tarragon, or oregano to change the flavor profile.
- Crispness: To keep the asparagus crunchy, avoid overcooking during the blanching process and make sure they are in the ice bath long enough.
- Serving Suggestions: Serve the pickled asparagus as a side dish, in salads, or as part of a charcuterie board. They also make a great garnish for cocktails like Bloody Marys.
Enjoy your tangy, crunchy pickled asparagus, perfect for sharing with family and friends during Easter celebrations!
- 24-ounce insulated stainless-steel water bottle with a FreeSip spout and push-button lid with lock
- Patented FreeSip spout designed for either sipping upright through the built-in straw or tilting back to...
- Protective push-to-open lid keeps spout clean; convenient carry loop doubles as a lock
Mustard Seed Pickled Turnips
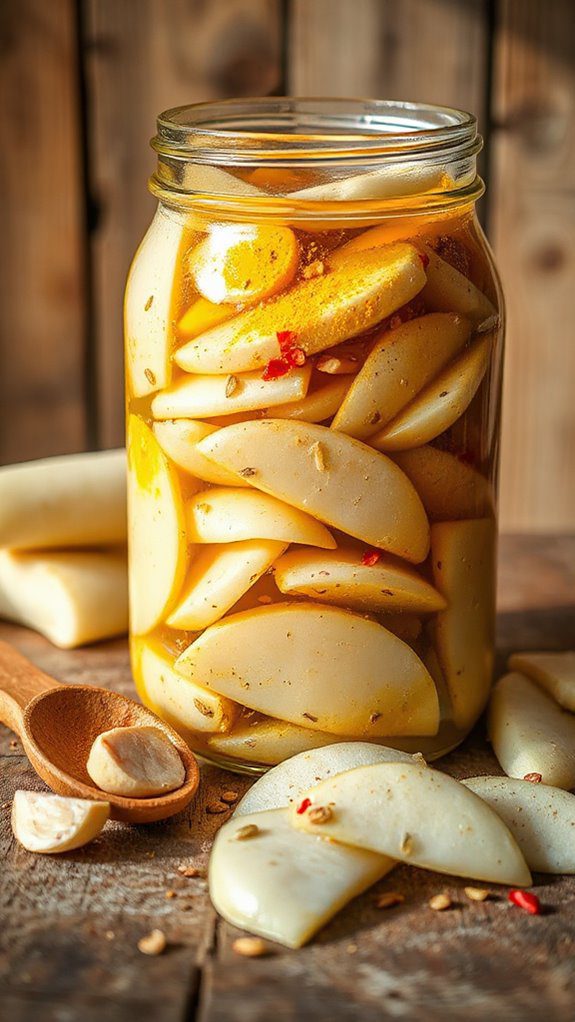
Mustard Seed Pickled Turnips are a deliciously tangy and crunchy accompaniment that adds a burst of flavor to any meal. Perfect for those who enjoy the unique combination of earthy turnips and the aromatic essence of mustard seeds, this recipe is ideal for adding a zesty touch to your Easter brunch or a colorful side dish for any occasion.
With a preparation time of about 30 minutes and an overnight marination, these pickled turnips will be a delightful addition to your springtime spread.
Ingredients:
- 1 pound turnips, peeled and cut into matchsticks
- 1 tablespoon mustard seeds
- 1 cup white vinegar
- 1 cup water
- 2 tablespoons sugar
- 1 tablespoon salt
- 1 teaspoon turmeric powder
- 1 teaspoon red pepper flakes (optional)
- 2 cloves garlic, smashed
Cooking Steps:
- Begin by combining the vinegar, water, sugar, salt, turmeric, and red pepper flakes in a medium saucepan. Bring the mixture to a simmer over medium heat, stirring occasionally until the sugar and salt are dissolved.
- While the pickling liquid is heating, place the cut turnips into a large jar or a glass container. Add the smashed garlic cloves and mustard seeds on top of the turnips.
- Once the pickling liquid is ready, carefully pour it over the turnips, ensuring that they are fully submerged.
- Allow the mixture to cool to room temperature, then seal the jar with a lid and refrigerate. The pickled turnips can be enjoyed after just a few hours but taste best after marinating overnight.
- Serve chilled as a side dish or in sandwiches, salads, and tacos.
Variations and Tips:
- For a sweeter profile, increase the sugar to 3 tablespoons.
- Experiment with different spices; add crushed black pepper or dill seeds for extra flavor.
- Add julienned carrots or radishes for a colorful medley of pickled vegetables.
- These pickled turnips can last for up to 2 weeks in the refrigerator, making them a convenient make-ahead option for gatherings.
Pickled Red Onions

Pickled red onions are a vibrant and tangy condiment that adds a delightful crunch and flavor to a variety of dishes. This quick and easy recipe is perfect for anyone looking to elevate their salads, sandwiches, tacos, or even as a topping for grilled meats.
Preparing pickled red onions takes approximately 20 minutes, plus a couple of hours for the flavors to meld together. These bright and zesty onions are ideal for Easter gatherings or any festive occasion where you want to impress your guests with something special.
Ingredients:
- 2 medium red onions, thinly sliced
- 1 cup red wine vinegar
- 1 cup water
- 3 tablespoons sugar
- 1 tablespoon salt
- 1 teaspoon black peppercorns
- 2-3 cloves garlic, peeled and crushed (optional)
- 1 bay leaf (optional)
- 1 teaspoon red pepper flakes (optional for heat)
Cooking Steps:
- In a medium saucepan, combine the red wine vinegar, water, sugar, salt, black peppercorns, garlic, bay leaf, and red pepper flakes if using. Heat over medium heat, stirring occasionally, until the sugar and salt are fully dissolved.
- Remove the saucepan from the heat and let the pickling liquid cool slightly.
- Meanwhile, place the thinly sliced red onions in a clean glass jar or bowl.
- Pour the warm pickling liquid over the onions, ensuring they are fully submerged. If needed, press them down with a spoon to make sure they are covered by the liquid.
- Allow the onions to cool to room temperature, then cover the jar or bowl and refrigerate. The onions will develop their flavor within a few hours, but for best results, let them sit overnight before serving.
- Enjoy the pickled red onions as a condiment, and remember to store any leftovers in the fridge for up to two weeks.
Variations and Tips:
- For a different flavor, try using apple cider vinegar or white vinegar instead of red wine vinegar.
- Add other spices or herbs such as mustard seeds, dill, or coriander seeds for additional flavor.
- If you prefer less sweetness, reduce the amount of sugar or omit it entirely.
- For quicker pickles, slice the onions even thinner or use a mandoline for uniform slices.
- These pickled onions can also be canned for longer shelf life if you follow proper canning methods.
With their bold flavor and beautiful color, pickled red onions are sure to be a hit at any Easter feast or gathering!
Sweet-and-Spicy Pickled Jalapeños
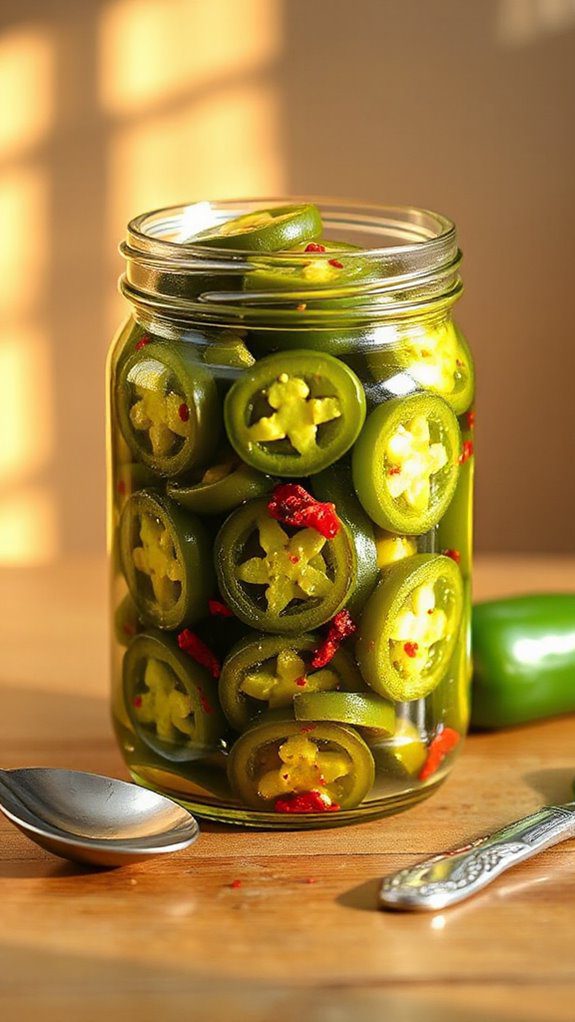
Sweet-and-Spicy Pickled Jalapeños are a delightful condiment that adds a flavorful kick to various dishes. This recipe is perfect for those who love a mix of heat and sweetness, making it an excellent addition to tacos, sandwiches, or even salads. The preparation time is relatively quick, taking about 15 minutes to assemble and then a few hours for the flavors to meld together.
Ingredients:
- 1 cup fresh jalapeños, sliced into rings
- 1 cup white vinegar
- ½ cup water
- ½ cup granulated sugar
- 1 tablespoon salt
- 1 teaspoon garlic powder
- 1 teaspoon onion powder
- ½ teaspoon black pepper
- ½ teaspoon crushed red pepper flakes (optional for extra heat)
Cooking Steps:
- Prepare the Jalapeños: Wearing gloves, slice the jalapeños into rings and set aside. Adjust the thickness of the slices based on your preference for texture.
- Make the Brine: In a medium saucepan, combine the white vinegar, water, granulated sugar, salt, garlic powder, onion powder, black pepper, and crushed red pepper flakes (if using). Bring to a simmer over medium heat, stirring until the sugar and salt are completely dissolved.
- Combine and Refrigerate: Once the brine is ready, remove it from the heat and let it cool for about 5-10 minutes. Place the jalapeño rings in a clean, glass jar and pour the brine over them. Confirm the jalapeños are fully submerged.
- Pickling Process: Allow the mixture to cool to room temperature, then seal the jar and place it in the refrigerator. Let the jalapeños pickle for at least 2 hours, though they will taste even better if allowed to sit overnight.
Variations:
- Add More Vegetables: Consider adding sliced carrots, onions, or garlic cloves to the jar for added flavor and variety.
- Vary the Sweetness: You can adjust the amount of sugar based on your taste preference—use honey or agave syrup for a different sweetness profile.
- Experiment with Spices: Add spices like cumin, coriander, or even a hint of turmeric for a unique twist.
Tips:
- For the best flavor, let the jalapeños pickle for at least 24 hours before consuming.
- Use this pickled jalapeño recipe as a base and modify it according to your personal taste preferences!
- Store the pickled jalapeños in the refrigerator for up to a month for peak flavor.
Pickled Cherry Tomatoes

Pickled cherry tomatoes are a delightful and tangy addition to any Easter spread, making them perfect for enhancing salads, sandwiches, or even as a standalone snack. This quick and easy recipe is ideal for those who enjoy pickling at home, especially during festive gatherings when vibrant flavors are highly appreciated.
The preparation time is around 15 minutes, plus an additional 24 hours for the flavors to meld beautifully in the fridge.
Ingredients:
- 1 pint of cherry tomatoes
- 1 cup of white vinegar
- 1/2 cup of water
- 1/4 cup of sugar
- 1 tablespoon of salt
- 2 garlic cloves, peeled and smashed
- 1 teaspoon of black peppercorns
- 1 teaspoon of red pepper flakes (optional for heat)
- Fresh herbs (e.g., dill, thyme, or basil) for flavor
Cooking Steps:
- Begin by washing the cherry tomatoes thoroughly. Use a toothpick or skewer to poke a small hole in each tomato to allow the pickling solution to penetrate.
- In a medium saucepan, combine the vinegar, water, sugar, and salt. Bring the mixture to a simmer over medium heat, stirring until the sugar and salt have dissolved.
- Once dissolved, add the smashed garlic, peppercorns, and red pepper flakes (if using) to the saucepan. Remove from heat and let the brine cool for about 10 minutes.
- Place the cherry tomatoes into a clean, sterilized jar. Add your choice of fresh herbs between the layers of tomatoes for added flavor.
- Pour the cooled brine over the tomatoes, ensuring they are fully submerged. Seal the jar tightly.
- Refrigerate the jar for at least 24 hours before serving, allowing the flavors to develop fully.
Variations and Tips:
- For a sweeter pickled tomato, increase the sugar to 1/2 cup.
- Experiment with different vinegar types, such as apple cider vinegar, for a unique flavor profile.
- Add onions or sliced jalapeños to the jar for extra texture and flavor.
- These pickled cherry tomatoes can be stored in the refrigerator for up to 2 weeks, making them a convenient option for meal prep.
- Enjoy your pickled tomatoes as a topping for grilled meats or within pasta dishes for an added zing!
Herbed Pickled Zucchini
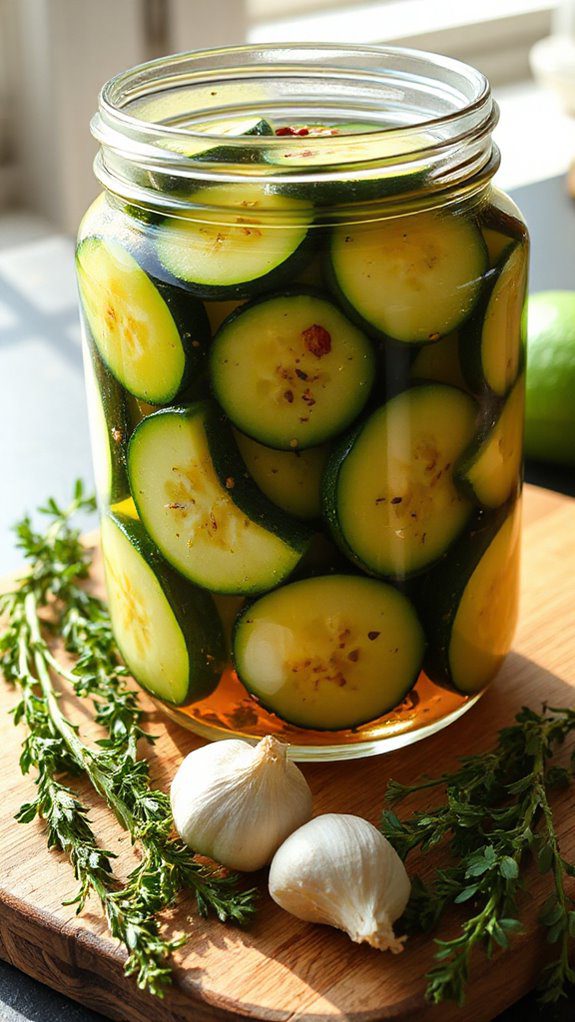
Herbed pickled zucchini is a delightful and tangy dish that serves as a fantastic accompaniment to various meals, making it perfect for spring and summer gatherings, especially around Easter.
This recipe is ideal for home cooks looking to preserve the fresh flavors of seasonal zucchini while adding a zesty twist. With a preparation time of about 15 minutes plus a chilling time of at least 24 hours, this quick pickling method allows you to create a revitalizing side dish that can be enjoyed for weeks.
Ingredients:
- 2 medium zucchini, sliced into thin rounds
- 1 cup white vinegar
- 1 cup water
- 3 tablespoons sugar
- 2 teaspoons salt
- 1 teaspoon black peppercorns
- 1 teaspoon mustard seeds
- 2 cloves garlic, peeled and smashed
- 1 teaspoon dried oregano
- 1 teaspoon dried thyme
- 1 teaspoon red pepper flakes (optional)
Cooking Steps:
- Begin by washing the zucchini thoroughly and slicing them into thin, even rounds. Place the zucchini slices in a large bowl or a glass jar.
- In a medium saucepan, combine the white vinegar, water, sugar, and salt. Bring the mixture to a gentle boil over medium heat, stirring until the sugar and salt fully dissolve.
- Once the brine is boiling, remove it from the heat and add the black peppercorns, mustard seeds, smashed garlic, oregano, thyme, and red pepper flakes (if using) to the mixture. Stir well to combine.
- Carefully pour the hot brine over the zucchini slices, ensuring they are fully submerged. If necessary, use a spoon to push down the zucchini.
- Allow the pickled zucchini to cool to room temperature before sealing the jar or bowl with a lid or cling wrap.
- Refrigerate the pickled zucchini for at least 24 hours before serving to allow the flavors to meld. The zucchini will be at their best after 2-3 days of marinating.
Variations and Tips:
- Experiment with different herbs and spices; dill, basil, or tarragon can add unique flavors.
- For a sweeter version, increase the sugar quantity or try adding a dash of honey.
- Consider adding other vegetables, such as bell peppers or red onion, for extra color and flavor.
- Store the pickled zucchini in the refrigerator for up to a month, making it a great option for meal prep or gifts.
Colorful Pickled Mixed Vegetables
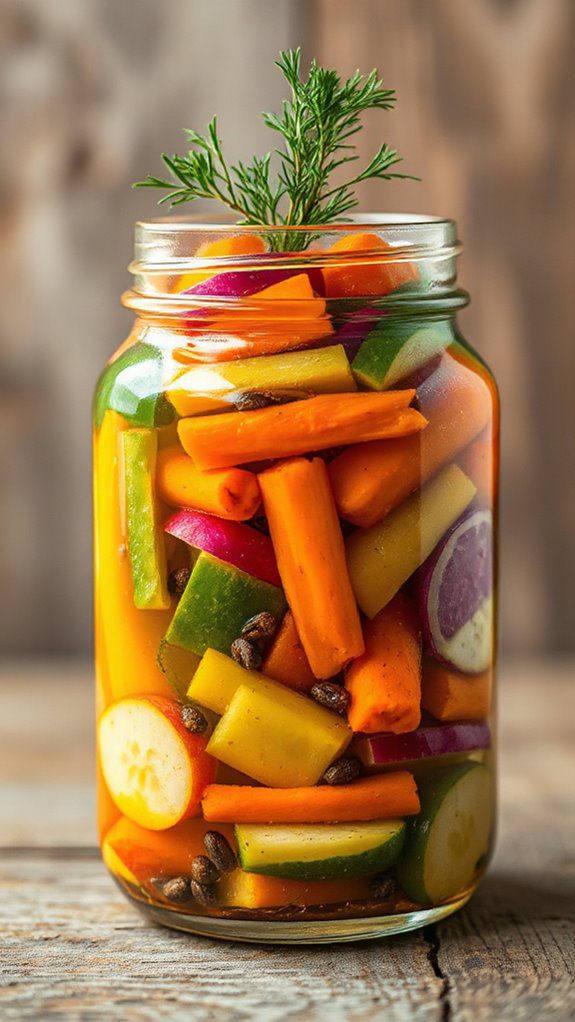
Colorful Pickled Mixed Vegetables are a delightful way to celebrate Easter and add a vibrant touch to your holiday spread.
This tangy and crunchy dish is perfect for those looking to add a healthy, flavorful side to their meals or for anyone who enjoys a new twist on traditional pickles. With a prep time of just 30 minutes and an overnight marination, these pickled vegetables can be made ahead of time to enhance the flavors and make entertaining effortless.
Ingredients:
- 1 cup carrots, julienned
- 1 cup cucumbers, sliced
- 1 cup radishes, sliced
- 1 cup bell peppers (red, yellow, and orange), sliced
- 1 cup red onions, thinly sliced
- 1 ½ cups white vinegar
- 1 cup water
- ½ cup sugar
- 1 tablespoon salt
- 1 teaspoon mustard seeds
- 1 teaspoon black peppercorns
- 1 teaspoon crushed red pepper flakes (optional)
- Fresh dill or other herbs for garnish
Cooking Steps:
- Prepare the Vegetables: In a large mixing bowl, combine the julienned carrots, sliced cucumbers, radishes, bell peppers, and onions. Mix well to guarantee an even distribution of vegetables.
- Make the Brine: In a medium saucepan, heat the white vinegar, water, sugar, salt, mustard seeds, black peppercorns, and crushed red pepper flakes (if using) over medium heat. Stir until the sugar and salt dissolve completely. Remove from heat and let cool slightly.
- Combine and Pack: Place the vegetable mix into sterilized jars, packing them tightly. Pour the cooled brine over the vegetables, making sure they are fully submerged. Leave some space at the top of the jar.
- Seal and Refrigerate: Seal the jars tightly and refrigerate. For the best flavor, allow the pickled vegetables to marinate for at least 24 hours before serving. They can be stored in the refrigerator for up to two weeks.
Variations and Tips:
- Vegetable Mix: Feel free to adjust the type of vegetables according to your preference or seasonal availability. Cauliflower, green beans, or even purple cabbage make great additions.
- Herbal Infusion: Add herbs like thyme, bay leaves, or tarragon to the brine for an extra flavor boost.
- Spicy Kick: If you want more heat, increase the amount of crushed red pepper flakes or add whole chili peppers to the jars.
- Serving Suggestion: Serve these pickled vegetables as a side dish, in sandwiches, or as a new topping for tacos.
- Gift Idea: These colorful pickled mixed vegetables can also be a thoughtful homemade gift for friends and family during the Easter season. Just remember to include a label with the ingredients and storage instructions.
Enjoy your vibrant and tangy Colorful Pickled Mixed Vegetables as part of your Easter feast!


