Easter sugar cookie decorating blossoms with creativity across skill levels. Classic bunny shapes charm families, while colorful egg designs invite imagination. Simple flower cookies and adorable chick cookies are perfect for beginners, while polka dot decorated eggs add flair. For a fun twist, explore 3D Easter basket cookies and marbled icing eggs. Chocolate-dipped bunny tails and floral wreath cookies offer delightful presentations. Each idea provides a canvas for expression, promising more exciting techniques and inspiration ahead.
Classic Bunny Shapes

Easter sugar cookies are a delightful treat that bring festive cheer to any gathering! These classic bunny-shaped cookies are perfect for families looking to engage in a fun baking activity during the Easter season.
With a preparation time of about 30 minutes and a baking time of 10-12 minutes, these cookies are a sweet way to celebrate, making them ideal for both kids and adults alike.
Ingredients:
- 2 3/4 cups all-purpose flour
- 1 teaspoon baking soda
- 1/2 teaspoon baking powder
- 1 cup unsalted butter, softened
- 1 1/2 cups white sugar
- 1 egg
- 1 teaspoon vanilla extract
- 1/2 teaspoon almond extract
- 3 to 4 tablespoons milk
- Pinch of salt
- Icing or royal icing for decorating
- Food coloring (optional)
- Sprinkles (optional)
Cooking Steps:
- Preheat the Oven: Preheat your oven to 375°F (190°C).
- Mix Dry Ingredients: In a small bowl, stir together the flour, baking soda, baking powder, and salt. Set aside.
- Cream Butter and Sugar: In a large bowl, cream together the softened butter and sugar until smooth and fluffy.
- Add Eggs and Extracts: Beat in the egg, vanilla extract, and almond extract until well combined.
- Combine Mixtures: Gradually blend the dry ingredients into the wet mixture. If the dough seems too dry, add the milk one tablespoon at a time until the desired consistency is achieved.
- Shape the Cookies: Roll out the dough on a floured surface to about 1/4 inch thickness. Use a bunny-shaped cookie cutter to cut out cookies. Place them onto ungreased baking sheets.
- Bake the Cookies: Bake in preheated oven for 10 to 12 minutes, or until golden. Remove from oven and let cool on wire racks.
- Decorate: Once cooled, you can decorate the cookies with icing or royal icing. For added fun, use food coloring for a vibrant look, and top with sprinkles for a festive finish.
Variations and Tips:
- Flavor Variations: Try adding citrus zest, such as lemon or orange, to the dough for a revitalizing twist.
- Shape Alternatives: In addition to bunnies, use other Easter-themed cookie cutters like eggs or chicks for variety.
- Thicker Cookies: If you prefer thicker cookies, roll the dough out to 1/2 inch thick and increase the baking time by a couple of minutes.
- Storage: Store your decorated cookies in an airtight container at room temperature for up to one week.
- Freezing: The unbaked dough can be frozen for up to three months. Just thaw it in the fridge before rolling out and cutting.
Enjoy these classic bunny-shaped sugar cookies as a playful and tasty addition to your Easter festivities!
- The Original Pro Chopper - Our superstar veggie slicer has been creating waves on TikTok! Simple to use,...
- Easy Meal Prep with Rust-Resistant Blades - Our vegetable chopper is perfect for anyone who wants to eat...
- 5-Star Design - The soft-grip TPU handle ensures controlled chopping, while the non-skid rubber base...
Colorful Egg Designs

Easter is a time for celebration, family gatherings, and of course, creative cookie decorating! Colorful egg designs sugar cookies are an exciting treat perfect for both kids and adults who want to fill their holidays with sweet charm and fun.
These delightful cookies have a crisp edge and a soft center, ideal for decorating with vibrant icing and edible embellishments. With a preparation time of about 30 minutes and an additional 30 minutes for baking and decorating, these cookies are a fantastic activity to engage everyone in the festive spirit!
Ingredients:
- 2 ¾ cups all-purpose flour
- 1 teaspoon baking powder
- ½ teaspoon salt
- 1 cup unsalted butter, softened
- 1 ½ cups granulated sugar
- 1 large egg
- 1 teaspoon vanilla extract
- 1 teaspoon almond extract
- Food coloring (various colors)
- Royal icing (store-bought or homemade)
- Edible glitter and sprinkles (optional)
Cooking Steps:
- Preheat the Oven: Preheat your oven to 350°F (175°C).
- Mix Dry Ingredients: In a medium bowl, whisk together the flour, baking powder, and salt until well combined. Set aside.
- Cream Butter and Sugar: In a large mixing bowl, beat the softened butter and granulated sugar together until light and fluffy.
- Add Egg and Extracts: Add the egg, vanilla extract, and almond extract to the butter-sugar mixture and mix until fully integrated.
- Combine Wet and Dry: Gradually add the dry ingredients to the wet mixture, mixing until a smooth dough forms.
- Chill the Dough: Wrap the dough in plastic wrap and refrigerate for at least 30 minutes to make rolling easier.
- Roll and Cut Cookies: On a lightly floured surface, roll out the chilled dough to about ¼ inch thick. Use a cookie cutter in the shape of egg designs to cut out the cookies and place them on a baking sheet lined with parchment paper.
- Bake: Bake the cookies for 8-10 minutes, or until edges are lightly golden. Remove from the oven and let cool on a wire rack.
- Decorate: Once cooled, use royal icing and food coloring to create colorful designs on the cookies. Add edible glitter or sprinkles for an extra festive touch!
Variations & Tips:
- Flavor Variations: Experiment with different extracts such as lemon or coconut for a unique flavor twist.
- Icing Technique: Use the flooding method with royal icing to create smooth backgrounds for your decorated eggs.
- Personalization: Let kids add their names or initials on cookies using colored icing to make them even more special.
- Storing Cookies: Keep the decorated cookies in an airtight container at room temperature for up to one week, or freeze undecorated cookies for longer storage.
Get ready to release your creativity and enjoy a delightful Easter baking experience!
- Makes Everything Simple : Just forget your bagged cheese! Only turn the handle for several times and get...
- Premium Material : All parts of the rotary cheese grater are made of food grade ABS material, no BPA. The...
- Three Option Grater : The parmesan cheese grater finishes food preparation with slicing, shredding and...
Simple Flower Cookies

Simple flower cookies are a delightful and charming treat perfect for Easter celebrations, spring gatherings, or even just a fun afternoon baking session with family. These sugar cookies are not only visually appealing but also customizable with various colors and designs to suit any occasion.
With a preparation time of approximately 30 minutes and a baking time of 10-12 minutes, these cookies are an easy way to spread joy and sweetness.
Ingredients:
- 2 3/4 cups all-purpose flour
- 1 teaspoon baking soda
- 1/2 teaspoon baking powder
- 1 cup unsalted butter, softened
- 1 1/2 cups white sugar
- 1 egg
- 1 teaspoon vanilla extract
- 1/2 teaspoon almond extract (optional)
- 3 cups powdered sugar
- 1-2 tablespoons milk
- Food coloring (various colors)
- Edible glitter or sprinkles (optional)
Instructions:
- Preheat your oven to 375°F (190°C) and line baking sheets with parchment paper.
- In a small bowl, stir together the flour, baking soda, and baking powder. Set aside.
- In a large bowl, cream together the softened butter and sugar until smooth. Beat in the egg, vanilla extract, and almond extract (if using).
- Gradually blend the dry ingredients into the creamed mixture until fully combined.
- Roll the dough into small balls, then flatten them slightly to form flower shapes using a cookie cutter or by shaping them with hands.
- Place the cookies on the prepared baking sheets and bake for 10-12 minutes, or until the edges are lightly golden. Allow them to cool on the sheets for a few minutes before transferring to wire racks to cool completely.
- Once the cookies are cool, prepare the icing by mixing the powdered sugar with milk until smooth and desired consistency is reached. Divide the icing into separate bowls and add food coloring to create various shades for decorating.
- Use a piping bag or a small spatula to decorate your cookies as desired, then sprinkle with edible glitter or sprinkles for extra flair.
Variations and Tips:
- Use different cookie cutters to create other shapes, such as bunnies or stars, for a more diverse cookie platter.
- Experiment with flavor extracts (like peppermint or lemon) in the dough for unique twists.
- For a fun activity, have kids join in on the decorating by letting them choose their colors and designs.
- Store undecorated cookies in an airtight container at room temperature for up to one week; iced cookies can be stored in the fridge for about a week.
- 💰 REDUCE WASTE AND SAVE MONEY: Chef Preserve keeps FOOD FRESH 5 TIMES LONGER than non-vacuum storage...
- ✅ POWERFUL, QUICK & EASY TO USE: Simply press the button to start. The device vacuum seals a bag in 5...
- ♻️ REUSABLE & RESEALABLE BAGS: Chef Preserve comes with dishwasher, freezer, refrigerator, and...
Adorable Chick Cookies

Adorable Chick Cookies are festive and fun sugar cookies shaped like little chicks, perfect for Easter celebrations.
These delightful treats make a great activity for families to bond over, as children can help with the decorating. With a preparation time of about 30 minutes and a baking time of 10-12 minutes, making these cookies is a joyful way to get into the holiday spirit.
Ingredients:
- 2 ¾ cups all-purpose flour
- 1 teaspoon baking powder
- ½ teaspoon salt
- 1 cup unsalted butter, softened
- 1 ½ cups granulated sugar
- 1 egg
- 1 teaspoon vanilla extract
- Yellow food coloring
- Royal icing (for decorating)
- Mini chocolate chips (for eyes)
- Yellow sprinkles (for texture)
- Orange fondant or candy (for beaks)
Cooking Steps:
1. Preheat the Oven: Preheat your oven to 350°F (175°C).
2. Mix Dry Ingredients: In a bowl, whisk together the flour, baking powder, and salt. Set aside.
3. Cream Butter and Sugar: In a separate mixing bowl, beat the softened butter and granulated sugar together until the mixture becomes light and fluffy.
4. Add Egg and Flavoring: Beat in the egg and vanilla extract until well combined.
5. Combine Mixtures: Gradually add the dry ingredients to the butter mixture, mixing until just combined.
6. Color the Dough: Divide the dough into two parts. Add a few drops of yellow food coloring to one part and mix until the color is even throughout.
The other part can remain plain for decorating the cookies.
7. Roll Out the Dough: On a lightly floured surface, roll out the yellow dough to about ¼-inch thickness. Use a chick-shaped cookie cutter to cut out the cookies.
8. Bake Cookies: Place the cut cookies on a baking sheet lined with parchment paper. Bake in the preheated oven for 10-12 minutes or until the edges are lightly golden.
Allow the cookies to cool completely on a wire rack.
9. Decorate: Once cooled, use royal icing to pipe on details like eyes, beaks, and feathers. Attach mini chocolate chips for eyes, sprinkle yellow sprinkles for added texture, and use small pieces of orange fondant or candy for beaks.
Variations and Tips:
- For a unique twist, try adding lemon zest to the cookie dough for a citrusy flavor.
- You can experiment with different colors of icing to create a rainbow of chick cookies.
- If time is short, consider using pre-made sugar cookie dough.
- Storing the cookies in an airtight container will help maintain their freshness for several days.
- To guarantee the dough doesn’t stick, consider refrigerating it for 30 minutes before rolling it out.
Enjoy creating and decorating these adorable chick cookies for Easter, and don’t forget to share your sweet creations with friends and family!
- Generous Capacity: 7-quart slow cooker that comfortably serves 9+ people or fits a 7-pound roast
- Cooking Flexibility: High or low slow cooking settings, with convenient warm function for ideal serving...
- Convenient: Set it and forget it feature enables you to cook while at work or performing daily tasks
Polka Dot Decorated Eggs

Polka Dot Decorated Eggs are a fun and whimsical way to celebrate Easter and bring a burst of color to your festivities. These decorated eggs are perfect for kids and families, providing an engaging crafting activity that combines creativity and holiday spirit. The preparation time is approximately 30 minutes, plus drying time, making it an enjoyable project to share with friends and family.
Ingredients:
- Hard-boiled eggs (as many as desired)
- Food coloring
- White vinegar
- Water
- Small paintbrushes
- Edible glitter (optional)
- Adhesive dots or colored stickers (for easier dotting)
- Cupcake liners or small bowls (for mixing colors)
Instructions:
1. Begin by hard-boiling your eggs. Place the eggs in a pot, cover with water, and boil for 10-12 minutes. Once done, transfer the eggs to an ice bath to cool.
2. In separate small bowls or cupcake liners, mix food coloring with a few drops of white vinegar and a small amount of water to create your desired colors for the dots.
3. Once your eggs are cooled and dried, you can use a small paintbrush to carefully apply the colored mixtures onto the eggs, creating polka dots in various sizes.
Alternatively, you can use adhesive dots or colored stickers for a more straightforward approach.
4. For added sparkle, sprinkle edible glitter over the wet paint to make the dots shine.
5. Allow the eggs to dry completely on a paper towel or drying rack before displaying or hiding them for an Easter egg hunt.
Variations and Tips:
- Experiment with different sizes and styles of polka dots, mixing larger and smaller dots for a more dynamic look.
- Consider using different methods, such as sponge painting or stencil techniques, for unique dot patterns.
- Try out pastel colors for a soft, springtime theme or vibrant colors for a bold, eye-catching display.
- If you have older kids, encourage them to create intricate designs using fine paintbrushes or markers for more detailed artwork.
- Remember that you can use natural food dyes made from beet juice, turmeric, or red cabbage if you prefer a more organic approach.
- 100% Leak-proof: Guaranteed no-spill seal and secure latches
- Crystal-clear Tritan Built: Stain-resistant and odor-resistant material for a clear view of contents
- Lightweight & Sturdy: Easy to carry, yet durable for everyday use
Pastel Rainbow Swirls
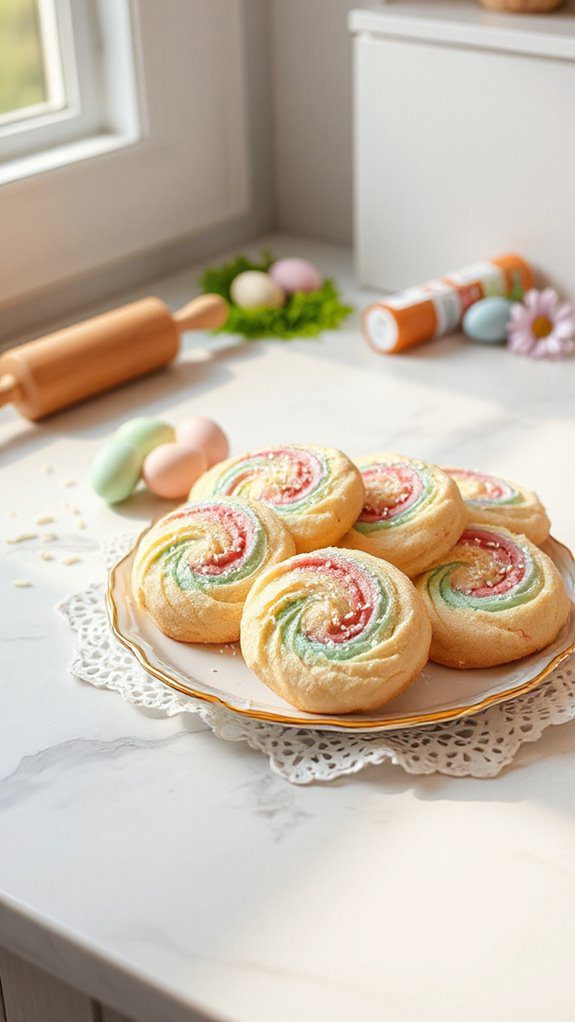
These delightful Pastel Rainbow Swirls sugar cookies are not only visually stunning but also incredibly delicious. Ideal for family gatherings, Easter celebrations, or simply a fun baking day with kids, these cookies are sure to impress with their vibrant colors and soft texture.
With a preparation time of approximately 30 minutes, followed by a chilling time and baking, you’ll have these festive treats ready to share in no time!
Ingredients:
- 2 ¾ cups all-purpose flour
- 1 teaspoon baking powder
- ½ teaspoon salt
- 1 cup unsalted butter, softened
- 1 ½ cups granulated sugar
- 1 large egg
- 1 teaspoon vanilla extract
- Food coloring (pastel colors of your choice)
- Sprinkles (optional)
Instructions:
- Preheat the Oven: Begin by preheating your oven to 350°F (175°C). Line a baking sheet with parchment paper and set aside.
- Mix Dry Ingredients: In a medium bowl, whisk together the all-purpose flour, baking powder, and salt. Set this mixture aside.
- Cream Butter and Sugar: In a large bowl, cream the softened butter and granulated sugar together until light and fluffy, about 2-3 minutes.
- Add Egg and Vanilla: Beat in the egg and vanilla extract until fully incorporated.
- Combine Mixtures: Gradually add the dry ingredients to the wet ingredients, mixing just until combined. Do not overmix.
- Divide Dough: Split the dough into four equal portions.
- Color the Dough: Add a few drops of your chosen pastel food coloring to each portion of dough. Use your hands or a spatula to knead the color into the dough until well mixed. You can create different color combinations for each portion.
- Roll and Layer: Take the colored dough and roll each portion into logs, about 1 inch thick. Then, stack the logs on top of each other in a rainbow order. Gently press down to flatten the logs slightly.
- Swirl the Dough: Using a sharp knife, cut the dough into slices and then twist the slices together to form a swirled pattern.
- Chill the Dough: Wrap the swirled dough in plastic wrap and refrigerate for at least 1 hour or until firm.
- Bake the Cookies: Remove the dough from the refrigerator and slice into ¼ inch thick rounds. Place them on the prepared baking sheet, leaving space between each cookie. If desired, sprinkle a few sprinkles on top before baking.
- Oven Time: Bake the cookies in the preheated oven for 8-10 minutes or until the edges are lightly golden. Let the cookies cool on the baking sheet for a few minutes before transferring them to a wire rack to cool completely.
Variations and Tips:
- Consider using cookie cutters to create fun shapes instead of rounds for an even more festive look.
- To make the colors more vibrant, add more food coloring a few drops at a time until you achieve your desired shade.
- For a fun twist, you can incorporate flavored extracts like almond or lemon to give your cookies a unique taste.
- If you want to turn this cookie recipe into a creative family activity, allow everyone to choose their favorite colors for their own batch of cookie dough!
Now you’re all set to bake these beautiful pastel rainbow swirl sugar cookies and share them with family and friends. Enjoy the baking and decorating process!
- 𝗘𝗳𝗳𝗼𝗿𝘁𝗹𝗲𝘀𝘀 𝗪𝗲𝗶𝗴𝗵𝗶𝗻𝗴: Supports 5 units...
- 𝗣𝗿𝗲𝗰𝗶𝘀𝗲 𝗥𝗲𝘀𝘂𝗹𝘁𝘀: Accurately weighs up to 11 lb/5 kg with 1 g...
- 𝗦𝗶𝗺𝗽𝗹𝗲 & 𝗖𝗼𝗺𝗽𝗮𝗰𝘁: The small and sleek scale is a perfect fit for...
Intricate Lace Patterns

Creating intricate lace patterns on Easter sugar cookies is a delightful way to elevate your baking. These cookies are not only a treat for the taste buds but also for the eyes, making them perfect for spring celebrations, Easter gatherings, or as personalized gifts.
The preparation time for this project is roughly 15 minutes for the cookie dough, 30 minutes to chill, and around 30 minutes for decorating, making it a fun and engaging activity for bakers of all skill levels.
Ingredients:
- 2 3/4 cups all-purpose flour
- 1 teaspoon baking powder
- 1/2 teaspoon salt
- 1 cup unsalted butter, softened
- 1 1/2 cups granulated sugar
- 1 egg
- 1 teaspoon vanilla extract
- 1/2 teaspoon almond extract (optional)
- Royal icing (for decorating)
- Food coloring (optional)
- Piping bags with fine tips
- Lace stencil (optional)
Instructions:
- In a medium bowl, whisk together the flour, baking powder, and salt; set aside.
- In a large bowl, cream together the softened butter and granulated sugar until light and fluffy.
- Beat in the egg, vanilla extract, and almond extract (if using).
- Gradually add the flour mixture to the wet ingredients, mixing until a dough forms.
- Divide the dough into two portions, flatten into disks, wrap in plastic wrap, and chill in the refrigerator for at least 30 minutes.
- Preheat your oven to 350°F (175°C) and line baking sheets with parchment paper.
- Roll out dough on a lightly floured surface to about 1/4 inch thick. Use cookie cutters to cut out desired shapes.
- Place cookies on prepared baking sheets and bake for 8-10 minutes, or until the edges begin to turn golden. Let them cool completely on wire racks.
- Prepare royal icing. You can tint it with food coloring to match your Easter theme.
- Use a piping bag fitted with a fine tip to create delicate lace patterns on the cooled cookies. For more intricate designs, consider using lace stencils to guide your piping.
- Allow the decorated cookies to dry completely before handling.
Variations and Tips:
- For a textured look, try incorporating edible glitter or colored sugar on top of the wet icing before it dries.
- If you’re new to piping, practice your lace patterns on parchment paper before decorating the cookies.
- Consider varying the flavor of your cookies by adding lemon or orange zest to the dough for a citrus twist.
- When using stencils, hold them firmly in place to guarantee a clean pattern, and remove them carefully after piping.
- To store, keep decorated cookies in an airtight container at room temperature for up to a week.
Enjoy your beautifully decorated Easter sugar cookies adorned with these intricate lace patterns!
- Instant Read Food Thermometer | Our instant read thermometer features a temperature probe and advanced,...
- Multi-Use | From bbq thermometer to baking thermometer, our digital food thermometer for cooking is...
- Easy-Read Digital Thermometer For Cooking | Large instant thermometer dial with bright blue backlight...
Fun Bunny Footprints

These Fun Bunny Footprints Sugar Cookies are a delightful treat perfect for Easter celebrations. Ideal for kids and adults alike, these cookies can be a wonderful family activity where everyone can join in on the decorating fun.
With a prep time of around 30 minutes and a baking time of 10-12 minutes, you’ll have yummy, festive cookies ready to display or give as gifts in no time!
Ingredients:
- 2 ¾ cups all-purpose flour
- 1 teaspoon baking powder
- ¼ teaspoon salt
- 1 cup unsalted butter, softened
- 1 ½ cups granulated sugar
- 1 egg
- 1 teaspoon vanilla extract
- 1 teaspoon almond extract (optional)
- Icing (royal or buttercream) in various colors
- Edible glitter (optional)
- Mini chocolate eggs (for decoration)
- Sprinkles (for decoration)
Cooking Steps:
- Prepare the Oven and Baking Sheets: Preheat your oven to 350°F (175°C) and line baking sheets with parchment paper.
- Mix Dry Ingredients: In a bowl, whisk together the flour, baking powder, and salt. Set aside.
- Cream Butter and Sugar: In another large bowl, cream together the softened butter and sugar until light and fluffy. This should take about 3-5 minutes.
- Add Egg and Extracts: Beat in the egg, vanilla extract, and almond extract (if using) until well combined.
- Combine Mixtures: Gradually add the dry ingredients to the wet ingredients, mixing until just combined.
- Chill the Dough: Cover the dough with plastic wrap and chill it in the refrigerator for about 30 minutes. This helps the cookies hold their shape while baking.
- Roll and Cut: On a floured surface, roll out the dough to about ¼ inch thickness. Use cookie cutters to cut out your favorite shapes, aiming for bunny silhouettes or footprint shapes.
- Bake the Cookies: Place the cutouts on the prepared baking sheets and bake for 10-12 minutes or until edges are lightly golden. Allow cooling on a wire rack.
- Decorate: Once cooled, use icing to create bunny feet prints. Start with pink for the paw pads and white for the foot outlines. Use edible glitter and sprinkles to glam up your decorations. Incorporate mini chocolate eggs for added fun!
- Serve and Enjoy: Let the icing set before serving your creative and delicious bunny footprint cookies!
Variations and Tips:
- Flavor Twists: Add lemon or orange zest to the dough for a citrusy twist.
- Colorful Icing: Use gel food colorings to create bright and vibrant icing. This will make your bunny footprints pop!
- Creative Shapes: While bunny footprints are adorable, you can also utilize other Easter-themed cookie cutters, such as eggs or carrots.
- Storage: Store your decorated cookies in an airtight container at room temperature for up to a week.
- Make it Easy: You can use store-bought sugar cookie dough for a quicker option.
Have fun creating and decorating these delightful sugar cookies that are guaranteed to bring joy to your Easter festivities!
- Versatile 54-Piece Collection: Elevate your kitchen with the Home Hero 54-Piece Kitchen Utensil Set, a...
- Durable and Long-Lasting: Crafted from premium stainless steel, these kitchen utensils are designed to...
- Perfect Holiday Gift: Delight your loved ones with this kitchen utensils gift set this festive season....
Stained Glass Window Cookies
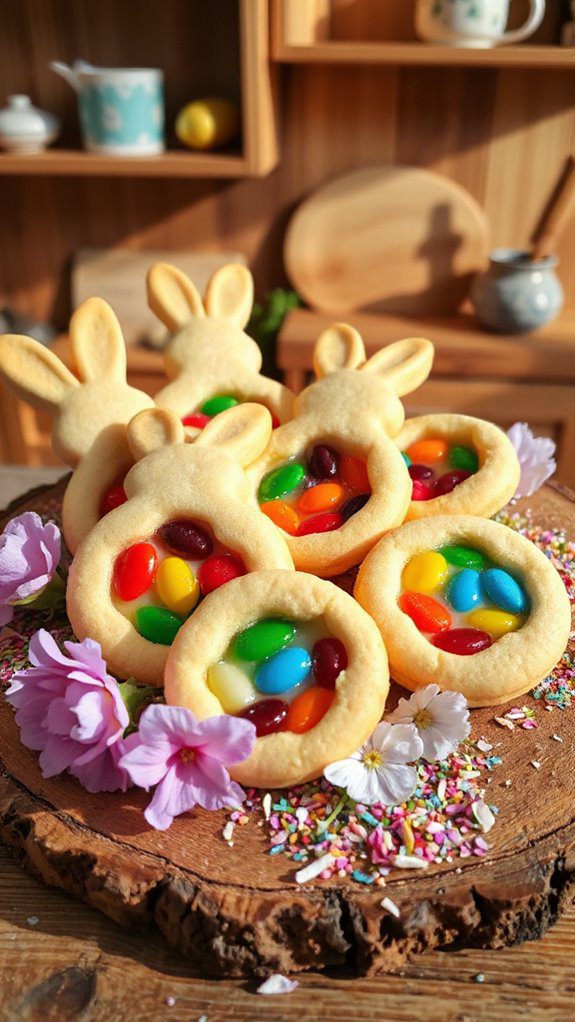
Stained Glass Window Cookies are a delightful twist on traditional sugar cookies, offering a fun and festive way to celebrate Easter. These beautiful cookies are made with a colorful, candy-filled center that resembles stained glass, adding an artistic touch to your holiday dessert spread. Perfect for families looking to engage kids in baking, these cookies can be decorated to match various spring themes and are sure to impress guests at any Easter gathering. The preparation time for this fun recipe is approximately 1 hour, including baking and cooling.
Ingredients:
- 2 ¾ cups all-purpose flour
- 1 teaspoon baking powder
- ½ teaspoon salt
- 1 cup unsalted butter, softened
- 1 ½ cups granulated sugar
- 1 large egg
- 1 teaspoon vanilla extract
- ½ teaspoon almond extract (optional)
- 1 cup crushed hard candies (like Jolly Ranchers)
Instructions:
- Preheat your oven to 350°F (175°C) and line a baking sheet with parchment paper.
- In a mixing bowl, whisk together the flour, baking powder, and salt. Set this dry mixture aside.
- In another bowl, cream the softened butter and granulated sugar together until light and fluffy, about 3-5 minutes.
- Beat in the egg and both extracts (vanilla and almond), mixing until well combined.
- Gradually add the dry ingredients to the wet mixture, stirring until just combined. The dough should come together in a ball.
- Divide the dough in half and wrap each half in plastic wrap. Refrigerate for at least 30 minutes to firm the dough, making it easier to work with.
- Roll out the chilled dough on a floured surface to about ¼-inch thickness. Use cookie cutters to cut out your desired shapes, and then cut out the centers using a smaller cookie cutter (this is where the “stained glass” look will come from).
- Place the cookies on the prepared baking sheet. Fill the cut-out centers with crushed candies, making sure not to overfill as they can bubble over.
- Bake for 8-10 minutes or until the edges are lightly golden and the candy has melted to create a glass-like appearance.
- Let the cookies cool on the baking sheet for a few minutes before transferring them to a wire rack to cool completely.
Variations and Tips:
- Use different shapes, such as Easter eggs, bunnies, or flowers to enhance the festive theme.
- Experiment with candy colors to create beautiful patterns in your cookies, utilizing color combinations that match your party décor.
- For added decoration, after the cookies have cooled, you can outline them with royal icing or sprinkle edible glitter for a whimsical touch.
- If you don’t have hard candies on hand, you can also use crushed gummy candies, but they may not yield as clear a “glass” effect.
- Store these cookies in an airtight container at room temperature for up to one week, keeping them crisp and fresh for your Easter celebrations!
- 24-ounce insulated stainless-steel water bottle with a FreeSip spout and push-button lid with lock
- Patented FreeSip spout designed for either sipping upright through the built-in straw or tilting back to...
- Protective push-to-open lid keeps spout clean; convenient carry loop doubles as a lock
Whimsical Carrot Cookies
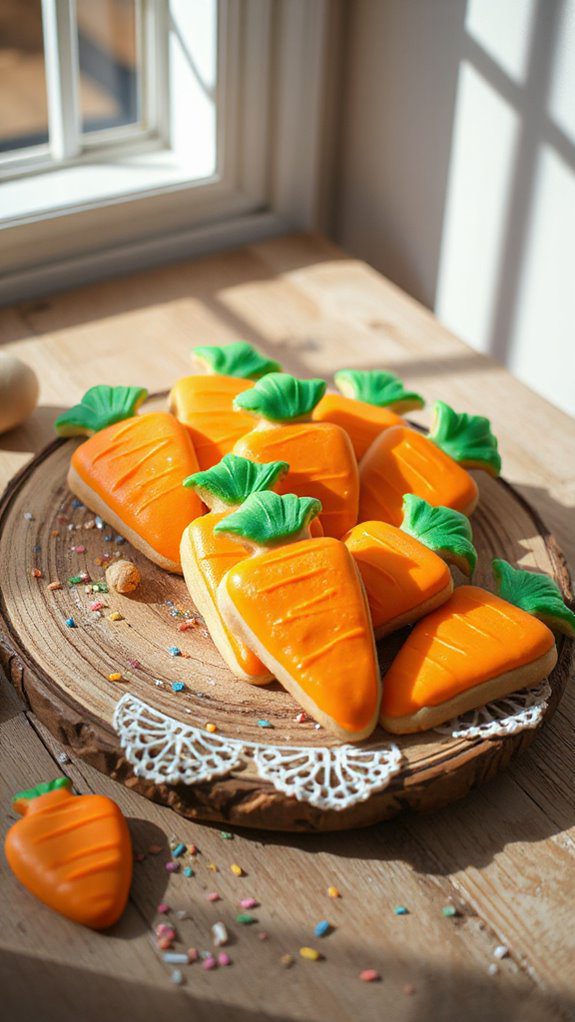
Whimsical Carrot Cookies are a fun and festive treat perfect for Easter celebrations or any springtime gathering. These vibrant cookies are not only adorable and eye-catching but also delicious, making them a great choice for kids and adults alike. With a preparation time of about 30 minutes (plus chilling and baking time), this delightful recipe will add a touch of whimsy to your dessert table.
Ingredients:
- 2 ¾ cups all-purpose flour
- 2 teaspoons baking powder
- ½ teaspoon salt
- 1 cup unsalted butter, softened
- 1 ½ cups granulated sugar
- 1 large egg
- 1 teaspoon vanilla extract
- 1 teaspoon almond extract
- 1 cup powdered sugar (for decorating)
- Orange and green icing (store-bought or homemade)
- Carrot cookie cutter (optional)
- Edible glitter or sprinkles (optional)
Instructions:
- Prep the Dough: In a large mixing bowl, whisk together the flour, baking powder, and salt. In another bowl, cream together the softened butter and granulated sugar until light and fluffy. Add in the egg, vanilla extract, and almond extract, mixing well to combine.
- Combine Mixtures: Gradually add the dry ingredients to the wet ingredients, mixing until a smooth dough forms.
- Chill the Dough: Wrap the dough in plastic wrap and refrigerate for at least 2 hours, or overnight for best results. This step is essential for achieving the right cookie shape during baking.
- Preheat the Oven: When ready to bake, preheat your oven to 350°F (175°C). Prepare a baking sheet by lining it with parchment paper.
- Roll and Cut: Once the dough is chilled, roll it out on a floured surface to about ¼ inch thick. Use a carrot-shaped cookie cutter to cut the cookies and transfer them to the prepared baking sheet.
- Bake: Bake the cookies for 8-10 minutes, or until the edges are lightly golden. Allow them to cool on the baking sheet for a few minutes before transferring to a wire rack to cool completely.
- Decorate: Once the cookies are cool, use orange icing to decorate the cookie bodies and green icing for the tops to mimic carrot greens. Add edible glitter or sprinkles for an extra festive touch.
Variations & Tips:
- Flavor Variations: Consider adding orange zest to the dough for an extra citrusy flavor.
- Icing Alternatives: If you want to try different flavors, you can use lemon or lime icing instead of orange for a zesty twist.
- Storage: Keep the decorated cookies in an airtight container at room temperature for up to one week.
- Make-ahead: The dough can also be made in advance and frozen for up to three months; just thaw and roll out when you’re ready to bake.
Enjoy making and sharing these whimsical carrot cookies – they are sure to brighten up your spring celebrations!
Glittery Nest Cookies

Glittery Nest Cookies are whimsical and delightful treats perfect for celebrating Easter or any springtime occasion. These charming cookies resemble little nests and are sure to be a hit with kids and adults alike. Ideal for family gatherings, school parties, or simply as a fun baking project at home, these cookies come together in about 30 minutes (plus chilling time) and will bring out everyone’s creativity during the decorating phase.
Ingredients:
- 2 ½ cups all-purpose flour
- 1 teaspoon baking powder
- ½ teaspoon salt
- 1 cup unsalted butter, softened
- 1 cup granulated sugar
- 1 large egg
- 1 teaspoon vanilla extract
- 1 to 2 cups shredded coconut
- Brightly colored candy eggs (e.g., chocolate or jelly beans)
- Edible glitter (optional)
- Icing (for decorating)
Cooking Steps:
- Preheat Oven: Preheat your oven to 350°F (175°C) and line a baking sheet with parchment paper.
- Mix Dry Ingredients: In a bowl, whisk together the flour, baking powder, and salt until well combined. Set aside.
- Cream Butter and Sugar: In a large mixing bowl, beat the softened butter and granulated sugar together until light and fluffy, about 2-3 minutes.
- Add Egg and Vanilla: Add the egg and vanilla extract to the butter mixture and beat until fully incorporated.
- Combine Mixtures: Gradually add the dry ingredients to the wet ingredients, mixing until just combined. Be careful not to overmix.
- Form Cookies: Scoop tablespoon-sized balls of dough and place them on the prepared baking sheet, spacing them about 2 inches apart. Use your finger to make a small indent in the center of each cookie.
- Add Coconut: Bake the cookies in the preheated oven for 10-12 minutes, until the edges are lightly golden. Remove from the oven and immediately fill the indent with shredded coconut to resemble a nest.
- Cool and Decorate: Allow the cookies to cool on the baking sheet for about 5 minutes, then transfer them to a wire rack to cool completely. Once cooled, decorate each nest with colorful candy eggs and sprinkle edible glitter over the top for a festive touch.
Variations and Tips:
- Coconut Alternative: If you’re not a fan of coconut, you can use crushed graham crackers or finely chopped nuts to create the nest.
- Icing Decoration: Use royal icing to create more intricate designs around the edges of the cookies if desired.
- Flavors: Experiment with different extracts such as almond or lemon for a unique twist on the flavor.
- Storage: Store these cookies in an airtight container at room temperature for up to a week.
Get creative with your decorations and enjoy the process of making these cheerful Glittery Nest Cookies!
3D Easter Basket Cookies

Easter Basket Cookies are a delightful addition to your holiday festivities, perfect for kids and adults alike who want to spread a little cheer this season.
These charming sugar cookies are designed to look like colorful Easter baskets filled with sweet treats, making them not only tasty but visually appealing as well. With a preparation time of about 1 hour and a baking time of 10-12 minutes, you’ll have an enjoyable project that can involve little ones in the decorating process, creating lasting memories as you bake together.
Ingredients:
- 2 ¾ cups all-purpose flour
- 1 tsp baking powder
- ½ tsp salt
- 1 cup unsalted butter, softened
- 1 ½ cups granulated sugar
- 1 large egg
- 1 tsp vanilla extract
- 1 tsp almond extract
- Colored frosting (green, yellow, pink, blue, etc.)
- Edible decorations (sprinkles, candy eggs, chocolate chips, etc.)
- Parchment paper
Cooking Steps:
- Preheat Oven: Begin by preheating your oven to 350°F (175°C).
- Mix Dry Ingredients: In a medium bowl, whisk together the flour, baking powder, and salt. Set aside.
- Cream Butter and Sugar: In a large mixing bowl, cream the softened butter and granulated sugar together until light and fluffy, about 3-5 minutes.
- Add Egg and Extracts: Beat in the egg, vanilla extract, and almond extract, mixing until combined.
- Combine Mixtures: Gradually add the dry ingredients to the wet ingredients, mixing slowly until everything is well incorporated.
- Chill Dough: Cover the dough with plastic wrap and chill in the refrigerator for at least 30 minutes; this helps the cookies hold their shape while baking.
- Shape Cookies: On a lightly floured surface, roll out the dough to about ¼ inch thick. Use cookie cutters to cut out basket shapes—round shapes for baskets and longer shapes for handles—and place them on a parchment-lined baking sheet.
- Bake: Bake in the preheated oven for 10-12 minutes, or until the edges are lightly golden. Allow them to cool completely on a wire rack.
- Decorate: Once cooled, decorate the cookies with green frosting to mimic grass, and add edible decorations like candy eggs or small chocolate bunnies to create the appearance of filled baskets.
Variations and Tips:
- Flavor Variations: For additional flavor, consider adding lemon zest or almond extract for a unique twist.
- Frosting Options: Use royal icing for a firmer finish or buttercream for a softer, creamier texture.
- Cookie Shapes: Get creative with cookie cutters! Consider making flower shapes or bunny silhouettes to pair with your basket cookies.
- Storage: Store cookies in an airtight container at room temperature for up to a week. For longer storage, freeze the undecorated cookies and thaw them before decorating.
- Involving Kids: Let children help with frosting and placement of edible decorations to make it a fun family activity!
Enjoy your baking and have a wonderful Easter filled with delicious treats!
Marbled Icing Eggs
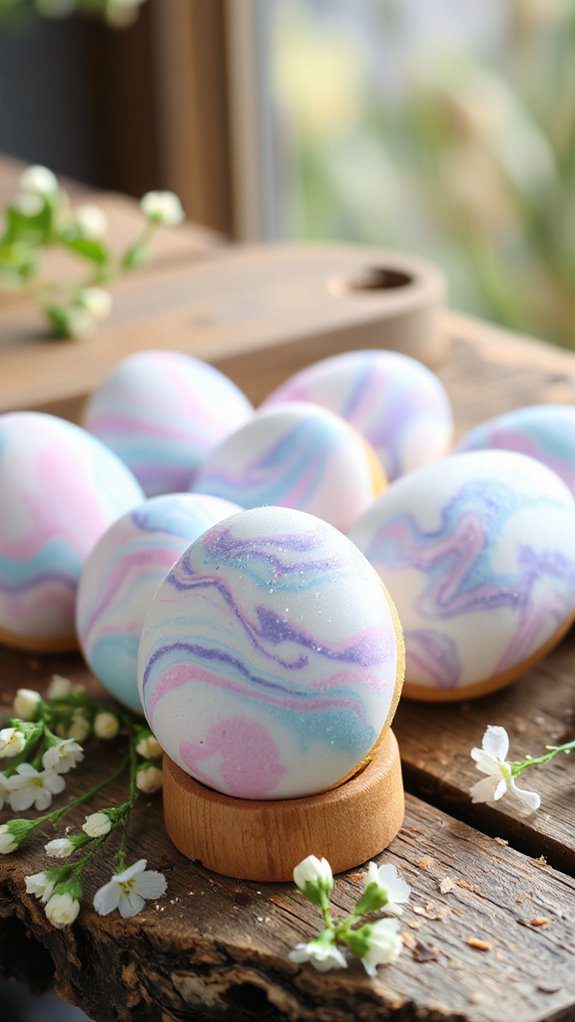
Marbled icing eggs are a delightful and visually stunning treat, perfect for celebrating Easter or any spring gathering! This sweet decorative treat is not only a fun project for families and kids but also introduces a unique and artistic twist to traditional sugar cookies. The preparation time for marbled icing eggs is about 30 minutes, with an additional 2-4 hours for drying, making it a great activity for a weekend or holiday celebration.
Ingredients:
- 2 cups powdered sugar
- 2 tablespoons meringue powder
- 5-6 tablespoons water
- Food coloring (various colors)
- Sugar cookies shaped like eggs (preferably cooled)
- Piping bags or squeeze bottles
- Toothpicks or skewer sticks
Instructions:
- In a large bowl, mix the powdered sugar and meringue powder. Gradually add water, stirring until smooth and achieving a thick but spreadable consistency.
- Divide the icing into separate bowls, depending on how many colors you would like to use for marbling. Add a few drops of food coloring to each bowl and mix gently to avoid fully blending the colors.
- Once your colored icings are ready, transfer them into piping bags or squeeze bottles for easy application.
- Take a cooled sugar cookie shaped like an egg and lay it flat on a clean surface.
- Starting with one color of icing, drizzle small amounts onto the cookie’s surface. Then, with another color, add more drizzles over the first.
- Using a toothpick or skewer stick, gently swirl the colors together to create a marbled effect. Be careful not to over-mix, as you want to retain distinct color patterns.
- Allow the decorated cookies to dry completely (2-4 hours) before handling or storing.
Variations and Tips:
- Experiment with different color combinations and patterns for a personalized touch. Pastel colors work particularly well for Easter themes.
- For added texture, consider mixing in edible glitter or finely crushed candies into the icing before applying.
- If you want a quicker drying time, use a dehydrator set to a low temperature.
- For a more sophisticated finish, try adding a clear glaze over the marbled icing once dried, providing an extra shiny appearance.
- Remember that the marbled effect looks best when the icing is applied thickly, so don’t be afraid to use more icing!
Chocolate-Dipped Bunny Tails

Ingredients:
- 1 batch of sugar cookie dough (homemade or store-bought)
- 1 cup semi-sweet chocolate chips
- 1 tablespoon coconut oil (optional, for smoother chocolate)
- Mini marshmallows
- Sprinkles (preferably pastel colors)
- Parchment paper
Cooking Steps:
- Preheat the oven: Preheat your oven to 350°F (175°C). Line a baking sheet with parchment paper.
- Shape the cookies: Roll the sugar cookie dough into small balls, about the size of a walnut. Flatten them slightly to form circular shapes that will serve as the bunny tails.
- Bake: Place the cookies on the prepared baking sheet and bake for 8-10 minutes, or until the edges are lightly golden. Remove from oven and let them cool completely on a wire rack.
- Melt the chocolate: In a microwave-safe bowl, combine the semi-sweet chocolate chips and coconut oil (if using). Heat in the microwave in 30-second intervals, stirring between, until completely melted and smooth.
- Dip the cookies: Take each cookie and dip one side into the melted chocolate, ensuring it’s generously coated. Allow any excess chocolate to drip off before placing the dipped cookies back on the parchment.
- Add bunny tails: While the chocolate is still wet, place a mini marshmallow on top of the dipped side of each cookie to represent the bunny tail.
- Decorate: Sprinkle pastel-colored sprinkles around the marshmallow while the chocolate is still soft to create a festive look.
- Set: Allow the chocolate to set completely at room temperature or in the refrigerator for about 15-20 minutes.
Variations and Tips:
- For added flavor, consider mixing in a few drops of vanilla extract into your sugar cookie dough before baking.
- If desired, use white chocolate chips instead of semi-sweet for a different look and taste.
- Experiment with different toppings like shredded coconut or colored sugar for the bunny tail for a more textured appearance.
- To make these treats more adorable, use small chocolate chips or candy eyes to create a face and make them look like real bunnies.
- Store any leftovers in an airtight container for up to a week, making these a perfect treat for sharing during the Easter celebration.
Floral Wreath Cookies

Floral wreath cookies are a delightful and festive treat perfect for celebrating Easter or any springtime gathering.
These charming sugar cookies are decorated to resemble beautiful floral wreaths, making them not only tasty but also a lovely addition to any dessert table. With a preparation time of about 30 minutes plus additional decorating time, these cookies are ideal for those looking to impress family or friends with their baking skills while enjoying the process of decorating.
Ingredients
- 2 ¾ cups all-purpose flour
- ½ teaspoon baking powder
- ½ teaspoon salt
- 1 cup unsalted butter, softened
- 1 ½ cups granulated sugar
- 1 egg
- 1 teaspoon vanilla extract
- 1 teaspoon almond extract
- Royal icing (various colors)
- Edible flowers and sprinkles for decoration
Cooking Steps
- Preheat the Oven: Preheat your oven to 350°F (175°C) and line baking sheets with parchment paper.
- Mix Dry Ingredients: In a small bowl, whisk together the flour, baking powder, and salt. Set aside.
- Cream Butter and Sugar: In a large mixing bowl, beat the softened butter and sugar together until light and fluffy, around 3-4 minutes.
- Add Egg and Extracts: Add the egg, vanilla extract, and almond extract to the butter mixture. Mix until fully combined.
- Combine Mixtures: Gradually add the dry ingredients to the wet ingredients, mixing just until the dough comes together. Do not overmix.
- Roll Out Dough: Divide the dough into two equal parts, wrap each in plastic wrap, and refrigerate for at least 30 minutes.
- Cut Out Cookies: On a floured surface, roll out the chilled dough to about ¼ inch thickness. Use a wreath-shaped cookie cutter or create a ring shape using a round cutter and a smaller cutter for the center.
- Bake the Cookies: Place the cut-out cookies on the prepared baking sheets and bake in the preheated oven for 8-10 minutes or until the edges are lightly golden. Allow them to cool completely on a wire rack.
- Decorate: Once cooled, use royal icing to pipe floral designs on the cookies. Decorate with edible flowers and sprinkles to enhance their appearance.
- Let Icing Set: Allow the icing to dry completely before serving or storing.
Variations and Tips
- Flavored Icing: Consider flavoring the royal icing with lemon, orange zest, or almond extract for added taste.
- Coloring: Use gel food coloring to achieve vibrant hues for your floral designs.
- Theme: Customize the flowers and colors based on your theme, whether it’s spring, Easter, or a birthday celebration.
- Storage: Keep the decorated cookies in an airtight container at room temperature for up to a week.
These floral wreath cookies are sure to bring a smile to everyone’s face and elevate your holiday festivities!
Enjoy the process of baking and decorating these sweet treats!


