Roasted Butternut Squash Soup Shots

Roasted butternut squash soup shots are a delightful and elegant appetizer perfect for fall gatherings. This dish combines creamy butternut squash with fragrant spices, resulting in a warm, comforting shot of flavor. Preparation time is approximately 30 minutes, and the difficulty level is easy, making it a great choice for both novice cooks and experienced chefs.
Ingredients:
- 1 medium butternut squash, peeled and cubed
- 1 tablespoon olive oil
- Salt and pepper to taste
- 1 small onion, diced
- 2 cloves garlic, minced
- 4 cups vegetable or chicken broth
- 1 teaspoon ground cinnamon
- ½ teaspoon ground nutmeg
- ¼ cup heavy cream (optional)
- Fresh parsley or thyme for garnish (optional)
Instructions:
- Preheat the oven to 400°F (200°C).
- On a baking sheet, toss the cubed butternut squash with olive oil, salt, and pepper. Roast for 25-30 minutes until tender and caramelized.
- In a large pot, heat a bit of oil over medium heat and sauté the diced onion until translucent. Add the minced garlic and cook for an additional minute.
- Stir in the roasted butternut squash, broth, cinnamon, and nutmeg. Bring to a simmer and cook for 10 minutes to blend flavors.
- Using a blender, puree the mixture until smooth, returning it to the pot. Adjust seasoning, and if desired, stir in heavy cream for added richness.
- Serve in shot glasses, garnished with fresh herbs.
Ingredient Suggestions:
Feel free to substitute the butternut squash with other fall vegetables like sweet potatoes or pumpkins.
If you prefer a vegan option, use coconut cream instead of heavy cream to maintain a creamy texture while keeping it dairy-free.
Variations:
Experiment with different spices such as ginger or curry powder for a unique twist.
Adding sautéed apples or pears can introduce a hint of sweetness, while a drizzle of balsamic glaze can enhance the flavor profile with a tangy contrast.
Cooking Tips:
To achieve the best flavor, roast the butternut squash until it is caramelized, as this brings out its natural sweetness.
Always taste and adjust the seasonings as you blend; a little salt can make a significant difference in enhancing the overall taste.
Drinks Pairing:
These roasted butternut squash soup shots pair wonderfully with crisp white wines like Sauvignon Blanc or a light, fruity red like Pinot Noir.
For a non-alcoholic option, consider serving them alongside apple cider or a sparkling water infused with citrus for a revitalizing complement.
- The Original Pro Chopper - Our superstar veggie slicer has been creating waves on TikTok! Simple to use,...
- Easy Meal Prep with Rust-Resistant Blades - Our vegetable chopper is perfect for anyone who wants to eat...
- 5-Star Design - The soft-grip TPU handle ensures controlled chopping, while the non-skid rubber base...
Apple and Cheddar Stuffed Mini Peppers

Apple and cheddar stuffed mini peppers are a delightful and colorful appetizer that brings together the sweet and savory flavors of crisp apples and sharp cheddar cheese. These bite-sized treats are perfect for fall gatherings, providing a unique flavor combination that will impress your guests.
Preparation time is approximately 20 minutes, and the difficulty level is easy, making it an ideal dish for cooks of all skill levels.
Ingredients:
- 12 mini sweet peppers, halved and seeded
- 1 cup sharp cheddar cheese, shredded
- 1 small apple, finely diced (preferably a tart variety like Granny Smith)
- 1 tablespoon fresh chives, chopped
- 1 tablespoon olive oil
- Salt and pepper to taste
- Optional: 1 tablespoon honey for drizzling
Instructions:
- Preheat your oven to 375°F (190°C).
- In a mixing bowl, combine the shredded cheddar cheese, diced apple, chopped chives, olive oil, salt, and pepper. Mix until well combined.
- Stuff each mini pepper half with the cheese and apple mixture, pressing it down gently to pack it in.
- Arrange the stuffed peppers on a baking sheet and, if desired, drizzle with honey.
- Bake in the preheated oven for 15-20 minutes or until the cheese is melted and the peppers are tender.
- Serve warm as an elegant appetizer.
Ingredient Suggestions:
Feel free to swap out sharp cheddar for other cheese varieties such as gouda or brie for a different flavor profile.
You can also replace the mini sweet peppers with larger bell peppers, but adjust the cooking time accordingly.
Variations:
Try adding toppings like crumbled bacon or diced walnuts to the cheese mixture for added crunch. Adding a pinch of cayenne pepper can introduce a subtle heat, or you can incorporate caramelized onions for more depth of flavor.
Cooking Tips:
Make sure to choose apples that will hold up during baking and offer a nice contrast to the richness of the cheese, such as tart or crisp varieties.
Be careful not to overstuff the peppers, as they may burst while baking if packed too tightly.
Drinks Pairing:
These apple and cheddar stuffed mini peppers pair wonderfully with a crisp cider or a light white wine like Pinot Grigio.
For a non-alcoholic option, consider serving them with sparkling water infused with lemon or lime for a revitalizing contrast.
- Makes Everything Simple : Just forget your bagged cheese! Only turn the handle for several times and get...
- Premium Material : All parts of the rotary cheese grater are made of food grade ABS material, no BPA. The...
- Three Option Grater : The parmesan cheese grater finishes food preparation with slicing, shredding and...
Spinach and Artichoke Dip With Crostini
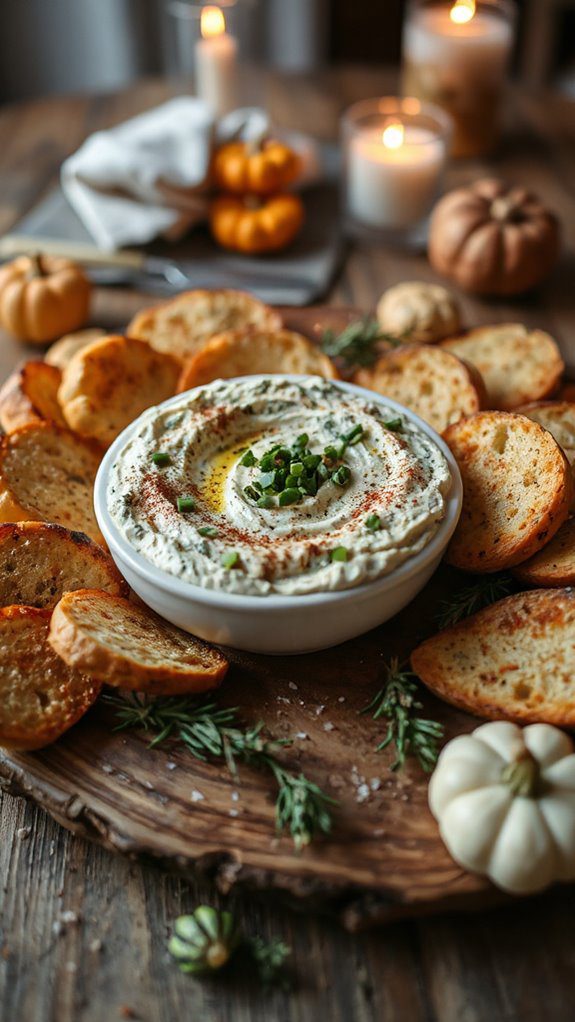
Spinach and artichoke dip with crostini is a classic warm appetizer that brings a creamy, cheesy flavor blend to your fall gatherings. This dish is perfect for sharing and is sure to please a crowd, making it a great choice for parties or family get-togethers.
Preparation time is about 30 minutes, and the difficulty level is easy, making it accessible for cooks of all levels.
Ingredients:
- 1 cup frozen spinach, thawed and drained
- 1 cup marinated artichoke hearts, chopped
- 1 cup cream cheese, softened
- 1 cup sour cream
- 1 cup shredded mozzarella cheese
- ½ cup grated Parmesan cheese
- 2 cloves garlic, minced
- 1 teaspoon lemon juice
- Salt and pepper to taste
- 1 baguette, sliced for crostini
- Olive oil for brushing
Instructions:
- Preheat your oven to 350°F (175°C).
- In a mixing bowl, combine the cream cheese, sour cream, mozzarella cheese, Parmesan cheese, minced garlic, lemon juice, and season with salt and pepper. Mix until smooth.
- Stir in the drained spinach and chopped artichokes until well incorporated.
- Transfer the mixture to a baking dish and spread it evenly.
- Bake in the preheated oven for 25-30 minutes until bubbly and golden on top.
- While the dip is baking, brush baguette slices with olive oil and bake on a separate baking sheet for 5-10 minutes until crisp.
- Serve the warm spinach and artichoke dip with crostini on the side for dipping.
Ingredient Suggestions:
Feel free to substitute fresh spinach for frozen, ensuring that it is well-drained. You can also use Greek yogurt instead of sour cream for a lighter version or replace the mozzarella with another cheese like gouda for a different flavor.
Variations:
To add an extra layer of flavor, consider including some crushed red pepper flakes for heat or mixing in diced jalapeños. You can also add sautéed onions or bell peppers to the mix or top the dip with additional cheese before baking for a cheesy crust.
Cooking Tips:
Make sure to thoroughly drain the frozen spinach to prevent a watery dip. If you prefer a creamier texture, blend the mixture using a food processor for an ultra-smooth consistency before transferring to a baking dish.
Keep an eye on the crostini to prevent burning, as they can crisp up quickly.
Drinks Pairing:
This spinach and artichoke dip pairs beautifully with a chilled Chardonnay or a light beer. For a non-alcoholic option, a sparkling lemonade can balance the rich flavors of the dip, offering a revitalizing contrast.
- 💰 REDUCE WASTE AND SAVE MONEY: Chef Preserve keeps FOOD FRESH 5 TIMES LONGER than non-vacuum storage...
- ✅ POWERFUL, QUICK & EASY TO USE: Simply press the button to start. The device vacuum seals a bag in 5...
- ♻️ REUSABLE & RESEALABLE BAGS: Chef Preserve comes with dishwasher, freezer, refrigerator, and...
Sweet Potato Bites With Marshmallow Drizzle

Sweet Potato Bites with Marshmallow Drizzle are a delightful and festive appetizer that brings a sweet and savory flavor combination to your fall gatherings. These bite-sized morsels are perfect for a cozy get-together or a holiday party, and they are easy to make, with a preparation time of about 40 minutes.
Ingredients:
- 2 medium sweet potatoes, peeled and cut into 1-inch cubes
- 2 tablespoons olive oil
- 1 teaspoon cinnamon
- Salt to taste
- 1 cup mini marshmallows
- 2 tablespoons maple syrup
- 1 tablespoon butter
Instructions:
- Preheat your oven to 425°F (220°C).
- In a mixing bowl, toss the sweet potato cubes with olive oil, cinnamon, and salt until evenly coated.
- Spread the sweet potatoes on a baking sheet in a single layer and roast for about 25-30 minutes or until tender and golden, flipping halfway through.
- During the last 5 minutes of roasting, sprinkle the mini marshmallows over the sweet potatoes and return to the oven until the marshmallows are golden and melted.
- In a small saucepan, melt the butter and maple syrup over low heat. Drizzle this mixture over the sweet potato bites before serving.
Ingredient Suggestions:
You can replace sweet potatoes with butternut squash for a different twist.
If you want to make it a bit healthier, consider using honey instead of maple syrup or reducing the amount of marshmallows used.
Variations:
For added flavor, try mixing in some chopped pecans or walnuts before roasting or sprinkle some crushed graham crackers on top of the marshmallows for a s’mores-inspired twist.
You could also add a pinch of nutmeg to the sweet potato blend for warmth.
Cooking Tips:
Confirm that the sweet potato cubes are cut uniformly to guarantee even cooking.
Keep an eye on the marshmallows while they are baking, as they can burn quickly.
For a more caramelized flavor, consider broiling the sweet potatoes for the last 1-2 minutes instead of baking with the marshmallows.
Drinks Pairing:
Sweet Potato Bites with Marshmallow Drizzle pair wonderfully with a spiced apple cider or a light, fruity white wine like Riesling.
For a non-alcoholic option, consider serving a vanilla-flavored sparkling water to complement the sweetness of the dish.
- Generous Capacity: 7-quart slow cooker that comfortably serves 9+ people or fits a 7-pound roast
- Cooking Flexibility: High or low slow cooking settings, with convenient warm function for ideal serving...
- Convenient: Set it and forget it feature enables you to cook while at work or performing daily tasks
Pumpkin Hummus With Pita Chips
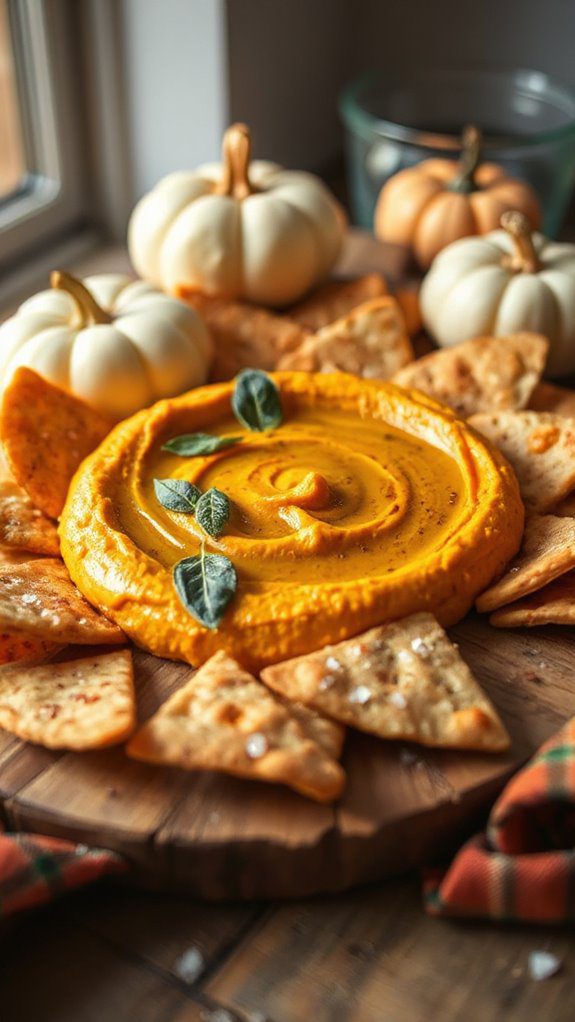
Pumpkin Hummus with Pita Chips is a creamy and flavorful dip that captures the essence of fall. This dish combines the earthy taste of pumpkin with traditional hummus ingredients and is perfect for autumn gatherings or a cozy night in. With a preparation time of about 15 minutes, this easy-to-make dish is suitable for all cooking skill levels.
Ingredients:
- 1 cup canned pumpkin puree
- 1 can (15 oz) chickpeas, drained and rinsed
- 2 tablespoons tahini
- 2 tablespoons olive oil
- 1 tablespoon lemon juice
- 1 garlic clove, minced
- 1 teaspoon ground cumin
- 1 teaspoon pumpkin pie spice
- Salt to taste
- Pita chips for serving
Instructions:
- In a food processor, combine pumpkin puree, chickpeas, tahini, olive oil, lemon juice, minced garlic, ground cumin, pumpkin pie spice, and salt.
- Blend until smooth and creamy, scraping down the sides as needed. If the hummus is too thick, add a little water or more olive oil to achieve the desired consistency.
- Taste and adjust seasoning if necessary, then transfer to a serving bowl.
- Serve with pita chips for dipping.
Ingredient Suggestions:
You can substitute chickpeas with white beans for a different flavor profile. For a creamier consistency, consider adding Greek yogurt or a splash of heavy cream.
If you don’t have tahini, almond butter or sunflower seed butter can serve as a convenient alternative.
Variations:
For a spicier twist, mix in some cayenne pepper or use roasted garlic instead of raw garlic.
Adding a sprinkle of pumpkin seeds or chopped fresh herbs like parsley or cilantro on top can enhance the presentation and flavor. You might also consider swirling in some balsamic glaze for an extra touch of sophistication.
Cooking Tips:
Ensure all ingredients are well-blended to achieve a smooth texture. If using canned pumpkin, make sure it’s pure pumpkin and not pumpkin pie filling, as the latter contains added sugar and spices.
For added flavor, let the hummus sit for at least 30 minutes in the refrigerator before serving to allow the flavors to meld.
Drinks Pairing:
Pumpkin Hummus pairs beautifully with a crisp white wine like Sauvignon Blanc or a lightly spiced Chai tea.
For non-alcoholic options, try serving with a revitalizing apple ginger spritzer or iced herbal tea with a hint of cinnamon to complement the dish’s warm flavors.
- 100% Leak-proof: Guaranteed no-spill seal and secure latches
- Crystal-clear Tritan Built: Stain-resistant and odor-resistant material for a clear view of contents
- Lightweight & Sturdy: Easy to carry, yet durable for everyday use
Cranberry Brie Bites

Cranberry Brie Bites are savory-sweet appetizers that combine creamy brie cheese with tart cranberry sauce, all wrapped in flaky pastry. These bites are perfect for holiday gatherings or cozy get-togethers, requiring about 20 minutes of preparation and are suitable for cooks of any skill level.
Ingredients:
- 1 package (1 sheet) puff pastry, thawed
- 1 small wheel of brie cheese
- 1/2 cup cranberry sauce (store-bought or homemade)
- 1 egg, beaten (for egg wash)
- Fresh rosemary or thyme for garnish (optional)
- Sugar for sprinkling (optional)
Instructions:
- Preheat your oven to 375°F (190°C).
- Roll out the thawed puff pastry on a lightly floured surface and cut it into squares (about 2 x 2 inches).
- Place a small piece of brie cheese in the center of each pastry square.
- Spoon a small amount of cranberry sauce over the brie.
- Fold the corners of the puff pastry over to create bites, pinching to seal.
- Brush the tops with the beaten egg and sprinkle with a little sugar if desired.
- Arrange the bites on a baking sheet lined with parchment paper and bake for 15-20 minutes, or until golden brown.
- Remove from the oven and let cool slightly before garnishing with herbs if using.
For ingredient suggestions, you can use camembert cheese instead of brie for a slightly different flavor profile. If you’re not a fan of cranberry sauce, consider using fig jam or a fruit chutney as an alternative topping.
Variations on this recipe could include adding chopped pecans or walnuts for added crunch, or mixing in a touch of orange zest to the cranberry sauce for a citrusy twist. You can also use different fresh herbs like sage or dill for garnish.
To guarantee a perfectly golden and flaky pastry, make certain your puff pastry is cold when you handle it.
Bake until the pastries are puffed and golden to achieve the best texture. Additionally, if the brie is too soft, chilling it slightly before cutting will make it easier to work with.
Cranberry Brie Bites pair wonderfully with sparkling wines like Prosecco or Champagne, which will complement the richness of the cheese and tartness of the cranberry.
For non-alcoholic options, consider serving them with spiced apple cider or a light herbal tea to enhance the flavors of the season.
- 𝗘𝗳𝗳𝗼𝗿𝘁𝗹𝗲𝘀𝘀 𝗪𝗲𝗶𝗴𝗵𝗶𝗻𝗴: Supports 5 units...
- 𝗣𝗿𝗲𝗰𝗶𝘀𝗲 𝗥𝗲𝘀𝘂𝗹𝘁𝘀: Accurately weighs up to 11 lb/5 kg with 1 g...
- 𝗦𝗶𝗺𝗽𝗹𝗲 & 𝗖𝗼𝗺𝗽𝗮𝗰𝘁: The small and sleek scale is a perfect fit for...
Maple-Glazed Bacon-Wrapped Dates
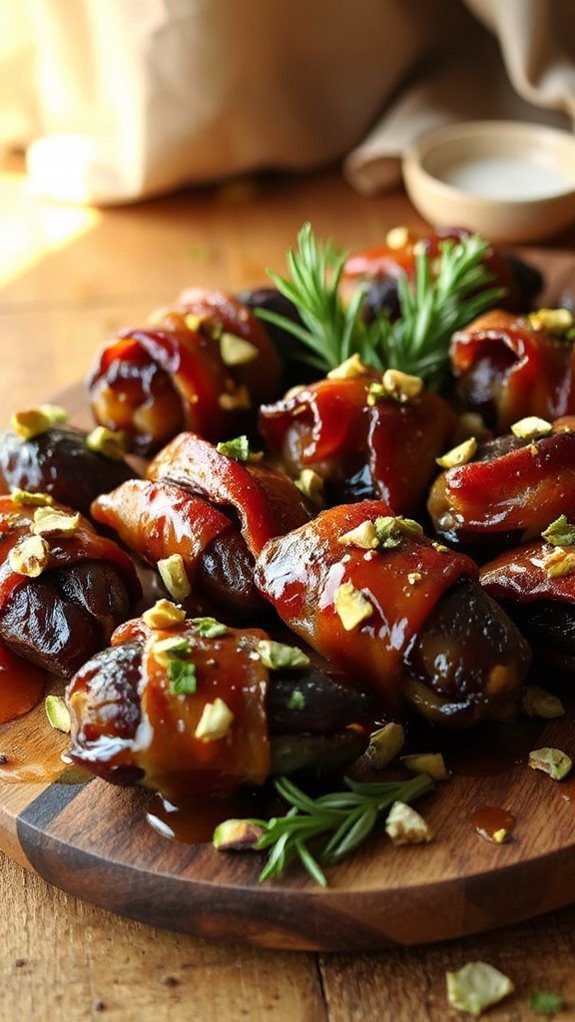
Maple-Glazed Bacon-Wrapped Dates are a delectable combination of sweet, savory, and smoky flavors that are guaranteed to impress your guests. These bite-sized appetizers require about 25 minutes to prepare and cook, making them an easy and delicious addition to any fall gathering. Suitable for cooks of all skill levels, these treats are perfect for holiday parties or casual get-togethers.
Ingredients:
- 1 pound Medjool dates, pitted
- 8 ounces bacon, cut in half
- 1/2 cup maple syrup
- Freshly cracked black pepper (optional)
Instructions:
- Preheat your oven to 400°F (200°C) and line a baking sheet with parchment paper.
- Stuff each date with a half slice of bacon, making sure to wrap it tightly around the date.
- Place the wrapped dates on the prepared baking sheet, seam side down.
- Drizzle the maple syrup evenly over the bacon-wrapped dates.
- Bake in the preheated oven for 15-20 minutes, or until the bacon is crispy and caramelized, turning halfway through.
- Optional: Sprinkle with freshly cracked black pepper for an added kick before serving.
For ingredient substitutions, you can use turkey bacon or prosciutto instead of regular bacon for a healthier option or a different flavor profile. If you can’t find Medjool dates, other varieties like Deglet Noor can also work, though they may be less sweet and softer.
Variations on this dish could involve stuffing the dates with cream cheese, goat cheese, or blue cheese instead of just wrapping them in bacon. Adding crushed nuts like almonds or pecans inside the dates can provide an enjoyable crunch.
To secure perfectly cooked bacon, make sure not to overcrowd the baking sheet, as this can cause the bacon to steam rather than crisp up. You can also flip the dates halfway through cooking to promote even browning and caramelization.
Pair these sweet and savory bites with a bold red wine, like a Cabernet Sauvignon or a Malbec, which will complement the richness of the bacon and sweetness of the maple syrup. For non-alcoholic options, a spiced cranberry soda or an apple ginger mocktail would enhance the flavors beautifully.
- Instant Read Food Thermometer | Our instant read thermometer features a temperature probe and advanced,...
- Multi-Use | From bbq thermometer to baking thermometer, our digital food thermometer for cooking is...
- Easy-Read Digital Thermometer For Cooking | Large instant thermometer dial with bright blue backlight...
Savory Pesto and Goat Cheese Palmiers

Savory Pesto and Goat Cheese Palmiers are a delightful and flaky appetizer that combines the rich flavors of pesto and creamy goat cheese wrapped in buttery puff pastry. These elegant bites are simple to prepare, taking about 30 minutes from start to finish, making them an ideal choice for any fall gathering or celebration. They are a fun, yet sophisticated option that can be enjoyed by chefs of all skill levels.
Ingredients:
- 1 sheet of frozen puff pastry, thawed
- 1/2 cup pesto (store-bought or homemade)
- 4 ounces goat cheese, softened
- 1/4 cup grated Parmesan cheese
- 1 egg (for egg wash)
- Salt and freshly ground black pepper, to taste
Instructions:
- Preheat your oven to 400°F (200°C) and line a baking sheet with parchment paper.
- On a lightly floured surface, roll out the thawed puff pastry into a rectangle, about 11×14 inches.
- Spread the pesto evenly over the puff pastry, leaving a small border around the edges.
- Sprinkle the softened goat cheese and grated Parmesan evenly on top of the pesto.
- Season with salt and freshly ground black pepper to taste.
- Starting from one long side, tightly roll the pastry into a log. Wrap it in plastic wrap and chill in the refrigerator for about 15-20 minutes to firm up.
- Once chilled, slice the log into 1/2-inch thick pieces and place them on the prepared baking sheet, spaced apart.
- Brush the tops with the egg wash to give them a golden color while baking.
- Bake for about 15-20 minutes, or until the palmiers are golden brown and puffed.
For ingredient substitutions, you can use store-bought puff pastry or make your own for a more invigorating flavor. If you don’t have goat cheese, cream cheese or ricotta can work as alternatives, though the flavor profile will change slightly.
Additionally, feel free to adjust the type of pesto used; sun-dried tomato or arugula pesto can also add a unique twist.
Variations on this dish could include adding finely chopped sun-dried tomatoes, olives, or fresh herbs like basil or thyme to the filling for added flavor. You can also experiment with different cheeses such as feta or mozzarella for a change in richness and texture.
To guarantee perfectly baked palmiers, make sure the puff pastry is chilled before slicing, as this helps maintain their shape while baking. Keep an eye on the oven to prevent burning, and rotate the baking sheet halfway through for even cooking.
If you want extra crispiness, bake them on a preheated pizza stone or baking steel.
Pair these savory palmiers with a crisp white wine like Sauvignon Blanc or a light red such as Pinot Noir, which will complement the richness of the goat cheese and the fresh flavors of the pesto.
For non-alcoholic options, consider serving a rejuvenating lemonade or a sparkling water infused with fresh herbs to balance the richness of the dish.
- Versatile 54-Piece Collection: Elevate your kitchen with the Home Hero 54-Piece Kitchen Utensil Set, a...
- Durable and Long-Lasting: Crafted from premium stainless steel, these kitchen utensils are designed to...
- Perfect Holiday Gift: Delight your loved ones with this kitchen utensils gift set this festive season....
Mini Sausage and Sage Stuffing Balls

Mini Sausage and Sage Stuffing Balls are a delectable appetizer that brings the comforting flavors of traditional stuffing to bite-sized perfection. This dish features savory sausage, fresh sage, and bread combined to create delightful, crispy bites that are perfect for any fall gathering.
With a preparation time of about 30 minutes, they are relatively easy to prepare, making them an excellent option for cooks of any skill level.
Ingredients:
- 1 pound ground sausage (Italian or breakfast sausage)
- 2 cups cubed bread (French or sourdough)
- 1/2 cup chicken broth
- 1/4 cup finely chopped fresh sage
- 1/4 cup finely chopped onion
- 1 clove garlic, minced
- 1 egg, beaten
- Salt and pepper, to taste
- Olive oil (for drizzling)
Instructions:
- Preheat your oven to 375°F (190°C) and line a baking sheet with parchment paper.
- In a large mixing bowl, combine the ground sausage, cubed bread, chopped sage, onion, garlic, beaten egg, and chicken broth. Season with salt and pepper to taste.
- Mix the ingredients until well combined, then form the mixture into small balls (about 1 to 1.5 inches in diameter).
- Place the formed balls on the prepared baking sheet. Drizzle with olive oil to help them brown while baking.
- Bake for 20-25 minutes, or until they are golden brown and cooked through.
If you want to customize your Mini Sausage and Sage Stuffing Balls, you can substitute ground turkey or chicken for the sausage for a healthier option.
Additionally, any cubed bread (like whole wheat or rye) can be used, along with vegetable broth instead of chicken broth for a vegetarian-friendly recipe.
For variations, feel free to add chopped cranberries or walnuts to the mixture for a hint of sweetness and crunch. You can also incorporate different herbs like thyme or rosemary to change the flavor profile or even experiment with different types of sausage such as chorizo or apple sausage for a unique twist.
To guarantee your stuffing balls are perfectly crispy on the outside and tender on the inside, don’t overcrowd them on the baking sheet.
Make sure to give them space so they can brown evenly. Additionally, flipping them halfway through the bake can enhance their crispiness.
These Mini Sausage and Sage Stuffing Balls pair wonderfully with a crisp white wine, such as Sauvignon Blanc or a light-bodied red like Pinot Noir.
For non-alcoholic options, consider a sparkling apple cider that echoes the seasonal flavors of fall.
- 24-ounce insulated stainless-steel water bottle with a FreeSip spout and push-button lid with lock
- Patented FreeSip spout designed for either sipping upright through the built-in straw or tilting back to...
- Protective push-to-open lid keeps spout clean; convenient carry loop doubles as a lock
Harvest Vegetable Skewers With Balsamic Glaze
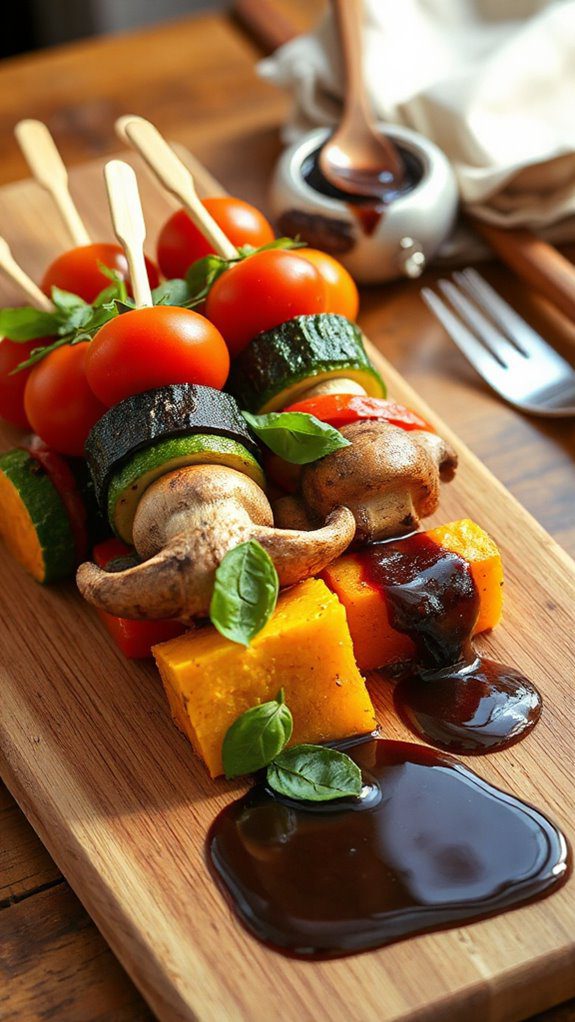
Harvest Vegetable Skewers With Balsamic Glaze are a vibrant and healthy appetizer that brings together the delightful flavors of seasonal vegetables drizzled with a tangy balsamic reduction. Perfect for fall gatherings, these skewers are easy to prepare, requiring about 25 minutes of prep time, making them suitable for cooks of all skill levels.
Ingredients:
- 1 cup cherry tomatoes
- 1 medium zucchini, sliced into half-moons
- 1 bell pepper (red, orange, or yellow), cut into bite-sized pieces
- 1 red onion, cut into wedges
- 1 cup mushrooms, halved
- 2 tablespoons olive oil
- Salt and pepper, to taste
- 1/4 cup balsamic vinegar
- Fresh basil leaves (for garnish)
Instructions:
- Preheat your grill or oven broiler to medium-high heat.
- In a large bowl, combine the cherry tomatoes, zucchini, bell pepper, red onion, and mushrooms. Drizzle with olive oil and season with salt and pepper. Toss to coat.
- Thread the vegetables onto skewers, alternating to create colorful arrangements.
- In a small saucepan over medium heat, bring the balsamic vinegar to a simmer and reduce for about 5-7 minutes until slightly thickened. Set aside.
- Grill or broil the skewers for about 10-15 minutes, turning occasionally until vegetables are tender and slightly charred.
- Drizzle with the reduced balsamic glaze and garnish with fresh basil before serving.
For ingredient suggestions, you can swap out any of the vegetables with your favorites or whatever is seasonal, such as asparagus, eggplant, or butternut squash.
You can also use vegetable oil instead of olive oil if desired. Variations on this recipe include adding cubed tofu or pre-cooked chicken for extra protein, or marinating the vegetables in Italian herbs or a dash of soy sauce for added flavor. You can even sprinkle some feta cheese over the finished skewers for a savory touch.
To achieve perfectly grilled vegetables, make sure to soak wooden skewers in water for at least 30 minutes beforehand to prevent them from burning. Also, make certain the grill or broiler is preheated for well-cooked and charred outcomes.
These Harvest Vegetable Skewers pair wonderfully with a light red wine, such as Pinot Noir, or a reviving white like Sauvignon Blanc. For a non-alcoholic option, serve with a chilled sparkling water infused with lemon or lime for a zesty touch!
Caramelized Onion Tartlets With Thyme

Caramelized Onion Tartlets With Thyme are a delicious and elegant appetizer perfect for fall gatherings or entertaining. These savory tarts feature sweet caramelized onions paired with fresh thyme, all nestled in a flaky pastry shell. With a prep time of about 30 minutes and moderate difficulty, this dish is a delightful addition to your appetizer spread.
Ingredients:
- 1 sheet of puff pastry, thawed
- 2 large onions, thinly sliced
- 2 tablespoons olive oil
- 1 tablespoon balsamic vinegar
- Salt and pepper, to taste
- 1 tablespoon fresh thyme leaves (or 1 teaspoon dried thyme)
- 1 egg (beaten, for egg wash)
- 1/2 cup crumbled goat cheese (optional)
Instructions:
- Preheat your oven to 400°F (200°C).
- In a large skillet, heat the olive oil over medium heat. Add the sliced onions and cook, stirring occasionally, for about 15-20 minutes until the onions are soft and caramelized. Stir in the balsamic vinegar, and season with salt, pepper, and thyme. Remove from heat.
- Roll out the puff pastry on a lightly floured surface and cut into squares or circles, depending on your desired shape. Place them on a baking sheet lined with parchment paper.
- Spoon the caramelized onion mixture onto the pastry, leaving a small border around the edges. If using, sprinkle with goat cheese.
- Brush the edges of the pastry with the beaten egg.
- Bake in the preheated oven for 15-20 minutes until the pastry is golden brown and puffed.
For ingredient substitutions, you can use shallots instead of onions for a milder flavor. Additionally, if goat cheese doesn’t appeal to you, try using feta or cream cheese for a different taste. For a gluten-free version, look for gluten-free puff pastry.
Variations on this recipe could include adding sautéed mushrooms to the caramelized onions for enhanced umami flavor, or incorporating cooked bacon for a smoky twist. You could also experiment with different herbs such as rosemary or sage to complement the dish.
To guarantee a perfectly flaky crust, handle the puff pastry gently and avoid overworking it. Also, allow the caramelized onions to cool slightly before placing them on the pastry to prevent it from becoming soggy. Baking them on a lower rack can also help with an even golden finish.
These Caramelized Onion Tartlets pair beautifully with a glass of crisp white wine like Chardonnay or a light-bodied red wine such as Pinot Noir. For a non-alcoholic option, consider pairing with a revitalizing herbal iced tea or a light sparkling lemonade to enhance the flavors of the tartlets.


