Low-carb desserts can be incredibly indulgent without sacrificing flavor. Options like rich chocolate chip cookies, velvety cheesecake bites, and airy chocolate mousse cater to those seeking a sweet treat while maintaining a healthy lifestyle. Almond flour brownies provide a fudgy alternative, while coconut macaroons and pumpkin spice muffins offer delightful variety. These desserts often surprise with their deliciousness, leaving diet concerns behind. For more tasty alternatives, a wealth of exciting recipes awaits discovery.
Low-Carb Chocolate Chip Cookies
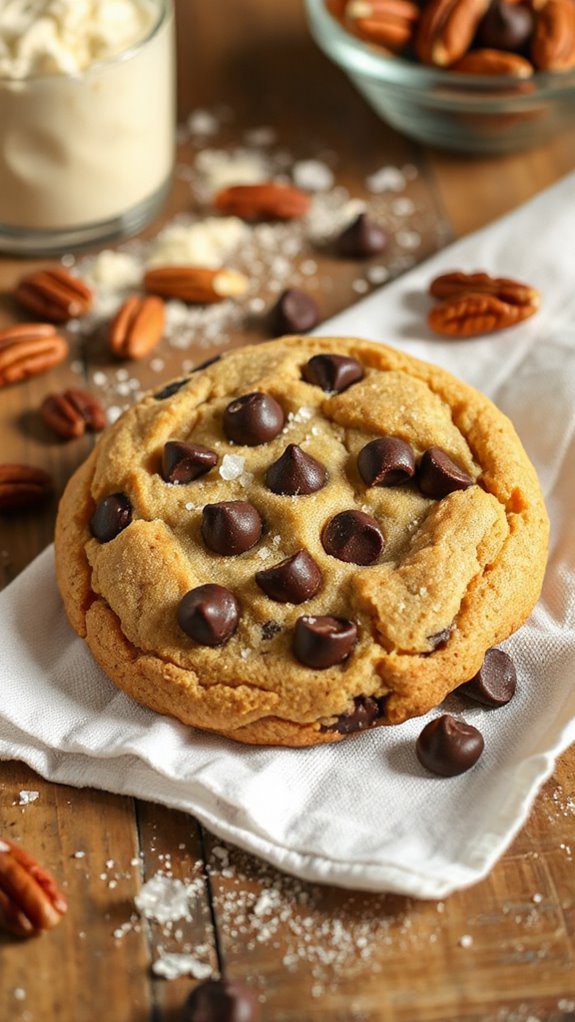
If you're craving something sweet without the carbs, these Low-Carb Chocolate Chip Cookies are the perfect solution. Ideal for those following a ketogenic or low-carb diet, these cookies are rich, chewy, and incredibly easy to make. They take just around 20 minutes from start to finish, making them a quick treat for anyone looking to satisfy their sweet tooth while still keeping their carb intake in check.
Ingredients:
- 1 cup almond flour
- 1/4 cup coconut flour
- 1/2 cup erythritol or your preferred low-carb sweetener
- 1/2 tsp baking soda
- 1/4 tsp salt
- 1/2 cup unsalted butter, softened
- 1 large egg
- 1 tsp vanilla extract
- 1/2 cup sugar-free chocolate chips
Cooking Steps:
- Preheat your oven to 350°F (175°C) and line a baking sheet with parchment paper.
- In a large mixing bowl, combine the almond flour, coconut flour, erythritol, baking soda, and salt. Mix well.
- In another bowl, cream together the softened butter, egg, and vanilla extract until light and fluffy.
- Gradually add the dry ingredients to the butter mixture, stirring until fully combined.
- Fold in the sugar-free chocolate chips.
- Using a cookie scoop or spoon, drop tablespoon-sized amounts of dough onto the prepared baking sheet, spacing them about 2 inches apart.
- Bake in the preheated oven for 10-12 minutes, or until the edges are golden brown.
- Allow the cookies to cool on the baking sheet for 5 minutes before transferring them to a wire rack to cool completely.
Variations and Tips:
- For added flavor, consider mixing in a teaspoon of cinnamon or a few drops of almond extract.
- If you enjoy nuts, feel free to add chopped walnuts or pecans to the dough.
- To make these cookies gooey, slightly underbake them; they will firm up as they cool.
- Store leftover cookies in an airtight container at room temperature for up to a week, or freeze them for longer storage.
- The Original Pro Chopper - Our superstar veggie slicer has been creating waves on TikTok! Simple to use,...
- Easy Meal Prep with Rust-Resistant Blades - Our vegetable chopper is perfect for anyone who wants to eat...
- 5-Star Design - The soft-grip TPU handle ensures controlled chopping, while the non-skid rubber base...
Keto Cheesecake Bites
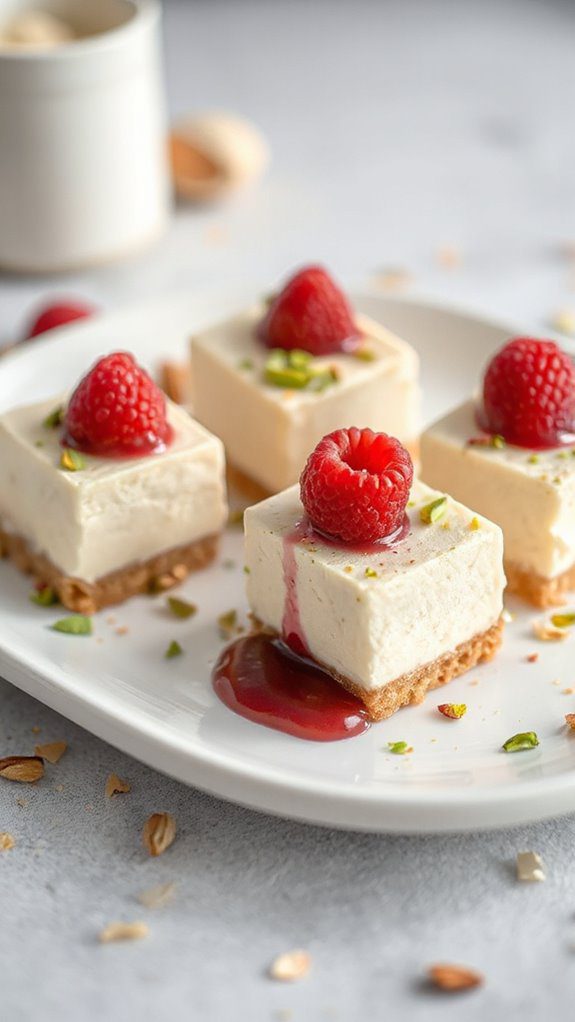
Keto Cheesecake Bites are a delightful low-carb dessert perfect for those following a ketogenic diet or anyone looking to indulge in a sweet treat without the guilt.
These little cheesecake morsels pack a rich, creamy flavor into a bite-sized form, making them great for parties, meal prep, or satisfying your sweet tooth throughout the week.
With a quick preparation time of only 15 minutes, plus cooling time, they are easy to whip up and can be stored in the fridge for a convenient dessert option.
Ingredients:
- 8 oz cream cheese, softened
- 1/4 cup powdered erythritol (or your preferred low-carb sweetener)
- 1 teaspoon vanilla extract
- 1/2 cup sour cream
- 1/4 cup almond flour (for the crust)
- 2 tablespoons melted butter (for the crust)
- Optional: lemon zest for extra flavor
Instructions:
- In a mixing bowl, combine the softened cream cheese, powdered erythritol, and vanilla extract. Use a hand mixer or stand mixer to blend until smooth and creamy.
- Add in the sour cream and mix until well incorporated, scraping down the sides as needed.
- In a separate small bowl, mix the almond flour and melted butter together until it resembles a crumbly mixture.
- Line a mini muffin pan with paper liners. Press a small amount of the almond flour mixture into the bottom of each liner to form a base for the cheesecake bites.
- Spoon the cream cheese mixture on top of the almond flour crust, filling each liner almost to the top.
- Place the muffin pan in the refrigerator and let cool for at least 2 hours, or until set.
- Once set, remove the bites from the muffin pan and peel away the liners. Store in an airtight container in the fridge for up to one week.
Variations and Tips:
- Flavor Variants: You can easily customize the flavor by adding different extracts like almond or coconut, or by folding in fresh berries or lemon zest before pouring into the muffin pan.
- Topping Ideas: For added decadence, top with a dollop of whipped cream, sugar-free chocolate ganache, or a sprinkle of unsweetened cocoa powder.
- Serving Suggestions: Serve these bites chilled, or let them sit at room temperature for a few minutes for a softer texture.
- Storage: Keep leftovers in an airtight container in the refrigerator. They also freeze well for longer storage; just be sure to thaw before serving!
- Makes Everything Simple : Just forget your bagged cheese! Only turn the handle for several times and get...
- Premium Material : All parts of the rotary cheese grater are made of food grade ABS material, no BPA. The...
- Three Option Grater : The parmesan cheese grater finishes food preparation with slicing, shredding and...
Sugar-Free Chocolate Mousse

Sugar-Free Chocolate Mousse is a rich, creamy dessert perfect for those following a low-carb or sugar-free lifestyle. This indulgent treat is ideal for anyone craving a chocolate fix without the guilt associated with sugar-laden desserts.
In just under 15 minutes of preparation time, you can whip up this delightful mousse and serve it to friends or family, making it a fantastic option for gatherings or simply a satisfying after-dinner treat.
Ingredients:
- 1 cup heavy whipping cream
- 2 tablespoons unsweetened cocoa powder
- 1/4 cup powdered erythritol (or your preferred sugar substitute)
- 1 teaspoon vanilla extract
- A pinch of salt
- Optional: chocolate shavings or berries for garnish
Instructions:
- In a mixing bowl, combine the heavy whipping cream, unsweetened cocoa powder, powdered erythritol, vanilla extract, and a pinch of salt.
- Using a hand mixer or stand mixer, whip the mixture on medium speed until it begins to thicken.
- Increase the speed to high and continue to whip until soft peaks form. Be careful not to over-whip, as it can turn grainy.
- Once the mousse has reached your desired consistency, spoon it into individual serving dishes or glasses.
- Chill in the refrigerator for at least 30 minutes to allow the flavors to meld and for the mousse to firm up.
- Serve chilled and garnish with chocolate shavings or berries, if desired.
Variations & Tips:
- For a mocha flavor, consider adding 1 tablespoon of instant coffee granules to the chocolate mixture.
- You can substitute the erythritol with other low-carb sweeteners like stevia or monk fruit sweetener, adjusting the quantity to taste.
- If you prefer a lighter mousse, fold in some softened cream cheese after whipping the cream for added creaminess without much additional sugar.
- Add a splash of almond extract for an extra flavor dimension.
- This dessert can be prepped ahead of time and stored in the fridge for up to three days before serving.
- 💰 REDUCE WASTE AND SAVE MONEY: Chef Preserve keeps FOOD FRESH 5 TIMES LONGER than non-vacuum storage...
- ✅ POWERFUL, QUICK & EASY TO USE: Simply press the button to start. The device vacuum seals a bag in 5...
- ♻️ REUSABLE & RESEALABLE BAGS: Chef Preserve comes with dishwasher, freezer, refrigerator, and...
Almond Flour Brownies
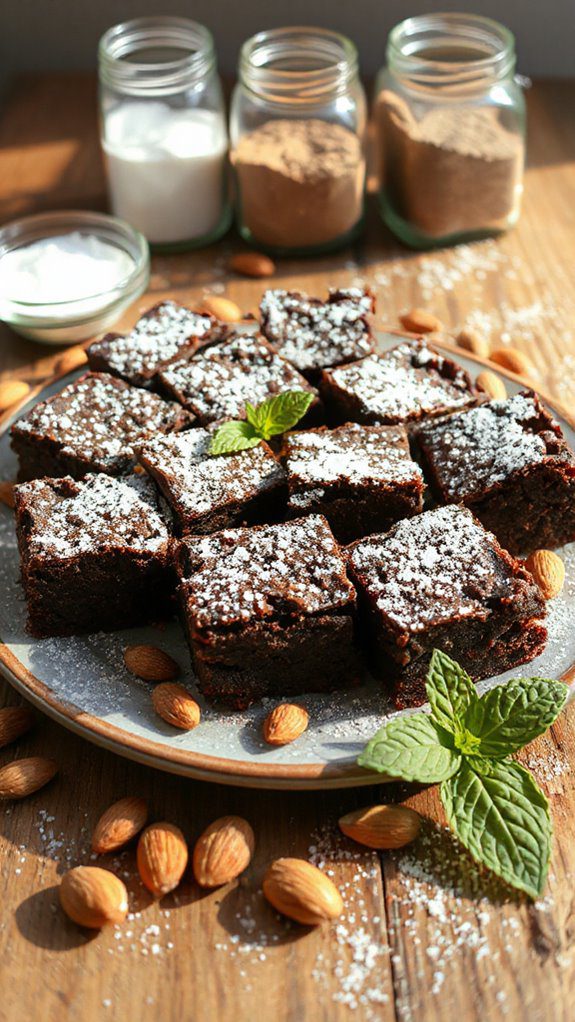
Almond Flour Brownies are a delightful, low-carb dessert that perfectly satisfies your sweet tooth without derailing your dietary goals. Made with almond flour, these brownies are gluten-free and ideal for those following a keto or paleo diet. They are rich, fudgy, and sure to please both sweet lovers and health-conscious individuals alike.
The preparation time is around 15 minutes, with an additional baking time of 20-25 minutes, making them a quick and easy treat for any occasion.
Ingredients:
- 1 cup almond flour
- 1/3 cup unsweetened cocoa powder
- 1/2 cup erythritol (or your preferred low-carb sweetener)
- 1/4 tsp salt
- 1/2 tsp baking powder
- 2 large eggs
- 1/4 cup melted coconut oil (or unsalted butter)
- 1 tsp vanilla extract
- Optional: 1/2 cup sugar-free chocolate chips or nuts
Cooking Steps:
- Preheat your oven to 350°F (175°C) and line an 8×8 inch baking dish with parchment paper for easy removal.
- In a mixing bowl, combine almond flour, cocoa powder, erythritol, salt, and baking powder. Whisk together until well mixed.
- In a separate bowl, beat the eggs, then add melted coconut oil and vanilla extract. Mix until combined.
- Gradually pour the wet ingredients into the dry ingredients. Stir until just combined; be careful not to overmix.
- If using, fold in sugar-free chocolate chips or nuts at this stage.
- Pour the brownie batter into the prepared baking dish and spread it evenly.
- Bake in the preheated oven for 20-25 minutes, or until a toothpick inserted into the center comes out clean.
- Allow the brownies to cool in the pan for about 10 minutes before lifting them out using the parchment paper. Let them cool completely on a wire rack before cutting into squares.
Variations and Tips:
- For a mint chocolate fudge flavor, add a few drops of peppermint extract to the batter.
- Consider topping the brownies with a sugar-free frosting or a sprinkle of sea salt for an extra gourmet touch.
- You can swap erythritol for other low-carb sweeteners like monk fruit or stevia, adjusting the quantity based on sweetness level.
- For extra decadence, try swirling in some sugar-free peanut butter or cream cheese before baking.
- Store these brownies in an airtight container at room temperature for up to 3 days or refrigerate for up to a week.
- Generous Capacity: 7-quart slow cooker that comfortably serves 9+ people or fits a 7-pound roast
- Cooking Flexibility: High or low slow cooking settings, with convenient warm function for ideal serving...
- Convenient: Set it and forget it feature enables you to cook while at work or performing daily tasks
Coconut Macaroons

Coconut macaroons are delightful low-carb treats that satisfy your sweet tooth without derailing your diet. These chewy and slightly crispy confections are primarily made of shredded coconut and are perfect for anyone looking for a gluten-free and sugar-free dessert option. They are ideal for paleo and ketogenic diets, making them a great choice for those who enjoy mindful eating.
With a preparation time of around 20 minutes, plus baking, you'll have a delicious dessert ready in no time!
Ingredients:
- 2 ½ cups unsweetened shredded coconut
- ¼ cup almond flour
- 1/3 cup granulated erythritol (or preferred sweetener)
- 2 large egg whites
- 1 teaspoon vanilla extract
- Pinch of salt
- Optional: 1/3 cup sugar-free dark chocolate chips (for drizzling or dipping)
Cooking Instructions:
- Preheat your oven to 325°F (163°C) and line a baking sheet with parchment paper.
- In a large mixing bowl, combine the shredded coconut, almond flour, erythritol, and pinch of salt. Mix well.
- In a separate bowl, whisk the egg whites and vanilla extract until frothy but not stiff.
- Fold the egg whites into the coconut mixture until thoroughly combined.
- Using a tablespoon or small cookie scoop, drop mounds of the coconut mixture onto the prepared baking sheet, spacing them about 1 inch apart.
- Bake in the preheated oven for 15-20 minutes or until they are golden brown on the edges.
- Remove from the oven and let them cool on the baking sheet for a few minutes before transferring to wire racks to cool completely.
Variations and Tips:
- For chocolate lovers, melt sugar-free dark chocolate and drizzle over the cooled macaroons for an extra indulgent treat.
- Try adding a teaspoon of almond or coconut extract for a flavor variation.
- For a tropical twist, mix in a few teaspoons of lime or orange zest into the coconut mixture.
- Store macaroons in an airtight container for up to a week, or freeze them for longer shelf life. Simply thaw before enjoying.
- Experiment with adding nuts or seeds to the mixture for added texture and flavor.
- 100% Leak-proof: Guaranteed no-spill seal and secure latches
- Crystal-clear Tritan Built: Stain-resistant and odor-resistant material for a clear view of contents
- Lightweight & Sturdy: Easy to carry, yet durable for everyday use
No-Bake Low-Carb Peanut Butter Bars
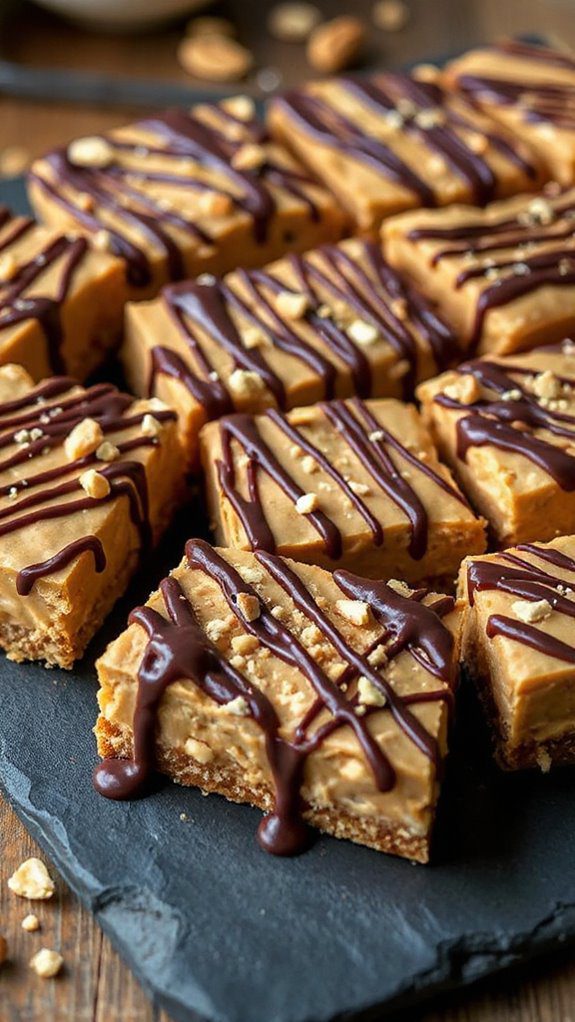
No-Bake Low-Carb Peanut Butter Bars are a delightful and satisfying treat that caters to those following a low-carb lifestyle, whether for weight management, diabetes control, or simply for a healthier diet.
These bars are rich in flavor, featuring the creamy and nutty taste of peanut butter, combined with a sweetness that comes from low-carb sweeteners. Perfect for meal prep or a quick snack, these bars take about 15 minutes to prepare, with some additional time recommended to chill in the refrigerator for a firmer texture.
Ingredients:
- 1 cup natural peanut butter (unsweetened)
- 1/4 cup powdered erythritol or your preferred low-carb sweetener
- 1/2 cup unsweetened cocoa powder
- 1/4 cup coconut oil, melted
- 1 teaspoon vanilla extract
- Pinch of salt
- Optional: 1/4 cup chopped nuts or sugar-free chocolate chips for topping
Instructions:
1. In a medium mixing bowl, combine the peanut butter, melted coconut oil, powdered erythritol, cocoa powder, vanilla extract, and salt.
Mix well until all ingredients are thoroughly blended into a smooth consistency.
2. If using, fold in chopped nuts or sugar-free chocolate chips into the mixture for added texture and taste.
3. Line an 8×8 inch baking dish with parchment paper, allowing some paper to hang over the sides for easy removal later.
4. Pour the peanut butter mixture into the prepared baking dish and spread it evenly with a spatula.
5. Place the dish in the refrigerator for about 1-2 hours to allow the bars to firm up completely.
6. Once chilled and firm, lift the bars out of the dish using the overhanging parchment paper. Cut into squares or rectangles to serve.
7. Store any leftovers in an airtight container in the refrigerator for up to a week.
Variations & Tips:
- For a chocolate twist, consider adding a couple of tablespoons of unsweetened chocolate powder to the mix before blending.
- If you prefer crunchier bars, substitute half of the smooth peanut butter for crunchy peanut butter.
- Drizzle the top with melted dark chocolate or sprinkle with sea salt for an extra gourmet touch.
- Feel free to experiment with different nut butters, such as almond or cashew butter, for a change in flavor while keeping it low-carb.
- 𝗘𝗳𝗳𝗼𝗿𝘁𝗹𝗲𝘀𝘀 𝗪𝗲𝗶𝗴𝗵𝗶𝗻𝗴: Supports 5 units...
- 𝗣𝗿𝗲𝗰𝗶𝘀𝗲 𝗥𝗲𝘀𝘂𝗹𝘁𝘀: Accurately weighs up to 11 lb/5 kg with 1 g...
- 𝗦𝗶𝗺𝗽𝗹𝗲 & 𝗖𝗼𝗺𝗽𝗮𝗰𝘁: The small and sleek scale is a perfect fit for...
Raspberry Lemonade Sorbet

Ingredients:
- 2 cups fresh raspberries (or frozen, thawed)
- 1 cup fresh lemon juice (about 4-6 lemons)
- 1/2 cup erythritol or preferred low-carb sweetener
- 1 tablespoon lemon zest
- 1 cup water
Cooking Steps:
- In a medium saucepan, combine water and erythritol. Heat over medium, stirring until the sweetener fully dissolves to create a simple syrup.
- Remove from heat and let cool.
- In a blender or food processor, add the raspberries, lemon juice, lemon zest, and the cooled syrup. Blend until smooth.
- Strain the mixture through a fine-mesh sieve into a bowl to remove the seeds, pressing with a spatula to extract all the juice.
- Discard the seeds.
- Pour the sorbet mixture into a shallow dish or an ice cream maker. If using a shallow dish, freeze for about 4-6 hours, stirring every 30 minutes to achieve a fluffy texture.
- If using an ice cream maker, churn according to the manufacturer's instructions.
- Once the sorbet reaches a scoopable consistency, transfer it to an airtight container and freeze for an additional 1-2 hours before serving.
Variations and Tips:
- For added flavor, consider mixing in a few fresh mint leaves during blending.
- To create a more dynamic sorbet, replace raspberries with other berries like strawberries or blueberries.
- If you want a creamier texture, you can mix in a splash of coconut milk or heavy cream before freezing.
- Make sure to allow the sorbet to sit at room temperature for a few minutes before serving for easy scooping.
- To enhance presentation, serve the sorbet in chilled bowls and garnish with fresh berries or a sprig of mint.
- Instant Read Food Thermometer | Our instant read thermometer features a temperature probe and advanced,...
- Multi-Use | From bbq thermometer to baking thermometer, our digital food thermometer for cooking is...
- Easy-Read Digital Thermometer For Cooking | Large instant thermometer dial with bright blue backlight...
Flourless Chocolate Cake
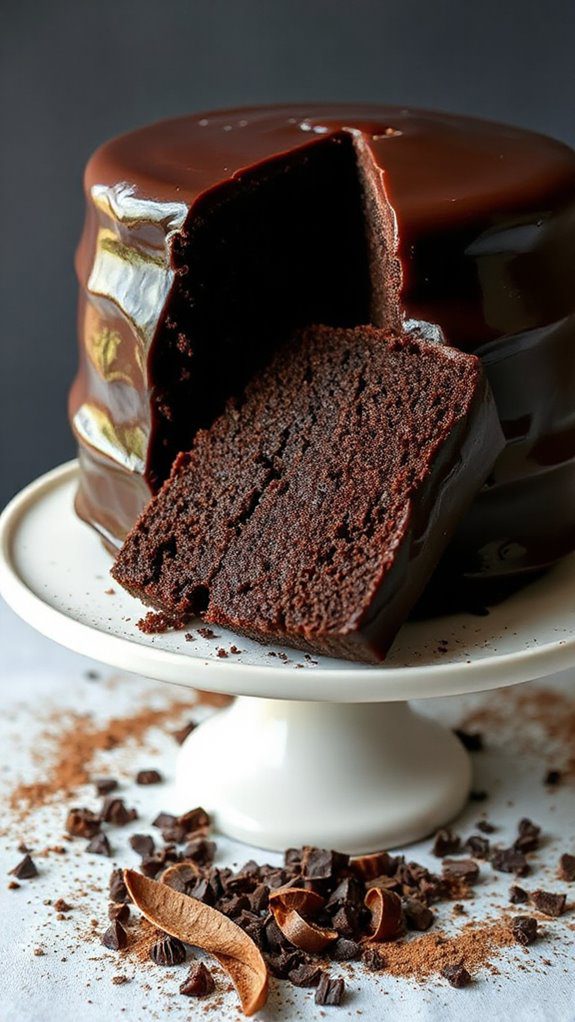
Flourless chocolate cake is a rich and decadent dessert that is perfect for those following a low carb or gluten-free lifestyle. This cake features a luxurious texture and intense chocolate flavor without the use of flour, making it a favorite among chocolate lovers and those seeking a healthier treat.
The preparation time is relatively quick, taking about 15 minutes to assemble, followed by a baking time of 30-35 minutes, allowing you to enjoy this indulgent dessert in under an hour.
Ingredients:
- 1 cup dark chocolate chips (sugar-free)
- 1/2 cup unsalted butter
- 3/4 cup granulated erythritol or coconut sugar
- 3 large eggs
- 1 teaspoon vanilla extract
- 1/4 cup unsweetened cocoa powder
- 1/2 teaspoon baking powder
- 1/4 teaspoon salt
Cooking Steps:
- Preheat your oven to 350°F (175°C). Grease an 8-inch round baking pan and line the bottom with parchment paper for easy removal.
- In a medium saucepan over low heat, combine the dark chocolate chips and unsalted butter. Stir until both are melted and smooth.
- Remove the saucepan from the heat and whisk in the erythritol until well combined. Allow it to cool slightly before adding the eggs.
- Add the eggs one at a time, whisking well after each addition. Stir in the vanilla extract.
- In a separate bowl, sift together the cocoa powder, baking powder, and salt. Gradually fold the dry ingredients into the chocolate mixture until just combined.
- Pour the batter into the prepared baking pan and smooth the top with a spatula.
- Bake for 30-35 minutes, or until a toothpick inserted into the center comes out with a few moist crumbs.
- Allow the cake to cool in the pan for 10 minutes before transferring it to a wire rack to cool completely.
- Once cooled, dust with additional cocoa powder or powdered erythritol if desired, and slice to serve.
Variations and Tips:
- For an extra flavor boost, consider adding a teaspoon of instant espresso powder to enhance the chocolate.
- You can also incorporate some sugar-free chocolate chunks into the batter for added texture.
- Serve with a dollop of whipped cream or a scoop of low-carb ice cream for a delightful contrast.
- This cake keeps well in the refrigerator for up to a week, and it can also be frozen for longer storage—just make sure it's wrapped tightly to prevent freezer burn.
- Versatile 54-Piece Collection: Elevate your kitchen with the Home Hero 54-Piece Kitchen Utensil Set, a...
- Durable and Long-Lasting: Crafted from premium stainless steel, these kitchen utensils are designed to...
- Perfect Holiday Gift: Delight your loved ones with this kitchen utensils gift set this festive season....
Keto Tiramisu

Keto Tiramisu is a delightful low-carb twist on the classic Italian dessert, perfect for those following a ketogenic diet or anyone looking to satisfy their sweet tooth without the carbs. This recipe combines rich coffee flavors with creamy mascarpone cheese and a hint of cocoa, while using almond flour in place of traditional sponge cake.
With a preparation time of about 30 minutes, plus an hour in the fridge to set, this guilt-free dessert makes an elegant treat for gatherings or a cozy night in.
Ingredients:
- 1 cup brewed espresso or strong coffee, cooled
- 2 tablespoons coffee liqueur (optional)
- 4 large eggs, separated
- 1/2 cup erythritol or keto-friendly sweetener
- 8 ounces mascarpone cheese
- 1 cup heavy whipping cream
- 1 teaspoon vanilla extract
- Unsweetened cocoa powder, for dusting
Cooking Steps:
- In a large mixing bowl, combine the cooled espresso and coffee liqueur (if using). Set aside.
- In another bowl, whisk the egg yolks and erythritol together until the mixture is pale and creamy.
- Add the mascarpone cheese to the egg yolk mixture and mix until fully combined and smooth.
- In a separate bowl, whip the heavy cream and vanilla extract until stiff peaks form. Gently fold this into the mascarpone mixture until well combined.
- In a shallow dish, dip each piece of almond flour cake (or, if preferred, ladyfinger substitutes) into the coffee mixture briefly, ensuring they do not become too soggy.
- Layer the soaked almond flour cakes at the bottom of your serving dish, spreading half the mascarpone mixture on top.
- Repeat the layering process with the remaining almond flour cakes and mascarpone mixture.
- Cover and refrigerate for at least 1 hour to allow the flavors to meld and the dessert to set.
- Before serving, dust the top with unsweetened cocoa powder as a finishing touch.
Variations and Tips:
- For added flavor, include a sprinkle of dark chocolate shavings on top.
- Consider using flavored extracts, such as almond or hazelnut, to enhance the mascarpone layer.
- If you want to add a bit of crunch, incorporate chopped nuts or keto-friendly chocolate chips in the layers.
- To make this dish even more keto-friendly, always check that your sweeteners and coffee liqueurs are low-carb certified.
- 24-ounce insulated stainless-steel water bottle with a FreeSip spout and push-button lid with lock
- Patented FreeSip spout designed for either sipping upright through the built-in straw or tilting back to...
- Protective push-to-open lid keeps spout clean; convenient carry loop doubles as a lock
Creamy Avocado Chocolate Pudding

Creamy Avocado Chocolate Pudding is a deliciously rich and indulgent dessert that offers a healthy alternative to traditional chocolate puddings.
Made primarily with ripe avocados, this treat is perfect for those following a low-carb lifestyle, vegans, or anyone who simply wants to enjoy a guilt-free chocolate dessert.
With a quick preparation time of only 15 minutes, this pudding can be conveniently whipped up for a last-minute sweet craving or dessert for guests.
Ingredients:
- 2 ripe avocados
- 1/4 cup unsweetened cocoa powder
- 1/4 cup almond milk (or any non-dairy milk)
- 1/4 cup sugar-free sweetener (like erythritol or stevia)
- 1 teaspoon vanilla extract
- A pinch of salt
Instructions:
- Cut the avocados in half, remove the pits, and scoop the flesh into a food processor.
- Add the unsweetened cocoa powder, almond milk, sugar-free sweetener, vanilla extract, and a pinch of salt.
- Blend the mixture on high speed until smooth and creamy, scraping down the sides as necessary.
- Taste the pudding and adjust the sweetness or cocoa flavor if desired by adding more sweetener or cocoa.
- Once combined to your satisfaction, transfer the pudding to serving bowls or containers.
- Chill in the refrigerator for at least 30 minutes to allow the flavors to meld and to serve it cold.
Variations and Tips:
- Flavor Boost: For added flavor, you can incorporate a teaspoon of espresso powder or instant coffee, which enhances the chocolate taste without adding extra carbs.
- Nut Butters: Mixing in a tablespoon of almond or peanut butter can create a creamier texture and add a delicious nutty flavor.
- Toppings: Top with fresh berries, shredded coconut, or a dollop of whipped coconut cream before serving for a delightful presentation.
- Storage: Store any leftovers in an airtight container in the fridge for up to 2-3 days. Make sure to cover the surface with plastic wrap to minimize browning from the avocado.
- Sweetener Options: Adjust the sweetness to your preference; if you are not strictly low-carb, you can use honey or maple syrup for a more traditional flavor.
Enjoy this decadent dessert that satisfies your sweet tooth while keeping things healthy!
Lemon Ricotta Pancakes

Lemon Ricotta Pancakes are a delightful twist on traditional pancakes, offering a light, fluffy texture with a vibrant citrus flavor.
These low-carb pancakes are perfect for anyone looking to indulge their sweet tooth while keeping their carbohydrate intake in check. Ideal for a weekend brunch or a special breakfast treat, they can be whipped up in just about 20 minutes, making them a quick and delicious option for any meal.
Ingredients
- 1 cup ricotta cheese
- 2 large eggs
- 1/4 cup almond flour
- 2 tablespoons coconut flour
- 1 tablespoon lemon zest
- 2 tablespoons lemon juice
- 1 teaspoon baking powder
- 1 teaspoon vanilla extract
- Pinch of salt
- Butter or coconut oil (for cooking)
Cooking Steps
- In a mixing bowl, combine the ricotta cheese, eggs, lemon zest, lemon juice, and vanilla extract. Mix until well combined and smooth.
- In another bowl, mix together the almond flour, coconut flour, baking powder, and a pinch of salt.
- Gradually add the dry ingredients to the ricotta mixture, stirring until the batter is well combined. The batter should be thick but pourable.
- Heat a non-stick skillet or griddle over medium heat and add a little butter or coconut oil.
- Pour a small amount of batter onto the skillet (about 1/4 cup for each pancake) and cook until bubbles form on the surface, about 2-3 minutes.
- Gently flip the pancake and cook for another 2-3 minutes on the other side until golden brown.
- Repeat with the remaining batter, adding more butter or oil to the skillet as needed.
Variations and Tips
- For added sweetness without extra carbs, you can incorporate a low-carb sweetener like erythritol or stevia into the batter.
- Add fresh blueberries or raspberries into the batter for a fruity twist.
- Serve with a dollop of Greek yogurt and a sprinkle of lemon zest for an extra creamy and tangy topping.
- Store leftover pancakes in an airtight container in the refrigerator for up to 3 days or freeze for longer storage. Reheat in a skillet or microwave before serving.
Low-Carb Pumpkin Pie
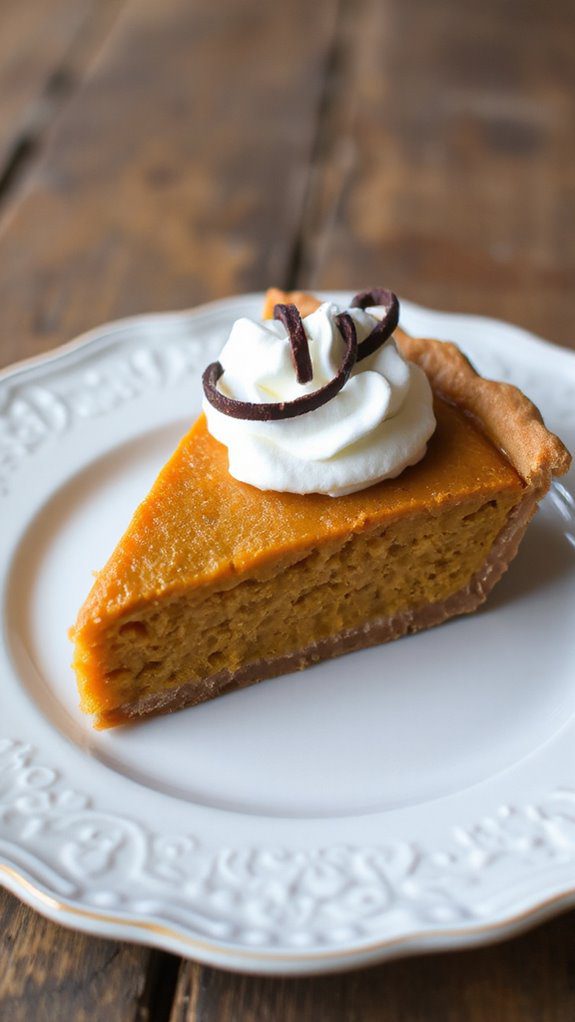
Low-carb pumpkin pie is a delicious alternative for those looking to enjoy a classic dessert while keeping their carbohydrate intake in check. Perfect for health-conscious individuals or anyone following a ketogenic or low-carb diet, this pie boasts the rich flavor of pumpkin and warm spices, making it an ideal treat for the fall season or holiday gatherings.
With a preparation time of about 20 minutes and a cooking time of 50 minutes, you can have a delightful pie ready to satisfy your sweet tooth without the added carbs.
Ingredients:
- 1 ½ cups pumpkin puree (canned or fresh)
- 3 large eggs
- 1 cup heavy cream
- ½ cup erythritol or your preferred low-carb sweetener
- 1 teaspoon vanilla extract
- 1 teaspoon cinnamon
- ½ teaspoon nutmeg
- ½ teaspoon ginger
- ½ teaspoon salt
- 1 pre-made low-carb pie crust (store-bought or homemade)
Cooking Steps:
- Preheat your oven to 350°F (175°C).
- In a large mixing bowl, combine the pumpkin puree, eggs, heavy cream, erythritol, and vanilla extract. Mix well until smooth and uniform.
- Add the cinnamon, nutmeg, ginger, and salt to the mixture, stirring until thoroughly combined.
- Pour the pumpkin filling into the prepared low-carb pie crust.
- Bake in the preheated oven for 45-50 minutes, or until the filling is set and a toothpick inserted into the center comes out clean.
- Allow the pie to cool at room temperature for at least 1 hour before slicing. Refrigerate any leftover pie.
Variations and Tips:
- For extra flavor, consider adding a pinch of cloves or allspice to the filling.
- If you're looking for a nut-free crust, opt for a coconut flour crust instead of almond flour.
- Serve with a dollop of unsweetened whipped cream or a sprinkle of crushed nuts for added texture.
- This pie can be made ahead of time; in fact, it often tastes better the next day after the flavors have had a chance to meld together. Just store it in the refrigerator.
- Adjust the sweetener to taste; some may prefer it sweeter or less sweet depending on personal preference.
Chocolate Avocado Truffles
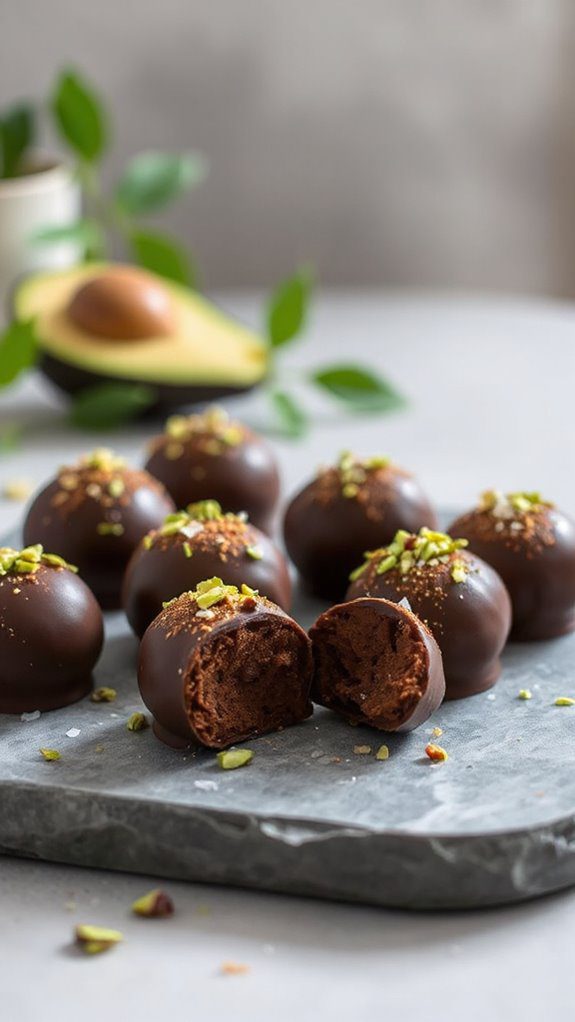
Chocolate avocado truffles are a delightful low carb dessert that marries the creamy texture of ripe avocados with rich dark chocolate, creating a decadent treat that is perfect for health-conscious individuals or anyone looking to satisfy a sweet tooth without the guilt.
These truffles are not only vegan-friendly but also packed with healthy fats, making them suitable for those following ketogenic or low carb diets.
With a preparation time of just 15 minutes (plus chilling), this sweet indulgence is a quick and easy option for parties, gatherings, or an after-dinner treat.
Ingredients:
- 1 ripe avocado
- 1 cup dark chocolate chips (preferably 70% cocoa or higher)
- 2 tablespoons unsweetened cocoa powder
- 2-3 tablespoons maple syrup or erythritol (adjust to taste)
- 1 teaspoon vanilla extract
- Pinch of sea salt
- Optional toppings: shredded coconut, chopped nuts, or additional cocoa powder
Cooking Steps:
- Begin by melting the dark chocolate chips in a microwave-safe bowl. Heat in the microwave in 20-second intervals, stirring in between until completely smooth, or use a double boiler on the stovetop.
- In a separate bowl, mash the ripe avocado until smooth, ensuring there are no lumps.
- Add the melted chocolate, unsweetened cocoa powder, maple syrup (or erythritol), vanilla extract, and a pinch of sea salt to the bowl with the mashed avocado. Mix well until all the ingredients are fully incorporated and the mixture is creamy.
- Taste the mixture and adjust sweetness as needed by adding more maple syrup or erythritol.
- Once combined, refrigerate the mixture for about 30 minutes to firm up slightly.
- After chilling, use a small cookie scoop or your hands to form small balls of the mixture, about 1 inch in diameter.
- Roll each truffle in your choice of toppings, such as shredded coconut, chopped nuts, or dusting with cocoa powder.
- Return the truffles to the refrigerator for an additional 15-20 minutes to set before serving.
Variations and Tips:
- For a hint of spice, consider adding a dash of cinnamon or cayenne pepper to the chocolate mixture.
- To enhance the flavor, try mixing in a tablespoon of nut butter or a splash of coffee extract.
- If you prefer a different chocolate flavor, experiment with white chocolate or milk chocolate options, keeping in mind the carbohydrate count.
- Feel free to adjust the sweetness level; taste after mixing the initial ingredients and add more sweetener as necessary.
- Store any leftover truffles in an airtight container in the refrigerator for up to a week.
Berry Almond Crumble
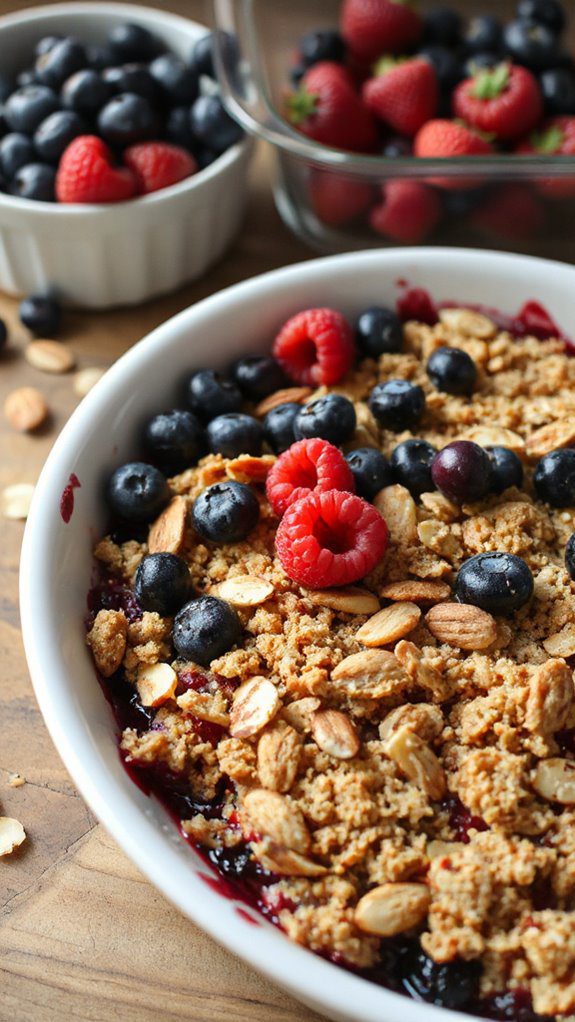
Berry Almond Crumble is a delightful and satisfying low-carb dessert that combines the natural sweetness of berries with a crunchy almond topping.
This dish is perfect for anyone looking to indulge in a sweet treat while adhering to a low-carb lifestyle. It takes about 30 minutes to prepare and 20 minutes to bake, making it a quick and easy option for a weeknight dessert or a special occasion.
Ingredients:
- 2 cups mixed berries (strawberries, blueberries, raspberries)
- 1/4 cup erythritol or preferred low-carb sweetener
- 1 tablespoon lemon juice
- 1 cup almond flour
- 1/2 cup sliced almonds
- 1/4 cup melted coconut oil or butter
- 1/2 teaspoon cinnamon
- Pinch of salt
- Optional: 1/4 teaspoon vanilla extract
Cooking Steps:
- Preheat the oven: Preheat your oven to 350°F (175°C).
- Prepare the berry filling: In a medium mixing bowl, combine the mixed berries, erythritol, and lemon juice. Gently toss them together until the berries are evenly coated.
- Make the crumble topping: In a separate bowl, mix the almond flour, sliced almonds, melted coconut oil (or butter), cinnamon, and salt. If desired, add vanilla extract for extra flavor. Stir until the mixture resembles coarse crumbs.
- Assemble the dish: In a greased baking dish, spread the berry mixture evenly across the bottom. Sprinkle the almond crumble topping generously over the berries.
- Bake: Place the dish in the preheated oven and bake for 20 minutes, or until the topping is golden brown and the berries are bubbling.
- Cool and serve: Remove from the oven and let it cool for a few minutes before serving. Enjoy it warm or at room temperature.
Variations and Tips:
- Berries: Feel free to use your favorite low-carb fruits, such as blackberries or chopped strawberries, or even a combination of them.
- Sweeteners: Experiment with different low-carb sweeteners or adjust the amount based on your taste preference.
- Serving Suggestions: Serve with a dollop of whipped cream or a scoop of low-carb ice cream for a decadent treat.
- Storage: Store any leftovers in an airtight container in the refrigerator for up to three days. Reheat in the oven for the best texture.
Cinnamon Roll Chaffles

Cinnamon roll chaffles are a delightful low-carb twist on the classic cinnamon roll, perfect for those following a keto or low-carb lifestyle. These delicious treats are made using a chaffle maker, which creates a crispy yet fluffy texture similar to a waffle. Ideal for breakfast, brunch, or even as a dessert, these chaffles can be enjoyed in just about 15 minutes. They are a fantastic way to satisfy your sweet tooth without the guilt!
Ingredients:
- 1 cup shredded mozzarella cheese
- 1 large egg
- 2 tablespoons almond flour
- 1 teaspoon cinnamon
- 1 tablespoon sweetener (erythritol, stevia, or your choice)
- ¼ teaspoon vanilla extract
- Cooking spray or oil (for the chaffle maker)
Cooking Steps:
- Preheat your chaffle maker according to the manufacturer's instructions.
- In a mixing bowl, combine the shredded mozzarella cheese and the egg, stirring until well mixed.
- Add the almond flour, cinnamon, sweetener, and vanilla extract to the cheese and egg mixture. Stir until all the ingredients are combined and form a thick batter.
- Lightly grease the chaffle maker with cooking spray or oil to prevent sticking.
- Pour half of the batter onto the chaffle maker and spread it slightly to cover the surface. Close the lid and cook for about 3-5 minutes, or until golden brown.
- Carefully remove the chaffle and repeat the process with the remaining batter.
- Serve warm, drizzled with sugar-free icing or topped with cream cheese for an extra indulgent treat.
Variations and Tips:
- For an extra flavor boost, consider adding a pinch of nutmeg or a tablespoon of chopped pecans or walnuts to the batter.
- You can make a sugar-free icing by mixing cream cheese with a bit of almond milk and sweetener until you reach your desired consistency.
- If you don't have a chaffle maker, you can use a regular waffle iron or make pancakes on a skillet, adjusting the cooking time as necessary.
- Store any leftovers in an airtight container in the fridge for up to three days; reheat them in the toaster or oven for best results.
Keto Pecan Pie Parfaits
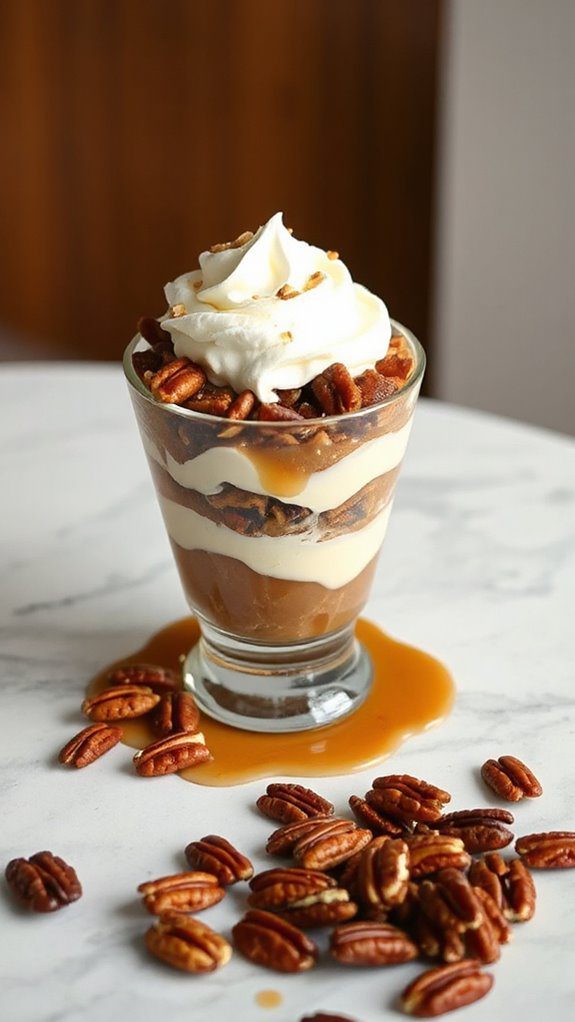
Keto Pecan Pie Parfaits are a delightful dessert that offers the rich and nutty flavors of traditional pecan pie without the added carbs. Ideal for those following a ketogenic diet, these parfaits feature layers of pecan filling, creamy cheesecake, and toasted pecans that create a satisfying, guilt-free treat.
Perfect for gatherings or just a cozy night in, prep time is only about 15 minutes, with a chilling period to enhance the flavors.
Ingredients
- 1 cup pecans, chopped
- 1 cup heavy cream
- 8 oz cream cheese, softened
- 1/3 cup erythritol (or sweetener of choice)
- 1 tsp vanilla extract
- 1 tsp cinnamon
- 2 tbsp unsweetened cocoa powder (optional, for a chocolate twist)
- Pinch of salt
- Optional: sugar-free caramel sauce for drizzling
Cooking Instructions
- Prepare the Pecan Filling: In a skillet over medium heat, toast the chopped pecans until golden brown, stirring frequently. Remove from heat and let cool.
- Make the Cream Cheese Mixture: In a mixing bowl, combine softened cream cheese, erythritol, vanilla extract, cinnamon, and a pinch of salt. Use a hand mixer to blend until smooth and creamy.
- Whip the Cream: In a separate bowl, whip the heavy cream until stiff peaks form. Gently fold the whipped cream into the cream cheese mixture until well combined. If you're adding cocoa powder, mix it in during this step.
- Assemble the Parfaits: In serving glasses or bowls, layer the cream cheese mixture, followed by a layer of toasted pecans. Repeat the layers until the glasses are full, finishing with a layer of the cream cheese mixture.
- Chill: Refrigerate the parfaits for at least 30 minutes to allow the flavors to meld together.
- Serve: Before serving, you can drizzle a little sugar-free caramel sauce on top and sprinkle extra pecans for garnish.
Variations and Tips
- Add Flavor Variations: For a different twist, consider adding a teaspoon of pumpkin spice or a splash of bourbon extract to the cream cheese mixture for a seasonal touch.
- Make it Dairy-Free: Substitute cream cheese with a dairy-free alternative and use coconut whipped cream instead of regular whipped cream to keep it dairy-free.
- Storing Leftovers: These parfaits can be stored in the refrigerator for up to 3 days, making them perfect for meal prep or after-party snacks.
- Presentation: Use clear glasses to showcase the beautiful layers of your parfaits for an impressive presentation at your gatherings.
Enjoy your luscious Keto Pecan Pie Parfaits and relish the flavors of a classic dessert in a low-carb fashion!
Coconut Cream Pie

Coconut Cream Pie is a delicious and indulgent dessert that fits perfectly into a low-carb lifestyle without sacrificing flavor. This pie is ideal for those who are following a ketogenic diet or anyone looking to enjoy a sweet treat while keeping their carbohydrate intake in check.
With a creamy, coconut-flavored filling and a crunchy crust, this dessert will satisfy your sweet tooth in just about 30 minutes of preparation time, plus chilling time.
Ingredients:
- 1 ½ cups unsweetened shredded coconut
- 1 cup almond flour
- ¼ cup unsweetened cocoa powder
- ½ cup erythritol (or preferred low-carb sweetener)
- ½ cup coconut oil, melted
- 5 large eggs
- 1 cup coconut milk (canned, full-fat)
- 2 tsp vanilla extract
- ½ tsp salt
- ¼ cup unsweetened heavy cream (for topping)
- Optional: toasted coconut flakes for garnish
Instructions:
1. Preheat the oven to 350°F (175°C).
2. Make the crust: In a bowl, combine almond flour, cocoa powder, ½ cup erythritol, and a pinch of salt. Add melted coconut oil and mix until it resembles wet sand.
Press the mixture into the bottom of a pie dish evenly to form the crust. Bake for 10-12 minutes or until lightly golden, then set aside to cool.
3. Prepare the filling: In a medium saucepan over low heat, whisk together the coconut milk, remaining erythritol, eggs, and vanilla extract until combined.
Stir continuously until the mixture has thickened, about 5-7 minutes. Once thickened, remove it from the heat and fold in the shredded coconut.
4. Assemble the pie: Pour the coconut filling into the cooled crust and spread it evenly. Refrigerate the pie for at least 2 hours to set.
5. Serve: Whip the heavy cream until soft peaks form and layer it on top of the chilled pie. Garnish with toasted coconut flakes if desired.
Variations & Tips:
- For added flavor, consider infusing the filling with a splash of rum or coconut extract.
- Use a pre-made low-carb crust if you're short on time.
- For a chocolate coconut cream pie, you can add cocoa powder to the filling.
- Serve with a dollop of whipped cream and some fresh berries for a rejuvenating contrast.
- Store leftovers in the refrigerator for up to 3 days for best results.
Enjoy your Low Carb Coconut Cream Pie, a treat that beautifully balances flavor and dietary needs!
Low-Carb Strawberry Shortcake

Low-Carb Strawberry Shortcake is a delightful dessert that caters to those looking to enjoy a sweet treat without the added carbs. This dish is perfect for individuals following a low-carb or ketogenic diet, as well as anyone who wants an invigorating and fruity dessert that doesn't compromise on flavor. The preparation time is approximately 30 minutes, making it a great option for both casual weeknight dinners and special occasions.
Ingredients:
- 1 cup almond flour
- 1/4 cup coconut flour
- 1/4 cup erythritol or preferred low-carb sweetener
- 1/2 teaspoon baking powder
- 1/4 teaspoon salt
- 4 large eggs
- 1/4 cup unsweetened almond milk
- 1 teaspoon vanilla extract
- 1 cup fresh strawberries, hulled and sliced
- 1 cup heavy whipping cream
- 2 tablespoons powdered erythritol or preferred low-carb sweetener for whipped cream
- Fresh mint leaves for garnish (optional)
Cooking Steps:
- Preheat your oven to 350°F (175°C). Line an 8-inch round cake pan with parchment paper and grease it lightly.
- In a mixing bowl, combine the almond flour, coconut flour, erythritol, baking powder, and salt, and mix until well blended.
- In another bowl, whisk together the eggs, almond milk, and vanilla extract until smooth.
- Gradually add the wet ingredients to the dry ingredients, stirring just until combined.
- Pour the batter into the prepared cake pan and smooth out the top. Bake for 20-25 minutes, or until a toothpick inserted into the center comes out clean. Remove from the oven and let it cool completely in the pan before transferring to a wire rack.
- While the cake cools, prepare the whipped cream. In a chilled mixing bowl, pour the heavy whipping cream and add 2 tablespoons of powdered erythritol. Whip the cream until soft peaks form, being careful not to overwhip.
- Once the cake has cooled, slice it in half horizontally to create two layers. Place one layer on a serving plate, top with half of the sliced strawberries, and spread a generous amount of whipped cream over the strawberries.
- Place the second layer of cake on top and repeat the process with the remaining strawberries and whipped cream. Garnish with fresh mint leaves if desired.
- Slice and serve immediately, or you can refrigerate it for up to 2 hours before serving to let the flavors meld.
Variations and Tips:
- For added flavor, consider incorporating lemon or orange zest into the whipped cream or the cake batter.
- You can also substitute mixed berries like blueberries or raspberries for the strawberries, or use a combination of berries for a colorful presentation.
- If you prefer a different sweetener, adjust the measures according to the sweetness level of your chosen alternative.
- To make individual servings, you can bake the cake in muffin tins. Adjust the baking time to about 15-20 minutes.
- Leftovers can be stored in an airtight container in the refrigerator for up to 3 days, though the cake is best enjoyed fresh.
Chocolate Peanut Butter Fat Bombs

Chocolate Peanut Butter Fat Bombs are the perfect indulgence for anyone following a low-carb or ketogenic diet.
These delicious bites are packed with healthy fats, making them a fantastic snack to help curb cravings while providing energy.
With just a little preparation time of around 15 minutes and a chill time of about 30 minutes, you can enjoy these rich, satisfying treats in no time.
Ingredients:
- 1/2 cup crunchy or creamy natural peanut butter
- 1/4 cup coconut oil, melted
- 1/4 cup unsweetened cocoa powder
- 1/4 cup erythritol or your preferred low-carb sweetener
- 1 teaspoon vanilla extract
- A pinch of salt
Cooking Instructions:
- In a mixing bowl, combine the melted coconut oil and peanut butter. Stir until well blended and smooth.
- Add the unsweetened cocoa powder, erythritol, vanilla extract, and salt to the mixture. Mix thoroughly until all ingredients are well incorporated and the batter is smooth.
- Line a silicone mold or mini muffin tin with parchment paper (if not using silicone, to help with easy removal).
- Spoon the mixture evenly into the molds, filling each one to the top.
- Place the molds in the freezer for about 30 minutes or until solid.
- Once frozen, pop the fat bombs out of the molds and store them in an airtight container in the freezer for later enjoyment.
Variations and Tips:
- Flavor Enhancements: Feel free to experiment by adding a few drops of stevia for additional sweetness, or mix in some sugar-free chocolate chips for extra texture.
- Nut Alternatives: If you're allergic to peanuts, try using almond butter or sunflower seed butter instead.
- Storage: These fat bombs can last in the freezer for up to 3 months, making them excellent for meal prep.
- Serving Suggestions: Serve with a sprinkle of sea salt on top, or dip them in melted dark chocolate for an extra layer of flavor.
Enjoy your homemade Chocolate Peanut Butter Fat Bombs as a guilt-free treat!
Creamy Vanilla Custard

Creamy vanilla custard is a luscious dessert that serves as a perfect low-carb treat for those wanting to indulge their sweet tooth without the guilt. This rich and velvety custard is ideal for anyone following a low-carbohydrate diet, as it's sweetened with low-carb sweeteners and made with wholesome ingredients.
Preparation time is approximately 15 minutes, with additional chilling time to set, making it an excellent choice for weeknight desserts or special occasions.
Ingredients:
- 2 cups heavy cream
- 4 large egg yolks
- 1/4 cup erythritol (or preferred low-carb sweetener)
- 1 tablespoon pure vanilla extract
- 1/4 teaspoon salt
- Optional: pinch of nutmeg or cinnamon for flavor
Cooking Steps:
1. In a medium saucepan, heat the heavy cream over medium heat until it starts to simmer, stirring occasionally—do not let it boil.
2. In a separate bowl, whisk together the egg yolks, erythritol, vanilla extract, and salt until well combined and slightly frothy.
3. Temper the egg yolk mixture by gradually adding a small amount of the hot cream to the bowl while whisking continuously. This will prevent the eggs from scrambling.
4. Once tempered, slowly pour the tempered egg mixture back into the saucepan with the remaining cream, continuing to whisk.
5. Cook the mixture over low heat, stirring constantly with a wooden spoon or silicone spatula, until it thickens enough to coat the back of the spoon (about 5-8 minutes).
Do not let it boil.
6. Once thickened, remove from heat and allow to cool slightly before straining through a fine-mesh sieve into a bowl to remove any lumps.
7. Cover with plastic wrap, pressing it directly onto the surface of the custard to prevent a skin from forming, and refrigerate for at least 2 hours or until set.
8. Serve chilled, optionally garnished with whipped cream, berries, or a sprinkle of cinnamon or nutmeg.
Variations and Tips:
- To enhance the flavor, you can infuse the heavy cream with a split vanilla bean or other flavorings like almond extract or citrus zest.
- If you prefer a flavored custard, consider adding other extracts such as coconut, maple, or mint during the cooking process.
- Store the custard in an airtight container in the refrigerator for up to 3 days to enjoy throughout the week.
- For a decadent twist, fold in some unsweetened cocoa powder after cooking to create a chocolate custard variation.
Zucchini Brownies

Zucchini brownies are a delicious and nutritious low carb dessert that cleverly incorporates zucchini into a sweet treat, making it great for those looking to reduce their carbohydrate intake while still enjoying a brownie.
These fudgy brownies are perfect for anyone following a low-carb or keto diet, or simply anyone looking to add more vegetables to their dessert! With a preparation time of about 15 minutes and a baking time of 25 minutes, you'll have these delightful brownies fresh from the oven in no time.
Ingredients:
- 1 cup grated zucchini (about 1 medium zucchini)
- 1/2 cup almond flour
- 1/4 cup unsweetened cocoa powder
- 1/2 cup sweetener (like erythritol or stevia)
- 2 large eggs
- 1/4 cup melted coconut oil or butter
- 1 teaspoon vanilla extract
- 1/2 teaspoon baking powder
- 1/4 teaspoon salt
- Optional: 1/4 cup sugar-free chocolate chips or nuts
Instructions:
1. Preheat your oven to 350°F (175°C) and line an 8×8 inch baking pan with parchment paper for easy removal.
2. In a large mixing bowl, combine the grated zucchini, almond flour, cocoa powder, and sweetener. Mix until well combined.
3. In another bowl, whisk together the eggs, melted coconut oil (or butter), and vanilla extract until smooth.
4. Pour the wet ingredients into the dry ingredients, and stir until combined.
If using, fold in the sugar-free chocolate chips or nuts at this point.
5. Pour the batter into the prepared baking pan and spread it evenly.
6. Bake in the preheated oven for about 25 minutes, or until a toothpick inserted into the center comes out clean.
7. Allow the brownies to cool in the pan for about 10 minutes before transferring them to a wire rack to cool completely before slicing.
Variations and Tips:
- For added flavor, you can mix in nuts, seeds, or sugar-free chocolate chips.
- If you want a more chocolatey flavor, increase the cocoa powder to 1/2 cup, but you may need to adjust the sweetener accordingly.
- These brownies can also be made dairy-free by using coconut oil instead of butter.
- To enhance the taste, consider adding a teaspoon of espresso powder to bring out the chocolate flavor.
- Serve these brownies slightly warm with a dollop of whipped cream or a scoop of low carb ice cream for an indulgent treat!
Low-Carb Pumpkin Spice Muffins

Low-Carb Pumpkin Spice Muffins are a delightful treat that perfectly captures the warmth and spices of fall while keeping your carbohydrate intake in check. These muffins are ideal for anyone following a low-carb or ketogenic diet and can be enjoyed for breakfast, as a snack, or even as a guilt-free dessert.
The preparation time for this recipe is approximately 15 minutes, with an additional 25–30 minutes for baking.
Ingredients:
- 1 cup almond flour
- ½ cup pumpkin puree (unsweetened)
- 3 large eggs
- ⅓ cup erythritol or other low-carb sweetener
- 1 teaspoon baking soda
- 1 teaspoon cinnamon
- ½ teaspoon nutmeg
- ½ teaspoon ginger
- ¼ teaspoon allspice
- ¼ teaspoon salt
- 1 teaspoon vanilla extract
- ¼ cup unsweetened coconut flakes (optional)
- ¼ cup chopped walnuts or pecans (optional)
Instructions:
- Preheat your oven to 350°F (175°C) and line a muffin tin with paper liners or grease it lightly with cooking spray.
- In a mixing bowl, combine the almond flour, erythritol, baking soda, cinnamon, nutmeg, ginger, allspice, and salt. Whisk together until well mixed.
- In another bowl, whisk together the pumpkin puree, eggs, and vanilla extract until smooth.
- Gradually fold the wet ingredients into the dry ingredients until just combined. Be careful not to overmix.
- If desired, fold in the unsweetened coconut flakes and nuts for added texture and flavor.
- Divide the batter evenly among the muffin cups, filling them about ¾ full.
- Bake in the preheated oven for 25–30 minutes, or until a toothpick inserted into the center of a muffin comes out clean.
- Allow the muffins to cool in the pan for about 5 minutes before transferring them to a wire rack to cool completely.
Variations and Tips:
- Feel free to substitute sunflower seed flour for almond flour if you're looking for a nut-free option.
- Add chocolate chips made from sugar-free chocolate for a richer flavor.
- To enhance moisture, consider adding a tablespoon of sour cream or Greek yogurt to the wet ingredients.
- These muffins freeze well! Store them in an airtight container or freezer bag for up to 3 months. Just thaw them overnight in the fridge before enjoying!
Raspberry Coconut Popsicles

Raspberry Coconut Popsicles are a delightful and invigorating treat that perfectly blend the tartness of raspberries with the creamy sweetness of coconut. These popsicles are an ideal low-carb dessert option for anyone looking to satisfy their sweet tooth without the guilt. They are not only keto-friendly but also an excellent choice for those trying to reduce their sugar intake.
With a quick preparation time of just 10 minutes (plus 4-6 hours for freezing), these popsicles are a simple and healthy dessert that you can enjoy all summer long.
Ingredients:
- 1 cup fresh raspberries
- 1 cup coconut milk (full-fat for creaminess)
- 2 tablespoons erythritol or your preferred low-carb sweetener
- 1 tablespoon lime juice
- Optional: unsweetened shredded coconut for garnish
Instructions:
- In a blender, combine the fresh raspberries, coconut milk, erythritol, and lime juice.
- Blend until smooth and well combined, ensuring there are no raspberry chunks remaining.
- Taste the mixture and adjust sweetness if necessary, adding more sweetener according to your preference.
- Pour the mixture into popsicle molds, leaving a little space at the top for expansion as they freeze.
- Insert popsicle sticks and place the molds in the freezer.
- Freeze for at least 4-6 hours, or until completely solid.
- To serve, run the molds under warm water for a few seconds to easily release the popsicles.
Variations and Tips:
- For an added texture, include a layer of unsweetened shredded coconut at the bottom of your molds before adding the raspberry-coconut mixture.
- Experiment with other berries like strawberries or blueberries for a fruity twist.
- For a creamier version, replace half of the coconut milk with Greek yogurt.
- If you don't have popsicle molds, use small plastic cups and wooden sticks instead.
- Always adjust the sweetness to your taste, especially if using different brands of coconut milk or sweeteners, as they can vary in sweetness.
Chocolate Hazelnut Spread
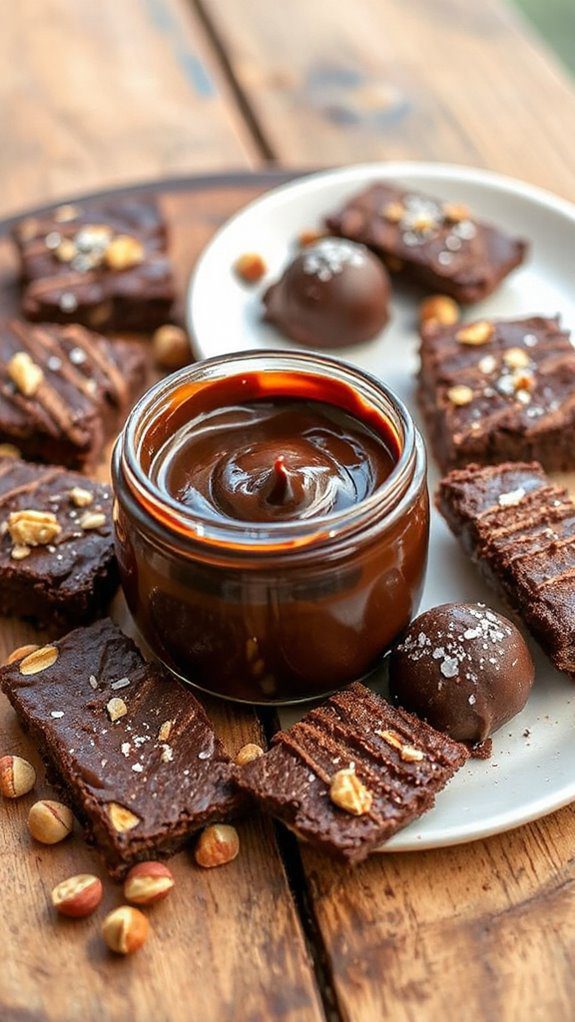
Chocolate Hazelnut Spread is a delightful, low-carb alternative to traditional sugary spreads. This rich and creamy treat is perfect for anyone following a low-carb or ketogenic diet who still wants to indulge their sweet tooth.
It's ideal for breakfast when spread on low-carb bread or pancakes, or as a snack right off the spoon. Preparation time for this recipe is approximately 15 minutes, with an additional cooling period to allow the flavors to meld.
Ingredients:
- 1 cup hazelnuts
- 1/2 cup unsweetened cocoa powder
- 1/4 cup powdered erythritol (or your preferred low-carb sweetener)
- 1/4 cup coconut oil, melted
- 1 teaspoon vanilla extract
- Pinch of salt
- 2-3 tablespoons water (as needed for consistency)
Cooking Steps:
1. Roast the Hazelnuts: Preheat your oven to 350°F (175°C). Spread the hazelnuts on a baking sheet and roast for about 10-15 minutes, or until golden and fragrant. This step enhances their flavor.
2. Cool and Peel: Once roasted, let the hazelnuts cool slightly. If desired, rub them in a kitchen towel to remove some of the skins. This step is optional; the spread will still be delicious with some skins left on.
3. Blend Ingredients: In a food processor, combine the roasted hazelnuts and blend until smooth. This may take a few minutes; scrape down the sides as needed.
Add the cocoa powder, powdered erythritol, melted coconut oil, vanilla extract, and a pinch of salt. Blend until fully combined and smooth.
4. Adjust Consistency: If the mixture is too thick, gradually add water, one tablespoon at a time, while blending until you reach your desired consistency.
5. Store: Transfer the spread to an airtight container and refrigerate. It will thicken as it cools and is best enjoyed within one to two weeks.
Variations:
- Flavored Spread: Add a tablespoon of espresso powder for a mocha twist, or a few drops of peppermint extract for a minty flavor.
- Nut-Free Version: Substitute the hazelnuts with sunflower seeds for a nut-free chocolate spread.
Tips:
- Confirm the hazelnuts are fully blended to achieve a smooth texture; this can take longer based on the power of your food processor.
- Adjust sweetness by starting with less erythritol and adding more to taste.
- For an extra creamy texture, mix in a bit more coconut oil or a splash of milk (dairy or non-dairy) after blending.
Key Lime Pie Bars
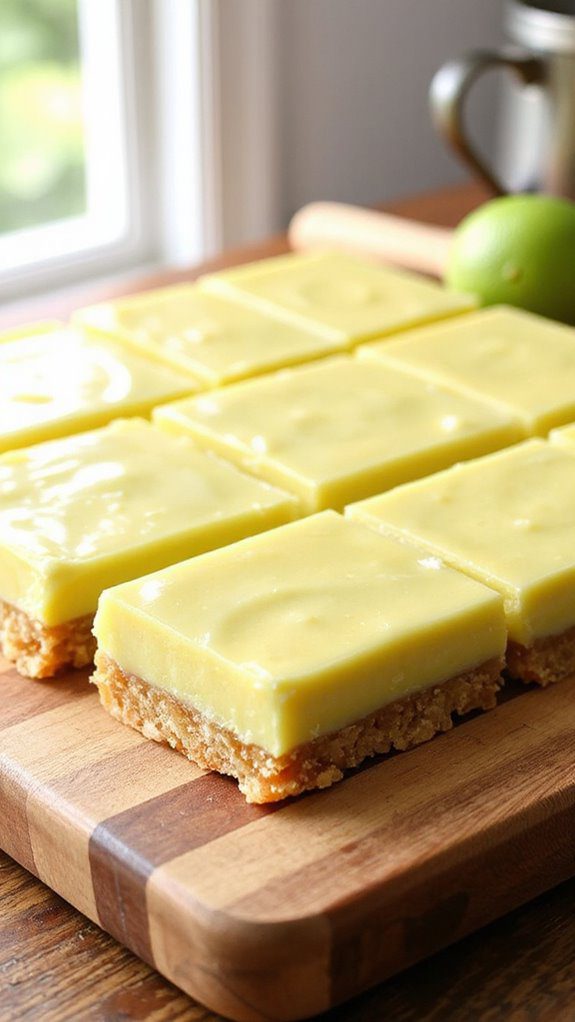
Key Lime Pie Bars are a delectable low-carb dessert that captures the tangy flavor of classic key lime pie in a convenient bar format.
These bars are perfect for anyone looking to satisfy their sweet tooth while adhering to a low-carb lifestyle, making them suitable for dieters, health-conscious individuals, and dessert lovers alike. With a preparation time of just 25 minutes, followed by a chilling time, they can be a quick and easy treat for gatherings, parties, or a personal indulgence.
Ingredients:
- 1 ½ cups almond flour
- ¼ cup unsweetened shredded coconut
- ½ cup unsalted butter, melted
- ¼ cup erythritol or your preferred low-carb sweetener
- 1 large egg
- 1 cup fresh lime juice
- Zest of 2 limes
- 1 can (14 oz) full-fat coconut milk
- 3 large eggs (for the filling)
- ½ cup erythritol or your preferred low-carb sweetener (for the filling)
- 1 teaspoon vanilla extract
- Pinch of salt
Cooking Steps:
- Preheat your oven to 350°F (175°C) and line an 8×8-inch baking dish with parchment paper, leaving some overhang for easy removal.
- In a medium bowl, combine the almond flour, shredded coconut, melted butter, ¼ cup erythritol, and 1 egg. Mix until well combined and the mixture resembles a crumbly dough.
- Press the crust mixture evenly into the bottom of the prepared baking dish. Bake in the preheated oven for 12-15 minutes or until golden brown. Remove from oven and let cool slightly.
- In another bowl, whisk together the lime juice, lime zest, coconut milk, 3 eggs, ½ cup erythritol, vanilla extract, and a pinch of salt until smooth and well combined.
- Pour the lime mixture over the crust. Return to the oven and bake for an additional 20-25 minutes, or until the filling is set.
- Allow the bars to cool at room temperature, then refrigerate for at least 2 hours or until fully chilled and firm.
- Once chilled, lift the bars out of the dish using the parchment paper and cut into squares. Serve chilled, garnished with extra lime zest if desired.
Variations and Tips:
- For a creamier texture, you can substitute the coconut milk with heavy cream.
- Feel free to adjust the sweetness according to your taste preference; start with less sweetener and add more if necessary.
- Adding a bit of gelatin can help set the filling even further if you prefer a firmer texture.
- Consider adding a layer of whipped cream topping for extra indulgence.
- Store leftovers in an airtight container in the refrigerator for up to a week for the best flavor and texture.


