For those seeking delicious low-carb options, a variety of keto dinner recipes are available. Options include creamy garlic butter Tuscan shrimp, zucchini noodles with pesto and grilled chicken, and cheesy cauliflower casserole. Hearty dishes such as beef stroganoff with shirataki noodles and keto chicken enchiladas offer satisfying flavors. Complement meals with sides like garlic parmesan roasted Brussels sprouts and braised pork chops with mustard cream sauce. Discovering more scrumptious recipes can enhance one's keto culinary journey.
Creamy Garlic Butter Tuscan Shrimp

Creamy Garlic Butter Tuscan Shrimp is a mouthwatering keto-friendly dish that combines succulent shrimp with a rich, creamy sauce infused with garlic, sun-dried tomatoes, and spinach.
This indulgent dish is perfect for a romantic dinner, family gatherings, or even a quick weeknight meal when you're looking to impress.
With a preparation time of just 10 minutes and a cooking time of 15 minutes, you can have this flavorful meal on the table in no time, making it ideal for busy individuals or anyone wanting to enjoy a delicious low-carb meal.
Ingredients:
- 1 pound large shrimp, peeled and deveined
- 2 tablespoons butter
- 4 cloves garlic, minced
- 1 cup heavy cream
- 1/2 cup sun-dried tomatoes, chopped
- 2 cups fresh spinach
- 1 teaspoon Italian seasoning
- Salt and pepper to taste
- Grated Parmesan cheese for serving (optional)
- Fresh basil for garnish (optional)
Cooking Instructions:
- In a large skillet, melt the butter over medium heat.
- Add the minced garlic and sauté for about 1 minute, or until fragrant.
- Increase the heat to medium-high and add the shrimp to the skillet. Season with salt, pepper, and Italian seasoning. Cook for 2-3 minutes on each side, or until the shrimp turn pink and opaque.
- Remove the shrimp from the skillet and set aside.
- In the same skillet, add the heavy cream and bring it to a simmer. Stir in the sun-dried tomatoes and cook for about 2 minutes.
- Add the fresh spinach and allow it to wilt in the sauce while stirring.
- Return the cooked shrimp to the skillet and mix well to coat with the creamy sauce. Cook for an additional 2 minutes to heat through.
- Serve immediately, garnished with grated Parmesan cheese and fresh basil if desired.
Variations and Tips:
- Substitute shrimp with chicken or scallops for different protein options.
- For a dairy-free version, use coconut cream instead of heavy cream and omit the cheese.
- Add red pepper flakes for a spicy kick.
- Serve over zoodles (zucchini noodles) or cauliflower rice for a complete meal.
- If you prefer a thicker sauce, let the cream simmer longer until it reduces to your liking.
- The Original Pro Chopper - Our superstar veggie slicer has been creating waves on TikTok! Simple to use,...
- Easy Meal Prep with Rust-Resistant Blades - Our vegetable chopper is perfect for anyone who wants to eat...
- 5-Star Design - The soft-grip TPU handle ensures controlled chopping, while the non-skid rubber base...
Zucchini Noodles With Pesto and Grilled Chicken
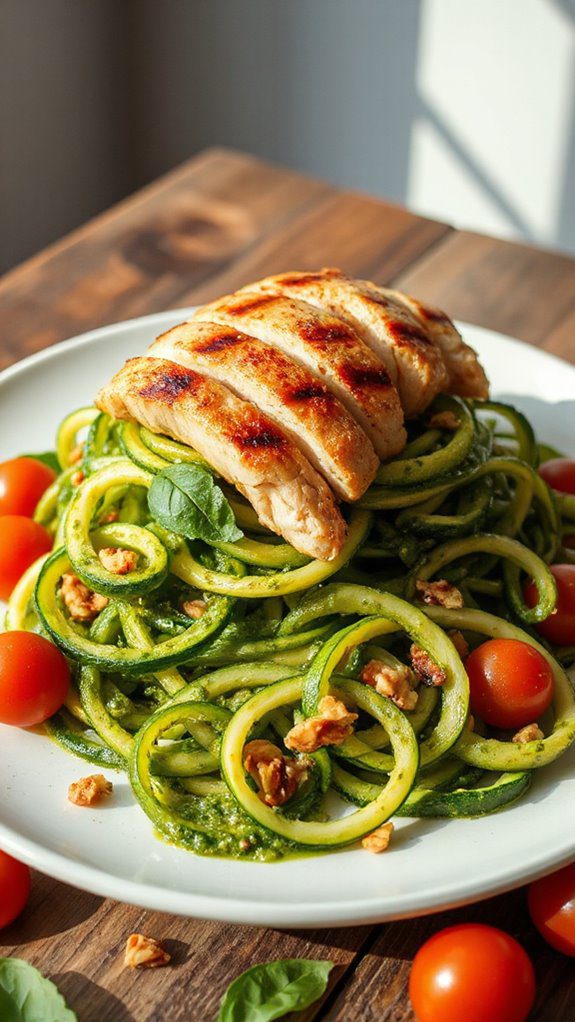
Zucchini Noodles with Pesto and Grilled Chicken is a delightful keto-friendly dish that offers a fresh and flavorful alternative to traditional pasta. This dish is perfect for anyone looking to reduce their carb intake while enjoying a satisfying and nutritious meal.
The combination of spiralized zucchini, homemade or store-bought pesto, and juicy grilled chicken creates a light yet filling dinner option that can be made in just 30 minutes, making it ideal for busy weeknights.
Ingredients:
- 2 medium zucchinis
- 2 boneless, skinless chicken breasts
- 1 cup homemade or store-bought pesto
- 2 tablespoons olive oil
- Salt and pepper to taste
- Parmesan cheese, grated (optional)
- Cherry tomatoes, halved (optional)
- Pine nuts, toasted (optional for garnish)
Cooking Steps:
- Prepare Zucchini Noodles: Using a spiralizer or vegetable peeler, create noodles from the zucchinis. Set aside on a paper towel to absorb excess moisture.
- Grill Chicken: Season the chicken breasts with olive oil, salt, and pepper. Preheat a grill or grill pan over medium-high heat. Grill the chicken for about 6-7 minutes per side, or until fully cooked and juices run clear. Let it rest for a few minutes before slicing.
- Sauté Zoodles: In a large skillet, heat a drizzle of olive oil over medium heat. Add the zucchini noodles and sauté for 2-3 minutes until slightly softened but still al dente. Avoid overcooking to prevent sogginess.
- Combine and Serve: In the skillet with the zoodles, add the pesto and mix well. Plate the zucchini noodles, top with sliced grilled chicken, and optionally garnish with grated Parmesan cheese, cherry tomatoes, and toasted pine nuts.
Variations and Tips:
- Pesto Variations: Experiment with different types of pesto, such as sun-dried tomato pesto or spinach pesto, for a unique twist.
- Add Protein: Feel free to substitute grilled chicken with shrimp, turkey, or a plant-based protein for a different protein source.
- Vegetable Mix-Ins: Incorporate other vegetables like bell peppers or spinach for added flavor and nutrition.
- Storage: This dish can be stored in an airtight container in the fridge for up to 2 days. Reheat gently to avoid overcooking the zucchini noodles.
- Nut-Free Option: If you are avoiding nuts, skip the pine nuts and use a nut-free pesto recipe.
- Makes Everything Simple : Just forget your bagged cheese! Only turn the handle for several times and get...
- Premium Material : All parts of the rotary cheese grater are made of food grade ABS material, no BPA. The...
- Three Option Grater : The parmesan cheese grater finishes food preparation with slicing, shredding and...
Cheesy Cauliflower Casserole

Cheesy cauliflower casserole is a delightful and hearty dish that's perfect for anyone following a keto diet or looking to incorporate more vegetables into their meals.
This creamy, cheesy bake not only satisfies cravings for comfort food but is also low in carbs, making it an excellent choice for dinner. The preparation time is approximately 15 minutes, with an additional 30-35 minutes for baking, making it both quick and easy to put together.
Ingredients:
- 1 large head of cauliflower, chopped into florets
- 1 cup of sharp cheddar cheese, shredded
- ½ cup of cream cheese, softened
- ½ cup of sour cream
- 1 cup of grated Parmesan cheese
- 2 cloves of garlic, minced
- 1 teaspoon onion powder
- 1 teaspoon garlic powder
- ½ teaspoon salt
- ½ teaspoon black pepper
- ¼ teaspoon paprika (optional)
- 2 tablespoons of chopped fresh parsley (for garnish)
Cooking Steps:
- Preheat your oven to 375°F (190°C).
- In a large pot, bring salted water to a boil and add the cauliflower florets. Cook for about 5-7 minutes until the cauliflower is tender but not mushy. Drain and set aside.
- In a mixing bowl, combine the cream cheese, sour cream, half of the cheddar cheese, garlic, onion powder, garlic powder, salt, pepper, and paprika. Mix until smooth and well combined.
- Fold the drained cauliflower florets into the cheesy mixture until they are well coated.
- Pour the mixture into a greased baking dish and spread it evenly. Top with the remaining cheddar cheese and grated Parmesan.
- Bake in the preheated oven for 25-30 minutes, or until the cheese is bubbling and golden brown on top.
- Once baked, remove from oven, let it cool for a few minutes, garnish with chopped parsley, and serve warm.
Variations & Tips:
- For a more indulgent flavor, consider adding crispy bacon bits or cooked sausage to the mixture before baking.
- You can substitute different cheese varieties like mozzarella or gouda to customize the taste.
- If you prefer a lower-calorie option, you can replace sour cream with Greek yogurt.
- Add sautéed vegetables such as spinach or mushrooms to increase fiber content.
- For a crunchy topping, sprinkle some crushed pork rinds or almond flour over the cheese before baking.
- Store leftovers in an airtight container in the refrigerator for up to 3 days, and reheat in the oven for the best texture.
- 💰 REDUCE WASTE AND SAVE MONEY: Chef Preserve keeps FOOD FRESH 5 TIMES LONGER than non-vacuum storage...
- ✅ POWERFUL, QUICK & EASY TO USE: Simply press the button to start. The device vacuum seals a bag in 5...
- ♻️ REUSABLE & RESEALABLE BAGS: Chef Preserve comes with dishwasher, freezer, refrigerator, and...
Lemon Herb Grilled Salmon
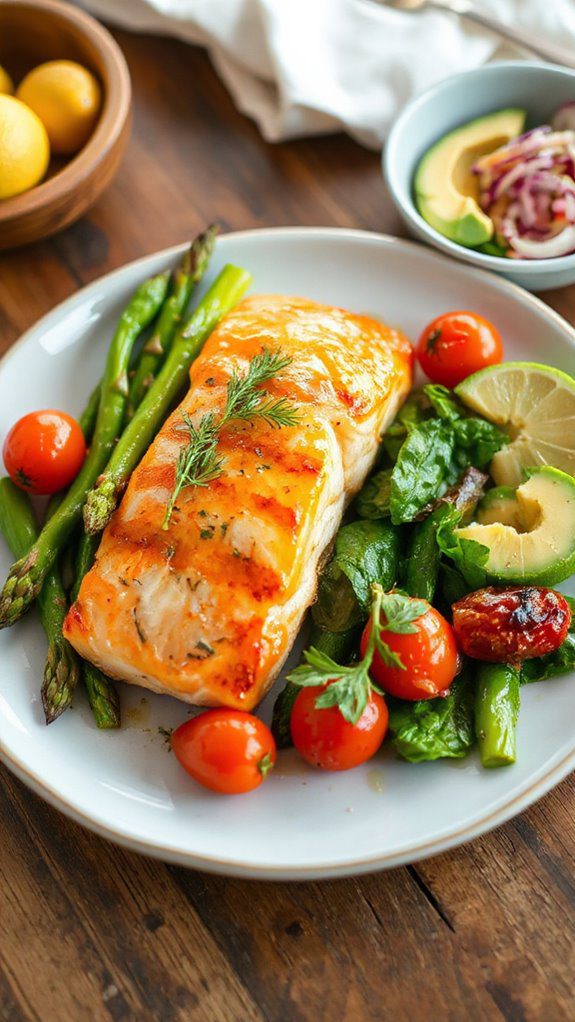
Lemon Herb Grilled Salmon is a light and invigorating keto-friendly dish that perfectly captures the bright flavors of citrus and fresh herbs. This healthy dish is ideal for anyone following a ketogenic diet looking for delicious ways to incorporate more fish into their meals.
With a preparation time of just 15 minutes and a cooking time of about 10 minutes, you can enjoy a nutritious dinner that's not only quick to make but also bursting with flavor.
Ingredients:
- 4 salmon fillets (6 ounces each)
- 2 tablespoons olive oil
- 1 lemon (zested and juiced)
- 2 cloves garlic (minced)
- 1 teaspoon fresh thyme (chopped)
- 1 teaspoon fresh rosemary (chopped)
- Salt and pepper (to taste)
- Lemon slices (for garnish)
- Fresh herbs (for garnish, optional)
Cooking Instructions:
- In a small bowl, mix together the olive oil, lemon zest, lemon juice, minced garlic, thyme, rosemary, salt, and pepper to create a marinade.
- Place the salmon fillets in a shallow dish or a resealable plastic bag and pour the marinade over the fish. Make sure each piece is well-coated. Allow it to marinate for at least 15-30 minutes in the refrigerator.
- Preheat your grill to medium-high heat and lightly oil the grill grates to prevent sticking.
- Remove the salmon from the marinade and let any excess marinade drip off. Place the salmon fillets skin-side down on the grill.
- Grill the salmon for about 4-5 minutes per side, depending on the thickness of the fillets, or until the salmon is opaque and flakes easily with a fork.
- Remove from the grill and let it rest for a few minutes before serving. Garnish with lemon slices and fresh herbs if desired.
Variations and Tips:
- For an extra flavor boost, try adding a pinch of red pepper flakes to the marinade for a hint of spice.
- If you don't have a grill, you can also cook the salmon in a skillet over medium heat or in the oven at 400°F for about 12-15 minutes.
- Pair the salmon with a side of grilled vegetables or a fresh green salad to keep your meal light and keto-friendly.
- Consider using different herbs like dill or basil for a unique twist on flavor.
- Generous Capacity: 7-quart slow cooker that comfortably serves 9+ people or fits a 7-pound roast
- Cooking Flexibility: High or low slow cooking settings, with convenient warm function for ideal serving...
- Convenient: Set it and forget it feature enables you to cook while at work or performing daily tasks
Beef Stroganoff With Shirataki Noodles
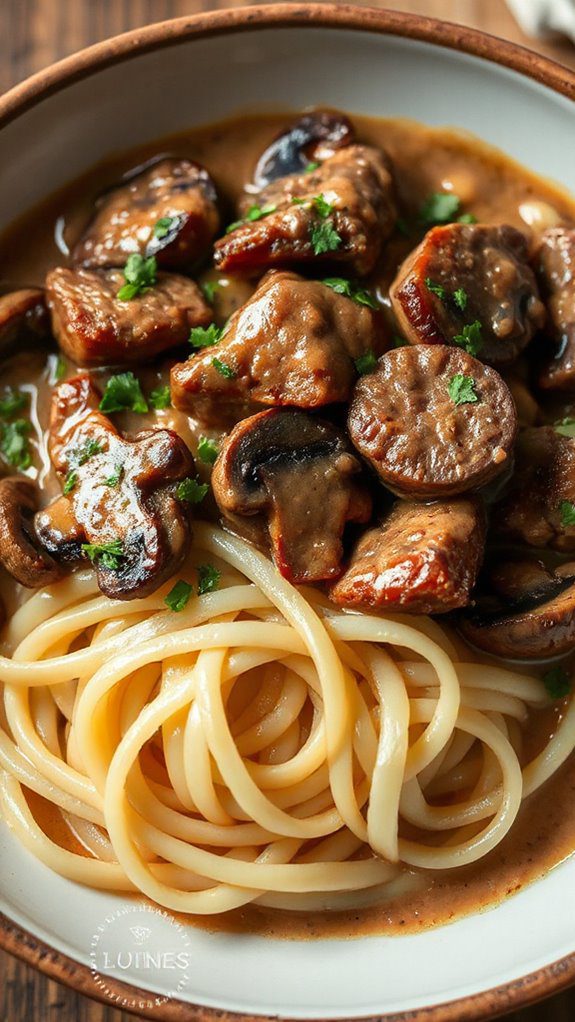
Beef Stroganoff is a classic comfort food, known for its creamy, savory sauce and tender beef. This keto-friendly version replaces traditional pasta with shirataki noodles, making it ideal for those following a low-carb diet while still satisfying cravings for rich, hearty meals. Preparation time is about 15 minutes, with around 30 minutes for cooking, allowing you to whip up a delicious dinner in under an hour.
Ingredients:
- 1 lb beef sirloin, thinly sliced
- 1 tablespoon olive oil
- 1 medium onion, diced
- 2 cloves garlic, minced
- 8 oz mushrooms, sliced
- 1 cup beef broth
- 1 tablespoon Worcestershire sauce
- 1 teaspoon Dijon mustard
- 1 cup heavy cream
- Salt and pepper to taste
- 1 package shirataki noodles, rinsed and drained (about 8 oz)
- Fresh parsley, chopped (for garnish)
Cooking Instructions:
- In a large skillet, heat the olive oil over medium-high heat. Add the sliced beef and season with salt and pepper. Brown the beef for about 3-5 minutes until cooked through, then remove from the skillet and set aside.
- In the same skillet, add the diced onion and sauté for 2-3 minutes until translucent. Add the minced garlic and sliced mushrooms, cooking for another 5-7 minutes until the mushrooms are tender.
- Pour in the beef broth, Worcestershire sauce, and Dijon mustard. Stir well, bringing the mixture to a simmer.
- Reduce the heat to low and pour in the heavy cream, stirring until well combined. Let the sauce simmer for an additional 3-5 minutes, allowing it to thicken slightly.
- Return the browned beef to the skillet, mixing it with the sauce. Add the rinsed and drained shirataki noodles, gently incorporating them so they are evenly coated. Cook for an additional 2-3 minutes until everything is heated through.
- Taste and adjust seasoning with salt and pepper if needed. Serve hot, garnished with fresh parsley.
Variations and Tips:
- For a dairy-free version, substitute heavy cream with coconut cream or a dairy-free alternative.
- You can add spinach or kale for added nutrients and a pop of color.
- If you prefer a touch of sweetness, consider adding a splash of dry white wine before introducing the heavy cream.
- Make sure to rinse the shirataki noodles well to eliminate any odor, and dry them before adding to the dish.
- This recipe can easily be doubled for meal prepping or serving a larger group.
Enjoy this delightful keto dish that's sure to impress family and friends while keeping your meals low-carb!
- 100% Leak-proof: Guaranteed no-spill seal and secure latches
- Crystal-clear Tritan Built: Stain-resistant and odor-resistant material for a clear view of contents
- Lightweight & Sturdy: Easy to carry, yet durable for everyday use
Chicken Alfredo Bake

Chicken Alfredo Bake is a rich and creamy keto-friendly dish that brings the comforting flavors of classic Alfredo sauce to your dinner table. This baked casserole combines tender, roasted chicken with zoodles (zucchini noodles) or cauliflower rice instead of traditional pasta, making it a perfect option for those following a ketogenic diet.
Ideal for weeknight dinners or meal prep, this dish requires about 40 minutes of preparation time and is sure to satisfy your craving for a hearty pasta-style meal without the carbs.
Ingredients:
- 2 cups cooked chicken, shredded or cubed
- 4 cups zucchini noodles (zoodles) or cauliflower rice
- 1 cup heavy cream
- 1 cup shredded mozzarella cheese
- 1/2 cup grated Parmesan cheese
- 2 cloves garlic, minced
- 1/2 teaspoon onion powder
- 1 teaspoon Italian seasoning
- Salt and pepper to taste
- Fresh parsley, chopped (for garnish)
Cooking Steps:
- Preheat your oven to 375°F (190°C).
- In a large mixing bowl, combine the cooked chicken, zoodles or cauliflower rice, heavy cream, half of the mozzarella cheese, Parmesan cheese, garlic, onion powder, Italian seasoning, salt, and pepper. Mix until evenly coated.
- Transfer the mixture to a greased 9×13 inch baking dish and spread it evenly.
- Sprinkle the remaining mozzarella cheese on top of the mixture.
- Bake in the preheated oven for 25-30 minutes, or until the cheese is bubbly and golden brown.
- Remove from the oven and let it cool for a few minutes before garnishing with fresh parsley.
Variations and Tips:
- For an extra kick of flavor, add sautéed mushrooms, spinach, or sun-dried tomatoes to the mixture.
- If you prefer a spicier version, add crushed red pepper flakes to the sauce.
- To make this dish dairy-free, substitute the heavy cream with coconut cream and use dairy-free cheese alternatives.
- This Chicken Alfredo Bake is perfect for meal prep! Store leftovers in an airtight container in the refrigerator for up to 4 days, and reheat in the oven or microwave as needed.
- 𝗘𝗳𝗳𝗼𝗿𝘁𝗹𝗲𝘀𝘀 𝗪𝗲𝗶𝗴𝗵𝗶𝗻𝗴: Supports 5 units...
- 𝗣𝗿𝗲𝗰𝗶𝘀𝗲 𝗥𝗲𝘀𝘂𝗹𝘁𝘀: Accurately weighs up to 11 lb/5 kg with 1 g...
- 𝗦𝗶𝗺𝗽𝗹𝗲 & 𝗖𝗼𝗺𝗽𝗮𝗰𝘁: The small and sleek scale is a perfect fit for...
Spicy Sausage and Peppers Skillet

The Spicy Sausage and Peppers Skillet is a vibrant, flavorful dish perfect for anyone on a ketogenic diet who enjoys bold and zesty flavors. It features juicy sausage, colorful bell peppers, and a variety of spices that combine to create a hearty meal.
Ideal for busy weeknights, this recipe takes only about 30 minutes to prepare, making it a quick and satisfying option for families or anyone needing a delicious low-carb dinner.
Ingredients:
- 1 lb spicy Italian sausage (or any preferred sausage)
- 1 red bell pepper, sliced
- 1 yellow bell pepper, sliced
- 1 green bell pepper, sliced
- 1 medium onion, sliced
- 3 cloves garlic, minced
- 2 tablespoons olive oil
- 1 teaspoon red pepper flakes (optional, for extra heat)
- Salt and pepper to taste
- Fresh parsley, chopped (for garnish)
Cooking Instructions:
- In a large skillet, heat the olive oil over medium heat. Once hot, add the sausage links and cook until browned on all sides, about 5-7 minutes. Remove the sausage from the skillet and set aside.
- In the same skillet, add the sliced onions and sauté for about 2 minutes until they start to soften.
- Add the sliced bell peppers and minced garlic to the skillet. Season with salt, pepper, and red pepper flakes if desired. Cook for another 5-7 minutes, stirring occasionally, until the vegetables are tender and slightly caramelized.
- Slice the cooked sausage into bite-sized pieces and return it to the skillet. Stir to combine everything and cook for an additional 2-3 minutes until heated through.
- Serve hot, garnished with fresh parsley.
Variations and Tips:
- For added depth of flavor, consider deglazing the skillet with a splash of chicken broth or white wine after cooking the onions and peppers.
- You can substitute the spicy sausage with chicken sausage or turkey sausage for a leaner option.
- Feel free to add other vegetables, such as zucchini or mushrooms, to increase the nutritional value and add more variety.
- For a creamy version, stir in some cream cheese or heavy cream just before serving.
- This dish pairs well with cauliflower rice or zucchini noodles for a complete keto meal.
- Instant Read Food Thermometer | Our instant read thermometer features a temperature probe and advanced,...
- Multi-Use | From bbq thermometer to baking thermometer, our digital food thermometer for cooking is...
- Easy-Read Digital Thermometer For Cooking | Large instant thermometer dial with bright blue backlight...
Eggplant Lasagna

Eggplant lasagna is a delicious low-carb and gluten-free alternative to traditional lasagna, perfect for those following a keto diet or anyone looking to reduce carbohydrates in their meals. This hearty dish layers thinly sliced roasted eggplant with rich marinara sauce, cheese, and ground meat, offering a satisfying and flavorful dinner option that the entire family will enjoy.
Preparing eggplant lasagna takes about 45 minutes of active cooking time, plus an additional 30 minutes for baking.
Ingredients:
- 2 large eggplants
- 1 lb ground beef or Italian sausage
- 2 cups marinara sauce (sugar-free)
- 2 cups ricotta cheese
- 1 ½ cups shredded mozzarella cheese
- ½ cup grated Parmesan cheese
- 1 large egg
- 2 cloves garlic, minced
- 2 teaspoons Italian seasoning
- Salt and pepper to taste
- Olive oil for brushing
Cooking Steps:
- Preheat your oven to 375°F (190°C).
- Slice the eggplants lengthwise into ¼-inch thick slices. Lay them on paper towels, sprinkle with salt, and let them sit for 30 minutes to draw out moisture and bitterness. Rinse and pat dry.
- Brush the eggplant slices with olive oil and arrange them on baking sheets. Roast in the preheated oven for about 20-25 minutes, turning them halfway through, until they are tender and slightly golden.
- In a skillet over medium heat, add the ground beef or sausage. Cook until browned, breaking it apart with a wooden spoon. Add minced garlic, salt, pepper, and Italian seasoning, cooking for an additional minute. Stir in the marinara sauce and let it simmer for 5 minutes.
- In a bowl, mix together the ricotta cheese, egg, and half of the grated Parmesan cheese until well combined. Season with salt and pepper.
- In a 9×13 inch baking dish, spread a thin layer of meat sauce on the bottom. Layer half of the roasted eggplant slices over the sauce. Spread half of the ricotta mixture on top, followed by a layer of meat sauce, then sprinkle with mozzarella cheese.
- Repeat the layers with the remaining eggplant, ricotta mixture, and meat sauce. Top with the remaining mozzarella and Parmesan cheese.
- Cover the dish with aluminum foil and bake for 20 minutes. Remove the foil and bake for an additional 15-20 minutes, or until the cheese is bubbly and golden.
- Allow the lasagna to cool for about 10 minutes before slicing and serving.
Variations and Tips:
- For a vegetarian version, substitute the meat with sautéed spinach, mushrooms, or other veggies.
- You can add layers of cooked zucchini or sliced bell peppers for added flavor and nutrition.
- Experiment with different cheeses; for a stronger flavor, use sharp cheddar or gouda.
- To make it spicier, stir in some crushed red pepper flakes to the meat sauce.
- Serve with a side salad or steamed vegetables for a complete meal.
- Versatile 54-Piece Collection: Elevate your kitchen with the Home Hero 54-Piece Kitchen Utensil Set, a...
- Durable and Long-Lasting: Crafted from premium stainless steel, these kitchen utensils are designed to...
- Perfect Holiday Gift: Delight your loved ones with this kitchen utensils gift set this festive season....
Coconut Curry Shrimp

Coconut Curry Shrimp is a vibrant and fragrant dish, perfect for those following a ketogenic diet but craving a taste of exotic cuisine. This dish features succulent shrimp cooked in a rich coconut milk base, infused with aromatic spices and curry flavors. Ideal for seafood lovers or anyone seeking to impress at dinner parties, this recipe is quick and easy to prepare, taking approximately 30 minutes from start to finish.
Ingredients:
- 1 lb large shrimp, peeled and deveined
- 1 can (13.5 oz) coconut milk
- 2 tablespoons coconut oil
- 1 medium onion, chopped
- 2 cloves garlic, minced
- 1 tablespoon fresh ginger, grated
- 2 tablespoons red curry paste (adjust for spice preference)
- 1 bell pepper, thinly sliced
- 1 cup spinach leaves (or any leafy greens)
- Salt and pepper, to taste
- Fresh cilantro, for garnish
- Lime wedges, for serving
- Optional: cauliflower rice for serving
Cooking Steps:
- In a large skillet or wok, heat the coconut oil over medium heat. Once hot, add the chopped onion and sauté for 2-3 minutes until it becomes translucent.
- Add the minced garlic and grated ginger to the skillet, cooking for another minute until fragrant.
- Stir in the red curry paste and cook for an additional 1-2 minutes, allowing the spices to bloom.
- Pour in the coconut milk, stirring well to combine all the flavors. Bring to a gentle simmer.
- Add the shrimp and sliced bell pepper to the mixture. Cook for about 5-7 minutes or until the shrimp turn pink and are cooked through.
- Stir in the spinach leaves and cook for an additional 1-2 minutes until wilted. Season with salt and pepper to taste.
- Remove from heat and garnished with fresh cilantro. Serve hot with lime wedges and cauliflower rice if desired.
Variations & Tips:
- For a vegan version, substitute shrimp with firm tofu or mushrooms.
- Feel free to add any low-carb vegetables, adjusting cooking times based on the type.
- If you prefer a thicker curry, simmer for longer after adding the coconut milk to reduce it.
- Try different curry pastes such as green or yellow based on your flavor preference.
- Pair with avocado slices for an extra creamy texture and healthy fats.
- 24-ounce insulated stainless-steel water bottle with a FreeSip spout and push-button lid with lock
- Patented FreeSip spout designed for either sipping upright through the built-in straw or tilting back to...
- Protective push-to-open lid keeps spout clean; convenient carry loop doubles as a lock
Stuffed Bell Peppers With Ground Turkey
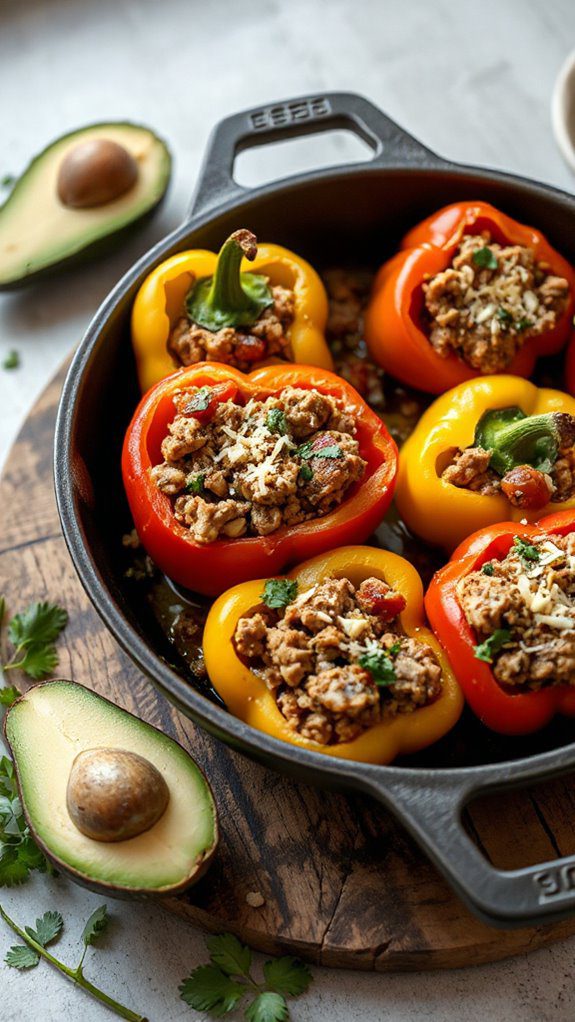
Stuffed Bell Peppers with Ground Turkey is a nutritious, keto-friendly dish that combines the vibrant flavors of bell peppers with the hearty texture of ground turkey. This meal is ideal for those pursuing a low-carb diet, families looking for a healthy dinner option, or anyone wanting to savor a delicious and filling meal.
The preparation time is approximately 15 minutes, with an additional 30 minutes for baking, making it a quick and satisfying dinner solution.
Ingredients:
- 4 large bell peppers (any color)
- 1 pound ground turkey
- 1 small onion, diced
- 3 cloves garlic, minced
- 1 cup diced tomatoes (canned or fresh)
- 1 teaspoon Italian seasoning
- 1 teaspoon paprika
- 1/2 teaspoon salt
- 1/4 teaspoon black pepper
- 1 cup shredded cheese (cheddar or mozzarella)
- Fresh parsley, chopped (for garnish)
Cooking Instructions:
- Preheat your oven to 375°F (190°C).
- Slice the tops off the bell peppers and remove the seeds and membranes. Place them upright in a baking dish.
- In a large skillet over medium heat, add the ground turkey and cook until browned, breaking it apart with a spoon (about 5-7 minutes).
- Add the diced onion and garlic to the skillet, cooking until the onion is translucent (about 3-4 minutes).
- Stir in the diced tomatoes, Italian seasoning, paprika, salt, and pepper. Cook for another 2-3 minutes until heated through.
- Remove the skillet from heat and stir in half of the shredded cheese.
- Spoon the turkey mixture evenly into each stuffed bell pepper, packing it down slightly.
- Sprinkle the remaining cheese over the tops of the stuffed peppers.
- Cover the baking dish with foil and bake in the preheated oven for 25 minutes. Remove the foil and bake for an additional 5-10 minutes until the cheese is bubbly and lightly golden.
- Remove from the oven, let cool for a few minutes, then garnish with fresh parsley before serving.
Variations and Tips:
- For added flavor, consider mixing in some cooked quinoa or cauliflower rice into the ground turkey mixture (though this may alter the keto aspect).
- Spice it up by adding diced jalapeños or red pepper flakes to the turkey mixture for some heat.
- Substitute ground turkey with other lean meats such as chicken or lean beef for variation.
- For a vegetarian option, replace the turkey with a mix of beans, lentils, or a plant-based meat alternative.
- Leftovers can be stored in an airtight container in the refrigerator for up to 3 days, and they reheat well in the oven or microwave.
Buffalo Cauliflower Bites

Buffalo Cauliflower Bites are a delectable and spicy alternative to traditional buffalo wings, making them perfect for vegetarians, those following a keto diet, and anyone looking to indulge in a healthier snack.
These crispy, flavor-packed bites are great for parties, game days, or as a satisfying side dish. With a total preparation time of approximately 30 minutes, they are quick to make and can be enjoyed by the whole family.
Ingredients:
- 1 head of cauliflower, cut into bite-sized florets
- 1 cup almond flour
- ½ cup unsweetened almond milk
- 1 teaspoon garlic powder
- 1 teaspoon onion powder
- ½ teaspoon paprika
- ½ teaspoon salt
- ¼ teaspoon black pepper
- ½ cup buffalo sauce (check for low-carb options)
- 2 tablespoons melted butter (optional)
Cooking Instructions:
- Preheat your oven to 450°F (230°C) and line a baking sheet with parchment paper.
- In a large mixing bowl, combine almond flour, garlic powder, onion powder, paprika, salt, and black pepper.
- In a separate bowl, whisk together almond milk and melted butter (if using).
- Dip each cauliflower floret into the almond milk mixture, allowing any excess to drip off, then coat in the almond flour mixture.
- Spread the coated cauliflower evenly on the prepared baking sheet and bake for 20 minutes, or until golden and crispy.
- In a separate bowl, mix the baked cauliflower with buffalo sauce until evenly coated.
- Return the buffalo-coated cauliflower to the baking sheet and bake for an additional 5-7 minutes to caramelize the sauce slightly.
- Serve hot with your favorite dipping sauce, such as ranch or blue cheese dressing.
Variations & Tips:
- Consider adding a sprinkle of nutritional yeast to the almond flour mixture for a cheesy flavor without the carbs.
- To make them even spicier, you can mix in cayenne pepper to the coating or use an extra hot buffalo sauce.
- If you're looking for a baked version with more crunch, try air frying the cauliflower bites at 400°F (200°C) for 15-20 minutes, tossing halfway through for even cooking.
- Pair the bites with celery sticks and carrots for a classic buffalo wing experience.
Keto Chicken Enchiladas

Keto Chicken Enchiladas are a delicious low-carb twist on a classic Mexican dish, perfect for anyone following a ketogenic diet or looking to reduce their carb intake without sacrificing flavor.
This dish is ideal for family meals, dinner parties, or even meal prepping, as it can be prepared in about 30 minutes and is packed with protein and healthy fats. By using zucchini noodles or low-carb tortillas, you can enjoy the satisfying taste of enchiladas while keeping your carb count in check.
Ingredients:
- 2 cups cooked shredded chicken
- 1 cup shredded cheese (cheddar or Monterey Jack)
- 1 cup enchilada sauce (check for low-carb options)
- 1 cup diced bell peppers
- 1 cup diced onions
- 1 teaspoon garlic powder
- 1 teaspoon cumin
- 1 teaspoon chili powder
- Salt and pepper to taste
- 4-6 low-carb tortillas (or zucchini noodles for a grain-free option)
- Fresh cilantro, for garnish (optional)
Cooking Steps:
- Preheat your oven to 375°F (190°C).
- In a large mixing bowl, combine the shredded chicken, ½ cup of cheese, diced bell peppers, diced onions, garlic powder, cumin, chili powder, salt, and pepper. Mix until all ingredients are well combined.
- Spread a thin layer of enchilada sauce on the bottom of a baking dish.
- If using low-carb tortillas, take one tortilla at a time, fill it with the chicken mixture, roll it up, and place it seam-side down in the baking dish. If using zucchini noodles, lay them flat, add the chicken mixture, and roll them up similarly.
- Once all enchiladas are in the dish, pour the remaining enchilada sauce over the top, making sure each enchilada is well-coated.
- Sprinkle the remaining ½ cup of cheese over the top of the enchiladas.
- Bake in the preheated oven for 20-25 minutes, or until the cheese is melted and bubbly.
- Garnish with fresh cilantro before serving.
Variations & Tips:
- For added flavor, you can add diced jalapeños to the chicken mixture for a spicy kick.
- Substitute the chicken with ground turkey or beef for a different protein option.
- Use homemade enchilada sauce to control ingredients or make it spicier.
- Make certain to read the labels on tortillas and enchilada sauce to confirm they fit your keto guidelines.
- These enchiladas can be assembled ahead of time and stored in the refrigerator before baking for an easy weeknight dinner.
Garlic Parmesan Roasted Brussels Sprouts
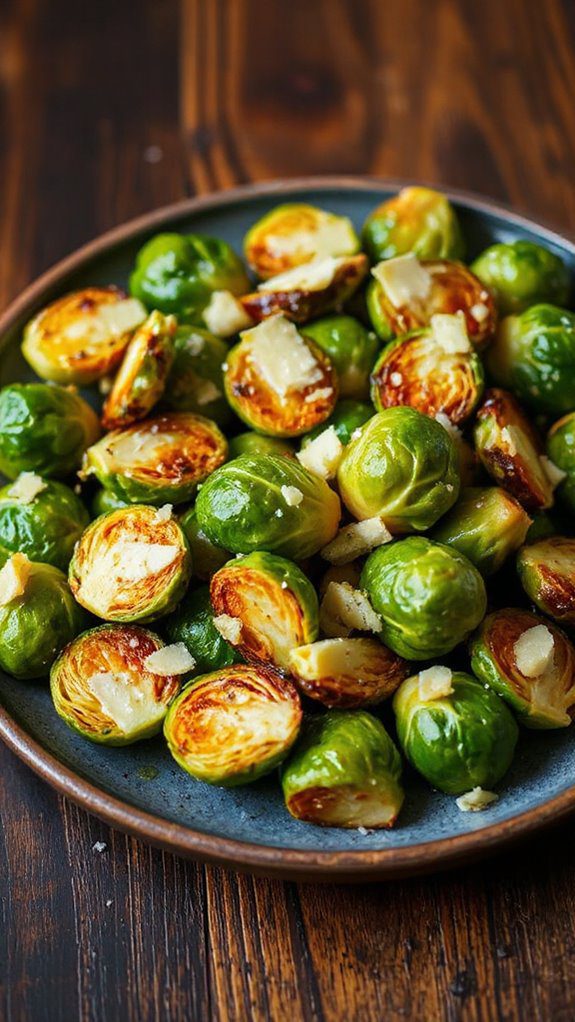
Garlic Parmesan Roasted Brussels Sprouts are a delightful and nutritious side dish that pairs perfectly with any keto meal. These roasted sprouts offer a savory flavor with the rich taste of garlic and the sharpness of parmesan cheese.
Ideal for keto dieters or anyone looking to include more vegetables in their meals, this dish can be prepared in just 25 minutes, making it a quick and easy option for busy weeknights or special dinner gatherings.
Ingredients:
- 1 lb Brussels sprouts, trimmed and halved
- 3 tablespoons olive oil
- 3 cloves garlic, minced
- 1/2 cup grated Parmesan cheese
- Salt and pepper to taste
- Optional: 1 teaspoon red pepper flakes for added heat
Cooking Instructions:
- Preheat your oven to 400°F (200°C).
- In a large mixing bowl, combine the halved Brussels sprouts, olive oil, minced garlic, salt, and pepper. Toss well to guarantee the sprouts are evenly coated.
- Spread the Brussels sprouts in a single layer on a baking sheet.
- Roast in the preheated oven for about 15 minutes, stirring halfway through to guarantee even cooking.
- After 15 minutes, remove the baking sheet from the oven and sprinkle the grated Parmesan cheese over the Brussels sprouts.
- Return the baking sheet to the oven and roast for an additional 5-7 minutes, or until the cheese is golden and bubbly.
- Remove from the oven and, if using, sprinkle with red pepper flakes and enjoy hot.
Variations and Tips:
- Experiment with different cheeses such as cheddar or feta for a unique flavor profile.
- Add nuts, like walnuts or pecans, before roasting for extra crunch and healthy fats.
- For a tangy twist, drizzle balsamic glaze over the cooked Brussels sprouts before serving.
- Make certain the sprouts are dry before tossing them with oil to guarantee they roast properly and don't become soggy.
- Leftovers can be stored in an airtight container in the fridge and reheated in the oven for best results.
Braised Pork Chops With Mustard Cream Sauce
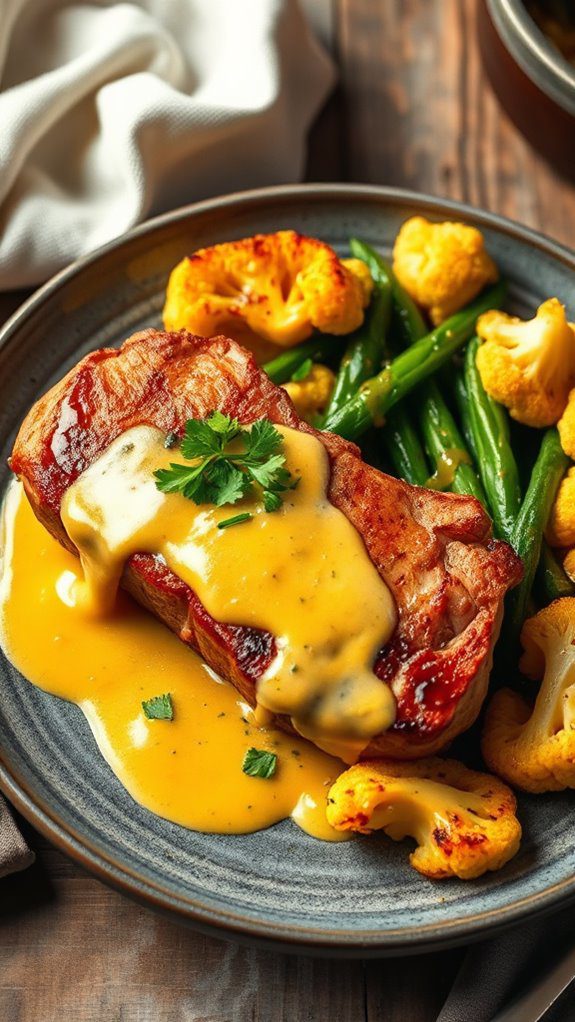
Braised Pork Chops with Mustard Cream Sauce is a delectable keto-friendly dish that brings together the rich flavors of succulent pork chops and a creamy, tangy mustard sauce. This dish is perfect for those following a low-carb diet, offering a satisfying and hearty meal without the extra carbs.
Ideal for a family dinner or a special occasion, it takes about 30 minutes to prepare and 1 hour to cook, making it a fantastic option for a cozy weeknight dinner.
Ingredients:
- 4 bone-in pork chops (about 1-inch thick)
- Salt and pepper, to taste
- 2 tablespoons olive oil
- 1 cup chicken broth
- 1/2 cup heavy cream
- 2 tablespoons Dijon mustard
- 1 tablespoon whole grain mustard
- 1 tablespoon fresh rosemary, chopped (or 1 teaspoon dried)
- 2 cloves garlic, minced
Cooking Steps:
- Prepare the Pork Chops: Season both sides of the pork chops with salt and pepper.
- Sear the Pork Chops: In a large skillet, heat the olive oil over medium-high heat. Add the pork chops and sear them for about 4-5 minutes on each side until they develop a golden-brown crust. Remove the pork chops from the skillet and set aside.
- Make the Sauce: In the same skillet, reduce the heat to medium and add the minced garlic. Sauté for about 30 seconds until fragrant. Carefully pour in the chicken broth to deglaze the pan, scraping up any browned bits.
- Add Mustard and Cream: Stir in the heavy cream, Dijon mustard, whole grain mustard, and rosemary. Mix well until the sauce is combined and simmer for 2-3 minutes.
- Braze the Pork Chops: Return the seared pork chops to the skillet, spoon some sauce over them, and cover the skillet. Reduce the heat to low and let them braise for about 30 minutes until the pork is cooked through and tender.
- Serve: Once done, remove the pork chops from the skillet and place them on a serving platter. Drizzle the mustard cream sauce over the top and serve immediately.
Variations and Tips:
- Add Veggies: Incorporate low-carb vegetables such as mushrooms or spinach into the sauce for added nutrition and flavor.
- Different Mustards: Feel free to experiment with different mustard varieties, like spicy brown or honey (in moderation), to customize the flavor to your liking.
- Marinade: For added flavor, marinate the pork chops in a mixture of olive oil, garlic, and rosemary for a couple of hours before cooking.
- Thickening the Sauce: If you prefer a thicker sauce, you can let it simmer uncovered for a few more minutes until it reduces to your desired consistency.
- Serving Suggestions: Pair this dish with mashed cauliflower or a revitalizing green salad to keep it keto-friendly while making a complete meal.
Thai Basil Beef Stir-Fry

Thai Basil Beef Stir-Fry is a delightful and aromatic dish that combines the rich flavors of beef with the distinct taste of Thai basil. This keto-friendly meal is perfect for anyone looking to enjoy a flavorful dinner while staying low on carbs.
Health-conscious eaters and busy families will appreciate its quick preparation time of around 20-25 minutes, making it an ideal choice for a weeknight dinner that doesn't compromise taste for convenience.
Ingredients:
- 1 lb beef flank steak, thinly sliced
- 3 tablespoons vegetable oil
- 4 cloves garlic, minced
- 2 red Thai chilis, chopped (adjust for spice preference)
- 2 cups fresh Thai basil leaves
- 2 tablespoons soy sauce (or coconut aminos for a gluten-free option)
- 1 tablespoon fish sauce
- 1 tablespoon oyster sauce (or a low-carb alternative)
- 1 teaspoon sweetener (erythritol or monk fruit, optional)
- 1 bell pepper, sliced (optional for added veggies)
- Salt and pepper to taste
- Lime wedges, for serving
Cooking Instructions:
- Prepare the Beef: Confirm the flank steak is sliced against the grain into thin strips for maximum tenderness.
- Heat Oil: In a large skillet or wok, heat the vegetable oil over medium-high heat until shimmering.
- Cook Garlic and Chilis: Add the minced garlic and chopped Thai chilis, stirring for about 30 seconds until fragrant.
- Stir-Fry Beef: Immediately add the sliced beef to the skillet. Stir-fry on high heat for 2-3 minutes until the beef is browned and cooked through.
- Add Sauce: Stir in the soy sauce, fish sauce, oyster sauce, and optional sweetener. Mix well to coat the beef evenly. If using sliced bell pepper, add it at this stage and cook for an additional minute.
- Finish with Basil: Toss in the Thai basil leaves, stirring gently until they wilt, which should take about 1-2 minutes.
- Season: Taste and adjust with salt and pepper as needed. Remove from heat.
- Serve: Plate the stir-fry and garnish with lime wedges on the side for an extra burst of flavor.
Variations and Tips:
- Protein Alternatives: You can swap the flank steak for chicken, shrimp, or tofu for a vegetarian option.
- Vegetable Add-ins: Feel free to add in more non-starchy vegetables like broccoli, zucchini, or snap peas to boost nutrient content.
- Heat Levels: Adjust the number of Thai chilis used based on your spice tolerance. You can also use red pepper flakes for a similar kick.
- Storage: Leftovers can be stored in an airtight container in the fridge for up to 3 days. Reheat gently in a skillet for the best texture.
Enjoy your Thai Basil Beef Stir-Fry as a delicious, low-carb dinner option that's sure to become a household favorite!


