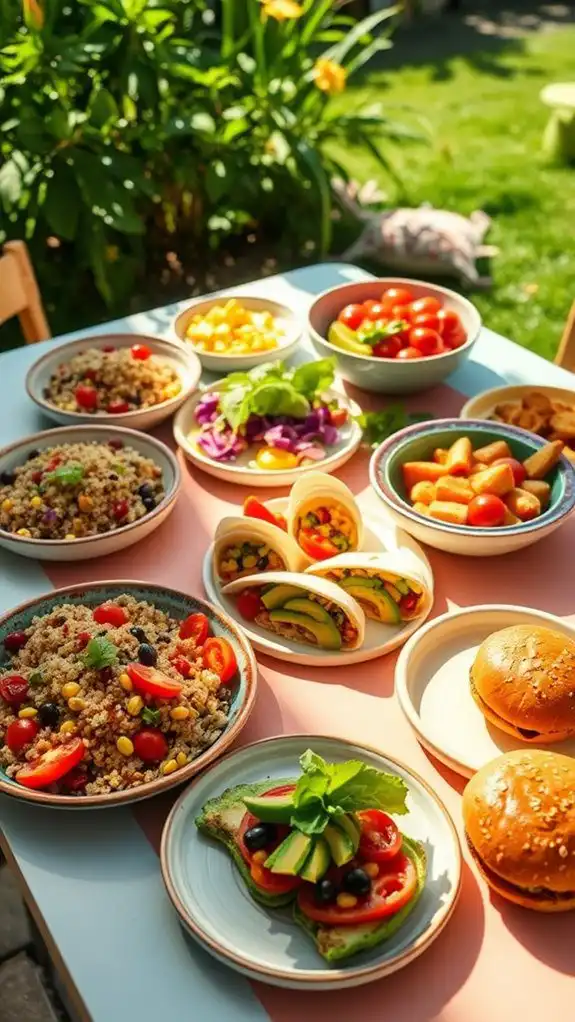
Finding fun, nutritious summer meals for kids can be a breeze. Consider tasty options like Veggie-Packed Pasta Primavera and Cheesy Zucchini and Corn Fritters, both colorful and full of flavor. Mini Pita Pizzas and Creamy Avocado Shrimp Quesadillas add a playful touch to dinner. For something comforting, try Spaghetti Squash with Marinara and Meatballs. Each dish promises not only to please little palates but also to bring the family together. There are even more delightful recipes ahead!
Veggie-Packed Pasta Primavera
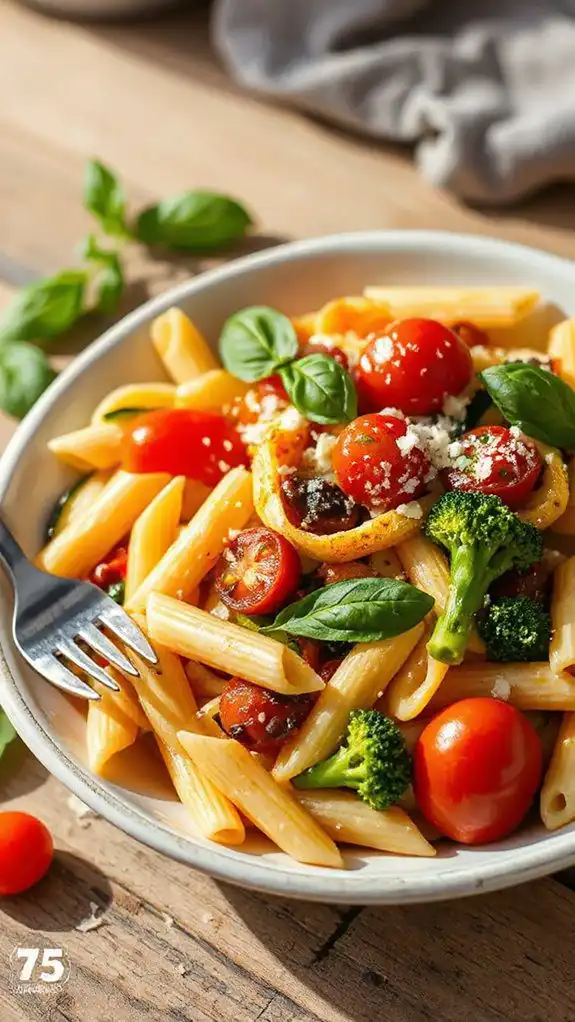
Veggie-Packed Pasta Primavera is a vibrant and nutritious dish that celebrates the freshness of summer vegetables tossed with pasta and a light, zesty sauce. This dish is perfect for families looking to infuse their meals with colorful veggies while keeping dinner wholesome and kid-friendly.
With a preparation time of just about 30 minutes, it’s a quick and delightful option for busy summer evenings.
Ingredients:
- 8 oz pasta (penne or fettuccine)
- 2 tbsp olive oil
- 1 cup bell peppers, chopped (any color)
- 1 cup zucchini, sliced
- 1 cup cherry tomatoes, halved
- 1 cup broccoli florets
- 2 cloves garlic, minced
- 1 tsp dried oregano
- Salt and pepper, to taste
- 1/4 cup grated Parmesan cheese (optional)
- Fresh basil, for garnish
Cooking Steps:
- Cook the pasta according to package instructions in a large pot of salted boiling water. Reserve 1/2 cup of pasta water before draining.
- While the pasta is cooking, heat olive oil in a large skillet over medium heat. Add garlic and sauté for about 30 seconds until fragrant.
- Add the bell peppers, zucchini, broccoli, and cherry tomatoes to the skillet. Sauté for 5-7 minutes, until the vegetables are tender-crisp.
- Add the cooked pasta to the skillet along with the reserved pasta water. Toss everything together until well combined.
- Season with dried oregano, salt, and pepper. Mix well to guarantee the pasta and vegetables are coated.
- Remove from heat and sprinkle with Parmesan cheese if using and fresh basil. Serve warm and enjoy!
Variations & Tips:
- You can substitute any of the vegetables based on what you have on hand. Asparagus, spinach, or snap peas are great alternatives!
- For added protein, consider tossing in cooked chicken, shrimp, or chickpeas.
- Make it vegan by skipping the cheese or using a plant-based cheese alternative.
- For a creamier version, stir in a spoonful of ricotta or a splash of cream before serving.
- Kids can help by washing the vegetables and tossing everything together, making it a fun family dinner prep activity!
Cheesy Zucchini and Corn Fritters

Cheesy Zucchini and Corn Fritters are a delightful summertime dish that kids will love! These savory fritters are packed with fresh zucchini and sweet corn, making them a tasty and nutritious option for family dinners or as a fun appetizer for gatherings.
Easy to prepare and quick to cook, these fritters take about 20 minutes of prep time and 10 minutes of cooking time, perfect for busy summer nights when you want to whip up something delicious but not too labor-intensive.
Ingredients:
- 2 medium zucchinis, grated
- 1 cup corn kernels (fresh, frozen, or canned)
- 1 cup all-purpose flour
- 1 cup shredded cheese (cheddar or mozzarella work well)
- 2 large eggs
- 1/2 teaspoon baking powder
- 1/2 teaspoon garlic powder
- 1/2 teaspoon onion powder
- Salt and pepper to taste
- Olive oil (for frying)
Cooking Steps:
- Begin by preparing the zucchini: Grate the zucchinis using a box grater. Place the grated zucchini in a clean dish towel or cheesecloth, and squeeze out excess moisture to avoid soggy fritters.
- In a large mixing bowl, combine the grated zucchini, corn, flour, shredded cheese, eggs, baking powder, garlic powder, onion powder, salt, and pepper. Mix until all ingredients are well combined.
- Heat a large skillet over medium heat and add a drizzle of olive oil.
- Once the oil is hot, scoop about 1/4 cup of the fritter mixture into the skillet, flattening it slightly with a spatula. Cook for 3-4 minutes on each side or until golden brown and crispy.
- Repeat with remaining batter, adding more oil as needed. Once cooked, transfer the fritters to a paper towel-lined plate to absorb excess oil.
- Serve warm with a dipping sauce of your choice, such as ranch dressing or yogurt.
Variations & Tips:
- For added flavor, mix in some chopped fresh herbs like parsley or cilantro.
- You can replace half of the cheese with crumbled feta for a tangy twist.
- To make these fritters gluten-free, substitute the all-purpose flour with gluten-free flour.
- Serve these fritters with a side of fresh salsa or a simple salad for a complete meal.
Colorful Chicken Tacos With Avocado Crema
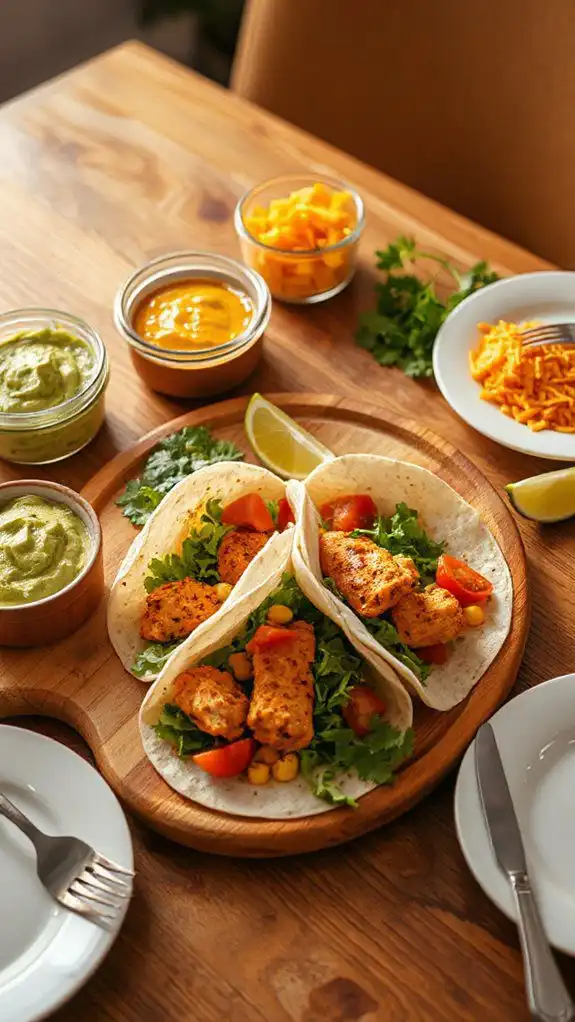
Colorful Chicken Tacos with Avocado Crema are a vibrant and delicious meal that’s perfect for families looking to enjoy a fun and interactive dinner together. This dish features seasoned chicken wrapped in soft tortillas and topped with fresh vegetables and a creamy avocado sauce, making it not only appetizing but also packed with nutrients. The preparation time is approximately 30 minutes, making it an excellent option for a weeknight dinner that will please both adults and kids alike.
Ingredients:
- 1 pound boneless, skinless chicken breasts
- 1 tablespoon olive oil
- 1 teaspoon chili powder
- 1 teaspoon cumin
- 1/2 teaspoon paprika
- Salt and pepper to taste
- 8 small flour or corn tortillas
- 1 cup shredded lettuce
- 1 cup diced tomatoes
- 1/2 cup shredded cheese (cheddar or Mexican blend)
- 1/2 cup corn (canned or frozen)
- 1 avocado
- 1/4 cup sour cream
- Juice of 1 lime
- Fresh cilantro for garnish (optional)
Cooking Instructions:
1. Cook the Chicken: In a medium bowl, mix together the olive oil, chili powder, cumin, paprika, salt, and pepper. Add the chicken breasts and coat them evenly with the spice mixture. Heat a grill pan or skillet over medium heat and add the chicken.
Cook for about 6-7 minutes on each side or until the chicken is cooked through and reaches an internal temperature of 165°F (75°C). Remove from heat and let it rest for a few minutes before slicing.
2. Prepare the Avocado Crema: While the chicken is resting, combine the avocado, sour cream, lime juice, and a pinch of salt in a blender or food processor. Blend until smooth and creamy. If you prefer a thinner consistency, you can add a little water or additional lime juice.
3. Assemble the Tacos: Warm the tortillas slightly in a dry pan or microwave. Place sliced chicken on each tortilla and top with lettuce, tomatoes, corn, shredded cheese, and a generous dollop of avocado crema.
Sprinkle with fresh cilantro if desired.
4. Serve and Enjoy: Serve the tacos immediately with extra lime wedges on the side.
Variations and Tips:
- Protein Alternatives: Substitute chicken with ground turkey, beef, or even a plant-based protein for a different twist.
- Vegetarian Version: Use black beans or grilled veggies as a filling instead of meat.
- Add More Veggies: Feel free to add diced onions, bell peppers, or jalapeños to enhance the flavor and nutrition of the tacos.
- Mild or Spicy: Adjust the level of spices according to your family’s preference for heat.
- Leftover Ideas: Any leftover chicken can be used in salads, wraps, or quesadillas for a quick lunch the next day.
Quinoa and Black Bean Stuffed Peppers
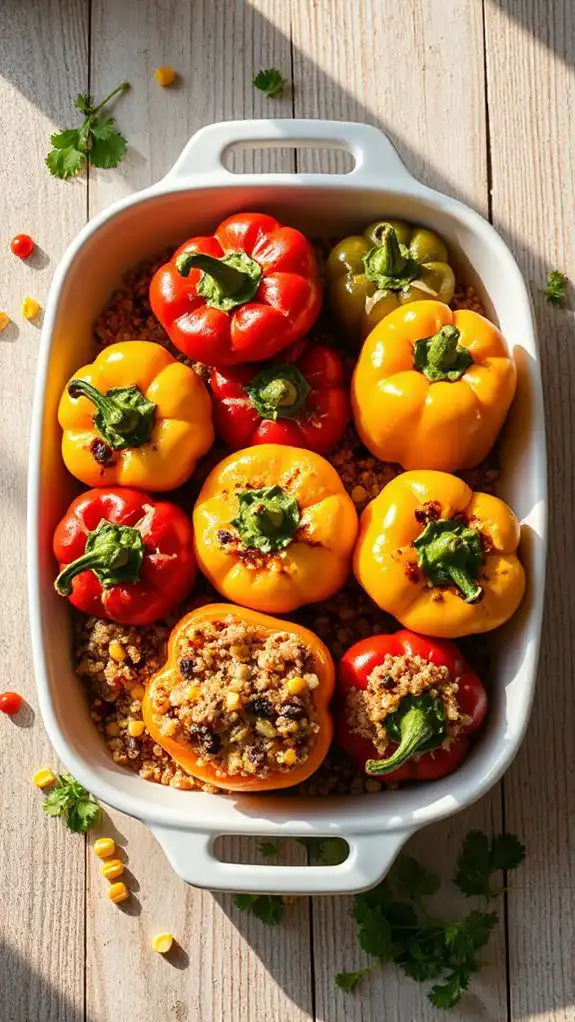
Quinoa and Black Bean Stuffed Peppers are a vibrant and nutritious dish that kids will love! It’s a fantastic way to incorporate vegetables, whole grains, and protein into their meals, making it an ideal option for family dinners during the summer.
This recipe takes about 30 minutes to prepare and another 30 minutes to cook, so you’ll have a wholesome meal ready in under an hour.
Ingredients:
- 4 large bell peppers (any color)
- 1 cup quinoa, rinsed
- 2 cups vegetable broth or water
- 1 can (15 oz) black beans, drained and rinsed
- 1 cup corn (fresh, frozen, or canned)
- 1 cup diced tomatoes (canned or fresh)
- 1 teaspoon cumin
- 1 teaspoon paprika
- 1/2 teaspoon garlic powder
- 1/2 teaspoon onion powder
- Salt and pepper to taste
- 1 cup shredded cheese (cheddar or a blend)
- 2 tablespoons olive oil
- Fresh cilantro or parsley for garnish (optional)
Cooking Instructions:
- Preheat your oven to 375°F (190°C).
- Cut the tops off the bell peppers and remove the seeds and membranes. Brush the outside with olive oil and place them upright in a baking dish.
- In a medium saucepan, combine the quinoa and vegetable broth (or water). Bring to a boil, then reduce heat to low. Cover and let simmer for about 15 minutes, or until the quinoa is fluffy and liquid is absorbed.
- In a large bowl, combine the cooked quinoa, black beans, corn, diced tomatoes, cumin, paprika, garlic powder, onion powder, salt, and pepper. Mix well until thoroughly combined.
- Spoon the quinoa mixture evenly into each bell pepper, pressing down gently to fill them completely. Top each filled pepper with shredded cheese.
- Cover the baking dish with aluminum foil and bake in the preheated oven for 20 minutes. Remove the foil and bake for an additional 10 minutes, or until the peppers are tender and the cheese is melted and bubbly.
- Let the stuffed peppers cool for a few minutes before garnishing with fresh cilantro or parsley. Serve warm.
Variations and Tips:
- For added spice, include diced jalapeños or sprinkle chili powder into the filling mixture.
- You can substitute the black beans with kidney beans or pinto beans, depending on your preference.
- To make it vegetarian, skip the cheese or use dairy-free cheese for a vegan option.
- Add some chopped spinach or kale to the quinoa filling for extra veggies.
- These stuffed peppers can be made ahead of time. Assemble them, cover tightly, and store in the refrigerator for up to 24 hours before baking.
Mini Pita Pizzas With Fresh Toppings
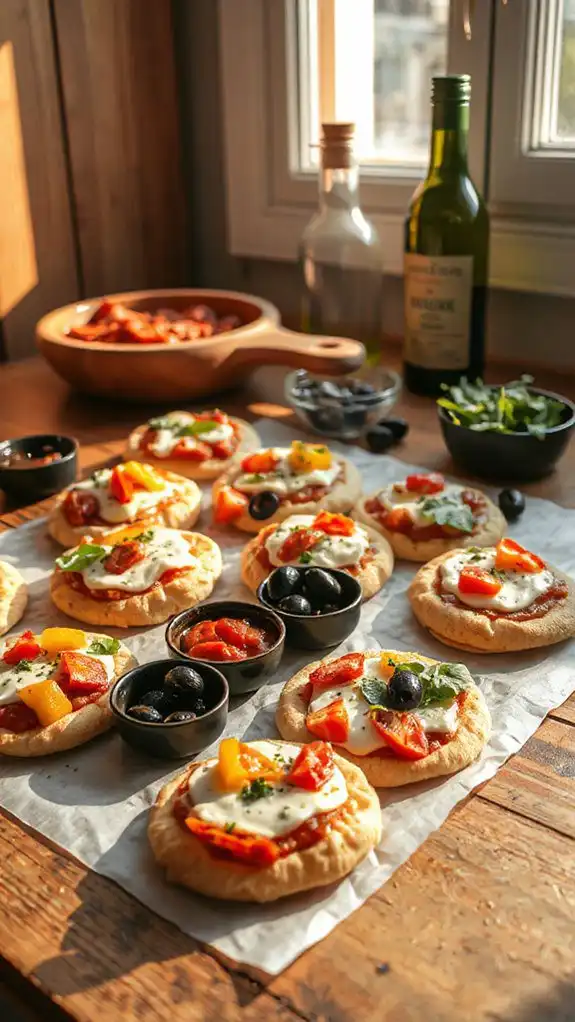
Mini pita pizzas are a delightful and versatile dish that kids will love to make and eat. These bite-sized treats are perfect for summer dinners, playdates, or even as a fun weekend lunch option.
With just a quick preparation time of around 15 minutes, you can have these customizable pizzas on the table in no time. Get ready to assemble mini masterpieces with your favorite toppings!
Ingredients:
- Whole wheat mini pitas
- Pizza sauce or marinara sauce
- Shredded mozzarella cheese
- Pepperoni slices (or other preferred toppings)
- Sliced bell peppers
- Sliced black olives
- Fresh basil leaves
- Olive oil
- Italian seasoning (optional)
Cooking Steps:
- Preheat your oven to 400°F (200°C).
- Place the mini pitas on a baking sheet lined with parchment paper.
- Spread a thin layer of pizza sauce or marinara sauce on top of each pita.
- Evenly sprinkle shredded mozzarella cheese over the sauce.
- Add your choice of toppings such as pepperoni, bell peppers, olives, or any favorite fresh veggies.
- Drizzle a little olive oil over the top for added flavor (optional).
- Sprinkle a pinch of Italian seasoning over the pizzas for a herby touch (optional).
- Bake in the preheated oven for about 8-10 minutes, or until the cheese is melted and bubbly.
- Remove from the oven and let cool slightly before serving. Garnish with fresh basil leaves.
Variations and Tips:
- Try using different types of cheese such as cheddar or feta for unique flavor profiles.
- For a healthier version, add spinach, arugula, or other leafy greens as toppings.
- If your kids love cooking, let them create their own mini pizza masterpieces with assorted toppings set out for them to choose from.
- Make it a fun activity by hosting a pizza-making party where kids can compete to create the most exciting mini pizza!
- Store leftovers in an airtight container and reheat in the oven for a quick snack later.
Enjoy the creative process of making these mini pita pizzas, and watch as your kids enjoy their tasty creations!
Sweet Potato and Chickpea Buddha Bowls
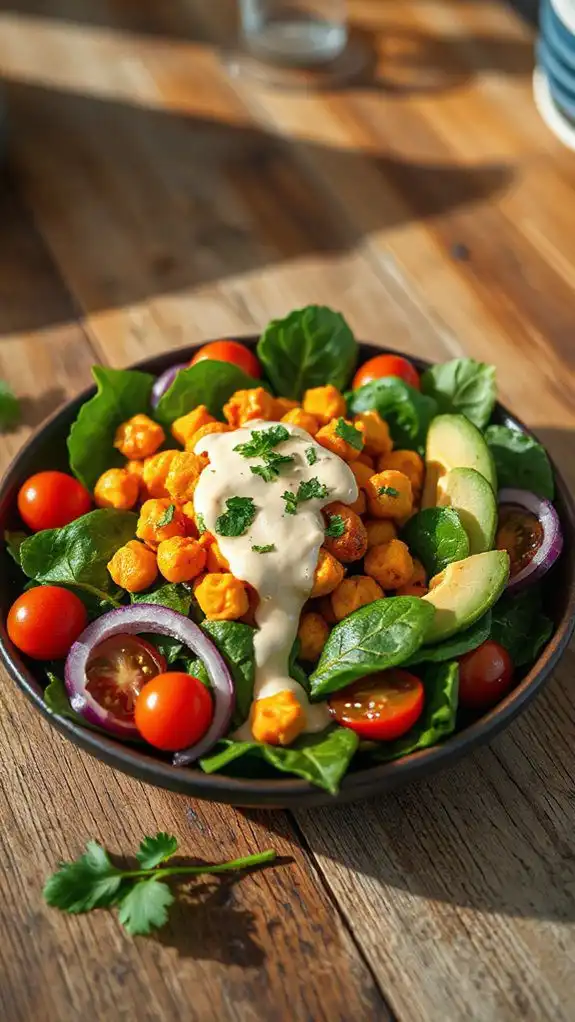
Sweet Potato and Chickpea Buddha Bowls are a vibrant, nutritious dish perfect for families seeking a healthy summer meal that appeals to kids and adults alike. Packed with protein, fiber, and colorful vegetables, these bowls are not only delicious but also visually exciting, making them a hit at the dinner table.
The preparation time for this dish is approximately 30-40 minutes, making it a quick and easy option for a busy summer evening.
Ingredients:
- 1 large sweet potato, peeled and diced
- 1 can (15 oz) chickpeas, drained and rinsed
- 2 tablespoons olive oil
- 1 teaspoon smoked paprika
- 1 teaspoon garlic powder
- Salt and pepper to taste
- 4 cups spinach or mixed greens
- 1 avocado, sliced
- 1 cup cherry tomatoes, halved
- 1/4 cup red onion, thinly sliced
- 1/4 cup tahini or a squeeze of lemon juice for dressing
- Fresh herbs for garnish (e.g., parsley or cilantro)
Cooking Steps:
- Preheat your oven to 400°F (200°C).
- In a large bowl, toss the diced sweet potato and chickpeas with olive oil, smoked paprika, garlic powder, salt, and pepper until coated evenly.
- Spread the sweet potato and chickpea mixture on a baking sheet in a single layer. Roast in the preheated oven for 25-30 minutes or until the sweet potatoes are tender and slightly crispy. Stir halfway through for even cooking.
- While the mixture is roasting, prepare the base by arranging the spinach or mixed greens in large bowls.
- Once the sweet potatoes and chickpeas are done roasting, divide them among the bowls on top of the greens.
- Top each bowl with avocado slices, cherry tomatoes, red onion, and a drizzle of tahini or a squeeze of lemon juice.
- Garnish with fresh herbs, if desired. Serve warm and enjoy!
Variations and Tips:
- Feel free to substitute the spinach with kale or any leafy green of your choice.
- To add extra crunch, consider sprinkling nuts or seeds, such as pumpkin seeds or sunflower seeds, on top.
- For a more filling option, you can add cooked quinoa or brown rice as a base.
- Experiment with different spices, such as curry powder or cumin, to customize the flavor profile.
- Store any leftovers in an airtight container in the fridge for up to 3 days; reheat in the microwave or enjoy cold.
Rainbow Vegetable Stir-Fry With Noodles
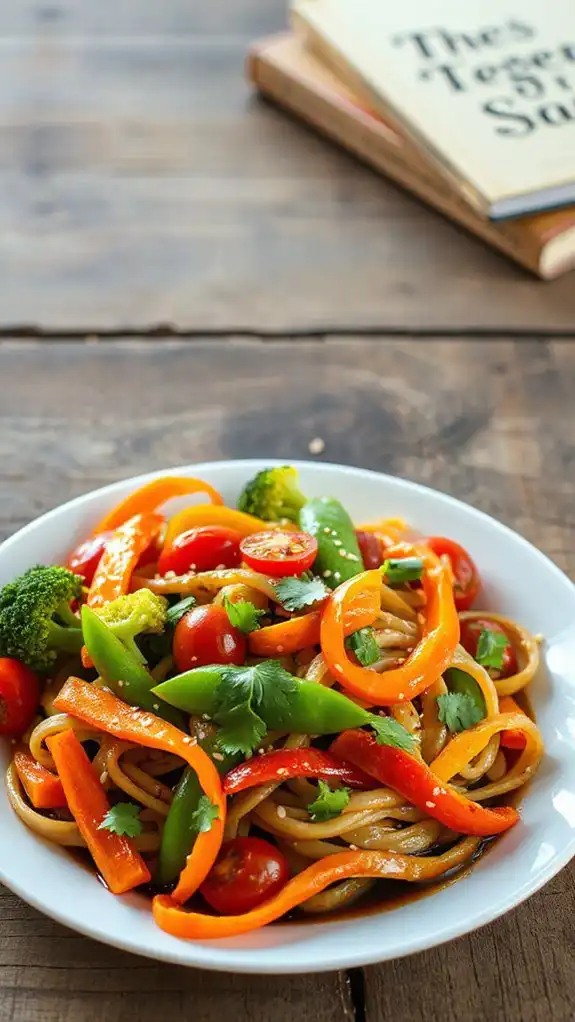
Rainbow Vegetable Stir-Fry With Noodles is a vibrant and colorful dish that’s not only visually appealing but also packed with nutrients, making it an ideal summer dinner for kids and families.
This quick and easy recipe takes about 30 minutes to prepare, ensuring that even on busy summer evenings, you can whip up a wholesome meal that kids will love. The combination of fresh vegetables and savory noodles provides a delightful burst of flavor that’s sure to keep everyone asking for seconds!
Ingredients:
- 8 oz egg noodles or rice noodles
- 2 tablespoons sesame oil
- 1 bell pepper (any color), sliced
- 1 cup broccoli florets
- 1 cup snap peas or green beans
- 1 medium carrot, julienned
- 1 cup cherry tomatoes, halved
- 2 cloves garlic, minced
- 2 tablespoons soy sauce
- 1 tablespoon oyster sauce (optional)
- 1 teaspoon ginger, grated
- Sesame seeds for garnish
- Fresh cilantro or green onions for garnish (optional)
Cooking Steps:
- Cook the Noodles: Bring a large pot of salted water to a boil. Add the noodles and cook according to package instructions until al dente. Drain and set aside.
- Sauté the Vegetables: In a large skillet or wok, heat the sesame oil over medium-high heat. Add the minced garlic and grated ginger, cooking for about 30 seconds until fragrant.
- Add the Veggies: Toss in the bell pepper, broccoli, snap peas, and carrot. Stir-fry for about 5–7 minutes, or until the vegetables are tender but still crisp.
- Incorporate Noodles: Add the cooked noodles to the skillet, along with the soy sauce and oyster sauce (if using). Toss everything together until well combined and heated through, about 2–3 minutes.
- Serve: Remove from heat, garnish with sesame seeds and optional cilantro or green onions, and serve warm.
Variations and Tips:
- Protein Add-ins: For added protein, consider adding tofu, chicken, shrimp, or beef. Cook these separately and then toss them in before serving.
- Vegetable Swaps: Feel free to use any seasonal vegetables you have on hand, such as zucchini, corn, or spinach, to make your stir-fry even more diverse.
- Make it Spicy: If your kids enjoy a bit of heat, add a pinch of red pepper flakes or a drizzle of sriracha sauce during cooking.
- Meal Prep: This dish is great for meal prep! You can chop the veggies in advance and store them in the fridge for up to 3 days, making dinner a breeze on busy nights.
Homemade Fish Sticks With Tartar Sauce
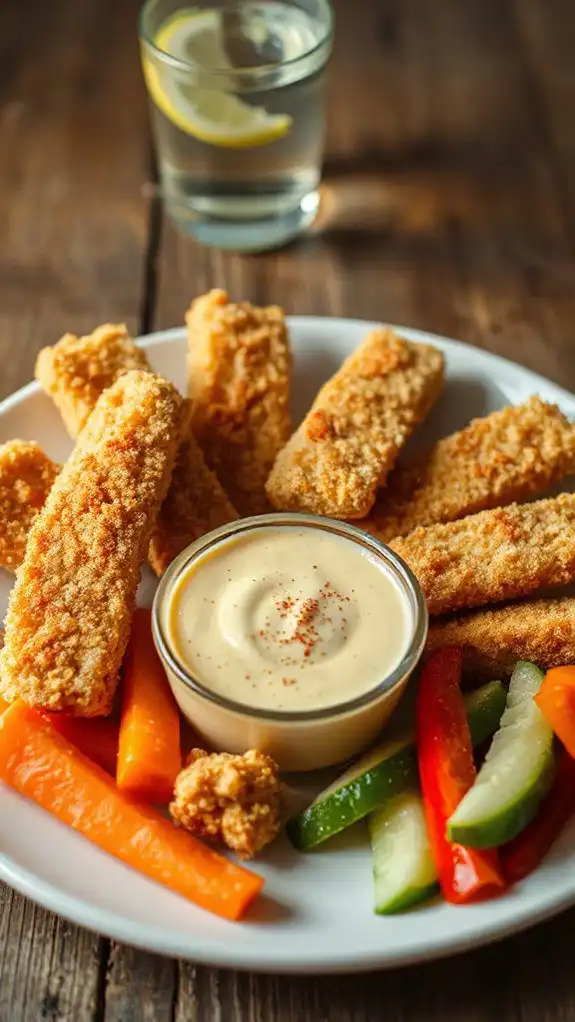
Homemade fish sticks with tartar sauce are a fun and healthy twist on a classic favorite that kids love! These crunchy, golden fish sticks are baked instead of fried, making them a fantastic option for a quick weeknight dinner that’s both nutritious and delicious. Preparation time is around 30 minutes, which includes 10 minutes of prep and 20 minutes of cooking.
Ingredients:
- 1 pound of white fish fillets (such as cod or haddock)
- 1/2 cup all-purpose flour
- 2 large eggs
- 1 cup breadcrumbs (preferably whole wheat or panko)
- 1 teaspoon garlic powder
- 1 teaspoon paprika
- 1/2 teaspoon salt
- 1/4 teaspoon black pepper
- Olive oil spray
Tartar Sauce:
- 1/2 cup mayonnaise
- 1 tablespoon dill pickle relish
- 1 teaspoon Dijon mustard
- 1 teaspoon lemon juice
- Salt and pepper, to taste
Cooking Instructions:
- Preheat the oven to 400°F (200°C) and line a baking sheet with parchment paper.
- Cut the fish fillets into equal-sized strips, about 1 inch wide. Pat them dry with a paper towel.
- Prepare three shallow bowls. In the first, place the flour. In the second, beat the eggs. In the third, mix the breadcrumbs with garlic powder, paprika, salt, and black pepper.
- Dredge each fish strip in the flour, shaking off any excess. Dip into the beaten eggs, then coat in the breadcrumb mixture, pressing gently to adhere.
- Place the coated fish sticks onto the prepared baking sheet. Lightly spray them with olive oil for extra crunch.
- Bake in the preheated oven for 15-20 minutes, or until golden brown and cooked through, flipping halfway for even cooking.
Tartar Sauce Instructions:
- In a small bowl, combine mayonnaise, dill pickle relish, Dijon mustard, and lemon juice. Mix well.
- Season with salt and pepper to taste.
Variations and Tips:
- Fish Options: You can use other types of fish like tilapia or salmon, depending on your family’s preference.
- Spice It Up: Add some cayenne pepper or chili powder to the breadcrumb mixture for a spicy kick.
- Make it Healthier: Substitute part of the breadcrumbs with crushed nuts or seeds to add extra nutrition.
- Oven Method: For a more hands-off approach, toss the coated fish sticks in the air fryer for about 12-15 minutes at 400°F (200°C) until crispy.
- Serving Suggestions: Serve the fish sticks with a side of fresh veggies, a green salad, or sweet potato fries for a complete meal.
Turkey and Spinach Lettuce Wraps
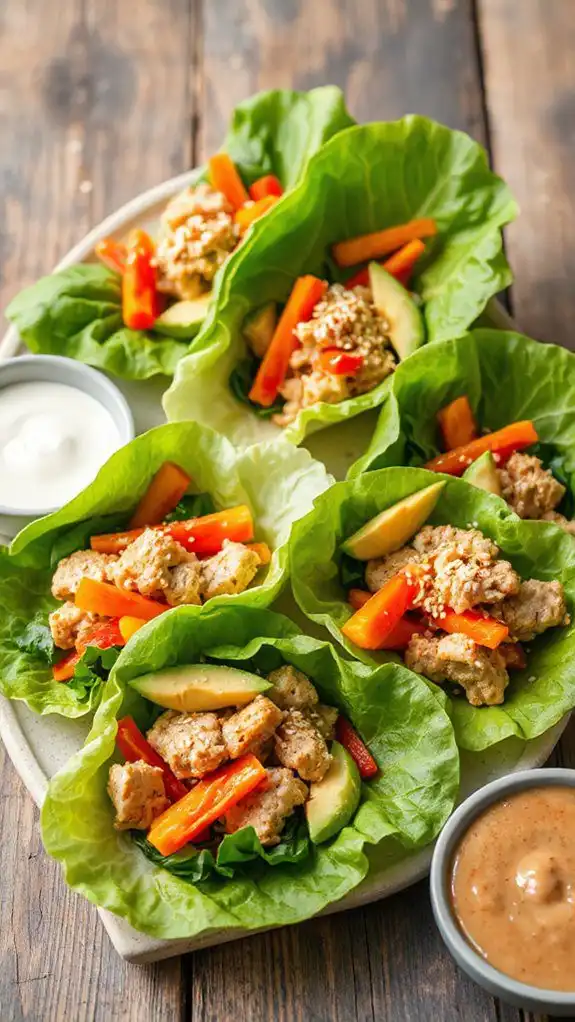
Turkey and Spinach Lettuce Wraps are a fantastic summer dinner option that is both nutritious and fun to eat! These wraps are perfect for kids and adults alike, as they provide a delightful crunch while keeping the meal light and rejuvenating. With a preparation time of only about 20 minutes, you can whip these up quickly, making them ideal for busy weeknights or casual dinners with family and friends.
Ingredients:
- 1 pound ground turkey
- 2 cups fresh spinach, chopped
- 1/2 bell pepper, diced
- 1/2 onion, diced
- 2 cloves garlic, minced
- 1 tablespoon soy sauce
- 1 teaspoon sesame oil
- Salt and pepper to taste
- 1 head of romaine lettuce or butter lettuce, leaves separated
- Optional toppings: shredded carrots, sliced cucumbers, sesame seeds, or avocado
Directions:
- In a large skillet, heat sesame oil over medium heat. Add minced garlic and diced onion; sauté until the onion is translucent.
- Add the ground turkey to the skillet and cook until browned. Break it apart with a spoon, making sure it’s cooked through.
- Stir in the chopped spinach and diced bell pepper, cooking until the spinach is wilted and the bell pepper is tender, about 3 minutes.
- Pour in the soy sauce, and season with salt and pepper to taste. Mix well and let cook for another minute to meld the flavors.
- Remove the pan from heat and let the turkey mixture cool slightly.
- To assemble the wraps, take a lettuce leaf, scoop a generous spoonful of the turkey mixture into the center, and add your choice of optional toppings.
Variations and Tips:
- Variations: You can substitute ground turkey with ground chicken or beef based on your preference. For a vegetarian option, replace the meat with cooked quinoa or a plant-based protein.
- Extra Flavor: Consider adding spices such as ginger or crushed red pepper for a bit of heat.
- Dip Options: Serve the wraps with a side of peanut sauce or a yogurt-based dip for added flavor.
- Make-Ahead: You can prepare the turkey mixture ahead of time and store it in the refrigerator for up to three days. Just reheat and serve with fresh lettuce wraps when ready to eat.
- Fun Shapes: Use whole grain tortillas instead of lettuce for a different presentation that kids might enjoy more.
Caprese Pasta Salad With Pesto
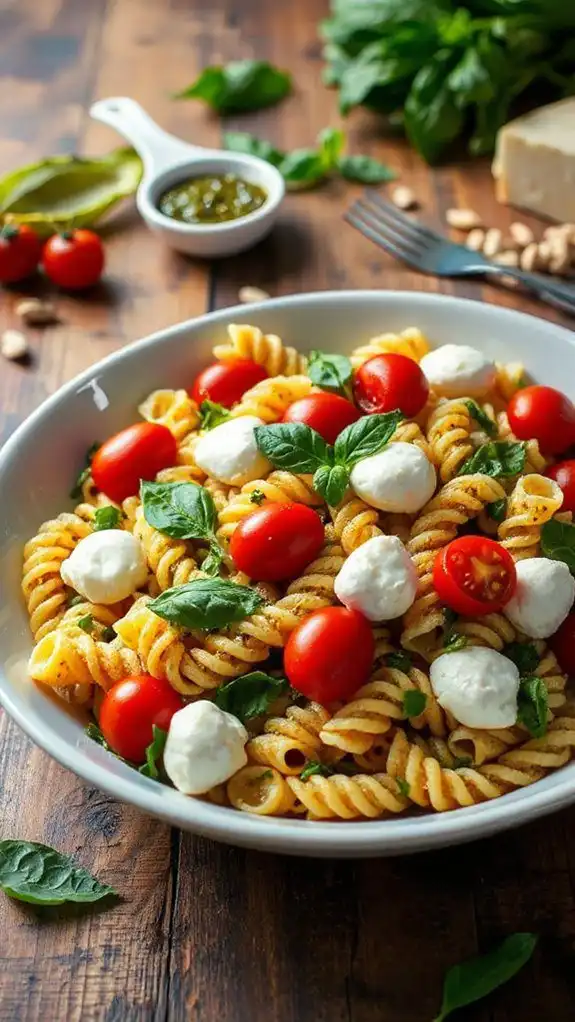
Caprese Pasta Salad with Pesto is a delightful and vibrant summer dish that perfectly combines the freshness of basil, the creaminess of mozzarella, and the sweetness of tomatoes, all tossed with al dente pasta and a rich, flavorful pesto.
This dish is ideal for families looking for a quick, nutritious meal during the hot summer months, as it can be served as a main dish or a side. With a preparation time of just 20 minutes, it’s perfect for busy weeknights or potluck gatherings.
Ingredients:
- 8 oz (about 2 cups) pasta (such as fusilli or penne)
- 1 cup cherry tomatoes, halved
- 8 oz fresh mozzarella balls, halved or cubed
- 1/2 cup fresh basil leaves, chopped
- 1/4 cup pesto (store-bought or homemade)
- 2 tablespoons olive oil
- Salt and pepper to taste
- Fresh basil leaves for garnish
Cooking Steps:
- Boil a large pot of salted water over high heat. Add the pasta and cook according to the package instructions until al dente. Drain and rinse under cold water to stop the cooking process; set aside.
- In a large mixing bowl, combine the cooked pasta, halved cherry tomatoes, mozzarella balls, and chopped basil.
- Drizzle the pesto and olive oil over the pasta salad. Gently toss everything together until evenly coated.
- Season with salt and pepper to taste.
- Garnish with extra basil leaves before serving.
Variations and Tips:
- For added protein, consider mixing in grilled chicken or chickpeas.
- Substitute the pasta with zoodles (zucchini noodles) for a gluten-free and lower-carb option.
- Feel free to incorporate other veggies like red onion, spinach, or bell peppers for extra color and crunch.
- Homemade pesto can be made easily by blending fresh basil, garlic, pine nuts, Parmesan cheese, and olive oil in a food processor.
- This pasta salad can be made ahead of time and stored in the fridge for up to 3 days; just toss again before serving to refresh the flavors.
Grilled Fruit and Chicken Skewers
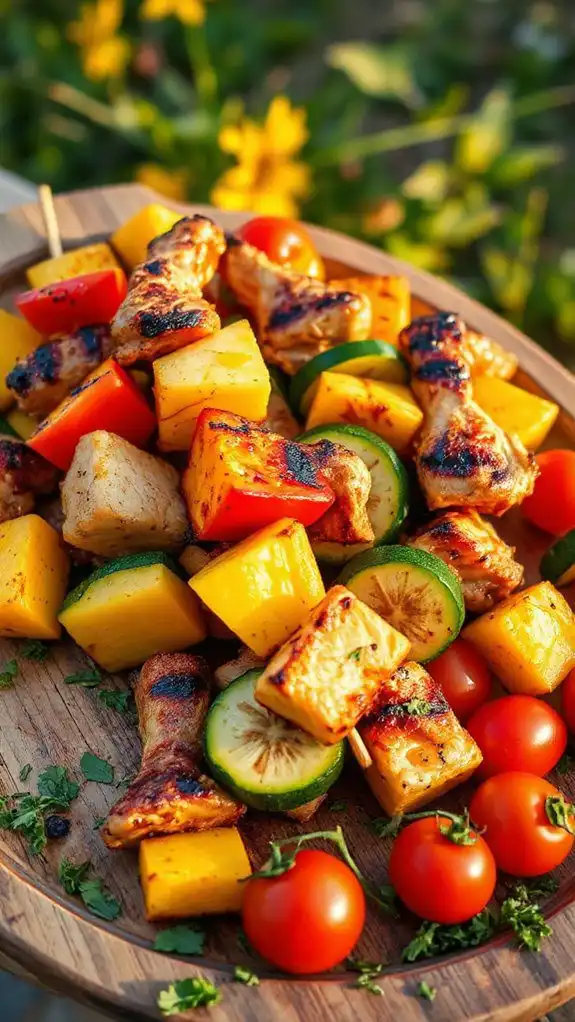
Grilled Fruit and Chicken Skewers are a fun and colorful dish perfect for summer evenings, especially for families with children. This dish combines juicy grilled chicken and a variety of sweet fruits, making it not only delicious but also visually appealing.
Ideal for backyard barbecues or a simple family dinner, these skewers take just 20 minutes to prepare and cook, allowing for plenty of time to enjoy the outdoors.
Ingredients:
- 1 pound chicken breast, cut into bite-sized pieces
- 1 cup pineapple chunks
- 1 cup bell pepper, cut into squares
- 1 cup zucchini, sliced into rounds
- 1 cup cherry tomatoes
- 2 tablespoons olive oil
- 1 teaspoon garlic powder
- 1 teaspoon paprika
- Salt and pepper to taste
- Skewers (wooden or metal)
Cooking Steps:
- Prepare the Skewers: If using wooden skewers, soak them in water for 30 minutes to prevent burning on the grill.
- Marinate the Chicken: In a bowl, combine the chicken pieces with olive oil, garlic powder, paprika, salt, and pepper. Toss to coat evenly and let marinate for 10 minutes.
- Assemble the Skewers: Thread the marinated chicken and pieces of fruit and vegetables onto the skewers, alternating between chicken, pineapple, bell pepper, zucchini, and cherry tomatoes.
- Preheat the Grill: Heat the grill to medium-high.
- Grill the Skewers: Place the skewers on the grill and cook for about 10-12 minutes, turning occasionally, until the chicken is cooked through and has grill marks.
- Serve: Remove the skewers from the grill and let them cool slightly before serving. Enjoy with your choice of dipping sauce or a side salad.
Variations and Tips:
- Fruit Options: Feel free to experiment with other fruits like peaches, strawberries, or mangoes for different flavors.
- Vegetable Options: Other veggies such as onion, mushrooms, or asparagus can also be added for more variety.
- Make it Kid-Friendly: Let kids help assemble their own skewers to encourage them to try different fruits and veggies.
- Condiments: Serve with a honey mustard dip or a yogurt-based sauce for added flavor.
- Make Ahead: Marinate the chicken the night before for a quick dinner option.
Creamy Avocado and Shrimp Quesadillas
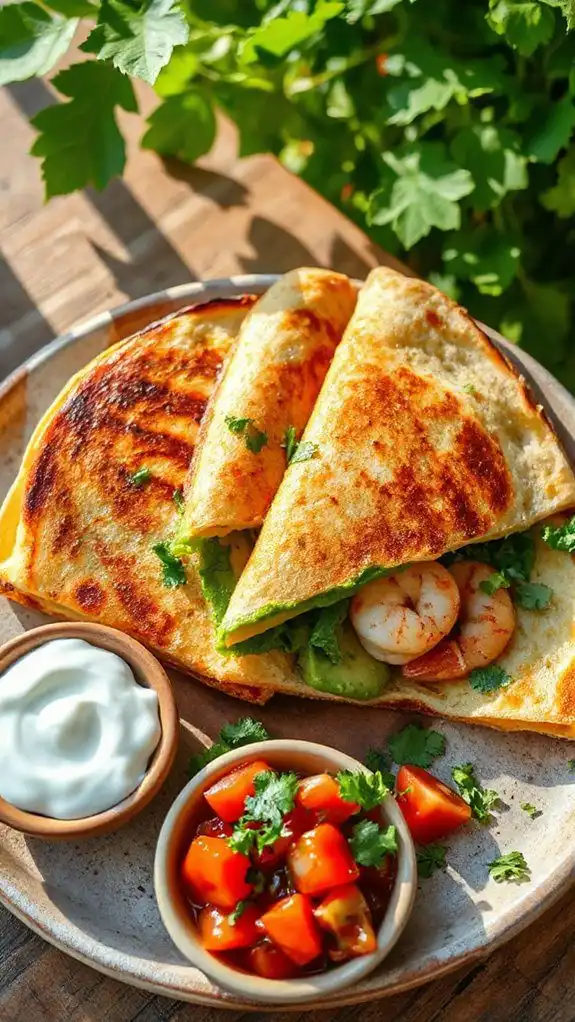
Creamy Avocado and Shrimp Quesadillas are a delicious and kid-friendly dish that combines the creamy texture of avocado with savory shrimp and melted cheese, all tucked between crispy tortillas.
This recipe is perfect for summertime family dinners, and it can be cooked in just 20 minutes! It’s a wonderful way to introduce seafood to kids who may be picky eaters, providing a nutritious and fun meal.
Ingredients:
- 1 pound shrimp, peeled and deveined
- 2 ripe avocados, mashed
- 1 cup shredded cheese (such as cheddar or mozzarella)
- 4 large flour tortillas
- 1 tablespoon olive oil
- 1 teaspoon garlic powder
- Salt and pepper to taste
- Optional toppings: sour cream, salsa, or fresh cilantro
Cooking Steps:
- In a medium bowl, toss the shrimp with olive oil, garlic powder, salt, and pepper.
- Heat a non-stick skillet over medium heat. Once hot, add the seasoned shrimp and cook for about 2-3 minutes on each side or until they turn pink and are cooked through. Remove from heat.
- In the same skillet, place one tortilla and evenly spread half of the mashed avocado on one half of the tortilla.
- Layer half of the cooked shrimp and half of the shredded cheese on top of the avocado. Fold the other half of the tortilla over to create a half-moon shape.
- Cook for 2-3 minutes on each side or until the tortilla is golden brown and the cheese has melted. Repeat the process with the second tortilla.
- Slice the quesadillas into wedges and serve warm with your choice of toppings like sour cream, salsa, or fresh cilantro.
Variations and Tips:
- Add Veggies: Include some sautéed bell peppers, onions, or spinach for added nutrition and flavor.
- Spicy Kick: For a little heat, add diced jalapeños or sprinkle some chili powder on the shrimp before cooking.
- Alternative Proteins: If shrimp isn’t a favorite, try chicken, turkey, or black beans as substitutes.
- Make Ahead: You can prepare the shrimp and avocado in advance, then quickly assemble and cook the quesadillas right before serving for a hassle-free meal.
- Cooking Method: For a healthier option, consider grilling the quesadillas instead of frying them, using a grill pan or outdoor grill.
Savory Breakfast-for-Dinner Egg Muffins
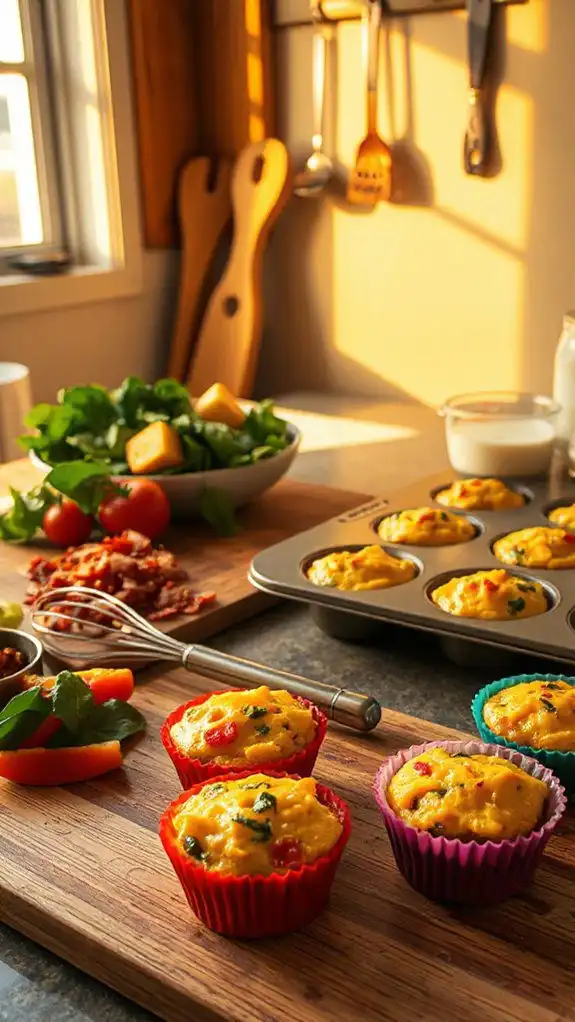
Savory Breakfast-for-Dinner Egg Muffins are a fun and versatile dish that kids will love, making them perfect for a family-friendly summer dinner or even breakfast for dinner theme nights.
These muffins are packed with protein and can be customized with various vegetables and cheeses according to your preferences. The preparation time is quick, taking about 10 minutes to prep and 20 minutes to bake, so you can have a delicious meal ready in no time!
Ingredients:
- 6 large eggs
- 1/2 cup milk
- 1 cup diced vegetables (e.g., bell peppers, spinach, onions, tomatoes)
- 1 cup shredded cheese (e.g., cheddar, mozzarella)
- 1/2 cup cooked and crumbled bacon or sausage (optional)
- Salt and pepper to taste
- Cooking spray or muffin liners
Cooking Steps:
- Preheat the oven to 375°F (190°C).
- Grease a muffin tin with cooking spray or line with muffin liners to prevent sticking.
- In a large mixing bowl, whisk the eggs and milk together until well combined.
- Stir in the diced vegetables, cheese, and cooked meat (if using). Season with salt and pepper to taste.
- Pour the egg mixture evenly into the muffin tin, filling each cup about 3/4 full.
- Bake in the preheated oven for 18-20 minutes, or until the egg muffins are puffed and a toothpick inserted into the center comes out clean.
- Allow the muffins to cool for a few minutes before removing them from the tin.
Variations and Tips:
- Feel free to swap the vegetables based on seasonal availability or your children’s preferences. Zucchini, broccoli, or mushrooms work well too.
- Experiment with different cheeses to find your family’s favorite flavor combinations.
- You can freeze leftovers by wrapping them individually in plastic wrap and storing them in an airtight container. Simply reheat in the microwave for a quick meal.
- Add herbs like parsley or chives for an extra flavor boost.
- You can increase the protein content by adding beans or swapping in egg whites for a lighter option.
Spaghetti Squash With Marinara and Meatballs
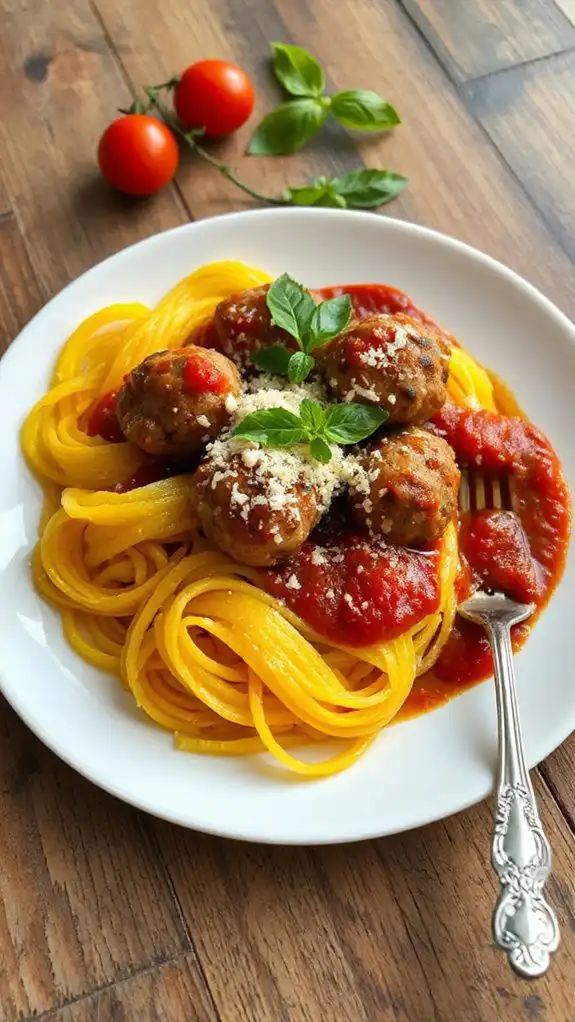
Spaghetti Squash with Marinara and Meatballs is a delightful and nutritious dish that offers a fun twist on traditional spaghetti, making it perfect for families looking to enjoy a healthy meal together during the summer. The dish features roasted spaghetti squash, which serves as a low-carb alternative to pasta, topped with a savory marinara sauce and hearty meatballs.
With a total preparation and cooking time of about 45 minutes, this meal is simple enough for kids to help with the preparation, allowing for a rewarding cooking experience that they can participate in.
Ingredients:
- 1 medium spaghetti squash
- 2 cups marinara sauce (store-bought or homemade)
- 1 pound ground beef or turkey (or plant-based substitute)
- 1/2 cup breadcrumbs (or gluten-free alternative)
- 1/4 cup grated Parmesan cheese (optional)
- 1/4 cup fresh parsley, chopped (or 1 tablespoon dried parsley)
- 1 teaspoon garlic powder
- 1 teaspoon onion powder
- Salt and pepper, to taste
- Olive oil, for drizzling
- Extra grated cheese for topping (optional)
Cooking Steps:
1. Preheat Oven: Preheat your oven to 400°F (200°C).
2. Prepare the Spaghetti Squash: Carefully slice the spaghetti squash in half lengthwise. Remove the seeds and drizzle the inside with olive oil, then sprinkle with salt and pepper.
Place the squash halves cut-side down on a baking sheet lined with parchment paper.
3. Roast the Spaghetti Squash: Bake the squash in the preheated oven for about 30-40 minutes, or until the flesh is tender and can be easily scraped with a fork to create spaghetti-like strands.
4. Make the Meatballs: In a large mixing bowl, combine the ground beef or turkey, breadcrumbs, Parmesan cheese (if using), parsley, garlic powder, onion powder, salt, and pepper.
Mix until just combined, being careful not to overwork the meat. Form the mixture into small meatballs, about 1 inch in diameter.
5. Cook the Meatballs: In a large skillet over medium heat, add olive oil and cook the meatballs for about 8-10 minutes, turning occasionally until they are browned on all sides and cooked through.
6. Heat the Marinara Sauce: In a separate saucepan, heat the marinara sauce over medium heat until warmed through.
7. Assemble the Dish: Once the spaghetti squash is done roasting, use a fork to scrape the insides and create spaghetti strands.
Place the strands in a serving dish, top with the meatballs, and pour the warm marinara sauce over the top. Sprinkle with additional grated cheese, if desired.
8. Serve and Enjoy: This dish can be served immediately and is best enjoyed warm.
Variations and Tips:
- Vegetarian Option: Substitute the meatballs with plant-based meat products or chickpea meatballs for a vegetarian dish.
- Extra Veggies: You can mix in sautéed vegetables such as bell peppers, zucchini, or spinach into the marinara sauce for added nutrition.
- Make Ahead: Both the meatballs and marinara sauce can be prepared in advance and refrigerated until ready to use—simply heat when needed.
- Leftovers: Store any leftovers in an airtight container in the refrigerator for up to 3 days and enjoy as a quick lunch or dinner option.
This kid-friendly meal not only pleases picky eaters but also encourages healthier eating habits with its wholesome ingredients. Enjoy your spaghetti squash adventure!
Tropical Rice Bowls With Pineapple and Grilled Chicken
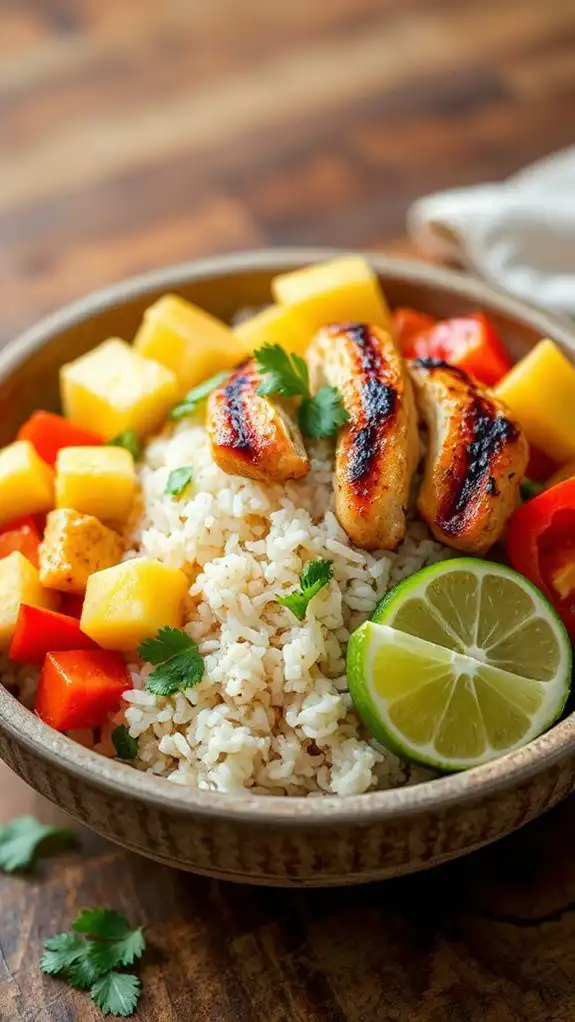
Tropical Rice Bowls with Pineapple and Grilled Chicken is a vibrant and flavorful dish that brings a taste of the islands to your dinner table. Perfect for warm summer evenings, this meal is not only healthy but also kid-friendly, making it an excellent choice for family dinners. The dish can be prepared in about 30 minutes, making it a quick and satisfying option after a busy day.
Ingredients:
- 2 cups cooked jasmine or basmati rice
- 2 boneless, skinless chicken breasts
- 1 tablespoon olive oil
- Salt and pepper to taste
- 1 teaspoon garlic powder
- 1 teaspoon paprika
- 1 cup pineapple chunks (fresh or canned)
- 1 red bell pepper, diced
- 1 cup sliced cucumbers
- 1 avocado, sliced
- Fresh cilantro, chopped (for garnish)
- Lime wedges (for serving)
Cooking Steps:
- Marinate the Chicken: In a bowl, combine olive oil, salt, pepper, garlic powder, and paprika. Coat the chicken breasts with this mixture and let marinate for about 10 minutes.
- Grill the Chicken: Preheat a grill or grill pan over medium-high heat. Cook the marinated chicken for about 6-7 minutes on each side, or until fully cooked and juices run clear. Remove from heat and let rest for a few minutes before slicing.
- Prepare the Rice: While the chicken is grilling, prepare the rice according to package instructions if not already cooked. Fluff the rice with a fork once cooked and set aside.
- Assemble the Bowls: In each bowl, add a serving of rice as the base, then layer on the sliced grilled chicken, pineapple chunks, diced red bell pepper, and cucumber slices.
- Add Toppings: Top each bowl with avocado slices and a sprinkle of fresh cilantro. Serve with lime wedges on the side for added zest.
Variations and Tips:
- Vegetarian Option: Swap out the chicken for grilled tofu or chickpeas for a delicious vegetarian alternative.
- Flavor Boost: Add your favorite teriyaki sauce or a drizzle of sesame oil for extra flavor.
- Extra Veggies: Feel free to incorporate additional veggies like corn, shredded carrots, or snap peas for more color and nutrition.
- Meal Prep: This dish is great for meal prep; prepare the components ahead of time and assemble when ready to eat. The rice and chicken can be stored in the refrigerator for up to 4 days.
- Safety Tip: Always verify chicken is cooked to an internal temperature of 165°F for safe consumption.