Low-carb dinner recipes offer flavorful and satisfying options for those looking to reduce carbohydrate intake. Dishes like zucchini noodles with pesto, cauliflower rice stir-fry, and lemon garlic butter shrimp provide delicious alternatives. Stuffed bell peppers and beef and broccoli stir-fry add variety, while garlic herb roasted cauliflower and cheesy buffalo chicken casserole guarantee hearty meals. Grilled lemon herb portobello mushrooms and shrimp avocado salad bring invigorating flavors. Exploring these recipes can reveal even more culinary delights suited for every palate.
Zucchini Noodles With Pesto and Cherry Tomatoes

Zucchini Noodles with Pesto and Cherry Tomatoes is a vibrant, low-carb dish that makes a perfect light dinner for anyone looking to reduce their carbohydrate intake or simply enjoy a fresh, healthy meal.
This vegetarian dish comes together in about 20 minutes, making it an excellent choice for busy weeknight dinners or a quick meal prep option. The combination of fresh zucchini noodles, aromatic pesto, and juicy cherry tomatoes offers a delightful and nutritious meal that's both satisfying and bursting with flavor.
Ingredients:
- 4 medium zucchini
- 1 cup cherry tomatoes, halved
- 1 cup fresh basil pesto (store-bought or homemade)
- 2 tablespoons olive oil
- Salt and pepper to taste
- Grated Parmesan cheese (optional, for serving)
- Pine nuts (optional, for garnish)
Cooking Instructions:
- Prepare the Zucchini Noodles: Using a spiralizer, julienne peeler, or mandoline, make zucchini noodles from the four medium zucchinis. If you don't have the tools, it's fine to slice the zucchini into thin strips or ribbons.
- Sauté the Noodles: In a large skillet, heat the olive oil over medium heat. Add the zucchini noodles and sauté for about 3-4 minutes until just tender but still slightly crunchy. Season with salt and pepper to taste.
- Add the Cherry Tomatoes: Once the zucchini noodles are cooked, add the halved cherry tomatoes to the skillet. Sauté for an additional 2-3 minutes until the tomatoes soften.
- Mix in the Pesto: Remove the skillet from heat and stir in the basil pesto until the noodles and tomatoes are well coated.
- Serve: Divide the zucchini noodles onto plates. If desired, sprinkle with grated Parmesan cheese and garnish with pine nuts for added crunch. Enjoy immediately!
Variations & Tips:
- Protein Boost: Add grilled chicken, shrimp, or chickpeas for extra protein to make it a more filling dish.
- Vegetable Add-Ons: Consider including other vegetables like bell peppers, spinach, or mushrooms for more flavor and texture.
- Homemade Pesto: For a homemade option, blend fresh basil, garlic, pine nuts, Parmesan cheese, and olive oil until smooth.
- Store Leftovers: Store any leftovers in an airtight container in the refrigerator for up to 2 days; however, zucchini noodles can become watery, so try to consume them fresh.
- Serving Size: This recipe serves about 2-4, depending on the portion sizes and whether you're pairing it with protein.
- The Original Pro Chopper - Our superstar veggie slicer has been creating waves on TikTok! Simple to use,...
- Easy Meal Prep with Rust-Resistant Blades - Our vegetable chopper is perfect for anyone who wants to eat...
- 5-Star Design - The soft-grip TPU handle ensures controlled chopping, while the non-skid rubber base...
Cauliflower Rice Stir-Fry With Chicken
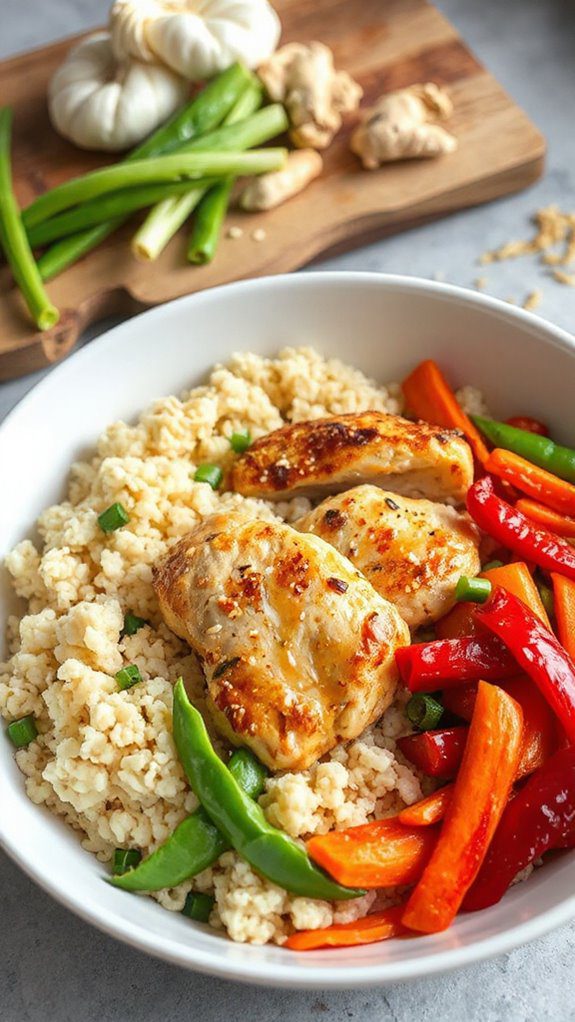
Cauliflower Rice Stir-Fry With Chicken is a delicious low-carb meal that's perfect for those looking to enjoy a healthier alternative to traditional fried rice. Packed with protein and veggies, this dish is ideal for busy weeknights when you need a quick and nutritious dinner option. The preparation and cooking time is around 30 minutes, making it an efficient choice for families or individuals who want to maintain a low-carb lifestyle without sacrificing flavor.
Ingredients:
- 1 medium head of cauliflower (or 4 cups of pre-riced cauliflower)
- 2 boneless, skinless chicken breasts, diced
- 2 tablespoons olive oil
- 1 cup bell peppers, diced (any color)
- 1 cup broccoli florets
- 1 medium carrot, diced
- 3 green onions, chopped
- 2 cloves garlic, minced
- 2 tablespoons soy sauce (or tamari for gluten-free)
- 1 tablespoon sesame oil
- Salt and pepper to taste
- Optional: sesame seeds for garnish
Cooking Steps:
- Start by ricing the cauliflower. Remove the leaves and stems and cut it into florets. Use a food processor to pulse the florets until they resemble rice grains. Alternatively, you can use premade riced cauliflower.
- Heat 1 tablespoon of olive oil in a large skillet or wok over medium-high heat. Add the diced chicken breasts and season with salt and pepper. Cook until browned and cooked through, about 5-7 minutes. Remove from the skillet and set aside.
- In the same skillet, add the remaining tablespoon of olive oil. Add the minced garlic, diced bell peppers, broccoli florets, and carrot. Stir-fry the vegetables for about 4-5 minutes until they are tender but still crisp.
- Add the riced cauliflower to the skillet with the vegetables and stir well. Pour in the soy sauce and sesame oil, and mix everything until combined. Cook for another 3-4 minutes, stirring occasionally until the cauliflower is tender.
- Return the cooked chicken to the skillet and mix until well incorporated. Cook for an additional minute to heat through. Adjust seasoning with salt and pepper if necessary.
- Serve hot, garnished with chopped green onions and sesame seeds if desired.
Variations & Tips:
- For a vegetarian version, substitute the chicken with tofu or tempeh.
- Feel free to add other vegetables like snap peas, zucchini, or mushrooms based on your preference.
- To add more flavor, consider incorporating ginger or different sauces such as hoisin or oyster sauce (adjust the quantity based on your taste).
- If you want to make it spicier, add some red pepper flakes or sriracha sauce.
- Leftovers can be stored in an airtight container in the refrigerator for up to three days. Reheat in a skillet or microwave before serving.
- Makes Everything Simple : Just forget your bagged cheese! Only turn the handle for several times and get...
- Premium Material : All parts of the rotary cheese grater are made of food grade ABS material, no BPA. The...
- Three Option Grater : The parmesan cheese grater finishes food preparation with slicing, shredding and...
Lemon Garlic Butter Shrimp With Asparagus
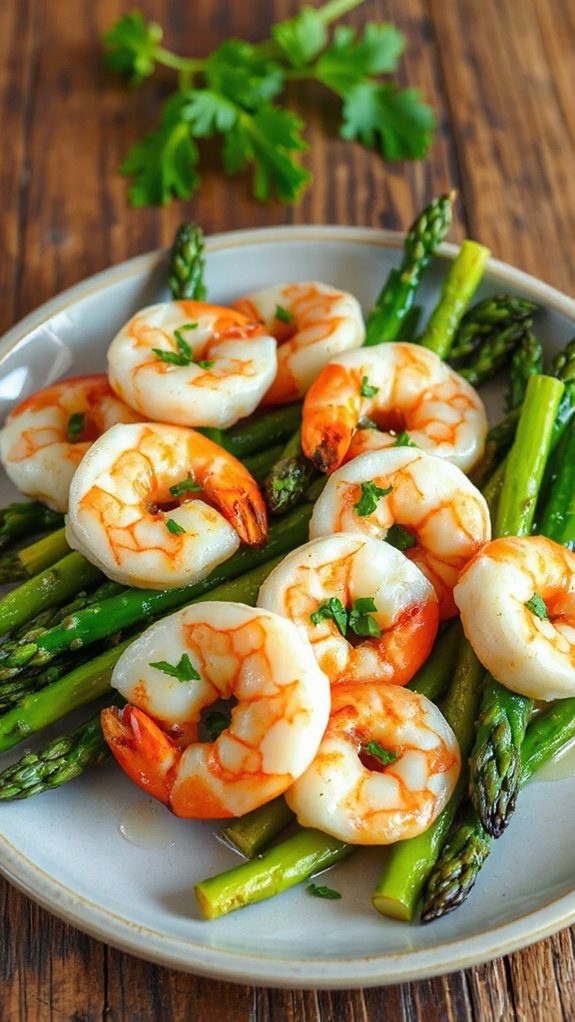
Lemon Garlic Butter Shrimp with Asparagus is a delightful low carb dish that brings together succulent shrimp and tender asparagus, all enveloped in a rich, buttery garlic sauce with a rejuvenating twist of lemon.
This dish is perfect for those seeking a quick weeknight dinner or a satisfying meal that fits within a low carb lifestyle. With a preparation time of just 15 minutes and a cooking time of 10 minutes, you can have this flavorful dish ready in under 30 minutes!
Ingredients
- 1 pound large shrimp, peeled and deveined
- 1 bunch asparagus, trimmed and cut into 2-inch pieces
- 4 tablespoons unsalted butter
- 4 cloves garlic, minced
- Juice of 1 lemon
- Zest of 1 lemon
- Salt and pepper, to taste
- Red pepper flakes (optional, for spice)
- Fresh parsley, chopped (for garnish)
Cooking Steps
1. Prepare the Asparagus: In a large skillet over medium-high heat, melt 2 tablespoons of butter. Add the asparagus pieces and sauté for about 3-4 minutes until they are bright green and slightly tender but still crisp.
Remove from the skillet and set aside.
2. Cook the Shrimp: In the same skillet, add the remaining 2 tablespoons of butter. Add the minced garlic and sauté for about 30 seconds until fragrant.
Then, add the shrimp, season with salt, pepper, and red pepper flakes (if using), and cook for 2-3 minutes on each side until they turn pink and opaque.
3. Combine Ingredients: Add the sautéed asparagus back into the skillet with the shrimp. Squeeze in the lemon juice and sprinkle the lemon zest over the top.
Toss everything together and cook for an additional minute to combine the flavors.
4. Serve: Remove from heat and garnish with chopped fresh parsley. Serve immediately.
Variations and Tips
- For a flavor twist, you can add a splash of white wine before adding the lemon juice for an extra depth of flavor.
- Substitute the shrimp with chicken breast or cauliflower for a different protein or vegetarian option.
- Serve over cauliflower rice or zucchini noodles for a complete low-carb meal.
- Make sure not to overcook the shrimp, as they can become tough. Cook until just pink and opaque for the best texture.
- To add more vegetables, consider including cherry tomatoes or bell peppers for additional color and flavor.
- 💰 REDUCE WASTE AND SAVE MONEY: Chef Preserve keeps FOOD FRESH 5 TIMES LONGER than non-vacuum storage...
- ✅ POWERFUL, QUICK & EASY TO USE: Simply press the button to start. The device vacuum seals a bag in 5...
- ♻️ REUSABLE & RESEALABLE BAGS: Chef Preserve comes with dishwasher, freezer, refrigerator, and...
Stuffed Bell Peppers With Ground Turkey
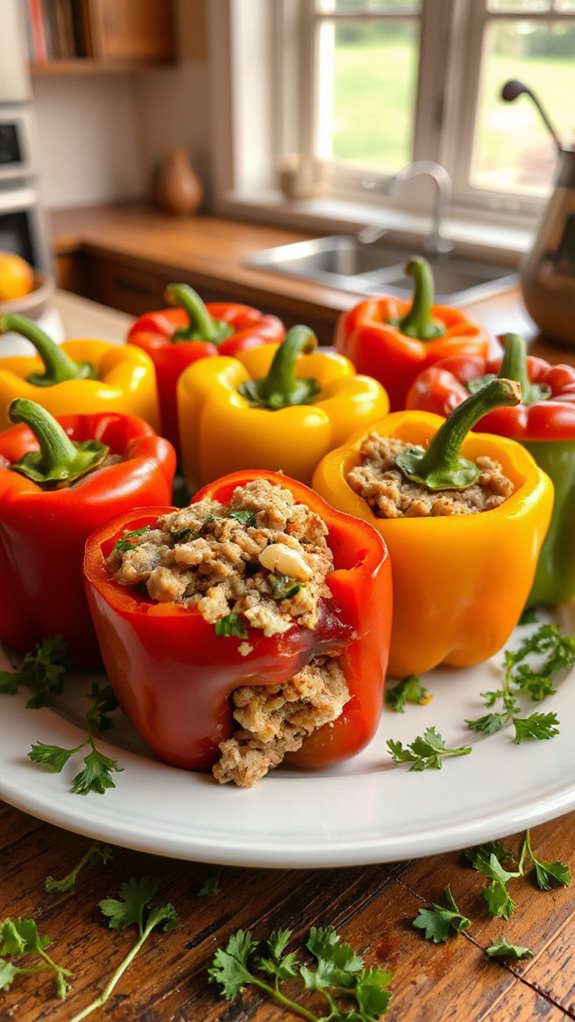
Stuffed bell peppers with ground turkey are a nutritious and flavorful low-carb dinner option that is perfect for those looking to cut down on carbs without sacrificing taste. This dish is ideal for families, meal prep enthusiasts, or anyone seeking a healthy, hearty meal. With a preparation time of approximately 15 minutes and a cooking time of 30-35 minutes, you can have a delicious and satisfying dinner ready in under an hour.
Ingredients:
- 4 large bell peppers (any color)
- 1 pound ground turkey
- 1 medium onion, chopped
- 2 cloves garlic, minced
- 1 cup diced tomatoes (canned or fresh)
- 1 teaspoon Italian seasoning
- 1 teaspoon paprika
- Salt and pepper to taste
- 1 cup shredded cheese (cheddar, mozzarella, or your choice)
- Olive oil for cooking
- Fresh basil or parsley for garnish (optional)
Cooking Steps:
- Preheat the oven to 375°F (190°C).
- Cut the tops off the bell peppers and remove the seeds and membranes. Lightly coat the outsides with olive oil and place them in a baking dish standing up.
- In a large skillet, heat a tablespoon of olive oil over medium heat. Add the chopped onion and sauté until softened, about 3-4 minutes. Stir in the minced garlic and cook for an additional minute.
- Add the ground turkey to the skillet, breaking it up with a spatula. Cook until browned and cooked through, about 7-10 minutes.
- Stir in the diced tomatoes, Italian seasoning, and paprika. Season with salt and pepper to taste. Cook for another 2-3 minutes until the mixture is heated through and well combined.
- Remove the skillet from heat and stir in half of the shredded cheese into the turkey mixture.
- Spoon the turkey mixture into each prepared bell pepper, packing it in gently. Top each stuffed pepper with the remaining shredded cheese.
- Cover the baking dish with foil and bake in the preheated oven for 25 minutes. Remove the foil and bake for an additional 10 minutes, or until the cheese is bubbly and golden.
- Once cooked, remove from the oven and let cool for a few minutes before serving. Garnish with fresh basil or parsley if desired.
Variations and Tips:
- For added flavor, experiment with different seasoning blends like taco seasoning or curry powder.
- Add other vegetables such as zucchini, mushrooms, or spinach to the turkey mixture for extra nutrition.
- To make this dish dairy-free, skip the cheese or use a dairy-free cheese alternative.
- You can prepare the stuffed peppers in advance and refrigerate them before baking. Just add about 10 minutes to the cooking time if baking from cold.
- Serve these stuffed peppers with a side salad or cauliflower rice for a complete low-carb meal.
- Generous Capacity: 7-quart slow cooker that comfortably serves 9+ people or fits a 7-pound roast
- Cooking Flexibility: High or low slow cooking settings, with convenient warm function for ideal serving...
- Convenient: Set it and forget it feature enables you to cook while at work or performing daily tasks
Beef and Broccoli Stir-Fry
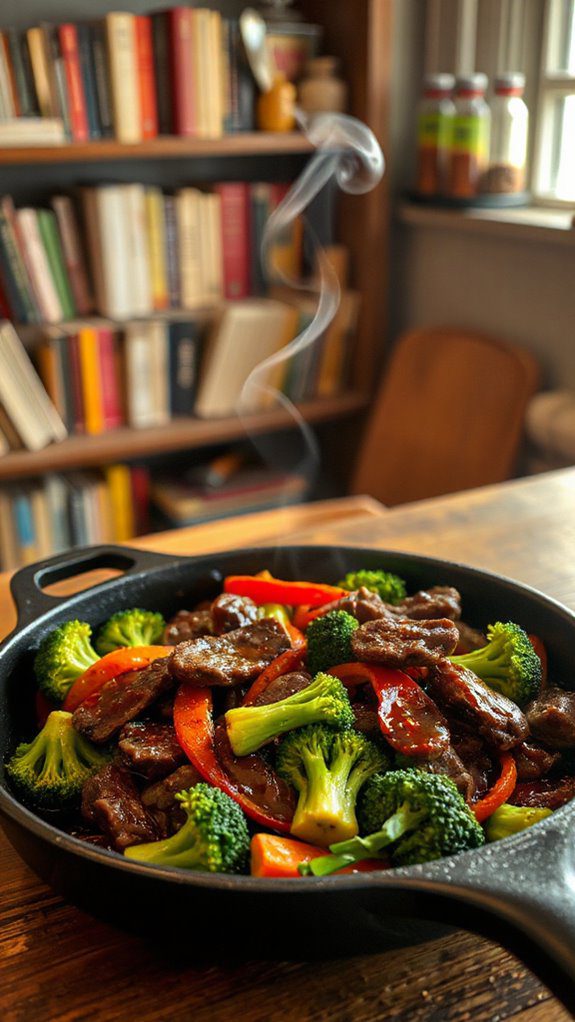
Beef and Broccoli Stir-Fry is a delicious and satisfying low-carb dish that combines tender strips of beef with vibrant broccoli florets, all tossed in a savory sauce. Perfect for those following a low-carb diet, this quick recipe is ideal for busy weeknights, taking only about 30 minutes from prep to plate.
It serves as a filling yet healthy option that can please the whole family while keeping carb counts in check.
Ingredients:
- 1 lb beef sirloin, thinly sliced
- 2 cups broccoli florets
- 1 tablespoon vegetable oil
- 3 cloves garlic, minced
- 1 teaspoon ginger, minced
- 1/4 cup soy sauce or tamari
- 1 tablespoon sesame oil
- 1 tablespoon rice vinegar (optional)
- Red pepper flakes (optional, for heat)
- Salt and pepper to taste
- Sesame seeds for garnish (optional)
Cooking Instructions:
- Marinate the Beef: In a bowl, combine the sliced beef with soy sauce or tamari, sesame oil, and rice vinegar (if using). Let it marinate for at least 10 minutes while preparing the vegetables.
- Prepare Broccoli: Bring a pot of water to a boil. Add the broccoli florets and blanch for about 2 minutes until bright green and tender-crisp. Drain and set aside.
- Stir-Fry the Beef: In a large skillet or wok, heat the vegetable oil over medium-high heat. Once hot, add the marinated beef in a single layer and cook for about 2-3 minutes, stirring frequently, until browned.
- Add Aromatics: Add minced garlic and ginger to the pan, cooking for an additional minute until fragrant.
- Combine: Add the blanched broccoli to the pan, tossing everything together and cooking for another 2-3 minutes until heated through. If you like heat, sprinkle in red pepper flakes to taste.
- Season: Taste and adjust seasoning with salt, pepper, or additional soy sauce as needed.
- Serve: Remove from heat, garnish with sesame seeds if desired, and serve immediately alongside cauliflower rice for a complete low-carb meal.
Variations & Tips:
- Substitute the beef with chicken, shrimp, or tofu for a different protein option.
- Add other low-carb vegetables like bell peppers, snow peas, or mushrooms for more variety.
- For a thicker sauce, consider adding a cornstarch slurry (1 tablespoon cornstarch mixed with 2 tablespoons water) during the final cooking step.
- Verify your beef is cut against the grain for maximum tenderness.
- To make this a meal prep dish, store leftovers in an airtight container; it tends to taste even better the next day!
- 100% Leak-proof: Guaranteed no-spill seal and secure latches
- Crystal-clear Tritan Built: Stain-resistant and odor-resistant material for a clear view of contents
- Lightweight & Sturdy: Easy to carry, yet durable for everyday use
Baked Salmon With Dill and Lemon
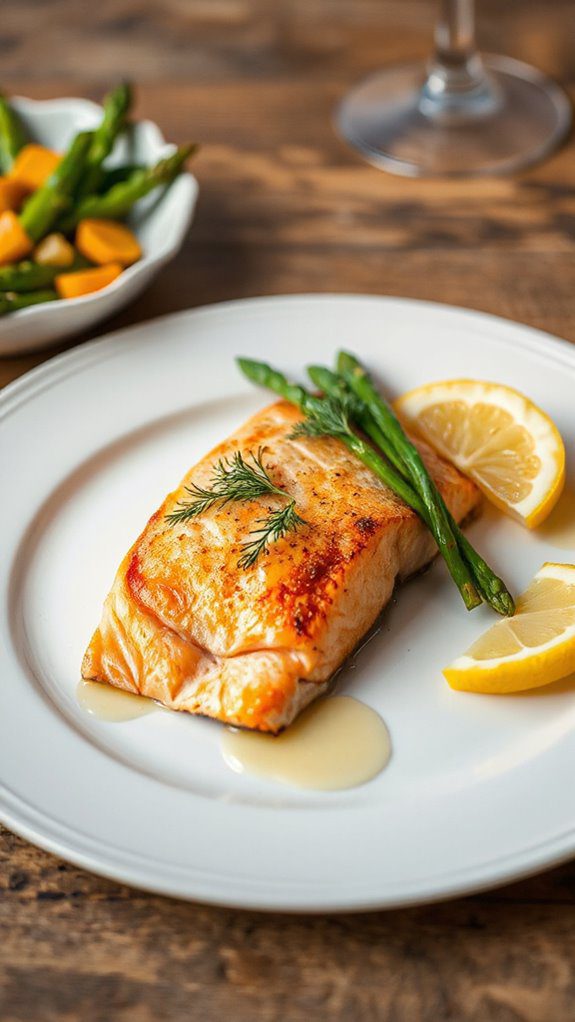
Baked Salmon with Dill and Lemon is a healthy, low-carb dinner option that is both flavorful and easy to prepare. This dish is perfect for those looking to incorporate more fish into their diet, as well as anyone seeking a light and nutritious meal.
With a preparation time of just 10 minutes and a cooking time of 15 minutes, this recipe is ideal for busy weeknights or a quick weekend dinner.
Ingredients:
- 4 salmon fillets
- 2 tablespoons olive oil
- 2 lemons (1 for juice, 1 sliced)
- 2 tablespoons fresh dill (or 2 teaspoons dried dill)
- Salt and pepper to taste
- Optional: fresh parsley for garnish
Cooking Instructions:
- Preheat the oven to 400°F (200°C).
- Line a baking sheet with parchment paper or lightly grease it with cooking spray to prevent sticking.
- Place the salmon fillets skin-side down on the prepared baking sheet.
- Drizzle the olive oil evenly over the salmon, making sure each fillet is well-coated.
- Squeeze the juice of one lemon over the fillets, then sprinkle with salt, pepper, and dill.
- Place lemon slices on top of each salmon fillet.
- Bake in the preheated oven for 12-15 minutes, or until the salmon flakes easily with a fork and is opaque in the center.
- Remove from the oven, garnish with fresh parsley if desired, and serve warm.
Variations and Tips:
- For an added kick, try marinating the salmon in a mixture of olive oil, lemon juice, dill, and crushed garlic for 30 minutes before baking.
- Pair this dish with a side of steamed asparagus or a fresh green salad for a complete meal.
- If you are using frozen salmon, make sure it is thoroughly thawed and dried before cooking for the best texture.
- Consider adding a sprinkle of red pepper flakes for a spicy twist or swapping dill for other fresh herbs like thyme or cilantro for varied flavor profiles.
- 𝗘𝗳𝗳𝗼𝗿𝘁𝗹𝗲𝘀𝘀 𝗪𝗲𝗶𝗴𝗵𝗶𝗻𝗴: Supports 5 units...
- 𝗣𝗿𝗲𝗰𝗶𝘀𝗲 𝗥𝗲𝘀𝘂𝗹𝘁𝘀: Accurately weighs up to 11 lb/5 kg with 1 g...
- 𝗦𝗶𝗺𝗽𝗹𝗲 & 𝗖𝗼𝗺𝗽𝗮𝗰𝘁: The small and sleek scale is a perfect fit for...
Eggplant Lasagna With Ricotta and Spinach
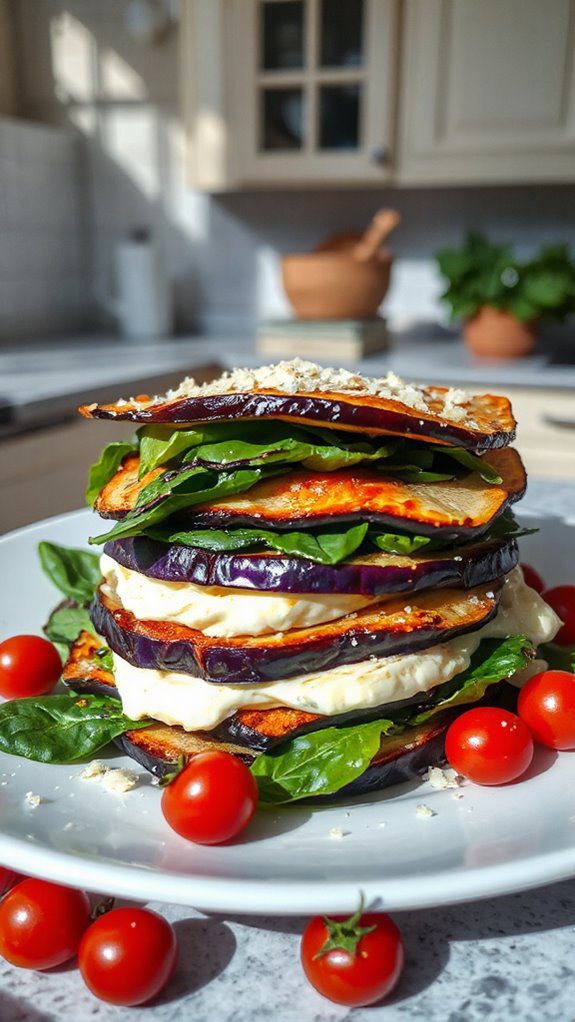
Eggplant lasagna with ricotta and spinach is a delicious low-carb alternative to traditional lasagna, perfect for anyone looking to reduce their carb intake while still enjoying a comforting, hearty meal.
This dish features layers of tender eggplant, creamy ricotta cheese, and nutritious spinach, making it a great option for vegetarians and those seeking lighter dinner recipes.
Preparation time is about 30 minutes, with an additional cooking time of 45 minutes, resulting in a wholesome dinner that serves 4.
Ingredients:
- 2 medium eggplants
- 15 oz ricotta cheese
- 2 cups fresh spinach, chopped
- 1 cup shredded mozzarella cheese
- 1 cup marinara sauce (low-sugar)
- 1 large egg
- 1 teaspoon dried oregano
- 1 teaspoon garlic powder
- Salt and pepper, to taste
- Olive oil spray or olive oil for brushing
Cooking Steps:
1. Preheat the oven to 375°F (190°C).
2. Slice the eggplants into thin, long slices (about 1/4 inch thick). Sprinkle with salt on both sides and let them sit for about 15-20 minutes to draw out moisture. Rinse and gently pat dry with a paper towel.
3. In a bowl, mix the ricotta cheese, chopped spinach, egg, oregano, garlic powder, salt, and pepper until well combined.
4. Lightly oil a baking dish using olive oil spray or a brush. Spread a layer of marinara sauce evenly across the bottom of the dish.
5. Layer half of the eggplant slices over the marinara sauce, then top with half of the ricotta-spinach mixture, followed by a sprinkle of mozzarella cheese.
Repeat the layering process one more time, finishing with a final layer of marinara sauce and a generous topping of mozzarella cheese.
6. Cover the dish with aluminum foil and bake for 30 minutes. Remove the foil and bake for an additional 15 minutes, or until the cheese is bubbly and golden.
7. Allow to cool for a few minutes before slicing and serving.
Variations and Tips:
- For extra flavor, add spices such as crushed red pepper flakes or Italian seasoning to the marinara sauce or ricotta mixture.
- You can substitute the spinach with other leafy greens such as kale or Swiss chard if desired.
- For a protein boost, consider adding cooked ground turkey or chicken to the ricotta mixture.
- This dish can be frozen before baking. Just thaw in the refrigerator when you're ready to cook, then bake as instructed.
- Serve with a crisp side salad for a complete meal that stays low in carbs.
- Instant Read Food Thermometer | Our instant read thermometer features a temperature probe and advanced,...
- Multi-Use | From bbq thermometer to baking thermometer, our digital food thermometer for cooking is...
- Easy-Read Digital Thermometer For Cooking | Large instant thermometer dial with bright blue backlight...
Chicken Alfredo With Zucchini Noodles

Chicken Alfredo with zucchini noodles is a delicious low-carb dinner option that combines the classic creamy Alfredo sauce with tender slices of chicken and spiralized zucchini. This dish is perfect for those following a low-carb or ketogenic diet, as it replaces traditional pasta with nutrient-dense zucchini, making it lighter yet satisfying.
Preparation time for this dish is approximately 30 minutes, making it an ideal option for a weeknight meal.
Ingredients:
- 2 medium zucchinis, spiralized into noodles
- 1 pound boneless, skinless chicken breasts
- 2 tablespoons olive oil
- Salt and pepper, to taste
- 1 cup heavy cream
- 1 cup grated Parmesan cheese
- 2 cloves garlic, minced
- 1 teaspoon Italian seasoning
- Fresh parsley, chopped for garnish (optional)
Cooking Steps:
- Prepare the Zoodles: Begin by spiralizing the zucchinis to create zucchini noodles. Set them aside for later use.
- Cook the Chicken: In a large skillet, heat olive oil over medium-high heat. Season the chicken breasts with salt and pepper on both sides. Cook the chicken for about 6-7 minutes on each side, or until fully cooked and no longer pink in the center. Remove the chicken from the skillet and set aside to rest.
- Make the Alfredo Sauce: In the same skillet, reduce the heat to medium and add minced garlic. Sauté for about 30 seconds until fragrant. Pour in the heavy cream, and bring it to a gentle simmer. Gradually whisk in the Parmesan cheese until the sauce is smooth and creamy. Add Italian seasoning and adjust seasoning with salt and pepper, if necessary.
- Combine and Serve: Add the spiralized zucchini noodles to the skillet, tossing gently to coat them in the Alfredo sauce. Allow the zoodles to cook for about 2-3 minutes until just tender. Slice the cooked chicken and place it on top of the zoodles. Garnish with chopped parsley if desired.
Variations and Tips:
- Add Vegetables: Include colorful vegetables like bell peppers, spinach, or cherry tomatoes for added nutrition and flavor.
- Protein Substitution: Use shrimp or turkey instead of chicken for a different protein option.
- Cheese Choices: Experiment with different types of cheese, such as mozzarella or Asiago, for a unique twist on the flavor.
- Spice it Up: Add red pepper flakes for a bit of heat or a squeeze of lemon juice for brightness.
- Meal Prep: You can prepare the chicken and sauce ahead of time and quickly reheat them with the zucchini noodles for an easy weeknight dinner.
Enjoy your delightful low-carb Chicken Alfredo with zucchini noodles, a tasty solution for a healthy yet indulgent meal!
- Versatile 54-Piece Collection: Elevate your kitchen with the Home Hero 54-Piece Kitchen Utensil Set, a...
- Durable and Long-Lasting: Crafted from premium stainless steel, these kitchen utensils are designed to...
- Perfect Holiday Gift: Delight your loved ones with this kitchen utensils gift set this festive season....
Spinach and Feta Stuffed Chicken Breast

Spinach and Feta Stuffed Chicken Breast is a delightful low-carb dish that combines the savory flavors of spinach and feta cheese, wrapped in juicy chicken breast. This recipe is perfect for anyone looking for a healthy yet satisfying dinner option. With a prep time of just 15 minutes and a cook time of 30 minutes, you'll have a delicious meal on the table in under an hour.
Ingredients:
- 2 large chicken breasts
- 1 cup fresh spinach, chopped
- 1/2 cup feta cheese, crumbled
- 1/4 cup cream cheese, softened
- 2 cloves garlic, minced
- 1 teaspoon dried oregano
- Salt and pepper, to taste
- 1 tablespoon olive oil
- 1 teaspoon lemon juice
Instructions:
- Preheat your oven to 375°F (190°C).
- In a mixing bowl, combine the chopped spinach, feta cheese, cream cheese, minced garlic, oregano, salt, and pepper. Mix well until all ingredients are incorporated.
- With a sharp knife, carefully cut a pocket into each chicken breast. Make sure not to cut all the way through.
- Stuff each chicken breast with the spinach and feta mixture, using toothpicks to secure the openings if necessary.
- Heat olive oil in an oven-safe skillet over medium-high heat. Once hot, sear the stuffed chicken breasts for about 3-4 minutes on each side until golden brown.
- Drizzle lemon juice over the chicken breasts, then transfer the skillet to the preheated oven.
- Bake for 25-30 minutes, or until the chicken is cooked through (internal temperature should reach 165°F or 75°C).
- Remove from the oven and let the chicken rest for a few minutes before slicing.
Variations and Tips:
- For an extra kick, add red pepper flakes to the spinach and feta mixture.
- You can substitute the feta cheese for goat cheese for a different flavor profile.
- Serve the stuffed chicken with a side of roasted vegetables or a fresh green salad for a complete low-carb meal.
- If you're short on time, consider using spinach that has been frozen and thawed, allowing for quicker prep.
- Don't forget to taste and adjust the seasoning as per your preference before cooking!
- 24-ounce insulated stainless-steel water bottle with a FreeSip spout and push-button lid with lock
- Patented FreeSip spout designed for either sipping upright through the built-in straw or tilting back to...
- Protective push-to-open lid keeps spout clean; convenient carry loop doubles as a lock
Keto Taco Salad With Avocado Dressing
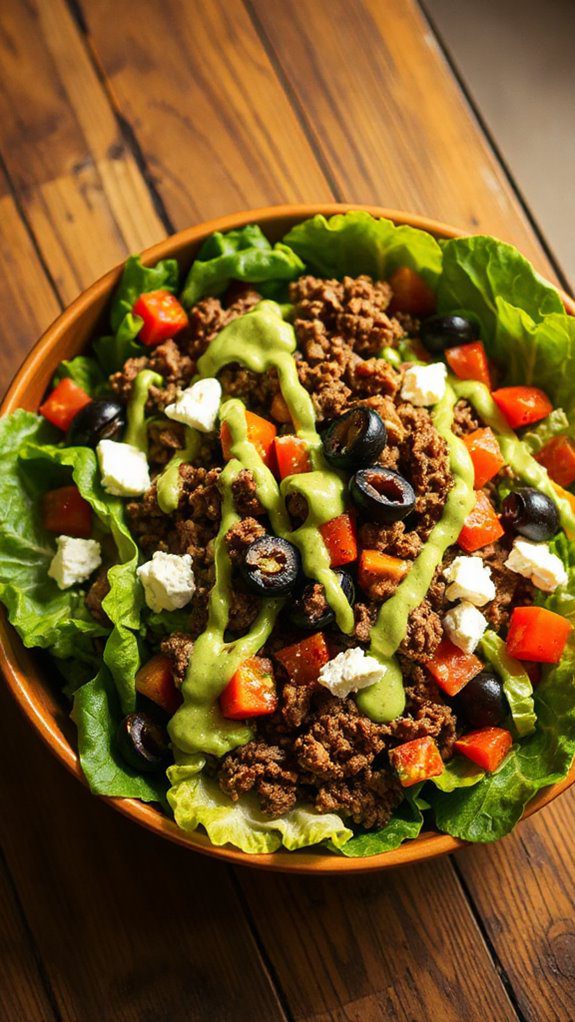
Keto Taco Salad with Avocado Dressing is a delicious and nutritious dish that's perfect for those following a low-carb or ketogenic diet. Packed with flavorful ingredients, this salad is ideal for lunch or dinner and can be prepared in just 20 minutes. The combination of seasoned ground beef, fresh vegetables, and a creamy avocado dressing creates a satisfying meal that will keep you full and energized without the carbs.
Ingredients:
- 1 lb ground beef (or turkey)
- 1 tablespoon olive oil
- 1 tablespoon taco seasoning
- 4 cups mixed greens (romaine, spinach, etc.)
- 1 medium tomato, diced
- 1/2 cup shredded cheese (cheddar or Mexican blend)
- 1/2 cup black olives, sliced
- 1/2 cup avocado, diced
- 1 small red onion, diced
- 1/4 cup fresh cilantro (optional)
- Salt and pepper to taste
For the Avocado Dressing:
- 1 ripe avocado
- 1/4 cup Greek yogurt (or sour cream)
- 1 tablespoon lime juice
- Salt and pepper to taste
- Water (as needed for desired consistency)
Cooking Steps:
- In a skillet over medium heat, add olive oil and ground beef (or turkey). Cook until browned, breaking it up with a spatula as it cooks.
- Once the meat is browned, season it with taco seasoning, salt, and pepper. Stir well and allow it to cook for another 2-3 minutes until everything is combined. Remove from heat and set aside.
- In a large bowl, assemble the salad by combining mixed greens, diced tomato, shredded cheese, black olives, diced avocado, and red onion.
- Prepare the avocado dressing by blending the avocado, Greek yogurt, lime juice, salt, and pepper in a food processor or blender. Add water a tablespoon at a time until you reach your desired consistency.
- To serve, portion the salad onto plates and top with the seasoned ground beef. Drizzle the avocado dressing over the salad, and if desired, sprinkle with fresh cilantro.
Variations and Tips:
- For a vegetarian version, substitute the meat with sautéed mushrooms or black beans seasoned with taco spices.
- Feel free to add additional toppings such as jalapeños, radishes, or guacamole for extra flavor.
- To enhance the dressing, you can add garlic powder, onion powder, or a splash of apple cider vinegar for a tangy kick.
- This dish can also be meal-prepped by preparing the components in advance and assembling them just before serving to maintain freshness.
Thai Coconut Curry Chicken
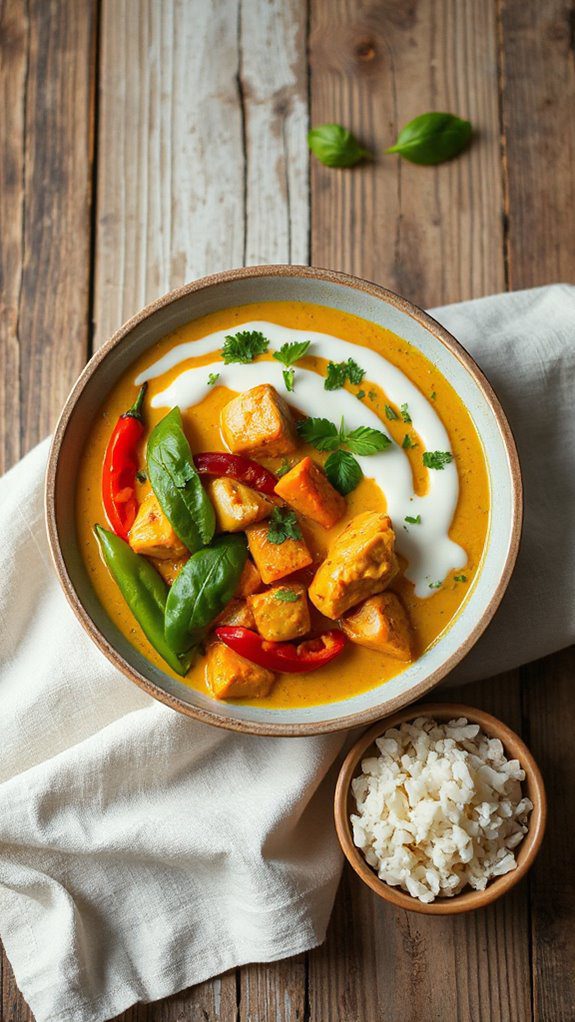
Thai Coconut Curry Chicken
Thai Coconut Curry Chicken is a flavorful, aromatic dish that combines tender chicken pieces with a creamy coconut milk base and a medley of vibrant vegetables. This dish is perfect for those following a low-carb diet while still wanting to enjoy bold flavors.
It serves well for a family dinner or any gathering, and can be ready in about 30 minutes, making it an excellent choice for busy weeknights.
Ingredients:
- 1 lb chicken breast, sliced into thin strips
- 1 can (14 oz) coconut milk
- 2 tablespoons red or green curry paste
- 1 tablespoon olive oil
- 1 bell pepper, sliced
- 1 cup broccoli florets
- 1 cup snap peas
- 2 cloves garlic, minced
- 1 tablespoon ginger, grated
- 2 tablespoons fish sauce (optional)
- 1 tablespoon lime juice
- Fresh cilantro, for garnish
Cooking Instructions:
- In a large skillet, heat the olive oil over medium heat. Add the minced garlic and grated ginger, and sauté for about 1 minute until fragrant.
- Add the sliced chicken breast to the pan and cook until browned, about 5-7 minutes.
- Stir in the curry paste and cook for an additional 1-2 minutes to deepen the flavor.
- Pour in the coconut milk and stir to combine. Bring to a simmer.
- Add the sliced bell pepper, broccoli florets, and snap peas. Cook for about 5-7 minutes until the vegetables are tender but still crisp.
- Season with fish sauce (if using) and lime juice, mixing well.
- Remove from heat and garnish with fresh cilantro before serving.
Variations and Tips:
- You can substitute chicken with shrimp, tofu, or a mix of your favorite vegetables for a vegetarian option.
- For extra spice, add chopped red chili peppers or a sprinkle of cayenne pepper.
- Serve over cauliflower rice for a low-carb alternative to traditional rice.
- Use fresh lime wedges for an extra pop of flavor when serving.
- This dish pairs well with a side of Asian-style steamed spinach or sautéed bok choy.
Garlic Herb Roasted Cauliflower

Garlic Herb Roasted Cauliflower is a delicious and healthy low-carb side dish that perfectly complements any dinner. This versatile dish offers a delightful medley of flavors, making it an ideal option for those following a low-carb or ketogenic diet, as well as anyone seeking to add more vegetables to their meals.
Preparation time is approximately 10 minutes, with a cooking time of about 30 minutes, making it a quick and easy option for a busy weeknight dinner.
Ingredients:
- 1 medium head of cauliflower, cut into florets
- 3 tablespoons olive oil
- 4 cloves garlic, minced
- 1 teaspoon dried thyme
- 1 teaspoon dried rosemary
- 1 teaspoon onion powder
- Salt and pepper, to taste
- Fresh parsley, chopped (for garnish)
Cooking Instructions:
- Preheat your oven to 425°F (220°C).
- In a large mixing bowl, combine the cauliflower florets with olive oil, minced garlic, thyme, rosemary, onion powder, salt, and pepper. Toss until the florets are evenly coated.
- Spread the cauliflower mixture in a single layer on a baking sheet lined with parchment paper for easy cleanup.
- Roast in the preheated oven for 25-30 minutes, or until the cauliflower is tender and golden brown, stirring halfway through for even cooking.
- Once done, remove from the oven and garnish with fresh parsley before serving.
Variations and Tips:
- For added flavor, sprinkle some grated Parmesan cheese over the cauliflower for the last 5 minutes of cooking.
- Experiment with different herbs such as basil, oregano, or dill for a unique twist on the flavor profile.
- If you like a little heat, consider adding a pinch of red pepper flakes to the mixture before roasting.
- Serve as a side dish with grilled meats, fish, or as a base for a hearty salad.
Enjoy the leftovers in a veggie wrap or atop a bed of greens for a light lunch!
Cheesy Buffalo Chicken Casserole
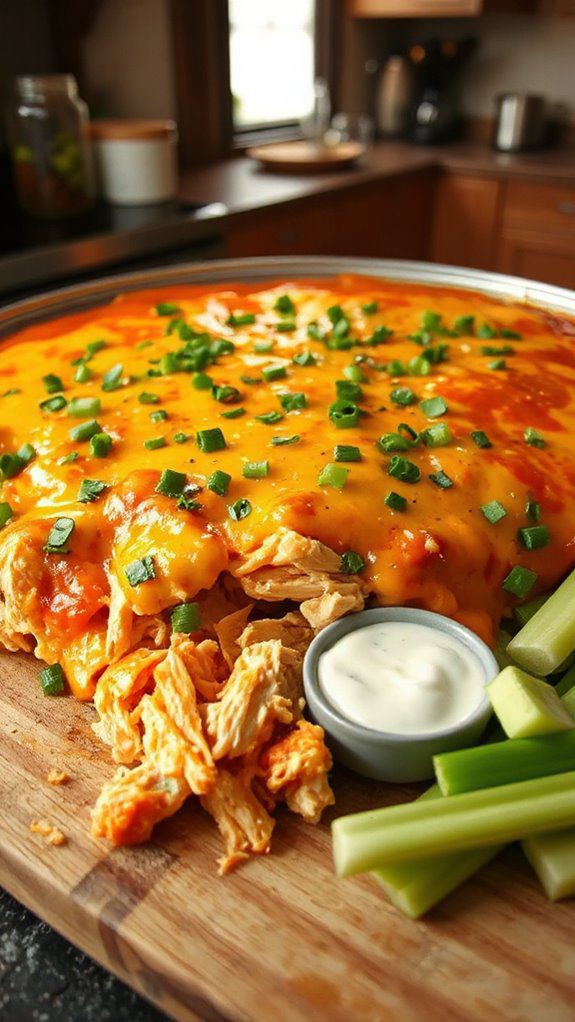
Cheesy Buffalo Chicken Casserole is a delightful low-carb dish that packs a punch of flavor with its spicy buffalo sauce combined with gooey cheese and tender chicken.
This dish is perfect for those following a low-carb or keto diet but can be enjoyed by anyone who loves a good comfort food that's easy to prepare.
With a total preparation and cooking time of about 45 minutes, this casserole is an ideal weeknight dinner option that will satisfy your cravings without the carb overload.
Ingredients:
- 2 cups cooked, shredded chicken
- 1/2 cup buffalo sauce
- 1 cup cream cheese, softened
- 1 cup shredded cheddar cheese
- 1/2 cup sour cream
- 1/2 teaspoon garlic powder
- 1/2 teaspoon onion powder
- Salt and pepper to taste
- Chopped green onions (for garnish)
Cooking Steps:
- Preheat your oven to 350°F (175°C).
- In a large mixing bowl, combine the shredded chicken and buffalo sauce. Mix well to guarantee the chicken is evenly coated.
- In a separate bowl, mix together the softened cream cheese, sour cream, garlic powder, onion powder, and a pinch of salt and pepper until smooth.
- Combine the cream cheese mixture with the buffalo chicken mixture and fold in half of the shredded cheddar cheese.
- Transfer the mixture into a greased 9×13 inch baking dish, spreading it evenly.
- Top the casserole with the remaining cheddar cheese.
- Bake in the preheated oven for 25-30 minutes, or until the cheese is bubbly and golden.
- Remove from the oven and let it cool slightly. Garnish with chopped green onions before serving.
Variations and Tips:
- For a milder version, use a mild buffalo sauce or mix the buffalo sauce with some ranch dressing to tone down the heat.
- Add some diced celery or finely chopped bell peppers to the chicken mixture for added crunch and nutrition.
- If you prefer a creamier casserole, mix in a splash of chicken broth or heavy cream to the sauce mixture.
- Serve with a side of leafy greens or low-carb vegetables for a complete meal.
- This casserole keeps well in the fridge for up to three days, making it perfect for leftovers!
Enjoy your hearty and flavorful Cheesy Buffalo Chicken Casserole as a satisfying dinner!
Grilled Lemon Herb Portobello Mushrooms
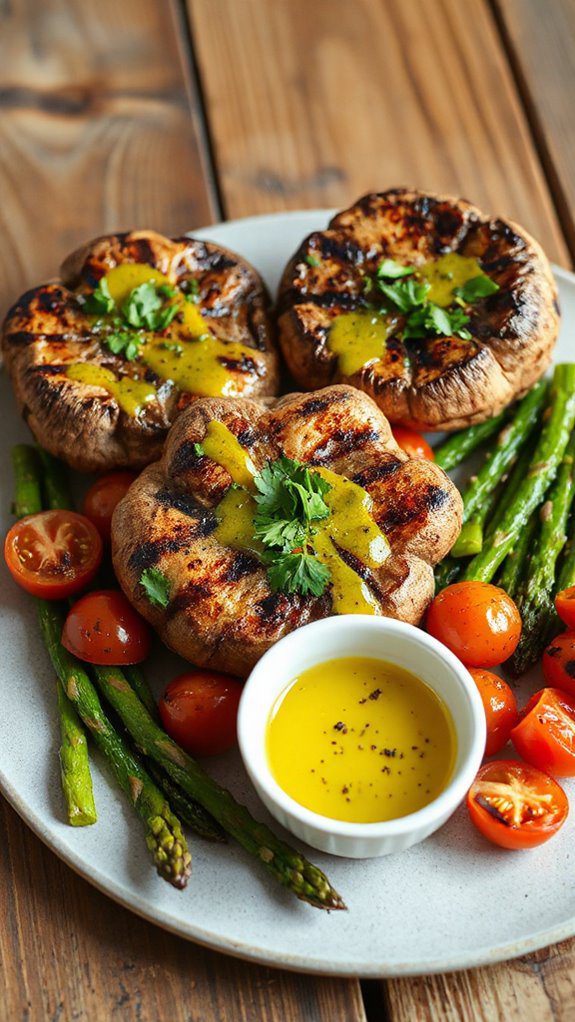
Grilled Lemon Herb Portobello Mushrooms are a delightful low-carb dish that showcases the rich, meaty texture of portobello mushrooms, infused with zesty lemon and fresh herbs.
This vegetarian option is perfect for those who are looking for a light dinner or a flavorful side dish to complement any meal. With a preparation time of just 15 minutes and a grilling time of about 10 minutes, you'll have a scrumptious and healthy dish on the table in no time.
Ingredients:
- 4 large portobello mushrooms
- 1/4 cup olive oil
- 2 tablespoons lemon juice
- 4 cloves garlic, minced
- 1 tablespoon fresh rosemary, chopped (or 1 teaspoon dried)
- 1 tablespoon fresh thyme, chopped (or 1 teaspoon dried)
- Salt and pepper, to taste
- Lemon zest, for garnish
- Fresh parsley, chopped, for garnish
Cooking Instructions:
- Preheat your grill to medium-high heat.
- In a small bowl, combine the olive oil, lemon juice, minced garlic, rosemary, thyme, salt, and pepper to create a marinade.
- Remove the stems from the portobello mushrooms and gently wipe the caps clean with a damp cloth.
- Brush the mushroom caps on both sides with the marinade, ensuring they are evenly coated.
- Place the mushrooms on the preheated grill, gill side up. Grill for 5 minutes, then flip and grill for an additional 5 minutes, or until tender and slightly charred.
- Once cooked, remove the mushrooms from the grill and drizzle with any remaining marinade.
- Garnish with lemon zest and chopped parsley before serving.
Variations & Tips:
- For a spicier kick, add red pepper flakes to the marinade.
- Experiment with different fresh herbs such as basil or oregano for a unique flavor profile.
- These mushrooms can also be served on a bed of mixed greens or as a filling for wraps made with low-carb tortillas.
- If you don't have a grill, you can easily cook the mushrooms in a grill pan or under the broiler in your oven.
- Make sure to serve them immediately for the best flavor and texture.
Shrimp and Avocado Salad With Lime Dressing

Shrimp and Avocado Salad with Lime Dressing is a revitalizing and nutritious low-carb dish perfect for those looking for a light dinner option or a satisfying meal that won't weigh them down. This salad combines succulent shrimp with creamy avocado and zesty lime dressing, resulting in a flavor-packed dish that is quick to prepare.
With a total preparation time of only 20 minutes, it is ideal for busy weeknights or for impressing guests at a casual get-together.
Ingredients:
- 1 pound shrimp, peeled and deveined
- 2 ripe avocados, diced
- 1 cup cherry tomatoes, halved
- 1/4 cup red onion, finely chopped
- 1/2 cup cilantro, chopped
- Juice of 2 limes
- 3 tablespoons olive oil
- Salt and pepper to taste
- Optional: 1 jalapeño, minced (for heat)
Cooking Steps:
- Cook the Shrimp: In a medium skillet over medium heat, add a drizzle of olive oil. When hot, add the peeled and deveined shrimp. Cook for about 2-3 minutes on each side or until they are pink and opaque. Remove from heat and set aside to cool.
- Prepare the Salad: In a large bowl, combine the diced avocados, halved cherry tomatoes, chopped red onion, and cilantro.
- Make the Dressing: In a small bowl, whisk together the lime juice, remaining olive oil, salt, and pepper. If you prefer some heat, add the minced jalapeño.
- Combine and Serve: Once the shrimp have cooled down, add them to the avocado mixture. Pour the lime dressing over the salad and gently toss to combine all ingredients.
- Chill and Enjoy: For best flavor, let the salad sit in the refrigerator for about 10 minutes before serving to allow the flavors to meld.
Variations and Tips:
- Add More Vegetables: Feel free to add diced cucumber, bell peppers, or even leafy greens for extra crunch and nutrition.
- Protein Options: If shrimp isn't your favorite, grilled chicken or diced tofu can be used as a great alternative.
- Make it Spicy: Increase the amount of jalapeño or add a pinch of red pepper flakes to the dressing for some heat.
- Presentation: Serve the salad in avocado halves for a beautiful presentation at dinner parties.
- Storage: This salad can be stored in an airtight container in the refrigerator for up to a day, but it's best enjoyed fresh.


