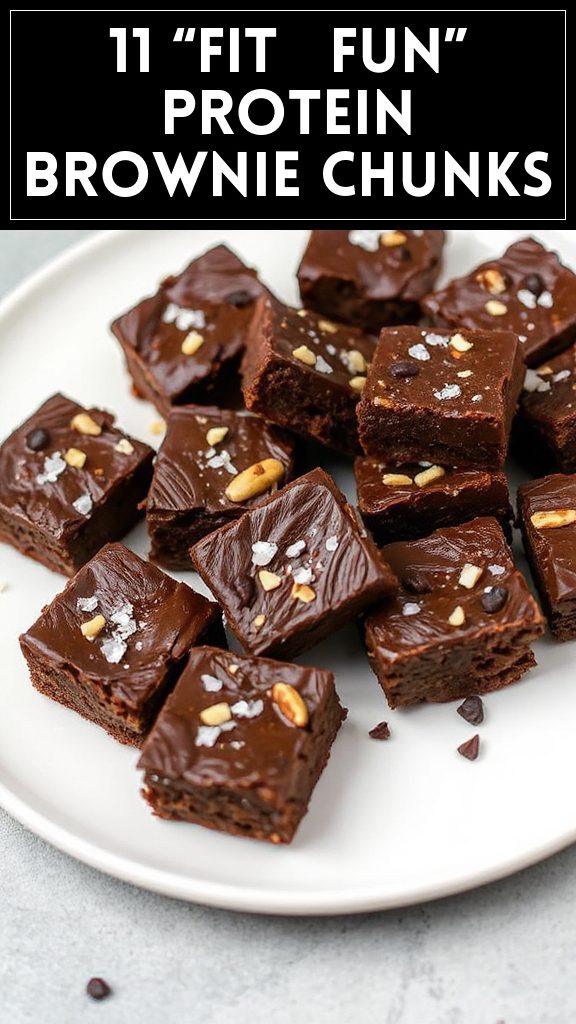
Microwave desserts are perfect for satisfying cravings in just minutes. Options like Chocolate Chip Mug Cake and Peanut Butter Brownie in a Mug are deliciously quick to prepare, taking only 5 minutes or less. These single-serving delights can be customized with various add-ins and toppings, elevating the experience. From fluffy cakes to gooey brownies, there's something for every sweet tooth. For more delightful microwave treats, explore creative combinations and variations that promise a perfect snack before your show starts.
Chocolate Chip Mug Cake
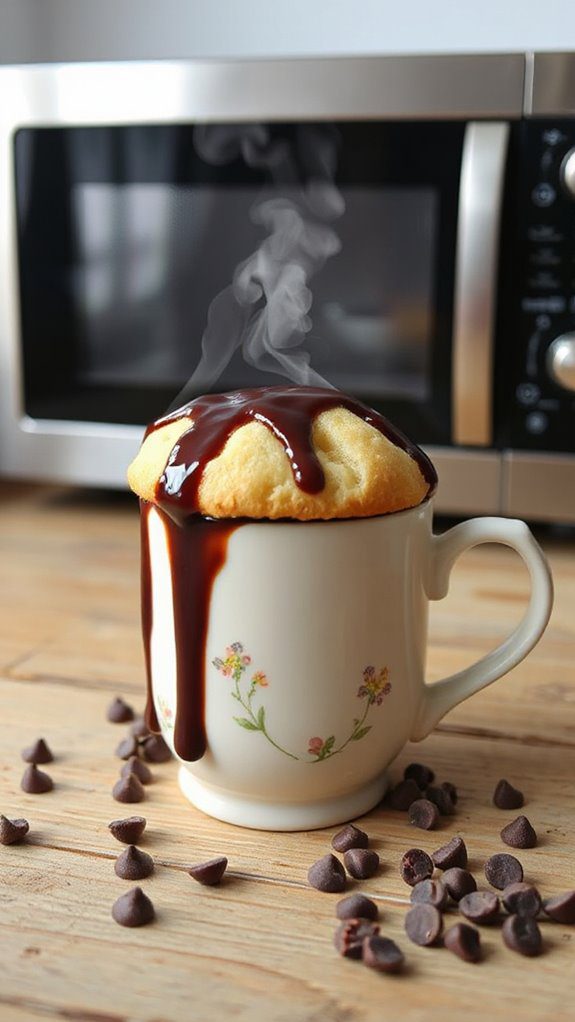
Chocolate Chip Mug Cake is a delightful single-serving dessert that's perfect for satisfying your sweet tooth in minutes. Ideal for busy individuals or anyone looking for a quick treat, this mug cake combines the classic flavors of chocolate chip cookies with the convenience of microwave cooking.
In just around 5 minutes, you can enjoy a warm, gooey, and delicious chocolate chip mug cake—no baking skills or oven required!
Ingredients:
- 4 tablespoons all-purpose flour
- 4 tablespoons granulated sugar
- 2 tablespoons cocoa powder
- 1/8 teaspoon baking powder
- Pinch of salt
- 3 tablespoons milk (or any non-dairy milk)
- 2 tablespoons vegetable oil (or melted butter)
- 1/4 teaspoon vanilla extract
- 2 tablespoons chocolate chips
Instructions:
- In a microwave-safe mug, whisk together the flour, sugar, cocoa powder, baking powder, and salt until fully combined.
- Add in the milk, vegetable oil, and vanilla extract. Stir until the mixture is smooth and well-blended.
- Gently fold in the chocolate chips, ensuring they are evenly distributed throughout the batter.
- Microwave the mug on high for 40 to 60 seconds. Start checking at the 40-second mark; the cake should rise and be set in the middle. Do not overcook, as it can become dry.
- Let the mug cake cool for a minute or two before digging in. Enjoy straight from the mug or top with whipped cream, ice cream, or a drizzle of chocolate syrup for extra indulgence!
Variations and Tips:
- Add-ins: Feel free to mix in nuts, peanut butter chips, or dried fruits for added flavor and texture.
- Flavored Mug Cake: Try swapping cocoa powder for instant coffee granules for a coffee-flavored cake.
- Microwave Power: Cooking times may vary depending on your microwave's wattage. Adjust accordingly to avoid overcooking.
- Serving Size: This recipe is easily adjustable—double the ingredients for a larger mug or multiple mugs.
- Extra Moisture: If you prefer a fudgier texture, reduce the cooking time slightly and allow the cake to sit covered for another minute after cooking.
Enjoy your quick and delicious dessert!
- The Original Pro Chopper - Our superstar veggie slicer has been creating waves on TikTok! Simple to use,...
- Easy Meal Prep with Rust-Resistant Blades - Our vegetable chopper is perfect for anyone who wants to eat...
- 5-Star Design - The soft-grip TPU handle ensures controlled chopping, while the non-skid rubber base...
Peanut Butter Brownie in a Mug
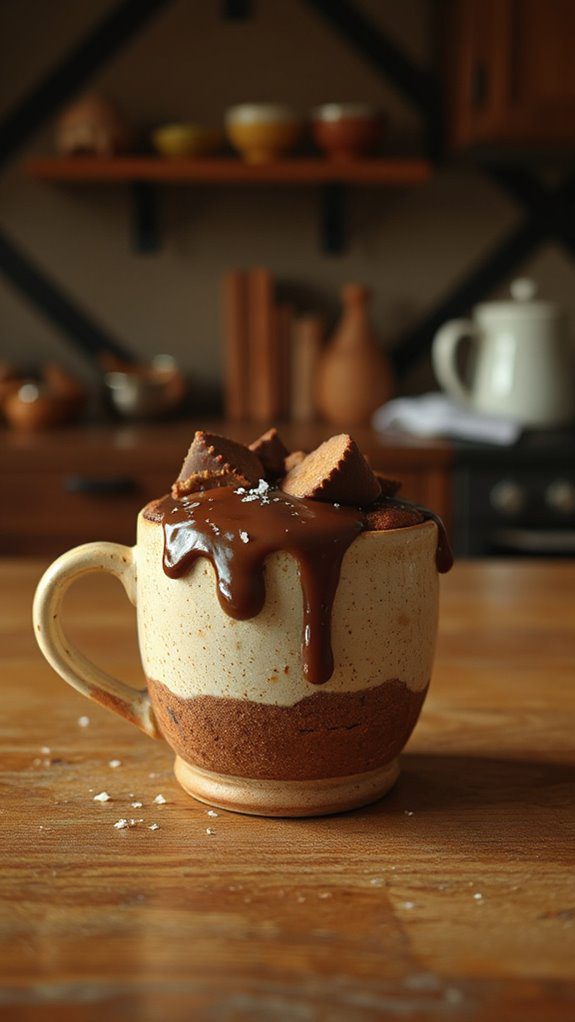
If you're craving something sweet and decadent but don't want to spend a lot of time in the kitchen, a Peanut Butter Brownie in a Mug is the perfect solution. This quick and satisfying dessert is ideal for solo indulgence or a late-night snack.
With just a few ingredients, you can whip up this fudgy brownie in less than 5 minutes, making it a favorite for busy individuals or anyone who wants to treat themselves to a homemade dessert without the fuss.
Ingredients:
- 1 tablespoon unsalted butter
- 2 tablespoons granulated sugar
- 1 tablespoon brown sugar
- 1 egg yolk
- 1/4 teaspoon vanilla extract
- 3 tablespoons all-purpose flour
- 1 tablespoon cocoa powder
- A pinch of salt
- 1 tablespoon peanut butter
- Optional: chocolate chips or nuts for extra texture
Cooking Steps:
- In a microwave-safe mug, melt the butter in the microwave for about 20-30 seconds.
- Once melted, add the granulated sugar and brown sugar to the mug, and stir well to combine.
- Add the egg yolk and vanilla extract to the mixture, and mix until smooth.
- Incorporate the flour, cocoa powder, and a pinch of salt into the mixture, stirring until everything is well combined.
- Finally, swirl in the peanut butter to create a marbled effect.
- Microwave the mug on high for about 30-40 seconds, checking for doneness. The brownie should be set but slightly gooey in the center.
- Allow the brownie to cool for a minute before digging in. Enjoy it directly from the mug or transfer it to a plate.
Variations and Tips:
- Feel free to switch out the peanut butter for almond or cashew butter for a different flavor profile.
- Add chocolate chips, nuts, or a dollop of Nutella for added richness.
- For a chewy texture, microwave for a shorter time, keeping an eye on it to avoid overcooking.
- Can be topped with whipped cream, ice cream, or a drizzle of chocolate sauce for an extra treat.
- Makes Everything Simple : Just forget your bagged cheese! Only turn the handle for several times and get...
- Premium Material : All parts of the rotary cheese grater are made of food grade ABS material, no BPA. The...
- Three Option Grater : The parmesan cheese grater finishes food preparation with slicing, shredding and...
1-Minute Vanilla Pudding
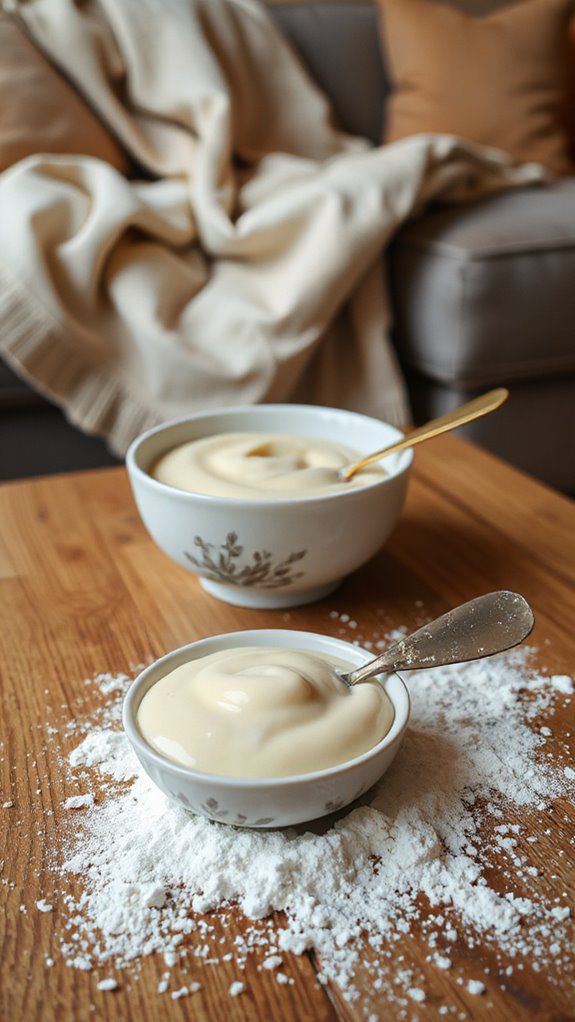
Minute Vanilla Pudding is a quick and creamy dessert that's perfect for satisfying your sweet tooth in just a few minutes.
Ideal for those busy weeknights or when unexpected guests pop over, this delightful pudding can be whipped up in under 10 minutes.
With its smooth texture and rich vanilla flavor, it caters to both kids and adults alike, making it a versatile treat for any occasion.
Ingredients:
- 2 cups milk
- 1/4 cup granulated sugar
- 2 tablespoons cornstarch
- 1/4 teaspoon salt
- 1 teaspoon vanilla extract
- 1 tablespoon unsalted butter (optional)
- Whipped cream (for serving, optional)
Cooking Steps:
- In a microwave-safe bowl, combine the milk, granulated sugar, cornstarch, and salt. Whisk together until well blended and there are no lumps.
- Place the bowl in the microwave and cook on high for 3 minutes.
- Remove the bowl from the microwave and stir the mixture. Return it to the microwave and cook for an additional 2 minutes.
- After the second cooking, stir again until the pudding thickens and reaches a creamy consistency.
- Once thickened, stir in the vanilla extract and, if desired, the butter for added richness. Mix until fully incorporated.
- Allow the pudding to cool for a few minutes before serving. If you prefer a chilled dessert, let it cool further in the refrigerator for about 15-20 minutes.
- Serve on its own or with a dollop of whipped cream on top!
Variations & Tips:
- For a chocolate version, substitute 1/4 cup of cocoa powder for an equal amount of cornstarch.
- You can add a few drops of almond extract for a nutty flavor twist.
- To enhance the dish, consider folding in some fresh fruits like berries or banana slices before serving.
- Store any leftovers in the fridge, covered, for up to 2 days.
- If you want individual servings, divide the pudding into small cups or bowls before chilling.
- 💰 REDUCE WASTE AND SAVE MONEY: Chef Preserve keeps FOOD FRESH 5 TIMES LONGER than non-vacuum storage...
- ✅ POWERFUL, QUICK & EASY TO USE: Simply press the button to start. The device vacuum seals a bag in 5...
- ♻️ REUSABLE & RESEALABLE BAGS: Chef Preserve comes with dishwasher, freezer, refrigerator, and...
Cinnamon Roll in a Mug
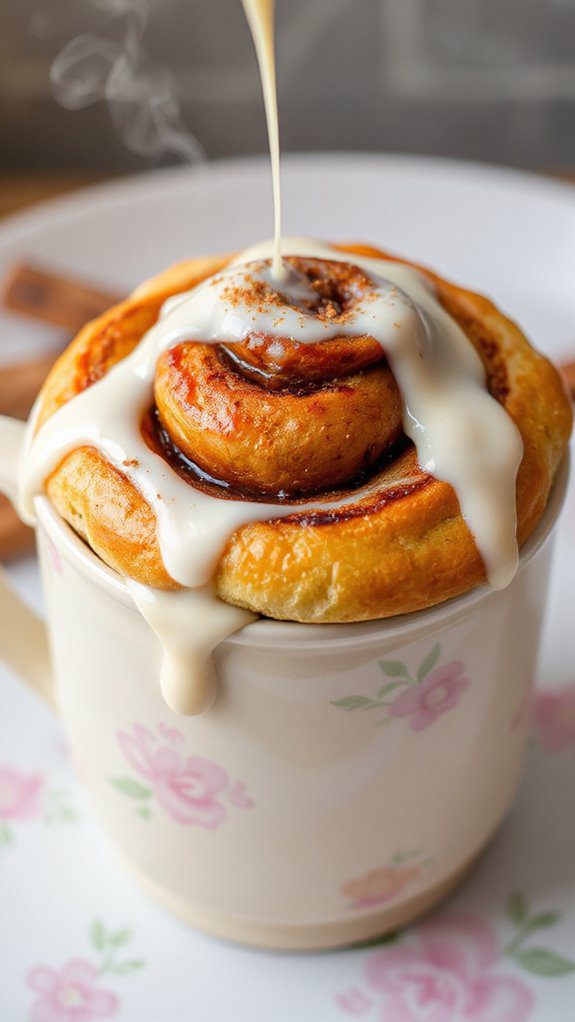
Indulge in a delightful and warm cinnamon roll without the fuss of traditional baking! This Cinnamon Roll in a Mug is a quick and easy microwave dessert that's perfect for when you're craving something sweet but don't want to spend a lot of time in the kitchen.
Ideal for a cozy morning treat or a late-night snack, it takes only about 5 minutes from start to finish. This recipe is perfect for busy individuals, students, or anyone looking for a quick dessert fix!
Ingredients:
- 4 tablespoons all-purpose flour
- 1/4 teaspoon baking powder
- 1/4 teaspoon salt
- 3 tablespoons milk
- 1 tablespoon granulated sugar
- 1 tablespoon melted butter
- 1/2 teaspoon vanilla extract
- 1 teaspoon ground cinnamon
- 1 tablespoon brown sugar
Cooking Instructions:
- In a large microwave-safe mug, combine the flour, baking powder, and salt. Mix well until fully incorporated.
- Add the milk, granulated sugar, melted butter, and vanilla extract to the dry ingredients. Stir until a thick batter forms.
- In a small bowl, mix the brown sugar and ground cinnamon together to create the cinnamon filling.
- Spoon half of the batter into the mug and spread it evenly. Sprinkle half of the cinnamon filling on top.
- Add the remaining batter on top of the filling and finish with the rest of the cinnamon mixture.
- Microwave on high for 1 to 1.5 minutes, or until the roll is cooked through and firm to the touch. Start with 1 minute and increase time as needed in 15-second intervals.
- Let the mug cool for a minute before indulging in your warm cinnamon roll!
Variations and Tips:
- Frosting: Drizzle some icing made from powdered sugar and milk on top for an extra sweet touch.
- Nuts: Add chopped walnuts or pecans for a crunchy texture.
- Chocolate: Mix in chocolate chips or use chocolate syrup as a swirl for a delicious twist.
- Cook Time: Adjust the microwave time according to the wattage of your microwave, as some may cook faster than others.
- Serving: Enjoy it warm straight from the mug, or transfer it to a plate and serve with a scoop of ice cream for an indulgent dessert!
- Generous Capacity: 7-quart slow cooker that comfortably serves 9+ people or fits a 7-pound roast
- Cooking Flexibility: High or low slow cooking settings, with convenient warm function for ideal serving...
- Convenient: Set it and forget it feature enables you to cook while at work or performing daily tasks
Microwave Cheesecake

Microwave cheesecake is a quick and convenient version of the classic dessert that brings creamy indulgence to your kitchen in just minutes.
Ideal for dessert lovers who crave something sweet but are short on time, this easy recipe can typically be prepared in about 10-15 minutes, making it perfect for last-minute cravings or surprise guests.
With just a few simple ingredients and a microwave, you can whip up a delightful single-serving cheesecake that's rich, creamy, and oh-so-satisfying.
Ingredients:
- 4 oz cream cheese, softened
- 2 tbsp sugar
- 1/2 tsp vanilla extract
- 1 egg
- 2 tbsp all-purpose flour
- 2 tbsp sour cream (optional)
- Graham cracker crumbs (for crust, optional)
- Toppings of choice (fruit, whipped cream, chocolate sauce, etc.)
Cooking Steps:
- In a microwave-safe bowl, combine the softened cream cheese and sugar. Mix using a fork or a whisk until smooth and well combined.
- Add the vanilla extract and egg to the mixture, then stir well to incorporate everything. Make sure there are no lumps.
- Gradually mix in the flour, ensuring that it is fully blended into the batter. If you're using sour cream, add it now for extra creaminess.
- If desired, press a layer of graham cracker crumbs into the bottom of a microwave-safe mug or ramekin as a crust.
- Pour the cheesecake mixture over the graham cracker crust (if using) or directly into the mug/ramekin.
- Microwave on high for about 1-2 minutes. Start with 1 minute, then check for doneness. The cheesecake should be set but still slightly jiggly in the center, as it will continue to cook off the heat.
- Let it cool for a couple of minutes before adding any toppings you like, such as fruit, whipped cream, or chocolate sauce.
Variations and Tips:
- Flavor Variations: Add lemon juice or zest for a citrus twist, or incorporate a spoonful of peanut butter or Nutella for a unique flavor.
- Baking time may vary: Depending on the wattage of your microwave, the cooking time may need slight adjustments. Make sure to monitor the cheesecake closely to avoid overcooking.
- Serving: This recipe can easily be doubled if you're serving more than one person; just increase the quantities and use a larger microwave-safe dish.
- Chilling (Optional): For a more traditional cheesecake experience, let the cheesecake chill in the fridge for about 30 minutes before serving.
- 100% Leak-proof: Guaranteed no-spill seal and secure latches
- Crystal-clear Tritan Built: Stain-resistant and odor-resistant material for a clear view of contents
- Lightweight & Sturdy: Easy to carry, yet durable for everyday use
Nutella Mug Cake
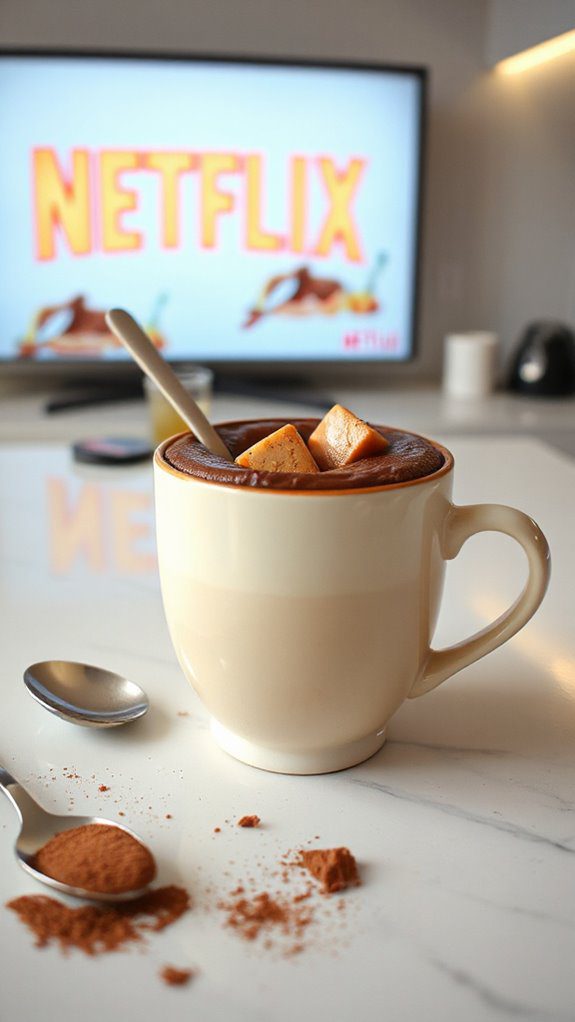
Microwave desserts are perfect for when you need a quick and indulgent treat without the hassle of baking a full cake. The Nutella Mug Cake is a delightful single-serving dessert that combines the rich, nutty flavor of Nutella with a soft and fluffy cake texture.
It's ideal for Nutella lovers and can be whipped up in just about 5 minutes, making it a fantastic option for late-night cravings or when unexpected guests arrive.
Ingredients:
- 4 tablespoons all-purpose flour
- 2 tablespoons granulated sugar
- 1 tablespoon unsweetened cocoa powder
- 1/8 teaspoon baking powder
- 1/4 cup milk
- 2 tablespoons Nutella
- 1 tablespoon vegetable oil
- A pinch of salt
- Optional: chocolate chips or nuts for topping
Cooking Steps:
- In a microwave-safe mug, combine the flour, sugar, cocoa powder, baking powder, and salt. Mix well with a fork to guarantee there are no clumps.
- Add the milk, Nutella, and vegetable oil to the dry ingredients. Stir until the batter is smooth and everything is well combined. Make sure to scrape down the sides of the mug.
- If desired, fold in a few chocolate chips or nuts for added texture.
- Microwave the mug on high for 1 minute and 30 seconds. Start checking at 1 minute and adjust your time as needed since microwave power levels can vary. The cake should rise and look set on top.
- Allow the mug cake to cool for a minute before enjoying – it'll be hot!
Variations and Tips:
- For a richer flavor, try adding a splash of vanilla extract to the batter.
- You can substitute Nutella with any chocolate hazelnut spread or even peanut butter for a different twist.
- Serve your Nutella mug cake with a scoop of ice cream or a drizzle of chocolate sauce for an extra special treat.
- If you prefer a lighter cake, use almond milk or oat milk instead of regular milk.
- 𝗘𝗳𝗳𝗼𝗿𝘁𝗹𝗲𝘀𝘀 𝗪𝗲𝗶𝗴𝗵𝗶𝗻𝗴: Supports 5 units...
- 𝗣𝗿𝗲𝗰𝗶𝘀𝗲 𝗥𝗲𝘀𝘂𝗹𝘁𝘀: Accurately weighs up to 11 lb/5 kg with 1 g...
- 𝗦𝗶𝗺𝗽𝗹𝗲 & 𝗖𝗼𝗺𝗽𝗮𝗰𝘁: The small and sleek scale is a perfect fit for...
Chocolate Lava Cake

Chocolate Lava Cake is a decadent dessert that features a warm, gooey center of melted chocolate that flows out when you cut into it.
This elegant dish is perfect for impressing guests at dinner parties, celebrating special occasions, or simply indulging yourself on a cozy evening. Best of all, it can be whipped up in just 15 minutes using a microwave, making it an easy yet luxurious treat for chocolate lovers.
Ingredients:
- 1/2 cup (1 stick) unsalted butter
- 1 cup semisweet chocolate chips
- 2 large eggs
- 2 large egg yolks
- 1/4 cup granulated sugar
- 2 tablespoons all-purpose flour
- 1/4 teaspoon salt
- Cooking spray or butter (for greasing)
Cooking Steps:
- In a microwave-safe bowl, combine the butter and chocolate chips. Microwave in 30-second intervals, stirring in between, until completely melted and smooth.
- In a separate bowl, whisk together the eggs, egg yolks, and granulated sugar until well combined.
- Gradually stir the melted chocolate mixture into the egg mixture until fully incorporated.
- Gently fold in the flour and salt until just combined; be careful not to overmix.
- Lightly grease two ramekins or microwave-safe mugs with cooking spray or butter.
- Divide the batter evenly between the prepared ramekins.
- Microwave each ramekin on high for 30-40 seconds. The edges should be firm, but the center should still look slightly undercooked. Let them sit for a minute to finish cooking.
- Carefully invert each ramekin onto a plate. Tap gently to release the cake and serve immediately.
Variations and Tips:
- Add flavor: Incorporate a splash of vanilla extract or a pinch of espresso powder for an extra flavor boost.
- Different chocolate: Use dark chocolate for a richer taste or milk chocolate for a sweeter version.
- Fruity twist: Add a few berries or nuts to the bottom of the ramekin before pouring in the batter for a delightful surprise.
- Serving suggestions: Serve with a scoop of vanilla ice cream or a dollop of whipped cream to complement the warm chocolate center.
- Adjust cooking time: Microwave times may vary, so keep a close eye on the cakes as they cook to avoid overcooking. They should still be soft in the middle.
- Instant Read Food Thermometer | Our instant read thermometer features a temperature probe and advanced,...
- Multi-Use | From bbq thermometer to baking thermometer, our digital food thermometer for cooking is...
- Easy-Read Digital Thermometer For Cooking | Large instant thermometer dial with bright blue backlight...
Maple Syrup Oatmeal Cookie

Microwave desserts offer quick and easy solutions for satisfying sweet cravings, and today's recipe for Maple Syrup Oatmeal Cookies is no exception. These delightful cookies are perfect for anyone looking for a warm, chewy treat in just a few minutes.
Ideal for busy individuals, last-minute snacking, or a cozy family dessert, this cookie recipe takes only about 10 minutes from start to finish. Utilizing the microwave, you'll enjoy the comforting flavors of maple and oats in a simple, yet delicious homemade treat.
Ingredients:
- 1/2 cup rolled oats
- 1/4 cup all-purpose flour
- 1/4 cup brown sugar
- 2 tablespoons maple syrup
- 2 tablespoons butter, melted
- 1/2 teaspoon baking powder
- 1/4 teaspoon vanilla extract
- Pinch of salt
- Optional: 1/4 cup chopped nuts or chocolate chips
Cooking Steps:
- In a microwave-safe bowl, mix together the rolled oats, all-purpose flour, brown sugar, baking powder, and salt until well combined.
- Add in the melted butter, maple syrup, and vanilla extract, stirring until the mixture forms a dough.
- If desired, fold in chopped nuts or chocolate chips for added flavor and texture.
- Scoop the dough into 2-3 portion-sized balls and flatten them slightly with the back of a spoon.
- Microwave the cookies on high for about 30-45 seconds or until they are set but still soft in the center. Be cautious not to overcook, as they will continue to firm up once removed from the microwave.
- Allow the cookies to cool for a minute or two before enjoying them warm.
Variations & Tips:
- For an oatmeal raisin twist, substitute chocolate chips with a handful of raisins.
- Experiment by adding spices like cinnamon or nutmeg for a warm flavor profile.
- If you prefer gluten-free cookies, substitute all-purpose flour with almond flour or gluten-free flour blend.
- Store any leftover cookies in an airtight container for up to 2 days; reheat in the microwave for a few seconds to restore softness.
Enjoy your delicious Maple Syrup Oatmeal Cookies for a quick dessert or snack anytime!
- Versatile 54-Piece Collection: Elevate your kitchen with the Home Hero 54-Piece Kitchen Utensil Set, a...
- Durable and Long-Lasting: Crafted from premium stainless steel, these kitchen utensils are designed to...
- Perfect Holiday Gift: Delight your loved ones with this kitchen utensils gift set this festive season....
Raspberry Mug Cake

Raspberry Mug Cake is a delightful single-serve dessert that's perfect for a quick sweet fix. This fluffy, fruity cake can be whipped up in just about 5 minutes, making it an ideal treat for those late-night cravings or for anyone who wants to indulge without the hassle of baking an entire cake.
With its vibrant raspberry flavor, this mug cake is not only delicious but also visually appealing, making it a great choice for casual gatherings or even a cozy night in.
Ingredients:
- 4 tablespoons all-purpose flour
- 4 tablespoons granulated sugar
- 1/8 teaspoon baking powder
- 1/8 teaspoon salt
- 3 tablespoons milk
- 2 tablespoons vegetable oil
- 1/4 teaspoon vanilla extract
- 2 tablespoons fresh or frozen raspberries
- Powdered sugar for dusting (optional)
Instructions:
- In a microwave-safe mug, combine the flour, sugar, baking powder, and salt. Stir well to verify there are no lumps.
- Add the milk, vegetable oil, and vanilla extract to the dry ingredients. Mix until fully combined and smooth.
- Gently fold in the raspberries, being careful not to break them too much.
- Microwave the mug on high for about 1 minute to 1 minute and 30 seconds. Start with 1 minute and check for doneness. The cake should rise and be firm to the touch, but still moist.
- Let the mug cake cool for a minute before dusting with powdered sugar, if desired. Enjoy straight from the mug!
Variations & Tips:
- Fruit Variations: Substitute raspberries with other berries such as blueberries, strawberries, or blackberries.
- Chocolate Twist: Add a tablespoon of cocoa powder to the dry ingredients for a chocolate raspberry mug cake.
- Nutty Addition: Toss in some chopped nuts like almonds or walnuts for added texture.
- Serving Suggestions: Serve with a scoop of vanilla ice cream or a dollop of whipped cream for an extra touch of indulgence.
- Microwave Cooking Times: Cooking times may vary depending on your microwave's wattage. Keep an eye on the cake as it cooks to prevent overcooking.
- 24-ounce insulated stainless-steel water bottle with a FreeSip spout and push-button lid with lock
- Patented FreeSip spout designed for either sipping upright through the built-in straw or tilting back to...
- Protective push-to-open lid keeps spout clean; convenient carry loop doubles as a lock
Peanut Butter Fudge
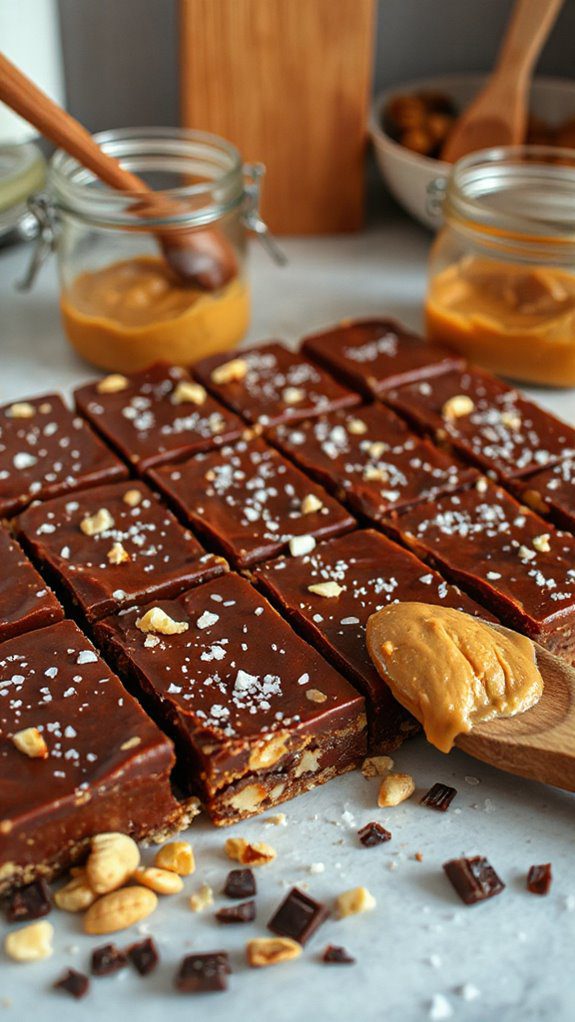
Peanut Butter Fudge is a decadent, indulgent dessert that combines the rich, nutty flavor of peanut butter with a creamy, smooth texture. This delightful treat is perfect for peanut butter lovers and makes an excellent snack or dessert for parties, gatherings, or just a sweet indulgence at home.
Best of all, it can be made in just 10 minutes in the microwave, plus a bit of time for it to set.
Ingredients:
- 1 cup creamy peanut butter
- 1/2 cup unsalted butter
- 2 cups powdered sugar
- 1 teaspoon vanilla extract
- A pinch of salt (optional)
- Chopped peanuts or chocolate chips (optional, for topping)
Cooking Steps:
- In a microwave-safe bowl, combine the creamy peanut butter and unsalted butter. Microwave in 30-second intervals, stirring in between, until the mixture is melted and smooth.
- Once melted, remove the bowl from the microwave and stir in the powdered sugar, vanilla extract, and a pinch of salt (if using). Mix until fully combined and smooth.
- Grease an 8×8-inch square baking dish or line it with parchment paper for easy removal. Pour the fudge mixture into the dish and spread it evenly with a spatula.
- If desired, sprinkle chopped peanuts or chocolate chips on top for added texture and flavor. Press them gently into the surface of the fudge.
- Refrigerate the fudge for about 1-2 hours, or until set. Once firm, cut into squares and enjoy!
Variations and Tips:
- For a richer flavor, consider adding a tablespoon of cocoa powder to the mixture for chocolate peanut butter fudge.
- If you prefer an alternative nut butter, substitute the creamy peanut butter with almond butter or cashew butter for a different taste.
- You can also add a swirl of melted chocolate on top for an extra layer of flavor—melt some chocolate chips and drizzle it over the fudge before it sets.
- Store any leftovers in an airtight container in the refrigerator for up to a week for ideal freshness.
Mug Banana Bread
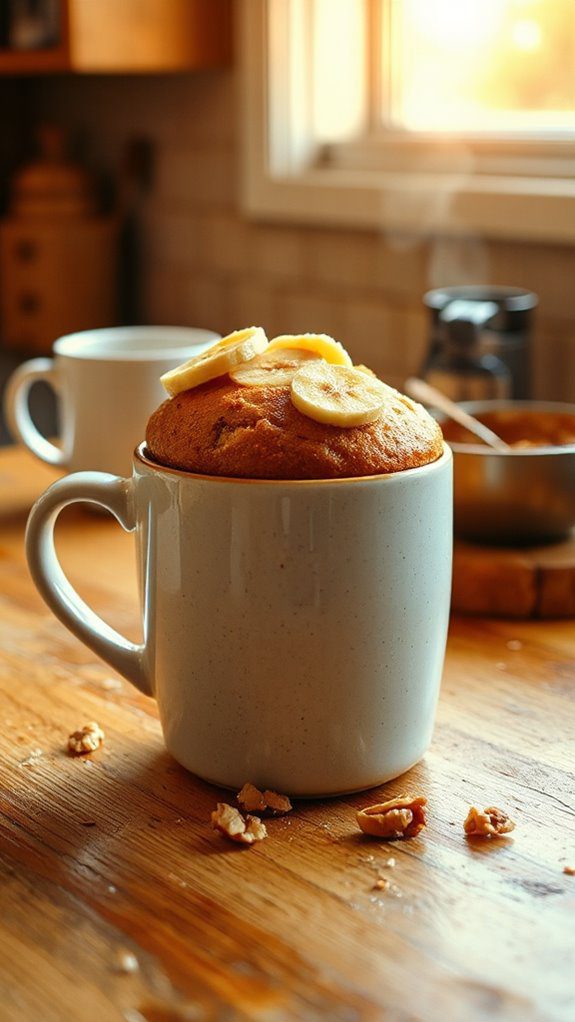
Mug Banana Bread is a quick and delightful dessert perfect for anyone looking for a sweet treat in a fraction of the time it normally takes to make traditional banana bread.
Ideal for busy individuals or those who simply crave a fast dessert, this mug recipe takes only about 5 minutes to prepare and cook. It's a single-serving dish, making it a convenient option for satisfying cravings without the need to bake an entire loaf.
Ingredients:
- 1 ripe banana
- 1 egg
- 3 tablespoons all-purpose flour
- 2 tablespoons sugar
- 1/4 teaspoon baking powder
- 1/4 teaspoon cinnamon
- 1 pinch of salt
- 1 tablespoon melted butter (optional)
- Chopped nuts or chocolate chips (optional)
Cooking Steps:
- In a microwave-safe mug, mash the ripe banana with a fork until smooth.
- Add the egg to the banana and whisk until both are well combined.
- Stir in the flour, sugar, baking powder, cinnamon, and salt until just mixed. If desired, add melted butter and mix again.
- If using, fold in the chopped nuts or chocolate chips.
- Microwave on high for 1-2 minutes, watching carefully. Cooking time may vary depending on your microwave's wattage; the banana bread should rise and be set in the middle.
- Allow the mug cake to cool slightly before enjoying.
Variations & Tips:
- For a healthier version, substitute the all-purpose flour with whole wheat flour and reduce sugar as needed.
- Add some vanilla extract or a dash of nutmeg for a flavor twist.
- For extra moisture, try mixing in a tablespoon of yogurt or applesauce.
- Top with a sprinkle of powdered sugar or a dollop of whipped cream for an indulgent touch.
- Serve warm, and if you have leftovers, refrigerate and reheat in the microwave for a quick treat later!
S'mores in a Mug
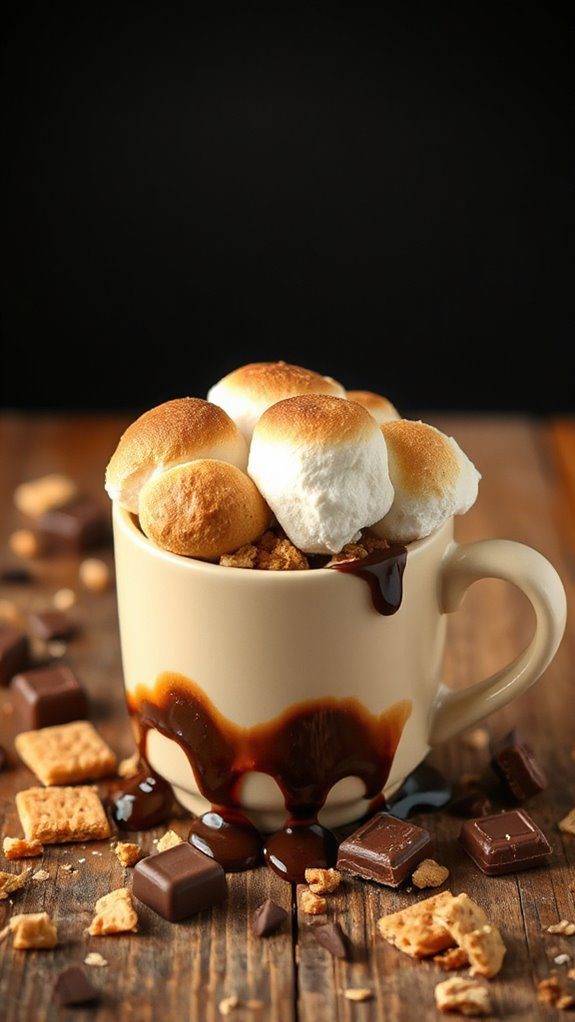
S'mores in a mug is a delightful and quick dessert that brings the classic camping treat right to your kitchen. This individual-sized dessert is perfect for satisfying chocolate cravings without the need for a campfire, making it ideal for both kids and adults alike.
In just under 10 minutes, you can indulge in layers of graham cracker, marshmallow, and chocolate goodness, all melted together for a gooey, sweet experience.
Ingredients:
- 2 tablespoons graham cracker crumbs
- 2 tablespoons milk chocolate chips
- 2 tablespoons mini marshmallows
- 1 tablespoon unsalted butter
- 1 additional tablespoon of graham cracker crumbs for topping (optional)
- A sprinkle of sea salt (optional)
Cooking Steps:
- In a microwave-safe mug, add the unsalted butter and melt it in the microwave for about 20 seconds.
- Once melted, sprinkle the graham cracker crumbs over the melted butter, mixing well to combine until you have a buttery crumb layer at the bottom.
- Next, add the milk chocolate chips on top of the graham cracker mixture, followed by the mini marshmallows.
- Microwave the mug on high for 30-45 seconds, watching closely until the marshmallows puff up and the chocolate is melted.
- Once done, take the mug out of the microwave (be careful, it will be hot) and sprinkle additional graham cracker crumbs and a touch of sea salt on top for extra flavor.
- Allow the dessert to cool for a minute before digging in with a spoon to enjoy your gooey, delicious S'mores in a mug!
Variations and Tips:
- For a richer flavor, consider using dark chocolate or a mix of chocolates.
- If you prefer, add a hint of peanut butter by swirling in a tablespoon of creamy or chunky peanut butter after melting the butter.
- For a gourmet twist, sprinkle crushed nuts or drizzle caramel sauce over the top before serving.
- Serve with a scoop of vanilla ice cream for an extra indulgent treat.
- Be mindful of microwave times; if you exceed the time, the marshmallows can become too hard or the chocolate may burn, so keep a close eye!
Matcha Mug Cake

Matcha Mug Cake is a delightful and quick dessert that combines the earthy flavors of matcha green tea with the comforting texture of a cake. This single-serving treat is perfect for matcha enthusiasts or anyone looking to satisfy their sweet tooth without the hassle of baking an entire cake.
With a preparation time of just 5 minutes and a cooking time of 1 minute, it's an ideal dessert for busy individuals or late-night snackers.
Ingredients
- 4 tablespoons all-purpose flour
- 2 tablespoons granulated sugar
- 1 tablespoon matcha powder
- 1/8 teaspoon baking powder
- 1/8 teaspoon salt
- 3 tablespoons milk (or non-dairy alternative)
- 2 tablespoons vegetable oil (or melted coconut oil)
- 1/4 teaspoon vanilla extract
Cooking Instructions
- In a microwave-safe mug, whisk together the flour, sugar, matcha powder, baking powder, and salt until well combined.
- Add the milk, vegetable oil, and vanilla extract to the dry ingredients. Mix until you have a smooth batter, making sure to scrape the bottom and sides of the mug.
- Microwave the mug on high for approximately 60-90 seconds. Start with 60 seconds and check for doneness; the cake should be set and spring back when pressed lightly.
- Allow the mug cake to cool for 1-2 minutes before enjoying it. You can also top it with whipped cream, ice cream, or a drizzle of honey for added flavor.
Variations and Tips
- For a healthier twist, substitute coconut sugar for granulated sugar and opt for whole wheat flour instead of all-purpose flour.
- Add chocolate chips, nuts, or dried fruit to the batter for additional texture and flavor.
- If you prefer a vegan version, use a plant-based milk and replace the vegetable oil with applesauce.
- Experiment with different flavorings such as almond extract or a touch of cinnamon to create your own unique twist on this mug cake.
Molten Nutella Brownie
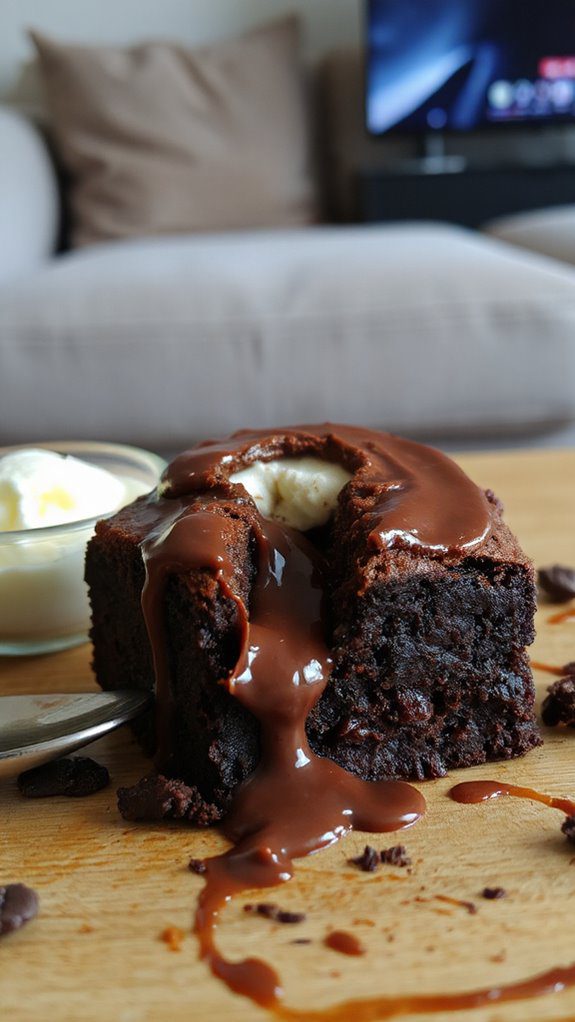
Indulge in the rich and gooey goodness of a Molten Nutella Brownie, a perfect dessert for Nutella lovers and chocolate enthusiasts alike. This quick and easy microwave dessert can be prepared in under 5 minutes, making it an ideal sweet treat for spontaneous cravings or a cozy evening at home.
With its fudgy interior and oozing Nutella center, these brownies are sure to impress friends, family, or yourself!
Ingredients:
- 1/4 cup all-purpose flour
- 1/4 cup granulated sugar
- 2 tablespoons unsweetened cocoa powder
- 1/8 teaspoon salt
- 2 tablespoons vegetable oil
- 2 tablespoons water
- 2 tablespoons Nutella (plus more for serving, if desired)
- Optional: a pinch of vanilla extract or a handful of chocolate chips
Cooking Steps:
- In a microwave-safe mug or bowl, combine the flour, sugar, cocoa powder, and salt. Mix well until all dry ingredients are evenly incorporated.
- Add the vegetable oil and water to the dry mixture. Stir until you have a smooth batter. If desired, add a pinch of vanilla extract to enhance the flavor.
- Spoon in 2 tablespoons of Nutella and gently swirl it into the batter without fully mixing, creating a molten center.
- Microwave the brownie for about 30-40 seconds on high. Start with 30 seconds and check for doneness; the brownie should be set on the edges but still gooey in the center.
- Let it cool for a minute before indulging. For an extra treat, top with additional Nutella or serve with scoops of ice cream.
Variations and Tips:
- Add-ins: Feel free to mix in chocolate chips, nuts, or even peanut butter for a twist on flavor.
- Serving Style: Serve it warm with a scoop of vanilla ice cream on the side for a delightful contrast in temperature and texture.
- Many Mugs: If you're making brownies for a group, you can multiply the ingredient quantities and divide them among multiple mugs for an easy party dessert.
- Nut-Free: Substitute Nutella with sunflower seed butter or almond butter if you prefer a nut-free dessert.
Enjoy your delicious, molten delight in just minutes!
Coconut Macaroons

Coconut macaroons are delightful bite-sized treats that combine the rich flavor of shredded coconut with just a hint of sweetness. Ideal for coconut lovers, these chewy cookies are perfect for dessert lovers of all ages and make a great addition to any gathering or special occasion.
They can be whipped up in just about 15 minutes, making them an excellent choice for those looking for a quick and easy dessert option using a microwave.
Ingredients
- 2 cups sweetened shredded coconut
- 1/2 cup sweetened condensed milk
- 1 teaspoon vanilla extract
- 1/4 teaspoon salt
- 1/4 cup semi-sweet chocolate chips (optional)
Cooking Steps
1. In a medium-sized mixing bowl, combine the shredded coconut, sweetened condensed milk, vanilla extract, and salt. Mix well until all the ingredients are evenly combined.
2. Using a tablespoon or small cookie scoop, form the mixture into small mounds and place them on a microwave-safe plate lined with parchment paper. Be sure to leave some space between each mound to allow for expansion.
3. Microwave the macaroons on high for 2 minutes. If necessary, continue to microwave in 15-second intervals until they are golden-brown and set.
Keep a close eye on them, as cooking times may vary depending on your microwave wattage.
4. Once done, remove the plate from the microwave and allow the macaroons to cool for a few minutes on the plate. They will firm up as they cool.
5. If you'd like to add the optional chocolate chips, melt them in the microwave for 30-45 seconds, stirring every 15 seconds until smooth. Drizzle or dip the cooled macaroons into the melted chocolate.
6. Allow the chocolate to set before serving.
Variations and Tips
- For added flavor, try incorporating 1/4 teaspoon of almond extract or a pinch of cinnamon into the mixture.
- You can also mix in chopped nuts or dried fruits to customize your macaroons further.
- If you prefer a less sweet version, use unsweetened coconut and adjust the sweetened condensed milk amount to taste.
- Store any leftovers in an airtight container at room temperature for up to a week, or in the refrigerator for slightly longer freshness.
Pumpkin Spice Mug Cake

This delightful Pumpkin Spice Mug Cake is the perfect quick dessert for pumpkin lovers and anyone craving a comforting treat.
Ready in just 5 minutes, this single-serving cake is ideal for a cozy night in or to satisfy a sudden sweet tooth. With its warm spices and moist texture, it's an easy microwave dessert that packs all the flavors of fall in a convenient mug.
Ingredients:
- 4 tablespoons all-purpose flour
- 2 tablespoons granulated sugar
- 1/4 teaspoon baking powder
- 1/4 teaspoon pumpkin pie spice
- 1/8 teaspoon salt
- 3 tablespoons canned pumpkin puree
- 3 tablespoons milk
- 2 tablespoons vegetable oil or melted butter
- 1/4 teaspoon vanilla extract
Cooking Instructions:
- In a microwave-safe mug, combine the flour, sugar, baking powder, pumpkin pie spice, and salt. Mix well with a fork to guarantee there are no lumps.
- Add the pumpkin puree, milk, vegetable oil (or melted butter), and vanilla extract to the dry ingredients. Stir well until the batter is smooth and fully combined.
- Tap the mug gently on the counter to release any air bubbles.
- Microwave on high for 1 minute and 30 seconds, checking at the 1-minute mark. The cake should rise but be careful not to overcook it, as microwave times can vary.
- Let the mug cake cool for a couple of minutes before enjoying straight from the mug.
Variations & Tips:
- For added flavor, mix in some chocolate chips or walnuts before microwaving.
- If you prefer a richer taste, substitute half of the all-purpose flour with almond flour.
- Top your cake with a dollop of whipped cream or a sprinkle of powdered sugar for an extra touch.
- If you'll be making several mug cakes at once, you can easily double the recipe, using separate mugs for each serving. Adjust the cooking time accordingly.
- Make sure to clean your mug thoroughly before using it to guarantee the cake comes out easily after cooking.
Chocolate Peanut Butter Mug Brownie

A Chocolate Peanut Butter Mug Brownie is a decadent single-serving dessert that combines the rich flavors of chocolate and creamy peanut butter, perfect for satisfying those late-night cravings or indulging in a quick treat.
This easy recipe comes together in just about 5 minutes, making it an ideal option for students, busy professionals, or anyone looking for a hassle-free dessert that requires minimum cleanup. With the microwave doing all the work, you'll have a warm, gooey brownie ready to enjoy in no time.
Ingredients:
- 4 tablespoons all-purpose flour
- 4 tablespoons granulated sugar
- 2 tablespoons unsweetened cocoa powder
- 1/8 teaspoon salt
- 3 tablespoons milk
- 2 tablespoons vegetable oil
- 1/4 teaspoon vanilla extract
- 1 tablespoon peanut butter (can be smooth or crunchy)
- Optional: chocolate chips for added decadence
Instructions:
- In a microwave-safe mug, combine the flour, sugar, cocoa powder, and salt. Mix well until there are no lumps.
- Add the milk, vegetable oil, and vanilla extract to the dry ingredients. Stir until fully combined, ensuring there are no dry pockets.
- Spoon the peanut butter into the center of the brownie batter. You can swirl it in with a toothpick for a marbled effect or leave it as a dollop on top.
- If you're adding chocolate chips, sprinkle them on top of the batter at this stage.
- Microwave the mug on high for about 40-60 seconds. Start checking at the 40-second mark; the brownie is done when it's set in the middle but still soft. Be careful not to overcook, as it will continue to cook slightly after being removed from the microwave.
- Let the brownie cool for a minute before indulging. Enjoy it straight from the mug or serve with a scoop of ice cream or whipped cream.
Variations and Tips:
- For a gluten-free version, substitute the all-purpose flour with almond flour or a gluten-free flour blend.
- Try adding some chopped nuts like walnuts or pecans for an extra crunch.
- If you really love peanut butter, use a peanut butter cup instead of plain peanut butter for an even richer flavor.
- Consider adding a sprinkle of sea salt on top after microwaving for a delightful sweet-and-salty contrast.
- If you want to make it a full meal, throw on some sliced bananas or strawberries after cooking for an extra fruity touch.
Lemon Mug Cake

Lemon mug cake is a delightful and invigorating dessert that is perfect for lemon lovers or anyone in need of a quick, sweet treat. This single-serving dessert can be prepared in just 5 minutes, making it an ideal choice for those late-night cravings or impromptu gatherings.
With its bright citrus flavor and fluffy texture, this mug cake is perfect for a quick dessert fix any day of the week.
Ingredients:
- 4 tablespoons all-purpose flour
- 4 tablespoons granulated sugar
- 1/8 teaspoon baking powder
- 1/8 teaspoon salt
- 3 tablespoons milk
- 2 tablespoons vegetable oil
- 1 tablespoon lemon juice
- 1 teaspoon lemon zest
- Optional: powdered sugar for dusting, whipped cream for serving
Cooking Steps:
- In a large microwave-safe mug (12 oz or larger), mix together the flour, sugar, baking powder, and salt until thoroughly combined.
- Add the milk, vegetable oil, lemon juice, and lemon zest to the mug and whisk until the batter is smooth and there are no lumps. Make sure to scrape the sides and bottom of the mug to guarantee all ingredients are well incorporated.
- Microwave the mug cake on high for 1 minute and 30 seconds. Depending on your microwave's wattage, you may need to adjust the time slightly. The cake should rise and look set in the middle.
- Let the mug cake cool for a minute before enjoying. If desired, dust with powdered sugar or top with whipped cream for an extra treat.
Variations and Tips:
- Flavor Variations: Consider adding a few drops of vanilla extract or a pinch of poppy seeds for additional flavor and texture. You can also substitute lime juice and zest for a lime mug cake.
- Fruit Add-Ins: Add a few blueberries or raspberries to the batter before microwaving for a fruity twist.
- Serving Suggestions: Serve the mug cake warm with a dollop of frosting, whipped cream, or a scoop of ice cream. It can also be a great base for a mini parfait.
- Microwave Power: Keep in mind that microwaves vary in power, so the cooking time might need to be adjusted. Keep an eye on the cake the first time you try it to avoid overcooking.
- Storage: This cake is best enjoyed fresh, but if you have leftovers, cover them and store them in the refrigerator for up to 2 days. Reheat in the microwave for 10-15 seconds before eating.
Coffee Mug Cake
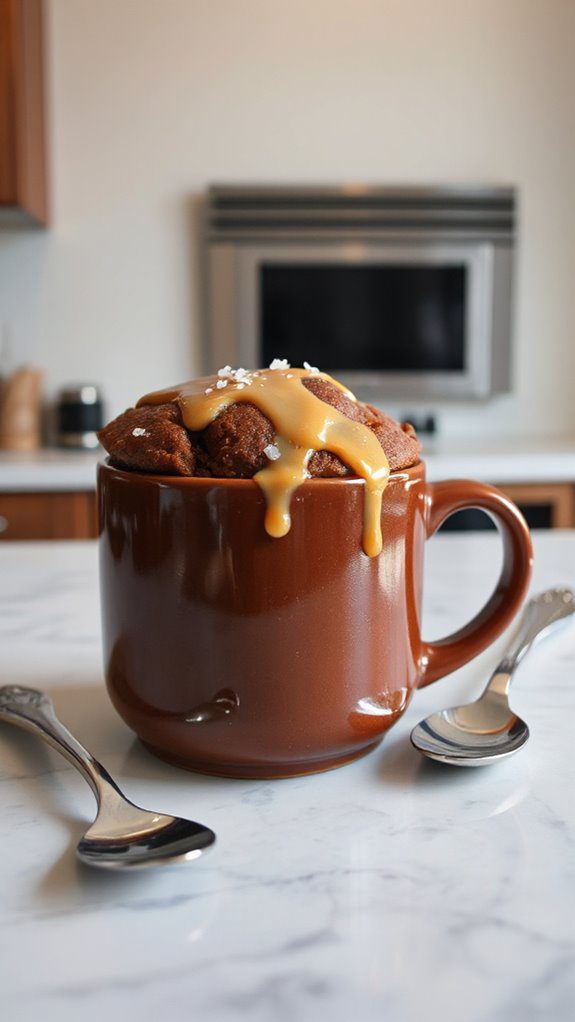
The Coffee Mug Cake is a delightful single-serving dessert that combines the rich flavor of coffee with a fluffy cake texture, all made conveniently in a microwave.
This quick indulgence is perfect for those late-night cravings or when you need a swift pick-me-up without the fuss of baking an entire cake.
In just about 5 minutes, you can enjoy a warm and comforting treat that blends the joy of coffee with the sweetness of a cake.
Ingredients:
- 4 tablespoons all-purpose flour
- 4 tablespoons granulated sugar
- 2 tablespoons unsweetened cocoa powder
- 1/8 teaspoon baking powder
- 1/8 teaspoon salt
- 3 tablespoons milk
- 2 tablespoons vegetable oil
- 1 tablespoon brewed coffee (or espresso)
- 1/4 teaspoon vanilla extract
Cooking Steps:
- In a microwave-safe mug, whisk together the flour, sugar, cocoa powder, baking powder, and salt until well combined.
- Add the milk, vegetable oil, brewed coffee, and vanilla extract to the dry ingredients in the mug. Stir until smooth and well mixed, ensuring no dry flour remains at the bottom.
- Microwave the mug on high for about 1 minute and 30 seconds. Start checking at 1 minute, as microwave wattages vary. The cake should rise and look set in the middle.
- Allow the mug cake to cool for a minute before enjoying it directly from the mug.
Variations and Tips:
- Add-ins: You can enhance your coffee mug cake by adding chocolate chips, nuts, or a dollop of your favorite frosting on top before microwaving.
- Flavor Boost: Substitute the brewed coffee with flavored coffee or add a sprinkle of cinnamon or a dash of almond extract for a twist.
- Adjust Sweetness: If you prefer a less sweet cake, reduce the amount of sugar to 3 tablespoons.
- Serving Style: For a decadent dessert, serve with whipped cream or a scoop of ice cream on top.
- Microwave Settings: Be cautious with cooking time, as overcooking can result in a rubbery texture. Start with less time and add increments as needed.
Enjoy your warm and cozy coffee mug cake as an easy and satisfying dessert!
Funfetti Mug Cake
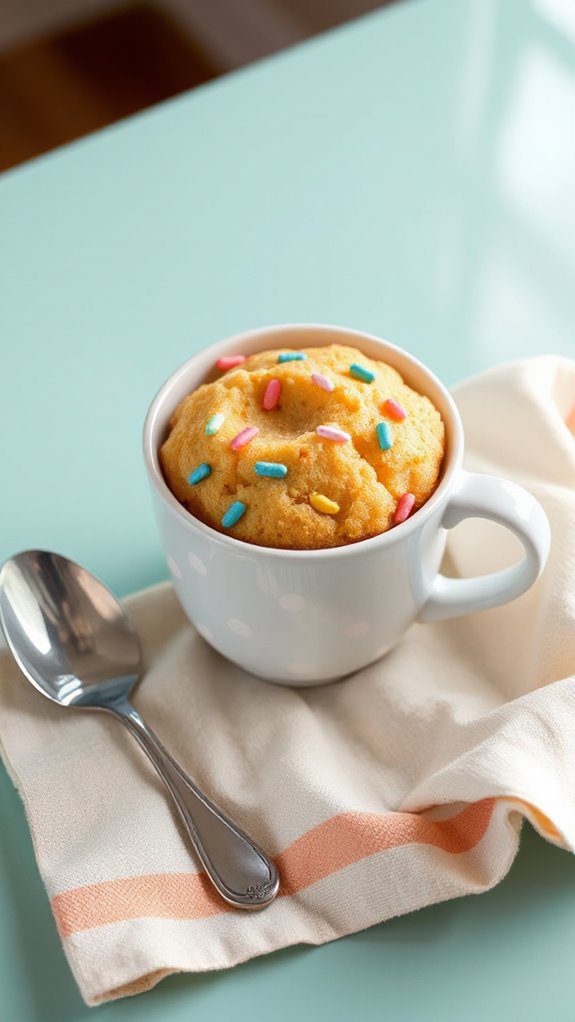
Funfetti Mug Cake is a delightful and whimsical dessert that brings joy to any occasion. This quick and easy microwave cake is perfect for a single serving, making it ideal for those late-night cravings or for a fun treat to share with friends. With a preparation time of just about 5 minutes, you can have a warm, fluffy cake ready in no time, brightened up with colorful sprinkles that add a festive touch.
Ingredients:
- 4 tablespoons all-purpose flour
- 4 tablespoons granulated sugar
- 1/8 teaspoon baking powder
- 1/8 teaspoon salt
- 3 tablespoons milk (any type)
- 2 tablespoons vegetable oil
- 1/4 teaspoon vanilla extract
- 1 tablespoon rainbow sprinkles (plus more for topping, if desired)
Cooking Steps:
- In a microwave-safe mug, whisk together the flour, sugar, baking powder, and salt until well combined.
- Add in the milk, vegetable oil, and vanilla extract. Stir until smooth and no lumps remain.
- Gently fold in the rainbow sprinkles, making sure they're distributed evenly throughout the batter.
- Microwave the mug on high for 30-40 seconds. You'll know it's done when the cake has risen and is set in the middle. (Microwave times may vary, so keep an eye on it to prevent overflow.)
- Allow the mug cake to cool for a minute before digging in. Top with extra sprinkles if desired for a festive touch.
Variations & Tips:
- Flavor Variations: Try adding a tablespoon of cocoa powder for a chocolate funfetti mug cake, or substitute almond extract for vanilla for a different flavor profile.
- Toppings: Consider adding whipped cream, a scoop of ice cream, or a drizzle of chocolate syrup on top for an indulgent treat.
- Healthier Option: Substitute some of the all-purpose flour for whole wheat flour and use a sugar substitute to make it a healthier version.
- Avoiding Overflow: Use a larger mug to make sure the batter has plenty of space to rise without spilling over. If you're unsure, start with a lower cooking time and add more as needed.
This Funfetti Mug Cake is sure to bring a smile to your face—enjoy your sweet, quick treat!
Churros in a Mug
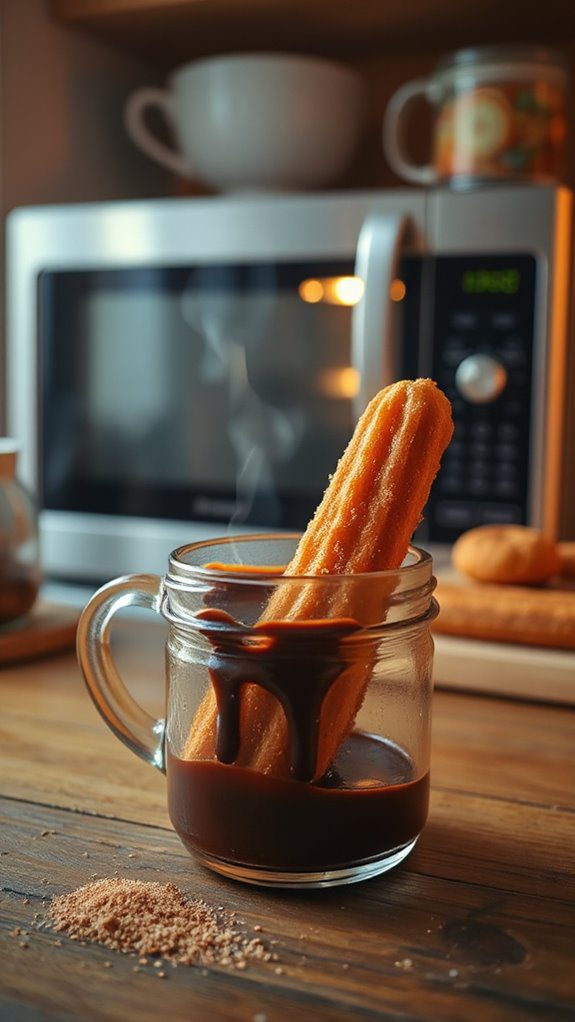
Churros in a Mug are a delightful and quick dessert option that brings the beloved flavors of traditional churros into a convenient, single-serving format. Perfect for those late-night cravings or when you're entertaining friends and want to impress without a lot of effort, these churros are ready in just 10 minutes!
With their warm, cinnamon-sugar coating and soft, doughy texture, they are an ideal treat for both kids and adults who enjoy a sweet indulgence.
Ingredients:
- 1/4 cup all-purpose flour
- 1/4 cup water
- 1 tablespoon unsalted butter
- 1 tablespoon granulated sugar
- 1/4 teaspoon salt
- 1/4 teaspoon baking powder
- 1/4 teaspoon ground cinnamon (for coating)
- 1 tablespoon additional sugar (for coating)
- Optional: chocolate sauce for dipping
Cooking Steps:
- In a microwave-safe mug, combine the water, butter, and 1 tablespoon of sugar. Microwave on high for about 30 seconds or until the butter is melted.
- Stir in the flour, salt, and baking powder until a dough forms. It should be thick and slightly sticky.
- Using a spoon or your fingers, shape the dough into small pieces or spirals that resemble churros. Place them back in the mug.
- Microwave the mug on high for 30 to 60 seconds, checking until the churros are puffed and firm to the touch (time may vary depending on your microwave).
- While the churros are cooking, mix the remaining sugar and cinnamon in a small bowl.
- Once the churros are done, remove the mug from the microwave and immediately roll the churros in the cinnamon-sugar mixture.
- Serve warm with a drizzle of chocolate sauce for extra indulgence.
Variations & Tips:
- For a chocolate churro variation, add 1 tablespoon of cocoa powder to the flour mixture.
- Try stuffing the churros with Nutella or cream cheese before microwaving for a surprise filling.
- If you prefer a healthier option, you can use whole wheat flour and reduce the sugar slightly.
- Be careful not to overcook the churros, as they can become tough. Start with 30 seconds and add time as needed.
- To enhance the flavor, add a dash of vanilla extract to the dough mixture.
Caramel Sauce Brownies
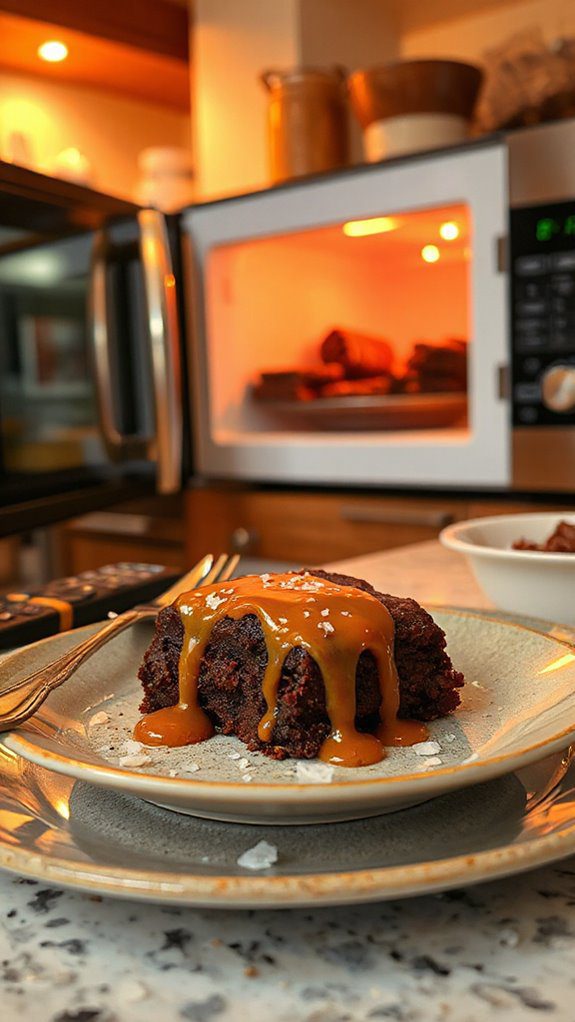
Caramel Sauce Brownies are a delightful treat combining the richness of fudgy brownies with velvety caramel sauce, making them perfect for satisfying your sweet tooth.
These brownies are ideal for chocolate lovers and can easily elevate any gathering or special occasion. With just 10 minutes of preparation time and 5-7 minutes in the microwave, you can whip up a batch that serves up to 8 people.
Ingredients:
- 1 cup semi-sweet chocolate chips
- ½ cup unsalted butter
- 3/4 cup granulated sugar
- 2 large eggs
- 1 teaspoon vanilla extract
- 1 cup all-purpose flour
- 1/4 teaspoon salt
- 1 cup caramel sauce (store-bought or homemade)
- Optional: sea salt for garnish
Cooking Steps:
- In a microwave-safe bowl, combine the semi-sweet chocolate chips and unsalted butter. Microwave on high for 1 minute, stirring halfway, until melted and smooth.
- Stir in the granulated sugar until well combined, followed by the eggs and vanilla extract.
- Gradually fold in the flour and salt, mixing until just combined and no dry ingredients remain.
- Spread half of the brownie batter evenly into a greased microwave-safe dish (8×8 inches works well).
- Drizzle half of the caramel sauce over the brownie batter, using a knife to swirl it slightly for a marbled effect.
- Pour the remaining brownie batter on top and finish with the remaining caramel sauce, swirling again if desired.
- Microwave on high for 5-7 minutes. Check for doneness by inserting a toothpick; it should come out with a few moist crumbs.
- Allow the brownies to cool for a few minutes before cutting into squares. If desired, sprinkle with a pinch of sea salt for an added flavor contrast.
Variations and Tips:
- Nutty Additions: Add 1/2 cup of chopped nuts (like walnuts or pecans) to the brownie batter for added texture and flavor.
- Stuffed Brownies: For an extra indulgent treat, consider stuffing the brownies with mini marshmallows or chocolate chunks before microwaving.
- Serving Suggestions: Serve with a scoop of vanilla ice cream or dollop of whipped cream for an extravagant dessert.
- Storage: Keep leftovers in an airtight container at room temperature for up to 3 days or in the refrigerator for up to a week. Reheat in the microwave for a few seconds before serving.
Cherry Almond Mug Cake
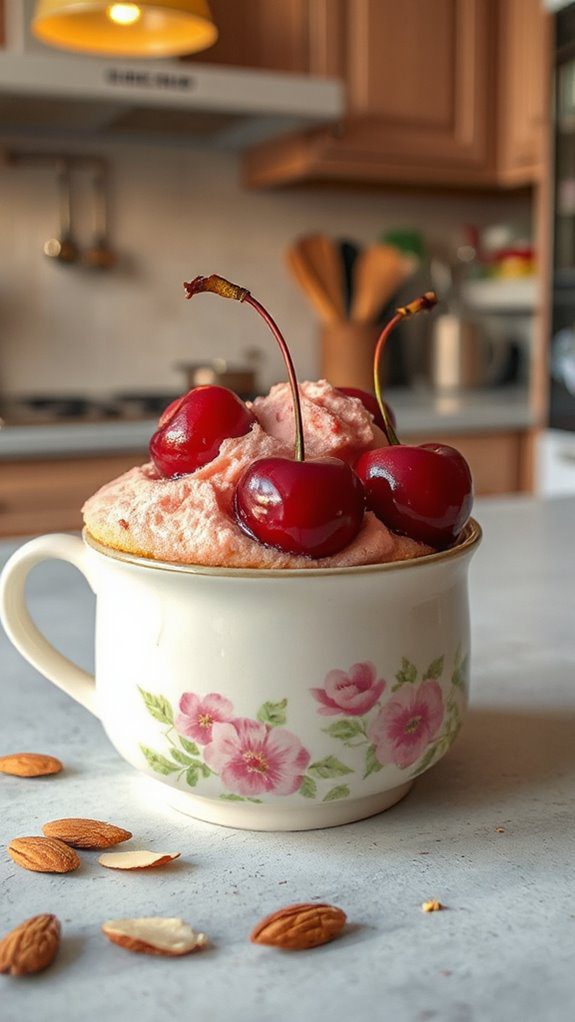
A Cherry Almond Mug Cake is a delightful single-serving dessert that's perfect for satisfying your sweet tooth in just a few minutes. This quick and easy treat combines the tartness of cherries with the nutty flavor of almonds, creating a deliciously moist cake that's ideal for anyone craving a little indulgence without the hassle of baking an entire cake.
With a preparation time of only about 5 minutes and a cooking time of 1 minute in the microwave, this mug cake is perfect for a late-night snack or a quick dessert after dinner.
Ingredients:
- 4 tablespoons all-purpose flour
- 2 tablespoons granulated sugar
- 1/8 teaspoon baking powder
- 1/8 teaspoon baking soda
- Pinch of salt
- 2 tablespoons milk
- 1 tablespoon vegetable oil
- 1/4 teaspoon almond extract
- 2 tablespoons cherry pie filling (or fresh/chopped cherries)
- Sliced almonds for topping (optional)
- Powdered sugar for dusting (optional)
Cooking Instructions:
- In a microwave-safe mug (about 12 oz capacity), combine the flour, sugar, baking powder, baking soda, and salt. Mix well with a fork or small whisk.
- Add in the milk, vegetable oil, and almond extract. Stir until the mixture is smooth and well-combined.
- Gently fold in the cherry pie filling or fresh cherries to distribute evenly throughout the batter.
- Microwave the mug on high for about 1 minute (depending on the strength of your microwave, it may take a bit longer). The cake should rise and look set in the middle.
- Allow the mug cake to cool for a minute or two before enjoying. You can top it with sliced almonds and a dusting of powdered sugar for an extra touch.
Variations & Tips:
- For a richer flavor, consider adding a tablespoon of cocoa powder to make a cherry chocolate mug cake.
- Experiment with different fruits such as peaches or blueberries to create your desired flavor mix.
- If you like a thicker mug cake, use a slightly larger mug and reduce the cooking time by a few seconds.
- Make sure not to overcook the mug cake, as this can lead to a dry texture. Start checking for doneness at 50 seconds.
- Serve with a scoop of ice cream or whipped cream for a more decadent dessert.
Gingerbread Mug Cake

Gingerbread Mug Cake is a delightful dessert that captures the warmth and spice of traditional gingerbread in a quick and convenient mug cake form.
Perfect for those cozy nights when you need a sweet treat in about 5 minutes, this mug cake serves one and is ideal for anyone craving a gingerbread flavor with minimal effort.
With its ease of preparation, it's perfect for busy individuals or anyone looking for a quick dessert option.
Ingredients:
- 4 tablespoons all-purpose flour
- 2 tablespoons brown sugar
- 1/2 teaspoon ground ginger
- 1/4 teaspoon ground cinnamon
- 1/8 teaspoon ground nutmeg
- 1/8 teaspoon baking powder
- Pinch of salt
- 3 tablespoons milk
- 2 tablespoons molasses
- 1 tablespoon vegetable oil
- Optional: whipped cream or vanilla ice cream for serving
Cooking Steps:
- In a microwave-safe mug (approximately 12 ounces), combine the flour, brown sugar, ginger, cinnamon, nutmeg, baking powder, and salt. Mix well until all the dry ingredients are evenly distributed.
- Add the milk, molasses, and vegetable oil to the mug. Stir until the batter is smooth and there are no lumps.
- Microwave the mug on high for about 1 minute and 30 seconds. Keep an eye on it while cooking, as microwaves may vary in power, and you don't want the cake to overflow.
- Allow the mug cake to cool slightly before eating. If desired, top with whipped cream or a scoop of vanilla ice cream for an extra indulgent treat.
Variations and Tips:
- For a spicier flavor, increase the amount of ginger and cinnamon according to your taste.
- You can add chopped nuts or chocolate chips for added texture and flavor.
- Serve with a sprinkle of powdered sugar on top for a decorative finish.
- To make it a festive treat, consider adding a dollop of cream cheese frosting on top after it has cooled.
- Experiment with different spices, such as allspice or cardamom, to create your own unique twist.
Strawberry Shortcake in a Mug
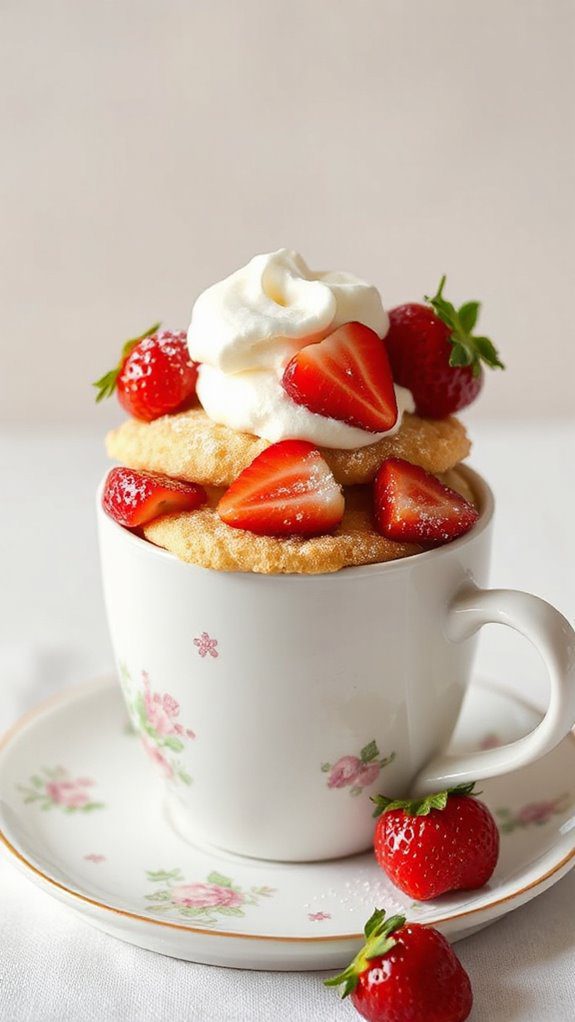
Strawberry Shortcake in a Mug is a delightful and quick dessert that brings the classic flavors of a traditional strawberry shortcake into a single-serving format. This treat is perfect for anyone who craves a sweet indulgence without the fuss of baking an entire cake.
It takes about 10 minutes from preparation to enjoying, making it ideal for a late-night snack, an impulsive dessert for one, or an easy offering for guests.
Ingredients:
- 4 tablespoons all-purpose flour
- 1 tablespoon granulated sugar
- 1/8 teaspoon baking powder
- 1/8 teaspoon salt
- 3 tablespoons milk
- 1 tablespoon vegetable oil
- 1/4 teaspoon vanilla extract
- 3-4 fresh strawberries, diced
- Whipped cream (for topping)
Cooking Instructions:
- In a microwave-safe mug, combine the flour, sugar, baking powder, and salt. Mix well with a fork.
- Add the milk, vegetable oil, and vanilla extract to the dry ingredients. Stir until everything is well combined and you have a smooth batter.
- Gently fold in the diced strawberries, ensuring they are evenly distributed throughout the batter.
- Microwave the mug on high for about 1 minute and 30 seconds. Check for doneness; if it still looks wet, microwave in 15-second intervals until cooked through.
- Allow the dessert to cool for a minute before adding a generous dollop of whipped cream on top. Enjoy your delicious strawberry shortcake in a mug!
Variations and Tips:
- For added flavor, you can mix in a pinch of lemon zest or a splash of almond extract.
- Substitute strawberries with other fruits such as blueberries, raspberries, or peaches for a delicious twist.
- If you prefer a healthier option, use whole wheat flour and substitute sugar with a sweetener of your choice.
- Be cautious with cooking times as microwaves can vary; start with shorter intervals to prevent overcooking.


