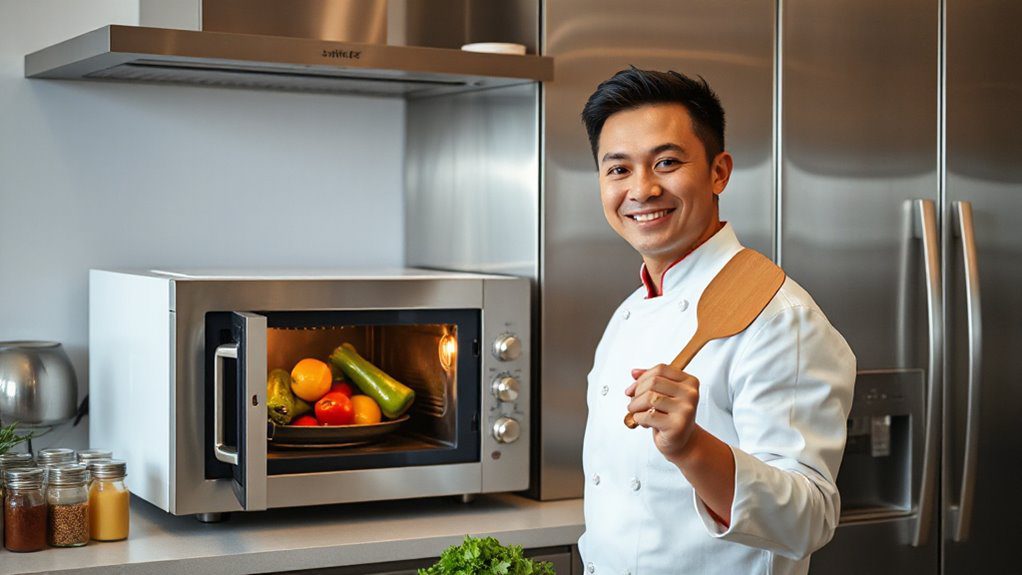
Professional chefs utilize various microwave hacks to optimize cooking. They quickly soften butter by cutting it into cubes and microwaving on low power. For vegetables, they steam them in a covered bowl to retain nutrients. Quinoa and rice are easily cooked using a rinse followed by microwaving with water or broth. These techniques showcase efficiency while enhancing flavor. Discover more surprising ways chefs maximize their time and elevate their dishes in the kitchen.
Quickly Soften Butter
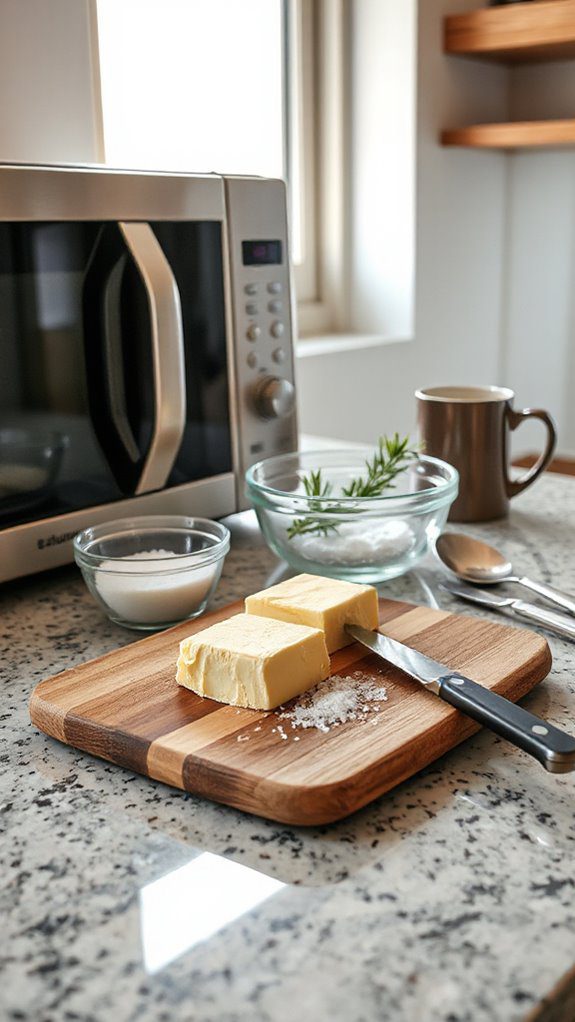
Soften butter quickly in the microwave is a game-changer for anyone who loves baking or cooking but often forgets to take the butter out of the fridge ahead of time.
This method is particularly ideal for those in a rush or anyone who finds themselves wanting to bake last-minute treats. The total preparation time is about 1-2 minutes, making it convenient for busy home cooks or anyone needing softened butter for recipes such as cookies, cakes, or spreads.
Ingredients:
– Cold butter (unsalted or salted, based on preference)
Cooking Steps:
- Prepare the Butter: Cut the cold butter into small cubes, about 1 tablespoon each. This helps it soften evenly and quickly when microwaved.
- Arrange in a Microwave-Safe Dish: Place the butter cubes in a microwave-safe dish. Make sure to spread them out in a single layer to guarantee even heating.
- Microwave on Low Power: Set your microwave to a low power setting (about 30% power) to avoid melting the butter. Heat it for 5-10 seconds at a time. Keep checking after each interval.
- Check Consistency: After each interval, check the butter to see if it is soft enough for your needs. Continue microwaving in 5-second increments until it reaches your desired softness, being careful not to melt it.
- Use as Desired: Once softened, use the butter immediately in your recipe or spread it on your favorite bread or toast.
Variations and Tips:
- Avoid Overheating: Be vigilant, as butter can quickly turn from softened to melted, so stay close to the microwave while doing this.
- Room Temperature Trick: If you have a little more time, grate the cold butter with a box grater. It will soften much quicker than cubed butter.
- Microwave with Water: Another alternative is to place a cup of water in the microwave alongside the butter while softening, creating a warm environment that helps soften the butter more uniformly.
Be sure to remove the water before using the butter.
– Use a Warm Bowl: You can also warm your microwave-safe dish for 10-15 seconds before placing the butter inside. This extra heat helps to soften the butter more quickly.
- The Original Pro Chopper - Our superstar veggie slicer has been creating waves on TikTok! Simple to use,...
- Easy Meal Prep with Rust-Resistant Blades - Our vegetable chopper is perfect for anyone who wants to eat...
- 5-Star Design - The soft-grip TPU handle ensures controlled chopping, while the non-skid rubber base...
Steam Vegetables to Perfection
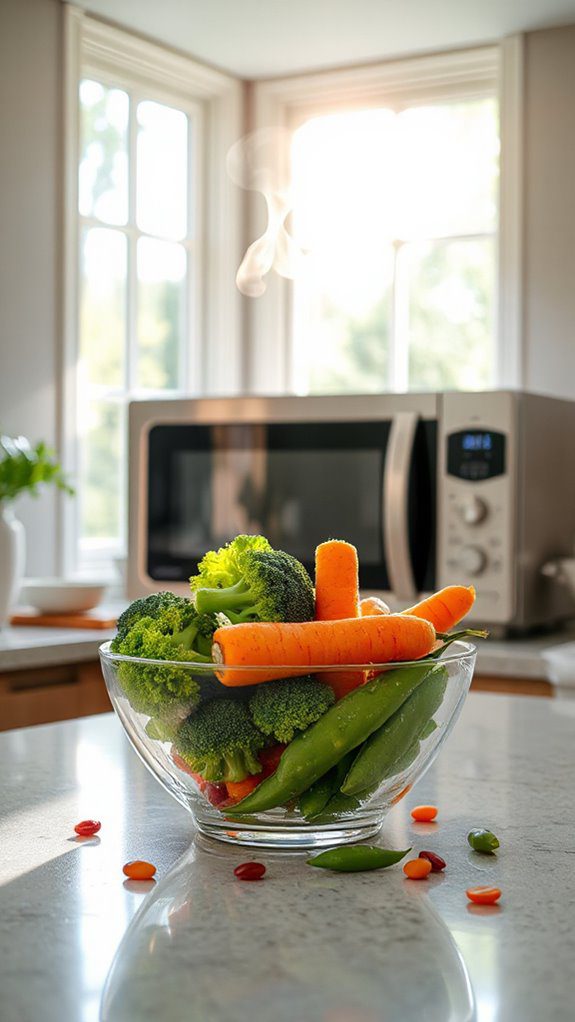
Steaming vegetables is a quick and healthy cooking method that retains nutrients, flavor, and vibrant colors. This dish is perfect for anyone looking to incorporate more vegetables into their diet or to serve as a side dish for a range of proteins.
Preparation and cooking time is around 10-15 minutes, making it ideal for busy weeknight meals or for meal prepping in advance.
Ingredients:
- 2 cups of mixed vegetables (e.g., broccoli, carrots, cauliflower, green beans)
- ½ cup of water
- Salt, to taste
- Pepper, to taste
- Optional: garlic powder, onion powder, lemon juice, or herbs for seasoning
Cooking Steps:
- Begin by washing and cutting your vegetables into uniform pieces to guarantee even cooking.
- Place the vegetables in a microwave-safe bowl. Add the water to the bowl.
- Cover the bowl with a microwave-safe lid or plate to trap the steam inside.
- Microwave on high for 3 to 5 minutes, depending on your microwave's wattage and the type of vegetables you're using. Check for doneness; they should be tender but still vibrant and crisp.
- Carefully remove the bowl from the microwave (it will be hot!). Drain any excess water.
- Season with salt, pepper, and any additional spices or lemon juice. Toss gently to combine.
Variations & Tips:
- Experiment with different vegetable combinations such as bell peppers, asparagus, or zucchini.
- For a flavor boost, add a splash of soy sauce, balsamic vinegar, or a sprinkle of parmesan cheese before serving.
- If you like your vegetables softer, increase the cooking time in 30-second intervals until they reach your desired tenderness.
- To make a complete meal, add steamed vegetables to cooked rice or quinoa and drizzle with your favorite sauce.
- Makes Everything Simple : Just forget your bagged cheese! Only turn the handle for several times and get...
- Premium Material : All parts of the rotary cheese grater are made of food grade ABS material, no BPA. The...
- Three Option Grater : The parmesan cheese grater finishes food preparation with slicing, shredding and...
Cook Quinoa and Rice Effortlessly
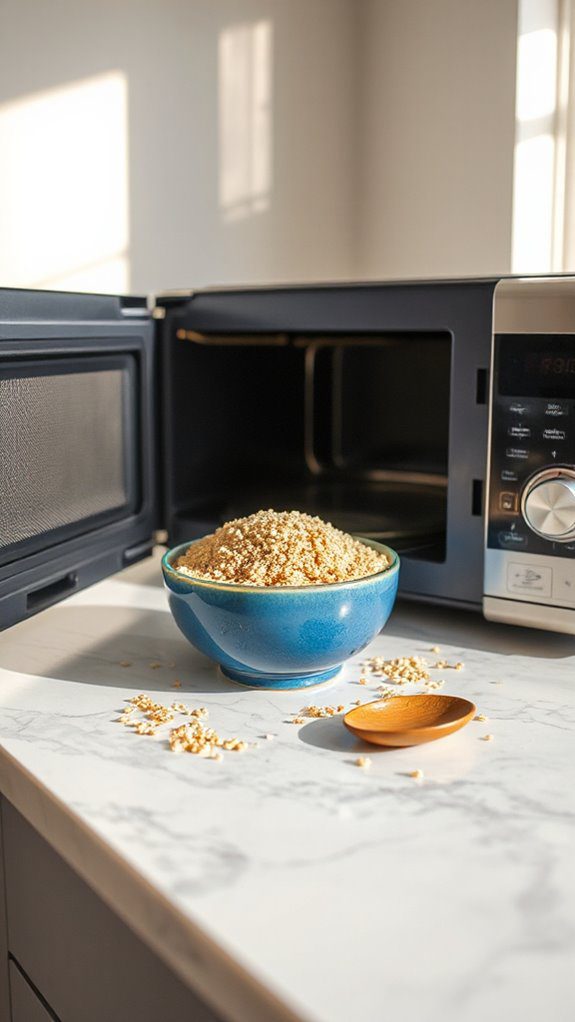
Cooking quinoa and rice in the microwave is a simple and efficient way to prepare a nutritious side dish that pairs perfectly with a variety of meals. This method is ideal for busy individuals or families who want a healthy option without the hassle of monitoring the stove.
With a total preparation and cooking time of approximately 20 minutes, you can have fluffy quinoa or rice ready to serve alongside your favorite protein or vegetables.
Ingredients:
- 1 cup quinoa or long-grain rice
- 2 cups water or broth (vegetable or chicken)
- 1 tablespoon olive oil (optional)
- 1/2 teaspoon salt (optional)
Cooking Steps:
- Rinse: Rinse the quinoa or rice under cold water in a fine-mesh strainer to remove any bitterness from quinoa or excess starch from the rice.
- Combine: In a microwave-safe bowl, combine the rinsed quinoa or rice, water or broth, olive oil, and salt.
- Cover: Cover the bowl with a microwave-safe lid or plate. If using plastic wrap, leave a small gap for steam to escape.
- Microwave: Microwave on high for 10 to 12 minutes for quinoa and 12 to 15 minutes for rice. Check halfway through cooking and stir if necessary to prevent sticking.
- Rest: Once the time is up, let it sit covered for an additional 5 minutes to allow it to finish cooking and absorb any remaining liquid.
- Fluff: Remove the cover and use a fork to fluff the quinoa or rice before serving.
Variations and Tips:
- Add Flavors: Enhance the taste by adding herbs, spices, or aromatics like garlic, onion, or bay leaves to the cooking water.
- Infused Broth: For a deeper flavor, substitute water with chicken or vegetable broth.
- Mixed Grains: Combine quinoa and rice in the same dish for a delicious grain blend but adjust water amounts accordingly—1.5 cups of water per cup of mixed grains.
- Serve Hot or Cold: Use cooked quinoa or rice in salads, grain bowls, or as a base for stir-fries.
- Store Leftovers: Refrigerate any leftovers for up to 5 days or freeze in portions for future meals. Always cool completely before storing.
- 💰 REDUCE WASTE AND SAVE MONEY: Chef Preserve keeps FOOD FRESH 5 TIMES LONGER than non-vacuum storage...
- ✅ POWERFUL, QUICK & EASY TO USE: Simply press the button to start. The device vacuum seals a bag in 5...
- ♻️ REUSABLE & RESEALABLE BAGS: Chef Preserve comes with dishwasher, freezer, refrigerator, and...
Poach Eggs in Minutes
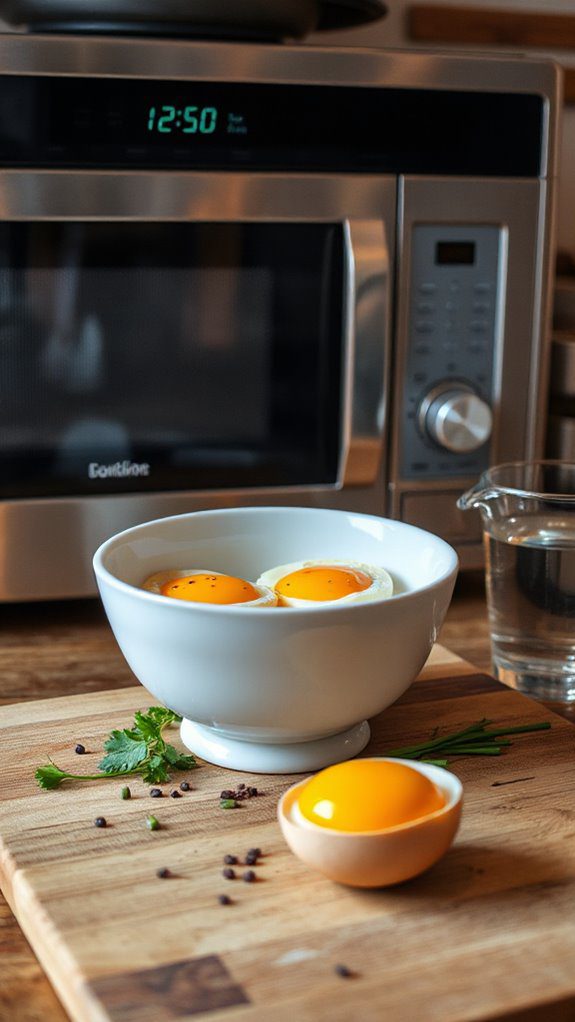
Poaching eggs is a classic culinary technique that yields tender, perfectly cooked eggs with runny yolks. This method is ideal for breakfast lovers looking to whip up a nutritious and elegant dish quickly.
With just a few simple steps, you can create poached eggs in minutes, making it perfect for busy mornings or brunch gatherings. Preparation and cooking time together take no more than 5-7 minutes.
Ingredients:
- Fresh eggs
- Water
- A dash of vinegar (optional)
- Salt and pepper (to taste)
Cooking Instructions:
- Fill a microwave-safe bowl or cup with about 1/2 cup of water. If desired, add a dash of vinegar to the water; this can help the egg whites set more quickly.
- Crack the fresh egg into the bowl, ensuring the yolk remains intact.
- Cover the bowl with a microwave-safe plate or lid to prevent splattering.
- Microwave on high for about 30-60 seconds, depending on your microwave's power and the doneness you prefer. Start with 30 seconds, then check the egg and continue in 10-second increments until the white is set, and the yolk is still soft.
- Carefully remove the bowl from the microwave (it will be hot!) and use a slotted spoon to lift the poached egg out, allowing any excess water to drain.
- Season with salt and pepper to taste and serve immediately.
Variations and Tips:
- For a burst of flavor, consider adding herbs (like chives or parsley) or spices to the water before poaching the eggs.
- If you prefer your eggs cooked more thoroughly, increase the microwave time accordingly until the desired doneness is reached, but be careful not to overcook them.
- Serve your poached eggs on a slice of toasted bread, avocado, or atop a salad for a complete meal.
- Experiment with different vinegar types (like white wine or apple cider) for subtle variations in flavor.
- Always use the freshest eggs possible for better results, as older eggs may not hold their shape as well during poaching.
- Generous Capacity: 7-quart slow cooker that comfortably serves 9+ people or fits a 7-pound roast
- Cooking Flexibility: High or low slow cooking settings, with convenient warm function for ideal serving...
- Convenient: Set it and forget it feature enables you to cook while at work or performing daily tasks
Rehydrate Dried Mushrooms
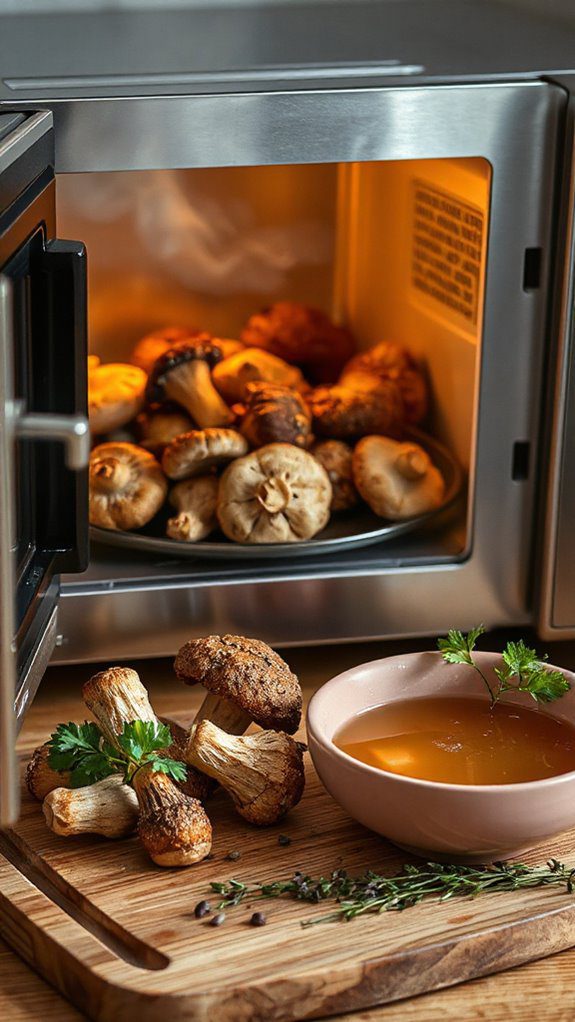
Rehydrating dried mushrooms is a quick and easy process that opens the door to a world of culinary possibilities. Ideal for home cooks looking to enhance their dishes with rich umami flavors, this method is particularly useful for adding depth to risottos, soups, or sauces. In just about 10 minutes, you can transform your dried mushrooms into a flavorful ingredient ready to elevate your cooking.
Ingredients:
- 1 cup of dried mushrooms (such as porcini, shiitake, or morels)
- 2 cups of hot water or vegetable broth
- Optional: 1 tablespoon of soy sauce or olive oil for flavor enhancement
Cooking Steps:
- Prepare the Mushrooms: Place the dried mushrooms in a heatproof bowl.
- Heat the Liquid: Boil water or vegetable broth, then carefully pour it over the dried mushrooms, ensuring they are fully submerged.
- Steep: Allow the mushrooms to soak for about 10-15 minutes, or until they become soft and plump. If using more delicate mushrooms, check for doneness at around 5-7 minutes.
- Drain and Rinse: Once rehydrated, use a slotted spoon to remove the mushrooms. Rinse them gently under cold water to remove any grit or residue.
- Flavor Boost (Optional): If desired, toss the rehydrated mushrooms in soy sauce or olive oil for extra flavor before using them in your dish.
- Use or Store: Incorporate the rehydrated mushrooms immediately into your recipe, or chop them and allow them to cool completely. Then store in an airtight container in the fridge for up to a week.
Variations and Tips:
- Flavor Variations: Experiment with different broths or add herbs and spices to the soaking liquid for additional flavor.
- Storage Tip: If you have leftover soaking liquid, don't discard it! Strain it through a fine mesh sieve and use it as a flavorful base for soups or risottos.
- Sautéing: For an even richer flavor, sauté the rehydrated mushrooms in a bit of butter or oil before adding them to your dish.
- Using the Mushrooms: Use rehydrated mushrooms just like fresh ones in recipes, but remember they're more concentrated in flavor, so adjust seasoning as needed.
With these steps, you can effortlessly bring the earthy taste of rehydrated mushrooms to your favorite dishes!
- 100% Leak-proof: Guaranteed no-spill seal and secure latches
- Crystal-clear Tritan Built: Stain-resistant and odor-resistant material for a clear view of contents
- Lightweight & Sturdy: Easy to carry, yet durable for everyday use
Melt Chocolate Without the Double Boiler
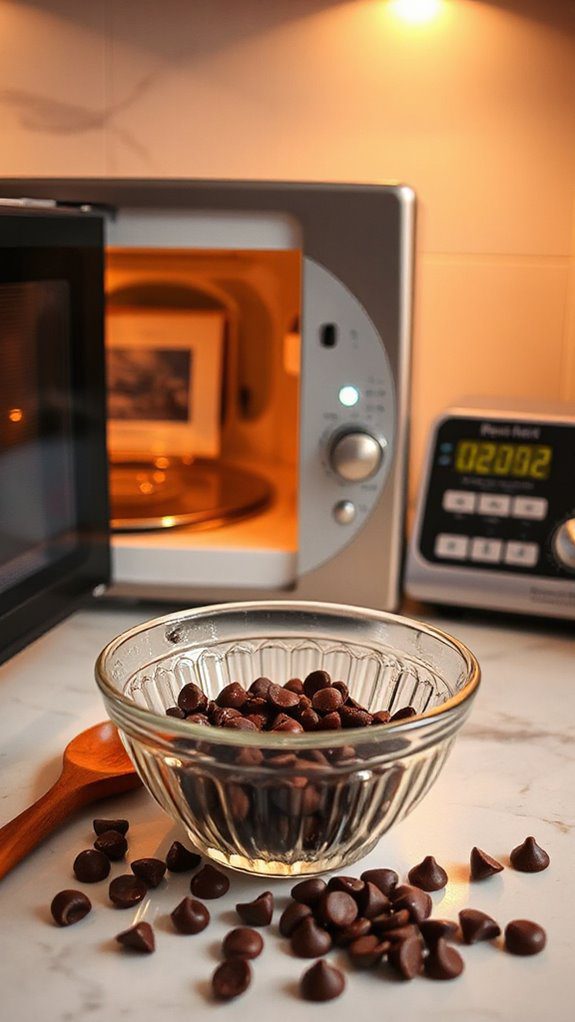
Melting chocolate is a fundamental skill in baking and confectionery, perfect for dipping fruits, drizzling over desserts, or as a base for homemade candies.
This quick microwave technique is ideal for anyone from novice bakers to seasoned professionals who need a fast and effective way to achieve silky smooth melted chocolate. The preparation time is minimal, taking only about 5 minutes, making it perfect for when you're in a time crunch or simply craving chocolatey treats.
Ingredients:
- 1 cup of chocolate chips or chopped chocolate (dark, milk, or white)
- Microwave-safe bowl
- Optional: a splash of vegetable oil or butter (for smoother consistency)
Instructions:
- Prepare the Chocolate: Place your chocolate chips or chopped chocolate into a microwave-safe bowl. If you'd like a smoother texture, add a splash of vegetable oil or butter at this stage.
- Microwave in Intervals: Heat the chocolate in the microwave on high for 30 seconds. After the timer goes off, take the bowl out and stir the chocolate thoroughly, even if it looks unmelted.
- Continue Melting: Return the bowl to the microwave and heat for another 15-30 seconds. Stir again after each interval. It's essential to stir, as residual heat will continue the melting process and help prevent burning.
- Check for Smoothness: Continue melting in 15-second increments, stirring between each, until the chocolate is fully melted and smooth. Be careful not to overheat, as chocolate can seize if it gets too hot.
- Use Immediately: Once melted, use the chocolate as desired for dipping, drizzling, or further recipes. If not using right away, allow it to cool slightly before storing.
Variations and Tips:
- Flavor Infusions: Consider adding flavored extracts such as vanilla, peppermint, or almond for an extra layer of taste.
- Homemade Chocolate Sauce: For a delicious chocolate sauce, incorporate cream or milk slowly to the melted chocolate until you reach the desired consistency.
- Avoiding Seizing: If your chocolate does seize up (turns thick or grainy), you may be able to salvage it by adding a tablespoon of vegetable oil or cream while working over low heat.
- Storage: Leftover melted chocolate can be stored in the fridge for up to a week. Rewarm gently in the microwave when needed.
This straightforward technique not only provides a professional touch to your kitchen repertoire but also enables you to enjoy delicious, melted chocolate at a moment's notice.
- 𝗘𝗳𝗳𝗼𝗿𝘁𝗹𝗲𝘀𝘀 𝗪𝗲𝗶𝗴𝗵𝗶𝗻𝗴: Supports 5 units...
- 𝗣𝗿𝗲𝗰𝗶𝘀𝗲 𝗥𝗲𝘀𝘂𝗹𝘁𝘀: Accurately weighs up to 11 lb/5 kg with 1 g...
- 𝗦𝗶𝗺𝗽𝗹𝗲 & 𝗖𝗼𝗺𝗽𝗮𝗰𝘁: The small and sleek scale is a perfect fit for...
Crisp Up Leftover Pizza
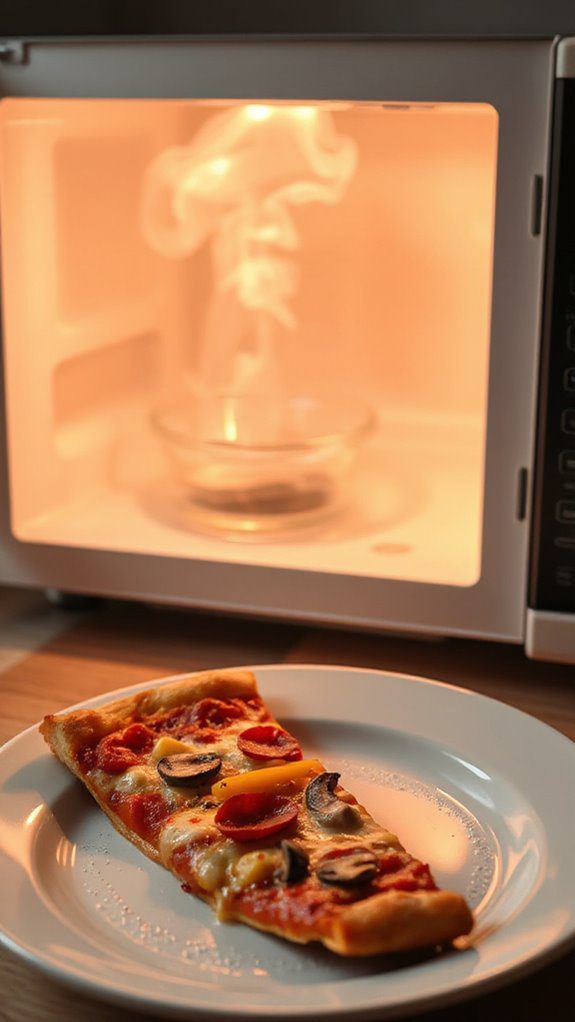
Leftover pizza can often end up soggy and unappetizing when reheated in the microwave, but with this simple technique, you'll achieve a crispy, delicious slice that tastes almost as good as fresh. Perfect for a quick lunch or snack, this method takes just a few minutes and is suitable for anyone who enjoys pizza—whether it's a late-night craving or a party leftover.
Ingredients
- 1-2 slices of leftover pizza
- 1 microwave-safe plate
- 1 cup of water (optional)
- Parchment paper or a microwave crisper (optional)
Cooking Steps
- Prepare Your Plate: Place a microwave-safe plate in the microwave. If you have a microwave crisper, use it for the best results, or lay down a piece of parchment paper on the plate to absorb moisture.
- Add the Pizza: Place your leftover pizza slices on the plate, ensuring that they are not overlapping. This allows for even heating and crisping.
- Add a Cup of Water (Optional): This step helps to create steam in the microwave, keeping the crust tender while allowing the cheese to melt properly. Position a cup of water in the microwave alongside the plate (do not put it on the pizza).
- Microwave: Heat the pizza on high for about 30 seconds to 1 minute. Start with 30 seconds and check for doneness. The goal is to heat it through while ensuring the crust remains crisp.
- Check and Finish: If the cheese hasn't melted or it needs a bit more crisping, heat in additional 10–15 second increments until you achieve your desired result.
- Let it Rest: Once heated, allow the pizza to sit for a minute before enjoying; this helps the cheese set slightly.
Variations and Tips
- Add Some Fresh Toppings: Before reheating, sprinkle some extra cheese or your favorite fresh veggies on top to elevate the flavor.
- Experiment with Seasonings: A sprinkle of red pepper flakes, garlic powder, or Italian herbs can add extra zing.
- Avoid Soggy Crust: Always use a microwave-safe plate and avoid covering the pizza tightly, which can trap moisture.
- Using an Air Fryer or Oven: For an even crisper crust, consider using an air fryer or oven instead of a microwave. Preheat your oven to 375°F (190°C) and bake for about 5-10 minutes.
- Instant Read Food Thermometer | Our instant read thermometer features a temperature probe and advanced,...
- Multi-Use | From bbq thermometer to baking thermometer, our digital food thermometer for cooking is...
- Easy-Read Digital Thermometer For Cooking | Large instant thermometer dial with bright blue backlight...
Make Homemade Popcorn Easily
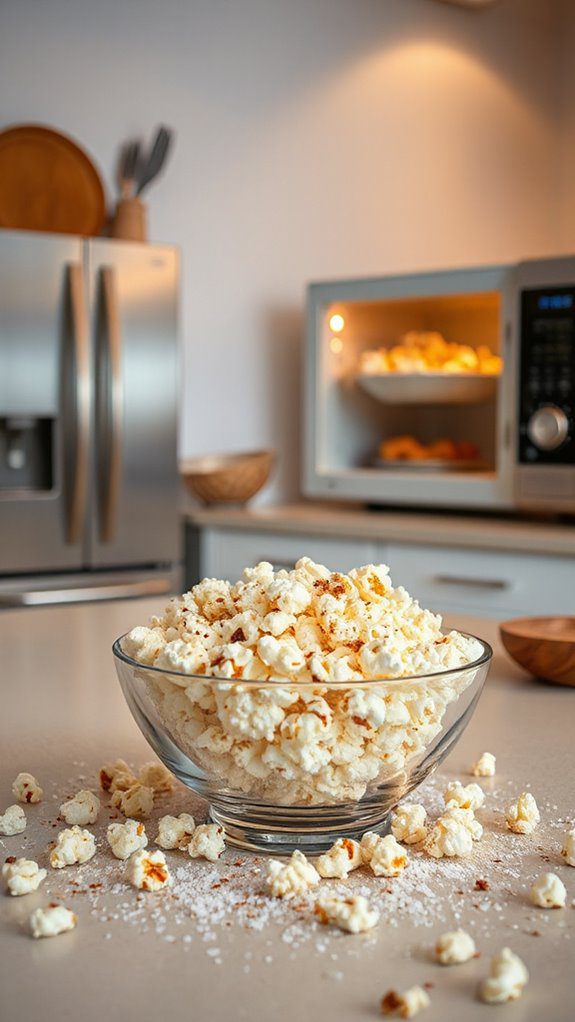
Homemade popcorn is a fun and delicious snack that's perfect for movie nights, parties, or a cozy evening at home.
It's great for families, kids, and anyone looking for a healthier alternative to store-bought popcorn. With just a few simple ingredients and a microwave, you can have a bowl of fresh, fluffy popcorn in under 10 minutes!
Ingredients:
- 1/4 cup popcorn kernels
- 1 tablespoon vegetable oil or melted butter (optional)
- Salt to taste
- Flavorings (optional: cheese powder, paprika, cinnamon, etc.)
Cooking Steps:
- Prepare the Popcorn Bag: Take a brown paper lunch bag and add the popcorn kernels. If you want to add oil or melted butter for flavor, drizzle it over the kernels in the bag.
- Seal the Bag: Fold the top of the paper bag over twice to make sure it's tightly sealed but not so tight that the kernels can't expand when they pop.
- Microwave: Place the bag upright in the microwave. Cook on high for 2 to 3 minutes, or until you hear the popping slow to about 2 seconds between pops. Cooking times may vary based on your microwave's wattage.
- Season: Carefully open the bag (watch out for steam!) and add salt or any desired flavorings. Shake well to distribute evenly.
- Serve: Pour the popcorn into a bowl and enjoy!
Variations and Tips:
- Flavored Popcorn: Experiment with different seasonings like garlic powder, nutritional yeast for a cheesy flavor, or even a sprinkle of sugar and cinnamon for a sweet treat.
- Experiment with Oils: Try using flavored oils like coconut or truffle oil to elevate your popcorn.
- Healthier Option: Skip the oil and stick to air-popped popcorn for a low-calorie snack.
- Storage: Store any leftover popcorn in an airtight container to keep it crunchy for a few days.
- Microwave Safety: Always make sure to stay close while microwaving to prevent burning or overcooking.
- Versatile 54-Piece Collection: Elevate your kitchen with the Home Hero 54-Piece Kitchen Utensil Set, a...
- Durable and Long-Lasting: Crafted from premium stainless steel, these kitchen utensils are designed to...
- Perfect Holiday Gift: Delight your loved ones with this kitchen utensils gift set this festive season....
Prepare a Single Serving of Oatmeal
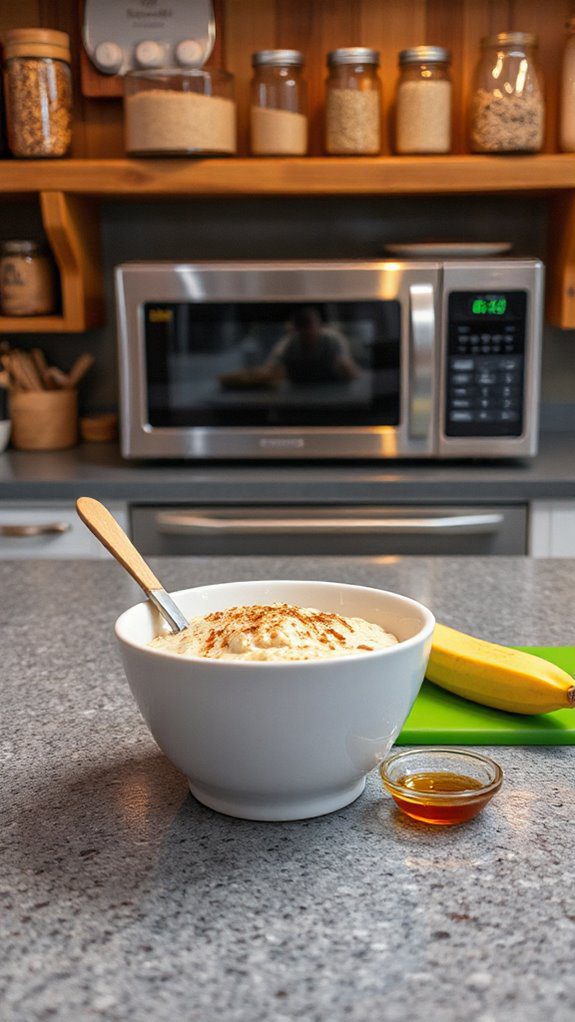
Microwave oatmeal is an incredibly convenient and nutritious dish that has become a staple for many looking for a quick breakfast or a healthy snack.
Ideal for busy individuals, students, or anyone on the go, this single serving of oatmeal can be prepared in a matter of minutes. With a cooking time of just 2-3 minutes, you can enjoy a warm bowl of comfort while customizing it to your taste.
Ingredients:
- 1/2 cup rolled oats
- 1 cup water or milk (dairy or non-dairy)
- Pinch of salt
- Optional toppings: sliced banana, berries, nuts, honey, or cinnamon
Cooking Instructions:
- In a microwave-safe bowl, combine the rolled oats and salt.
- Pour in the water or milk, and stir well to mix.
- Microwave on high for 1 minute and 30 seconds.
- Carefully remove the bowl from the microwave (it may be hot) and stir the oatmeal.
- If it needs more cooking, microwave for an additional 30 seconds.
- Once cooked, let the bowl sit for about 1 minute to thicken.
- Top with your desired toppings like fruit, nuts, honey, or spices, and enjoy!
Variations and Tips:
- For creamier oatmeal, use milk instead of water or mix in a dollop of yogurt after cooking.
- To add flavor, try incorporating a dash of vanilla extract or a spoonful of nut butter before microwaving.
- Experiment with different fruit combinations: add chopped apples or frozen berries while cooking for added flavor and nutrition.
- For a heartier breakfast, mix in some chia seeds, flax seeds, or protein powder before cooking.
- Make it a dessert by adding cocoa powder or chocolate chips along with some sweetener like maple syrup for a delicious chocolate oatmeal treat.
- 24-ounce insulated stainless-steel water bottle with a FreeSip spout and push-button lid with lock
- Patented FreeSip spout designed for either sipping upright through the built-in straw or tilting back to...
- Protective push-to-open lid keeps spout clean; convenient carry loop doubles as a lock
Infuse Flavor Into Oils and Butters
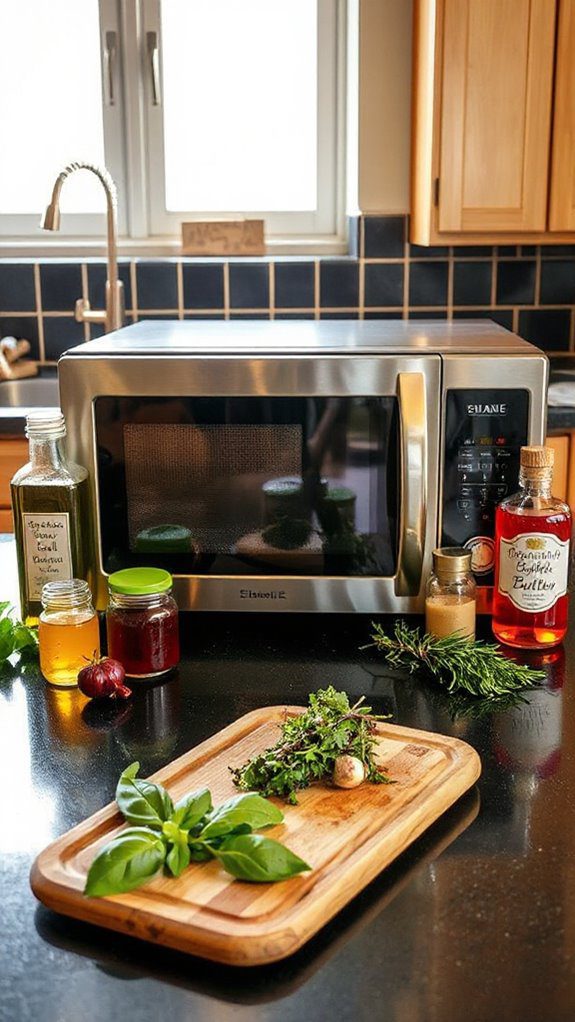
Infused oils are a versatile and delicious way to enhance the flavor of your dishes, perfect for drizzling over salads, roasted vegetables, or dipping bread.
This recipe for herb-infused olive oil is ideal for those who love to bring a burst of flavor to their cooking without spending hours in the kitchen. With a preparation time of just 10 minutes and a brief microwave infusion process, you can create a gourmet ingredient to elevate your everyday meals.
Ingredients:
- 1 cup extra virgin olive oil
- 2-3 sprigs of fresh rosemary
- 2-3 sprigs of fresh thyme
- 2-3 cloves of garlic, crushed
- 1 teaspoon black peppercorns
- Optional: 1 small chili pepper for a spicy kick
Cooking Steps:
- Combine Ingredients: In a microwave-safe bowl, combine the olive oil, rosemary, thyme, crushed garlic, black peppercorns, and optional chili pepper if you like heat. Verify that the herbs and spices are fully submerged in the oil.
- Microwave Infusion: Cover the bowl loosely with a microwave-safe lid or plate to prevent splattering. Microwave on high for 30 seconds, then let it rest for 1 minute. Repeat this process in 30-second intervals until the oil is warm but not boiling (approximately 2-3 minutes total). The gentle heat will extract the flavors from the herbs without burning them.
- Cool & Strain: Once infused, remove the bowl from the microwave and let it cool for about 10 minutes. After cooling, strain the oil through a fine-mesh sieve or cheesecloth into a clean bottle or jar, discarding the solids.
- Store: Seal the bottle or jar and store it in a cool, dark place. The infused oil will last for about two weeks if kept refrigerated.
Variations & Tips:
- Experiment with Herbs: Feel free to customize the flavors by adding other herbs like basil, parsley, or dill.
- Add Citrus Zest: For a revitalizing twist, include the zest of a lemon or an orange in the infusion.
- Use Different Oils: While olive oil is classic, you can also try using avocado oil or grapeseed oil for unique flavors.
- Safety Note: Always confirm the oil is not boiling during the infusion process, as excessive heat can degrade the oil's quality and flavors.
Quick Marinating Techniques
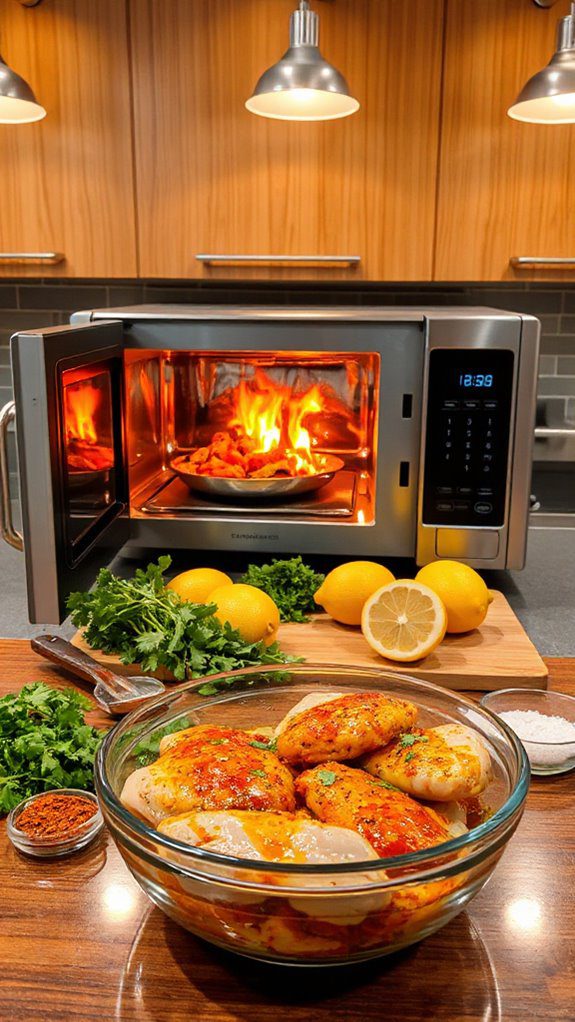
Quick marinating is an efficient way to infuse meats, vegetables, or tofu with flavor in a fraction of the time it typically takes.
Ideal for busy weeknights or last-minute dinner guests, these techniques allow you to create a delicious and aromatic dish in just 15 to 30 minutes of marinating time.
This recipe features quick-marinated chicken breasts, which can be grilled or sautéed for a delightful meal that serves four.
Ingredients:
- 4 boneless, skinless chicken breasts
- 1/4 cup soy sauce
- 2 tablespoons olive oil
- 2 tablespoons honey or maple syrup
- 3 cloves garlic, minced
- 1 tablespoon fresh ginger, grated (or 1 teaspoon ground ginger)
- 1 teaspoon red pepper flakes (optional)
- Juice of 1 lime or lemon
- Fresh herbs for garnish (e.g., cilantro or parsley)
Cooking Steps:
1. Prepare the Marinade: In a medium bowl, whisk together the soy sauce, olive oil, honey, minced garlic, grated ginger, red pepper flakes, and lime or lemon juice until well combined.
2. Marinate the Chicken: Place the chicken breasts in a resealable plastic bag or a shallow dish. Pour the marinade over the chicken, ensuring each piece is thoroughly coated.
Seal the bag or cover the dish and let it marinate in the refrigerator for at least 15 minutes or up to 30 minutes for more flavor.
3. Cook the Chicken: Preheat your grill or a skillet over medium-high heat. Remove the chicken from the marinade, allowing excess marinade to drip off, and discard the remaining marinade.
Grill or sauté the chicken for 6-7 minutes per side or until the internal temperature reaches 165°F (75°C).
4. Serve: Remove the chicken from the heat, let it rest for a few minutes, then slice and serve garnished with your choice of fresh herbs.
Variations and Tips:
- Vegetarian Option: Substitute chicken with firm tofu. Use the same marinade and adjust cooking time to 3-4 minutes per side for a crispy texture.
- Herbaceous Flavor: Add chopped fresh herbs like basil, thyme, or rosemary to the marinade for an aromatic twist.
- Add Vegetables: Marinate sliced bell peppers, zucchini, or mushrooms with the same marinade and grill or sauté them alongside the chicken for a complete meal.
- Storage: If you have leftover marinated chicken, it can be stored in an airtight container in the refrigerator for up to 2 days, or frozen after marinating for future meals.
Warm Tortillas in a Snap
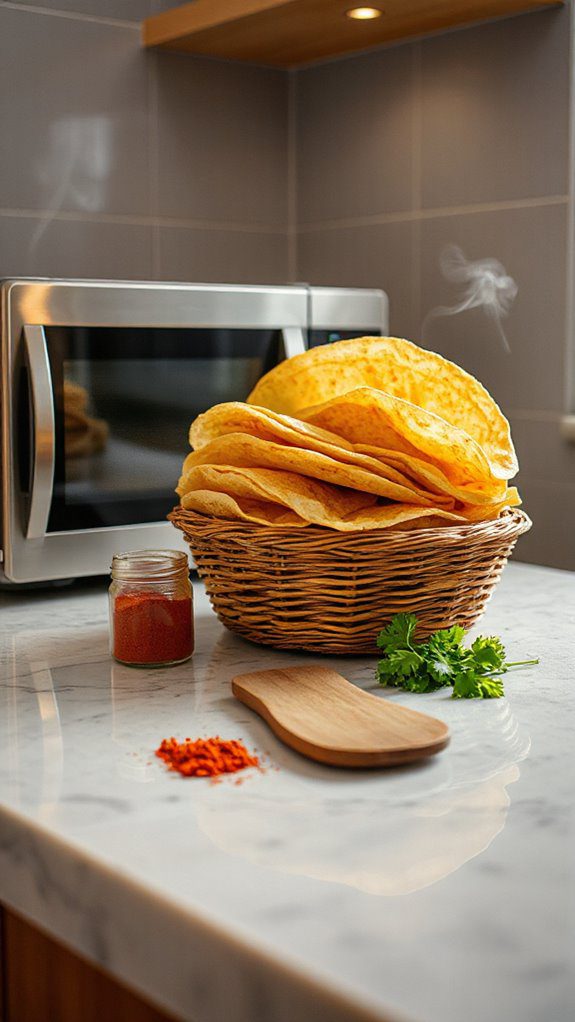
Warm tortillas are a versatile staple in many cuisines, particularly in Mexican dishes. This quick and easy microwave method is perfect for anyone looking to add a fresh, soft tortilla to their meals without the hassle of heating up the stovetop.
Whether you're prepping tacos, quesadillas, or simply enjoying them with a side of guacamole, this method takes just a few minutes and is great for feeding a crowd or a cozy family dinner.
Ingredients:
- Corn or flour tortillas (6-8)
- Damp paper towels or a clean kitchen towel
Cooking Steps:
- Prepare the Tortillas: Stack your tortillas (up to 6-8 at a time) on a plate or microwave-safe dish.
- Moisten the Towels: Dampen a paper towel or a kitchen towel with water. Make sure it's not dripping wet—just enough to create steam.
- Cover the Tortillas: Place the damp towel over the stacked tortillas. This will help keep them warm and prevent them from drying out.
- Microwave: Heat the tortillas in the microwave on high for about 30 seconds. If you're warming more than 6 tortillas, increase the time to 1 minute.
- Check the Warmth: Carefully remove the plate from the microwave (it may be hot) and remove the towel. Check if the tortillas are warm enough; if not, cover and microwave for an additional 10-15 seconds, as needed.
- Serve Immediately: Enjoy your warm tortillas right away, filling them with your favorite ingredients.
Variations and Tips:
- For Extra Flavor: Try brushing the tortillas lightly with oil and seasoning them before warming for a tasty upgrade.
- Wrapping and Storing: If you're preparing tortillas for an event or gathering, wrap the warmed tortillas in aluminum foil to keep them warm for a longer period.
- Freezing Option: You can stack tortillas with parchment paper in between, then freeze them. When ready to use, simply remove the desired amount and follow the warming instructions.
- Experiment with Different Tortillas: Consider trying whole wheat or flavored tortillas for a unique twist. The warming method remains the same regardless of the type.
- Make it a Meal: Pair your warm tortillas with various fillings like grilled veggies, chicken, or beans for a quick meal.
Bake Mug Cakes in a Flash

Mug cakes are the ultimate quick dessert, perfect for satisfying those sudden sweet cravings without the fuss of baking a whole cake. This single-serving treat can be prepared in just about 5 minutes, making it ideal for busy professionals, students, or anyone who wants a quick indulgence without the wait.
With a microwave, you can have a warm, fluffy mug cake ready to enjoy in no time.
Ingredients:
- 4 tablespoons all-purpose flour
- 4 tablespoons granulated sugar
- 2 tablespoons cocoa powder (for chocolate cake) or flavor of choice
- 1/8 teaspoon baking powder
- A pinch of salt
- 3 tablespoons milk
- 2 tablespoons vegetable oil or melted butter
- 1/4 teaspoon vanilla extract
- Optional toppings: chocolate chips, nuts, or whipped cream
Cooking Steps:
- In a microwave-safe mug (about 12 oz), combine the flour, sugar, cocoa powder (if applicable), baking powder, and salt. Stir until well combined.
- Add the milk, vegetable oil (or melted butter), and vanilla extract to the dry ingredients. Mix thoroughly until you have a smooth batter. Make sure there are no lumps.
- If desired, fold in chocolate chips or nuts for added flavor and texture.
- Microwave the mug cake on high for about 1 to 1.5 minutes. Keep an eye on it to verify it doesn't overflow. Cooking times can vary based on your microwave's power, so adjust accordingly.
- Once done, let the mug cake rest for a minute before digging in. Add your favorite toppings such as whipped cream or a scoop of ice cream for extra deliciousness.
Variations and Tips:
- Flavors: Experiment with different flavors by swapping in fruit purees, peanut butter, or even matcha powder.
- Serving Size: This recipe can be doubled for a larger portion, just make sure your mug is big enough to hold the mixture as it will rise while cooking.
- Microwave Tips: If your microwave is particularly powerful, start with a shorter cooking time (around 60 seconds) and check for doneness to prevent overcooking.
- Toppings: Top with fresh fruit, a drizzle of caramel or chocolate sauce, or a sprinkle of powdered sugar for a festive touch.
Enjoy your quick and simple mug cake, perfect for any time you need a sweet pick-me-up!
Blanch Green Beans Smoothly
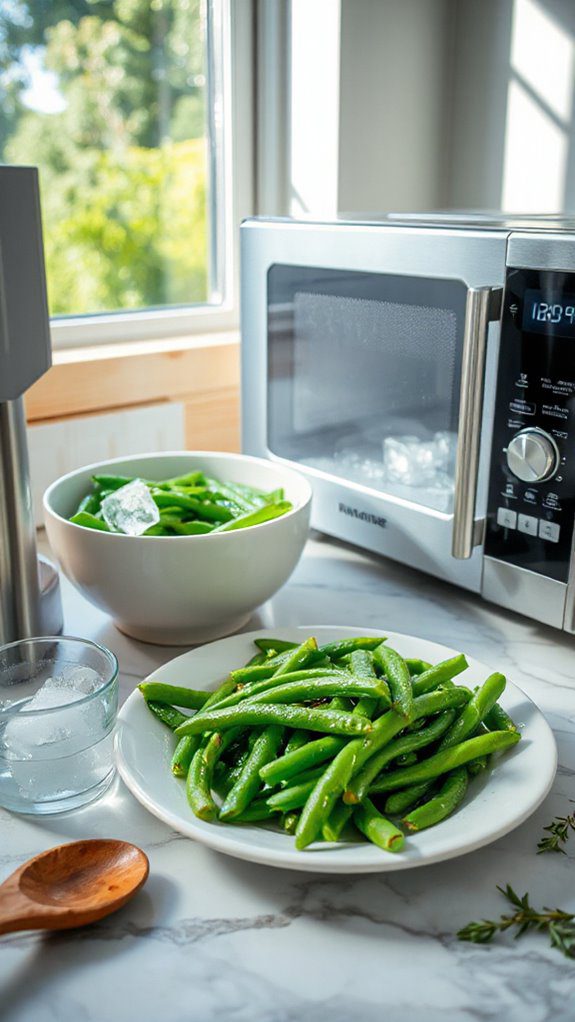
Blanching green beans is a simple and quick technique used to preserve the bright color and crisp texture of the beans, making them perfect for salads or as a side dish.
This method is ideal for both home cooks and those looking to enhance their meal prep skills. The entire process takes about 10-15 minutes, allowing you to enjoy fresh, vibrant green beans without much hassle.
Ingredients:
- Fresh green beans (about 1 pound)
- Salt (for the blanching water)
- Ice water (for shocking the beans)
Instructions:
- Prepare the Green Beans: Rinse the green beans under cold water, then trim the ends by snapping them off or using a knife to cut them.
- Boil the Water: Fill a large pot with water and add a generous amount of salt (approximately 1 tablespoon per quart of water). Bring it to a rolling boil over high heat.
- Blanch the Beans: Once the water is boiling, carefully add the trimmed green beans to the pot. Allow them to cook for about 2-4 minutes, depending on the thickness of the beans; they should turn bright green and be tender-crisp.
- Shock in Ice Water: While the beans are blanching, prepare a bowl of ice water. Once they're done cooking, immediately transfer the green beans to the ice water using a slotted spoon or tongs. This will stop the cooking process and set the color.
- Drain and Dry: After about 5 minutes, remove the green beans from the ice water and drain them in a colander. Pat them dry with a towel or allow to air dry.
Variations and Tips:
- Seasoning: Before serving, you can toss the blanched beans in olive oil and a squeeze of lemon juice for extra flavor.
- Add Aromatics: For added flavor, you can boil the water with garlic cloves or bay leaves.
- Cooking Time Adjustments: Adjust the blanching time based on how crisp you prefer your beans—longer for softer beans or shorter for crunchier ones.
- Storage: Blanched green beans can be stored in the refrigerator in an airtight container for up to 3 days or frozen for later use.
This microwave hack for blanching green beans guarantees you maintain their lovely green hue and crispiness, making them a delightful addition to any meal.
Revive Stale Bread
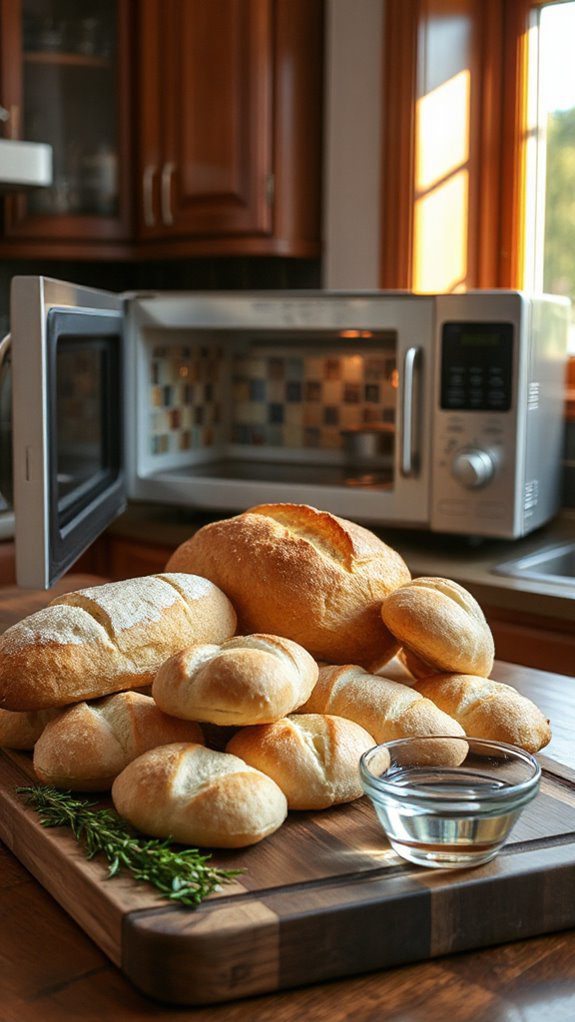
Reviving stale bread is a simple yet effective technique to breathe new life into your leftover loaves. This method is ideal for anyone looking to minimize food waste and enjoy fresh bread once again, whether for a cozy breakfast or as an accompaniment to dinner. The process takes just about 5 minutes, allowing you to enjoy that warm, crusty texture and delightful flavor of fresh bread without needing to bake from scratch.
Ingredients:
- Stale bread (any type)
- Water
- Microwave-safe plate or paper towel
Cooking Instructions:
- Prepare the Bread: Slice your stale bread if it isn't already. This will help it heat more evenly and revive its texture.
- Moisten the Bread: Lightly dampen a paper towel with water or sprinkle a few drops of water onto the bread slices. Make sure the bread isn't soaked; it should be just slightly moist.
- Cover and Microwave: Place the damp bread slices on a microwave-safe plate and cover them with either the damp paper towel or another plate to trap the steam.
- Heat: Microwave the covered bread on high for about 10-15 seconds. Check the bread; if it still feels stale or hard, continue to heat in 5-second intervals until it reaches your desired softness. Be cautious not to overheat, as bread can become tough.
- Serve: Enjoy your revived bread immediately, either on its own or as part of a meal.
Variations and Tips:
- For a Crusty Finish: After microwaving, you can pop the bread into a toaster or under a broiler for a minute to regain that crispy exterior.
- Spice it Up: Before microwaving, consider adding toppings like garlic butter or herbs for extra flavor.
- Experiment with Different Breads: This method works well with all types of bread, including baguettes, sourdough, and sandwich bread.
- Use with Caution: Remember that this method is best for small amounts of bread, as microwaving larger batches can lead to uneven heating. Always check after short intervals.
- Storage: Stale bread is best revived as soon as possible. If you have to store it again, seal in an airtight container to prevent further staleness.
Make a Quick Tomato Sauce
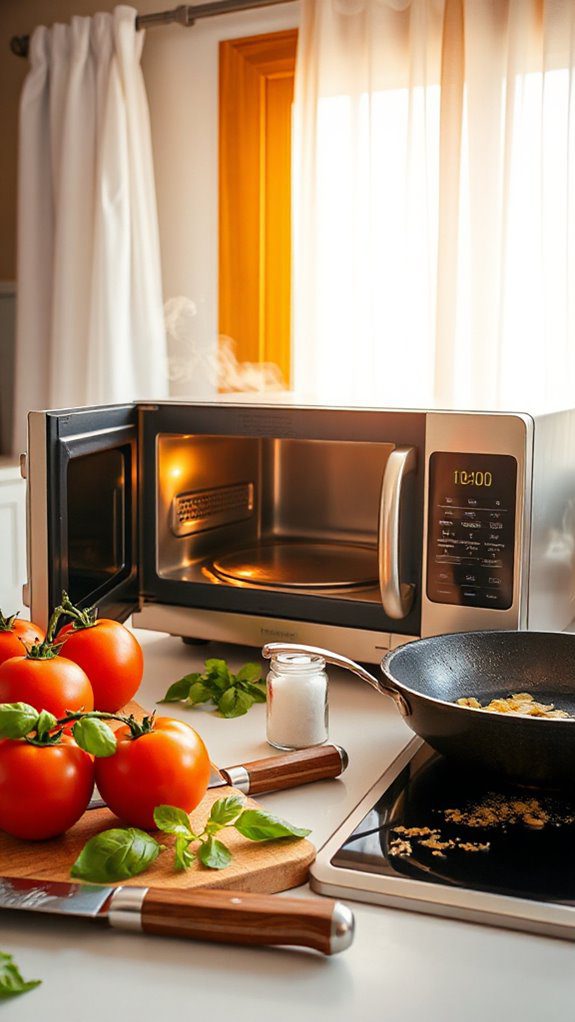
This quick tomato sauce recipe is a versatile and flavorful option that can elevate many dishes, from pasta to pizzas.
It's perfect for busy weeknights when you crave a homemade taste without the hours of simmering. You can whip up this sauce in just about 15 minutes, making it an ideal choice for anyone from beginners to seasoned home chefs looking to save time without sacrificing flavor.
Ingredients:
- 1 can (14 oz) of crushed tomatoes
- 2 tablespoons of olive oil
- 2 cloves garlic, minced
- 1 teaspoon dried oregano
- 1 teaspoon sugar (optional)
- Salt and pepper to taste
- Fresh basil (optional, for garnish)
Cooking Steps:
1. In a microwave-safe bowl, combine the crushed tomatoes, olive oil, minced garlic, dried oregano, sugar (if using), salt, and pepper.
2. Stir the mixture to combine all the ingredients well.
3. Cover the bowl with a microwave-safe lid or plate.
4. Microwave on high for 5 minutes. Carefully remove the bowl and stir, then microwave for an additional 2-3 minutes until the sauce is heated through and the garlic is fragrant.
5. Taste for seasoning and adjust as needed.
If you prefer a smoother sauce, you can blend it with an immersion blender or in a blender until desired consistency is reached.
6. Serve over cooked pasta, as a pizza base, or use it in any dish that calls for tomato sauce.
Variations and Tips:
- Add Vegetables: Toss in some chopped bell peppers, onions, or mushrooms before microwaving for added flavor and nutrition.
- Spice It Up: For a spicy kick, add a pinch of red pepper flakes or some chopped fresh chili.
- Herbs: Experiment with different herbs such as thyme or parsley to customize the flavor of your sauce.
- Storage: This sauce can be made in bulk and stored in the refrigerator for up to a week or frozen for later use. Just thaw and reheat in the microwave when ready to serve.
- Presentation: Drizzle with a little extra virgin olive oil and sprinkle fresh basil on top just before serving for a beautiful finish.
Prepare a Bread Pudding
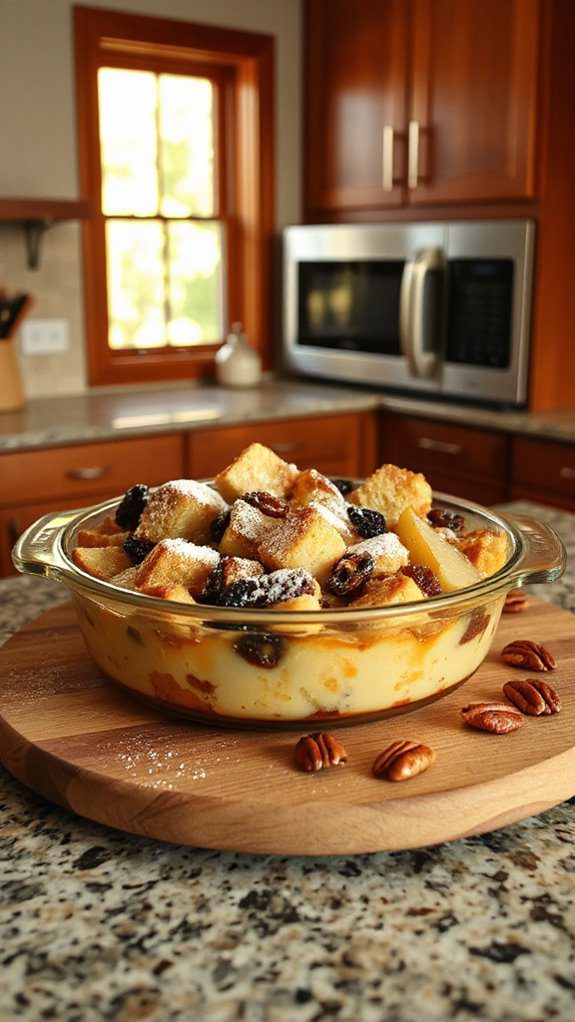
Bread pudding is a delightful dessert that combines stale bread with a creamy custard and sweet flavors, resulting in a warm and comforting dish. This versatile dish is perfect for utilizing leftover bread and is a favorite among both children and adults.
Ideal for a family gathering or a cozy night in, you can prepare this microwave bread pudding in just 15 minutes, making it a quick and satisfying treat for any occasion.
Ingredients:
- 2 cups day-old bread, cubed
- 2 cups milk
- 3 large eggs
- ½ cup sugar
- 1 teaspoon vanilla extract
- ½ teaspoon ground cinnamon
- Pinch of salt
- Optional: raisins or chocolate chips
Cooking Steps:
- In a large microwave-safe bowl, combine the milk, eggs, sugar, vanilla extract, ground cinnamon, and salt. Whisk together until well blended.
- Add the cubed bread to the bowl, ensuring the bread is soaked evenly in the custard mixture. If desired, fold in raisins or chocolate chips at this stage.
- Cover the bowl with microwave-safe plastic wrap, leaving a small vent for steam to escape.
- Microwave on high for 5-7 minutes. Check for doneness — the pudding should be set and not wet in the center. If needed, continue microwaving in 1-minute increments until done.
- Let the bread pudding sit for a few minutes before serving. Optionally, top with a drizzle of caramel sauce, a scoop of ice cream, or a dusting of powdered sugar.
Variations and Tips:
- Flavor Variations: Experiment with different flavorings like almond extract or orange zest for a unique twist.
- Bread Choices: Use brioche, challah, or even leftover bagels for different textures and flavors.
- Add-ins: Incorporate fruits, nuts, or various types of chocolate for added richness and flavor.
- Leftover Bread: This recipe is a great way to repurpose stale bread; keep a bag in your freezer for such desserts.
- Storage: Store leftovers in the refrigerator and enjoy them within a few days, reheating in the microwave for a quick and satisfying snack.
Cook Fish Fillets Perfectly
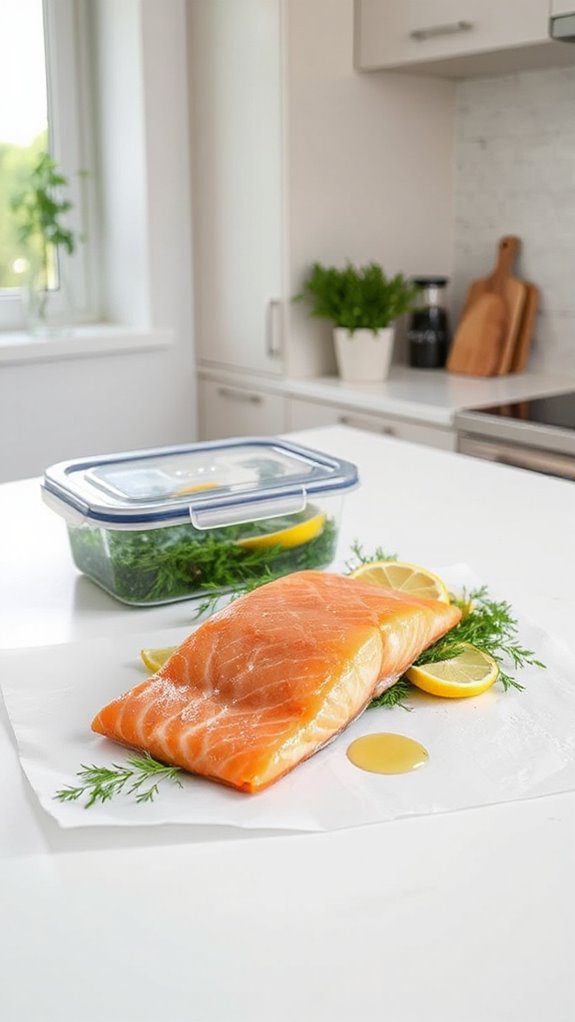
Cooking fish fillets in the microwave is a quick and efficient way to prepare a healthy meal that is ideal for busy individuals or families looking for a nutritious option.
This method preserves the moisture and flavor of the fish while cutting down on cooking time, making it perfect for a weeknight dinner or a healthy lunch.
With a preparation time of just 10 minutes and a cooking time of around 5 minutes, you can have perfectly cooked fish fillets ready to enjoy in less than 15 minutes!
Ingredients:
- 2 fish fillets (salmon, tilapia, or cod)
- 1 tablespoon olive oil
- 1 lemon (sliced)
- Salt and pepper to taste
- Fresh herbs (dill, parsley, or thyme) for garnish (optional)
Cooking Steps Instructions:
- Start by patting the fish fillets dry with a paper towel to remove excess moisture. This will help them cook evenly in the microwave.
- Place the fish fillets, skin side down if applicable, in a microwave-safe dish. Drizzle olive oil over the top and season with salt and pepper.
- Lay lemon slices on top of each fillet for added flavor and moisture during cooking.
- Cover the dish with a microwave-safe lid or plate to prevent splatters.
- Microwave the fish fillets on high for 3-5 minutes, depending on the thickness of the fillets. Check for doneness by ensuring the fish flakes easily with a fork and is opaque throughout.
- Let the fish rest for 1 minute before serving. Garnish with fresh herbs, if desired.
Variations & Tips:
- For a different flavor profile, try using different marinades or seasoning blends such as garlic and herb, teriyaki, or Mediterranean spices.
- Add in vegetables such as thinly sliced bell peppers, zucchini, or asparagus in the dish to create a complete meal that cooks alongside the fish.
- Always start with less cooking time if you're unsure; you can always add more time as needed, but overcooked fish can become dry.
- Using parchment paper as a steamer can also help to retain moisture; simply wrap the fish fillets with the ingredients and microwave.
Heat Spices for More Aroma
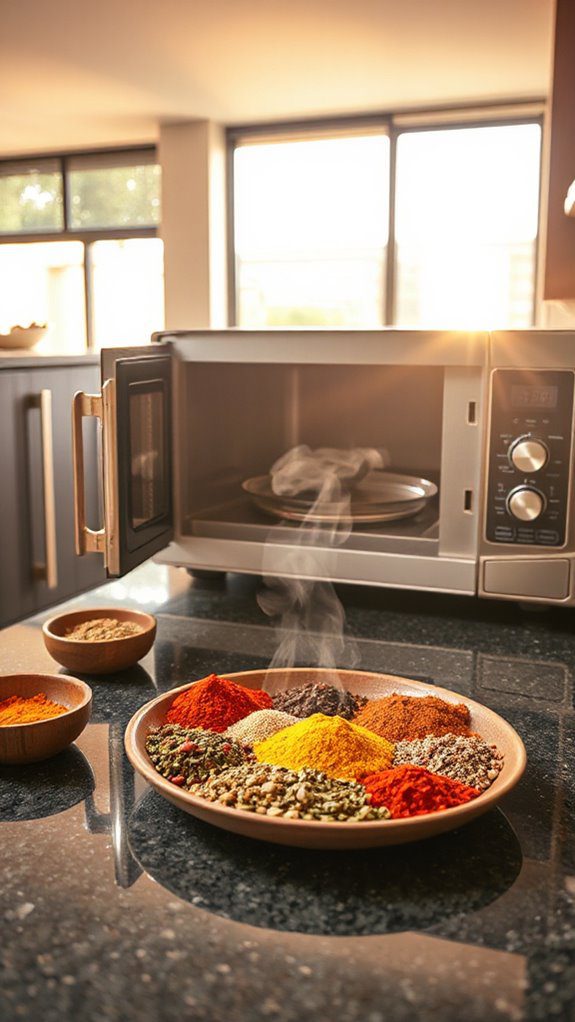
Heating spices in the microwave is a quick and effective way to enhance their aroma, making them perfect for seasoning all types of dishes, from meats to soups and stews.
This method is ideal for cooks looking to elevate their culinary creations without spending too much time in the kitchen.
With just a few minutes of prep, you can infuse an incredible depth of flavor into your meals, making them irresistible.
The total preparation time for this microwave spice heating hack is approximately 5 minutes.
Ingredients:
- 2 tablespoons of whole spices (such as cumin seeds, coriander seeds, fennel seeds, or mustard seeds)
- 1 teaspoon of ground spices (such as cinnamon, turmeric, or paprika)
- Microwave-safe dish or plate
- Paper towel or microwave-safe lid
Cooking Steps:
- Measure your spices: Start by measuring out the whole and ground spices you wish to use for your dish. Choose a combination that suits your recipe or mood.
- Prepare the microwave dish: Place the measured spices into a microwave-safe dish or plate, ensuring they are spread out evenly for even heating.
- Cover the spices: To prevent any splattering and to keep the aroma contained, cover the dish with a paper towel or a microwave-safe lid.
- Microwave the spices: Heat the spices in the microwave on high for 30 seconds. Depending on your microwave's wattage and the amount of spices, you may need to adjust the time slightly. Start with 30 seconds and increase as needed.
- Check for aroma: After 30 seconds, carefully remove the dish and check for the aroma. If you desire a stronger scent, continue to heat in 10-second increments until the spices fragrant.
- Let it cool: Once aromatic, allow the spices to cool slightly before using them in your cooking. This will intensify their flavor when added to your dishes.
Variations and Tips:
- Experiment with spices: Try different combinations of spices to find your perfect blend. For instance, mix heat with sweetness by combining chili flakes with cinnamon.
- Use for seasoning blends: After heating, crush the spices to make a homemade seasoning blend such as garam masala or taco seasoning.
- Storage: Store any unused heated spices in an airtight container to preserve their enhanced aroma and flavor for later use.
- Pairing: Consider using heated spices to elevate dishes such as roasted vegetables, grilled meats, or homemade sauces.
Make Fluffy Scrambled Eggs
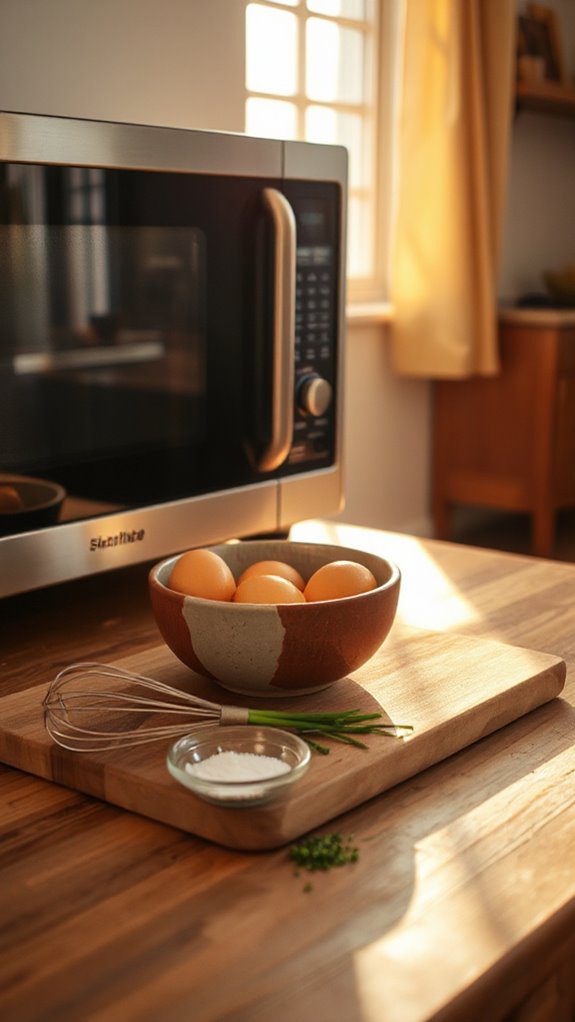
Fluffy scrambled eggs are a classic breakfast dish perfect for anyone looking to start their day with a light, protein-packed meal. This recipe takes only about 5 minutes to prepare and cook, making it ideal for busy mornings or a quick brunch with friends.
The microwave method not only saves time but also guarantees that your eggs remain soft and creamy, without any fear of overcooking.
Ingredients:
- 2 large eggs
- 2 tablespoons milk (or cream for richness)
- Salt, to taste
- Pepper, to taste
- Optional: fresh herbs, cheese, or vegetables of your choice for added flavor
Cooking Steps:
- Crack the eggs into a microwave-safe bowl and add the milk, salt, and pepper. Use a fork or whisk to beat the mixture until well combined and slightly frothy.
- Place the bowl in the microwave and cook on high for 30 seconds.
- After 30 seconds, remove the bowl and stir the eggs gently with a fork, scraping the edges and bottom of the bowl.
- Return the bowl to the microwave and cook for another 30 seconds. Repeat the stirring process, and if necessary, continue microwaving in 15-second increments until the eggs are softly set but still slightly runny; they will continue to cook once removed from the microwave.
- If desired, fold in any optional ingredients like cheese, herbs, or diced vegetables before serving. Enjoy your fluffy scrambled eggs immediately!
Variations and Tips:
- Experiment with different types of milk for varying textures; whole milk will create creamier eggs, while skim milk will result in a lighter dish.
- To elevate flavors, consider adding a sprinkle of your favorite cheese (like cheddar or feta) or a dash of hot sauce before microwaving.
- For a healthier option, try adding spinach or tomatoes right before cooking.
- Keep an eye on the eggs while microwaving, as cooking times can vary depending on your microwave wattage; always stir frequently to achieve even cooking.
- If you prefer your scrambled eggs a bit more solid, cook them longer but be careful not to overdo it!
Toast Nuts Rapidly
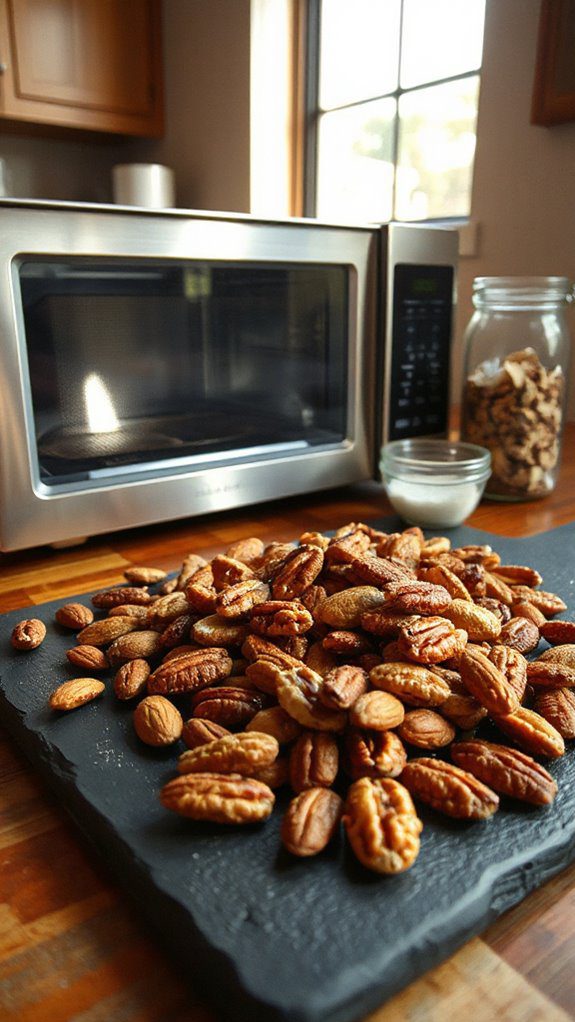
Toasting nuts is an essential step in many recipes, enhancing their flavor and aroma. This quick and easy method using a microwave is perfect for home cooks who want to add depth to their dishes without spending too much time in the kitchen.
Whether you're sprinkling them over salads, adding them to baked goods, or enjoying them as a snack, toasting nuts takes only about 5 to 7 minutes of preparation and cooking time.
Ingredients:
- 1 cup of raw nuts (almonds, walnuts, pecans, or any other variety)
- Microwave-safe bowl
- Optional: Pinch of salt or spices for seasoning
Instructions:
- Place the raw nuts into a microwave-safe bowl. Confirm the bowl is large enough as the nuts can pop or jump around while toasting.
- If using, sprinkle a pinch of salt or your choice of spices over the nuts for additional flavor.
- Microwave the nuts on high for 1 minute.
- After 1 minute, stir the nuts to confirm even toasting.
- Continue microwaving in 30-second intervals, stirring after each interval, until the nuts are golden brown and fragrant. This should take no more than 3 to 5 additional minutes, depending on the type of nuts and microwave power.
- Once toasted, remove the bowl from the microwave (caution: it might be hot!) and let the nuts cool completely before using them in your recipe or storing.
Variations & Tips:
- Experiment with different spices such as cinnamon, cayenne, or garlic powder for unique flavor profiles.
- Toast nuts in larger batches and store them in an airtight container in the fridge to keep them fresh for snacking or cooking later.
- Keep an eye on the nuts as they can go from perfectly toasted to burnt very quickly due to the microwave's power.
- Use this method for a variety of nuts such as cashews, pistachios, or even seeds like pumpkin and sunflower seeds for added nutritional benefits.
Create Instant Soup
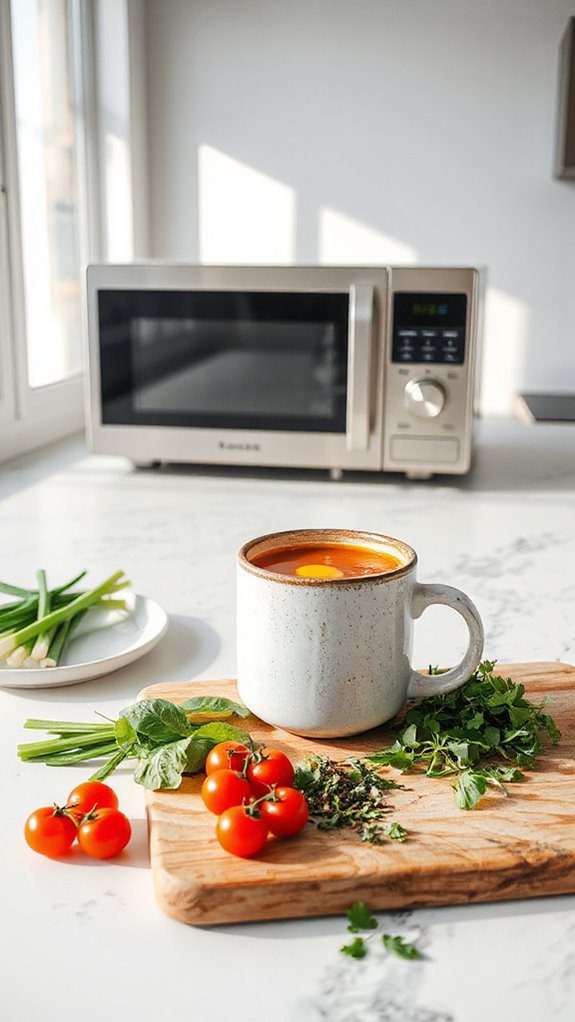
Instant soup is a quick and comforting dish, perfect for busy weeknights or when you're feeling under the weather.
This microwave recipe allows you to whip up a delicious bowl of soup in just a few minutes, making it ideal for anyone looking for a healthy meal without the fuss. With a preparation time of only 5 minutes and cook time of 5 minutes, you can enjoy a warm, nourishing dish in no time.
Ingredients:
- 1 cup vegetable or chicken broth
- 1/2 cup frozen mixed vegetables (peas, carrots, corn, etc.)
- 1/4 cup instant noodles or rice
- 1/2 teaspoon garlic powder
- 1/2 teaspoon onion powder
- Salt and pepper to taste
- Optional toppings: fresh herbs, shredded cheese, or a squeeze of lemon
Cooking Steps:
- In a microwave-safe bowl, pour in the broth and add the frozen mixed vegetables.
- Microwave on high for 2 minutes, or until the broth is hot and the vegetables are heated through.
- Stir in the instant noodles or rice, garlic powder, onion powder, salt, and pepper.
- Return to the microwave and cook for an additional 2-3 minutes, or until the noodles or rice are fully cooked. Stir halfway through for even cooking.
- Carefully remove the bowl from the microwave (it will be hot!) and allow it to cool for a minute.
- Serve hot, garnished with your favorite toppings such as fresh herbs, a sprinkle of cheese, or a squeeze of lemon juice for added flavor.
Variations and Tips:
- For a creamier soup, stir in a tablespoon of cream or milk after cooking.
- Add protein by including diced cooked chicken, tofu, or beans.
- Use canned vegetables instead of frozen if you prefer; just reduce the cooking time.
- Spice it up by adding a pinch of chili flakes or a dash of soy sauce.
- Experiment with different broths or stock bases depending on your flavor preferences.
Bake Potatoes in Record Time
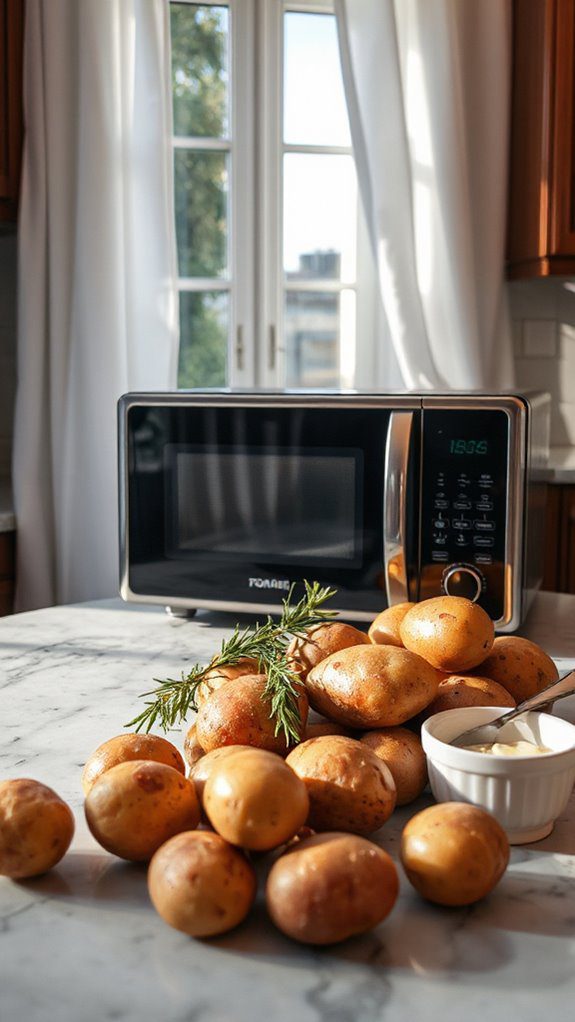
Baked potatoes are a classic comfort food loved by many, and they can be easily made in a fraction of the time using a microwave. This method is perfect for busy weeknights when you need a hearty side dish or a quick meal. In just about 10 minutes, you can enjoy fluffy and tender baked potatoes, ideal for families, single individuals, or anyone looking for a delicious snack.
Ingredients:
- 4 medium-sized russet potatoes
- Olive oil (optional)
- Sea salt (optional)
- Toppings of your choice (e.g., butter, sour cream, cheese, chives)
Cooking Steps:
- Wash and Prepare Potatoes: Rinse the potatoes under cold water, scrubbing off dirt. Pat them dry with a towel. Use a fork to poke several holes in each potato to allow steam to escape during cooking.
- Optional Oil and Salt: If desired, rub the potatoes with a little olive oil and sprinkle with sea salt for extra flavor and a crisper skin.
- Microwave Cooking: Place 2 potatoes on a microwave-safe plate and microwave on high for 5 minutes. After 5 minutes, turn them over and cook for an additional 3-5 minutes, depending on the size of the potatoes. For larger potatoes, you may need to increase the time. Cook the remaining 2 potatoes in the same way.
- Check for Doneness: Carefully remove the potatoes from the microwave (they will be hot). Insert a fork into the thickest part of the potato; if it slides in easily, the potato is done. If not, microwave in 1-minute increments until tender.
- Serve: Let the potatoes rest for a couple of minutes before cutting them open. Fluff the insides with a fork and add your desired toppings.
Variations and Tips:
- Flavorful Variations: Try rubbing the skins with different spices like paprika, garlic powder, or herbs for added flavor before microwaving.
- Cheesy Baked Potato: Add cheese on top of the potato during the last minute of microwaving to melt it perfectly.
- Batch Cooking: You can microwave multiple potatoes at once, just verify they are similar in size for even cooking.
- Crispier Skin: For a crispier skin, finish the microwaved potatoes by placing them under a broiler for 2-3 minutes.
- Quick Meals: Cut the baked potatoes in half and top them with pre-cooked chicken, beans, or veggies for a quick and satisfying meal.
Whip Up a Cheese Sauce
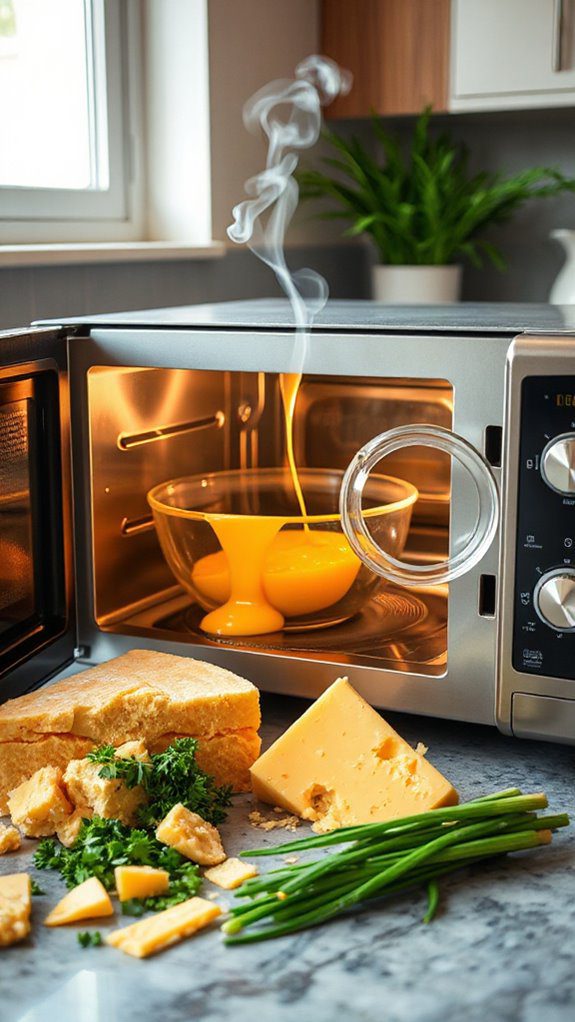
Microwave cheese sauce is a creamy and delicious addition that can elevate a variety of dishes, from nachos to pasta.
It's a quick and easy recipe that's perfect for anyone looking to add a cheesy twist to their meals, whether you're cooking for a gathering or just a cozy night in.
The best part is, it takes only about 10 minutes of preparation and cooking time!
Ingredients:
- 1 cup shredded cheddar cheese
- ½ cup milk
- 2 tablespoons butter
- 1 tablespoon all-purpose flour
- ½ teaspoon garlic powder (optional)
- ½ teaspoon onion powder (optional)
- Salt and pepper to taste
- Pinch of paprika (optional, for garnish)
Cooking Steps:
- In a microwave-safe bowl, combine the butter and milk. Microwave on high for 30 seconds to melt the butter.
- Add the flour, garlic powder, onion powder, salt, and pepper to the bowl. Whisk together until smooth.
- Gradually stir in the shredded cheddar cheese until fully incorporated.
- Microwave the mixture on high for 30-60 seconds, stopping to stir every 15 seconds until the cheese is melted and the sauce is creamy.
- If the sauce is too thick, add a splash more milk to reach your desired consistency.
- Once ready, sprinkle a pinch of paprika on top for an extra touch and serve warm.
Variations & Tips:
- For a spicy kick, consider adding diced jalapeños or a dash of hot sauce before microwaving.
- You can mix in other types of cheese, like mozzarella or parmesan, for more flavor complexity.
- If you're looking for a healthier option, try substituting half of the cheddar cheese with Greek yogurt for a creamy texture without added fat.
- This cheese sauce can be effortlessly stored in an airtight container in the fridge for up to 3 days; just reheat in the microwave and stir well before serving.
Reheat Food Evenly
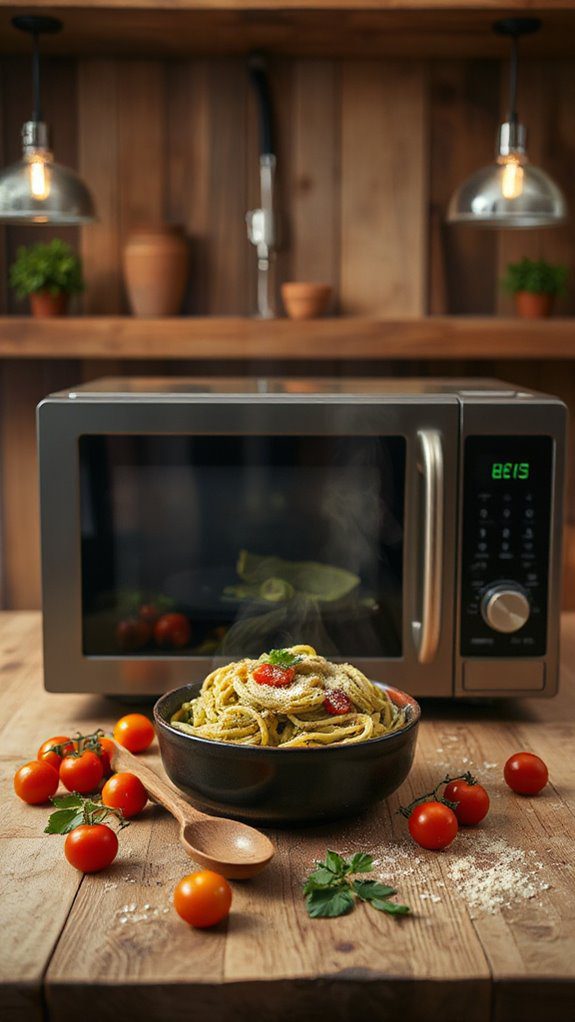
This quick and colorful vegetable stir-fry is perfect for those busy weeknights when you need a nutritious meal in a flash. Ideal for individuals, couples, or small families, this dish highlights a variety of fresh vegetables and can be easily customized to suit any palate.
Preparation time is approximately 10 minutes, with an additional 5-7 minutes for cooking in the microwave, making it a simple and healthy dinner option in less than 20 minutes.
Ingredients:
- 1 cup of broccoli florets
- 1 cup of bell peppers, sliced (any color)
- 1 cup of snap peas
- 1 carrot, julienned
- 2 cloves of garlic, minced
- 2 tablespoons of soy sauce (or tamari for gluten-free)
- 1 tablespoon of olive oil (or sesame oil for a richer flavor)
- Salt and pepper to taste
- Optional: crushed red pepper flakes for heat
- Optional: cooked rice or noodles, for serving
Cooking Steps:
- In a large microwave-safe bowl, combine the broccoli, bell peppers, snap peas, and carrots.
- Add the minced garlic, olive oil, soy sauce, and a pinch of salt and pepper to the vegetables. If you like a kick, sprinkle in some crushed red pepper flakes.
- Cover the bowl with a microwave-safe lid or plate, leaving a small vent for steam to escape.
- Microwave on high for 2-3 minutes, then stir the vegetables. Return to the microwave and cook for an additional 2-3 minutes, or until the vegetables are tender but still crisp.
- Carefully remove the bowl from the microwave (it will be hot!) and give everything a gentle stir to mix the flavors.
- Taste and adjust seasoning if necessary. Serve over cooked rice or noodles if desired.
Variations & Tips:
- Mix and match your favorite vegetables such as zucchini, asparagus, or mushrooms to create a unique stir-fry each time.
- For added protein, consider tossing in pre-cooked chicken, shrimp, or tofu just before microwaving.
- To achieve evenly reheated leftovers, spread them out in a single layer on a microwave-safe plate, cover, and heat in short intervals, stirring in between.
- Enhance the dish with toppings like sesame seeds, chopped green onions, or fresh herbs for added flavor and texture.
