
Microwave cooking provides quick and delicious alternatives to time-consuming recipes. Dishes like Cheesy Broccoli and Rice Casserole, Microwave Macaroni and Cheese, and Spicy Mug Chili offer a rich flavor profile with minimal effort. For those craving something nutritious, Quinoa and Black Bean Bowls elevate a simple meal. Each recipe is designed for ultimate convenience, retaining nutrients and taste. Those looking for more delightful microwave creations will discover an array of options waiting to be explored.
Cheesy Broccoli and Rice Casserole

Cheesy Broccoli and Rice Casserole is a comforting and flavorful dish that brings together tender broccoli florets, fluffy rice, and melted cheese for a satisfying meal. This dish is perfect for busy weeknights, family gatherings, or as a side dish for any protein.
It takes approximately 30 minutes to prepare and cook, making it an ideal choice for those who want a quick yet delicious dinner option.
Ingredients:
- 2 cups cooked rice (white or brown)
- 2 cups fresh or frozen broccoli florets
- 1 cup cheddar cheese, shredded
- 1 cup cream of mushroom soup (or any cream soup)
- ½ cup milk
- ½ teaspoon garlic powder
- ½ teaspoon onion powder
- Salt and pepper to taste
- ½ cup breadcrumbs (optional for topping)
- Olive oil or cooking spray
Cooking Steps:
- In a large microwave-safe bowl, combine the cooked rice, broccoli florets, cheddar cheese, cream of mushroom soup, milk, garlic powder, onion powder, and salt and pepper. Mix well until all ingredients are fully incorporated.
- Cover the bowl with a microwave-safe lid or microwave-safe plastic wrap, leaving a small vent for steam to escape. Microwave on high for 5-7 minutes, or until the broccoli is tender and the mixture is heated through.
- Stir the mixture to combine everything again. If desired, sprinkle breadcrumbs over the top.
- Return the casserole to the microwave and cook for an additional 2-3 minutes, or until the breadcrumbs are golden brown and the cheese is bubbly.
- Allow to cool for a few minutes before serving. Enjoy your deliciously cheesy casserole!
Variations & Tips:
- For a protein boost, add cooked chicken, ham, or beans to the mixture.
- Use different types of cheese, such as mozzarella or pepper jack, for a unique flavor twist.
- For added vegetables, consider incorporating diced bell peppers, carrots, or spinach.
- To make it healthier, opt for low-fat or fat-free cream soup and cheese.
- If you want a crispy topping, broil the casserole in an oven-safe dish for a few minutes after microwaving.
- Leftovers can be stored in the refrigerator for up to 3 days; simply reheat in the microwave.
Microwave Macaroni and Cheese

Microwave Macaroni and Cheese is a quick, creamy, and delicious dish that serves as the ultimate comfort food, perfect for busy weeknight dinners or satisfying late-night cravings.
Ideal for students, families, or anyone looking for an easy meal, this dish can be prepared in just about 10 minutes. Whether you enjoy it plain or want to add your favorite mix-ins, this microwave recipe is a breeze to whip up.
Ingredients:
- 1 cup elbow macaroni
- 2 cups water
- ½ cup shredded cheddar cheese
- ¼ cup milk
- 1 tablespoon butter
- Salt and pepper to taste
- Optional: breadcrumbs, additional cheese, or spices for topping
Cooking Steps:
- In a microwave-safe bowl, combine the elbow macaroni and water. Make sure the macaroni is fully submerged.
- Microwave on high for about 4-5 minutes, stirring halfway through, until the macaroni is tender. (Note: Cooking times may vary depending on your microwave wattage.)
- Carefully remove the bowl from the microwave (it will be hot) and drain any excess water if necessary.
- Add the butter, milk, shredded cheddar cheese, and a pinch of salt and pepper to the macaroni. Stir until the cheese is melted and the mixture is creamy.
- If desired, top with breadcrumbs or additional cheese and microwave for 30 seconds to 1 minute until melted and bubbly.
Variations and Tips:
- For a gourmet touch, add cooked bacon, diced tomatoes, or sautéed vegetables when mixing in the cheese.
- Try different cheese combinations such as mozzarella, Gouda, or pepper jack for a unique flavor.
- For a spicy kick, mix in some hot sauce or crushed red pepper flakes.
- Make it a complete meal by adding cooked meat like chicken or ground beef.
- If you prefer a baked macaroni flavor, after mixing in cheese and other ingredients, microwave for an extra minute with breadcrumbs on top until crispy.
Enjoy your quick and easy microwave macaroni and cheese!
Spicy Mug Chili

Spicy Mug Chili is a quick and satisfying dish perfect for those busy weekdays or lazy afternoons when you crave something hearty without a lot of effort.
This single-serving chili can be cooked entirely in your microwave and is ideal for college students, busy professionals, or anyone in need of a fast, flavorful meal.
With a preparation time of just 10 minutes, you can enjoy a full bowl of spicy goodness in no time!
Ingredients:
- 1 cup canned diced tomatoes
- 1/2 can black beans (drained and rinsed)
- 1/4 cup corn (frozen or canned)
- 1/4 cup diced onion
- 1 small clove garlic, minced
- 1 teaspoon chili powder
- 1/2 teaspoon cumin
- 1/4 teaspoon cayenne pepper (adjust to taste)
- Salt and pepper to taste
- 1 tablespoon shredded cheese (optional)
- Fresh cilantro for garnish (optional)
Cooking Steps:
- In a large microwave-safe mug, combine the canned diced tomatoes, black beans, corn, diced onion, garlic, and all the spices (chili powder, cumin, cayenne pepper, salt, and pepper).
- Stir well to combine the ingredients evenly.
- Microwave uncovered on high for about 2-3 minutes. Check after 2 minutes; if the mug is getting too hot, give it a stir and continue cooking in 30-second intervals until heated through.
- Once heated, carefully remove the mug (it will be hot!) and top with shredded cheese, if using.
- Let it sit for a minute or so to cool slightly. Garnish with fresh cilantro if desired before serving.
Variations and Tips:
- For a meatier version, add cooked ground beef or turkey to the mixture. Adjust cooking time accordingly.
- If you prefer a vegetarian option, you can substitute the black beans with lentils or chickpeas.
- Spice lovers can add chopped jalapeños or a dash of hot sauce for an extra kick.
- Experiment with different vegetables like bell peppers or zucchini for added flavor and nutrition.
- Pair with a slice of crusty bread or tortilla chips for a more filling meal.
- This mug chili can be stored and reheated easily, making it perfect for meal prep – simply double or triple the recipe!
Quinoa and Black Bean Bowl
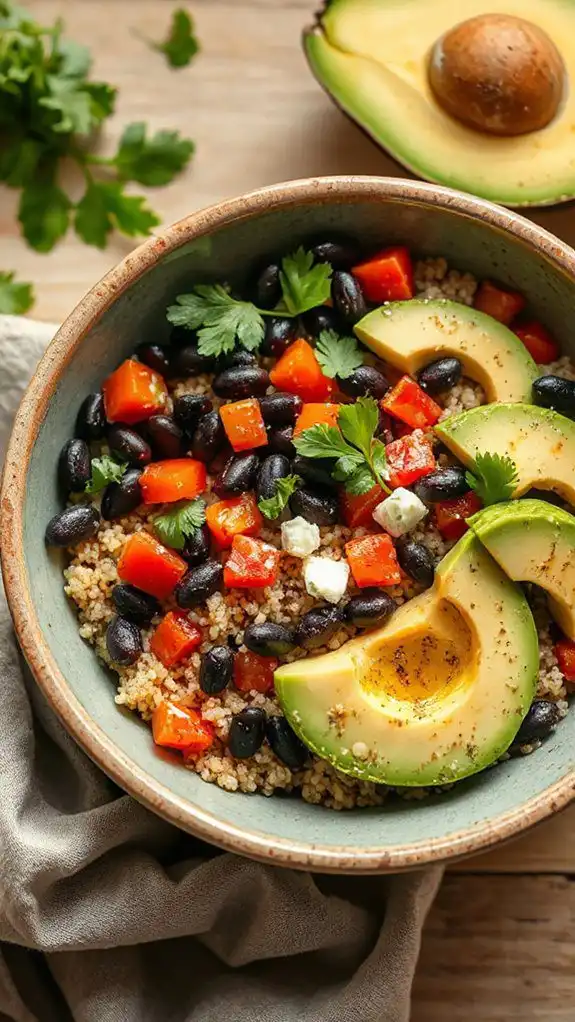
The Quinoa and Black Bean Bowl is a nutritious and hearty dish that serves as a perfect meal for anyone seeking a protein-packed vegetarian option. With vibrant flavors and a blend of textures, this bowl is perfect for a quick lunch or dinner, and it can be prepared in just 15 minutes using the microwave.
Ideal for busy individuals, health-conscious eaters, or anyone wanting to enjoy a delicious meal without much fuss, this recipe is bound to become a favorite!
Ingredients:
- 1 cup quinoa
- 2 cups vegetable broth or water
- 1 can (15 oz) black beans, drained and rinsed
- 1 cup corn (fresh, frozen, or canned)
- 1 bell pepper, diced
- 1 teaspoon cumin
- 1 teaspoon chili powder
- Salt and pepper to taste
- 1 avocado, diced (for topping)
- Fresh cilantro (for garnish)
- Lime wedges (for serving)
Cooking Instructions:
- Rinse the quinoa under cold water in a fine mesh strainer.
- In a microwave-safe bowl, combine the rinsed quinoa and vegetable broth (or water). Cover the bowl with a microwave-safe lid or plastic wrap, leaving a small gap to allow steam to escape.
- Microwave on high for 8-10 minutes, or until the quinoa has absorbed all the liquid and is fluffy. Check halfway through and stir if needed.
- In the same bowl, add the black beans, corn, diced bell pepper, cumin, chili powder, salt, and pepper. Mix well.
- Return the bowl to the microwave and heat for an additional 2-3 minutes until the vegetables are warmed through.
- Remove from the microwave and let it cool slightly before serving.
- Top the bowl with diced avocado, fresh cilantro, and lime wedges to squeeze over before enjoying.
Variations & Tips:
- Spice it Up: Add jalapeños (fresh or pickled) for an extra kick.
- Add Protein: Toss in grilled chicken or shrimp for a non-vegetarian option.
- Different Grains: Substitute quinoa with cooked brown rice or farro for a variation in texture.
- Meal Prep: This bowl is perfect for meal prepping; make a larger batch and store in the fridge for up to 4 days. Just reheat and enjoy!
- Dress it Up: A drizzle of lime vinaigrette or your favorite dressing can elevate the flavors even more.
- Vegetable Swap: Feel free to add or substitute any vegetables you have on hand, such as diced zucchini or spinach.
This Quinoa and Black Bean Bowl is not only quick and easy to prepare but also versatile and satisfying, making it a wonderful addition to your collection of microwave recipes!
Lemon Garlic Butter Shrimp

Lemon Garlic Butter Shrimp is a quick and delicious dish that highlights the sweet, tender flavors of shrimp paired with the bright acidity of lemon and the rich depth of garlic and butter. This recipe is perfect for seafood lovers, busy professionals, or anyone looking to whip up a gourmet meal in under 15 minutes.
Whether you're serving it over pasta, with a side of rice, or simply on its own, this meal impresses while keeping your kitchen clean and your prep time minimal.
Ingredients:
- 1 pound large shrimp, peeled and deveined
- 4 tablespoons unsalted butter
- 3 cloves garlic, minced
- Juice and zest of 1 lemon
- Salt and pepper, to taste
- Chopped parsley, for garnish
- Cooked pasta or rice (optional, for serving)
Cooking Instructions:
- In a large microwave-safe bowl, melt the butter in the microwave. Start with 30-second intervals until fully melted.
- Add the minced garlic to the melted butter and microwave for an additional 30 seconds. This will help infuse the butter with the garlic flavor.
- Stir in the shrimp, lemon juice, lemon zest, salt, and pepper. Make sure the shrimp are well coated with the mixture.
- Cover the bowl with a microwave-safe lid or plate and cook on high for 3-4 minutes, or until the shrimp turn pink and opaque.
- Carefully remove the bowl from the microwave (it will be hot!), and let it sit for about one minute.
- Sprinkle with chopped parsley and serve hot, over cooked pasta or rice if desired.
Variations and Tips:
- For extra flavor, consider adding red pepper flakes for some heat or a splash of white wine before microwaving.
- You can substitute the shrimp with other proteins like scallops or chicken, although cooking times may vary.
- Always check for doneness, as overcooking shrimp can make them rubbery. They should be opaque and firm when ready.
- If you prefer a thicker sauce, mix in a tablespoon of cornstarch with the garlic and butter mixture before adding the shrimp. Cook for an additional minute to thicken.
- This dish can be enjoyed hot or at room temperature, making it a versatile option for picnics or potlucks.
Single-Serve Chocolate Mug Cake

Indulge in a rich, chocolatey treat with this easy single-serve chocolate mug cake recipe. Perfect for those late-night cravings or when you want a quick dessert without the hassle of baking an entire cake, this mug cake can be whipped up in just 5 minutes.
Ideal for chocolate lovers, this recipe provides a warm, delicious dessert that satisfies your sweet tooth in no time.
Ingredients:
- 4 tablespoons all-purpose flour
- 4 tablespoons granulated sugar
- 2 tablespoons unsweetened cocoa powder
- 1/8 teaspoon baking powder
- Pinch of salt
- 3 tablespoons milk
- 2 tablespoons vegetable oil
- 1/4 teaspoon vanilla extract
- Optional: chocolate chips or nuts
Cooking Instructions:
- In a microwave-safe mug, combine the flour, sugar, cocoa powder, baking powder, and salt. Stir until well mixed.
- Add the milk, vegetable oil, and vanilla extract to the dry ingredients. Stir until you achieve a smooth batter, making sure there are no lumps.
- If desired, fold in a few chocolate chips or nuts for added texture and flavor.
- Microwave the mug on high for 1 minute and 30 seconds. Check for doneness; if necessary, microwave for an additional 10-15 seconds. The cake should be set but still moist.
- Allow the mug cake to cool for a minute before enjoying it straight from the mug.
Variations and Tips:
- For a richer flavor, use dark cocoa powder instead of regular cocoa powder.
- Substitute milk with almond milk or oat milk for a dairy-free option.
- Top your mug cake with whipped cream, a scoop of ice cream, or a drizzle of chocolate syrup for extra indulgence.
- Experiment with different mix-ins such as peanut butter, caramel sauce, or even flavored extracts for unique variations.
- Be cautious with the cooking time, as microwaves vary in power; it's better to start with less time and add more if needed.
Microwave Vegetable Risotto
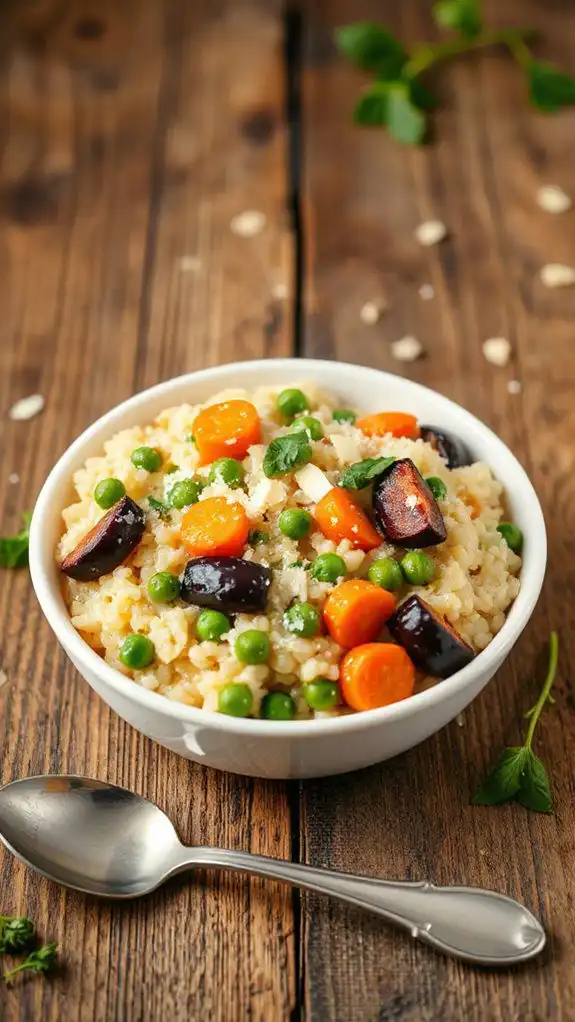
Microwave Vegetable Risotto is a quick and delicious dish that combines creamy Arborio rice with a medley of colorful vegetables. Ideal for busy individuals or families wanting a healthy meal in just 30 minutes, this risotto offers a comforting flavor profile without the hassle of traditional risotto preparation.
Perfect for vegetarians and those seeking a nutritious option, it's a great way to incorporate more vegetables into your diet.
Ingredients:
- 1 cup Arborio rice
- 2 cups vegetable broth
- 1 cup mixed vegetables (e.g., peas, carrots, bell peppers)
- 1 small onion, finely chopped
- 1 clove garlic, minced
- 1 tablespoon olive oil
- 1/4 cup grated Parmesan cheese (optional)
- Salt and pepper, to taste
- Fresh herbs (e.g., parsley or basil), for garnish
Cooking Instructions:
- In a large microwave-safe bowl, combine the Arborio rice, chopped onion, minced garlic, and olive oil. Stir well.
- Pour in the vegetable broth and add the mixed vegetables. Stir again to guarantee everything is evenly distributed.
- Cover the bowl with microwave-safe plastic wrap, leaving a small section open to allow steam to escape.
- Microwave on high for 10 minutes. After 10 minutes, stir the risotto and microwave for an additional 5-7 minutes, or until the rice is tender and creamy.
- Carefully remove the bowl from the microwave (it will be hot!) and let it sit for a couple of minutes.
- Stir in the grated Parmesan cheese, if using, and season with salt and pepper to taste.
- Serve hot, garnished with fresh herbs.
Variations and Tips:
- For a richer flavor, add a splash of white wine before microwaving.
- Substitute the mixed vegetables with seasonal veggies, such as zucchini, asparagus, or spinach, for different flavors.
- For a vegan option, omit the cheese or use a plant-based alternative.
- If you enjoy a bit of crunch, top the risotto with toasted nuts such as pine nuts or walnuts before serving.
- Experiment with different herbs like thyme or rosemary to customize the flavor to your liking.
Egg and Cheese Breakfast Sandwich

The Egg and Cheese Breakfast Sandwich is the perfect quick meal for busy mornings or weekend brunch. This satisfying dish combines fluffy scrambled eggs with melted cheese, all sandwiched between your choice of bread.
It takes about 5 minutes to prepare and 1-2 minutes to cook in the microwave, making it an ideal option for anyone who wants a hearty breakfast without spending too much time in the kitchen.
Ingredients:
- 1 large egg
- 1 slice of cheese (American, cheddar, or your favorite)
- 1 slice of bread (English muffin, bagel, or sandwich bread)
- Salt and pepper to taste
- Optional: cooked bacon, sausage, or vegetables (like spinach or bell peppers)
Cooking Instructions:
- Crack the egg into a microwave-safe bowl or mug, adding a pinch of salt and pepper. Whisk the egg until it's well beaten.
- Microwave the egg on high for about 30 seconds. After 30 seconds, stir the egg and microwave for another 15-30 seconds until fully cooked. Avoid overcooking as it will make the egg rubbery.
- While the egg is cooking, toast your bread in a toaster or microwave it for a few seconds until warmed.
- Once the egg is ready, place the slice of cheese on top of the hot egg to allow it to melt slightly.
- Assemble your sandwich by placing the egg and cheese atop one piece of bread, then topping it with the other slice. Add any optional ingredients like cooked bacon or veggies for extra flavor.
- If desired, wrap the sandwich in a paper towel and microwave for an additional 10-15 seconds to heat everything through before enjoying.
Variations & Tips:
- For a southwestern twist, add some salsa or avocado before closing the sandwich.
- Use different types of cheese like feta or gouda for unique flavors.
- Substitute egg for egg whites for a lighter option.
- If you prefer a crispy sandwich, toast the bread in a skillet for a minute after assembling.
- Experiment with different types of bread, including whole grain or gluten-free options, according to your preference.
Stuffed Bell Peppers

Stuffed bell peppers are a delicious and versatile dish that can serve as a hearty main course or a colorful side.
Ideal for families and busy individuals, these peppers are easy to prepare and can be filled with various ingredients to suit your taste. The total preparation time is typically around 30–40 minutes and can be made entirely in the microwave, making them perfect for a quick weeknight dinner or a festive gathering.
Ingredients:
- 4 medium bell peppers (any color)
- 1 cup cooked rice (white or brown)
- 1 cup ground meat (beef, turkey, or chicken)
- 1 small onion, finely chopped
- 1 clove garlic, minced
- 1 cup canned diced tomatoes
- 1 teaspoon Italian seasoning
- Salt and pepper to taste
- 1 cup shredded cheese (cheddar, mozzarella, or your choice)
- Optional: chopped herbs for garnish (parsley or basil)
Cooking Steps:
- Prepare the Peppers: Cut the tops off the bell peppers and remove the seeds and membranes. Rinse them under water and set aside.
- Cook the Filling: In a microwave-safe bowl, combine the cooked rice, ground meat, chopped onion, minced garlic, diced tomatoes, Italian seasoning, salt, and pepper. Mix well and cover the bowl with a microwave-safe lid or wrap.
- Microwave the Filling: Microwave the mixture on high for about 5-6 minutes, stirring halfway through, until the meat is cooked through and the onion is tender.
- Stuff the Peppers: Carefully fill each bell pepper with the meat and rice mixture, packing it tightly. Place them upright in a microwave-safe dish. If there's any leftover filling, you can place it around the peppers.
- Cook the Stuffed Peppers: Cover the dish with a microwave-safe lid or wrap and microwave on high for 5-7 minutes, or until the peppers are tender.
- Add Cheese: Remove the dish from the microwave, sprinkle cheese on top of each stuffed pepper, and return to the microwave (uncovered) for an additional 1-2 minutes, until the cheese is melted.
- Serve and Garnish: Let the peppers cool slightly before serving. Garnish with fresh herbs if desired.
Variations and Tips:
- Vegetarian Option: Replace the ground meat with black beans, lentils, or chopped vegetables for a vegetarian version. You can also add in quinoa or other grains to bulk up the dish.
- Spicy Twist: Add diced jalapeños or use pepper jack cheese for a spicy kick.
- Make Ahead: You can prepare the filling in advance and store it in the refrigerator. Just stuff the peppers and microwave when ready to serve.
- Serving Suggestions: Serve with a side salad or crusty bread for a complete meal. You can also drizzle with hot sauce for some extra flavor.
Microwave Chocolate Chip Cookie
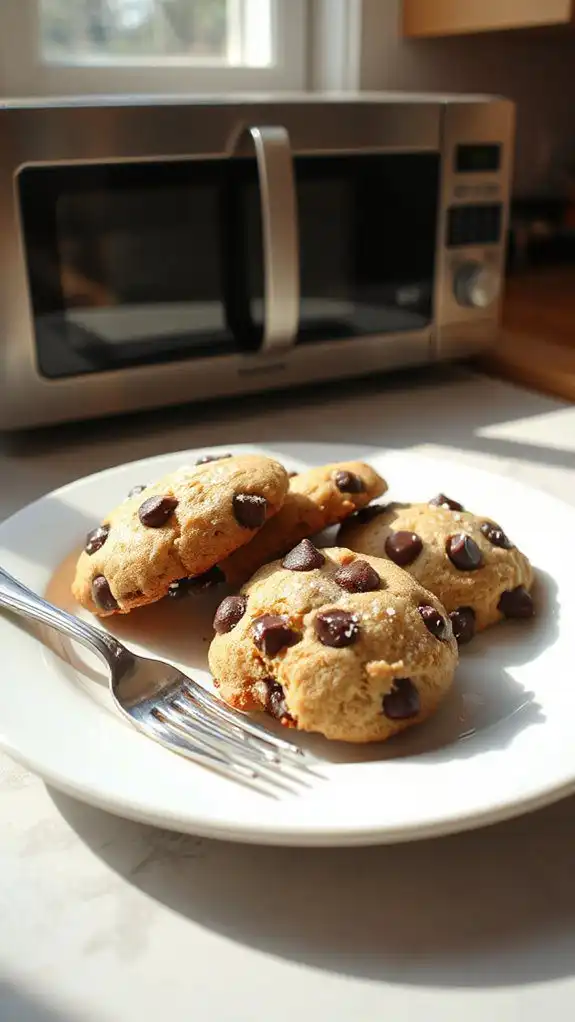
Microwave Chocolate Chip Cookies are a quick and delicious treat that satisfy your sweet tooth in just minutes. Ideal for those who crave homemade cookies but are short on time or resources, this microwavable dessert is perfect for college students, busy parents, or anyone looking for a late-night snack.
With a preparation time of just 5 minutes and a cooking time of around 40-60 seconds, you'll be enjoying warm, gooey cookies in no time.
Ingredients:
- 1 tablespoon unsalted butter
- 1 tablespoon granulated sugar
- 1 tablespoon brown sugar
- 1/4 teaspoon vanilla extract
- Pinch of salt
- 1 egg yolk
- 3 tablespoons all-purpose flour
- 1 tablespoon chocolate chips
Cooking Steps:
- In a microwave-safe mug or bowl, melt the butter in the microwave for about 10-15 seconds.
- Add the granulated sugar, brown sugar, vanilla extract, and salt to the melted butter. Mix well until combined.
- Stir in the egg yolk until fully incorporated.
- Gradually add in the flour, mixing until just combined.
- Fold in the chocolate chips.
- Microwave the cookie dough for about 40-60 seconds, watching to verify it does not overflow. The cookie should look set but still a little soft.
- Allow the cookie to cool for a minute before enjoying straight from the mug or transferring to a plate.
Variations and Tips:
- Mix-ins: Feel free to customize your cookies with nuts, dried fruit, or different types of chocolate.
- Flavoring: Add a sprinkle of cinnamon or a few drops of almond extract for a unique twist.
- Serving: Serve warm with a scoop of ice cream on top for an indulgent dessert.
- Storage: If you have leftovers (which is unlikely), store in an airtight container at room temperature for up to a day.
- Cooking Tip: Microwaves vary in power, so adjust the cooking time as needed. Start with less time and add more if necessary to avoid overcooking.
Sweet Potato and Black Bean Enchiladas

Sweet Potato and Black Bean Enchiladas are a delightful, hearty dish that combines the sweetness of roasted sweet potatoes with the earthy flavors of black beans, all wrapped in warm tortillas and topped with zesty enchilada sauce. This dish is vegetarian-friendly and perfect for anyone looking to enjoy a nutritious meal. It can serve as a main course for family dinners, gatherings, or meal prep for the week ahead. Preparation time is approximately 30 minutes, with a cooking time of about 20 minutes.
Ingredients:
- 2 medium sweet potatoes, peeled and diced
- 1 can black beans, drained and rinsed
- 1 cup corn (fresh or frozen)
- 1 teaspoon cumin
- 1 teaspoon chili powder
- Salt and pepper to taste
- 8-10 corn tortillas
- 1 cup enchilada sauce (store-bought or homemade)
- 1 cup shredded cheese (cheddar or Monterey Jack)
- Fresh cilantro for garnish (optional)
- Sour cream (optional for serving)
Cooking Instructions:
- Preheat the Microwave: Place a microwave-safe dish with water in your microwave and preheat to steam the sweet potatoes.
- Steam Sweet Potatoes: Place the diced sweet potatoes in a microwave-safe bowl, cover, and microwave on high for 5-7 minutes, or until tender. Drain and set aside.
- Mix Filling: In a large mixing bowl, combine the steamed sweet potatoes, black beans, corn, cumin, chili powder, salt, and pepper. Mix until well combined.
- Prepare Tortillas: Wrap the tortillas in a damp paper towel and warm them in the microwave for about 30 seconds, or until soft and pliable.
- Assemble Enchiladas: Spoon a portion of the sweet potato and black bean mixture onto each tortilla, roll them up tightly, and place seam-side down in a microwave-safe dish.
- Add Sauce: Pour the enchilada sauce over the rolled enchiladas, and sprinkle the shredded cheese on top.
- Microwave: Cover the dish with a microwave-safe lid or plastic wrap (with a few holes for steam to escape) and microwave for 5-7 minutes, or until the cheese is melted and bubbly.
- Garnish and Serve: Carefully remove from the microwave, let cool for a minute, and garnish with fresh cilantro and serve with sour cream if desired.
Variations and Tips:
- Add Protein: For a heartier meal, add cooked shredded chicken or ground turkey to the filling.
- Spice It Up: Incorporate chopped jalapeños or use a spicy enchilada sauce for an extra kick.
- Different Cheeses: Experiment with different cheeses or use a dairy-free option to suit dietary needs.
- Make Ahead: Prepare the enchiladas ahead of time, and refrigerate them until you are ready to cook. Just add a few extra minutes to the heating time.
- Freeze for Later: These enchiladas freeze well; wrap them tightly and store them for up to 3 months. To reheat, thaw overnight in the fridge and microwave as directed.
Enjoying these Sweet Potato and Black Bean Enchiladas not only delivers a tasty meal but also offers a budget-friendly and time-efficient cooking option, perfect for busy weeknights!
Creamy Tomato Basil Pasta

Creamy Tomato Basil Pasta is a delightful dish that combines the rich flavors of tomatoes and fresh basil with a creamy sauce, making it perfect for a quick weeknight dinner or a cozy lunch.
This recipe is ideal for pasta lovers who enjoy a comforting meal that can be made in under 30 minutes. It's suitable for busy families, college students, or anyone looking for a fast yet delicious meal option.
Ingredients:
- 8 oz pasta (penne or spaghetti)
- 1 can (14 oz) diced tomatoes
- 1 cup heavy cream
- 1 cup fresh basil leaves, chopped
- 2 cloves garlic, minced
- 1 tsp olive oil
- Salt and pepper to taste
- Grated Parmesan cheese for serving (optional)
Cooking Steps:
- In a large microwave-safe bowl, combine the pasta and enough water to cover it by about an inch. Microwave on high for 8-10 minutes, or until the pasta is cooked al dente. Drain and set aside.
- In another microwave-safe bowl, combine the diced tomatoes, heavy cream, minced garlic, and olive oil. Season with salt and pepper. Microwave on high for 3-4 minutes, stirring halfway through, until heated through.
- Add the cooked pasta directly into the sauce mixture and stir to combine evenly. Microwave the mixture for an additional 1-2 minutes to heat everything together.
- Stir in the chopped basil and serve hot, topped with grated Parmesan cheese if desired.
Variations and Tips:
- For a protein boost, add cooked chicken, shrimp, or sautéed mushrooms to the pasta before serving.
- To make it lighter, substitute heavy cream with Greek yogurt or a non-dairy alternative.
- For added texture, consider tossing in some spinach or arugula just before serving.
- If you like a bit of heat, sprinkle red pepper flakes into the sauce mixture.
- Adjust the consistency of the sauce by adding a little pasta water if it seems too thick.
Raspberry Coconut Oatmeal
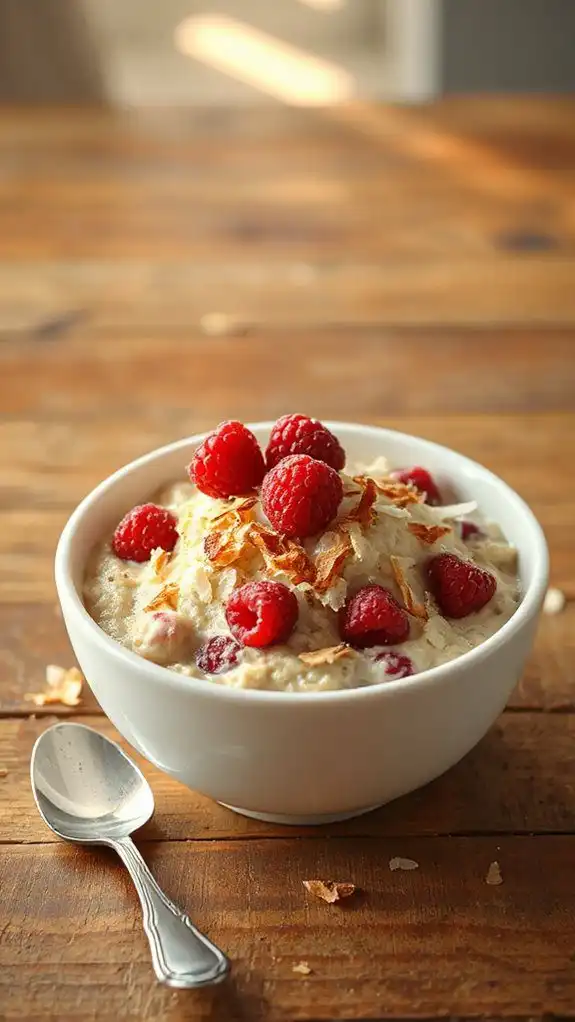
Raspberry Coconut Oatmeal is a delightful and nutritious breakfast option that combines the rich flavors of coconut with the tartness of fresh raspberries. This dish is perfect for busy mornings, as it can be prepared in just 5 minutes using a microwave, making it ideal for individuals and families looking for a quick yet wholesome meal.
With the vibrant colors and delicious taste, it's also a great way to start your day or serve as a satisfying snack any time.
Ingredients:
- 1 cup rolled oats
- 2 cups water or milk (or a non-dairy alternative)
- 1/2 cup fresh raspberries (or frozen)
- 1/4 cup shredded coconut (unsweetened)
- 1 tablespoon honey or maple syrup (optional)
- A pinch of salt
- 1/2 teaspoon vanilla extract (optional)
- Toppings: extra raspberries, coconut flakes, nuts, or seeds (optional)
Cooking Steps:
- In a microwave-safe bowl, combine the rolled oats, water (or milk), and a pinch of salt.
- Microwave on high for 2 to 3 minutes until the oatmeal is cooked and has absorbed most of the liquid. Keep an eye on it to prevent overflow.
- Carefully remove the bowl from the microwave (it may be hot) and stir in the shredded coconut, fresh raspberries, honey (or maple syrup), and vanilla extract (if using).
- Return the bowl to the microwave and heat for an additional 30 seconds to 1 minute, just to warm the raspberries and melt the coconut slightly.
- Mix well and let it sit for a minute to thicken before serving. If it's too thick for your liking, stir in a bit of extra water or milk to achieve your desired consistency.
- Garnish with extra raspberries, coconut flakes, or a sprinkling of nuts or seeds for added texture and flavor before serving.
Variations and Tips:
- For an extra protein boost, consider adding a spoonful of nut butter, yogurt, or protein powder.
- Swap out raspberries for other berries like blueberries, strawberries, or blackberries depending on your preference or what's in season.
- If you like a little crunch, sprinkle some chopped nuts or granola on top just before serving.
- To make this dish even more tropical, add a splash of pineapple juice along with the water.
- This oatmeal can be made ahead of time and reheated. Just store it in the fridge and reheat for breakfast during the week.
Microwave Frittata

A microwave frittata is a quick and easy dish that's perfect for a nutritious breakfast, brunch, or even a light dinner.
This fluffy and versatile dish can be customized with your choice of vegetables, meats, and cheese, making it ideal for families, busy professionals, or anyone looking to whip up a delicious meal in no time.
The preparation time for this microwave frittata is around 10 minutes, with a cooking time of approximately 5-7 minutes, depending on your microwave.
Ingredients:
- 4 large eggs
- 1/4 cup milk (or a dairy alternative)
- 1/2 cup diced vegetables (bell peppers, onions, spinach, etc.)
- 1/2 cup cooked meats (ham, bacon, sausage, etc.) – optional
- 1/2 cup shredded cheese (cheddar, feta, mozzarella, etc.)
- Salt and pepper to taste
- Fresh herbs (parsley, chives, or basil), optional for garnish
Cooking Steps:
- In a microwave-safe bowl, whisk together the eggs and milk until well combined. Add salt and pepper to taste.
- Stir in your choice of diced vegetables and cooked meats if using, followed by the shredded cheese.
- Microwave the mixture on high for 3-4 minutes. Stop halfway through and stir to guarantee even cooking.
- Continue microwaving in 1-minute intervals until the frittata is fully set and cooked through.
- Let it sit for a minute before serving. Garnish with fresh herbs if desired.
Variations and Tips:
- Vegetarian Option: Omit the meats and add more vegetables or even legumes like black beans or chickpeas for added protein.
- Spice It Up: Add hot sauce or crushed red pepper flakes to the egg mixture for a spicy kick.
- Cheese Alternatives: Experiment with different kinds of cheese for varying flavors, or try goat cheese for a tangy touch.
- Add Flavor: Consider sautéing your vegetables in a skillet for a few minutes before adding them to the bowl for deeper flavors, though this does increase prep time.
- Portion Control: Use single-serving ramekins for individual frittatas, adjusting cooking time accordingly (usually around 2-3 minutes).
Enjoy your easy and delicious microwave frittata!
Thai Coconut Curry Soup

Thai Coconut Curry Soup is a flavorful and aromatic dish that embodies the essence of Thai cuisine. This creamy, savory soup is perfect for those looking for a comforting meal or a light yet satisfying appetizer. With a preparation time of approximately 15 minutes and a cooking time of 20 minutes, this dish serves as an excellent choice for busy weeknights or a cozy gathering with friends and family.
Ingredients:
- 1 tablespoon coconut oil
- 1 onion, chopped
- 3 cloves garlic, minced
- 1 tablespoon fresh ginger, grated
- 2 tablespoons red curry paste
- 1 can (14 oz) coconut milk
- 4 cups vegetable broth
- 2 cups mixed vegetables (e.g., bell peppers, carrots, broccoli)
- 1 tablespoon soy sauce
- 1 tablespoon lime juice
- Fresh cilantro, chopped (for garnish)
- Optional: cooked chicken or tofu for added protein
- Optional: sliced red chili for heat
Cooking Instructions:
- In a large microwave-safe bowl, heat the coconut oil for about 30 seconds until melted.
- Add the chopped onion to the bowl and microwave for 2-3 minutes, or until soft.
- Stir in the minced garlic, grated ginger, and red curry paste; microwave for an additional 1-2 minutes, until fragrant.
- Pour in the coconut milk and vegetable broth, then stir well to combine. Microwave for 5-7 minutes until the mixture is hot.
- Add the mixed vegetables and microwave for another 5-10 minutes, stirring halfway through, until the veggies are tender.
- Stir in soy sauce and lime juice before serving. If desired, fold in cooked chicken or tofu.
- Serve hot, garnished with fresh cilantro and optional sliced red chili.
Variations and Tips:
- For a spicier soup, increase the amount of red curry paste or add more sliced red chili.
- Substitute the vegetable broth with chicken broth for a non-vegetarian version.
- Feel free to use any vegetables you have on hand, such as zucchini, snap peas, or spinach.
- For a lighter version, consider using light coconut milk or reducing the amount of coconut milk used.
- If preparing for meal prep, store the soup in the fridge for up to 3 days, or freeze for longer storage. Reheat in the microwave before serving.
Cheesy Ham and Potato Bake

Cheesy Ham and Potato Bake is a deliciously hearty dish that combines the creamy texture of cheese with tender potatoes and savory ham. This comforting meal is perfect for families looking for a quick weeknight dinner or for anyone wanting to impress guests with minimal effort.
With a preparation time of only 15 minutes and a cooking time of about 30 minutes, you can have this delightful bake ready to serve in no time.
Ingredients:
- 4 cups diced potatoes (fresh or frozen)
- 1 cup diced ham
- 2 cups shredded cheddar cheese
- 1 cup milk
- 1/2 cup sour cream
- 1 teaspoon garlic powder
- 1 teaspoon onion powder
- Salt and pepper to taste
- 1/4 cup chopped green onions (optional)
- 1/2 cup breadcrumbs (optional for topping)
Cooking Instructions:
- In a large microwave-safe bowl, combine the diced potatoes and diced ham.
- In a separate bowl, mix together the milk, sour cream, garlic powder, onion powder, salt, and pepper until well combined.
- Pour the creamy mixture over the potatoes and ham, stirring to coat everything evenly.
- Sprinkle 1 1/2 cups of cheddar cheese on top of the potato and ham mixture. Stir gently to incorporate some of the cheese into the mixture while keeping some on top.
- Cover the bowl with a microwave-safe lid or plastic wrap, making sure to leave a small vent for steam to escape.
- Microwave on high for about 15-20 minutes, stirring halfway through, until the potatoes are tender.
- Once cooked, sprinkle the remaining cheese on top and, if desired, add breadcrumbs for an extra crunchy topping.
- Return to the microwave for an additional 2-3 minutes or until the cheese is melted and bubbly.
- Remove from the microwave, let it sit for a few minutes, and garnish with chopped green onions if using before serving.
Variations and Tips:
- For a lighter version, substitute half the sour cream with Greek yogurt.
- Add in some steamed vegetables like broccoli or peas for added nutrition.
- If you prefer a spicier kick, consider adding some diced jalapeños or a dash of hot sauce to the mixture before microwaving.
- For different flavor profiles, try using different types of cheese such as gouda or mozzarella.
- Be cautious with salt, especially if your ham is already salted; taste the mixture before adding more salt.
Enjoy your cheesy ham and potato bake as a satisfying dish that is sure to become a family favorite!
Garlic Butter Corn on the Cob

Garlic Butter Corn on the Cob is a delicious and easy-to-make side dish that's perfect for summer barbecues, picnics, or simply as a treat with weeknight dinners. The sweet, juicy corn pairs beautifully with the rich flavor of garlic butter, making it a favorite for both kids and adults.
This recipe takes just about 10 minutes in the microwave and is ideal for those who want a quick and flavorful addition to their meals.
Ingredients:
- 4 ears of corn on the cob, husked and cleaned
- 4 tablespoons unsalted butter
- 2 garlic cloves, minced
- 1 teaspoon salt
- 1/2 teaspoon black pepper
- 1 tablespoon chopped fresh parsley (optional)
- Parmesan cheese (optional)
Directions:
- Prepare the Corn: Start by husking the corn and removing any silk. Break the cobs in half if they're too large to fit in your microwave.
- Make Garlic Butter: In a small microwave-safe bowl, combine the unsalted butter and minced garlic. Microwave on high for about 30 seconds, or until the butter has melted and becomes fragrant.
- Combine and Season: Add salt, black pepper, and chopped parsley (if using) to the melted garlic butter and stir to combine.
- Cook the Corn: Place the prepared corn on a microwave-safe plate. Brush each ear generously with the garlic butter mixture, reserving some for serving. Cover the corn with a damp paper towel to retain moisture. Microwave on high for 4-6 minutes. Rotate the corn halfway through cooking for even results.
- Serve: Carefully remove the corn from the microwave (it will be hot!), and brush with any remaining garlic butter. Sprinkle with Parmesan cheese, if desired, and serve immediately.
Variations & Tips:
- Add Spice: For a kick, add a pinch of red pepper flakes to the garlic butter mixture.
- Herbed Butter: Swap out the parsley for other fresh herbs like cilantro or chives for different flavor profiles.
- Flavor Infusions: Experiment by adding lemon zest or lime juice to the garlic butter for a zesty twist.
- Storage: Leftovers can be stored in an airtight container in the refrigerator for up to 3 days. Reheat in the microwave for 1-2 minutes before serving.
Enjoy this quick and delicious Garlic Butter Corn on the Cob that will elevate any meal!
Cinnamon Roll in a Mug

The Cinnamon Roll in a Mug is a delightful treat that's perfect for those cozy mornings or late-night cravings. This quick and easy dessert is ideal for anyone looking for a single-serving sweet indulgence without the hassle of baking a whole batch.
With a preparation time of just 5 minutes and minimal cleanup, you can enjoy this warm, gooey cinnamon roll in under 10 minutes!
Ingredients:
- 4 tablespoons all-purpose flour
- 1/4 teaspoon baking powder
- 1/8 teaspoon salt
- 1 tablespoon granulated sugar
- 3 tablespoons milk
- 1 tablespoon vegetable oil
- 1/2 teaspoon vanilla extract
- 1 tablespoon brown sugar
- 1/2 teaspoon ground cinnamon
- 1 tablespoon cream cheese (optional, for topping)
Cooking Steps:
- In a microwave-safe mug, mix together the flour, baking powder, salt, and granulated sugar until combined.
- Add the milk, vegetable oil, and vanilla extract to the dry ingredients, and stir until a smooth batter forms.
- In a small bowl, combine the brown sugar and cinnamon. Sprinkle half of this mixture over the batter and swirl it in with a fork or toothpick for a marbled effect.
- Sprinkle the remaining cinnamon-sugar mixture on top.
- Microwave the mug on high for about 1 minute and 20 seconds, or until the cinnamon roll has risen and is set in the middle. Microwave times may vary, so check for doneness.
- Optional: Top with cream cheese for an extra indulgent experience before enjoying!
Variations and Tips:
- For a nutty flavor, add chopped pecans or walnuts to the batter or topping.
- Experiment with different extracts, such as almond or maple, to change up the flavor.
- To make it a bit healthier, substitute half of the all-purpose flour with whole wheat flour.
- If you prefer, a drizzle of icing made from powdered sugar and milk can elevate your cinnamon roll even further!
- Confirm that your mug is large enough to prevent overflow while microwaving.
Enjoy your warm, fluffy Cinnamon Roll in a Mug—perfect for a delightful solo treat!
Microwave Teriyaki Chicken

Microwave Teriyaki Chicken is a quick and delicious dish that brings the savory and slightly sweet flavor of traditional teriyaki sauce to your kitchen in a flash. Perfect for busy weeknight dinners or for impressing guests with minimal effort, this recipe requires only about 20 minutes of preparation and cooking time. It's ideal for those who love Asian cuisine or anyone looking for a simple, yet flavorful meal that can be made in a microwave.
Ingredients:
- 2 boneless, skinless chicken breasts
- 1/2 cup teriyaki sauce
- 1 tablespoon olive oil
- 1 teaspoon minced garlic
- 1/2 teaspoon grated ginger (optional)
- 1/4 teaspoon black pepper
- 1 cup steamed broccoli (fresh or frozen)
- 1 cup cooked rice (white or brown)
- Sesame seeds (for garnish)
- Green onions, sliced (for garnish)
Cooking Steps:
- Begin by placing the chicken breasts in a microwave-safe dish. Rub the chicken with olive oil, minced garlic, grated ginger, and black pepper.
- Pour the teriyaki sauce over the chicken, ensuring it is well coated. Cover the dish with a microwave-safe lid or plastic wrap, leaving a small vent for steam to escape.
- Microwave on high for 5-6 minutes, or until the chicken is fully cooked (internal temperature should reach 165°F / 74°C). Cooking times may vary based on your microwave and the thickness of the chicken breasts.
- While the chicken is cooking, prepare the steamed broccoli according to package instructions if using frozen, or steam fresh broccoli until tender.
- Once the chicken is done, let it rest for a few minutes before slicing it into bite-sized pieces.
- To serve, place the cooked rice on each plate, add the sliced teriyaki chicken on top, and arrange the steamed broccoli alongside. Drizzle any remaining sauce from the dish over the chicken and rice. Garnish with sesame seeds and sliced green onions.
Variations and Tips:
- For an extra kick, add some red pepper flakes to the teriyaki sauce before microwaving.
- You can substitute the chicken with tofu or shrimp for a different protein source, but adjust cooking times accordingly.
- Feel free to add other vegetables to the dish, such as bell peppers, snap peas, or carrots, which can be quickly steamed in the microwave.
- For a richer flavor, marinate the chicken in teriyaki sauce for 30 minutes before microwaving.
- Serve with a side of edamame or a simple salad for a complete meal.
Peanut Butter Banana Overnight Oats
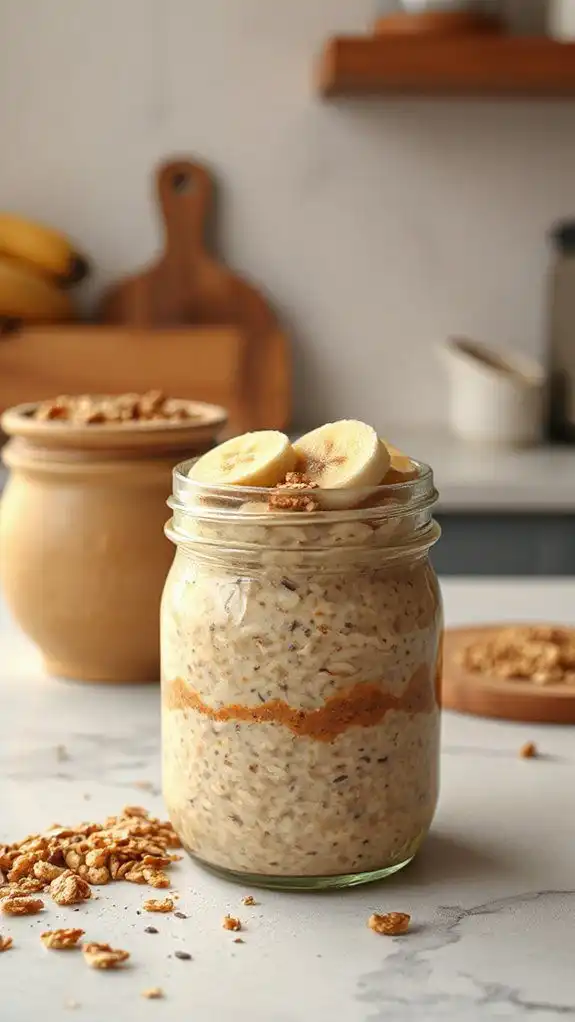
Peanut Butter Banana Overnight Oats are a delightful and nutritious breakfast option that's perfect for busy mornings or as a quick snack throughout the day. This dish combines the rich flavors of peanut butter and banana with wholesome oats, making it an ideal choice for anyone seeking a healthy, energizing start to their day.
With minimal preparation required, you can have this meal prepped in just about 10 minutes the night before, allowing for a hassle-free breakfast that you can enjoy on the go.
Ingredients:
- 1 cup rolled oats
- 2 cups milk (dairy or non-dairy)
- 2 ripe bananas, mashed
- 1/4 cup peanut butter
- 2 tablespoons honey or maple syrup (optional, for sweetness)
- 1/2 teaspoon cinnamon
- 1/4 teaspoon salt
- Chopped nuts or seeds (for topping, optional)
- Additional sliced banana (for topping, optional)
Cooking Steps:
- In a medium-sized bowl, combine the rolled oats, milk, mashed bananas, peanut butter, honey or maple syrup (if using), cinnamon, and salt. Stir until everything is well mixed.
- Divide the mixture evenly into two jars or containers with lids.
- Cover the jars and refrigerate overnight (or for at least 4 hours) to allow the oats to soak and soften.
- In the morning, give the oats a good stir before serving. Add a splash of milk if they are too thick for your liking.
- Top with chopped nuts, seeds, or additional sliced banana for an extra crunch and flavor.
Variations and Tips:
- For a chocolatey twist, add a tablespoon of cocoa powder to the mixture or top with dark chocolate chips.
- If you prefer a nuttier flavor, substitute almond or cashew butter for the peanut butter.
- You can customize the sweetness by adjusting the amount of honey or maple syrup based on your taste preference.
- For added nutrition, feel free to mix in chia seeds or flaxseeds before refrigerating.
- These overnight oats can also be stored in the refrigerator for up to 3 days, making them a great meal prep option.
Vegetable Stir-Fry
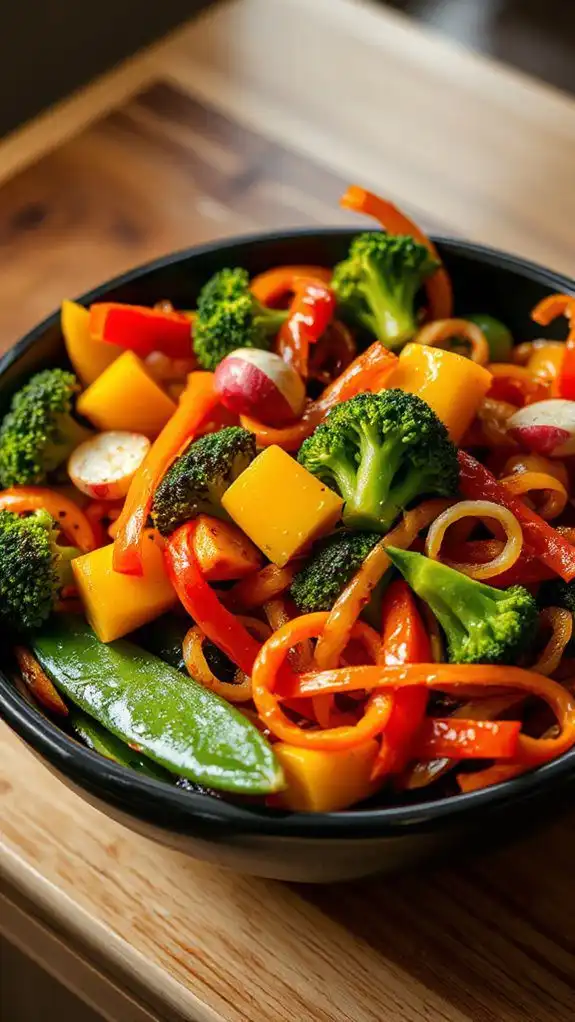
Vegetable Stir-Fry
Vegetable Stir-Fry is a quick and healthy dish that can be prepared in the microwave, making it ideal for busy individuals or families looking for a nutritious meal without spending too much time in the kitchen. This dish is perfect for vegetarians and can be customized to suit various dietary preferences.
With a preparation time of just 15 minutes, it beautifully combines vibrant vegetables with delightful flavors, making it a satisfying option for lunch or dinner.
Ingredients:
- 2 cups mixed vegetables (e.g., bell peppers, broccoli, carrots, snap peas)
- 1 tablespoon vegetable oil
- 2 cloves garlic, minced
- 1 tablespoon soy sauce
- 1 teaspoon sesame oil
- Salt and pepper to taste
- Cooked rice or noodles (optional, for serving)
Cooking Steps:
- In a microwave-safe bowl, combine the mixed vegetables and drizzle with vegetable oil. Toss to coat the vegetables evenly.
- Cover the bowl with a microwave-safe lid or plastic wrap, leaving a small vent for steam to escape. Microwave on high for 3-5 minutes, or until the vegetables are tender-crisp.
- Carefully remove the bowl from the microwave (it will be hot) and stir in the minced garlic, soy sauce, sesame oil, salt, and pepper.
- Return the bowl to the microwave and cook for an additional 1-2 minutes, ensuring the garlic is cooked through.
- Serve hot over cooked rice or noodles if desired.
Variations:
- Swap the mixed vegetables for your favorites such as zucchini, asparagus, or mushrooms.
- Add protein options such as tofu, cooked chicken, or shrimp for a more filling meal.
- Experiment with different sauces like teriyaki or hoisin for varied flavors.
Tips:
- For a bit of crunch, sprinkle sesame seeds or chopped nuts on top before serving.
- Adjust cooking times based on the power of your microwave and the quantity of vegetables used.
- Use fresh or frozen vegetables based on availability; frozen vegetables will cook faster.
Mini Meatloaf
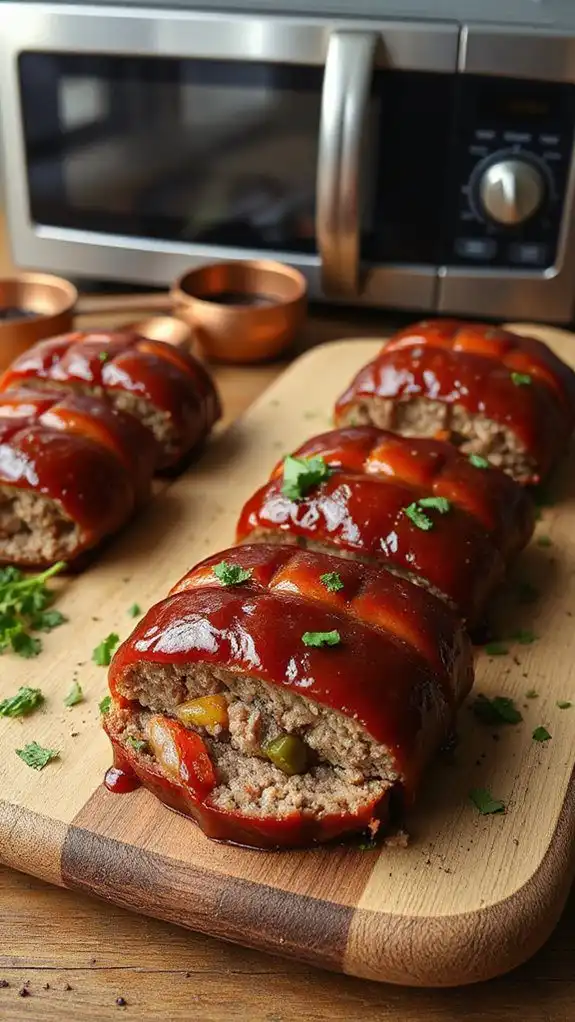
Mini meatloaf is a versatile, comforting dish that brings the classic flavors of a traditional meatloaf into a convenient, portioned serving size. Perfect for busy weeknights or as an easy meal prep option, this dish can be customized to suit picky eaters or tailored for specific dietary preferences.
With a preparation time of just 10 minutes and a cooking time of around 20 minutes, these mini meatloaves are hearty enough to satisfy any appetite while also being quick and easy to whip up.
Ingredients:
- 1 pound ground beef (or turkey)
- 1 cup breadcrumbs
- 1/2 cup milk
- 1/2 cup ketchup (plus more for topping)
- 1 small onion, finely chopped
- 1 egg
- 1 teaspoon garlic powder
- 1 teaspoon salt
- 1/2 teaspoon black pepper
- 1 teaspoon Worcestershire sauce
- Optional: chopped fresh herbs or spices (e.g., parsley, thyme, or Italian seasoning)
Cooking Steps:
- In a large bowl, combine ground beef (or turkey), breadcrumbs, milk, 1/2 cup ketchup, minced onion, egg, garlic powder, salt, pepper, and Worcestershire sauce. Mix until well incorporated but do not overwork the meat.
- Preheat your microwave to high power.
- Grease a microwave-safe muffin tin or loaf pan. Evenly divide the meat mixture among the muffin cups or shape into mini loaves and place them in the pan.
- Brush the tops with additional ketchup for added flavor and moisture.
- Cover the muffin tin or loaf pan with microwave-safe plastic wrap or a microwave-safe lid, leaving a small gap for steam to escape.
- Cook on high for approximately 10-12 minutes, or until the internal temperature reaches 160°F (70°C). Cooking time may vary based on the wattage of your microwave and the size of the meatloaves.
- Allow to rest for a minute before serving. Serve individually or with your favorite sides.
Variations & Tips:
- For a healthier version, substitute half of the ground meat with shredded vegetables like zucchini or carrots for added moisture and nutrition.
- Experiment with different proteins such as ground chicken or a meat substitute for a vegetarian option.
- Add cheese to the meat mixture for a gooey, delicious surprise.
- Customize the spices and herbs according to your preferences; try adding chili powder for a spicy kick or smoked paprika for a rich flavor.
- Serve with steamed broccoli, a salad, or mashed potatoes for a complete meal.
Coconut Cream Pie in a Mug

Coconut Cream Pie in a Mug is a delightful, quick, and easy dessert perfect for coconut enthusiasts and anyone craving a sweet treat. This recipe is great for those who want a comforting dessert in a matter of minutes, making it ideal for a late-night snack or a quick dessert for one.
The total preparation time is approximately 10 minutes, and it can be made using a microwave, ensuring minimal cleanup and hassle.
Ingredients:
- 1 tablespoon unsalted butter
- 2 tablespoons granulated sugar
- 1 tablespoon all-purpose flour
- 1/4 cup milk
- 2 tablespoons coconut cream
- 2 tablespoons shredded coconut (sweetened or unsweetened)
- 1/4 teaspoon vanilla extract
- Whipped cream (for topping, optional)
- Additional shredded coconut for garnish (optional)
Cooking Steps:
- In a microwave-safe mug, melt the unsalted butter in the microwave for about 20 seconds.
- Once melted, whisk in the granulated sugar and flour until smooth and well combined.
- Gradually add the milk, coconut cream, and vanilla extract, stirring continuously until the mixture is smooth.
- Stir in the shredded coconut until evenly distributed throughout the batter.
- Microwave on high for 60-90 seconds, keeping an eye on it to prevent overflowing. The pie should be set but still slightly gooey in the center.
- Let it cool for a minute, then top with whipped cream and extra shredded coconut if desired.
Variations and Tips:
- For a chocolate twist, add 1 tablespoon of cocoa powder to the mixture before microwaving.
- Replace shredded coconut with crushed graham crackers for a pie crust flavor.
- Experiment with flavors by incorporating almond or rum extract instead of vanilla.
- If you prefer a richer dessert, fold in some chocolate chips before microwaving for a decadent finish.
- Store any leftovers in the refrigerator and enjoy cold or reheated for a slightly different experience.
Spinach and Feta Microwave Stuffed Chicken
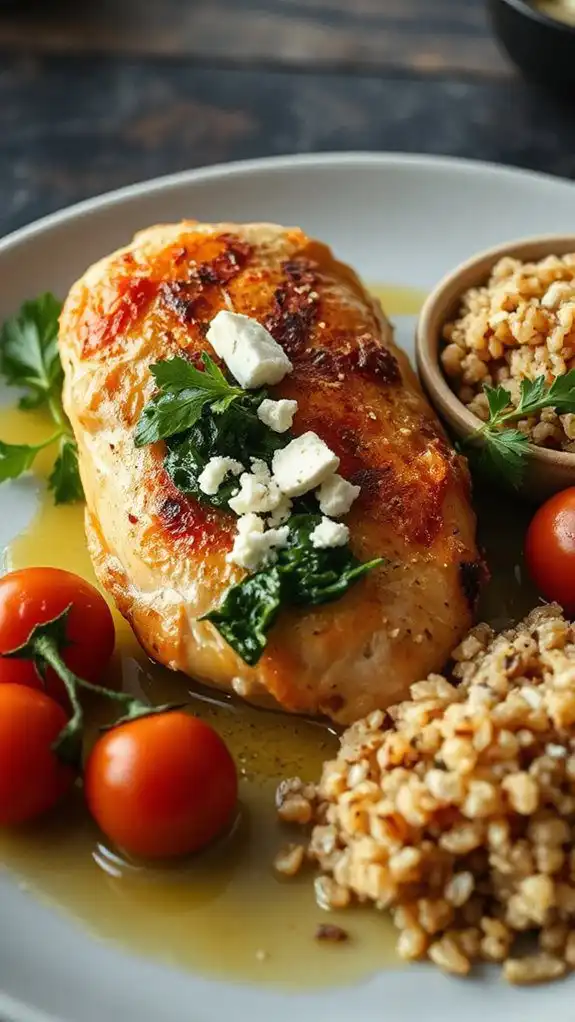
Spinach and Feta Microwave Stuffed Chicken is a delightful dish that combines the rich flavors of spinach and tangy feta cheese stuffed inside tender chicken breasts. This recipe is perfect for busy individuals or families looking for a quick, healthy meal that can be prepared in about 20 minutes.
It's not only a great source of protein but also packed with nutrients from the spinach, making it an ideal option for a nutritious dinner or lunch.
Ingredients:
- 2 boneless, skinless chicken breasts
- 1 cup fresh spinach, chopped
- 1/2 cup feta cheese, crumbled
- 1 tablespoon olive oil
- 1 clove garlic, minced
- Salt and pepper to taste
- 1 teaspoon dried oregano (optional)
Cooking Steps:
- Begin by preparing the spinach filling. In a microwave-safe bowl, combine chopped spinach, feta cheese, minced garlic, olive oil, oregano, salt, and pepper. Microwave the mixture for 1-2 minutes until the spinach is wilted and the ingredients are well combined. Stir to guarantee even mixing.
- Take the chicken breasts and with a sharp knife, carefully create a pocket by slicing them horizontally, making sure not to cut all the way through.
- Stuff each chicken breast with the spinach and feta mixture, evenly distributing the filling between the two breasts. You can secure the opening with toothpicks if necessary.
- Season the outside of the chicken breasts with salt, pepper, and optional spices of your choice.
- Place the stuffed chicken breasts in a microwave-safe dish. Cover the dish with a microwave-safe lid or wrap it with plastic wrap, leaving a small vent for steam to escape.
- Microwave on high for about 6-8 minutes, or until the chicken is cooked through and reaches an internal temperature of 165°F (75°C). Cooking time may vary depending on the wattage of your microwave, so check for doneness.
- Let the chicken rest for 2-3 minutes before serving. This will allow the juices to redistribute.
Variations and Tips:
- For added flavor, you can incorporate other herbs like basil or parsley into the spinach filling.
- Feel free to swap out the feta cheese for other cheeses such as mozzarella or goat cheese if you prefer a different taste.
- Serve the stuffed chicken with a side of steamed vegetables or a fresh salad for a complete meal.
- If you like a crisp texture, you can briefly pan-sear the stuffed chicken in a hot skillet after microwaving to golden the outside lightly.
Creamy Mushroom Risotto
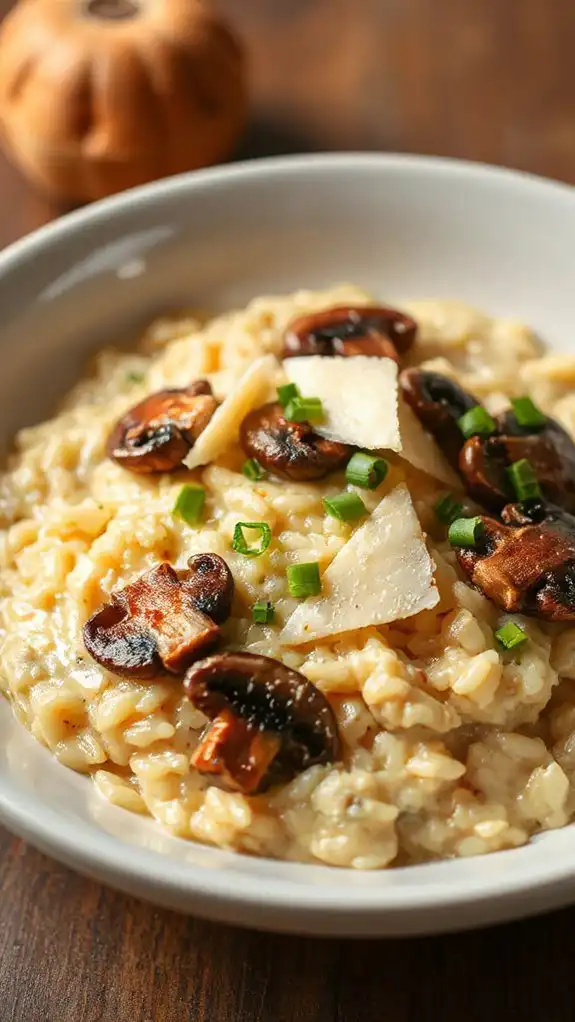
Creamy Mushroom Risotto is a rich and comforting dish that showcases the earthy flavors of mushrooms combined with the creamy texture of Arborio rice. This delicious risotto is perfect for a cozy dinner at home or impressing guests at a special gathering.
With a preparation time of around 30 minutes, it is an ideal dish for those who love to savor a creamy and fulfilling meal without spending all day in the kitchen.
Ingredients:
- 1 cup Arborio rice
- 4 cups vegetable or chicken broth
- 2 tablespoons olive oil
- 1 small onion, finely chopped
- 2 garlic cloves, minced
- 8 ounces mushrooms, sliced (such as cremini or shiitake)
- ½ cup dry white wine (optional)
- ½ cup grated Parmesan cheese
- 2 tablespoons butter
- Salt and pepper to taste
- Fresh parsley for garnish (optional)
Cooking Instructions:
- In a microwave-safe bowl, combine the broth and heat it in the microwave for about 4-5 minutes until hot but not boiling.
- In another large microwave-safe bowl, heat the olive oil on high for 1 minute. Add the chopped onion and garlic, then microwave for an additional 2 minutes, stirring halfway through until softened.
- Stir in the sliced mushrooms and microwave for another 3-4 minutes until they release their juices and are tender.
- Add the Arborio rice to the mushroom mixture and stir to coat the rice with the oil. Microwave on high for 1-2 minutes.
- If using, pour in the white wine and microwave for an additional 1-2 minutes, stirring until the wine is mostly absorbed.
- Slowly add the hot broth, one cup at a time, microwaving for about 5-6 minutes for each addition, stirring after each interval, until the rice is al dente and creamy. This should take about 20-25 minutes in total.
- Once cooked, stir in the butter and grated Parmesan cheese. Season with salt and pepper to taste and mix until creamy.
- Allow it to rest for 2-3 minutes before serving. Garnish with fresh parsley if desired.
Variations & Tips:
- For added flavor, sauté chopped fresh thyme or rosemary with the onions.
- You can substitute the mushrooms with vegetables like asparagus, peas, or spinach for a different twist.
- For a vegan version, replace Parmesan cheese with nutritional yeast and use plant-based butter.
- To enhance the creaminess, you can stir in a splash of cream or a tablespoon of mascarpone cheese just before serving.
- Be sure to stir consistently to help release the starches from the rice, creating a silky texture.
Enjoy your microwave-made Creamy Mushroom Risotto!