
Microwave recipes provide fast and satisfying options for a mood boost. Among the favorites are the comforting Microwave Banana Mug Cake, featuring ripe bananas and a fluffy texture, and Cheesy Microwave Popcorn, a savory snack perfect for any occasion. Other delights include Quick Quesadilla and Microwave Mac and Cheese, offering warm, cheesy goodness in minutes. Sweet treats like Chocolate Chip Cookie in a Mug and S'mores in a Mug add joy. Discover even more delicious ideas sure to elevate spirits.
Microwave Banana Mug Cake

The Microwave Banana Mug Cake is a quick and delightful dessert that combines the rich flavor of ripe bananas with a soft, fluffy cake texture, making it the perfect treat for banana lovers.
Ideal for those who want a homemade dessert in a hurry or individuals seeking a single serving of sweetness, this mug cake requires only about 5 minutes to prepare and cook.
It's a fantastic way to satisfy your sweet tooth without the need to bake an entire cake!
Ingredients:
- 1 ripe banana
- 1 egg
- 3 tablespoons all-purpose flour
- 2 tablespoons sugar
- 1 tablespoon milk
- 1 tablespoon melted butter (or coconut oil)
- 1/2 teaspoon baking powder
- A pinch of salt
- Optional: chocolate chips or nuts for topping
Cooking Instructions:
- In a microwave-safe mug, mash the ripe banana with a fork until smooth.
- Add the egg and mix well to combine thoroughly.
- Stir in the flour, sugar, milk, melted butter, baking powder, and salt until you have a smooth batter. Make sure there are no lumps.
- If desired, fold in chocolate chips or nuts for added texture and flavor.
- Microwave the mug on high for 1 minute and 30 seconds. Keep an eye on it while cooking; stop the microwave if the cake rises too high to prevent overflow.
- Let the mug cake cool for a minute before enjoying it straight from the mug.
Variations and Tips:
- For a healthier version, substitute the sugar with honey or maple syrup and use whole wheat flour.
- Add a pinch of cinnamon or vanilla extract for a flavor boost.
- Top with whipped cream or a scoop of ice cream for an indulgent treat.
- If you don't have a microwave-safe mug, use a small bowl instead.
- Make sure your banana is very ripe for the best flavor and natural sweetness.
Cheesy Microwave Popcorn

Cheesy microwave popcorn is a quick and delectable snack that combines the classic taste of popcorn with a rich, cheesy flavor. Perfect for movie nights, parties, or a fun afternoon treat for cheese lovers, this dish takes only about 5 minutes to prepare and cook.
With its easy preparation and minimal ingredients, cheesy microwave popcorn is suitable for all ages and can be enjoyed by the whole family.
Ingredients:
- 1/2 cup popcorn kernels
- 2 tablespoons olive oil or butter
- 1 teaspoon salt (adjust to taste)
- 1/2 cup grated cheddar cheese
- 1 teaspoon garlic powder (optional)
- 1 teaspoon onion powder (optional)
Cooking Steps:
- Place the popcorn kernels in a large microwave-safe bowl. If you prefer, you can also use a microwave popcorn popper.
- Drizzle the olive oil or melted butter over the popcorn kernels and sprinkle the salt, garlic powder, and onion powder if using. Mix well to evenly coat the kernels.
- Cover the bowl with a microwave-safe lid or plate to prevent the popcorn from spilling out while popping.
- Microwave on high for 2-4 minutes, or until you hear popcorn popping slow down to about 2 seconds between pops. Be cautious not to overcook it, as it can burn quickly.
- Carefully remove the bowl from the microwave (it will be hot!). Let it sit for a minute, then uncover.
- Sprinkle the grated cheddar cheese over the popped popcorn while it's still warm, then toss to combine until the cheese melts slightly and sticks to the popcorn.
Variations and Tips:
- Experiment with different cheeses such as Parmesan, mozzarella, or nutritional yeast for a vegan option.
- Add spices like paprika, chili powder, or ranch seasoning to give your popcorn an extra flavor kick.
- For a sweeter version, sprinkle the popcorn with cinnamon and sugar instead of cheese.
- Store leftover popcorn in an airtight container to maintain freshness.
Quick Quesadilla
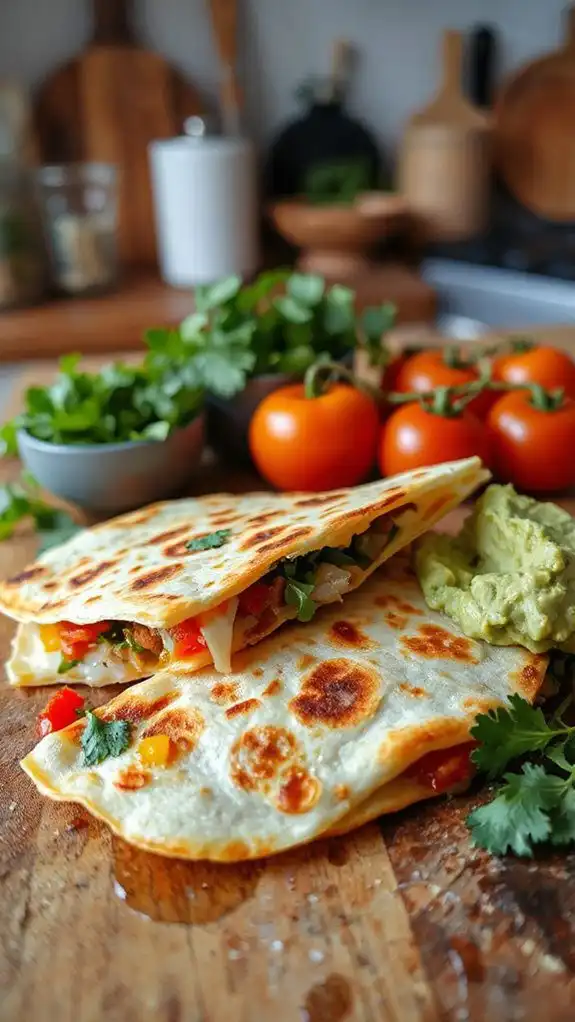
Quick Quesadilla is a simple and delicious dish that brings the flavors of Mexico into your kitchen in just a matter of minutes. Ideal for a quick lunch, snack, or even a crowd-pleasing appetizer, this microwave quesadilla is perfect for busy individuals or families looking for a fast and flavorful meal.
With a total preparation time of around 5 minutes and cooking time of about 1 minute, you can enjoy this cheesy treat in no time at all.
Ingredients:
- 2 flour tortillas
- 1 cup shredded cheese (cheddar, mozzarella, or a blend)
- 1/2 cup cooked chicken (optional)
- 1/4 cup diced bell peppers (optional)
- 1/4 cup sliced olives (optional)
- Salsa (for serving)
- Sour cream (for serving)
Cooking Steps:
- Place one tortilla on a microwave-safe plate.
- Evenly spread the shredded cheese over the tortilla; add the optional chicken, bell peppers, and olives if desired.
- Top with the second tortilla and press down gently to flatten.
- Microwave on high for 1 minute, or until the cheese is melted and the tortillas are slightly crispy. If your microwave is less powerful, you may need to add an additional 15-30 seconds.
- Carefully remove the plate from the microwave (it may be hot!) and let it cool for a few seconds.
- Cut the quesadilla into wedges, serve with salsa and sour cream, and enjoy!
Variations and Tips:
- For a vegetarian option, skip the chicken and add extra vegetables like spinach or mushrooms.
- Experiment with different types of cheese for varied flavors, such as pepper jack for a spicy kick.
- Add spices such as cumin or chili flakes to the cheese mixture for extra flavor.
- To enhance crispiness, you can toast the quesadilla for a few minutes in a frying pan after microwaving.
- Consider adding black beans or corn for additional heartiness and nutrition.
Microwave Mac and Cheese

Microwave Mac and Cheese is a quick and comforting dish that's perfect for busy weeknights or a satisfying snack for cheese lovers of all ages.
This creamy pasta dish can be whipped up in just 5 minutes, making it an ideal option for college students, parents with little time to spare, or anyone craving a delicious, homemade meal without the fuss.
Follow this simple recipe for a cheesy delight!
Ingredients:
- 1 cup elbow macaroni
- 1 cup water
- 1 cup shredded cheddar cheese
- ¼ cup milk
- Salt and pepper to taste
- Optional: 1 tablespoon butter
Cooking Instructions:
- In a microwave-safe bowl, combine the elbow macaroni and water.
- Microwave on high for 4 minutes, watching to guarantee it doesn't bubble over. If needed, pause halfway to stir.
- After 4 minutes, carefully remove the bowl (it will be hot!) and stir the pasta.
- Add the shredded cheddar cheese, milk, and butter (if using) to the cooked macaroni. Stir until well combined.
- Microwave for an additional 1 minute, or until the cheese is melted and the consistency is creamy. Stir and let it sit for a minute before serving. Season with salt and pepper to taste.
Variations and Tips:
- Veggie Mac and Cheese: Add a handful of frozen peas, spinach, or broccoli to the macaroni before microwaving.
- Spicy Mac and Cheese: Mix in some jalapeños or a sprinkle of cayenne pepper for a kick.
- Gourmet Mac and Cheese: Try mixing in different types of cheese like gouda, mozzarella, or cream cheese for a richer flavor.
- Herbs and Seasoning: Add garlic powder, paprika, or Italian herbs for extra flavor.
- Storage: If you have leftovers, store them in an airtight container in the refrigerator for up to 2 days, and reheat in the microwave.
Enjoy your quick and delicious Microwave Mac and Cheese!
Chocolate Chip Cookie in a Mug
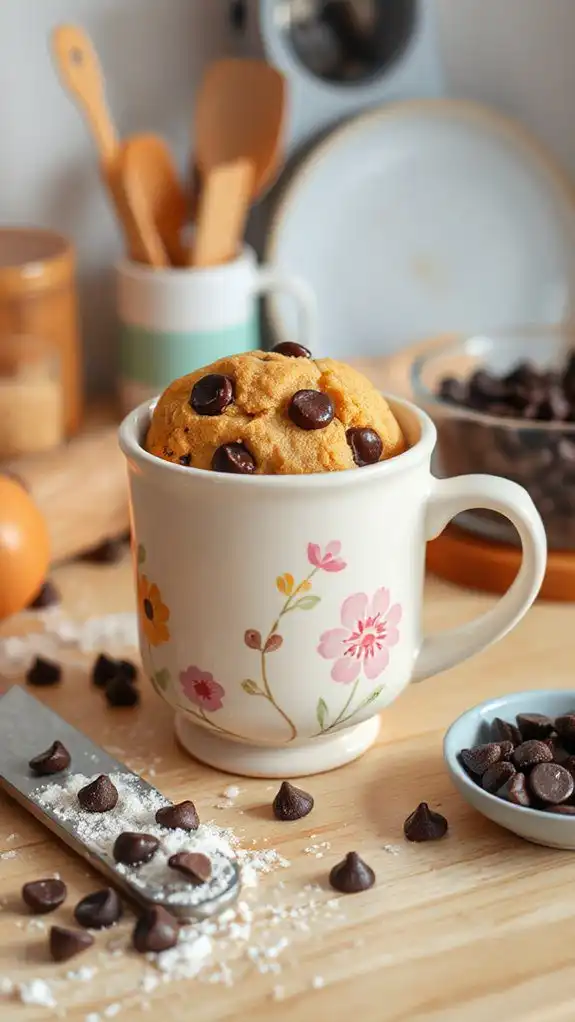
Chocolate Chip Cookie in a Mug is a quick and delightful dessert that satisfies your sweet tooth in just a few minutes.
Perfect for busy individuals or those late-night cravings, this single-serving treat offers the warm, gooey goodness of a chocolate chip cookie without the need for baking an entire batch.
With a total preparation and cooking time of around 5 minutes, it's an ideal solution for a quick indulgence.
Ingredients:
- 1 tablespoon unsalted butter
- 1 tablespoon granulated sugar
- 1 tablespoon brown sugar
- 1/4 teaspoon vanilla extract
- A pinch of salt
- 1 egg yolk
- 3 tablespoons all-purpose flour
- 2 tablespoons chocolate chips
Cooking Steps:
1. In a microwave-safe mug, melt the butter in the microwave for about 20-30 seconds, or until fully melted.
2. Add the granulated sugar, brown sugar, and vanilla extract to the mug, and stir well until combined.
3. Incorporate the egg yolk and mix until the batter is smooth.
4. Stir in the salt and flour until the mixture is just combined—be careful not to overmix.
5. Fold in the chocolate chips, ensuring they are evenly distributed throughout the dough.
6. Microwave the mug on high for about 40 to 60 seconds, depending on your microwave's wattage.
Keep an eye on it to prevent overflow, as it may puff up while cooking.
7. Let the cookie cool for a minute before enjoying directly from the mug.
Variations and Tips:
- Add-ins: Customize your cookie by adding nuts, dried fruits, or different types of chocolate chips (like white or dark chocolate).
- Flavor Boost: Incorporate a sprinkle of cinnamon or a few drops of almond extract for an extra flavor twist.
- Serving Suggestion: Top with a scoop of vanilla ice cream or whipped cream for an indulgent treat.
- Microwave Time: Start with a shorter cooking time and increase in 10-second intervals to prevent overcooking.
- Vegan Option: Substitute the butter for coconut oil and use a flax egg (1 tablespoon ground flaxseed mixed with 2.5 tablespoons of water) instead of the egg yolk for a vegan-friendly version.
Easy Vegetable Stir Fry
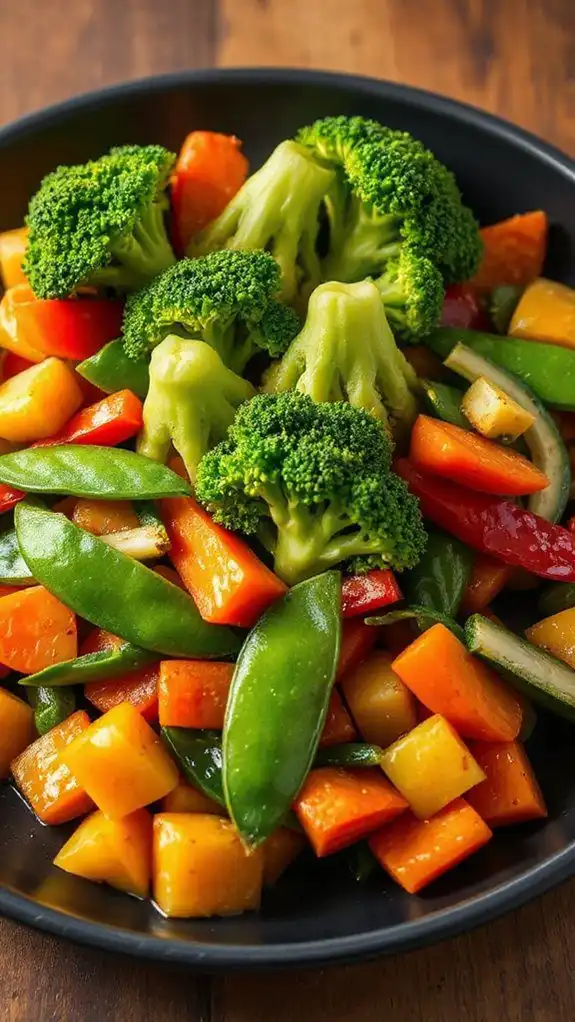
This Easy Vegetable Stir Fry is a quick and colorful dish that's perfect for anyone looking to whip up a healthy meal in no time.
It's ideal for busy weeknights, and can be customized to accommodate various dietary preferences, making it great for vegetarians or those seeking to include more veggies in their diet.
Preparation time is a mere 10 minutes, with a cooking time of about 5 minutes, resulting in a delightful meal ready in just 15 minutes.
Ingredients:
- 2 cups mixed bell peppers (sliced)
- 1 cup broccoli florets
- 1 cup snap peas
- 1 carrot (julienned)
- 2 tablespoons olive oil or sesame oil
- 3 cloves garlic (minced)
- 1 inch ginger (grated)
- 3 tablespoons soy sauce or tamari (for gluten-free)
- 1 tablespoon rice vinegar
- Optional: sesame seeds, green onions, or chili flakes for garnish
Cooking Steps:
- Begin by washing and slicing all the vegetables into bite-sized pieces to guarantee even cooking.
- In a large microwave-safe bowl, combine the mixed bell peppers, broccoli, snap peas, and carrot.
- Drizzle the olive oil (or sesame oil) over the vegetables and toss gently to coat.
- Add the minced garlic and grated ginger, stirring to incorporate into the vegetable mixture.
- Cover the bowl with a microwave-safe lid or plate to prevent moisture loss during cooking.
- Microwave on high for 3 to 4 minutes, stopping halfway to stir the mixture. The vegetables should be vibrant and tender-crisp.
- Carefully remove from the microwave, and drizzle the soy sauce and rice vinegar over the stir fry. Toss well to combine flavors.
- Garnish with sesame seeds, sliced green onions, or chili flakes if desired before serving.
Variations and Tips:
- Feel free to swap out vegetables based on what you have on hand. Zucchini, asparagus, or mushrooms work beautifully as well.
- For added protein, you can stir in some cooked tofu, chicken, or shrimp during the last minute of cooking.
- Pair the stir fry with cooked rice or quinoa for a complete meal.
- To enhance the flavor, consider adding a teaspoon of cornstarch mixed with a tablespoon of water before microwaving, which will create a light sauce as it cooks.
2-Minute Mug Pizza

Minute Mug Pizza is a quick and delightful single-serving dish that brings the joy of pizza right to your microwave in less than 5 minutes! Perfect for busy individuals, students, or anyone craving a personal-sized pizza without the hassle, this recipe is customizable to suit your taste.
Whether you're looking for a snack, a meal, or a fun dish to prepare with kids, this mug pizza not only saves time but also allows for endless ingredient variations.
Ingredients:
- 4 tablespoons all-purpose flour
- 1/8 teaspoon baking powder
- 1/8 teaspoon salt
- 3 tablespoons milk
- 1 tablespoon olive oil
- 2 tablespoons pizza sauce
- 1/4 cup shredded mozzarella cheese
- Additional toppings (pepperoni, bell peppers, onions, etc.) as desired
Cooking Steps:
- In a microwave-safe mug, combine the flour, baking powder, and salt. Mix well.
- Add the milk and olive oil to the dry ingredients, and stir until the batter is smooth and well-blended.
- Spoon the pizza sauce over the batter, and gently mix it in.
- Sprinkle the shredded mozzarella cheese on top, followed by any additional toppings you desire.
- Place the mug in the microwave and cook on high for 1 to 1.5 minutes, or until the dough is cooked through and the cheese is melted.
- Carefully remove the mug from the microwave (it will be hot), let it cool for a minute, and enjoy your Minute Mug Pizza!
Variations and Tips:
- Experiment with different types of cheese like cheddar, pepper jack, or feta for different flavors.
- For a healthier twist, swap out regular flour for whole wheat or a gluten-free flour blend.
- Add herbs like oregano or basil into the batter for extra flavor.
- Keep an eye on your pizza while cooking, as microwave times can vary; adjust accordingly to avoid overcooking.
- Enjoy your mug pizza right away, but it can also be served alongside a fresh salad for a more complete meal.
Microwave Scrambled Eggs
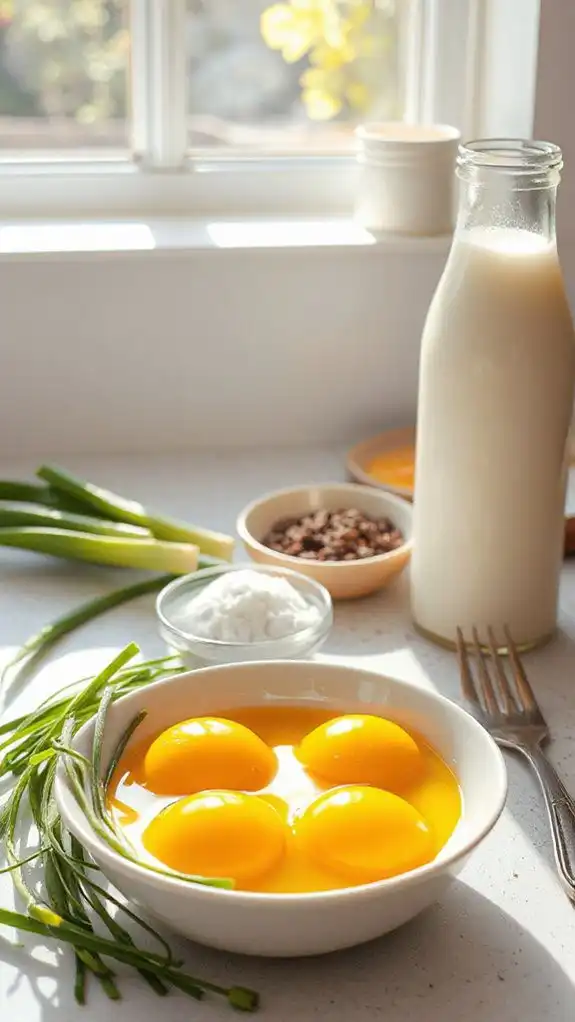
Microwave scrambled eggs are a quick and convenient dish perfect for a busy breakfast or a light snack. Ideal for individuals or small families looking for a nutritious meal that can be prepared in just about 5 minutes, these scrambled eggs can be customized with various ingredients to suit your taste.
With minimal clean-up and no need for complicated cooking techniques, they make a perfect go-to for anyone, from busy professionals to college students.
Ingredients:
- 2 large eggs
- 2 tablespoons milk (or water)
- Salt, to taste
- Pepper, to taste
- Butter or cooking spray (optional)
- Optional toppings (cheese, herbs, vegetables, cooked meats)
Cooking Steps:
- Prep the Mug: Choose a microwave-safe mug or bowl. If desired, add a small pat of butter or a quick spray of cooking spray to prevent sticking.
- Mix the Eggs: Crack the eggs into the mug or bowl. Add the milk (or water), salt, and pepper. Whisk everything together with a fork until well combined.
- Microwave them: Place the mug in the microwave and cook on high for 30 seconds. After 30 seconds, stir the mixture with a fork to break up any cooking that has started.
- Continue Cooking: Return the mug to the microwave and cook for another 30 seconds. Stir again. If the eggs are not fully cooked, return to the microwave in 10-second increments, stirring after each until cooked to your desired consistency.
- Finishing Touches: Once cooked, you can add your choice of optional toppings like shredded cheese, herbs, or pre-cooked vegetables and meats. Stir again to combine.
Variations and Tips:
- For a richer flavor, you can use cream instead of milk or water.
- Experiment with different spices like paprika, onion powder, or hot sauce for a kick.
- Add in diced tomatoes, bell peppers, or green onions right before serving for added nutrition and taste.
- Make it a complete meal by pairing your scrambled eggs with toast, a breakfast burrito, or a fresh fruit salad.
Cinnamon Sugar Sweet Potatoes
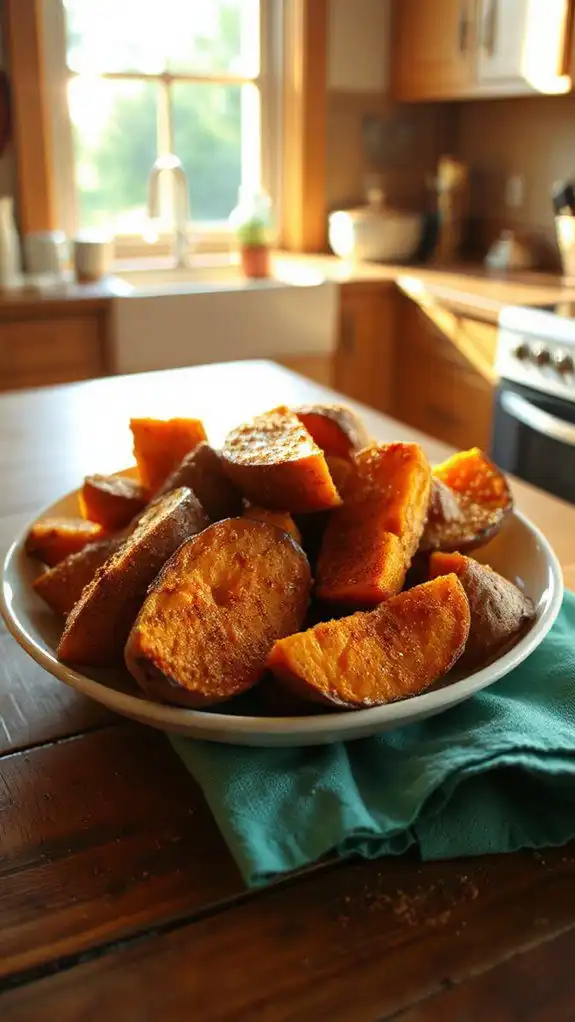
Cinnamon Sugar Sweet Potatoes are a delightful and simple side dish that combines the natural sweetness of fresh sweet potatoes with the warm flavors of cinnamon and sugar. This dish is perfect for family dinners, holiday gatherings, or just a cozy evening meal.
With a preparation time of about 10 minutes and a cooking time of 8–10 minutes in the microwave, you can whip this up in no time!
Ingredients:
- 2 medium sweet potatoes
- 2 tablespoons brown sugar
- 1 teaspoon ground cinnamon
- 1 tablespoon butter (optional)
- Pinch of salt
Cooking Instructions:
- Start by washing and scrubbing the sweet potatoes under running water to remove any dirt and debris.
- Using a fork, poke several holes into each sweet potato to allow steam to escape while cooking.
- Place the sweet potatoes on a microwave-safe plate and microwave on high for 5-8 minutes, turning halfway through the cooking time. Check for tenderness by inserting a fork; they should be soft but not mushy.
- Once cooked, remove the sweet potatoes from the microwave and let them cool for a few minutes before handling.
- Cut open the sweet potatoes and, if desired, scoop out a small portion of the flesh to create a hollow center for added toppings.
- In a small bowl, mix the brown sugar, cinnamon, and a pinch of salt.
- Sprinkle the cinnamon sugar mixture evenly over the opened sweet potatoes, then add a dollop of butter on top if desired.
- Optionally, return the sweet potatoes to the microwave for an additional 30 seconds to melt the butter and slightly caramelize the sugar.
Variations and Tips:
- For a nutty twist, add chopped pecans or walnuts on top with the sugar mixture.
- Substitute brown sugar with maple syrup for a different sweetening option or to enhance the flavor.
- Enhance the dish by adding a sprinkle of nutmeg or allspice for additional warmth.
- If you prefer a savory version, omit the sugar and cinnamon and add salt, pepper, and spices like paprika or cumin instead.
- These sweet potatoes can be enjoyed as a warm side dish or cooled to room temperature and served as a salad topping.
Microwave Taco Bowl
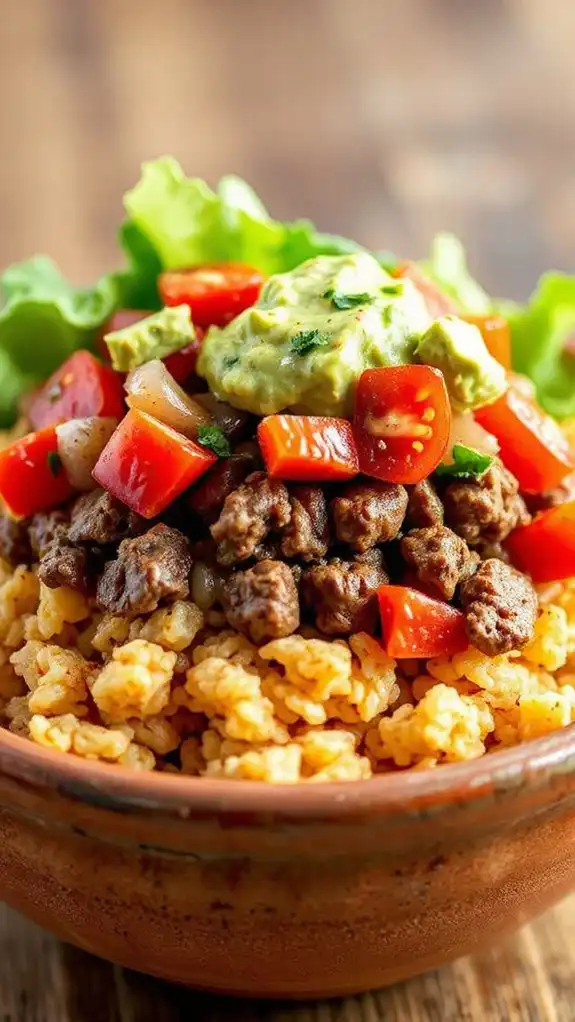
The Microwave Taco Bowl is a quick and delicious meal perfect for busy individuals or families looking for a satisfying option that doesn't require extensive cooking skills.
Ideal for lunch or dinner, this dish comes together in just about 15 minutes, making it a fantastic weeknight choice or an easy meal prep item. Packed with flavor and customizable to suit your taste, the taco bowl is sure to become a favorite in your household.
Ingredients:
- 1 cup cooked rice (white or brown)
- 1 cup canned black beans, rinsed and drained
- 1/2 cup corn (canned or frozen)
- 1/2 cup salsa
- 1 cup shredded cheese (cheddar, Monterey Jack, or your preference)
- 1/2 teaspoon taco seasoning
- 1 avocado, diced
- 1/4 cup sour cream or Greek yogurt
- Fresh cilantro, chopped (optional)
- Lime wedges (optional)
Cooking Steps:
- In a microwave-safe bowl, combine the cooked rice, black beans, corn, and salsa. Stir well to mix the ingredients.
- Sprinkle the taco seasoning over the mixture and stir again to guarantee even distribution.
- Cover the bowl loosely with a microwave-safe lid or plate and heat in the microwave on high for about 2-3 minutes, or until heated through.
- Once heated, remove from the microwave and add the shredded cheese on top. Return to the microwave for an additional 30 seconds to 1 minute, or until the cheese is melted.
- Carefully remove the bowl from the microwave and let it cool for a minute.
- Top with diced avocado, sour cream (or Greek yogurt), and chopped cilantro if desired.
- Serve with lime wedges on the side for an extra zesty flavor.
Variations & Tips:
- For a protein boost, add cooked ground beef, chicken, or turkey to the mix before heating.
- You can use quinoa instead of rice for a different flavor and added nutrition.
- Experiment with different toppings such as jalapeños, olives, or diced tomatoes.
- To make it spicier, add chopped fresh jalapeños or a dash of hot sauce to the mix.
- Leftover taco bowls can be stored in the refrigerator for up to three days, making them perfect for meal prep.
Peanut Butter and Jelly Oatmeal
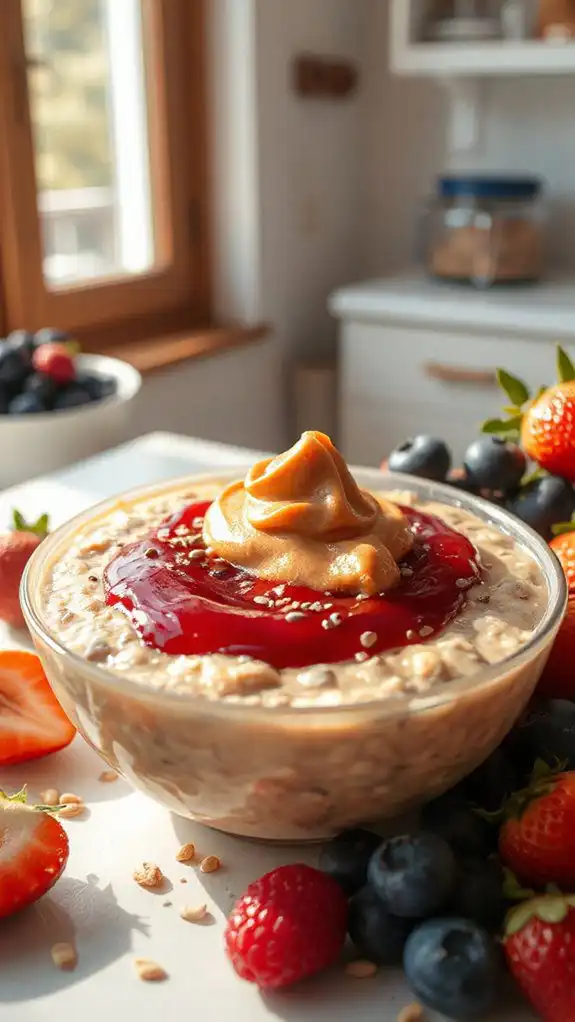
Peanut Butter and Jelly Oatmeal is a delicious and nutritious dish perfect for breakfast or a mid-day snack. This comforting bowl combines the classic flavors of peanut butter and jelly with hearty oats, making it ideal for both kids and adults looking for a quick and filling meal. The preparation time is just about 5 minutes, making it a fantastic option for busy mornings or when you're craving a sweet treat without spending too much time in the kitchen.
Ingredients:
- 1 cup rolled oats
- 2 cups water or milk (dairy or non-dairy)
- 2 tablespoons peanut butter
- 2 tablespoons jelly or jam (flavor of your choice)
- 1 tablespoon honey or maple syrup (optional)
- Pinch of salt
- Fresh fruit or nuts for topping (optional)
Cooking Steps:
- In a microwave-safe bowl, combine the rolled oats, water (or milk), and a pinch of salt.
- Microwave on high for 2 to 3 minutes, stirring halfway through, or until the oats are cooked and have absorbed the liquid.
- Carefully remove the bowl from the microwave (it will be hot!), and stir in the peanut butter and jelly until fully combined.
- For added sweetness, you can mix in honey or maple syrup at this point if desired.
- Top with fresh fruit or nuts for extra flavor and texture, if you like.
Variations and Tips:
- Try different flavors of jelly or jam to create new flavor combinations, like strawberry, grape, or raspberry.
- Substitute almond butter or sunflower seed butter for peanut butter if you have nut allergies.
- For a protein boost, stir in a spoonful of Greek yogurt on top.
- Add spices like cinnamon or nutmeg to the oats before cooking for an extra kick of flavor.
- Make it a dessert by topping with whipped cream or dark chocolate chips.
- You can prepare the oats in advance by storing them in the fridge overnight and microwaving in the morning for a quick breakfast.
Steamed Lemon Garlic Broccoli
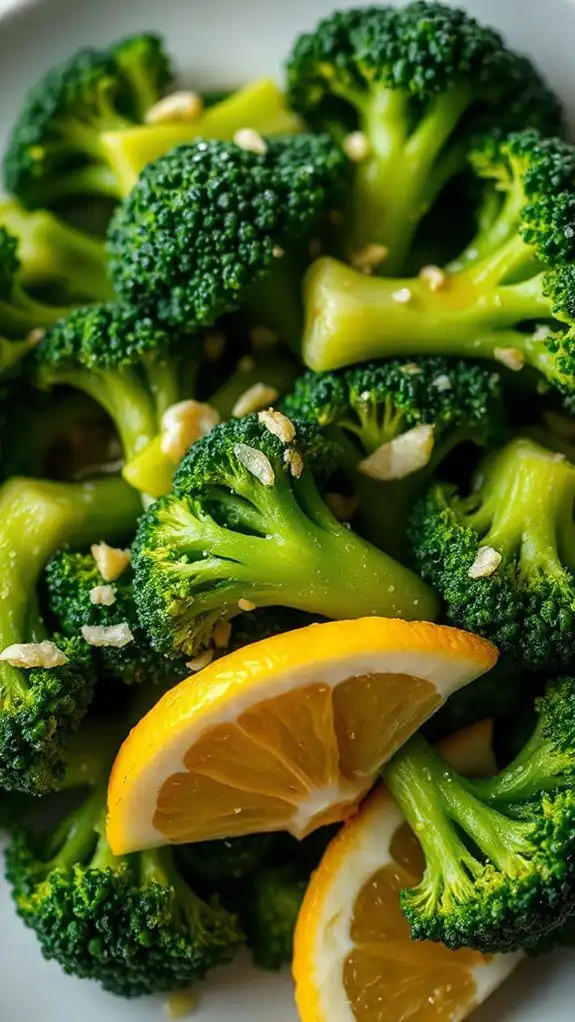
Steamed Lemon Garlic Broccoli is a vibrant and nutritious side dish that enhances any meal with its fresh flavors. This recipe is perfect for those looking to incorporate healthier options into their diet, and it pairs wonderfully with grilled chicken, fish, or tofu. With a prep time of just 5 minutes and a cooking time of 5 minutes in the microwave, you can have this delicious side ready in a flash.
Ingredients:
- 1 pound of fresh broccoli florets
- 2 tablespoons of olive oil
- 2 cloves of garlic, minced
- Juice of 1 lemon
- Salt, to taste
- Black pepper, to taste
- Optional: lemon zest for garnish
Cooking Steps:
- Prepare Broccoli: Rinse the broccoli florets under cold water and drain well. Trim any thick stems as needed.
- Mix Ingredients: In a microwave-safe bowl, combine the olive oil, minced garlic, lemon juice, salt, and black pepper.
- Steam Broccoli: Add the broccoli florets to the bowl and toss well to coat them with the lemon-garlic mixture.
- Cover and Cook: Cover the bowl with microwave-safe plastic wrap or a lid, leaving a small vent for steam to escape. Microwave on high for about 3 to 5 minutes, until the broccoli is tender-crisp.
- Serve: Carefully remove the bowl from the microwave (it will be hot!) and give the broccoli a gentle stir. Taste and adjust seasoning if needed. If desired, sprinkle lemon zest on top for an added citrusy burst.
Variations and Tips:
- Add Heat: For a bit of spice, add a pinch of red pepper flakes to the mixture before microwaving.
- Cheesy Addition: Sprinkle grated Parmesan cheese over the broccoli after steaming for a savory twist.
- Other Veggies: Feel free to mix in other vegetables like carrots or snap peas for extra color and nutrients.
- Serving Suggestion: This dish can be served warm or can also be chilled as part of a revitalizing salad.
Enjoy your flavorful and healthy Steamed Lemon Garlic Broccoli!
Microwave Risotto

Microwave risotto is a quick and convenient way to enjoy this classic Italian dish without the need for constant stirring over a stovetop. Ideal for busy weeknight dinners or a comforting meal for one, this version can be made in just 20 minutes. It retains the creamy texture and flavor of traditional risotto while simplifying the process, perfect for beginners or anyone wanting a hassle-free meal.
Ingredients:
- 1 cup Arborio rice
- 3 cups vegetable or chicken broth
- 1 small onion, finely chopped
- 2 cloves garlic, minced
- 1/2 cup white wine (optional)
- 1/2 cup grated Parmesan cheese
- 2 tablespoons butter
- Salt and pepper to taste
- Fresh parsley, chopped (for garnish)
Cooking Steps:
- In a large microwave-safe bowl, combine the Arborio rice, chopped onion, and minced garlic.
- Pour in the broth and white wine (if using). Stir to combine.
- Cover the bowl loosely with a microwave-safe lid or plastic wrap, leaving a small vent for steam to escape.
- Microwave on high for 8 minutes, then stir the mixture to guarantee even cooking.
- Return to the microwave and cook for an additional 7-10 minutes, or until the rice is creamy and has absorbed most of the liquid. Check every couple of minutes to prevent overflow and to gauge doneness.
- Once cooked, remove from the microwave and stir in the butter and grated Parmesan cheese. Season with salt and pepper to taste.
- Let it sit for a couple of minutes, then garnish with fresh parsley before serving.
Variations and Tips:
- Add your favorite vegetables (like peas, mushrooms, or spinach) in the last few minutes of cooking for added nutrition and flavor.
- For a protein boost, mix in cooked chicken, shrimp, or tofu.
- For a richer flavor, use homemade broth or add a sprig of fresh thyme during cooking.
- Experiment with different cheeses like feta or goat cheese for a twist on the classic Parmesan.
- To make it creamy without cheese, try adding a splash of cream or a dairy-free alternative right before serving.
Apple Cinnamon Microwave Muffin
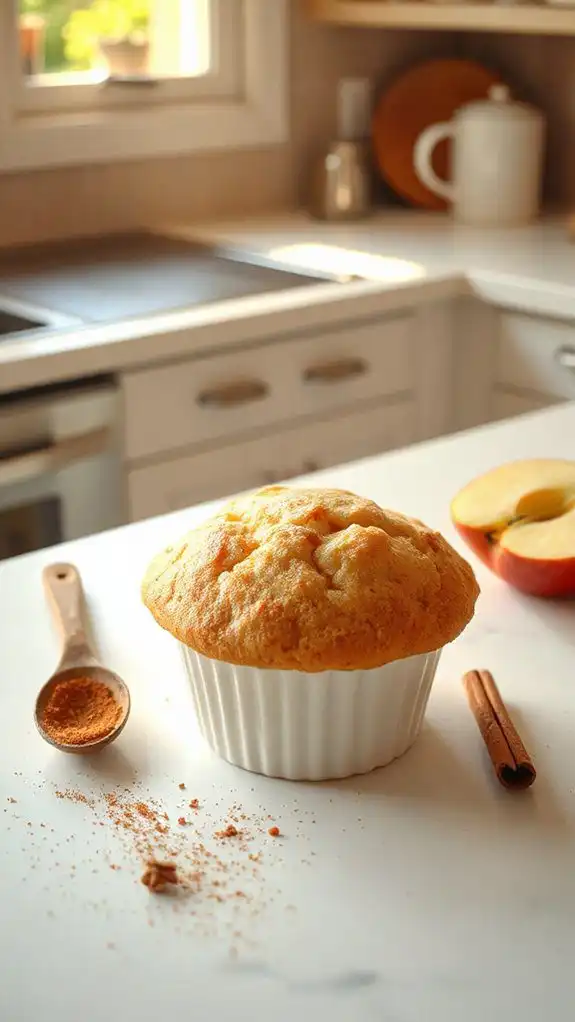
The Apple Cinnamon Microwave Muffin is a quick and delicious treat that's perfect for breakfast or a satisfying snack. This single-serve muffin is ideal for busy individuals or families, as it takes just 5 minutes to prepare and cook.
With warm flavors of apple and cinnamon, this muffin is an excellent choice for those craving a home-baked treat without the waiting time.
Ingredients:
- 1/4 cup all-purpose flour
- 1/4 tsp baking powder
- 1/4 tsp cinnamon
- Pinch of salt
- 2 tbsp sugar (or honey)
- 1/4 cup milk
- 1 tbsp vegetable oil
- 1/4 cup diced apple (peeled)
- 1 tbsp chopped nuts (optional)
Cooking Steps:
- In a microwave-safe mug or bowl, combine the flour, baking powder, cinnamon, salt, and sugar. Mix well to guarantee the dry ingredients are evenly distributed.
- Add the milk and vegetable oil to the dry mixture. Stir until you achieve a smooth batter.
- Fold in the diced apple and nuts (if using).
- Microwave on high for 1 minute and 30 seconds to 2 minutes, depending on your microwave's wattage (the muffin should rise and set in the center).
- Let it cool for a minute before enjoying your fluffy Apple Cinnamon Muffin directly in the mug or on a plate.
Variations and Tips:
- For a lower sugar option, reduce the sugar to taste or use a sugar substitute.
- You can mix in other fruits such as blueberries or bananas for different flavors.
- Add a sprinkle of oats or a drizzle of honey on top for added texture and sweetness.
- This muffin is best enjoyed fresh; however, you can store leftovers in an airtight container in the fridge for up to 2 days. Reheat in the microwave for a few seconds to soften before eating.
Mug Brownie With Walnuts
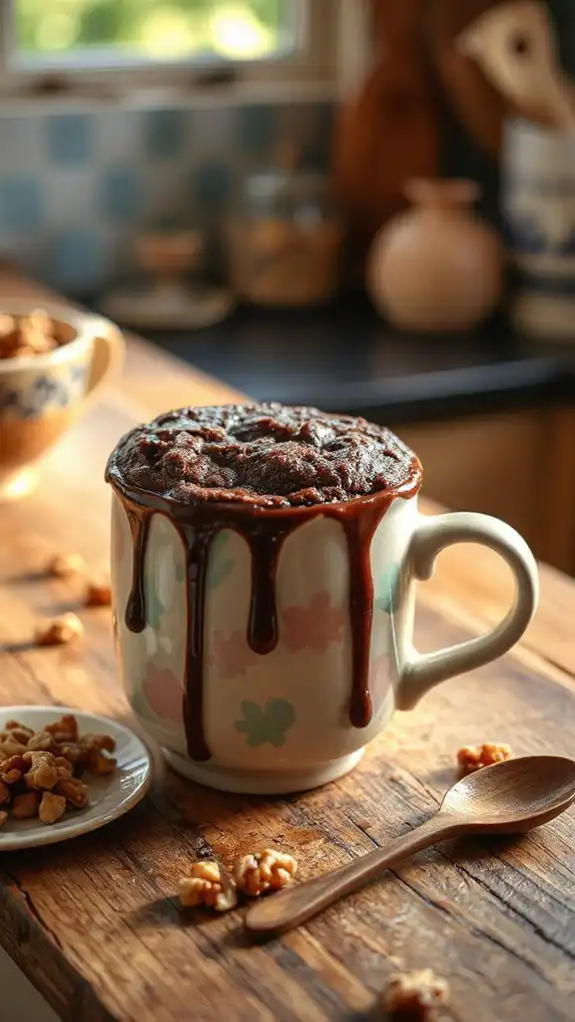
If you're craving a rich and fudgy brownie but don't want to spend a lot of time in the kitchen, this mug brownie with walnuts is the perfect solution! Ideal for a quick dessert for one or a late-night snack, this microwave recipe takes just about 5 minutes to prepare and cook, making it perfect for those sudden sweet cravings.
With the added crunch of walnuts, this simple treat will satisfy chocolate lovers in no time.
Ingredients:
- 4 tablespoons all-purpose flour
- 4 tablespoons granulated sugar
- 2 tablespoons unsweetened cocoa powder
- 1/8 teaspoon salt
- 2 tablespoons vegetable oil
- 2 tablespoons water
- 2 tablespoons chopped walnuts
- Optional: a few chocolate chips for extra richness
Cooking Instructions:
- In a standard microwave-safe mug, combine the flour, sugar, cocoa powder, and salt. Mix well until all the dry ingredients are incorporated.
- Add the vegetable oil and water to the dry ingredients. Stir until the mixture is smooth and free of lumps.
- Fold in the chopped walnuts and, if desired, a few chocolate chips.
- Microwave the mug on high for 40-60 seconds. Start checking at the 40-second mark; the brownie is done when it has risen and the center appears set but still slightly soft.
- Let the brownie cool for a minute before enjoying straight from the mug!
Variations and Tips:
- For a peanut butter twist, add a spoonful of peanut butter on top before microwaving.
- Experiment with different nuts like pecans or almonds for a varied crunch.
- Top your brownie with a scoop of ice cream or a dollop of whipped cream for an indulgent dessert.
- If you prefer a more cake-like texture, microwave for an additional 10-15 seconds.
- Always keep an eye on the mug while it cooks, as microwaves can vary in power and cooking may take less or more time depending on the wattage.
Savory Microwave Couscous

Savory Microwave Couscous is a quick and delicious dish that serves as a perfect side or main meal. It's ideal for busy individuals, families, or anyone looking for a hassle-free meal that's ready in under 15 minutes.
This versatile dish can be customized to suit your taste preferences and dietary needs, making it a go-to for last-minute dinners or meal prep.
Ingredients:
- 1 cup couscous
- 1 cup vegetable or chicken broth
- 1 tablespoon olive oil
- 1 teaspoon garlic powder
- 1 teaspoon onion powder
- 1/2 teaspoon paprika
- Salt and pepper to taste
- 1/2 cup frozen peas and carrots (optional)
- Fresh herbs for garnish (such as parsley or cilantro)
Cooking Instructions:
- In a microwave-safe bowl, combine the couscous, broth, olive oil, garlic powder, onion powder, paprika, salt, and pepper.
- Stir in the frozen peas and carrots, if using.
- Cover the bowl with a microwave-safe lid or microwave-safe plastic wrap, leaving a small vent for steam to escape.
- Microwave on high for 4-5 minutes, or until the liquid is absorbed and the couscous is fluffy.
- Remove the bowl from the microwave carefully as it will be hot. Fluff the couscous with a fork.
- Taste and adjust seasoning if necessary, then garnish with fresh herbs before serving.
Variations and Tips:
- Vegetables: Feel free to add other vegetables like bell peppers, spinach, or diced tomatoes to enhance the flavor and nutrition.
- Protein: Stir in cooked chicken, shrimp, or beans for a more filling meal.
- Spices: Experiment with different spices like cumin, turmeric, or Italian seasoning for a varied flavor profile.
- Q&A: Store leftover couscous in an airtight container in the fridge for up to 3 days. Reheat with a splash of water in the microwave.
Creamy Microwave Polenta

Creamy Microwave Polenta is a delicious and versatile dish perfect for anyone looking for a quick and comforting meal or side dish.
This easy-to-make recipe takes just about 10 minutes of preparation time and can be enjoyed as a base for various toppings, making it ideal for both busy weeknights and leisurely weekends.
Whether you're feeding a family or preparing a simple dinner for yourself, you'll love the creamy texture and rich flavor of this polenta.
Ingredients:
- 1 cup of quick-cooking polenta
- 4 cups of water or broth
- 1 teaspoon of salt
- 2 tablespoons of butter
- ½ cup of grated Parmesan cheese
- Freshly ground black pepper (to taste)
Cooking Steps:
- In a large microwave-safe bowl, combine the quick-cooking polenta, water (or broth), and salt.
- Cover the bowl with a microwave-safe lid or plate, leaving a small gap to allow steam to escape.
- Microwave on high for 5 minutes. Carefully stir the mixture, then return the bowl to the microwave and cook for an additional 2-3 minutes, or until the polenta is thick and cooked through.
- Once the polenta is cooked, remove it from the microwave and stir in the butter and Parmesan cheese until well combined.
- Season with freshly ground black pepper to taste, and serve immediately.
Variations and Tips:
- Herbed Polenta: Add chopped fresh herbs such as basil, thyme, or rosemary to the polenta for an added layer of flavor.
- Cheesy Polenta: Experiment with different types of cheese, such as gouda or cheddar, for a unique cheesy experience.
- Topping Ideas: Serve with sautéed mushrooms, roasted vegetables, or a savory meat sauce for a complete dish.
- Make it Vegan: Substitute the butter with olive oil and use a dairy-free cheese alternative.
- Storage: Leftover polenta can be stored in an airtight container in the refrigerator for up to 4 days.
Reheat with a splash of water or broth to restore creaminess.
Enjoy your creamy microwave polenta as a delightful addition to any meal!
Microwave Mini Meatloaf
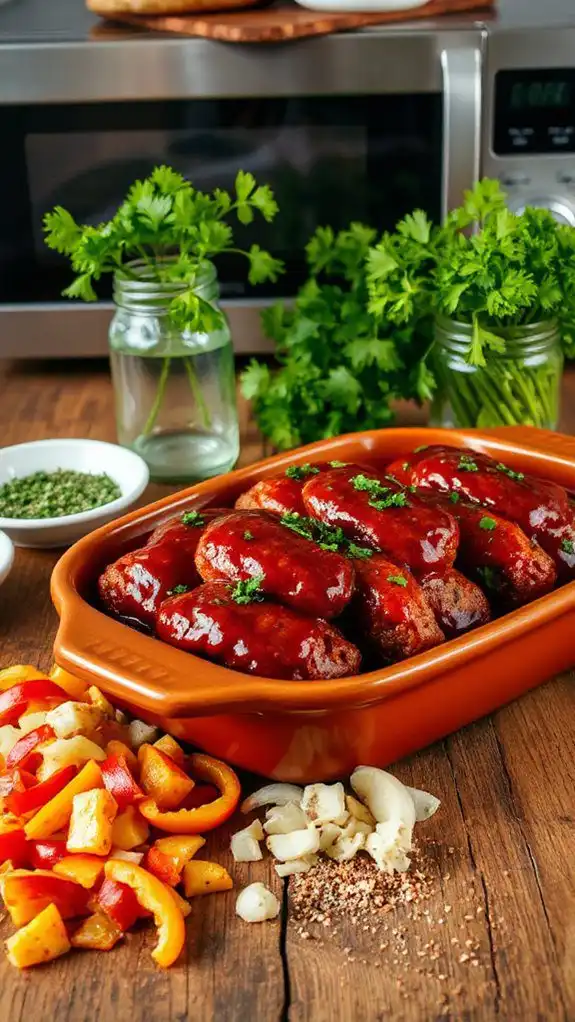
Microwave Mini Meatloaf is a quick and convenient dish that packs all the comforting flavors of traditional meatloaf into easy-to-prepare individual servings.
This dish is perfect for busy weeknights or when you're craving a hearty meal without the long cooking times. In just about 30 minutes, you can have delicious mini meatloaves ready to serve, making them ideal for families, solo diners, or even meal prep enthusiasts.
Ingredients:
- 1 pound ground beef (or ground turkey)
- 1/2 cup breadcrumbs
- 1/4 cup milk
- 1/4 cup ketchup (plus extra for topping)
- 1 small onion, finely chopped
- 1 egg
- 1 teaspoon garlic powder
- 1 teaspoon salt
- 1/2 teaspoon black pepper
- 1 teaspoon Worcestershire sauce
- Optional: chopped bell peppers or herbs for added flavor
Cooking Steps:
- In a large mixing bowl, combine the ground beef, breadcrumbs, milk, ketchup, chopped onion, egg, garlic powder, salt, black pepper, and Worcestershire sauce. Mix until just combined, being careful not to over-mix.
- Divide the meat mixture into approximately four equal portions and shape each portion into a mini loaf.
- Place the mini loaves in a microwave-safe dish or on a microwave-safe plate. Leave some space between each loaf for even cooking.
- Pour a small amount of ketchup over the top of each mini meatloaf for added flavor and moisture.
- Cover the dish with a microwave-safe lid or microwave-safe plastic wrap. Leave a small vent to allow steam to escape.
- Microwave on high for 10-12 minutes, checking for doneness. Use a meat thermometer to verify that the internal temperature reaches 160°F (70°C) for ground beef or 165°F (74°C) for ground turkey.
- Once cooked, let the mini meatloaves rest for a few minutes before serving.
Variations & Tips:
- Experiment with different types of ground meat like chicken, pork, or plant-based substitutes.
- Add chopped vegetables like bell peppers, zucchini, or carrots to mix into the meat for added nutrition and flavor.
- For a spicier kick, mix in some hot sauce or diced jalapeños.
- Pair with a side of steamed vegetables or a salad for a complete meal.
- Store any leftovers in an airtight container in the refrigerator for up to 3 days, or freeze them for meal prep convenience.
Chocolate Peanut Butter Mug Cake

If you're looking for a quick and indulgent dessert, this Chocolate Peanut Butter Mug Cake is the perfect answer! It's a delightful single-serving cake that's ready in just a few minutes, making it ideal for a late-night snack or an afternoon pick-me-up.
With rich chocolate flavor and the creamy goodness of peanut butter, this mug cake will satisfy any sweet tooth. Preparation and cooking time is approximately 5 minutes.
Ingredients:
- 4 tablespoons all-purpose flour
- 2 tablespoons sugar
- 2 tablespoons unsweetened cocoa powder
- 1/8 teaspoon baking powder
- 1/8 teaspoon salt
- 3 tablespoons milk
- 1 tablespoon vegetable oil
- 1 tablespoon creamy peanut butter
- 1/2 teaspoon vanilla extract
- Optional: chocolate chips for extra richness
Cooking Steps:
- In a microwave-safe mug (approximately 12 oz capacity), combine the flour, sugar, cocoa powder, baking powder, and salt. Mix well to guarantee there are no lumps.
- Add the milk, vegetable oil, peanut butter, and vanilla extract to the dry ingredients. Stir until you have a smooth batter. If desired, fold in a few chocolate chips for added flavor.
- Microwave the mug on high for about 1 minute and 30 seconds. Cooking time may vary based on the wattage of your microwave, so keep an eye on the cake as it cooks. It is ready when it has risen and is no longer wet in the center.
- Let the mug cake cool for a minute before enjoying. You can top it with a scoop of ice cream, whipped cream, or more peanut butter if you like!
Variations and Tips:
- Substitute almond flour for a gluten-free version.
- For a richer flavor, you can use dark chocolate cocoa powder or add a tablespoon of chocolate hazelnut spread.
- If you prefer a nuttier taste, sprinkle in chopped nuts or switch to chunky peanut butter.
- Always check your mug cake a few seconds before the recommended cooking time is up; you want a fluffy texture, not a dry cake.
- For an extra treat, drizzle warm chocolate sauce or caramel over the top.
Enjoy your delicious and easy Chocolate Peanut Butter Mug Cake!
Healthy Quinoa Bowl
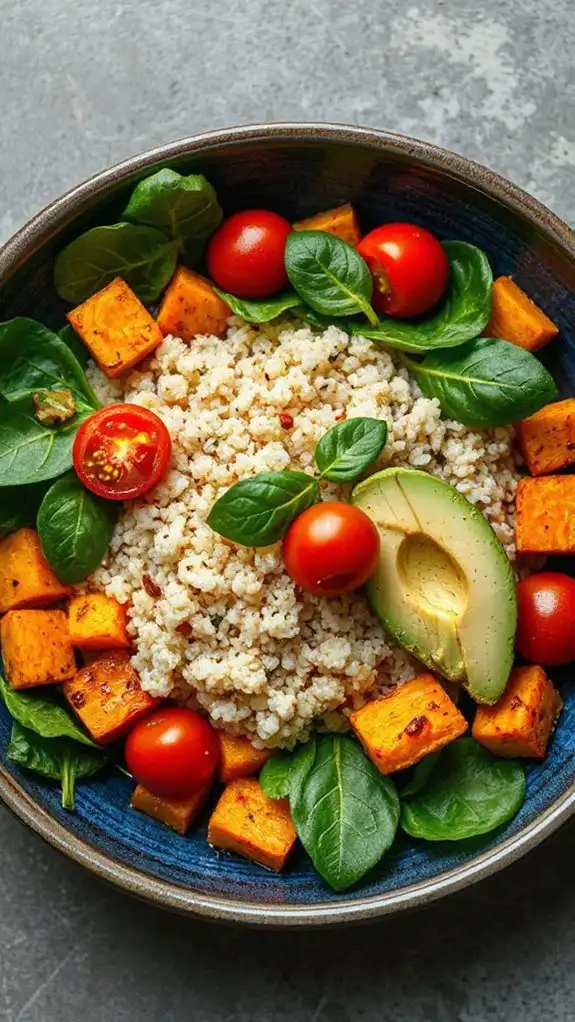
The Healthy Quinoa Bowl is a nutritious and colorful dish perfect for anyone seeking a quick and wholesome meal. Packed with protein, fiber, and a medley of vitamins, it's ideal for those following a vegetarian or gluten-free diet or anyone looking to incorporate more healthy ingredients into their meals.
This recipe takes about 15 minutes to prepare and can easily be customized to suit your taste preferences.
Ingredients:
- 1 cup quinoa
- 2 cups vegetable broth or water
- 1 cup cherry tomatoes, halved
- 1 cup cucumber, diced
- 1 red bell pepper, diced
- 1 cup cooked black beans (canned or pre-cooked)
- 1 avocado, sliced
- 1/4 cup fresh parsley, chopped
- Juice of 1 lemon
- 2 tablespoons olive oil
- Salt and pepper, to taste
Cooking Steps:
- Rinse the quinoa thoroughly under cold water to remove any bitterness.
- In a microwave-safe bowl, combine the quinoa and vegetable broth (or water). Cover with a microwave-safe lid or plastic wrap.
- Microwave on high for about 10-12 minutes or until the liquid is absorbed and the quinoa is fluffy. Let it sit for a few minutes before removing it from the microwave.
- While the quinoa is cooking, prepare the vegetables: in a separate bowl, combine the cherry tomatoes, cucumber, red bell pepper, and black beans.
- Once the quinoa is ready, fluff it with a fork and mix it into the vegetable bowl.
- Drizzle the lemon juice and olive oil over the mixture, tossing gently to combine all the ingredients.
- Season with salt and pepper to taste. Top with sliced avocado and sprinkle with fresh parsley before serving.
Variations and Tips:
- Protein Boost: Add grilled chicken, shrimp, or tofu for extra protein.
- Seasoning: Try adding cumin, chili powder, or your favorite herbs for added flavor.
- Extra Veggies: Feel free to include additional vegetables like spinach, corn, or carrots for added nutrition.
- Storage: This bowl can be stored in an airtight container in the fridge for up to 3 days, making it a great meal prep option.
- Customize the recipe by using different dressings or nuts for added crunch and texture.
Cheesy Cauliflower Mash
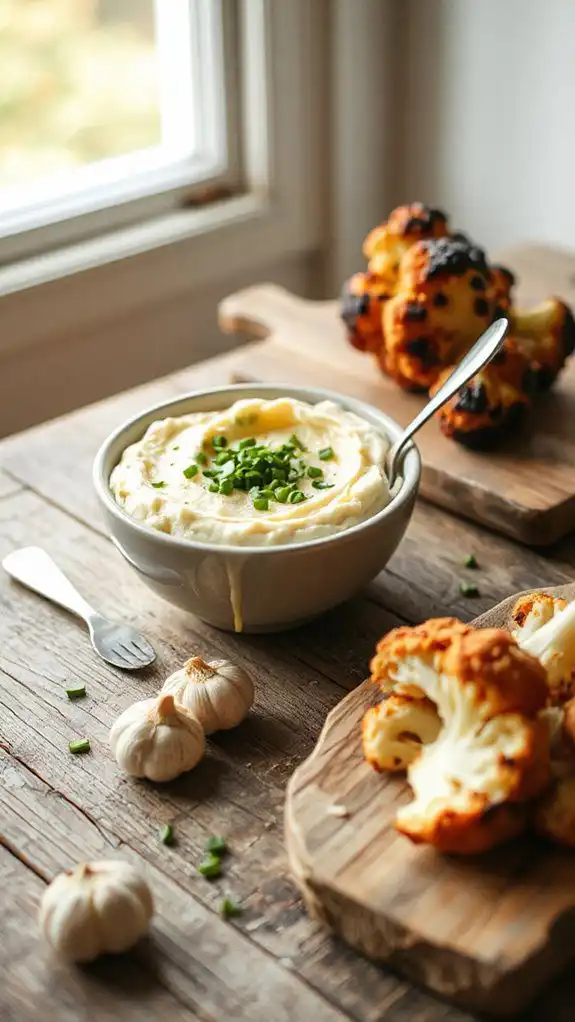
Cheesy Cauliflower Mash is a delightful, low-carb alternative to traditional mashed potatoes that is perfect for anyone looking to enjoy a creamy, cheesy side dish without the extra carbs.
This dish is ideal for families or individuals balancing health-conscious eating with delicious flavors. It takes roughly 20 minutes to prepare and cook, making it a quick and satisfying addition to any meal.
Ingredients:
- 1 large head of cauliflower, cut into florets
- 1 cup shredded cheese (cheddar or your choice)
- 1/4 cup cream cheese
- 1/4 cup milk (or more, as needed)
- 2 garlic cloves, minced
- Salt and pepper to taste
- 2 tablespoons butter
- Optional: chives or green onions for garnish
Cooking Steps:
- Place the cauliflower florets in a microwave-safe bowl with a splash of water. Cover the bowl with a microwave-safe lid or plastic wrap, leaving one corner open for steam to escape.
- Microwave the cauliflower on high for about 8-10 minutes or until tender, checking halfway through. The florets should be soft enough to mash easily.
- Once cooked, drain any excess water from the bowl and add the butter and minced garlic. Mash the cauliflower using a potato masher or fork until it reaches your desired consistency.
- Stir in the cream cheese, milk, and shredded cheese until melted and well combined. If the mixture is too thick, gradually add more milk until it reaches your desired creaminess.
- Season with salt and pepper to taste. Mix well and transfer to a serving dish. Garnish with chopped chives or green onions if desired.
Variations and Tips:
- For an even creamier texture, you can use an immersion blender to puree the cauliflower to your liking.
- Experiment with different cheeses, such as mozzarella or gouda, for a unique flavor.
- Add cooked bacon bits or sautéed mushrooms for extra depth and variety in taste.
- This dish can be made ahead of time and reheated in the microwave; simply add a splash of milk before reheating to restore creaminess.
- Serve it alongside grilled meats, roasted chicken, or as part of a vegetarian feast.
Easy Microwave Pancakes
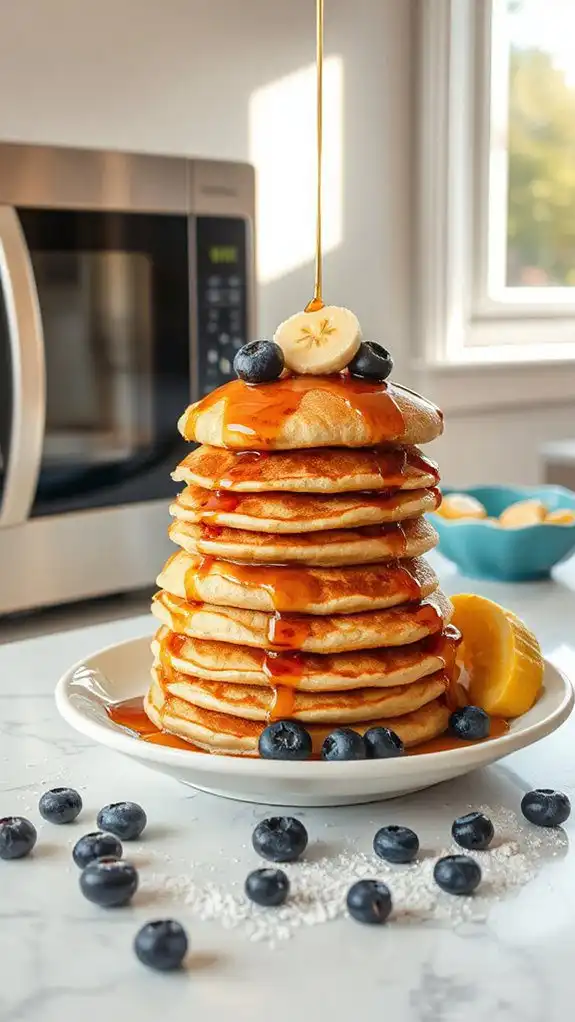
Microwave pancakes are a delightful and quick breakfast option, perfect for busy mornings or for those who simply want a fluffy treat without the hassle of frying on a griddle.
These pancakes can be made in under 5 minutes, making them an ideal choice for families with kids or anyone looking for a fast and satisfying meal. With just a few simple ingredients, you can whip up a delicious stack of pancakes in no time.
Ingredients:
- 1/2 cup all-purpose flour
- 1 tablespoon sugar
- 1/2 teaspoon baking powder
- 1/4 teaspoon baking soda
- 1/4 teaspoon salt
- 1/2 cup milk (can substitute with almond or soy milk)
- 1 tablespoon vegetable oil or melted butter
- 1/2 teaspoon vanilla extract
- Optional toppings: maple syrup, fresh fruit, chocolate chips, or whipped cream
Cooking Steps:
- In a microwave-safe bowl or mug, whisk together the flour, sugar, baking powder, baking soda, and salt until well combined.
- Gently stir in the milk, vegetable oil (or melted butter), and vanilla extract until the batter is smooth and lump-free.
- If desired, fold in any optional ingredients like chocolate chips or berries into the batter.
- Microwave the bowl or mug on high for about 1-1.5 minutes. The cooking time may vary depending on your microwave's wattage, so check for doneness by ensuring the pancake is set in the middle.
- Allow the pancake to cool slightly before removing it from the bowl or mug. Top with your favorite toppings such as syrup, fruit, or whipped cream.
Variations and Tips:
- For banana pancakes, mash half a ripe banana and mix it into the batter.
- Add a pinch of cinnamon or nutmeg for extra flavor.
- For a protein boost, add a scoop of protein powder to the dry ingredients.
- If you're feeling adventurous, try adding a spoonful of peanut butter or Nutella into the center of the batter before microwaving for a delightful surprise.
- Always keep an eye on the pancake while it's cooking, as microwaves can vary in power and cause the pancake to overflow or cook unevenly. Adjust your cooking time as needed based on your microwave.
These microwave pancakes are not only simple to make but also customizable to suit your taste, making them a great go-to recipe for any breakfast lover!
Spinach and Feta Stuffed Potatoes

Ingredients:
- 2 large russet potatoes
- 1 cup fresh spinach, chopped
- 1/2 cup feta cheese, crumbled
- 1/4 cup Greek yogurt (or sour cream)
- 1 clove garlic, minced
- 1 tablespoon olive oil
- Salt and pepper, to taste
- Optional: chopped fresh herbs (such as dill or parsley) for garnish
Cooking Instructions:
- Prepare the Potatoes: Scrub the potatoes under running water and poke several holes with a fork to allow steam to escape while cooking. Place them on a microwave-safe plate.
- Microwave the Potatoes: Microwave the potatoes on high for about 8-10 minutes, or until they are soft. Rotate them halfway through for even cooking.
- Make the Filling: While the potatoes are cooking, heat olive oil in a skillet over medium heat. Add the minced garlic and sauté for 1 minute until fragrant.
- Add the chopped spinach and cook until wilted, about 2-3 minutes. Remove from heat and let cool slightly.
- Combine Ingredients: In a mixing bowl, combine the cooked spinach and garlic with crumbled feta cheese, Greek yogurt, salt, and pepper. Mix well to combine.
- Stuff the Potatoes: Once the potatoes are cooked and cool enough to handle, cut them in half lengthwise. Scoop out some of the flesh and add it to the spinach-feta mixture. Stir to combine, then spoon the mixture back into the potato skins.
- Final Microwave: Place the stuffed potatoes back in the microwave for another 1-2 minutes to heat through.
- Serve: Garnish with fresh herbs if desired and serve immediately.
Variations & Tips:
- You can add diced onions or bell peppers to the spinach mixture for some added flavor and texture.
- For a creamier filling, consider adding a splash of cream or a bit more Greek yogurt.
- If you like a bit of heat, add some red pepper flakes to the filling.
- You can make this recipe with leftover baked potatoes to save even more time.
- Leftover stuffed potatoes can be stored in the refrigerator for 2-3 days and reheated in the microwave before serving.
S'mores in a Mug

S'mores in a Mug is a delightful twist on the classic campfire treat, perfect for satisfying your sweet tooth in under 10 minutes. Ideal for anyone craving a quick dessert without the hassle of a full cooking setup, this microwave recipe serves one and brings the flavors of chocolate, marshmallow, and graham crackers together in a fun, easy-to-make dish.
Enjoy it as a solo treat or make it a cozy night with friends!
Ingredients:
- 2 tablespoons graham cracker crumbs
- 1 tablespoon unsalted butter, melted
- 1 tablespoon brown sugar
- 1 tablespoon chocolate chips
- 1-2 marshmallows (or mini marshmallows)
- A pinch of salt
- Additional graham cracker pieces for topping (optional)
Cooking Steps:
- In a microwave-safe mug, combine the graham cracker crumbs, melted butter, brown sugar, and salt. Stir well to create a crumbly mixture.
- Add in the chocolate chips and mix gently until evenly distributed in the mug.
- Place the marshmallows on top of the mixture. Depending on your preference for marshmallow gooeyness, use 1 or 2, or substitute with mini marshmallows for a more even distribution.
- Microwave the mug on high for about 30 seconds, or until the marshmallows puff up and the chocolate is melted. Keep an eye on it to avoid overflow.
- Carefully remove the mug from the microwave (it will be hot!) and let it cool for a minute before digging in. Feel free to crumble additional graham cracker pieces on top for extra crunch.
Variations and Tips:
- Nutty Twist: Add crushed nuts (such as almonds or walnuts) for added texture.
- Flavored Chocolate: Use flavored chocolate chips (like mint or caramel) for a unique twist on the traditional s'mores flavor.
- Dairy-Free: Substitute chocolate chips with dairy-free alternatives and use vegan marshmallows for a plant-based version.
- Serving Suggestion: Pair with a scoop of vanilla ice cream for an indulgent dessert!
Microwave Fruit Crisp
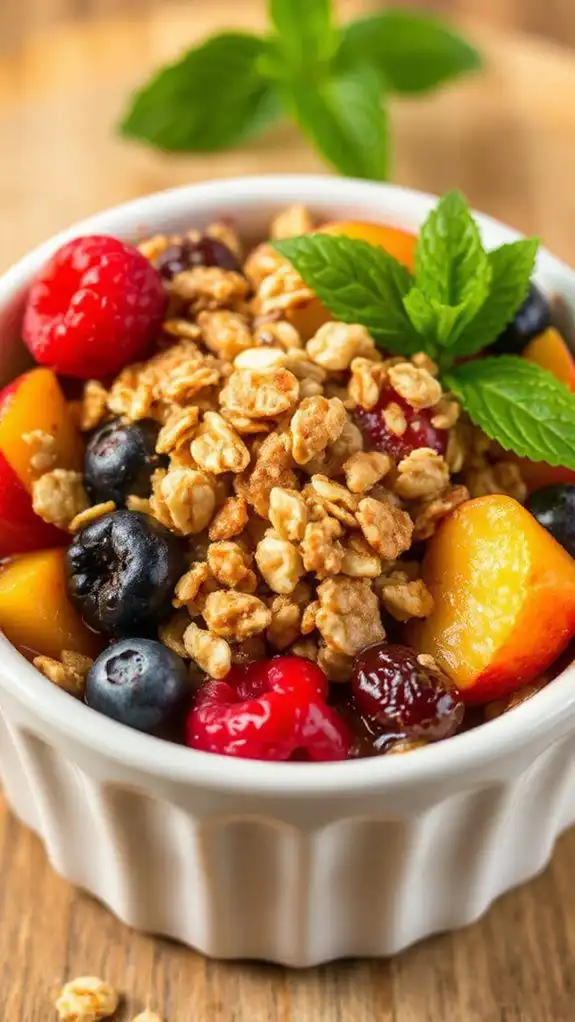
Microwave Fruit Crisp is a delightful and easy-to-make dessert that features warm, tender fruit topped with a crunchy, buttery streusel layer.
Perfect for a quick weeknight treat or as a special dessert for guests, this dish can be made in under 15 minutes, making it ideal for those who want something sweet without the fuss. You can customize the fruits based on what's in season or your personal preferences, resulting in a versatile dessert option.
Ingredients:
- 2 cups of fresh or frozen fruit (such as berries, peaches, or apples)
- 1 tablespoon of sugar (adjust according to the sweetness of the fruit)
- 1 teaspoon of lemon juice
- 1/2 cup of rolled oats
- 1/4 cup of brown sugar
- 1/4 cup of flour
- 1/4 teaspoon of cinnamon
- 1/4 cup of cold butter, cubed
- A pinch of salt
Cooking Instructions:
- In a microwave-safe bowl, combine the fruit, sugar, and lemon juice. Gently mix to coat the fruit evenly, then set aside.
- In a separate bowl, mix the rolled oats, brown sugar, flour, cinnamon, and salt until well combined.
- Add the cold cubed butter to the oat mixture. Using a fork or your fingers, work the butter into the dry ingredients until the mixture resembles coarse crumbs.
- Evenly distribute the fruit mixture in the bottom of a microwave-safe dish. Next, sprinkle the crumb topping over the fruit.
- Microwave on high for 5-7 minutes, or until the fruit is bubbly and the topping is lightly golden. Cooking times may vary depending on your microwave's power, so check for doneness.
- Allow it to cool for a few minutes before serving. Enjoy it plain or with a scoop of vanilla ice cream or whipped cream.
Variations and Tips:
- Fruit Variation: Try using a mix of fruits for different flavors. Apples and cinnamon are classic, while berries provide a tart and sweet combination.
- Nutty Oats: Add chopped nuts like pecans or walnuts to the oat topping for extra crunch and flavor.
- Spice It Up: Experiment with spices such as nutmeg or ginger for a different flavor profile.
- Storing Leftovers: You can cover any leftovers and store them in the refrigerator for up to three days. Reheat in the microwave for a quick dessert.
- Serving Suggestions: Serve the warm fruit crisp with a dollop of yogurt or a sprinkle of granola for added texture.