If you're looking for quick, satisfying meals for one, I've got you covered with 22 delicious microwave dinner ideas. You can whip up cheesy mac and cheese, a vibrant vegetable stir-fry, or even a gourmet instant ramen. There's also a single-serve quinoa bowl and hearty Spanish rice and beans. These options are not only easy to make but also perfect for solo dining. Stick around; I'll share more tasty recipes you can enjoy in no time!
Cheesy Microwave Mac and Cheese

Mac and cheese is a quintessential comfort food that has roots in the United Kingdom and Italy, with early recipes appearing in a 1769 cookbook. Over the years, it has evolved into a beloved dish in many cultures, especially in America, where various adaptations emerge. One of the simplest and fastest ways to prepare mac and cheese is via the microwave, making it perfect for solo dining. This recipe brings you creamy, cheesy goodness in just a few minutes.
Ingredients:
- 1 cup elbow macaroni
- 1 cup water
- 1/2 cup shredded cheddar cheese
- 1/4 cup milk
- 1 tablespoon butter
- Salt and pepper to taste
- Optional: 1 tablespoon grated Parmesan cheese
- Optional: A pinch of paprika or garlic powder
Cooking Instructions:
- In a microwave-safe bowl, combine 1 cup of elbow macaroni and 1 cup of water.
- Place the bowl in the microwave and cook on high for 3-4 minutes, or until the pasta is tender. Check halfway through and stir to confirm even cooking.
- Carefully remove the bowl from the microwave. Drain any excess water if necessary (be cautious, as it will be hot).
- Add 1/2 cup of shredded cheddar cheese, 1/4 cup of milk, and 1 tablespoon of butter to the cooked pasta.
- Stir the mixture until the cheese and butter melt into a creamy sauce. If it's too thick, you can add a bit more milk to achieve your desired consistency.
- Season the mac and cheese with salt, pepper, and any optional spices you desire.
- Return the bowl to the microwave and heat for an additional 30 seconds if necessary, then stir again before serving.
Variations:
This basic mac and cheese recipe is highly adaptable! You can experiment with different types of cheese, such as mozzarella, gouda, or pepper jack for a spicy kick. For added flavor, consider incorporating ingredients like cooked bacon bits, sautéed vegetables (like broccoli or spinach), or even a dollop of your favorite hot sauce. You can also change up the pasta shape; try using penne, shells, or even whole wheat pasta for a healthier option. Add breadcrumbs on top before microwaving for a crunchy texture or mix in some herbs for freshness.
Kitchen Utensils:
| Utensil | Purpose |
|---|---|
| Microwave-safe bowl | For cooking the pasta and mixing ingredients |
| Measuring cup | To measure water and milk |
| Measuring spoons | For accurate measurement of butter and spices |
| Fork or spoon | For stirring and mixing the mac and cheese |
| Colander (optional) | To drain excess water from the pasta (if needed) |
With these simple ingredients and directions, you can whip up a delightful serving of cheesy microwave mac and cheese in no time! Enjoy your solo dining experience!
- The Original Pro Chopper - Our superstar veggie slicer has been creating waves on TikTok! Simple to use,...
- Easy Meal Prep with Rust-Resistant Blades - Our vegetable chopper is perfect for anyone who wants to eat...
- 5-Star Design - The soft-grip TPU handle ensures controlled chopping, while the non-skid rubber base...
Microwave Vegetable Stir-Fry
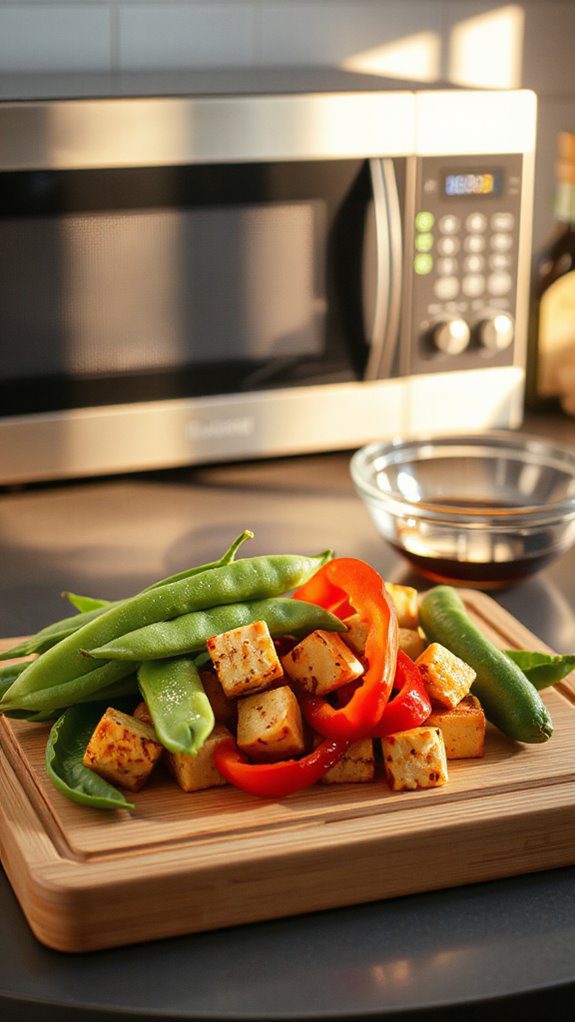
Microwave Vegetable Stir-Fry is a quick, versatile, and nutritious meal that highlights the deliciousness of fresh vegetables. Originating from Asian cuisine, stir-frying is a popular method that cooks food quickly while preserving its flavor and nutrients. While traditional stir-frying is usually done in a hot wok, this microwave version offers a convenient alternative perfect for solo diners.
Ingredients:
- 1 cup mixed vegetables (broccoli, bell peppers, carrots, snap peas, etc.)
- 1 tablespoon soy sauce
- 1 teaspoon sesame oil
- 1 clove garlic, minced
- ½ teaspoon ginger, grated (optional)
- 1 tablespoon water
- Salt and pepper to taste
- Cooked rice or noodles (for serving)
- Optional toppings: sesame seeds, green onions, or crushed red pepper
Cooking Instructions:
- Start by preparing your vegetables. If using fresh produce, wash and chop them into bite-sized pieces. If using frozen vegetables, measure out 1 cup and set aside.
- In a microwave-safe bowl, combine the mixed vegetables, soy sauce, sesame oil, minced garlic, ginger (if using), and water. Stir until the vegetables are well coated in the sauce.
- Cover the bowl with a microwave-safe lid or microwave-safe plastic wrap, leaving a small vent for steam to escape.
- Microwave on high for 3-5 minutes, or until the vegetables are tender but still crisp. Cooking times may vary depending on the wattage of your microwave.
- Carefully remove the bowl from the microwave (it will be hot!), and stir the contents. Season with salt and pepper to taste.
- Serve the stir-fried vegetables over a bed of cooked rice or noodles. Top with optional sesame seeds, green onions, or crushed red pepper for added flavor.
Variations:
This Microwave Vegetable Stir-Fry can be easily customized based on your preference and what you have on hand. For a protein boost, consider adding diced tofu, leftover chicken, or shrimp before microwaving. You can also experiment with different vegetables, such as zucchini, asparagus, or mushrooms, or incorporate a variety of sauces like teriyaki or hoisin for a different flavor profile. If you enjoy extra heat, add a splash of sriracha or red pepper flakes to the dish. Feel free to alter the cooking time based on the freshness of your veggies or the number of ingredients you're using.
Kitchen Utensils:
| Utensil | Purpose |
|---|---|
| Microwave-safe bowl | To mix and cook the vegetables |
| Microwave-safe lid | To cover the bowl while cooking |
| Cutting board | For chopping vegetables |
| Chef's knife | To chop vegetables before cooking |
| Measuring spoons | For measuring sauces and oils |
With this easy recipe, you can enjoy a delightful and healthy meal ready in minutes, perfect for solo dining.
- Makes Everything Simple : Just forget your bagged cheese! Only turn the handle for several times and get...
- Premium Material : All parts of the rotary cheese grater are made of food grade ABS material, no BPA. The...
- Three Option Grater : The parmesan cheese grater finishes food preparation with slicing, shredding and...
Instant Ramen With a Twist
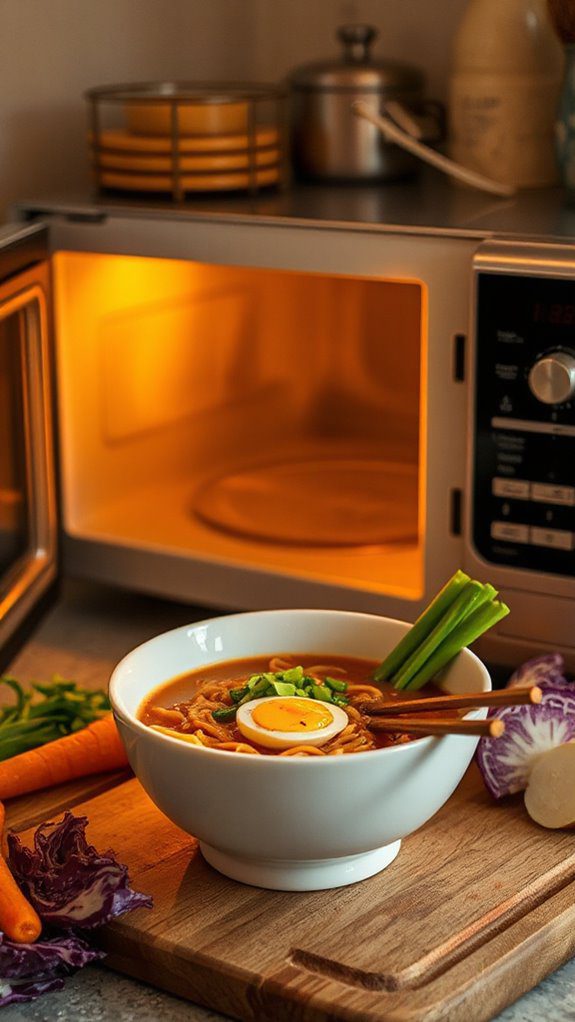
Instant ramen is a beloved staple around the world, originally hailing from Japan in the late 1950s. It was created as a quick and affordable meal option and has since evolved into countless variations, chosen for its versatility and convenience. With just a few additional ingredients, you can transform standard instant ramen into a gourmet dish that satisfies both your taste buds and hunger.
Ingredients:
- 1 packet of instant ramen noodles (any flavor)
- 2 cups of water
- 1 tablespoon of soy sauce
- 1 tablespoon of sesame oil
- 1 egg
- 1/2 cup of fresh spinach or bok choy
- 1/4 cup of sliced mushrooms (shiitake or button)
- 1/4 cup of green onions, chopped
- Optional: chili flakes or sriracha for heat
- Optional: cooked protein (e.g., tofu, chicken, or shrimp)
Cooking Instructions:
- Boil the Water:
- In a microwave-safe bowl, combine 2 cups of water and the instant ramen noodle cake.
- Microwave on high for 4-5 minutes, or until the noodles are cooked through. Stir halfway through cooking.
- Prepare the Broth:
- Carefully remove the bowl from the microwave (it will be hot).
- Add the seasoning packet from the ramen, soy sauce, and sesame oil to the noodles. Stir well to combine.
- Add Vegetables:
- Stir in the fresh spinach (or bok choy) and sliced mushrooms into the noodle mixture. Let them wilt in the hot broth for about 1-2 minutes.
- Cook the Egg:
- In a separate microwave-safe bowl, crack an egg. Whisk it gently with a fork until combined.
- Microwave for about 30-45 seconds or until the egg is set. Remove and let cool for a minute before slicing it into strips or scrambling it.
- Combine and Serve:
- Top the ramen with the prepared egg and chopped green onions.
- Add chili flakes or sriracha for an extra kick if desired.
- Toss in any additional cooked protein to make it more filling.
- Enjoy:
- Serve in a large bowl, eat with chopsticks or a spoon, and savor your delicious instant ramen with a twist.
Recommended Variations:
You can customize this dish in many ways! Consider swapping in different vegetables such as bell peppers, zucchini, or corn to keep it seasonal and interesting. For a different flavor base, try using miso paste or using a vegetable or beef broth instead of water when cooking the noodles. For those who enjoy creamy textures, you might stir in a tablespoon of peanut butter or miso for an extra layer of flavor. Finally, experiment with toppings like sesame seeds, nori strips, or pickled ginger to elevate the dish even further.
Kitchen Utensils:
| Utensil | Purpose |
|---|---|
| Microwave-safe bowl | To cook the noodles and prepare the broth |
| Fork | For whisking the egg and stirring ingredients |
| Measuring spoons | To measure sauces and oils accurately |
| Stirring spoon | For combining ingredients |
| Knife | For slicing vegetables and egg |
With these simple steps and variations, you'll have a delightful bowl of instant ramen that is not only quick to make but also packed with flavor! Enjoy your solo dining experience!
- 💰 REDUCE WASTE AND SAVE MONEY: Chef Preserve keeps FOOD FRESH 5 TIMES LONGER than non-vacuum storage...
- ✅ POWERFUL, QUICK & EASY TO USE: Simply press the button to start. The device vacuum seals a bag in 5...
- ♻️ REUSABLE & RESEALABLE BAGS: Chef Preserve comes with dishwasher, freezer, refrigerator, and...
Single-Serve Microwave Quinoa Bowl
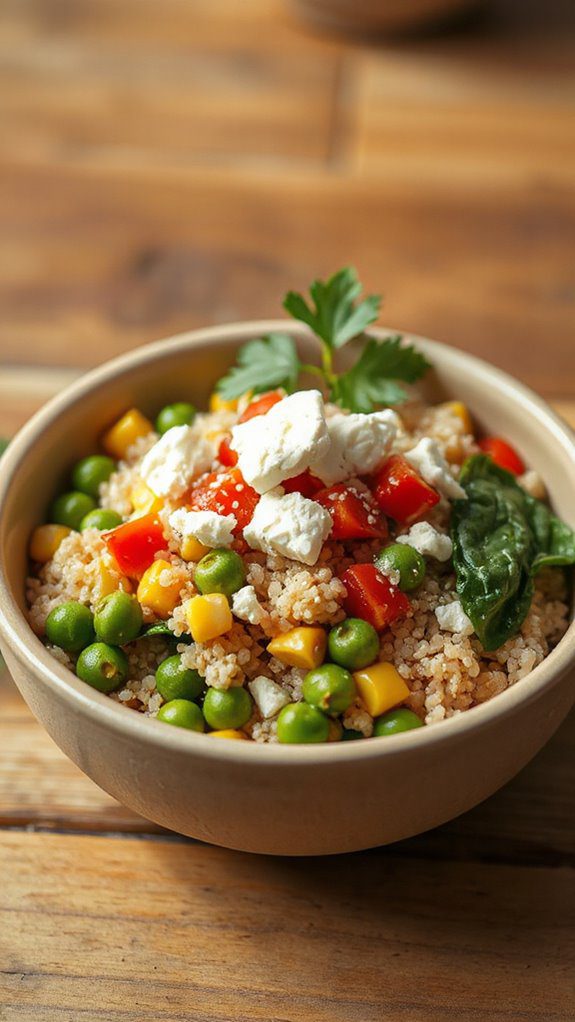
The Single-Serve Microwave Quinoa Bowl is a nutritious and versatile dish that has gained popularity in recent years, especially among health-conscious individuals and those leading busy lives. Quinoa, a grain native to South America, was a staple food of the ancient Incas. It is known for its impressive nutritional profile, being rich in protein, fiber, and various essential vitamins and minerals. This microwave quinoa bowl offers a quick and easy way to enjoy a wholesome meal packed with flavors and nutrients without the hassle of extensive cooking.
Ingredients
- 1/2 cup quinoa
- 1 cup water or vegetable broth
- 1/4 teaspoon salt
- 1/2 cup black beans (canned, rinsed and drained)
- 1/2 cup corn (canned, frozen, or fresh)
- 1/2 bell pepper (diced, any color)
- 1/4 avocado (sliced)
- 1 tablespoon olive oil
- 1 tablespoon lime juice
- 1/4 teaspoon cumin
- 1/4 teaspoon paprika
- Fresh cilantro (for garnish)
- Optional toppings: salsa, cheese, Greek yogurt
Cooking Instructions
- Rinse the quinoa under cold water in a fine mesh strainer to remove its natural coating, called saponin, which can impart a bitter taste.
- In a microwave-safe bowl, combine the rinsed quinoa, water or vegetable broth, and salt.
- Cover the bowl with a microwave-safe lid or plate to prevent splatter.
- Microwave on high for 6-8 minutes, or until the quinoa is fluffy and the liquid is absorbed. Check halfway through and stir if necessary.
- Once cooked, let the quinoa sit in the microwave for an additional 2 minutes before carefully removing it (it will be hot!).
- In a separate bowl, mix the black beans, corn, diced bell pepper, olive oil, lime juice, cumin, and paprika.
- Combine the prepared quinoa with the black bean mixture and mix until well combined.
- Top with sliced avocado and garnish with fresh cilantro.
- If desired, add optional toppings like salsa, cheese, or Greek yogurt before serving.
Variations
Feel free to personalize your quinoa bowl by experimenting with various ingredients and preparation methods. Instead of black beans, you can use chickpeas or lentils for added protein. Add some chopped tomatoes, spinach, or other vegetables you love for extra flavor and nutrition. For a touch of spice, include some diced jalapeños or a drizzle of hot sauce. Additionally, you can swap the olive oil for avocado oil or add different seasonings like garlic powder or chili powder. If you prefer a creamier texture, mix in some yogurt or a dollop of hummus. The beauty of the quinoa bowl lies in its flexibility—make it uniquely yours!
Kitchen Utensils
| Utensil | Purpose |
|---|---|
| Fine mesh strainer | To rinse quinoa |
| Microwave-safe bowl | For cooking quinoa and mixing ingredients |
| Microwave-safe lid or plate | To cover the bowl during cooking |
| Wooden spoon or spatula | To mix ingredients after cooking |
| Measuring cups and spoons | For accurate measurement of ingredients |
Perfect for solo dining, this microwave quinoa bowl can be made in no time and offers a filling and wholesome meal option. Enjoy exploring different variations to keep your meals exciting!
- Generous Capacity: 7-quart slow cooker that comfortably serves 9+ people or fits a 7-pound roast
- Cooking Flexibility: High or low slow cooking settings, with convenient warm function for ideal serving...
- Convenient: Set it and forget it feature enables you to cook while at work or performing daily tasks
Spanish Rice and Beans

Spanish Rice and Beans is a hearty and flavorful dish that has roots in Hispanic culture, often associated with traditional comfort food. The combination of rice and beans not only makes for a filling meal but also provides a complete protein that is vegetarian-friendly. This dish is widely enjoyed in various Spanish-speaking countries, often served as a side or main course.
Ingredients
- 1 cup long-grain white rice
- 1 can (15 oz) black beans, drained and rinsed
- 1 cup vegetable or chicken broth
- ½ cup diced tomatoes (canned or fresh)
- ½ cup onion, finely chopped
- 1 clove garlic, minced
- 1 teaspoon chili powder
- 1 teaspoon cumin
- ¼ teaspoon paprika
- 2 tablespoons olive oil
- Salt and pepper, to taste
- Fresh cilantro, for garnish (optional)
- Lime wedges, for serving (optional)
Cooking Instructions
- Prepare the Ingredients: Gather all the ingredients listed above and bring them to your workspace.
- Sauté the Aromatics: In a microwave-safe bowl (or a medium skillet if preferred on a stove), heat the olive oil for about 30 seconds in the microwave. Add the chopped onion and minced garlic. Microwave for about 2 minutes, or until the onion has softened.
- Add the Rice: Stir in the long-grain rice, chili powder, cumin, smoked paprika, and a pinch of salt and pepper into the bowl. Mix well to evenly coat the rice with the spices and enhance the flavor.
- Mix in Liquids and Beans: Pour in the vegetable or chicken broth, then add the diced tomatoes and the rinsed black beans. Stir everything until well combined.
- Cook in the Microwave: Cover the bowl with a microwave-safe lid or plastic wrap, leaving a small vent for steam to escape. Microwave on high for about 15 minutes. After 10 minutes, check the rice's doneness—if additional time is required, continue cooking in 2-minute increments until the rice is tender and the liquid is absorbed.
- Let it Sit: Once the rice is cooked, let it sit covered for 5 minutes to allow the flavors to meld.
- Fluff and Serve: After resting, fluff the rice and beans with a fork. Serve hot, garnished with fresh cilantro and lime wedges if desired.
Variations
Feel free to personalize your Spanish Rice and Beans by incorporating additional ingredients such as bell peppers, corn, or even diced carrots for a pop of color and flavor. If you prefer a spicier kick, consider adding jalapeños or a dash of hot sauce in step 4. For a protein boost, stir in cooked chicken or sausage when adding the beans. You can also substitute the black beans for pinto or kidney beans based on your preference. Experimenting with different spices, such as oregano or cayenne pepper, can also offer exciting new flavor profiles.
Kitchen Utensils
| Utensil | Purpose |
|---|---|
| Microwave-safe bowl | To cook the rice and beans mixture |
| Plastic wrap or lid | To cover the bowl for microwave cooking |
| Spoon or spatula | To stir and mix the ingredients |
| Measuring cups | To measure out rice and liquids |
| Knife and cutting board | To chop onions, garlic, and other veggies |
- 100% Leak-proof: Guaranteed no-spill seal and secure latches
- Crystal-clear Tritan Built: Stain-resistant and odor-resistant material for a clear view of contents
- Lightweight & Sturdy: Easy to carry, yet durable for everyday use
Microwave Egg Fried Rice
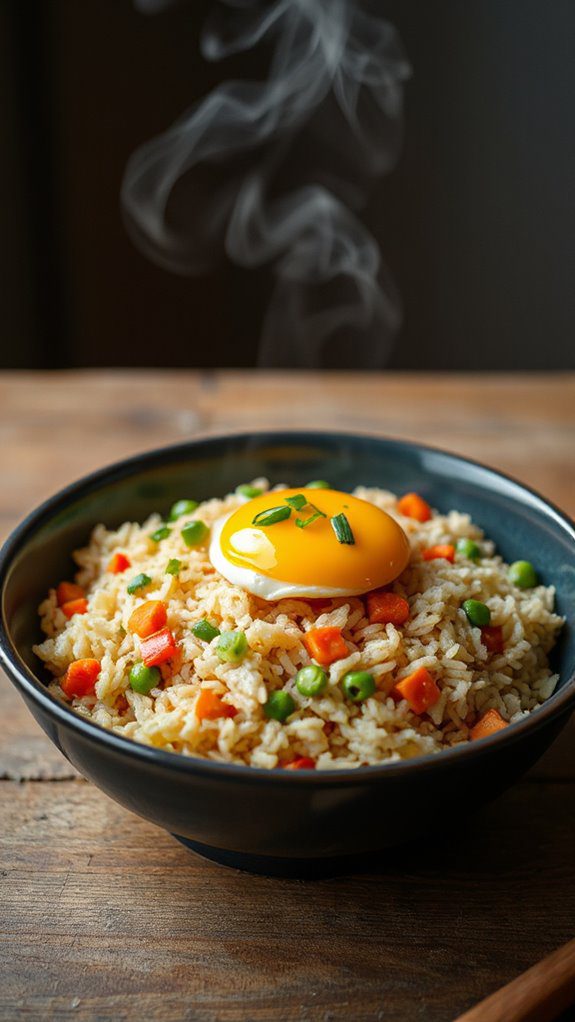
Egg Fried Rice is a beloved dish that has its roots in Chinese cuisine. It is a versatile recipe often enjoyed as a side dish or a quick meal on its own, popularized both in Asian restaurants and home kitchens worldwide. Its convenience and ease of preparation make it an ideal choice for solo dining, especially with the help of a microwave. Whether you're using leftover rice or preparing it fresh, this dish is not only filling but also customizable to fit your taste preferences.
Ingredients
- 1 cup cooked rice (preferably cold, day-old rice works best)
- 1 large egg
- 1 tablespoon soy sauce
- 1/2 cup mixed vegetables (peas, carrots, corn)
- 1 green onion, sliced
- 1 teaspoon sesame oil (optional)
- Salt and pepper to taste
- A pinch of garlic powder (optional)
Cooking Instructions
- Prepare the Rice: If you haven't already cooked rice, you can use the microwave to prepare it. Rinse 1/2 a cup of rice, add 1 cup of water in a microwave-safe bowl, then cover and microwave on high for about 8-10 minutes or until water is absorbed. Let it cool.
- Combine Ingredients: In a large microwave-safe bowl, add the cooked rice, mixed vegetables, and sliced green onions.
- Beat the Egg: In a separate small bowl, crack the egg and beat it lightly with a fork. Then pour the beaten egg over the rice mixture.
- Season: Drizzle the soy sauce, sesame oil, salt, pepper, and garlic powder (if using) over the ingredients in the bowl. Mix everything thoroughly to guarantee even seasoning.
- Microwave: Cover the bowl with a microwave-safe plate or lid. Microwave on high for 2-3 minutes, stirring halfway through to guarantee even cooking.
- Finish and Serve: Once the egg is fully cooked, check to make sure everything is heated through. If needed, microwave for an additional minute. Fluff the rice with a fork and enjoy!
Variations
Egg Fried Rice is highly adaptable, and you can easily modify the recipe based on your preferences or what you have available. For a protein boost, add diced cooked chicken, shrimp, or tofu. If you're looking for a vegetarian option, substitute the egg for scrambled tofu and incorporate more vegetables like bell peppers or broccoli for added nutrition. Spicy lovers can also add sriracha or chili flakes for some heat. Experiment with different sauces such as teriyaki or oyster sauce to give it a unique twist!
Kitchen Utensils
| Utensil | Purpose |
|---|---|
| Microwave-safe bowl | For mixing and microwaving the ingredients |
| Fork | To beat the egg and mix ingredients |
| Microwave-safe plate or lid | To cover the bowl while microwaving |
| Spoon | For stirring and serving |
| Measuring cup | To quantify the rice and vegetables |
With these easy steps and tips, you can prepare a delicious serving of Microwave Egg Fried Rice in no time, perfect for satisfying your solo dining needs!
- 𝗘𝗳𝗳𝗼𝗿𝘁𝗹𝗲𝘀𝘀 𝗪𝗲𝗶𝗴𝗵𝗶𝗻𝗴: Supports 5 units...
- 𝗣𝗿𝗲𝗰𝗶𝘀𝗲 𝗥𝗲𝘀𝘂𝗹𝘁𝘀: Accurately weighs up to 11 lb/5 kg with 1 g...
- 𝗦𝗶𝗺𝗽𝗹𝗲 & 𝗖𝗼𝗺𝗽𝗮𝗰𝘁: The small and sleek scale is a perfect fit for...
Homemade Microwave Pizza

Microwave pizza has become a popular method for creating a quick and satisfying meal, especially for those dining solo. The concept of microwave pizza dates back to the early days of microwave cooking when individuals began experimenting with various toppings and crusts to produce a meal that requires minimal prep and cook time. This dish allows for ultimate customization and is perfect for satisfying those late-night cravings or creating a casual lunch.
Ingredients
- 1 large flour tortilla or pre-made pizza crust
- 1/4 cup pizza sauce
- 1/2 cup shredded mozzarella cheese
- 1/4 cup sliced pepperoni (or your choice of toppings)
- 1 tablespoon olive oil (optional)
- 1/4 teaspoon dried oregano
- 1/4 teaspoon garlic powder
- Salt and pepper to taste
- Fresh basil leaves (optional, for garnish)
Cooking Instructions
- Prepare the Crust: Place the tortilla or pre-made pizza crust on a microwave-safe plate. If using a tortilla, you can brush it lightly with olive oil for added flavor and crispiness.
- Spread Pizza Sauce: Using a spoon, evenly spread the pizza sauce over the surface of the tortilla or crust. Be sure to leave a small border around the edge to form a crust.
- Add Cheese: Sprinkle the shredded mozzarella cheese over the sauce. Make sure to cover the sauce evenly for a deliciously cheesy pizza.
- Layer Toppings: Add your choice of toppings, starting with the pepperoni slices. You can also include vegetables like bell peppers, onions, mushrooms, or anything else you desire.
- Season: Sprinkle the dried oregano, garlic powder, salt, and pepper over the top of the assembled pizza for added flavor.
- Microwave Cooking: Place the plate in the microwave and cook on high for 1-2 minutes. Check the pizza after the first minute. The cheese should be melted and bubbling. Cooking times may vary depending on your microwave's wattage, so adjust accordingly.
- Let It Rest: Carefully remove the plate from the microwave (it will be hot!). Allow the pizza to cool for about a minute.
- Garnish and Serve: If desired, top with fresh basil leaves before slicing. Cut into portions and enjoy your homemade microwave pizza!
Variations
You can customize your homemade microwave pizza in several ways to suit your taste. Consider trying different crusts, such as whole wheat tortillas or flatbreads, for a healthier option. Experiment with various sauces, like pesto or BBQ sauce, as a base. Toppings are limitless—go vegetarian with spinach and feta, create a Hawaiian delight with pineapple and ham, or add a spicy kick with jalapeños. Additionally, consider using a blend of cheeses, such as cheddar or provolone, to give your pizza a unique flavor profile.
Kitchen Utensils
| Utensil | Purpose |
|---|---|
| Microwave-safe Plate | To assemble and cook the pizza |
| Spoon | For spreading sauce and layering ingredients |
| Measuring Cups | To accurately measure sauce and cheese |
| Knife | For cutting the finished pizza |
| Cutting Board | To chop toppings, if necessary |
Using this simple recipe, you can enjoy a delicious homemade microwave pizza tailored to your preferences in just a matter of minutes, making it an ideal choice for solo dining!
- Instant Read Food Thermometer | Our instant read thermometer features a temperature probe and advanced,...
- Multi-Use | From bbq thermometer to baking thermometer, our digital food thermometer for cooking is...
- Easy-Read Digital Thermometer For Cooking | Large instant thermometer dial with bright blue backlight...
Creamy Tomato Soup With Grilled Cheese

Introduction:
Creamy tomato soup with grilled cheese is a classic American comfort food that has comforted many for generations. The combination of smooth, rich soup and crispy, cheesy bread is simple yet satisfying, making it a favorite for solo dining. Originating as a way to utilize overripe tomatoes, this dish has evolved into a beloved staple in many households across the globe. Whether enjoyed on a chilly day or as a nostalgic meal from childhood, creamy tomato soup paired with grilled cheese is an easy and delightful option.
Ingredients:
- 1 can (14 oz) of diced tomatoes
- 1 cup of vegetable broth or chicken broth
- 1/2 cup of heavy cream or milk
- 1 tablespoon of olive oil or butter
- 1 small onion, finely chopped
- 2 cloves of garlic, minced
- 1 teaspoon of dried basil (or a few fresh basil leaves)
- Salt, to taste
- Pepper, to taste
- 2 slices of bread (white, whole wheat, or your choice)
- 1/2 cup of shredded cheese (cheddar, mozzarella, or your choice)
Cooking Instructions:
- Sauté Aromatics: In a microwave-safe bowl, combine olive oil or butter with chopped onion and minced garlic. Cover with a microwave-safe lid and microwave on high for about 2-3 minutes, or until the onion is translucent. Stir halfway through for even cooking.
- Add Tomatoes and Broth: Add the can of diced tomatoes (with juice) and vegetable or chicken broth to the bowl. Stir well and cover. Microwave on high for 5-7 minutes, or until heated through.
- Blend the Soup: Carefully remove the bowl from the microwave (it may be hot). Using an immersion blender (or transferring to a standard blender), blend the soup until it is smooth. If using a standard blender, be cautious of the hot liquid and blend in batches if necessary.
- Add Cream and Seasoning: Return the soup to the microwave-safe bowl if using a standard blender. Stir in the heavy cream or milk, dried basil, salt, and pepper. Microwave for another 2-3 minutes until heated through. Adjust seasoning to taste.
- Prepare Grilled Cheese: While the soup is in the microwave, spread butter on one side of each slice of bread. Place shredded cheese between the slices, buttered side out. Microwave on a microwave-safe plate for 40-60 seconds, or until the cheese starts to melt slightly.
- Toast Bread: To get a crispy grilled cheese, toast it in a skillet over medium heat for 2-3 minutes per side until golden brown. Alternatively, you can lightly toast it in a toaster if a crispy texture isn't essential.
- Serve: Pour the creamy tomato soup into a bowl and cut the grilled cheese into halves or quarters. Serve together and enjoy your comforting meal!
Variations:
There are numerous ways to elevate creamy tomato soup and grilled cheese! For the soup, consider adding a splash of balsamic vinegar or a teaspoon of sugar for sweetness, or spice it up with a pinch of red pepper flakes. You can also incorporate fresh vegetables, such as diced carrots or bell peppers, while sautéing the onion. For the grilled cheese, experiment with different cheeses like pepper jack or Gouda, or add additional fillings such as tomato slices, avocado, or herbs to make it more interesting. You can even swap out traditional bread for sourdough or rye for a twist on flavor.
Essential Kitchen Utensils:
| Utensil | Purpose |
|---|---|
| Microwave-safe bowl | For cooking the soup and sautéing ingredients |
| Immersion blender or standard blender | To blend the soup until smooth |
| Cutting board | For chopping onions and garlic |
| Knife | To chop vegetables |
| Skillet | For toasting the grilled cheese |
Enjoy your homemade creamy tomato soup with grilled cheese – a delightful dish sure to warm your heart!
- Versatile 54-Piece Collection: Elevate your kitchen with the Home Hero 54-Piece Kitchen Utensil Set, a...
- Durable and Long-Lasting: Crafted from premium stainless steel, these kitchen utensils are designed to...
- Perfect Holiday Gift: Delight your loved ones with this kitchen utensils gift set this festive season....
Quick Chili in a Mug
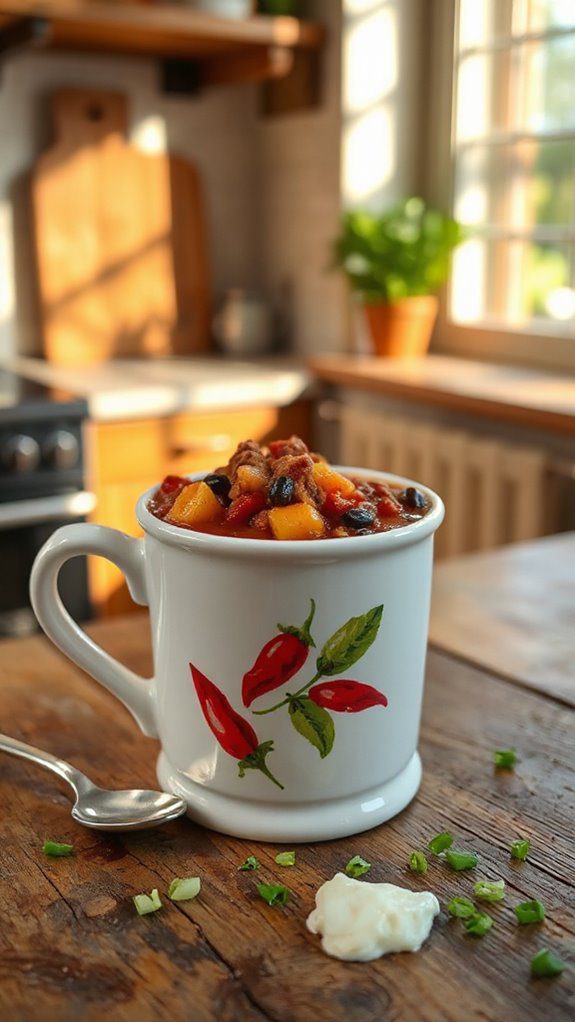
Chili is a hearty and comforting dish that has roots in Texan cuisine, influenced by Native American, Mexican, and Spanish culinary traditions. It gained popularity in the United States during the late 19th century, often associated with cowboys and ranchers who sought a robust meal. Today, chili has numerous variations, including vegetarian and bean-based options, making it a versatile dish that can be adapted to suit individual tastes. This Quick Chili in a Mug recipe is tailored for solo dining, allowing you to indulge in a flavorful meal without excessive preparation.
Ingredients
- 1 can (15 oz) kidney beans, drained and rinsed
- 1 can (15 oz) diced tomatoes with green chilies
- 1 cup corn (fresh or frozen)
- 1 cup vegetable or beef broth
- 1 tablespoon chili powder
- 1 teaspoon cumin
- 1 teaspoon garlic powder
- 1/2 teaspoon onion powder
- Salt and pepper, to taste
- Optional toppings: shredded cheese, sour cream, chopped green onions, or avocado
Cooking Instructions
- In a large microwave-safe mug, combine the drained kidney beans, diced tomatoes (with their juice), and corn.
- Add the vegetable or beef broth to the mug, stirring to combine all the ingredients.
- Stir in the chili powder, cumin, garlic powder, onion powder, and season with salt and pepper to taste.
- Place the mug in the microwave and heat on high for 2-3 minutes, or until the mixture is hot throughout. If needed, stir halfway through for even heating.
- Once heated, remove the mug from the microwave carefully (it may be hot!) and allow it to cool for a minute.
- Top with desired toppings, such as shredded cheese, sour cream, chopped green onions, or avocado.
- Enjoy your delicious and easy Quick Chili right from the mug!
Variations
There are countless ways to customize your Quick Chili in a Mug! You can swap out the kidney beans for black beans or pinto beans for a different flavor. For a vegetarian twist, use vegetable broth instead of beef broth. If you prefer a spicier chili, add jalapeño slices or a dash of hot sauce. You can even incorporate leftover grilled chicken or ground turkey for added protein. Additional vegetables like bell peppers or zucchini can also be mixed in for extra nutrition. Play with the spices, adjusting them according to your heat preference, or try adding a tablespoon of cocoa powder for a richer flavor profile.
Kitchen Utensils
| Utensil | Purpose |
|---|---|
| Microwave-safe mug | To prepare and serve the chili |
| Can opener | To open the cans of beans and tomatoes |
| Measuring spoons | To measure out spices |
| Spoon | To stir ingredients and serve the chili |
| Microwave | To heat the chili mixture |
Enjoy your Quick Chili in a Mug as a satisfying solo meal that can be whipped up in no time!
- 24-ounce insulated stainless-steel water bottle with a FreeSip spout and push-button lid with lock
- Patented FreeSip spout designed for either sipping upright through the built-in straw or tilting back to...
- Protective push-to-open lid keeps spout clean; convenient carry loop doubles as a lock
One-Person Microwave Lasagna
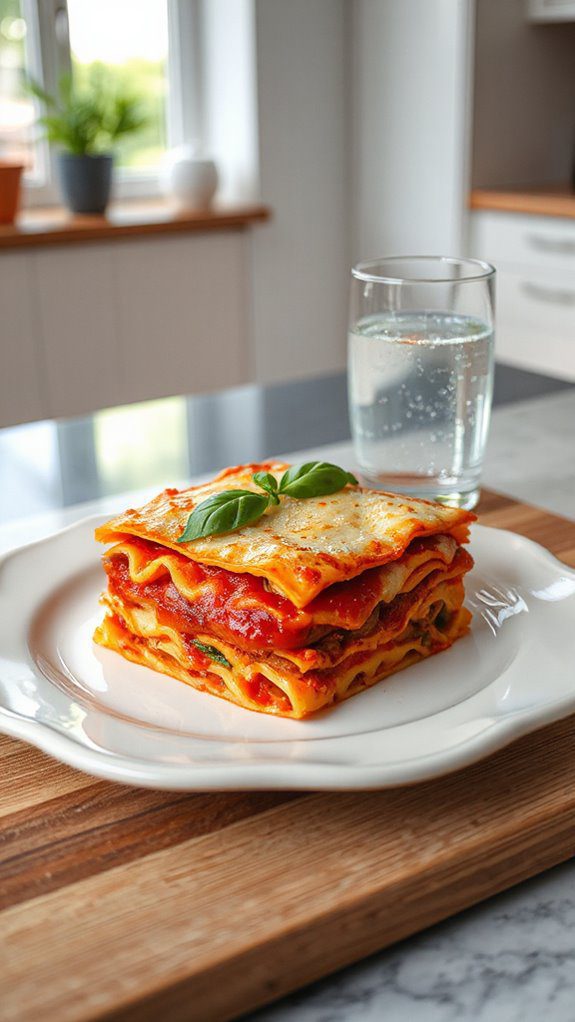
Lasagna is a beloved Italian dish, rich in history and flavor. Originating from the Ancient Greek dish "Laganon," made of layers of pasta, it has evolved into many versions. This one-person microwave lasagna recipe is perfect for a quick, delightful meal without the fuss of preparing a large casserole. Ideal for solo dining, it brings comforting, home-cooked flavors in just a few minutes!
Ingredients
- 1 cup marinara sauce
- 1 lasagna noodle (no-boil)
- 1/2 cup ricotta cheese
- 1/4 cup shredded mozzarella cheese
- 1/4 cup grated Parmesan cheese
- 1/4 teaspoon Italian seasoning
- Salt and pepper to taste
- Fresh basil (optional for garnish)
Cooking Instructions
- Prepare the Lasagna Noodle: Break the no-boil lasagna noodle into pieces if necessary, depending on the size of your microwave-safe dish.
- Layer the Sauce: Pour a small amount of marinara sauce into the bottom of your microwave-safe dish to prevent sticking.
- Create the First Layer: Place a piece of lasagna noodle on top of the sauce. Cover with a layer of ricotta cheese, followed by a sprinkle of mozzarella, and a dash of Italian seasoning. Add a small amount of salt and pepper to taste.
- Add More Layers: Repeat the layering process: marinara sauce, lasagna noodle, ricotta cheese, mozzarella cheese, and spices until you reach the top, finishing with a layer of marinara sauce and a generous sprinkle of Parmesan cheese.
- Cover and Microwave: Cover the dish with a microwave-safe lid or plastic wrap, leaving a small corner open to vent. Microwave on high for about 5-7 minutes, checking periodically. The lasagna is done when the cheese is melted, and the noodle is tender.
- Let It Sit: Carefully remove the dish from the microwave (it will be hot!). Let the lasagna sit for about 2-3 minutes to cool and set.
- Garnish and Serve: Garnish with fresh basil if desired, and enjoy your single-serving lasagna!
Variations
Feel free to experiment with your one-person microwave lasagna! You can modify the recipe by adding sautéed vegetables like spinach, zucchini, or mushrooms for extra nutrition. If you prefer a meaty version, include cooked ground beef, turkey, or sausage in the layers. You can also swap out the cheeses for a dairy-free alternative or use a different pasta noodle, such as whole wheat or gluten-free options. For a spicy kick, add red pepper flakes or use a spicy marinara sauce.
Kitchen Utensils
| Utensil | Purpose |
|---|---|
| Microwave-safe dish | To prepare and cook the lasagna |
| Microwave-safe lid | To cover the dish while cooking |
| Fork/spoon | For layering and mixing ingredients |
| Measuring cups | To measure ingredients accurately |
| Plastic wrap | To vent the dish while microwaving |
Now you're all set to create a delicious one-person microwave lasagna that's perfect for solo dining!
Microwaveable Stuffed Bell Peppers

Stuffed bell peppers are a classic dish that showcases the vibrant flavors of fresh vegetables, grains, and proteins. This dish originates from Central and South America, where famous regional variations exist, but it has made its way to various cuisines around the world. Perfect for solo dining, microwaveable stuffed bell peppers provide an easy, healthy, and satisfying meal in no time.
Ingredients:
- 2 large bell peppers (any color)
- 1 cup cooked rice (white, brown, or quinoa)
- 1/2 cup cooked ground meat (beef, turkey, or chicken) or plant-based protein
- 1/2 cup diced tomatoes (canned or fresh)
- 1/2 cup corn (canned or frozen)
- 1/2 cup shredded cheese (cheddar, mozzarella, or vegan alternative)
- 1 tablespoon taco seasoning (or to taste)
- Salt and pepper to taste
- Fresh herbs for garnish (optional)
Cooking Instructions:
- Prepare the Peppers: Wash the bell peppers and slice the tops off. Remove seeds and membranes carefully. If necessary, trim the bottoms slightly for stability but do not cut through.
- Make the Filling: In a medium bowl, combine the cooked rice, ground meat (or plant-based protein), diced tomatoes, corn, half of the shredded cheese, taco seasoning, salt, and pepper. Stir until well mixed.
- Stuff the Peppers: Spoon the filling into each bell pepper until they are well-packed. Leave a little room at the top to allow for the cheese and filling to expand.
- Top with Cheese: Sprinkle the remaining shredded cheese on top of the stuffed peppers.
- Prepare for Microwave: Place the stuffed peppers upright in a microwave-safe dish. If necessary, add a splash of water to the bottom of the dish to steam the peppers.
- Cover and Microwave: Cover the dish with microwave-safe plastic wrap or a microwave-safe lid. Microwave on high for 6-8 minutes, or until the peppers are tender and the filling is heated through. Cooking time may vary based on your microwave's wattage.
- Let Rest: Carefully remove the dish from the microwave (it will be hot!). Let the stuffed peppers rest for a minute.
- Serve: Garnish with fresh herbs if desired and enjoy your microwaveable stuffed bell peppers!
Variations:
Feel free to get creative with your stuffed bell peppers! You can experiment with different types of grains like couscous or barley instead of rice. Swap out the protein for lentils or beans for a vegetarian option. Adding in chopped onions, garlic, or other vegetables not only boosts flavor but also nutrition. For an Italian twist, use marinara sauce and Italian seasoning instead of taco seasoning. Additionally, switch up the cheese for your favorite melting variety or eliminate it altogether for a dairy-free dish.
Kitchen Utensils:
| Kitchen Utensil | Purpose |
|---|---|
| Microwave-safe dish | To hold the stuffed peppers while cooking |
| Mixing bowl | To combine all filling ingredients |
| Spoon | For scooping and stuffing the peppers |
| Knife | To cut the tops off the bell peppers |
| Plastic wrap or microwave lid | To cover the dish while microwaving |
Enjoy your delicious and customizable microwaveable stuffed bell peppers!
Simple Tuna Pasta Dish

Introduction:
Tuna pasta is a savory dish that combines pasta with canned tuna, offering a deliciously quick and easy meal option, particularly popular among solo diners. This dish has roots tracing back to the mid-20th century when canned foods gained popularity due to their convenience and long shelf life. Tuna pasta can be modified with various ingredients and flavors, making it versatile while remaining an affordable choice for a hearty meal.
Ingredients:
- 1 cup of pasta (any shape; spaghetti or penne works well)
- 1 can of tuna (in water or olive oil)
- 1 tablespoon of olive oil or butter
- 1 clove of garlic (minced)
- 1/2 cup of cherry tomatoes (halved)
- 1/4 cup of frozen peas (optional)
- 1/4 teaspoon of salt
- 1/4 teaspoon of black pepper
- 1/2 teaspoon of dried oregano or Italian seasoning
- 1 tablespoon of lemon juice (optional)
- Fresh parsley for garnish (optional)
- Grated Parmesan cheese for serving (optional)
Cooking Instructions:
- Prepare the Pasta:
- In a microwave-safe bowl, add 1 cup of pasta and cover it with about 2 cups of water. Stir in a pinch of salt.
- Microwave on high for 8-10 minutes, or until al dente, checking halfway through and stirring. If needed, add more water during cooking.
- Drain and Set Aside:
- Once the pasta is cooked, carefully drain any excess water using a colander. Set aside.
- Cook Garlic and Vegetables:
- In another microwave-safe bowl, combine 1 tablespoon of olive oil or butter with minced garlic and halved cherry tomatoes.
- Microwave for 1-2 minutes until the garlic is fragrant and the tomatoes have softened slightly.
- Combine Ingredients:
- Add the drained tuna, cooked pasta, frozen peas (if using), salt, pepper, and oregano or Italian seasoning to the bowl with the garlic and tomatoes.
- Stir until everything is well combined.
- Final Cooking:
- Microwave the entire mixture for an additional 1-2 minutes to heat through.
- If using, stir in the lemon juice at this stage.
- Serve:
- Garnish with fresh parsley and grated Parmesan cheese if desired. Serve immediately.
Variations:
Feel free to customize this simple tuna pasta dish to your liking. For a creamier option, consider adding a splash of heavy cream or a dollop of Greek yogurt after cooking. If you prefer a vegetarian twist, swap the tuna for chickpeas or a medley of sautéed vegetables. Add spices such as red pepper flakes for a kick or experiment with different herbs like basil or thyme for added flavor. For a heartier option, include more vegetables like spinach, bell peppers, or even artichokes.
Kitchen Utensils:
| Kitchen Utensil | Purpose |
|---|---|
| Microwave-safe bowl | For cooking pasta and mixing ingredients |
| Colander | To drain excess water from the pasta |
| Spoon or spatula | For stirring and combining the ingredients |
| Measuring cup | For measuring pasta and other ingredients |
| Knife and cutting board | For chopping garlic and halving tomatoes |
This simple tuna pasta dish creates a satisfying meal perfect for solo dining, combining ease and flavor in every bite! Enjoy your culinary adventure!
Solo Baked Potato With Toppings
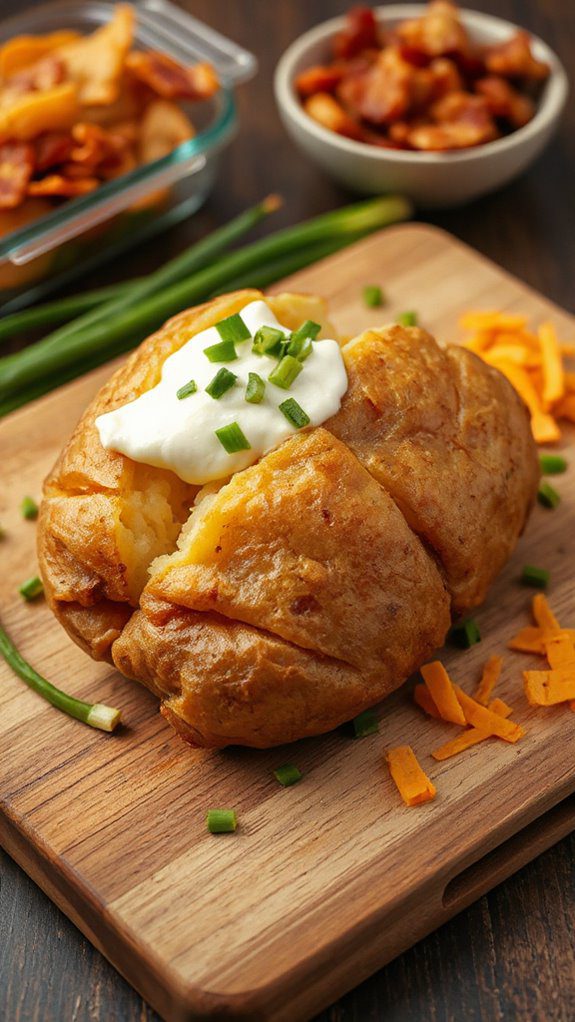
A baked potato is a simple yet satisfying meal that has been enjoyed by many for generations. Historically, the potato originated in the Andean region of South America and was cultivated by the Inca civilization. The concept of baking potatoes first gained popularity in the 19th century, particularly in Britain, and since then, baked potatoes have become a staple comfort food worldwide. This dish is perfect for solo dining—easy to prepare and customize according to personal preferences.
Ingredients
- 1 medium-sized russet potato
- Olive oil
- Salt
- Pepper
- Toppings of your choice (e.g., sour cream, shredded cheese, chopped chives, bacon bits, broccoli, chili, or any other favorite toppings)
Cooking Instructions
- Prepare the Potato: Start by washing the russet potato thoroughly under running water to remove any dirt or grime. Scrub it with a brush if necessary. Pat it dry with a clean kitchen towel.
- Poke Holes: Using a fork, poke several holes (about 5-6) into the potato. This allows steam to escape during cooking and prevents the potato from bursting.
- Season the Potato: Brush the potato with a thin layer of olive oil. Then, sprinkle salt and pepper generously all over it, ensuring even coverage.
- Microwave Cooking: Place the potato on a microwave-safe plate and microwave on high for about 5 minutes. After 5 minutes, carefully flip the potato over and microwave for an additional 4-5 minutes. The potato should be soft if you poke it with a fork. If it's still firm, continue microwaving in 1-minute increments until fully cooked.
- Rest the Potato: Once cooked, let the potato rest for 2-3 minutes after removing it from the microwave. This helps to complete the cooking process.
- Slice and Top: Carefully slice the potato open lengthwise, fluff the inside with a fork, and add your desired toppings.
Variations
The beauty of a baked potato is in its versatility. While the classic toppings like sour cream, cheese, and chives are delicious, you can experiment with different flavors and preparations. For a heartier meal, consider adding chili or broccoli. If you're feeling adventurous, try Mediterranean toppings like feta cheese, olives, and tomatoes, or go for a Mexican twist with guacamole, salsa, and jalapeños. You can also roast the potato in the oven for a crisper skin instead of microwaving it or try wrapping it in foil for an even more rustic touch.
Kitchen Utensils
| Utensil | Purpose |
|---|---|
| Fork | To poke holes in the potato |
| Microwave-safe plate | To cook the potato in the microwave |
| Brush | For applying olive oil |
| Knife | For slicing the potato |
| Small bowl | For mixing toppings (if needed) |
Enjoy your delicious and customizable solo baked potato!
One-Bowl Microwave Teriyaki Chicken

Teriyaki chicken is a popular Japanese dish that combines the flavors of soy sauce, sake, and mirin, creating a delicious marinade or glaze for grilled or broiled chicken. Originating from Japan, the term "teriyaki" refers to the technique of cooking food with a shiny glaze. Today, teriyaki chicken is enjoyed worldwide, adapted in various ways to suit different tastes and dietary preferences. This one-bowl microwave recipe allows for a quick and convenient way to enjoy teriyaki chicken, perfect for solo dining.
Ingredients
- 1 boneless, skinless chicken breast (about 6 oz)
- 2 tablespoons teriyaki sauce
- 1 tablespoon honey or brown sugar
- 1 tablespoon olive oil
- 1/2 cup steamed broccoli florets
- 1/2 cup cooked rice (white, brown, or jasmine)
- 1 green onion, thinly sliced
- Sesame seeds (optional, for garnish)
- Salt and pepper to taste
Cooking Instructions
- Preparation of the Chicken:
- Cut the chicken breast into bite-sized pieces. Season with salt and pepper.
- Combine Ingredients:
- In a microwave-safe bowl, mix together the teriyaki sauce, honey (or brown sugar), and olive oil. Stir in the chicken pieces until well coated.
- Microwave Cooking:
- Cover the bowl with a microwave-safe lid or wrap it with microwave-safe plastic wrap. Microwave on high for 3 minutes.
- Carefully remove the bowl and stir the chicken. Return it to the microwave and cook for an additional 2-3 minutes or until the chicken is fully cooked (internal temperature should reach 165°F).
- Add Vegetables and Rice:
- Once the chicken is cooked, add the steamed broccoli florets and cooked rice to the bowl. Stir to combine all the ingredients.
- Final Touch:
- Microwave the bowl for an additional 1-2 minutes to warm the rice and broccoli.
- Remove from the microwave and garnish with sliced green onions and sesame seeds if desired. Enjoy your meal!
Variations
Feel free to customize this teriyaki chicken recipe to suit your taste and dietary preferences. For a lighter option, consider using skinless chicken thighs instead of breast, or tofu for a vegetarian alternative. You can also experiment with different vegetables such as bell peppers, snap peas, or carrots. To add a bit of heat, include some red pepper flakes or sriracha in the sauce. For a healthier grain option, try quinoa or cauliflower rice instead of traditional rice.
Kitchen Utensils
| Utensil | Purpose |
|---|---|
| Microwave-safe bowl | To combine and cook ingredients |
| Microwave-safe lid/plastic wrap | To cover the bowl while microwaving |
| Knife | For cutting chicken and vegetables |
| Cutting board | To provide a safe surface for cutting |
| Measuring spoons | To measure sauces and seasonings |
With this quick and delicious One-Bowl Microwave Teriyaki Chicken recipe, you can enjoy an authentic taste of Japan in no time!
Spinach and Feta Microwave Omelette

Spinach and Feta Microwave Omelette is a quick, nutritious, and satisfying meal, perfect for solo dining. Originating as a popular choice for breakfast in Mediterranean countries, this dish has evolved to be enjoyed at any time of the day. The combination of tender spinach and creamy feta cheese not only delivers a burst of flavor but also packs a nutritional punch. Ideal for those busy weekdays or lazy weekends when you want a home-cooked meal in minutes, this omelette is bound to become a staple in your cooking repertoire.
Ingredients:
- 2 large eggs
- 1 tablespoon milk (or water)
- 1 cup fresh spinach, chopped
- 1/4 cup feta cheese, crumbled
- Salt and pepper, to taste
- Olive oil or cooking spray (for greasing the bowl)
- Optional: sliced fresh tomatoes or olives for garnish
Cooking Instructions:
- Prepare the Bowl: Lightly grease a microwave-safe bowl with olive oil or cooking spray to prevent sticking.
- Mix the Ingredients: In the greased bowl, crack the two eggs and add the tablespoon of milk. Whisk together until well combined.
- Add Veggies and Cheese: Stir in the chopped spinach and crumbled feta cheese. Season with salt and pepper according to your taste preference.
- Microwave the Omelette: Place the bowl in the microwave and cook on high for 1 minute and 30 seconds. Check the omelette; if it's not fully set, continue cooking in 15-second intervals until the center is firm.
- Fluff and Serve: Once cooked, use a fork to gently fluff the omelette. Let it cool for a minute before serving. Optionally, add sliced tomatoes or olives on top for extra flavor.
Variations:
Feel free to mix things up with this spinach and feta microwave omelette! For a heartier breakfast, include diced bell peppers, mushrooms, or onion alongside the spinach. If you're avoiding dairy, you can swap out the feta cheese for a dairy-free alternative like nutritional yeast for a cheesy flavor. For a protein boost, toss in cooked chicken, turkey, or even chickpeas. You could also experiment with different fresh herbs, like dill or parsley, to enhance the flavor. Finally, try using different types of cheese, such as goat cheese or cheddar, for a unique spin on this classic dish.
Kitchen Utensils:
| Utensil | Purpose |
|---|---|
| Microwave-safe bowl | To combine all ingredients and cook the omelette |
| Whisk | To beat the eggs and mix ingredients thoroughly |
| Fork | For fluffing the omelette before serving |
| Measuring spoons | For measuring milk and other ingredients |
| Cutting board and knife | For chopping spinach and other vegetables |
This recipe is perfect for anyone looking to enjoy a homemade meal in no time, while also being flexible enough to adapt to your personal taste!
Instant Couscous Salad
Introduction
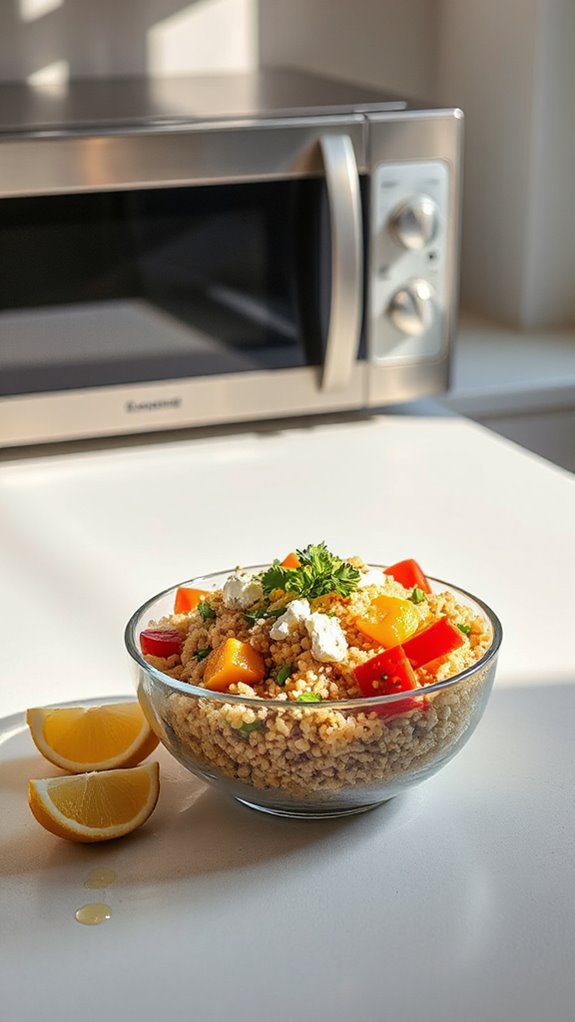
Instant couscous salad is a quick and nutritious dish that highlights the versatility of couscous, a type of pasta made from durum wheat semolina. Originating from North Africa, couscous has been a staple in the region since ancient times, often enjoyed for its minimal cooking requirements and adaptability to various flavors. This salad is perfect for solo dining, allowing for a delightful blend of textures and tastes that can easily be customized based on your preference.
Ingredients
- 1 cup instant couscous
- 1 cup boiling water or vegetable broth
- 1 tablespoon olive oil
- 1 tablespoon lemon juice
- 1 tablespoon balsamic vinegar
- 1/2 cup cherry tomatoes, halved
- 1/2 cup cucumber, diced
- 1/4 cup red onion, finely chopped
- 1/4 cup bell pepper, diced (any color)
- 1/4 cup feta cheese, crumbled (optional)
- 1/4 cup chickpeas, rinsed and drained
- Fresh parsley or mint, chopped (for garnish)
- Salt and pepper, to taste
Cooking Instructions
- In a medium bowl, combine the boiling water (or vegetable broth) with the instant couscous. Cover the bowl and let it sit for about 5 minutes or until the couscous has absorbed all the liquid.
- Fluff the couscous with a fork to separate the grains and let it cool slightly.
- In a small bowl, whisk together the olive oil, lemon juice, balsamic vinegar, salt, and pepper.
- Once the couscous has cooled, add in the cherry tomatoes, cucumber, red onion, bell pepper, feta cheese (if using), and chickpeas.
- Pour the dressing over the couscous mixture and toss everything together until well combined.
- Adjust the seasoning with more salt, pepper, or lemon juice to taste.
- Garnish the salad with fresh parsley or mint before serving.
Recommendations for Variations
Feel free to experiment with the ingredients and preparation of the instant couscous salad! You could substitute the vegetables based on what you have on hand, such as adding grated carrots or avocados. For a protein boost, consider incorporating cooked chicken or shrimp. You can also switch the cheese for goat or leave it out entirely for a dairy-free option. For a spicier kick, you could add some diced jalapeños or a sprinkle of red pepper flakes. Additionally, enhance the salad by incorporating nuts or seeds, like pine nuts or sunflower seeds, for added crunch and flavor.
Kitchen Utensils
| Utensil | Purpose |
|---|---|
| Medium mixing bowl | To combine the couscous and dressing |
| Fork | To fluff the couscous and mix ingredients |
| Small bowl | For preparing the dressing |
| Knife | To chop vegetables |
| Measuring cups | To measure out couscous and other ingredients |
With minimal preparation and the option to modify according to your taste preferences or pantry supplies, this instant couscous salad is a perfect choice for a satisfying solo meal. Enjoy!
Single-Serve Chicken Alfredo
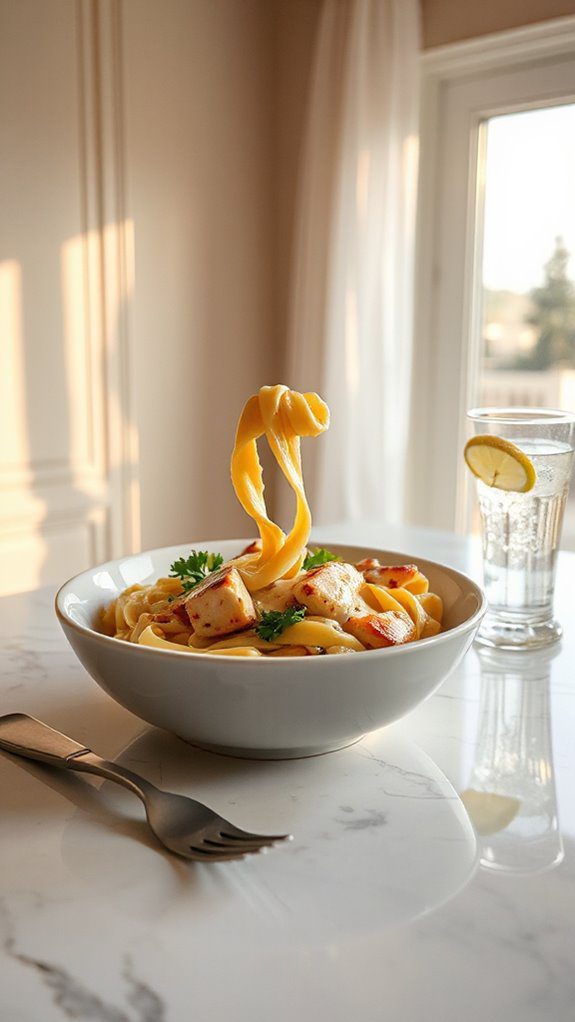
Chicken Alfredo is a classic Italian-American dish that features a luxurious cream sauce, tender chicken, and pasta, typically fettuccine. Its origins can be traced back to early 20th century Rome, where it was initially created by Alfredo di Lelio. Over time, it made its way to the U.S., evolving into the creamy, decadent version many know and love today. Perfect for solo dining, this single-serve Chicken Alfredo is quick and easy to prepare in the microwave while still delivering comforting flavors.
Ingredients:
- 1 cup fettuccine pasta
- 1 cup cooked, rotisserie chicken, shredded
- 1/2 cup heavy cream
- 1/4 cup grated Parmesan cheese
- 1 tablespoon butter
- 1 clove garlic, minced
- Salt and pepper to taste
- Fresh parsley, chopped (for garnish)
- Optional: crushed red pepper flakes (for spice)
Cooking Instructions:
- Cook the Pasta: In a microwave-safe bowl, add the fettuccine pasta and cover with water. Microwave on high for 5-7 minutes or until al dente. Check occasionally and stir.
- Drain the Pasta: Once cooked, carefully drain the pasta and set it aside.
- Make the Alfredo Sauce: In another microwave-safe bowl, combine the heavy cream, butter, garlic, and Parmesan cheese. Season with salt and pepper. Microwave the mixture for about 1-2 minutes until warm, then stir until the cheese is melted and the sauce is creamy.
- Combine Chicken and Pasta: Add the shredded chicken and cooked fettuccine to the Alfredo sauce mixture. Stir well to verify the pasta and chicken are uniformly coated in the sauce.
- Heat Again: Return the bowl to the microwave and heat for an additional 1-2 minutes if needed, verifying everything is hot throughout.
- Serve: Garnish with fresh parsley and a sprinkle of crushed red pepper flakes if desired, then enjoy your delicious single-serve Chicken Alfredo.
Variations:
Consider mixing up your Chicken Alfredo with different ingredients or preparation methods. Swap the fettuccine for whole wheat or gluten-free pasta for a healthier twist. Add sautéed vegetables like broccoli, spinach, or mushrooms for added nutrition and texture. For a lighter version, replace heavy cream with Greek yogurt or silken tofu blended smooth. You could even substitute chicken with shrimp or sautéed mushrooms for a vegetarian version. Experiment with varying types of cheese, such as mozzarella or Asiago, to create unique flavors!
Kitchen Utensils:
| Kitchen Utensil | Purpose |
|---|---|
| Microwave-safe bowl | For cooking the pasta and preparing the Alfredo sauce |
| Colander | For draining the cooked pasta |
| Measuring cup | To measure cream and cheese |
| Stirring spoon | To mix ingredients |
| Knife | For mincing garlic and optionally chopping parsley |
Quick Microwave Moroccan Chickpeas
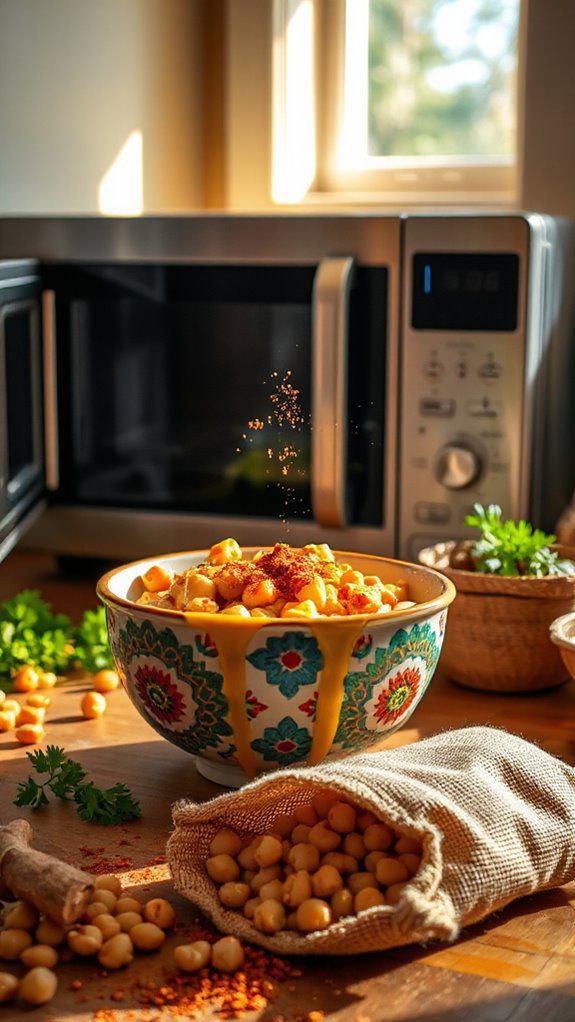
Moroccan cuisine is known for its vibrant flavors and unique spice blends. One of the hallmark ingredients in this rich cuisine is the chickpea, which is used extensively in many dishes. Quick Microwave Moroccan Chickpeas is a perfect dish that highlights the essence of Moroccan cooking while being simple enough for solo dining. This dish is not only nutritious and filling but also an excellent representation of the traditional spices and ingredients found in Moroccan culture. Enjoy this delightful meal within minutes and experience the aromatic journey that Moroccan cuisine offers.
Ingredients:
- 1 can (15 oz) chickpeas, drained and rinsed
- 1 tablespoon olive oil
- 1/2 teaspoon ground cumin
- 1/2 teaspoon ground coriander
- 1/2 teaspoon paprika
- 1/4 teaspoon cinnamon
- 1/4 teaspoon turmeric
- Salt and pepper to taste
- 1 cup diced tomatoes (fresh or canned)
- 1/4 cup chopped onion
- 2 cloves garlic, minced
- 1/4 cup raisins or chopped dried apricots (optional)
- Fresh cilantro or parsley for garnish (optional)
- Lemon wedges for serving (optional)
Cooking Instructions:
- In a microwave-safe bowl, combine the drained chickpeas, diced tomatoes, chopped onion, and minced garlic.
- Drizzle the olive oil over the mixture.
- Sprinkle in the ground cumin, ground coriander, paprika, cinnamon, turmeric, salt, and pepper.
- Stir the mixture thoroughly to guarantee that all ingredients are evenly coated with the spices.
- Cover the bowl with a microwave-safe lid or plastic wrap (leave a slight gap for steam to escape).
- Microwave on high for 5 to 7 minutes or until the onions are tender and the mixture is hot throughout. Stir halfway through to guarantee even cooking.
- If using, add the raisins or chopped dried apricots and mix well. Microwave for an additional 1 minute.
- Remove from the microwave and let it sit for a minute before serving.
- Garnish with fresh cilantro or parsley and serve with a wedge of lemon on the side.
Variations:
You can get creative with this recipe! For a heartier version, feel free to add cooked rice or quinoa before microwaving. For a spicy kick, include diced jalapeños or a dash of cayenne pepper. Alternatives to chickpeas include lentils or a mixture of beans. You can also customize the dish by substituting the raisins or dried apricots with chopped nuts for a crunchier texture, or incorporating various veggies like bell peppers, zucchini, or spinach. Experiment with different herbs such as mint or dill for a fresh twist.
Kitchen Utensils:
| Kitchen Utensil | Purpose |
|---|---|
| Microwave-safe bowl | To combine and cook the chickpea mixture |
| Microwave-safe lid/plastic wrap | To cover the bowl while microwaving |
| Spoon or spatula | For stirring the ingredients |
| Measuring spoons | To accurately measure spices |
| Knife and cutting board | To chop onion and garlic |
Enjoy your Quick Microwave Moroccan Chickpeas, a dish that brings a taste of Morocco right to your kitchen in just a few minutes!
Microwave Butternut Squash Risotto
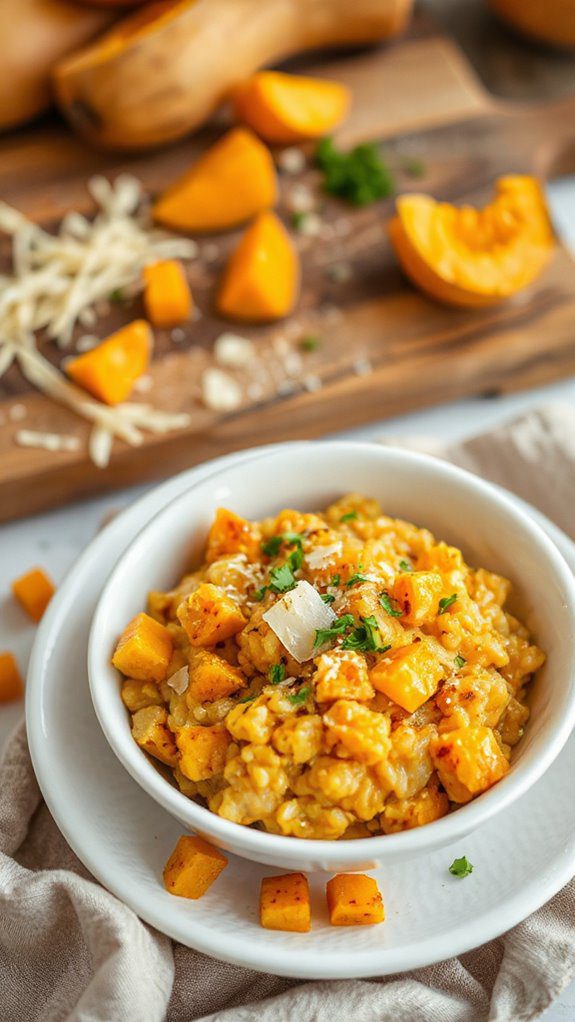
Butternut squash risotto is a creamy, comforting dish that combines the natural sweetness of butternut squash with the richness of arborio rice. Risotto originated in Northern Italy, specifically in the Lombardy region, where rice is grown in abundance. Traditionally, it is stirred continuously over low heat to achieve its creamy texture, but this microwave adaptation provides a convenient option for solo diners.
Ingredients:
- 1 cup arborio rice
- 2 cups vegetable or chicken broth
- 1 cup diced butternut squash (fresh or frozen)
- 1 small onion, finely chopped
- 2 cloves garlic, minced
- 2 tablespoons olive oil
- 1/4 cup grated Parmesan cheese
- Salt and pepper to taste
- Fresh thyme or sage leaves for garnish (optional)
- Water (as needed)
Cooking Instructions:
- In a large microwave-safe bowl, combine the diced butternut squash, chopped onion, minced garlic, and olive oil. Stir to coat the vegetables with oil.
- Cover the bowl with a microwave-safe lid or plate and microwave on high for 5 minutes, or until the butternut squash is tender.
- Add the arborio rice to the bowl and stir well to combine with the vegetables.
- Pour in the vegetable or chicken broth, adding extra water if needed to guarantee the rice is fully submerged. Season with salt and pepper.
- Cover the bowl again and microwave on high for 10 minutes.
- After 10 minutes, stir the risotto and check for doneness. If the rice is still firm, microwave in increments of 2 minutes, stirring in between, until the rice is creamy and cooked through.
- Once the risotto is ready, stir in the grated Parmesan cheese until melted and well incorporated.
- Serve hot, garnished with fresh thyme or sage leaves if desired.
Variations:
You can customize your butternut squash risotto by adding other seasonal vegetables, such as spinach or kale, for extra nutrition. Try incorporating different cheeses, such as goat cheese or mozzarella, for a unique flavor. For a protein boost, consider adding cooked chicken or chickpeas. Alternatively, for a bit of spice, include a pinch of chili flakes or a splash of balsamic vinegar for added depth. Additionally, experiment with different herbs like rosemary or parsley for diverse flavor profiles.
Kitchen Utensils:
| Kitchen Utensil | Purpose |
|---|---|
| Microwave-safe bowl | To cook and mix all ingredients |
| Microwave-safe lid/plate | To cover the bowl during microwaving |
| Measuring cups/spoons | For accurate measurement of ingredients |
| Stirring spoon | For mixing the risotto |
| Grater | To grate Parmesan cheese |
Enjoy your homemade microwave butternut squash risotto, a perfect solo dining experience that's both nutritious and delightful!
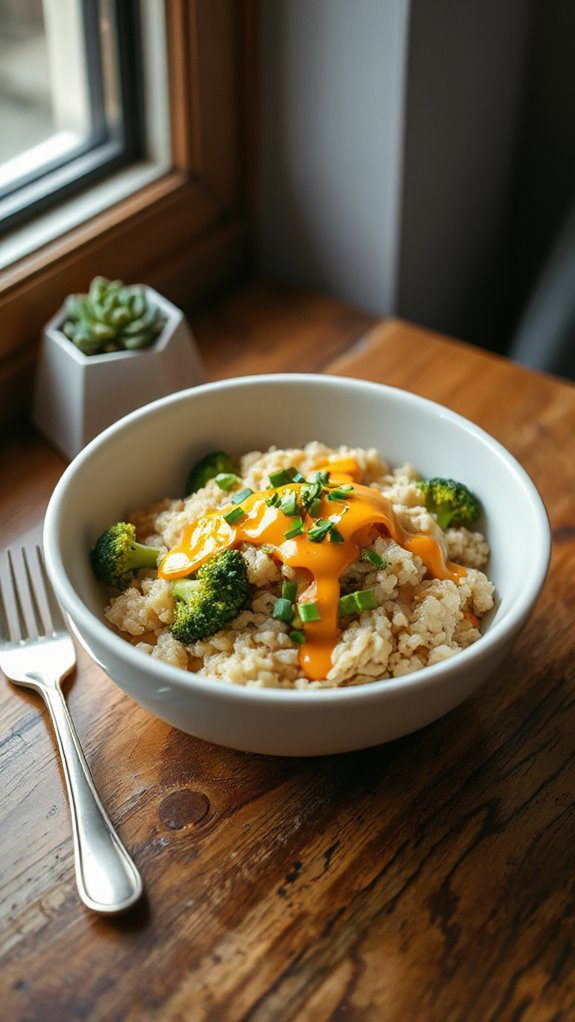
Easy Broccoli and Cheddar Rice
Introduction:
Easy Broccoli and Cheddar Rice is a delightful comfort food that brings together the nutritional benefits of broccoli with the cheesy richness of cheddar. This dish is both simple to prepare and satisfying, making it a popular choice for solo dining. It is inspired by classic cheesy rice casseroles, often served as a side dish but perfect for a quick, nutritious meal on its own. Over the years, variations have emerged globally, reflecting local ingredients and tastes, but the foundational elements of broccoli, cheese, and rice remain beloved by many.
Ingredients:
- 1 cup uncooked white rice (or brown rice for a healthier option)
- 2 cups vegetable or chicken broth
- 1 cup fresh or frozen broccoli florets
- 1 cup shredded cheddar cheese (sharp or mild, based on preference)
- 1 tablespoon olive oil (optional)
- 1/2 teaspoon garlic powder (optional)
- Salt and pepper to taste
- 1/4 teaspoon onion powder (optional)
- 1 tablespoon butter (optional)
Cooking Instructions:
- Prepare the Rice: In a microwave-safe bowl, combine the uncooked rice and vegetable or chicken broth. Make sure the broth covers the rice completely.
- Add the Broccoli: If using fresh broccoli, chop it into small florets. Add the broccoli florets to the bowl with the rice and broth.
- Microwave the Mixture: Cover the bowl with a microwave-safe lid or plate. Microwave on high for 10-12 minutes or until the rice is cooked and the liquid is absorbed. If using brown rice, you may need to adjust the cooking time to about 15-20 minutes.
- Include the Cheddar: Once the rice and broccoli are cooked, carefully remove the bowl from the microwave (it will be hot). Stir in the shredded cheddar cheese, olive oil, garlic powder, onion powder, salt, and pepper. Mix until the cheese is melted and evenly distributed.
- Final Touch: If desired, add butter for extra flavor and creaminess. Stir well to combine all ingredients.
- Serve: Let it sit for a minute to cool slightly, then serve hot.
Variations:
This dish is highly customizable! You can substitute the cheddar cheese with other varieties such as mozzarella, gouda, or pepper jack for a spicy kick. Try adding ingredients like diced cooked chicken, sautéed mushrooms, or even a handful of spinach for added nutrition. For a vegan option, you can use plant-based cheese and vegetable broth. You could also switch the broccoli for other vegetables such as cauliflower or mixed veggies.
Kitchen Utensils:
| Kitchen Utensil | Purpose |
|---|---|
| Microwave-safe bowl | To cook the rice and broccoli |
| Microwave-safe lid or plate | To cover the bowl while microwaving |
| Measuring cups | To measure rice and broth |
| Spoon or spatula | For stirring ingredients together |
| Knife and cutting board | If chopping fresh broccoli or other veggies |
Enjoy your Easy Broccoli and Cheddar Rice as a wholesome solo meal that's quick, easy, and versatile!
Maple-Glazed Sweet Potatoes With Veggies
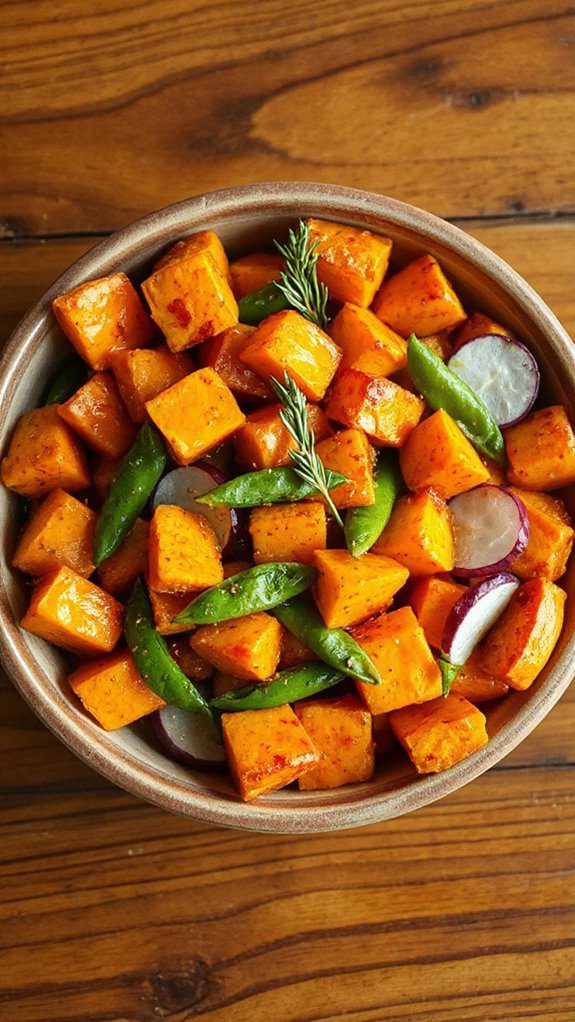
Maple-glazed sweet potatoes with veggies is a delightful and nutritious dish that highlights the natural sweetness of sweet potatoes, enhanced by the rich flavors of maple syrup. Traditionally enjoyed in North American cuisine, sweet potatoes are celebrated for their versatility and health benefits. This quick microwave method makes it perfect for solo dining, allowing you to enjoy a delicious meal without the need for extensive cooking.
Ingredients
- 1 medium sweet potato
- 1 cup mixed vegetables (such as broccoli, bell peppers, and carrots)
- 2 tablespoons maple syrup
- 1 tablespoon olive oil
- ½ teaspoon salt
- ¼ teaspoon black pepper
- ½ teaspoon cinnamon (optional)
- Fresh parsley for garnish (optional)
Cooking Instructions
- Prepare the Sweet Potato: Wash the sweet potato thoroughly and pierce it several times with a fork. This will help steam the potato evenly in the microwave.
- Cook the Sweet Potato: Place the sweet potato on a microwave-safe plate and microwave on high for 5-7 minutes, or until tender. Cooking times may vary depending on the size of the sweet potato and the wattage of your microwave.
- Prepare the Mixed Vegetables: While the sweet potato is cooking, chop the mixed vegetables into bite-sized pieces.
- Microwave the Vegetables: In a microwave-safe bowl, combine the mixed vegetables with olive oil, salt, pepper, and cinnamon (if using). Cover the bowl with plastic wrap or a microwave-safe lid, leaving a small vent. Microwave on high for about 3-4 minutes, or until the vegetables are tender yet crisp.
- Combine Ingredients: Once the sweet potato is cooked, remove it from the microwave and let it cool for a minute. Carefully slice the sweet potato in half. Drizzle maple syrup over the flesh of the potato and then add the cooked vegetables on top.
- Serve: Garnish with fresh parsley if desired and enjoy your maple-glazed sweet potatoes with veggies while warm.
Variations
Feel free to make this dish your own! You can try different vegetables according to your preference or availability, such as zucchini, asparagus, or green beans. Experiment with different sweeteners like honey or agave syrup for a twist on the flavor. For added protein, consider topping the dish with cooked chickpeas or black beans. Additionally, you can spice it up with a sprinkle of cayenne pepper or smoked paprika for a flavorful kick.
Kitchen Utensils
| Utensil | Purpose |
|---|---|
| Microwave-safe plate | To cook the sweet potato |
| Microwave-safe bowl | To steam the mixed vegetables |
| Fork | To pierce the sweet potato |
| Plastic wrap or lid | To cover vegetables during cooking |
| Knife | To chop vegetables and slice the sweet potato |
Enjoy your delicious and easy microwave dinner with maple-glazed sweet potatoes and veggies!
Mug Cake for Dessert
Mug cake is a delightful and convenient dessert that has become a favorite for solo diners and busy individuals. Originating in the United States, this quick-to-make treat rose to popularity in the early 2000s with the advent of microwave cooking and single-serving desserts. The beauty of a mug cake lies not only in its ease of preparation but also in its versatility, allowing you to customize flavors to create your perfect sweet indulgence.
Ingredients
- 4 tablespoons all-purpose flour
- 4 tablespoons sugar
- 2 tablespoons cocoa powder (for chocolate mug cake) or flavor of choice (vanilla, lemon, etc.)
- 1/8 teaspoon baking powder
- 1/8 teaspoon salt
- 3 tablespoons milk (or any preferred milk alternative)
- 2 tablespoons vegetable oil (or melted butter)
- 1/4 teaspoon vanilla extract (optional)
- Optional toppings: chocolate chips, nuts, or whipped cream
Cooking Instructions
- In a microwave-safe mug (approximately 12 oz), combine the all-purpose flour, sugar, cocoa powder (if making a chocolate mug cake), baking powder, and salt. Mix until well-combined.
- Add the milk, vegetable oil, and vanilla extract to the dry ingredients in the mug. Stir together until the batter is smooth and no lumps remain.
- If desired, fold in your choice of chocolate chips or nuts for added flavor and texture.
- Microwave the mug on high for about 1 minute and 30 seconds. Cooking times may vary depending on your microwave's wattage, so start checking at 1 minute for doneness. The cake should rise and look set in the center.
- Allow the mug cake to cool for a minute before adding any toppings, such as whipped cream or a drizzle of chocolate sauce.
- Enjoy your delicious mug cake straight from the mug or transfer it to a plate if you prefer!
Variations
The mug cake can be easily modified to suit different tastes and dietary restrictions. For a healthier option, consider substituting half of the all-purpose flour with almond flour or oats, and using a sugar substitute. Try different flavors by replacing cocoa powder with 2 tablespoons of matcha powder for a green tea flavor. Add in fruit, such as mashed bananas or applesauce, to introduce natural sweetness and moisture. You can also experiment with spices like cinnamon or nutmeg for an autumnal twist. The possibilities are endless!
Kitchen Utensils
| Kitchen Utensil | Purpose |
|---|---|
| Microwave-safe mug | To mix and cook the mug cake |
| Measuring spoons | For accurate measurement of ingredients |
| Small mixing spoon | To stir ingredients thoroughly |
| Microwave oven | To cook the mug cake |
| Plate (optional) | For serving purposes |
With this simple recipe and a few variations in mind, you can treat yourself to a quick, delicious dessert any day of the week!


