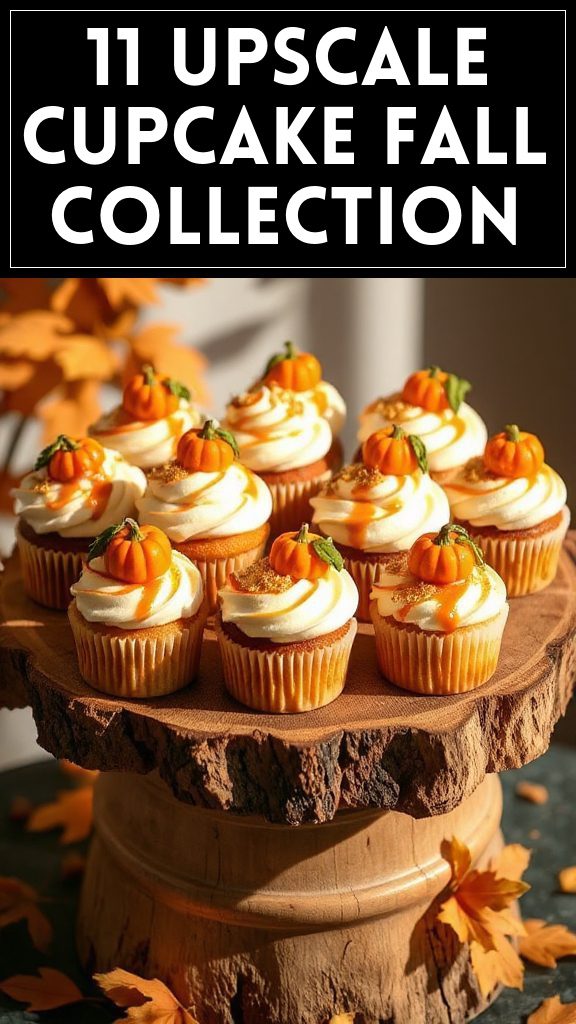
Pumpkin Spice Cake Jar

Pumpkin Spice Cake Jars are a delightful, portable dessert that combines the comforting flavors of fall in a convenient jar. These layered treats feature moist pumpkin spice cake, creamy frosting, and optional toppings, all beautifully presented for a fun and nostalgic treat that’s perfect for fall gatherings or cozy nights in.
| Ingredients | Quantity |
|---|---|
| Pumpkin puree | 1 cup |
| All-purpose flour | 2 cups |
| Sugar | 1 cup |
| Brown sugar | 1/2 cup |
| Baking powder | 2 teaspoons |
| Baking soda | 1 teaspoon |
| Cinnamon | 1 teaspoon |
| Nutmeg | 1/2 teaspoon |
| Ginger | 1/2 teaspoon |
| Salt | 1/2 teaspoon |
| Eggs | 2 large |
| Vanilla extract | 1 teaspoon |
| Vegetable oil | 1/2 cup |
| Cream cheese frosting | 1 cup |
| Whipped cream (optional) | As needed |
| Crushed graham crackers (optional) | As needed |
Instructions:
- Preheat the oven to 350°F (175°C) and grease a 9×13 inch baking dish.
- In a large bowl, whisk together the pumpkin puree, sugar, brown sugar, eggs, vanilla extract, and vegetable oil until well combined.
- In another bowl, sift together the flour, baking powder, baking soda, spices, and salt. Gradually add the dry ingredients to the wet ingredients, mixing until just combined.
- Pour the batter into the prepared baking dish and bake for 30-35 minutes, or until a toothpick comes out clean. Allow to cool completely.
- Once cooled, cut the cake into small squares. In a jar, layer pieces of pumpkin spice cake, a generous dollop of cream cheese frosting, and optional toppings like whipped cream and crushed graham crackers. Repeat the layers until the jar is filled.
- Seal the jars and enjoy your Pumpkin Spice Cake Jars!

- The Original Pro Chopper - Our superstar veggie slicer has been creating waves on TikTok! Simple to use,...
- Easy Meal Prep with Rust-Resistant Blades - Our vegetable chopper is perfect for anyone who wants to eat...
- 5-Star Design - The soft-grip TPU handle ensures controlled chopping, while the non-skid rubber base...
Apple Cinnamon Layered Delight

Apple Cinnamon Layered Delight is a scrumptious dessert that captures the essence of autumn in every spoonful. This layered treat features moist apple cinnamon cake, creamy vanilla frosting, and can be enhanced with optional toppings like caramel sauce or nuts. Perfect for gatherings or cozy evenings, these cake jars are a delightful way to enjoy the comforting flavors of fall.
| Ingredients | Quantity |
|---|---|
| Apple sauce | 1 cup |
| All-purpose flour | 2 cups |
| Sugar | 1 cup |
| Brown sugar | 1/2 cup |
| Baking powder | 2 teaspoons |
| Baking soda | 1 teaspoon |
| Cinnamon | 2 teaspoons |
| Nutmeg | 1/4 teaspoon |
| Salt | 1/2 teaspoon |
| Eggs | 2 large |
| Vanilla extract | 1 teaspoon |
| Vegetable oil | 1/2 cup |
| Cream cheese frosting | 1 cup |
| Caramel sauce (optional) | As needed |
| Chopped nuts (optional) | As needed |
Instructions:
- Preheat the oven to 350°F (175°C) and grease a 9×13 inch baking dish.
- In a large bowl, mix apple sauce, sugar, brown sugar, eggs, vanilla extract, and vegetable oil until smooth.
- In another bowl, whisk together flour, baking powder, baking soda, cinnamon, nutmeg, and salt. Gradually add to the wet mixture, stirring until just combined.
- Pour the batter into the prepared baking dish and bake for 25-30 minutes, or until a toothpick comes out clean. Allow to cool completely.
- Once cooled, cut the cake into small squares. In a jar, layer pieces of apple cinnamon cake, a dollop of cream cheese frosting, and optional toppings like caramel sauce and chopped nuts. Repeat the layers until the jar is filled.
- Seal the jars and enjoy your Apple Cinnamon Layered Delight!

- Makes Everything Simple : Just forget your bagged cheese! Only turn the handle for several times and get...
- Premium Material : All parts of the rotary cheese grater are made of food grade ABS material, no BPA. The...
- Three Option Grater : The parmesan cheese grater finishes food preparation with slicing, shredding and...
Salted Caramel Pecan Cake Jar

Salted Caramel Pecan Cake Jar is a luxurious dessert that harmoniously blends the rich flavors of moist cake, sweet and salty caramel, and crunchy pecans. These layers of deliciousness come together beautifully in a jar, making it not only a treat for the taste buds but also a visual delight. Perfect for festive occasions or as a special indulgence, this dessert captures the essence of indulgence in every bite.
| Ingredients | Quantity |
|---|---|
| Pecan halves | 1 cup |
| All-purpose flour | 1 ½ cups |
| Sugar | 1 cup |
| Brown sugar | ½ cup |
| Baking powder | 1 teaspoon |
| Baking soda | ½ teaspoon |
| Salt | ½ teaspoon |
| Cinnamon | 1 teaspoon |
| Eggs | 2 large |
| Vanilla extract | 1 teaspoon |
| Vegetable oil | ½ cup |
| Milk | ½ cup |
| Salted caramel sauce | 1 cup |
| Butter | ½ cup (for frosting) |
| Powdered sugar | 1 cup (for frosting) |
Instructions:
- Preheat the oven to 350°F (175°C) and lightly grease a cake pan.
- In a mixing bowl, whisk together the flour, sugar, brown sugar, baking powder, baking soda, salt, and cinnamon.
- In another bowl, combine eggs, vanilla extract, vegetable oil, and milk, and mix until well blended.
- Gradually add the wet mixture to the dry ingredients, stirring until just combined. Fold in the pecans.
- Pour the batter into the prepared pan and bake for 25-30 minutes or until a toothpick comes out clean. Let it cool completely.
- For the frosting, beat together softened butter and powdered sugar until creamy and smooth.
- Once the cake is cooled, cut it into squares. In a jar, layer pieces of cake, salted caramel sauce, and a dollop of frosting. Repeat layers to fill the jar.
- Top with additional caramel and chopped pecans if desired, seal the jars, and enjoy your Salted Caramel Pecan Cake Jar!

- 💰 REDUCE WASTE AND SAVE MONEY: Chef Preserve keeps FOOD FRESH 5 TIMES LONGER than non-vacuum storage...
- ✅ POWERFUL, QUICK & EASY TO USE: Simply press the button to start. The device vacuum seals a bag in 5...
- ♻️ REUSABLE & RESEALABLE BAGS: Chef Preserve comes with dishwasher, freezer, refrigerator, and...
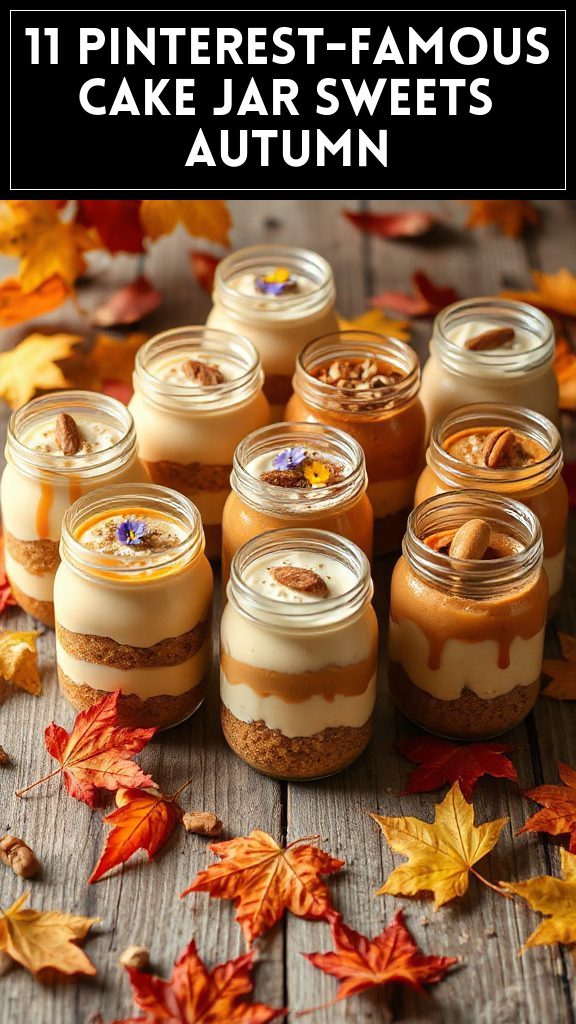
Maple Walnut Dessert Jars

Maple Walnut Dessert Jars are an exquisite, layered sweet treat that combines the warm flavors of maple syrup and toasted walnuts, making it a perfect fall dessert. These jars feature moist cake-like layers, rich maple cream, and crunchy walnut pieces, all beautifully presented, making them ideal for gatherings or a cozy night in. Each spoonful is an indulgent experience that will warm your heart and satisfy your sweet cravings.
| Ingredients | Quantity |
|---|---|
| Chopped walnuts | 1 cup |
| All-purpose flour | 1 ½ cups |
| Sugar | 1 cup |
| Brown sugar | ½ cup |
| Baking powder | 1 teaspoon |
| Baking soda | ½ teaspoon |
| Salt | ½ teaspoon |
| Cinnamon | 1 teaspoon |
| Eggs | 2 large |
| Vanilla extract | 1 teaspoon |
| Vegetable oil | ½ cup |
| Milk | ½ cup |
| Maple syrup | ¾ cup |
| Butter | ½ cup (for cream) |
| Powdered sugar | 1 cup (for cream) |
| Maple extract (optional) | ½ teaspoon (for cream) |
Instructions:
- Preheat the oven to 350°F (175°C) and grease a cake pan.
- In a bowl, whisk together flour, sugar, brown sugar, baking powder, baking soda, salt, and cinnamon.
- In a separate bowl, mix eggs, vanilla extract, vegetable oil, milk, and maple syrup until combined.
- Combine wet and dry ingredients, then fold in the chopped walnuts. Pour batter into the pan and bake for 25-30 minutes or until a toothpick inserted comes out clean. Allow to cool completely.
- For the cream, beat softened butter and powdered sugar with maple extract until smooth.
- Cut the cooled cake into cubes and layer pieces in jars with maple cream and chopped walnuts. Repeat the layers until jars are full.
- Top with additional maple syrup and walnuts if desired, seal the jars, and savor your Maple Walnut Dessert Jars!

- Generous Capacity: 7-quart slow cooker that comfortably serves 9+ people or fits a 7-pound roast
- Cooking Flexibility: High or low slow cooking settings, with convenient warm function for ideal serving...
- Convenient: Set it and forget it feature enables you to cook while at work or performing daily tasks
Chocolate Hazelnut Fall Bliss

Chocolate Hazelnut Fall Bliss is a decadent dessert jar that captures the rich flavors of chocolate and the nutty essence of hazelnuts, perfect for autumn festivities or a cozy evening at home. With layers of moist chocolate cake, creamy hazelnut frosting, and delicate chocolate shavings, this dessert is not only visually appealing but also an indulgent treat that will satisfy any sweet tooth. Each bite brings warmth and happiness, making it a delightful way to celebrate the fall season.
| Ingredients | Quantity |
|---|---|
| All-purpose flour | 1 ½ cups |
| Granulated sugar | 1 cup |
| Cocoa powder | ½ cup |
| Baking powder | 1 teaspoon |
| Baking soda | ½ teaspoon |
| Salt | ¼ teaspoon |
| Eggs | 2 large |
| Vegetable oil | ½ cup |
| Milk | ½ cup |
| Vanilla extract | 1 teaspoon |
| Hazelnut spread | ¾ cup |
| Heavy cream | 1 cup |
| Powdered sugar | 1 cup |
| Chopped hazelnuts (for topping) | ½ cup |
| Chocolate shavings (for garnish) | Optional |
Instructions:
- Preheat the oven to 350°F (175°C) and grease a cake pan.
- In a bowl, mix flour, sugar, cocoa powder, baking powder, baking soda, and salt.
- In another bowl, whisk together eggs, vegetable oil, milk, and vanilla extract until well combined.
- Combine wet and dry ingredients, mixing until just combined. Pour into the greased pan and bake for 25-30 minutes, or until a toothpick comes out clean. Allow to cool completely.
- For the frosting, beat heavy cream until soft peaks form, then gradually add powdered sugar and mix until smooth. Incorporate the hazelnut spread until well combined.
- Cut the cooled chocolate cake into cubes and layer in jars with hazelnut frosting. Repeat layers until jars are full.
- Top with chopped hazelnuts and chocolate shavings if desired, seal the jars, and enjoy your Chocolate Hazelnut Fall Bliss!

- 100% Leak-proof: Guaranteed no-spill seal and secure latches
- Crystal-clear Tritan Built: Stain-resistant and odor-resistant material for a clear view of contents
- Lightweight & Sturdy: Easy to carry, yet durable for everyday use
Cranberry Orange Cake Jar

Cranberry Orange Cake Jar is a delightful and vibrant dessert that perfectly embodies the flavors of the holiday season. With layers of moist cranberry-infused orange cake, creamy orange frosting, and a hint of tartness from fresh cranberries, this cake jar is a festive treat ideal for gatherings or as a sweet gift for loved ones. Each bite brings a burst of citrusy goodness that pairs wonderfully with the sweet and tangy elements, making it a revitalizing addition to any dessert table.
| Ingredients | Quantity |
|---|---|
| All-purpose flour | 1 ½ cups |
| Granulated sugar | 1 cup |
| Baking powder | 1 teaspoon |
| Baking soda | ½ teaspoon |
| Salt | ¼ teaspoon |
| Eggs | 2 large |
| Vegetable oil | ½ cup |
| Orange juice | ½ cup |
| Zest of 1 orange | 1 tablespoon |
| Fresh cranberries (chopped) | 1 cup |
| Heavy cream | 1 cup |
| Powdered sugar | 1 cup |
| Orange extract | 1 teaspoon |
| Chopped fresh cranberries (for topping) | ½ cup |
Instructions:
- Preheat the oven to 350°F (175°C) and grease a cake pan.
- In a bowl, mix flour, sugar, baking powder, baking soda, and salt.
- In another bowl, whisk together eggs, vegetable oil, orange juice, and orange zest until well combined.
- Combine wet and dry ingredients, adding the chopped cranberries, and mix until just combined. Pour into the greased pan and bake for 25-30 minutes, or until a toothpick comes out clean. Allow to cool completely.
- For the frosting, beat heavy cream until soft peaks form, then gradually add powdered sugar and orange extract, mixing until smooth.
- Cut the cooled cranberry orange cake into cubes and layer in jars with orange frosting. Repeat layers until jars are full.
- Top with chopped fresh cranberries, seal the jars, and enjoy your Cranberry Orange Cake Jar!

- 𝗘𝗳𝗳𝗼𝗿𝘁𝗹𝗲𝘀𝘀 𝗪𝗲𝗶𝗴𝗵𝗶𝗻𝗴: Supports 5 units...
- 𝗣𝗿𝗲𝗰𝗶𝘀𝗲 𝗥𝗲𝘀𝘂𝗹𝘁𝘀: Accurately weighs up to 11 lb/5 kg with 1 g...
- 𝗦𝗶𝗺𝗽𝗹𝗲 & 𝗖𝗼𝗺𝗽𝗮𝗰𝘁: The small and sleek scale is a perfect fit for...
Gingerbread Layer Cake Jars

Gingerbread Layer Cake Jars are a festive and flavorful dessert that captures the essence of the holiday season. With layers of spiced gingerbread cake, creamy whipped frosting, and a touch of seasonal spices, these jars are perfect for holiday parties or as a cozy treat to enjoy by the fireplace. Each spoonful delivers a delightful combination of warmth and sweetness, making it an irresistible addition to your dessert offerings.
| Ingredients | Quantity |
|---|---|
| All-purpose flour | 2 cups |
| Ground ginger | 2 teaspoons |
| Ground cinnamon | 1 teaspoon |
| Ground cloves | ½ teaspoon |
| Baking powder | 1 teaspoon |
| Baking soda | 1 teaspoon |
| Salt | ½ teaspoon |
| Granulated sugar | 1 cup |
| Brown sugar (packed) | ½ cup |
| Eggs | 2 large |
| Molasses | ¾ cup |
| Warm water | ½ cup |
| Unsalted butter (melted) | ½ cup |
| Heavy cream | 1 cup |
| Powdered sugar | 1 cup |
| Vanilla extract | 1 teaspoon |
| Crushed gingerbread cookies | 1 cup |
| Whipped cream (for topping) | Optional |
Instructions:
- Preheat the oven to 350°F (175°C) and grease a cake pan.
- In a bowl, mix flour, ginger, cinnamon, cloves, baking powder, baking soda, and salt.
- In a separate bowl, whisk together granulated sugar, brown sugar, eggs, molasses, warm water, and melted butter until smooth.
- Combine the wet and dry ingredients until just mixed, then pour into the greased pan and bake for 30-35 minutes, or until a toothpick comes out clean. Allow to cool completely.
- For the frosting, beat heavy cream until soft peaks form, then gradually add powdered sugar and vanilla extract, mixing until smooth.
- Cut the cooled gingerbread cake into cubes and layer in jars with whipped frosting and crushed gingerbread cookies. Repeat layers until jars are full.
- Top with a dollop of whipped cream or additional crushed cookies, seal the jars, and enjoy your festive Gingerbread Layer Cake Jars!

- Instant Read Food Thermometer | Our instant read thermometer features a temperature probe and advanced,...
- Multi-Use | From bbq thermometer to baking thermometer, our digital food thermometer for cooking is...
- Easy-Read Digital Thermometer For Cooking | Large instant thermometer dial with bright blue backlight...
S’mores Autumn Treats

S’mores Autumn Treats are a delightful twist on the classic campfire dessert, capturing all the cozy flavors of fall. With layers of graham cracker crumbs, rich chocolate pudding, and fluffy marshmallow topping, these treats served in jars make for a perfect indulgence as the weather cools down. They are not only visually appealing but also incredibly easy to assemble, making them an excellent choice for gatherings or a leisurely evening at home.
| Ingredients | Quantity |
|---|---|
| Graham cracker crumbs | 2 cups |
| Unsweetened cocoa powder | ½ cup |
| Sugar | ¾ cup |
| Milk | 2 cups |
| Cornstarch | ¼ cup |
| Vanilla extract | 1 teaspoon |
| Semi-sweet chocolate chips | 1 cup |
| Mini marshmallows | 2 cups |
| Whipped cream (optional) | For topping |
Instructions:
- In a medium saucepan, mix cocoa powder, sugar, cornstarch, and a pinch of salt. Gradually whisk in milk and cook over medium heat, stirring constantly until it thickens.
- Once thickened, remove from heat and stir in chocolate chips and vanilla extract until melted and smooth.
- In jars, create layers by starting with a layer of graham cracker crumbs, followed by the chocolate pudding, and then mini marshmallows.
- Repeat the layers until jars are filled, finishing with mini marshmallows on top.
- If desired, add a dollop of whipped cream to the top layer, seal the jars, and enjoy your S’mores Autumn Treats!

- Versatile 54-Piece Collection: Elevate your kitchen with the Home Hero 54-Piece Kitchen Utensil Set, a...
- Durable and Long-Lasting: Crafted from premium stainless steel, these kitchen utensils are designed to...
- Perfect Holiday Gift: Delight your loved ones with this kitchen utensils gift set this festive season....
Chai Latte Cake in a Jar

Chai Latte Cake in a Jar is a warm and comforting dessert that brings together the aromatic spices of chai tea blended into a moist cake, perfect for enjoying in a cozy setting. Each layer of cake is infused with chai flavors and topped with creamy frosting, all beautifully packed in a jar for easy serving and sharing. It’s an ideal treat for tea lovers and a unique addition to any gathering or celebration.
| Ingredients | Quantity |
|---|---|
| All-purpose flour | 2 cups |
| Granulated sugar | 1 cup |
| Baking powder | 2 teaspoons |
| Ground cinnamon | 1 teaspoon |
| Ground ginger | 1 teaspoon |
| Ground cardamom | ½ teaspoon |
| Ground cloves | ¼ teaspoon |
| Salt | ½ teaspoon |
| Eggs | 2 large |
| Milk | 1 cup |
| Vanilla extract | 1 teaspoon |
| Vegetable oil | ½ cup |
| Cream cheese | 8 oz |
| Powdered sugar | 2 cups |
| Heavy cream | 1 cup |
| Chai tea bags | 2 (for flavoring) |
Instructions:
- Preheat the oven to 350°F (175°C) and grease and flour a 9×13 inch pan or use individual ramekins.
- In a large bowl, whisk together flour, sugar, baking powder, spices, and salt.
- In another bowl, beat together eggs, milk, vanilla, and oil until smooth. Gradually mix into the dry ingredients until just combined.
- Pour the batter into the prepared pan and bake for 25-30 minutes, or until a toothpick inserted in the center comes out clean. Let cool.
- For the frosting, beat cream cheese and powdered sugar until smooth, then add heavy cream and beat until fluffy.
- Once the cake is cooled, cut it into layers (or portion out from ramekins), then layer pieces of cake and frosting in jars.
- Seal jars and chill, then enjoy your delectable Chai Latte Cake in a Jar!

- 24-ounce insulated stainless-steel water bottle with a FreeSip spout and push-button lid with lock
- Patented FreeSip spout designed for either sipping upright through the built-in straw or tilting back to...
- Protective push-to-open lid keeps spout clean; convenient carry loop doubles as a lock
Carrot Cake With Cream Cheese Frosting

Carrot Cake with Cream Cheese Frosting is a classic dessert that combines the moistness of freshly grated carrots with warm spices, offering a delightful balance of flavors and textures. When layered in a jar, this treat becomes a perfect individual serving that not only looks appealing but also makes for a fantastic gift or party favor. The rich and tangy cream cheese frosting complements the sweetness of the carrot cake, creating a deliciously satisfying experience.
| Ingredients | Quantity |
|---|---|
| All-purpose flour | 2 cups |
| Granulated sugar | 1 ½ cups |
| Baking powder | 1 ½ teaspoons |
| Baking soda | 1 teaspoon |
| Ground cinnamon | 1 teaspoon |
| Ground nutmeg | ½ teaspoon |
| Salt | ½ teaspoon |
| Eggs | 4 large |
| Vegetable oil | 1 cup |
| Grated carrots | 3 cups |
| Chopped walnuts (optional) | 1 cup |
| Cream cheese | 8 oz |
| Unsalted butter | ½ cup |
| Powdered sugar | 2 cups |
| Vanilla extract | 1 teaspoon |
| Heavy cream (optional) | 1 cup |
Instructions:
- Preheat your oven to 350°F (175°C) and grease and flour a 9×13 inch baking pan.
- In a large mixing bowl, whisk together the flour, sugar, baking powder, baking soda, spices, and salt.
- In another bowl, beat the eggs and oil together until well combined. Fold this into the dry mixture until incorporated; add grated carrots and walnuts (if using).
- Pour the batter into the prepared pan and bake for 30-35 minutes, or until a toothpick inserted in the center comes out clean. Let the cake cool completely.
- For the cream cheese frosting, beat together the cream cheese and butter until smooth, then gradually add powdered sugar and vanilla, mixing until fluffy.
- Once the cake is cooled, cut it into layers and start layering the cake and frosting mixture in jars.
- Seal the jars and chill for a few hours before serving. Enjoy your delicious Carrot Cake with Cream Cheese Frosting!
Rustic Pear and Almond Cake Jars

Rustic Pear and Almond Cake Jars are a delightful treat that combines the sweet, juicy flavors of ripe pears with fragrant almond essence. This moist and tender cake is perfect for serving in individual jars, offering an elegant presentation for gatherings or as a personalized dessert gift. Each spoonful showcases the natural sweetness of the pears and the nutty goodness of almonds, making it a comforting indulgence.
| Ingredients | Quantity |
|---|---|
| All-purpose flour | 1 ½ cups |
| Granulated sugar | 1 cup |
| Baking powder | 1 teaspoon |
| Almond extract | 1 teaspoon |
| Salt | ½ teaspoon |
| Eggs | 2 large |
| Unsalted butter (melted) | ½ cup |
| Milk | ½ cup |
| Ripe pears (peeled and diced) | 2 medium |
| Sliced almonds | ¼ cup |
| Powdered sugar (for garnish) | Optional |
Instructions:
- Preheat your oven to 350°F (175°C) and prepare 4-6 small jars by greasing them lightly.
- In a mixing bowl, combine flour, sugar, baking powder, salt, and almond extract.
- In another bowl, whisk together the eggs, melted butter, and milk. Add this mixture to the dry ingredients and mix until just combined. Gently fold in the diced pears and sliced almonds.
- Pour the batter evenly into the prepared jars, filling them about two-thirds full.
- Bake in the preheated oven for 25-30 minutes, or until a toothpick inserted comes out clean. Allow the cakes to cool before sealing the jars.
- Once cooled, dust with powdered sugar if desired, and enjoy your Rustic Pear and Almond Cake Jars!