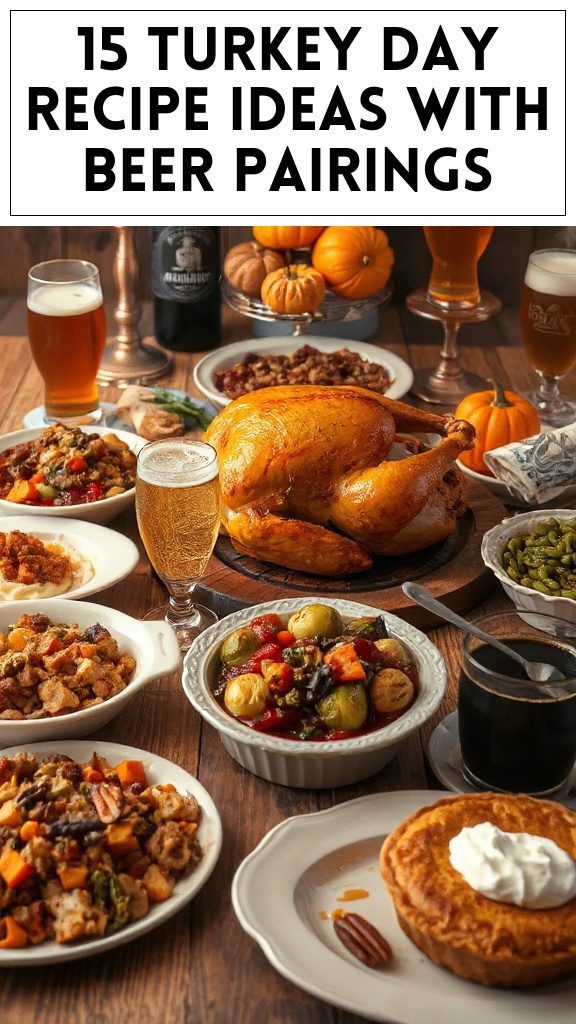
Cheesy Pasta Salad
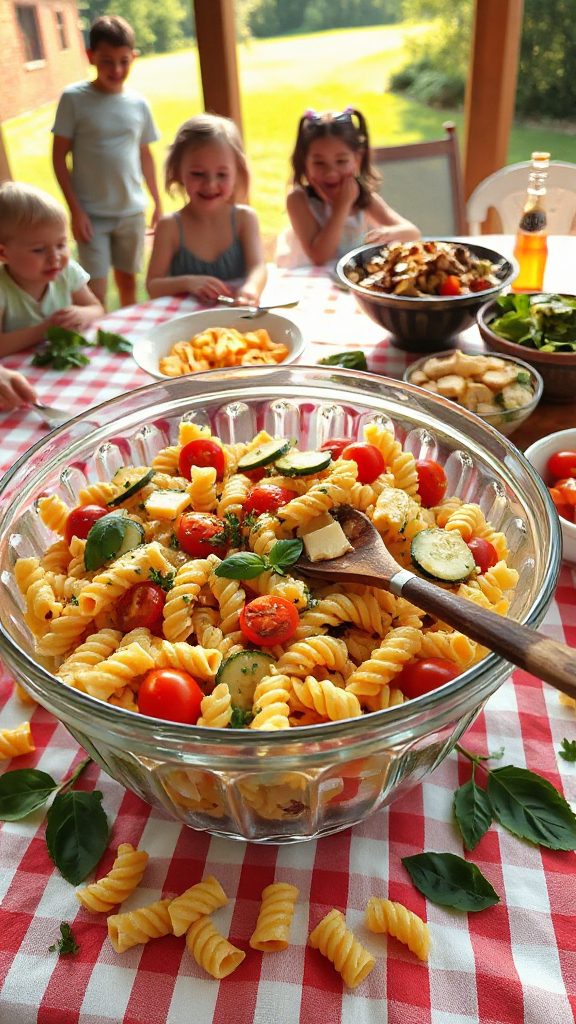
Cheesy pasta salad is a delightful and versatile dish that’s perfect for a back-to-school potluck. This easy-to-make salad combines pasta, cheese, and colorful vegetables, making it a crowd-pleaser that can be served chilled or at room temperature. It’s a fantastic side dish that pairs well with various main courses or can be enjoyed on its own!
| Ingredients | Quantity |
|---|---|
| Pasta (rotini or macaroni) | 2 cups |
| Cheddar cheese (shredded) | 1 cup |
| Cream cheese (softened) | 4 oz |
| Mayonnaise | 1/2 cup |
| Greek yogurt/Pasta water | 1/4 cup |
| Bell peppers (diced) | 1 cup (mixed) |
| Cherry tomatoes (halved) | 1 cup |
| Green onions (sliced) | 1/4 cup |
| Italian seasoning | 1 tsp |
| Salt and pepper | to taste |
Instructions Summary:
- Cook the pasta according to package directions until al dente. Drain and cool.
- In a large bowl, combine the cream cheese, mayonnaise, Greek yogurt (or pasta water), salt, and pepper. Mix well.
- Add the cooled pasta, cheese, bell peppers, cherry tomatoes, green onions, and Italian seasoning to the bowl. Stir until well combined.
- Chill in the refrigerator for at least 30 minutes before serving. Enjoy!
- The Original Pro Chopper - Our superstar veggie slicer has been creating waves on TikTok! Simple to use,...
- Easy Meal Prep with Rust-Resistant Blades - Our vegetable chopper is perfect for anyone who wants to eat...
- 5-Star Design - The soft-grip TPU handle ensures controlled chopping, while the non-skid rubber base...
Mini Caprese Skewers

Mini Caprese skewers are a fresh and vibrant appetizer that’s perfect for a back-to-school potluck. These bite-sized treats combine the classic flavors of mozzarella, tomatoes, and basil, drizzled with balsamic glaze for a deliciously invigorating option. They’re easy to assemble, visually appealing, and make for a great finger food that everyone will love!
| Ingredients | Quantity |
|---|---|
| Cherry tomatoes | 1 pint |
| Fresh mozzarella balls (bocconcini) | 1 lb |
| Fresh basil leaves | 1 bunch |
| Balsamic glaze | to drizzle |
| Olive oil | 1 tablespoon |
| Salt and pepper | to taste |
| Skewers (toothpick size) | 12-15 |
Instructions Summary:
- Thread one cherry tomato, one mozzarella ball, and one basil leaf onto each skewer. Repeat until all ingredients are used.
- Arrange skewers on a serving platter.
- Drizzle with olive oil and balsamic glaze, then sprinkle with salt and pepper to taste.
- Serve immediately or chill until ready to enjoy.
- Makes Everything Simple : Just forget your bagged cheese! Only turn the handle for several times and get...
- Premium Material : All parts of the rotary cheese grater are made of food grade ABS material, no BPA. The...
- Three Option Grater : The parmesan cheese grater finishes food preparation with slicing, shredding and...
Chicken Enchilada Quesadillas

Chicken enchilada quesadillas are a delicious and satisfying dish that brings the flavors of traditional enchiladas into a quick and easy-to-eat format. These quesadillas are filled with shredded chicken, cheese, and enchilada sauce, all nestled between crispy tortillas. Perfect for a back-to-school potluck, they are sure to be a hit with both kids and adults alike!
| Ingredients | Quantity |
|---|---|
| Shredded rotisserie chicken | 2 cups |
| Shredded cheese (cheddar or Monterey Jack) | 2 cups |
| Enchilada sauce | 1 cup |
| Flour tortillas | 6-8 |
| Olive oil | 2 tablespoons |
| Chopped green onions | 1/4 cup |
| Sour cream (for serving) | optional |
| Fresh cilantro (for garnish) | optional |
Instructions Summary:
- In a mixing bowl, combine shredded chicken, cheese, enchilada sauce, and chopped green onions.
- Heat olive oil in a large skillet over medium heat.
- Place one tortilla in the skillet, then spread a portion of the chicken mixture on one half. Fold the tortilla over and cook until golden brown on both sides, about 3-4 minutes per side.
- Repeat with remaining tortillas and filling.
- Slice quesadillas into wedges and serve hot with sour cream and cilantro, if desired.
- 💰 REDUCE WASTE AND SAVE MONEY: Chef Preserve keeps FOOD FRESH 5 TIMES LONGER than non-vacuum storage...
- ✅ POWERFUL, QUICK & EASY TO USE: Simply press the button to start. The device vacuum seals a bag in 5...
- ♻️ REUSABLE & RESEALABLE BAGS: Chef Preserve comes with dishwasher, freezer, refrigerator, and...
Veggie and Hummus Platter

Veggie and hummus platter is a colorful and healthy dish that’s perfect for a back-to-school potluck. This dish features an array of fresh vegetables, such as carrots, cucumbers, bell peppers, and cherry tomatoes, accompanied by a creamy hummus dip. It’s not only nutritious but also fun to eat, making it a great choice for kids and a crowd-pleaser for adults.
| Ingredients | Quantity |
|---|---|
| Carrots (cut into sticks) | 2 cups |
| Cucumber (sliced) | 1 large |
| Bell peppers (sliced) | 2 (any color) |
| Cherry tomatoes | 1 pint |
| Celery (cut into sticks) | 2 stalks |
| Radishes (sliced) | 1 cup |
| Hummus | 1 cup |
| Olive oil | 1 tablespoon |
| Fresh parsley (for garnish) | optional |
Instructions Summary:
- Wash and prepare all vegetables by cutting them into sticks, slices, or bite-sized pieces as needed.
- Arrange the vegetables on a large platter in an attractive, colorful layout.
- Pour the hummus into a small bowl and place it in the center of the vegetable platter.
- Drizzle olive oil over the hummus for extra flavor and garnish with fresh parsley, if desired.
- Serve immediately or cover and refrigerate until ready to serve.
- Generous Capacity: 7-quart slow cooker that comfortably serves 9+ people or fits a 7-pound roast
- Cooking Flexibility: High or low slow cooking settings, with convenient warm function for ideal serving...
- Convenient: Set it and forget it feature enables you to cook while at work or performing daily tasks
Sweet Potato Fries

Sweet potato fries are a delicious and healthier alternative to traditional fries, making them a perfect addition to any back-to-school potluck. Their natural sweetness, combined with a crispy texture and savory seasoning, is sure to delight both kids and adults alike. Easy to prepare and bake, these fries can be served with a variety of dipping sauces.
| Ingredients | Quantity |
|---|---|
| Sweet potatoes | 2 large |
| Olive oil | 2 tablespoons |
| Paprika | 1 teaspoon |
| Garlic powder | 1 teaspoon |
| Salt | 1/2 teaspoon |
| Pepper | 1/4 teaspoon |
| Optional: Chopped fresh herbs (e.g., parsley) | for garnish |
Instructions Summary:
- Preheat the oven to 425°F (220°C).
- Wash and peel the sweet potatoes, then cut them into fries or wedges.
- In a large bowl, toss the sweet potato fries with olive oil, paprika, garlic powder, salt, and pepper until evenly coated.
- Spread the fries in a single layer on a baking sheet lined with parchment paper.
- Bake for 20-25 minutes, flipping halfway through, until crispy and golden brown.
- Remove from the oven and garnish with fresh herbs if desired. Serve warm with your favorite dipping sauce.
- 100% Leak-proof: Guaranteed no-spill seal and secure latches
- Crystal-clear Tritan Built: Stain-resistant and odor-resistant material for a clear view of contents
- Lightweight & Sturdy: Easy to carry, yet durable for everyday use
Fruit and Yogurt Parfaits

Fruit and yogurt parfaits are a delightful and nutritious option for any back-to-school potluck. This dish layers creamy yogurt with fresh fruits and crunchy granola, resulting in a colorful and satisfying treat that appeals to all ages. It’s easy to assemble, making it an ideal choice for those busy prepping for the school year.
| Ingredients | Quantity |
|---|---|
| Greek yogurt | 4 cups |
| Mixed fresh fruits (e.g., strawberries, blueberries, bananas) | 2 cups (chopped) |
| Granola | 1 cup |
| Honey (optional) | 2 tablespoons |
| Mint leaves (for garnish, optional) | A handful |
Instructions Summary:
- In clear cups or bowls, start by adding a layer of Greek yogurt at the bottom.
- Add a layer of mixed fresh fruits on top of the yogurt.
- Sprinkle a layer of granola over the fruit.
- Repeat the layers until the cups are filled, finishing with a layer of yogurt and a sprinkle of granola on top.
- Drizzle honey on top if desired and garnish with mint leaves. Serve chilled.
- 𝗘𝗳𝗳𝗼𝗿𝘁𝗹𝗲𝘀𝘀 𝗪𝗲𝗶𝗴𝗵𝗶𝗻𝗴: Supports 5 units...
- 𝗣𝗿𝗲𝗰𝗶𝘀𝗲 𝗥𝗲𝘀𝘂𝗹𝘁𝘀: Accurately weighs up to 11 lb/5 kg with 1 g...
- 𝗦𝗶𝗺𝗽𝗹𝗲 & 𝗖𝗼𝗺𝗽𝗮𝗰𝘁: The small and sleek scale is a perfect fit for...
Sloppy Joe Sliders
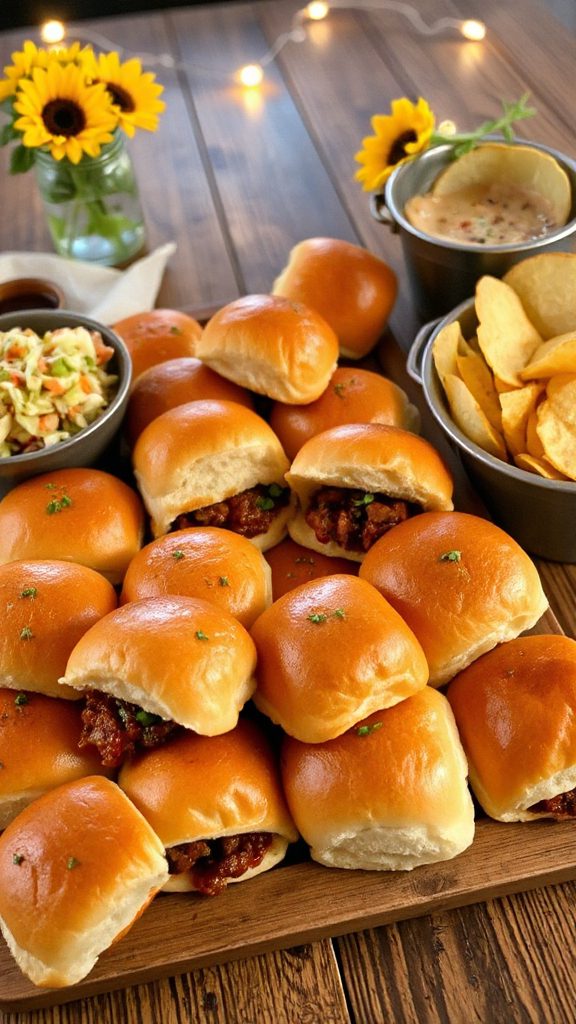
Sloppy Joe sliders are a fun and satisfying dish that brings a nostalgic twist to any back-to-school potluck. These mini sandwiches feature a savory blend of ground beef, onions, and tangy sauce, served on soft slider buns. They are an easy-to-eat option that allows guests to indulge in classic flavors without the mess, making them perfect for social gatherings.
| Ingredients | Quantity |
|---|---|
| Ground beef | 1 pound |
| Onion (finely chopped) | 1 medium |
| Green bell pepper (chopped) | 1 medium |
| Tomato sauce | 1 cup |
| Ketchup | 1/4 cup |
| Worcestershire sauce | 1 tablespoon |
| Dijon mustard | 1 tablespoon |
| Sliders buns | 12 buns |
| Salt | To taste |
| Pepper | To taste |
| Shredded cheese (optional) | 1 cup |
Instructions Summary:
- In a large skillet over medium heat, cook the ground beef with onion and green pepper until the meat is browned and the vegetables are tender. Drain excess fat.
- Stir in tomato sauce, ketchup, Worcestershire sauce, Dijon mustard, salt, and pepper. Simmer for about 10 minutes until thickened.
- While the mixture simmers, prepare the sliders by slicing the slider buns in half.
- Spoon the Sloppy Joe mixture onto the bottom half of each slider bun, adding cheese on top if desired.
- Place the top half of the bun on each slider and serve warm. Enjoy your Sloppy Joe sliders!
- Instant Read Food Thermometer | Our instant read thermometer features a temperature probe and advanced,...
- Multi-Use | From bbq thermometer to baking thermometer, our digital food thermometer for cooking is...
- Easy-Read Digital Thermometer For Cooking | Large instant thermometer dial with bright blue backlight...
Deviled Eggs With a Twist
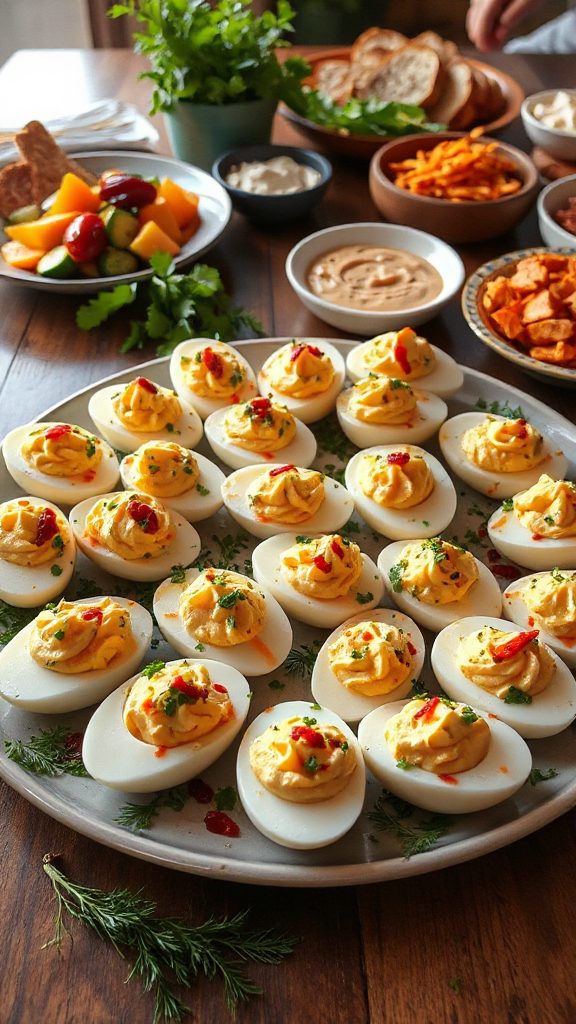
Deviled eggs with a twist are a delightful and creative take on a classic appetizer, perfect for any back-to-school potluck. Adding unexpected ingredients such as avocado or bacon elevates the traditional deviled egg into a unique and flavorful dish that will impress your guests. These creamy and savory bites are easy to prepare, making them a great choice for social gatherings.
| Ingredients | Quantity |
|---|---|
| Hard-boiled eggs | 6 eggs |
| Avocado (mashed) | 1 medium |
| Mayonnaise | 2 tablespoons |
| Dijon mustard | 1 teaspoon |
| Lime juice | 1 tablespoon |
| Salt | To taste |
| Pepper | To taste |
| Crumbled bacon (optional) | 1/4 cup |
| Paprika | For garnish |
| Chives (chopped, optional) | For garnish |
Instructions Summary:
- Slice the hard-boiled eggs in half lengthwise, carefully removing the yolks and placing them in a mixing bowl.
- Mash the yolks with avocado, mayonnaise, Dijon mustard, lime juice, salt, and pepper until smooth and creamy.
- If using, fold in crumbled bacon for extra flavor.
- Spoon or pipe the mixture back into the egg white halves.
- Garnish each deviled egg with a sprinkle of paprika and chopped chives, if desired, and serve chilled. Enjoy your deviled eggs with a twist!
- Versatile 54-Piece Collection: Elevate your kitchen with the Home Hero 54-Piece Kitchen Utensil Set, a...
- Durable and Long-Lasting: Crafted from premium stainless steel, these kitchen utensils are designed to...
- Perfect Holiday Gift: Delight your loved ones with this kitchen utensils gift set this festive season....
Spinach and Cheese Stuffed Puff Pastry

Spinach and Cheese Stuffed Puff Pastry is a savory and flaky dish that’s perfect for potlucks, offering a delightful combination of creamy cheese and nutritious spinach wrapped in golden, crispy pastry. These bite-sized delights are not only easy to make but also serve as a hit among both kids and adults, making them an excellent addition to any back-to-school gathering.
| Ingredients | Quantity |
|---|---|
| Puff pastry sheets | 2 sheets |
| Fresh spinach (chopped) | 2 cups |
| Cream cheese | 8 ounces |
| Feta cheese (crumbled) | 1 cup |
| Garlic (minced) | 2 cloves |
| Olive oil | 1 tablespoon |
| Egg (beaten) | 1 egg |
| Salt | To taste |
| Pepper | To taste |
| Parmesan cheese (grated) | 1/4 cup |
Instructions Summary:
- Preheat the oven to 400°F (200°C) and line a baking sheet with parchment paper.
- In a skillet, heat olive oil over medium heat and sauté minced garlic until fragrant, then add chopped spinach and cook until wilted. Remove from heat and let cool slightly.
- In a mixing bowl, combine cream cheese, feta cheese, sautéed spinach, salt, and pepper until well mixed.
- Roll out the puff pastry sheets and cut them into squares or circles. Spoon a generous amount of the spinach and cheese mixture onto the center of each pastry piece.
- Fold over the pastry to seal, pressing the edges with a fork to secure.
- Brush the tops with the beaten egg and sprinkle with grated Parmesan cheese.
- Bake in the oven for 15-20 minutes, or until golden brown. Serve warm and enjoy your delicious Spinach and Cheese Stuffed Puff Pastry!
- 24-ounce insulated stainless-steel water bottle with a FreeSip spout and push-button lid with lock
- Patented FreeSip spout designed for either sipping upright through the built-in straw or tilting back to...
- Protective push-to-open lid keeps spout clean; convenient carry loop doubles as a lock
Chocolate Chip Cookie Bars
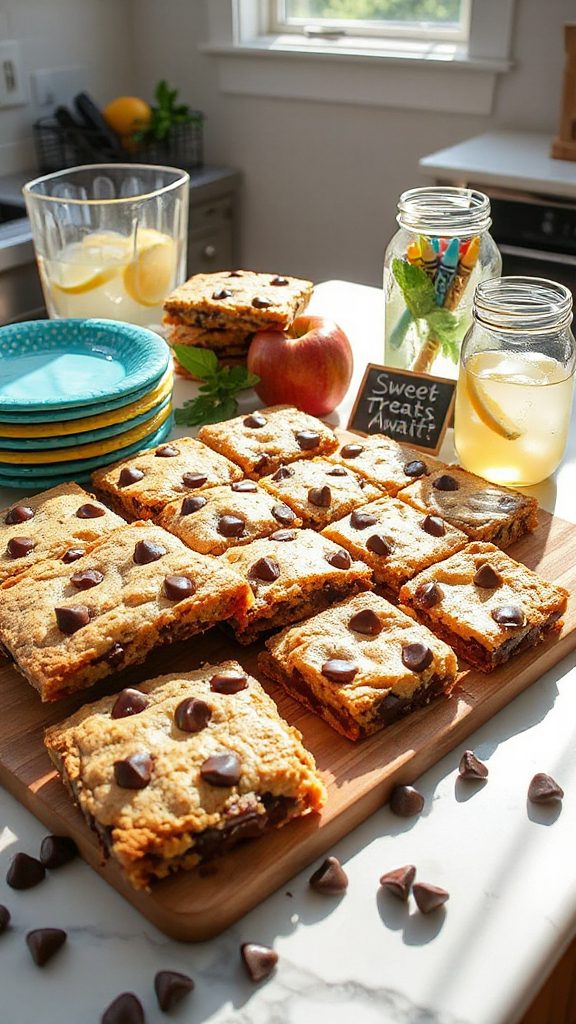
Chocolate Chip Cookie Bars are a decadent and crowd-pleasing dessert perfect for any back-to-school potluck. These bars combine the classic flavors of chocolate chip cookies into an easy-to-serve treat that can easily be cut into squares, making them the ideal sweet addition to share with friends and family.
| Ingredients | Quantity |
|---|---|
| Unsalted butter | 1 cup (2 sticks) |
| Brown sugar | 1 cup |
| Granulated sugar | 1/2 cup |
| Eggs | 2 large |
| Vanilla extract | 2 teaspoons |
| All-purpose flour | 2 1/4 cups |
| Baking soda | 1 teaspoon |
| Salt | 1/2 teaspoon |
| Semi-sweet chocolate chips | 2 cups |
Instructions Summary:
- Preheat the oven to 350°F (175°C) and grease a 9×13 inch baking pan.
- In a large bowl, cream together the butter, brown sugar, and granulated sugar until smooth. Beat in the eggs and vanilla extract.
- In a separate bowl, whisk together the flour, baking soda, and salt, then gradually combine with the wet ingredients until just mixed. Fold in the chocolate chips.
- Spread the cookie dough evenly in the prepared baking pan.
- Bake for 25-30 minutes or until the edges are golden and the center is set. Allow to cool before cutting into bars and serving. Enjoy your delicious Chocolate Chip Cookie Bars!
No-Bake Energy Bites
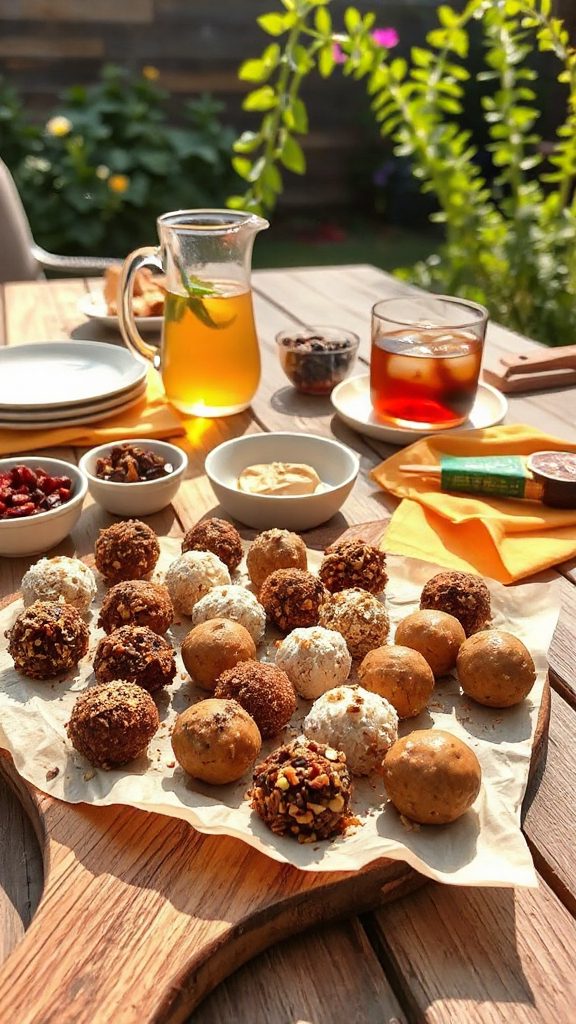
No-Bake Energy Bites are a quick and nutritious snack that is perfect for busy back-to-school days. These energy-packed bites combine oats, nut butter, and a variety of mix-ins, making them a delicious and wholesome treat for kids and adults alike. They require no baking, and can be made in just a few minutes, making them a convenient option for potlucks or lunch boxes.
| Ingredients | Quantity |
|---|---|
| Rolled oats | 1 cup |
| Peanut butter (or nut butter) | 1/2 cup |
| Honey | 1/3 cup |
| Mini chocolate chips | 1/2 cup |
| Ground flaxseed | 1/4 cup |
| Chia seeds (optional) | 1 tablespoon |
| Vanilla extract | 1 teaspoon |
| Salt | 1/4 teaspoon |
Instructions Summary:
- In a mixing bowl, combine rolled oats, peanut butter, honey, mini chocolate chips, ground flaxseed, chia seeds, vanilla extract, and salt.
- Mix until all ingredients are well combined and the mixture is sticky.
- Use your hands to form small, bite-sized balls (about 1-inch in diameter).
- Place the energy bites on a baking sheet lined with parchment paper and refrigerate for at least 30 minutes to set.
- Once firm, store in an airtight container in the fridge for up to one week. Enjoy these delicious No-Bake Energy Bites anytime for a boost of energy!


