This collection of 25 invigorating low-carb summer recipes requires no cooking, making them perfect for warm weather meals. Options include Zucchini Noodle Salad with Pesto, Caprese Salad Skewers, and Cucumber and Avocado Rolls. These dishes highlight fresh ingredients and are suitable for quick lunches or snacks. Ideal for those following a low-carb lifestyle, these recipes emphasize convenience and vibrancy. Explore further for additional ideas and variations to enhance your summer dining experience.
Zucchini Noodle Salad With Pesto
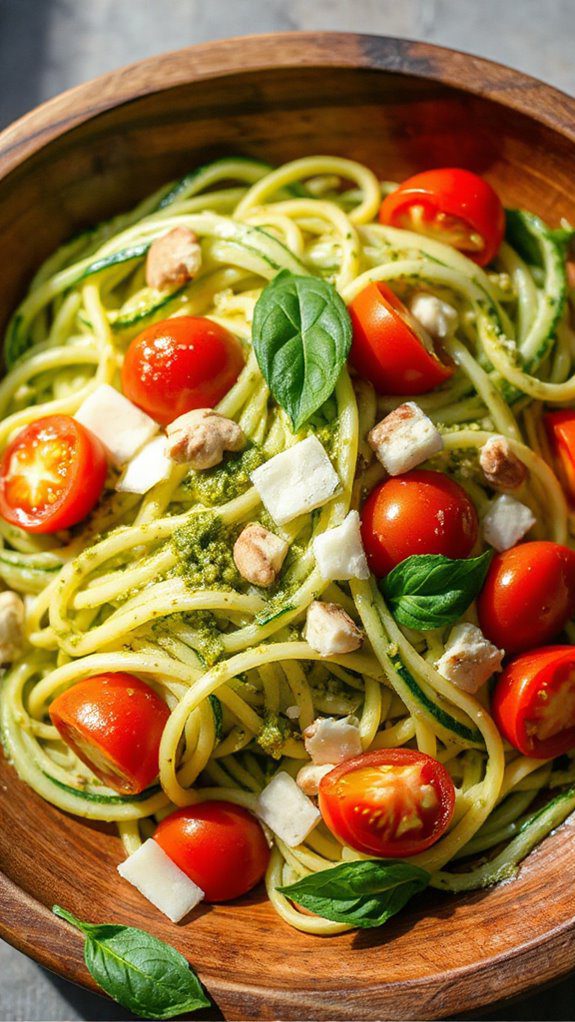
Zucchini Noodle Salad with Pesto is an invigorating and nutritious low-carb dish that showcases the vibrant flavors of summer. This dish is perfect for those looking to enjoy a healthy, gluten-free meal that is packed with fresh vegetables and aromatic basil. With a preparation time of just 15 minutes, it's an ideal option for a quick lunch or a light dinner.
This salad is not only visually appealing with its bright colors but also incredibly versatile.
Ingredients:
- 2 medium zucchinis
- 1 cup cherry tomatoes, halved
- 1 cup bell pepper, diced
- 1 cup arugula or spinach
- ½ cup homemade or store-bought basil pesto
- ¼ cup grated Parmesan cheese (optional)
- Salt and pepper, to taste
- Olive oil, for drizzling
Cooking Steps:
1. Prepare the Zoodles: Using a spiralizer, julienne peeler, or knife, create zucchini noodles (zoodles) from the two medium zucchinis.
If you prefer softer noodles, you can lightly sauté them in a pan for a few minutes but keep them al dente for a fresh crunch.
2. Combine the Vegetables: In a large bowl, combine the zucchini noodles, halved cherry tomatoes, diced bell pepper, and arugula or spinach. Toss gently to mix the ingredients without breaking the zucchini noodles.
3. Add the Pesto: Drizzle the basil pesto over the salad. Gently toss everything together until the zoodles and vegetables are well coated with the pesto.
4. Season: Add salt and pepper to taste. If desired, sprinkle grated Parmesan cheese on top for an extra savory touch.
5. Serve: Drizzle with a little olive oil for added flavor and serve immediately as an invigorating salad or side dish.
Variations and Tips:
- Protein Boost: Add grilled chicken, shrimp, or chickpeas to the salad for a protein boost.
- Other Veggies: Feel free to incorporate other seasonal vegetables such as cucumber, radishes, or zucchini if you're craving more crunch.
- Nut-Free Option: Replace the pesto with a homemade avocado dressing made from ripe avocados, lemon juice, and garlic for a nut-free option.
- Make Ahead: You can prepare the zoodles and veggies in advance and toss them with the pesto just before serving to keep everything fresh.
- Meal Prep: This salad can be portioned into containers for a quick grab-and-go lunch during the week.
Just store the pesto separately and stir it in right before eating.
Enjoy this delightful and healthy Zucchini Noodle Salad with Pesto as a light meal or as an enticing side dish to accompany your summertime gatherings!
- The Original Pro Chopper - Our superstar veggie slicer has been creating waves on TikTok! Simple to use,...
- Easy Meal Prep with Rust-Resistant Blades - Our vegetable chopper is perfect for anyone who wants to eat...
- 5-Star Design - The soft-grip TPU handle ensures controlled chopping, while the non-skid rubber base...
Caprese Salad Skewers

Caprese Salad Skewers are a delightful appetizer that embodies the fresh flavors of summertime. This dish combines ripe tomatoes, creamy mozzarella, and fragrant basil, all drizzled with a touch of balsamic glaze. Perfect for summer gatherings, picnics, or as a light snack, these skewers are low in carbs, making them ideal for those following a low-carb lifestyle.
The preparation time is around 15 minutes, making it a quick and easy option that doesn't require cooking.
Ingredients:
- Cherry tomatoes
- Fresh mozzarella balls (bocconcini)
- Fresh basil leaves
- Balsamic glaze
- Extra virgin olive oil
- Salt and pepper to taste
- Skewers (small wooden or metal)
Cooking Steps:
- Begin by washing the cherry tomatoes and basil leaves thoroughly. Pat them dry with a paper towel.
- If using wooden skewers, soak them in water for about 10 minutes to prevent burning (if grilling).
- Thread a cherry tomato onto the skewer, followed by a basil leaf, and then a mozzarella ball. Repeat this pattern until the skewer is filled, leaving a bit of space at each end for handling.
- Once all skewers are assembled, lay them on a serving platter.
- Drizzle the skewers with a bit of extra virgin olive oil and balsamic glaze.
- Finally, season with salt and pepper to taste.
Variations and Tips:
- For added flavor, consider marinating the mozzarella balls in olive oil, garlic, and herbs for a few hours before assembling.
- Use colorful heirloom tomatoes for a visually stunning presentation.
- Alternate ingredients by adding slices of avocado or cubes of cucumber for a twist on the traditional recipe.
- Serve with a side of pesto for dipping to enhance the flavor profile.
- These skewers can be made a few hours in advance; just keep them refrigerated until serving.
- Makes Everything Simple : Just forget your bagged cheese! Only turn the handle for several times and get...
- Premium Material : All parts of the rotary cheese grater are made of food grade ABS material, no BPA. The...
- Three Option Grater : The parmesan cheese grater finishes food preparation with slicing, shredding and...
Cucumber and Avocado Rolls
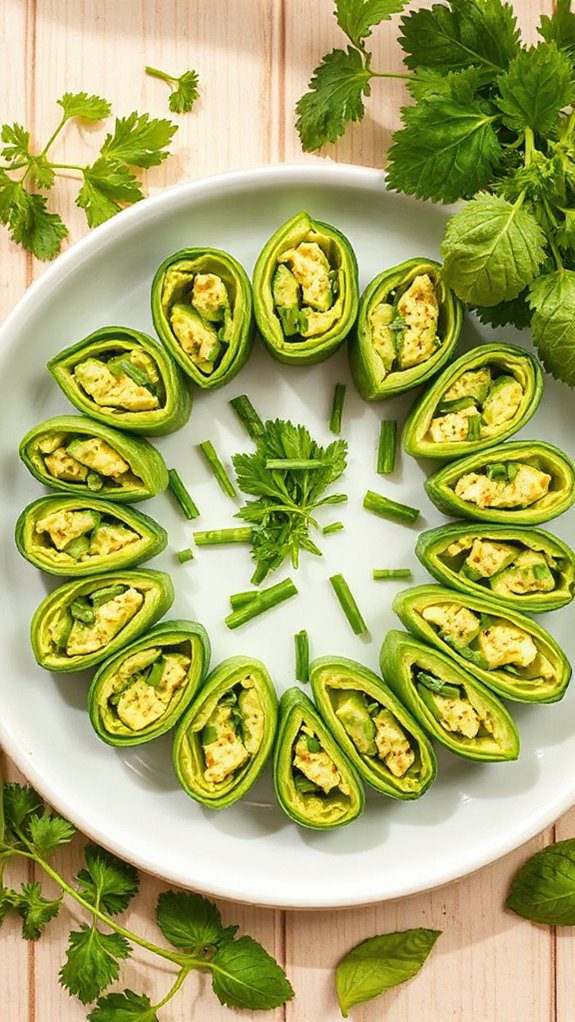
Cucumber and Avocado Rolls are a revitalizing, low-carb dish perfect for summer gatherings or as a light snack.
These rolls are not only visually appealing but also packed with nutrients, making them an excellent choice for anyone looking to maintain a healthy diet.
With minimal ingredients and a preparation time of just 15 minutes, these delightful rolls can impress guests or serve as a quick and satisfying meal for yourself.
Ingredients:
- 1 large cucumber
- 1 ripe avocado
- 1 tablespoon lemon juice
- Salt and pepper, to taste
- Fresh herbs (such as dill, cilantro, or parsley)
- Optional: smoked salmon or turkey slices
Cooking Instructions:
- Start by washing the cucumber and trimming the ends. Using a mandoline slicer or a sharp knife, slice the cucumber lengthwise into thin strips (about 1/8 inch thick) to create rollable ribbons.
- In a mixing bowl, mash the ripe avocado with lemon juice, salt, and pepper until you achieve a creamy consistency.
- Lay out the cucumber strips on a flat surface. Spread a thin layer of the avocado mixture over each cucumber slice.
- If desired, add fresh herbs and optional fillings such as smoked salmon or turkey slices on top of the avocado.
- Gently roll each cucumber slice from one end to the other, securing the filling inside.
- Arrange the rolls on a serving platter and garnish with additional herbs if desired.
Variations and Tips:
- For added flavor, consider mixing spices like garlic powder, onion powder, or red pepper flakes into the avocado mixture.
- If you prefer a crunch, add thinly sliced radishes or carrots inside the rolls.
- Experiment with different fillings such as cream cheese, hummus, or even a light spread of pesto to vary the taste.
- These rolls can also be served with a homemade dipping sauce, like a simple yogurt or tzatziki sauce, for an extra burst of flavor.
- Prepare the cucumber and avocado filling ahead of time for quicker assembly when it's time to serve.
- 💰 REDUCE WASTE AND SAVE MONEY: Chef Preserve keeps FOOD FRESH 5 TIMES LONGER than non-vacuum storage...
- ✅ POWERFUL, QUICK & EASY TO USE: Simply press the button to start. The device vacuum seals a bag in 5...
- ♻️ REUSABLE & RESEALABLE BAGS: Chef Preserve comes with dishwasher, freezer, refrigerator, and...
Greek Salad With Feta and Olives
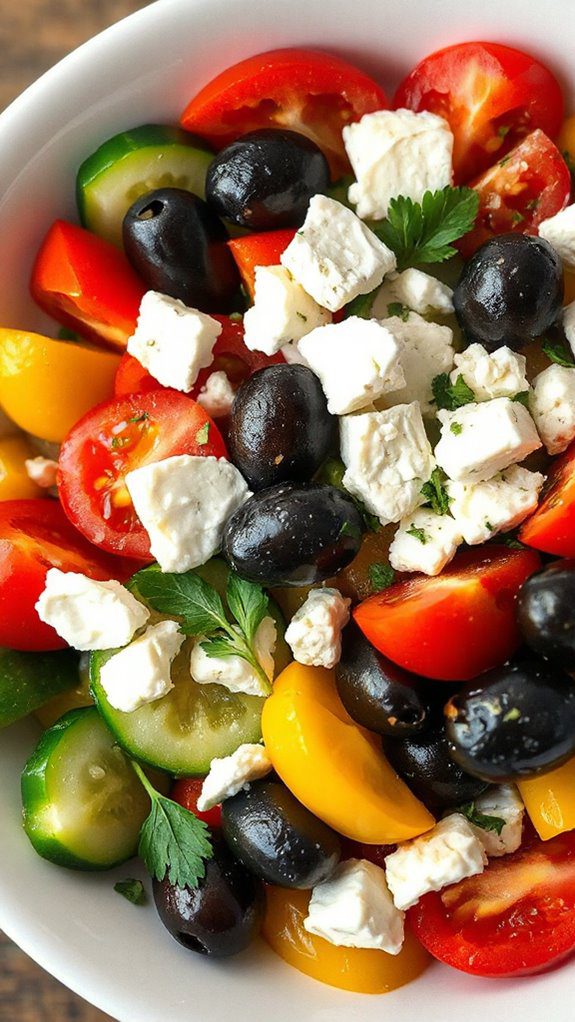
Greek Salad With Feta and Olives is a revitalizing and nutritious dish that embodies the flavors of the Mediterranean. It is perfect for anyone looking to enjoy a low carb meal during the summer months, especially those who appreciate fresh vegetables and tangy feta cheese.
This salad can be prepared in just 15 minutes, making it an ideal choice for a quick lunch or a flavorful side dish at a barbecue or picnic.
Ingredients:
- 2 cups cherry tomatoes, halved
- 1 cucumber, diced
- 1 bell pepper (any color), diced
- 1/2 red onion, thinly sliced
- 1 cup Kalamata olives, pitted
- 1 cup feta cheese, crumbled
- 1/4 cup extra virgin olive oil
- 2 tablespoons red wine vinegar
- 1 teaspoon dried oregano
- Salt and pepper to taste
- Fresh parsley for garnish (optional)
Cooking Steps:
- In a large mixing bowl, combine the cherry tomatoes, cucumber, bell pepper, red onion, and Kalamata olives.
- Drizzle the extra virgin olive oil and red wine vinegar over the salad mixture.
- Sprinkle the dried oregano, salt, and pepper to taste. Gently toss all the ingredients until well combined.
- Add the crumbled feta cheese on top, and toss gently to distribute without breaking the feta too much.
- Garnish with fresh parsley if desired and serve immediately.
Variations and Tips:
- For a protein boost, consider adding grilled chicken, shrimp, or chickpeas to the salad.
- Feel free to substitute the feta cheese with goat cheese or omit it altogether for a dairy-free version.
- Add some delicious crunch with a handful of sunflower seeds or walnuts.
- If you prefer a bit of spice, add a pinch of red pepper flakes or chopped fresh herbs such as basil or mint.
- To make it ahead of time, prepare the salad without the dressing and feta, refrigerate, and add these components just before serving to maintain freshness.
- Generous Capacity: 7-quart slow cooker that comfortably serves 9+ people or fits a 7-pound roast
- Cooking Flexibility: High or low slow cooking settings, with convenient warm function for ideal serving...
- Convenient: Set it and forget it feature enables you to cook while at work or performing daily tasks
Shrimp Ceviche

Shrimp ceviche is a vibrant, invigorating dish perfect for warm summer days, offering a delightful combination of flavors that highlight fresh shrimp, citrus, and herbs. This low-carb recipe is ideal for those seeking a light, healthy meal or a zesty appetizer for gatherings. The preparation time is relatively quick, taking about 20-30 minutes, with an additional time for marinating.
Ingredients:
- 1 pound raw shrimp, peeled and deveined
- 1 cup fresh lime juice (about 6-8 limes)
- 1 medium red onion, diced
- 1 medium cucumber, diced
- 2 medium tomatoes, diced
- 1 jalapeño pepper, minced (optional)
- 1/2 cup fresh cilantro, chopped
- Salt and pepper to taste
- Avocado (for garnish, optional)
Cooking Steps:
- Begin by chopping the shrimp into bite-sized pieces and place them in a glass or ceramic bowl.
- Pour the fresh lime juice over the shrimp, ensuring they are fully submerged. Cover the bowl with plastic wrap and refrigerate for about 15-20 minutes or until the shrimp turn pink and opaque, indicating they are "cooked" by the citrus.
- While the shrimp marinates, prepare the vegetables. In a separate bowl, combine the diced red onion, cucumber, tomatoes, and jalapeño. Mix well.
- Once the shrimp are ready, drain off some of the lime juice, leaving just enough to keep the mixture moist.
- Fold the vegetable mixture and chopped cilantro into the shrimp. Season with salt and pepper to taste. Toss gently until well combined.
- Serve immediately, garnished with slices of avocado if desired.
Variations and Tips:
- For a tropical twist, add diced mango or pineapple to the ceviche.
- If you're not a fan of shrimp, you can substitute it with diced white fish, like tilapia or cod.
- Experiment with different herbs, such as mint or parsley, for a unique flavor profile.
- For added crunch, include diced bell peppers or radishes.
- This dish is best served chilled, so prepare it shortly before serving for ideal freshness. Enjoy your shrimp ceviche with tortilla chips or lettuce wraps for a low-carb option!
- 100% Leak-proof: Guaranteed no-spill seal and secure latches
- Crystal-clear Tritan Built: Stain-resistant and odor-resistant material for a clear view of contents
- Lightweight & Sturdy: Easy to carry, yet durable for everyday use
Lettuce Wraps With Turkey and Avocado
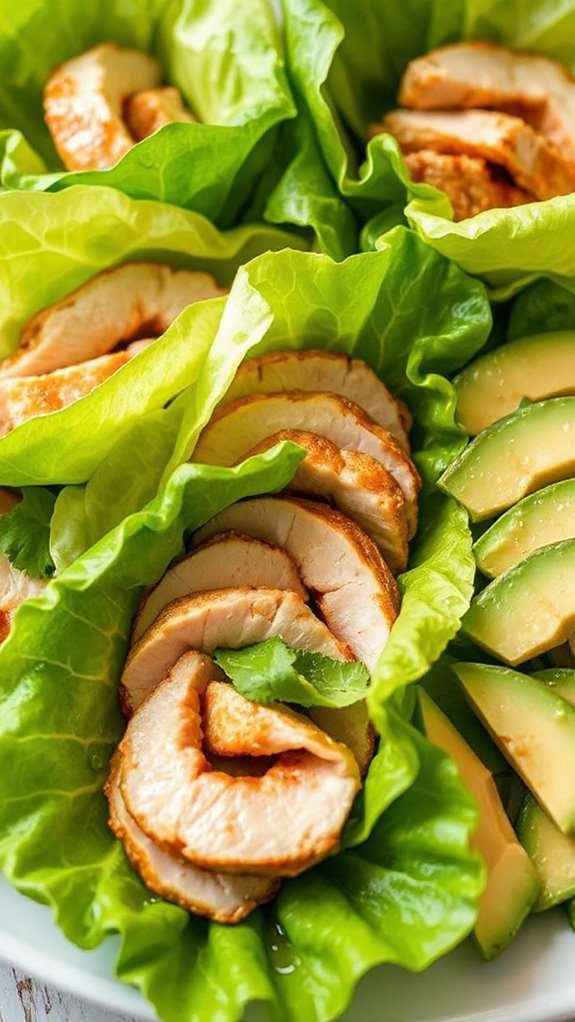
Lettuce wraps with turkey and avocado are a revitalizing and healthy option for anyone looking to enjoy a low-carb meal that is both satisfying and packed with flavor. These wraps are perfect for lunch, dinner, or even as a quick snack, and they take just about 15 minutes to prepare.
They're family-friendly, easy to customize, and ideal for those following a keto or low-carb diet, while still being delicious enough for everyone to enjoy.
Ingredients:
- 1 lb ground turkey
- 1 tablespoon olive oil
- 1 teaspoon garlic powder
- 1 teaspoon onion powder
- 1 teaspoon paprika
- Salt and pepper, to taste
- 1 avocado, diced
- 1 head of romaine lettuce or butter lettuce, leaves separated
- Fresh cilantro or parsley, for garnish
- Lime wedges, for serving
Cooking Steps:
- In a large skillet, heat the olive oil over medium heat. Add the ground turkey and cook until browned, about 5-7 minutes.
- Once the turkey is cooked through, stir in garlic powder, onion powder, paprika, salt, and pepper. Mix well and cook for an additional 2-3 minutes to allow the flavors to meld.
- Remove the skillet from heat and stir in the diced avocado gently, being careful not to mash it too much.
- To serve, take a lettuce leaf and spoon a portion of the turkey and avocado mixture onto the leaf. Top with fresh cilantro or parsley.
- Squeeze a little lime juice over the wrap for added zest, then roll or fold the lettuce leaf around the filling.
Variations and Tips:
- For added crunch, consider mixing in diced bell peppers, cucumber, or radishes to the turkey filling.
- Use different proteins such as ground chicken or beef for a variety of flavors.
- For a spicier kick, add diced jalapeños or a splash of hot sauce to the turkey mixture.
- These wraps can be made in advance; simply store the turkey filling in the refrigerator and assemble the wraps just before serving.
- If you're looking for a creamy dressing, consider adding a drizzle of Greek yogurt or a low-carb ranch dressing inside the wrap.
Enjoy your revitalizing and low-carb lunch or dinner!
- 𝗘𝗳𝗳𝗼𝗿𝘁𝗹𝗲𝘀𝘀 𝗪𝗲𝗶𝗴𝗵𝗶𝗻𝗴: Supports 5 units...
- 𝗣𝗿𝗲𝗰𝗶𝘀𝗲 𝗥𝗲𝘀𝘂𝗹𝘁𝘀: Accurately weighs up to 11 lb/5 kg with 1 g...
- 𝗦𝗶𝗺𝗽𝗹𝗲 & 𝗖𝗼𝗺𝗽𝗮𝗰𝘁: The small and sleek scale is a perfect fit for...
Chilled Gazpacho
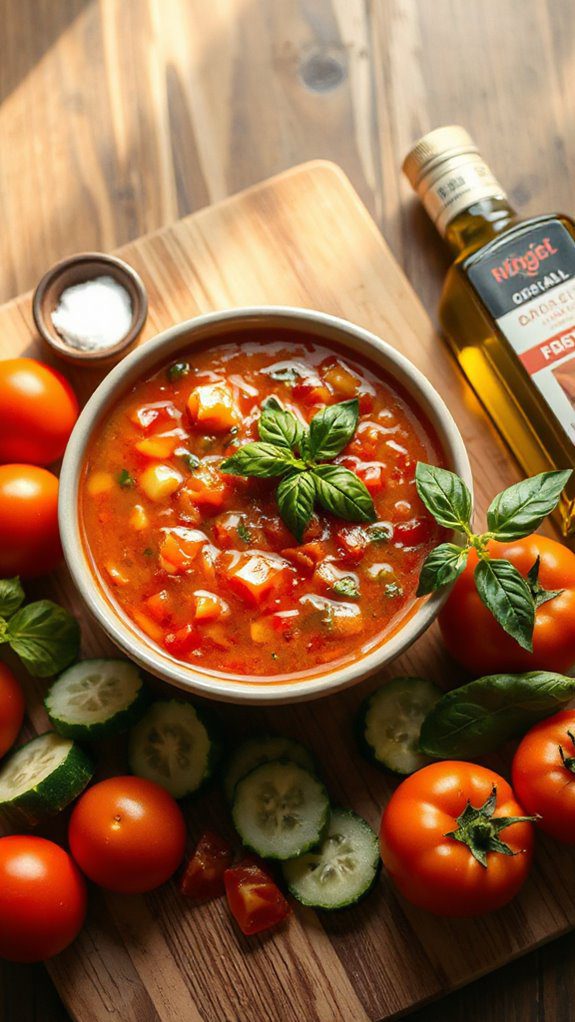
Chilled Gazpacho is a revitalizing Spanish soup that is perfect for hot summer days. This dish is not only low in carbohydrates but also packed with fresh vegetables, making it an ideal choice for those looking to enjoy a light, nutritious meal.
It's a great option for anyone, particularly those following a low-carb diet, and can be easily prepared in about 20 minutes, although allowing it to chill in the fridge for an hour or two before serving will enhance the flavors.
Ingredients:
- 6 ripe tomatoes, diced
- 1 cucumber, peeled and diced
- 1 bell pepper, diced (red or green)
- 1 small red onion, diced
- 2 cloves garlic, minced
- 3 cups vegetable broth (low-sodium)
- 2 tablespoons olive oil
- 2 tablespoons red wine vinegar
- Salt and pepper to taste
- Fresh basil or parsley for garnish
Cooking Steps:
- In a large mixing bowl, combine the diced tomatoes, cucumber, bell pepper, red onion, and minced garlic.
- Add the vegetable broth, olive oil, and red wine vinegar to the vegetable mixture. Use a hand blender or a traditional blender to puree the mixture until smooth, or you can leave it slightly chunky for texture.
- Season with salt and pepper to taste, adjusting as necessary.
- Pour the gazpacho into a container and cover it. Refrigerate for at least one hour to allow the flavors to meld and the soup to chill.
- Before serving, give the gazpacho a good stir. Serve cold in bowls, garnished with fresh basil or parsley.
Tips and Variations:
- For a spicier version, add a diced jalapeño or a few dashes of hot sauce.
- You can add cubed avocado in the soup just before serving for added creaminess.
- Substitute the red wine vinegar with balsamic vinegar for a sweeter taste.
- For a creamy texture, mix in a dollop of Greek yogurt or sour cream before serving.
- Gazpacho can be enjoyed as an appetizer, a light lunch, or even as a revitalizing snack!
- Instant Read Food Thermometer | Our instant read thermometer features a temperature probe and advanced,...
- Multi-Use | From bbq thermometer to baking thermometer, our digital food thermometer for cooking is...
- Easy-Read Digital Thermometer For Cooking | Large instant thermometer dial with bright blue backlight...
Tuna Salad Stuffed Tomatoes
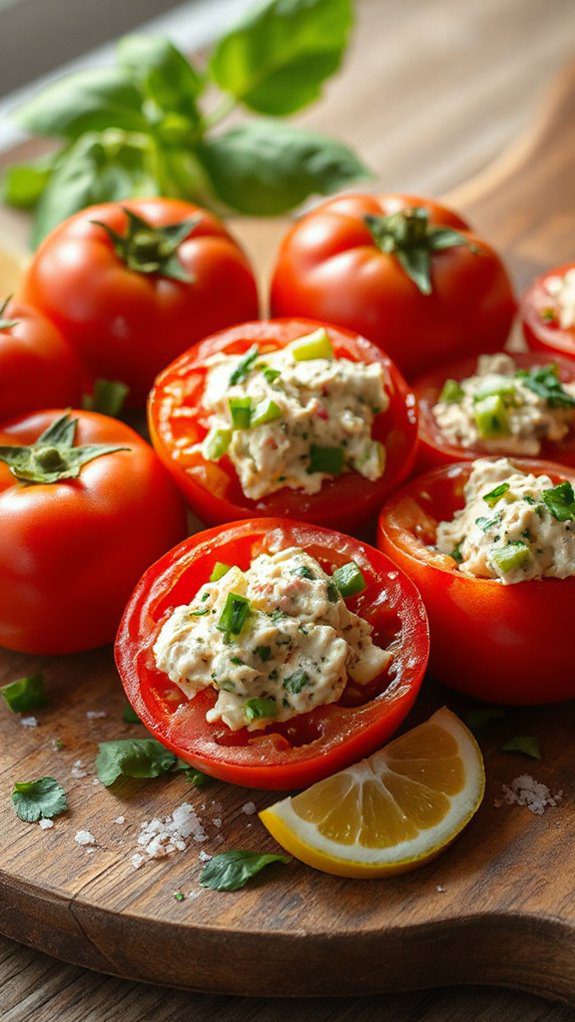
Tuna Salad Stuffed Tomatoes are a revitalizing and nutritious low-carb dish perfect for warm summer days. This light meal is ideal for anyone looking to enjoy a tasty, healthy option that's quick to prepare, fitting well into a busy lifestyle or for gathering around the patio with friends.
In just about 15 minutes, you can whip up these stuffed tomatoes that will not only satiate hunger but also impress with their vibrant presentation.
Ingredients:
- 4 large ripe tomatoes
- 1 can (5 oz) tuna, drained
- 1/4 cup mayonnaise (or Greek yogurt for a lighter version)
- 1 tablespoon Dijon mustard
- 1/4 cup diced celery
- 1/4 cup diced red onion
- 1 tablespoon chopped fresh parsley (optional)
- Salt and pepper to taste
- Lemon wedges (for serving)
Instructions:
- Begin by preparing the tomatoes. Cut the tops off the tomatoes and gently scoop out the seeds and pulp using a spoon, creating a hollow shell. Place them upside down on a paper towel to drain excess liquid.
- In a medium bowl, combine the drained tuna, mayonnaise (or Greek yogurt), Dijon mustard, diced celery, diced red onion, and parsley. Mix thoroughly until well combined.
- Season the mixture with salt and pepper to taste.
- Once the tomatoes have drained, carefully stuff each tomato with the tuna salad mixture, pressing it down gently to fill completely.
- Arrange the stuffed tomatoes on a serving platter and serve immediately, garnished with lemon wedges on the side for squeezing over the top.
Variations & Tips:
- For an extra crunch, consider adding diced bell peppers or shredded carrots to the tuna salad mixture.
- You can substitute the tuna for canned chicken or chickpeas for a different twist.
- Add some chopped pickles or capers to the tuna salad for a briny flavor.
- If you prefer, serve the tuna salad in lettuce cups instead of tomatoes for a crisp and low-carb alternative.
- Versatile 54-Piece Collection: Elevate your kitchen with the Home Hero 54-Piece Kitchen Utensil Set, a...
- Durable and Long-Lasting: Crafted from premium stainless steel, these kitchen utensils are designed to...
- Perfect Holiday Gift: Delight your loved ones with this kitchen utensils gift set this festive season....
Chicken Salad With Grapes and Walnuts

Chicken Salad with Grapes and Walnuts is a delightful low-carb dish perfect for hot summer days. This invigorating salad combines tender, shredded chicken with sweet grapes, crunchy walnuts, and a creamy dressing, making it a satisfying meal on its own or a fantastic side dish.
Ideal for anyone looking for a light yet filling option, this recipe takes about 20 minutes to prepare.
Ingredients:
- 2 cups cooked chicken, shredded
- 1 cup seedless grapes, halved
- 1/2 cup walnuts, chopped
- 1/4 cup celery, diced
- 1/2 cup mayonnaise (preferably low-carb)
- 1 tablespoon Dijon mustard
- Salt and pepper, to taste
- Fresh parsley, for garnish (optional)
Cooking Steps:
- In a large mixing bowl, combine the shredded chicken, halved grapes, chopped walnuts, and diced celery.
- In a separate smaller bowl, whisk together mayonnaise, Dijon mustard, salt, and pepper until well blended.
- Pour the dressing over the chicken mixture and toss until everything is evenly coated.
- Adjust seasoning if necessary and garnish with fresh parsley for added flavor and presentation.
- Serve immediately, or refrigerate for 30 minutes to allow the flavors to meld.
Variations and Tips:
- For added crunch, you can substitute or add chopped apples or diced bell peppers.
- Substitute Greek yogurt for some or all of the mayonnaise for a lighter dressing option.
- If you prefer a bit of sweetness, a drizzle of honey or a sprinkle of stevia can be added to the dressing.
- This salad can be served on a bed of lettuce, in lettuce wraps, or with low-carb tortillas for an easy meal.
- Leftovers can be stored in an airtight container in the refrigerator for up to 3 days.
- 24-ounce insulated stainless-steel water bottle with a FreeSip spout and push-button lid with lock
- Patented FreeSip spout designed for either sipping upright through the built-in straw or tilting back to...
- Protective push-to-open lid keeps spout clean; convenient carry loop doubles as a lock
Antipasto Platter
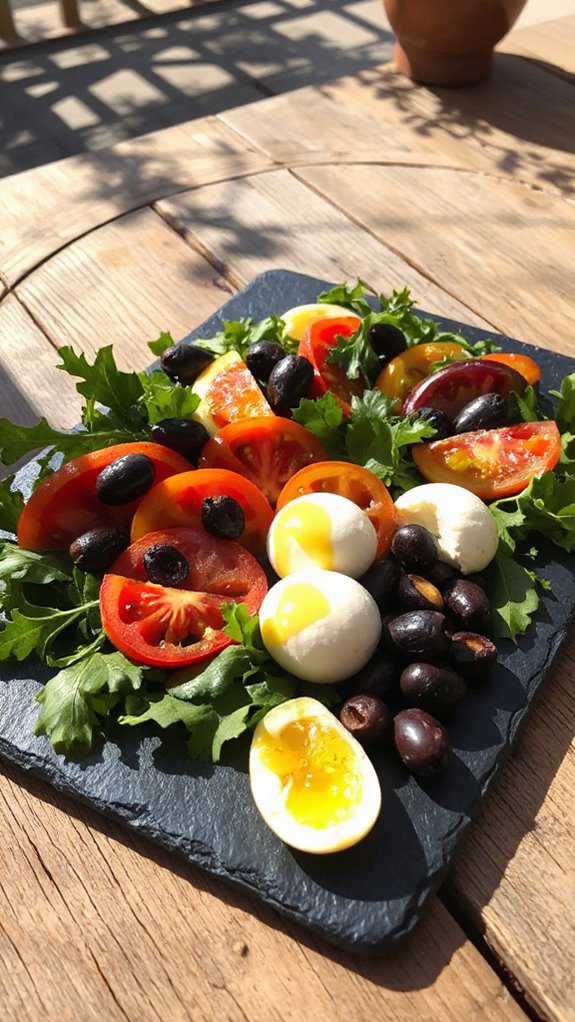
An Antipasto Platter is a delightful assortment of Italian appetizers that is perfect for summer gatherings, picnics, or casual dining. This no-cook dish is ideal for those following a low-carb lifestyle while also being a crowd-pleaser.
Preparation time is minimal, usually around 15-20 minutes, making it easy to whip up before a party or enjoy as a light lunch or dinner option. The array of flavors, colors, and textures makes it visually appealing and provides a variety of complimentary tastes to savor.
Ingredients:
- Assorted cured meats (such as prosciutto, salami, and capicola)
- Cheeses (such as mozzarella balls, provolone, and Parmesan)
- Olives (mixed green and black olives)
- Artichoke hearts (marinated)
- Roasted red peppers
- Cherry tomatoes
- Fresh basil leaves
- Olive oil (for drizzling)
- Balsamic vinegar (optional)
- Freshly cracked black pepper
Cooking Instructions:
- Prepare the Serving Platter: Choose a large, attractive serving platter or wooden board as the base for your antipasto.
- Arrange the Meats: Begin by laying down the assorted cured meats. Roll or fold the slices to create dimension.
- Add Cheeses: Next, place the cheeses around the meats, ensuring a good visual balance. You can cut the cheeses into cubes or leave them in whole pieces depending on preference.
- Incorporate the Vegetables: Scatter the olives, artichoke hearts, roasted red peppers, and cherry tomatoes across the platter, filling in empty spaces for a colorful presentation.
- Garnish: Add a few fresh basil leaves for a burst of freshness and aroma.
- Finish with a Drizzle: Lightly drizzle the olive oil over the platter and add a splash of balsamic vinegar if desired. Finally, sprinkle with freshly cracked black pepper for added flavor.
Variations & Tips:
- Cheese Varieties: Experiment with different types of cheese like goat cheese or feta for varied flavors.
- Add Nuts: Include a handful of mixed nuts for added crunch and nutritional texture.
- Herbs and Spices: Sprinkle Italian seasoning or dried herbs over the platter to enhance flavors.
- Low-Carb Crackers: Offer a side of low-carb crackers or veggie sticks for dipping.
- Seasonal changes: In summer, consider adding fresh seasonal items like slices of zucchini or cucumbers.
- Make it customizable: Serve individual mini antipasto platters in mason jars for a fun, portable option.
Enjoy your vibrant and tasty Antipasto Platter, perfect for any low-carb summer gathering!
Watermelon and Feta Salad
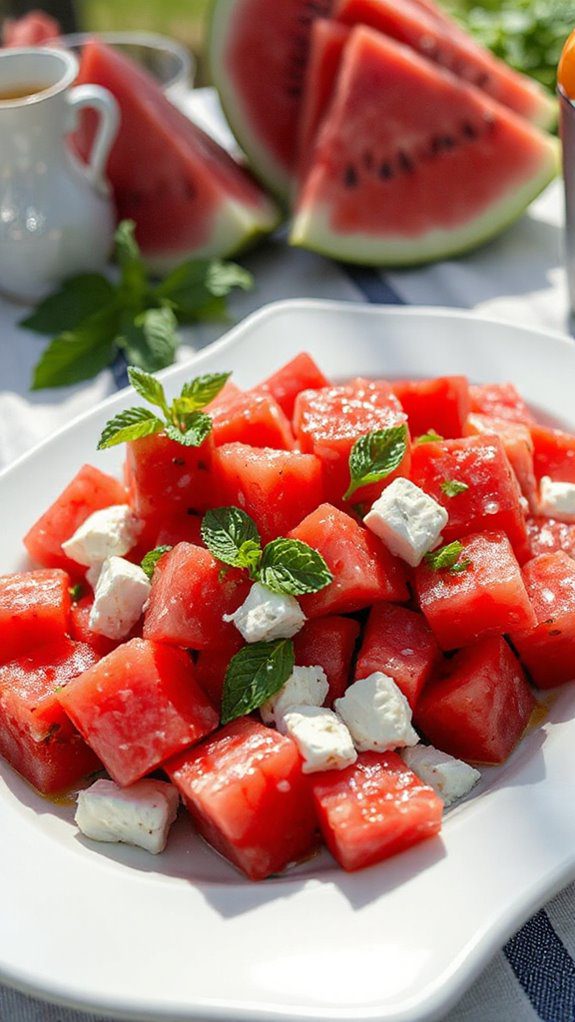
Watermelon and Feta Salad is a revitalizing and vibrant dish that perfectly captures the essence of summer. This light and nutritious salad is ideal for those following a low-carb diet, as it offers a delightful combination of sweet and savory flavors.
Great for picnics, barbecues, or as a side dish at dinner, it can be prepared in just 10 minutes, making it a quick and easy option for any occasion.
Ingredients:
- 4 cups watermelon, cubed
- 1 cup feta cheese, crumbled
- 1/2 cup fresh mint leaves, chopped
- 1/4 cup red onion, thinly sliced
- 2 tablespoons olive oil
- 1 tablespoon balsamic vinegar
- Salt and pepper to taste
- Optional: 1/4 cup cucumber, diced
Cooking Steps:
- Begin by cutting the watermelon into bite-sized cubes and place them in a large mixing bowl.
- Add the crumbled feta cheese and thinly sliced red onion to the watermelon.
- If using, add the diced cucumber for an extra crunch.
- Drizzle the olive oil and balsamic vinegar over the mixture.
- Gently toss the ingredients together until they're well combined.
- Sprinkle the chopped mint leaves over the top and season with salt and pepper to taste.
- Serve immediately or chill in the refrigerator for up to 30 minutes before serving to enhance the flavors.
Variations & Tips:
- For an added twist, consider adding sliced avocado or chopped nuts like pistachios for richness and texture.
- You can also substitute the balsamic vinegar with lime juice for a zesty kick.
- For those who want to keep it even lower in carbs, you can reduce the amount of feta or ditch the red onion.
- This salad can be made a few hours in advance; just keep the mint leaves separate until ready to serve to maintain their freshness.
Spicy Shrimp and Mango Salsa

Spicy Shrimp and Mango Salsa is a vibrant and rejuvenating dish, perfect for hot summer days or a light evening meal. It combines the heat of seasoned shrimp with the sweetness of fresh mango, offering a delightful contrast in flavors and textures. This dish is ideal for low-carb enthusiasts and is an excellent choice for those looking to impress at summer gatherings or family dinners.
The preparation time is approximately 20 minutes, making it a quick and satisfying option for any occasion.
Ingredients:
- 1 pound large shrimp, peeled and deveined
- 1 tablespoon olive oil
- 1 teaspoon chili powder
- 1 teaspoon paprika
- 1/2 teaspoon cayenne pepper (adjust for spice level)
- Salt and pepper to taste
- 1 ripe mango, diced
- 1/2 red onion, finely chopped
- 1 jalapeño, seeded and minced
- Juice of 1 lime
- Fresh cilantro, chopped (for garnish)
Cooking Steps:
- In a bowl, combine the shrimp with olive oil, chili powder, paprika, cayenne pepper, salt, and pepper. Toss until the shrimp are evenly coated.
- Heat a skillet over medium-high heat. Add the seasoned shrimp and cook for 2-3 minutes on each side, or until they turn pink and opaque. Remove from heat.
- In a separate bowl, mix together the diced mango, red onion, jalapeño, lime juice, and a pinch of salt. Gently fold in the cooked shrimp.
- Taste the salsa and adjust seasoning if necessary. Garnish with chopped fresh cilantro before serving.
Variations and Tips:
- For extra flavor, marinate the shrimp in the spice mix for 30 minutes before cooking.
- You can swap mango with pineapple for a tropical twist.
- Serve the spicy shrimp and mango salsa with lettuce wraps for a fresh low-carb approach.
- To enhance the flavor, add diced avocado to the mango salsa.
- Pair this dish with a chilled glass of white wine or a revitalizing cocktail to complement the heat.
Spinach and Artichoke Dip
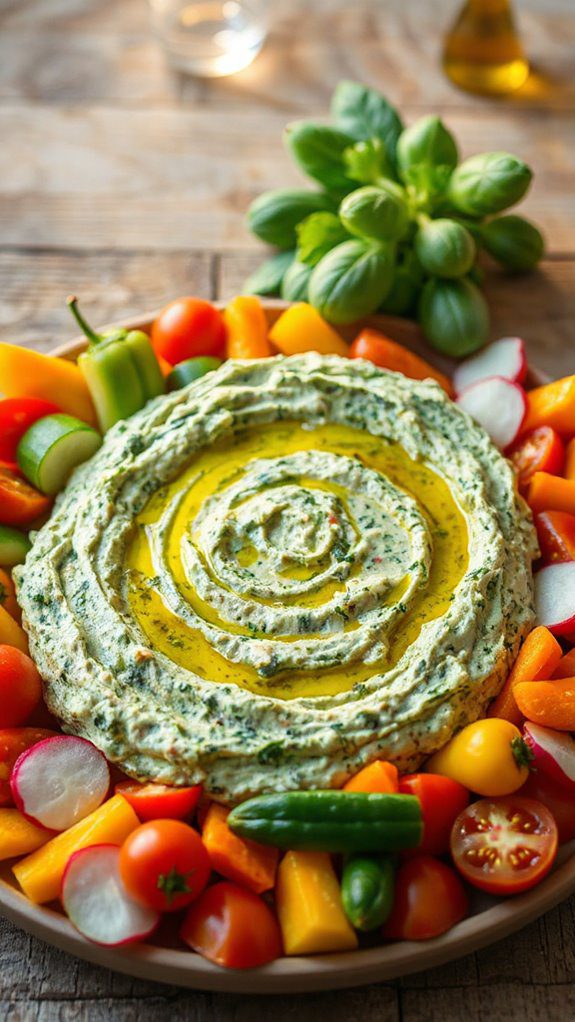
Spinach and Artichoke Dip is a creamy, flavorful appetizer that's perfect for summer gatherings, picnics, or cozy nights in. This dish combines the earthy flavors of spinach and the delicate taste of artichokes with a rich, cheesy base.
It's ideal for those following a low-carb diet, providing a satisfying option for both health-conscious eaters and guests alike. Preparing this dish takes about 20 minutes, making it a quick and delightful option for any occasion.
Ingredients:
- 1 cup fresh spinach, chopped
- 1 cup artichoke hearts, drained and chopped
- 1 cup cream cheese, softened
- 1/2 cup sour cream
- 1/2 cup grated Parmesan cheese
- 1/2 cup shredded mozzarella cheese
- 2 cloves garlic, minced
- Salt and pepper to taste
- Olive oil for greasing the baking dish
Cooking Steps:
- Preheat your oven to 375°F (190°C).
- In a mixing bowl, combine the softened cream cheese, sour cream, Parmesan cheese, and half of the mozzarella cheese. Mix until smooth and well blended.
- Stir in the chopped spinach, artichokes, minced garlic, salt, and pepper until fully combined.
- Grease a baking dish with a bit of olive oil and transfer the dip mixture into the dish, spreading it out evenly.
- Top the mixture with the remaining mozzarella cheese.
- Bake in the preheated oven for about 20 minutes or until the cheese is bubbly and golden brown on top.
- Remove from the oven and let it cool for a few minutes before serving.
Variations and Tips:
- For extra flavor, consider adding a dash of red pepper flakes or a sprinkle of lemon juice to brighten the dish.
- You can replace the sour cream with Greek yogurt for a tangy twist.
- Serve with low-carb dippers like cucumber slices, bell pepper strips, or celery sticks.
- This dip can also be made ahead of time and refrigerated; simply reheat in the oven before serving.
- For a richer flavor, try incorporating different types of cheese like gouda or cream cheese mixtures.
Roasted Red Pepper Hummus With Veggies

Roasted Red Pepper Hummus is a flavorful, low-carb dip that is perfect for health-conscious individuals looking for a nutritious and satisfying snack. It combines the rich taste of roasted red peppers with the creaminess of chickpeas, making it an excellent option for those following a low-carb lifestyle or anyone wanting a tasty appetizer.
This dish takes approximately 15 minutes to prepare and can be served with an array of fresh veggies for dipping, making it an ideal choice for gatherings or meal prep.
Ingredients:
- 1 can (15 oz) chickpeas, drained and rinsed
- 1 large roasted red pepper (jarred or homemade)
- 2 tablespoons tahini
- 2 tablespoons olive oil
- 2 tablespoons lemon juice
- 1 garlic clove, minced
- 1/2 teaspoon ground cumin
- Salt and pepper to taste
- Assorted raw vegetables for dipping (carrots, celery, cucumber, bell peppers)
Cooking Steps:
- In a food processor, combine the drained chickpeas, roasted red pepper, tahini, olive oil, lemon juice, minced garlic, ground cumin, and a pinch of salt and pepper.
- Blend the mixture until smooth and creamy. If the hummus is too thick, you can add a tablespoon of water or additional olive oil to reach your desired consistency.
- Taste and adjust seasoning as needed. You may want to add more lemon juice, salt, or spices based on your preference.
- Transfer the hummus to a serving bowl and drizzle a little extra olive oil on top for added flavor.
- Serve with an assortment of fresh, raw vegetables for dipping.
Variations and Tips:
- For a spicier kick, add a pinch of cayenne pepper or a few slices of jalapeño to the food processor.
- Experiment with additional flavors by incorporating ingredients like sun-dried tomatoes, olives, or herbs such as parsley or cilantro.
- To keep the hummus low-carb, serve with non-starchy vegetables such as radishes, zucchini slices, or broccoli florets.
- This hummus can be stored in an airtight container in the refrigerator for up to a week. The flavors will deepen as it sits, making it even more delicious over time.
Smoked Salmon and Cream Cheese Wraps

Smoked Salmon and Cream Cheese Wraps are a delicious and healthy option for those following a low-carb lifestyle. This simple, no-cook dish offers a perfect balance of flavors and nutrients, making it ideal for lunch, brunch, or as a light snack. The preparation time is minimal—just 10 minutes!
These wraps are great for busy individuals seeking a quick yet satisfying meal that is also suitable for gatherings or picnics.
Ingredients:
- 4 large lettuce leaves (romaine or butter lettuce work well)
- 4 ounces smoked salmon
- 4 ounces cream cheese, softened
- 1 tablespoon capers
- 1 tablespoon fresh dill, chopped (optional)
- ½ cucumber, thinly sliced
- Lemon wedges (for serving)
Instructions:
- Begin by laying out the large lettuce leaves flat on a clean surface or plate.
- Spread a generous layer of softened cream cheese over each lettuce leaf.
- Place slices of smoked salmon on top of the cream cheese.
- Add a few capers, sliced cucumbers, and a sprinkle of fresh dill (if using) onto the salmon.
- Carefully roll each lettuce leaf tightly, starting from one end, to form a wrap.
- Optionally, slice each wrap in half for easier handling and serving.
- Serve immediately with lemon wedges on the side for a fresh squeeze of citrus as desired.
Variations & Tips:
- For added flavor, try incorporating different herbs such as chives or parsley.
- Swap out cream cheese for a flavored cream cheese (such as herbed or garlic) to diversify the taste.
- Add avocado slices for extra creaminess and healthy fats.
- If you prefer a bit of crunch, include shredded carrots or bell peppers in the wraps.
- Make sure the lettuce leaves are dry to prevent them from tearing when spreading the cream cheese.
- These wraps can be made ahead of time and stored in the refrigerator for up to a few hours before serving.
Avocado Egg Salad
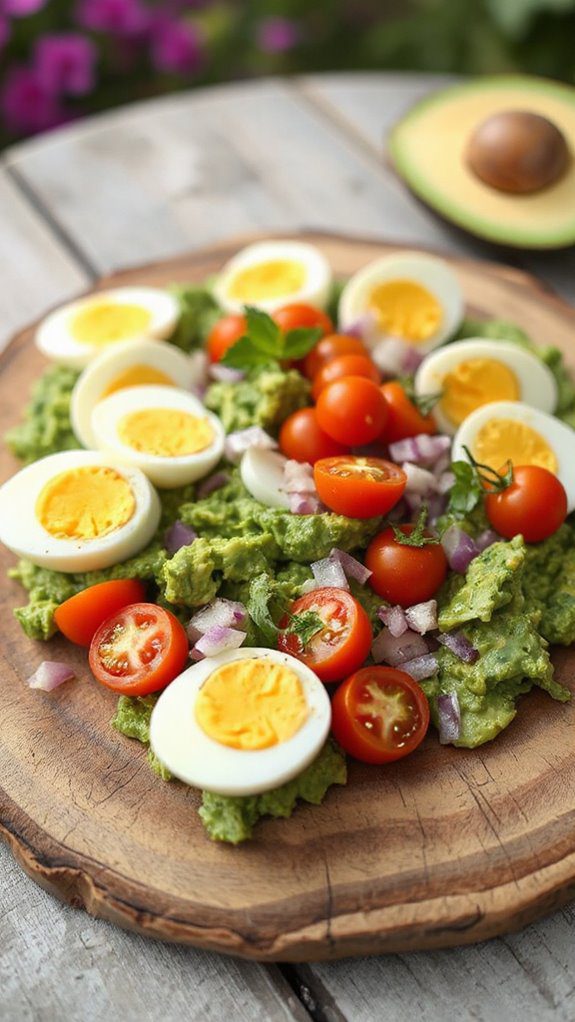
Avocado Egg Salad is a creamy, delicious dish that's perfect for those following a low-carb diet or anyone looking for a healthy, satisfying meal. This dish is ideal for summer picnics, light lunches, or a quick dinner option, taking approximately 15-20 minutes to prepare.
With the combination of protein from the eggs and the healthy fats from the avocado, this salad is both filling and nutritious.
Ingredients:
- 4 hard-boiled eggs
- 1 ripe avocado
- 2 tablespoons mayonnaise (or Greek yogurt for a lighter option)
- 1 tablespoon Dijon mustard
- 1 tablespoon fresh lemon juice
- Salt and pepper to taste
- 2 tablespoons chopped fresh chives (or green onions)
- Optional: diced tomatoes, celery, or cucumber for added crunch
Instructions:
- Begin by hard boiling the eggs. Place them in a pot, cover with cold water, and bring to a boil. Once boiling, turn off the heat, cover, and let them sit for about 10-12 minutes.
- After that, transfer the eggs to an ice bath to cool quickly, then peel.
- In a mixing bowl, mash the ripe avocado with a fork until smooth but still slightly chunky.
- Chop the hard-boiled eggs and add them to the bowl with the mashed avocado.
- Stir in the mayonnaise (or Greek yogurt), Dijon mustard, and lemon juice. Mix until combined.
- Season with salt and pepper to taste, and fold in the chopped chives.
- If desired, add diced tomatoes, celery, or cucumber to the mixture for extra texture and freshness.
- Serve immediately on a bed of lettuce, in a low-carb wrap, or enjoy it on its own.
Variations and Tips:
- For a spicy kick, consider adding diced jalapeños or a dash of hot sauce.
- If you're a fan of herbs, try incorporating some chopped cilantro or dill for a fresh twist.
- To make it more substantial, serve the avocado egg salad on whole-grain bread or keto-friendly crackers.
- This salad can be stored in the refrigerator for up to 2 days in an airtight container, but it's best enjoyed fresh as the avocado may begin to brown. To preserve freshness, you can also add a bit of extra lemon juice before storing.
Cabbage Slaw With Peanut Dressing

Cabbage Slaw with Peanut Dressing is a revitalizing and nutritious dish that perfectly complements summer meals while adhering to low-carb dietary preferences. This vibrant slaw is ideal for those looking to incorporate more vegetables into their diet without sacrificing flavor.
With a preparation time of just 15 minutes, it's an excellent choice for quick lunches, picnics, or as a side dish at barbecues.
Ingredients
- 4 cups green cabbage, finely shredded
- 1 cup purple cabbage, finely shredded
- 1 large carrot, julienned
- 1/2 cup green onions, chopped
- 1/4 cup fresh cilantro, chopped
- 1/4 cup unsalted peanuts, chopped
Peanut Dressing:
- 1/4 cup natural peanut butter
- 2 tablespoons soy sauce or tamari
- 1 tablespoon sesame oil
- 1 tablespoon rice vinegar
- 1 tablespoon honey or low-carb sweetener (optional)
- 1-2 teaspoons sriracha (optional for heat)
- Water as needed for thinning
Cooking Steps
- In a large mixing bowl, combine the shredded green cabbage, purple cabbage, julienned carrot, chopped green onions, and chopped cilantro.
- In a separate bowl, whisk together the peanut butter, soy sauce, sesame oil, rice vinegar, honey (if using), and sriracha (if using). Add water to achieve desired consistency.
- Pour the peanut dressing over the cabbage mixture and toss well to coat all the vegetables thoroughly.
- Taste and adjust seasoning if needed, adding more soy sauce or sweetener as desired.
- Top with chopped peanuts for added crunch and garnish before serving.
Variations & Tips
- For added protein, include shredded grilled chicken or tofu to make it a hearty main dish.
- Substitute almond butter or sunflower seed butter for a different nut flavor or if you have nut allergies.
- If you prefer a tangier dressing, increase the rice vinegar or add a squeeze of lime juice.
- This slaw is best served fresh but can be stored in the refrigerator in an airtight container for up to 2 days. Just be aware that the cabbage may wilt slightly over time.
- Serve as a side dish to grilled meats, or enjoy it on its own as a light and healthy lunch option.
Cheese and Charcuterie Board
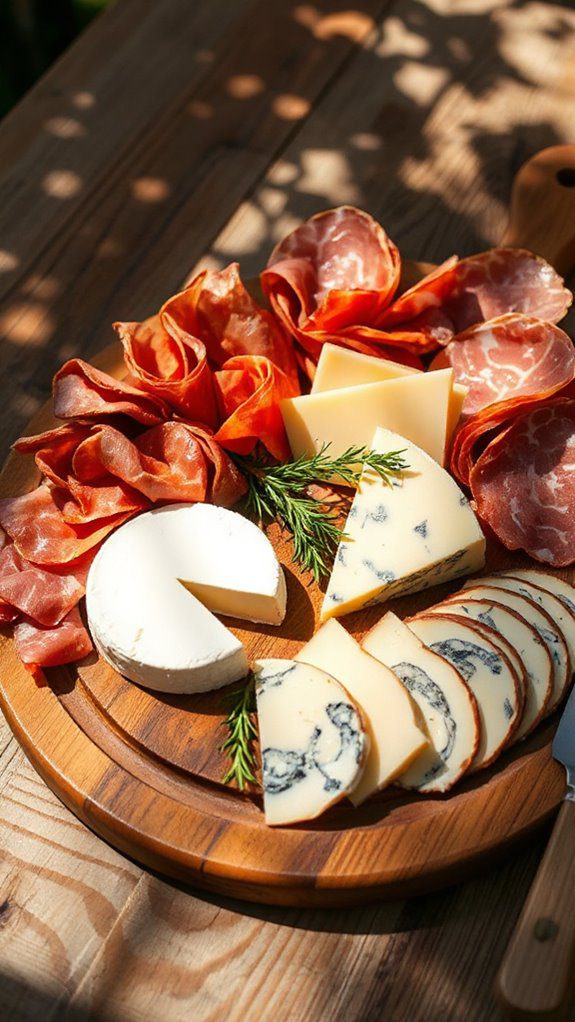
A cheese and charcuterie board is an elegant and versatile dish, perfect for any summer gathering, picnic, or casual entertaining. This aesthetically pleasing platter showcases a selection of cured meats, artisan cheeses, fresh fruits, nuts, and accompaniments.
It's ideal for those following a low-carb lifestyle, as you can customize it with keto-friendly choices. Preparation time is typically around 15-20 minutes, allowing you to create a beautiful and delicious spread without much fuss.
Ingredients:
- Assorted cheeses (e.g., brie, cheddar, gouda, blue cheese)
- Assorted cured meats (e.g., salami, prosciutto, chorizo)
- Fresh vegetables (e.g., cucumbers, cherry tomatoes, bell peppers)
- Olives (green and black)
- Nuts (e.g., almonds, walnuts, pecans)
- Fresh berries (e.g., strawberries, blackberries, raspberries)
- Dried fruits (e.g., apricots, figs)
- Low-carb dips (e.g., hummus, guacamole)
- Fresh herbs (e.g., rosemary, thyme) for garnish
Instructions:
- Select a Board: Start with a large cutting board, wooden platter, or marble slab to showcase your cheese and charcuterie.
- Arrange the Cheeses: Begin by placing your selected cheeses on the board. Cut some into wedges or cubes to encourage easy serving while leaving whole rounds or blocks for visual interest.
- Add the Meats: Fold or roll the cured meats and arrange them around the cheeses. You can layer different meats for texture and flavor contrast.
- Incorporate Fresh Produce: Fill in the spaces with fresh vegetables such as cucumbers and cherry tomatoes, adding a crunch that balances the creaminess of the cheeses.
- Include Olives and Nuts: Scatter olives in small bowls or directly onto the board, and sprinkle nuts to add a savory crunch.
- Add Fruits: Highlight the board with fresh berries and a few pieces of dried fruit for color and a touch of sweetness.
- Finish with Dips: Place small bowls of low-carb dips on the board for added flavor and variety.
- Garnish: For an upscale touch, add fresh herbs between the elements, which will also enhance the aroma and presentation.
Variations & Tips:
- Cheese Variety: Experiment with different types of cheeses and swap them according to your taste or availability, focusing on hard cheeses and creamy options.
- Meat Options: Consider adding smoked salmon or specialty sausages for an extra flavor dimension.
- Theme Boards: Create themed boards, such as Mediterranean with feta, tzatziki, and pita chips, or Spanish with Manchego, chorizo, and marcona almonds.
- Portion Control: Be mindful of portion sizes to maintain a low-carb profile. Aim for a well-balanced selection while ensuring the board doesn't become overly cluttered.
- Seasonal Ingredients: Use seasonal fruits and vegetables to keep the board fresh and vibrant throughout the summer.
- Serving Suggestions: Provide toothpicks or small utensils to make it easy for guests to serve themselves, enhancing the overall experience.
This cheese and charcuterie board will be a showstopper at your summer gathering, pleasing both the palate and the eye! Enjoy!
Berry and Spinach Salad
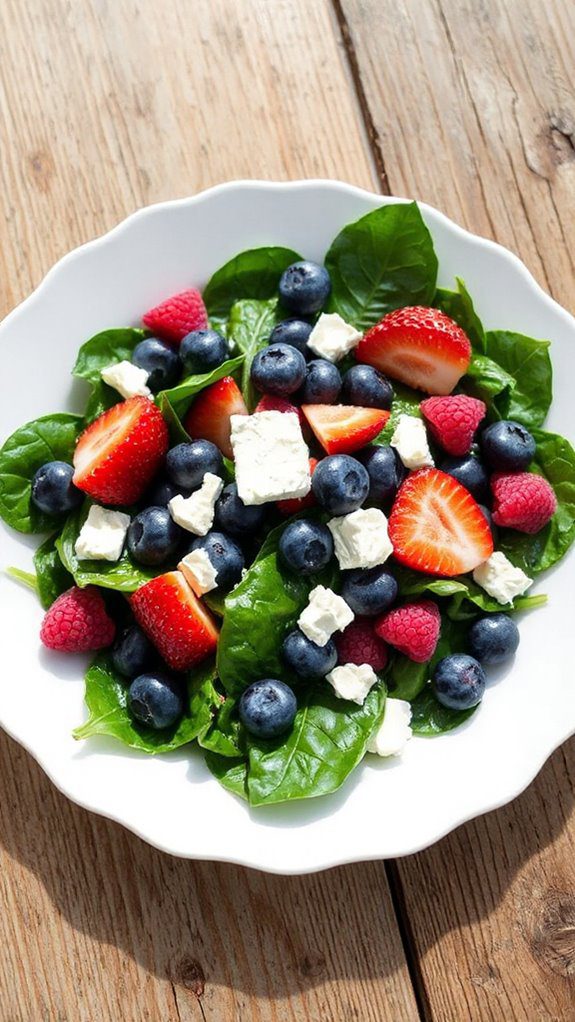
The Berry and Spinach Salad is a vibrant and invigorating dish, perfect for anyone looking to enjoy a light, healthy meal during the warmer months. Packed with nutrients, this low-carb salad is especially great for those following a ketogenic lifestyle or simply wanting to incorporate more greens and fruits into their diet.
With a preparation time of just 15 minutes, it's an ideal choice for a quick lunch, a side dish at dinner, or a delightful addition to a summer gathering.
Ingredients:
- 4 cups fresh baby spinach leaves
- 1 cup mixed berries (strawberries, blueberries, raspberries)
- 1/4 cup crumbled feta cheese
- 1/4 cup sliced almonds
- 1/4 cup red onion, thinly sliced
- 2 tablespoons olive oil
- 1 tablespoon balsamic vinegar
- Salt and pepper to taste
Cooking Steps:
- Prepare the Ingredients: Rinse the baby spinach thoroughly and pat dry. Wash the mixed berries and slice the strawberries into halves or quarters, depending on size. Thinly slice the red onion.
- Mix the Salad: In a large bowl, combine the spinach leaves, mixed berries, crumbled feta, sliced almonds, and red onion.
- Make the Dressing: In a small bowl, whisk together the olive oil and balsamic vinegar. Season with salt and pepper to taste.
- Toss the Salad: Drizzle the dressing over the salad ingredients and gently toss until everything is well coated.
- Serve: Plate the salad and serve immediately, or chill in the fridge for about 10 minutes before serving for an extra invigorating experience.
Variations and Tips:
- Add Protein: For a heartier salad, consider adding grilled chicken or shrimp to boost the protein content.
- Different Nuts: Substitute the sliced almonds with walnuts or pecans for a different crunch and flavor.
- Vegan Option: Omit the feta cheese and consider adding avocado slices for creaminess.
- Alternate Dressings: Experiment with different dressings such as a lemon vinaigrette or honey mustard for a twist on flavor.
- Sweetness Factor: If you prefer a touch of sweetness, you could add a drizzle of honey or maple syrup to the dressing.
Eggplant Rollatini With Ricotta
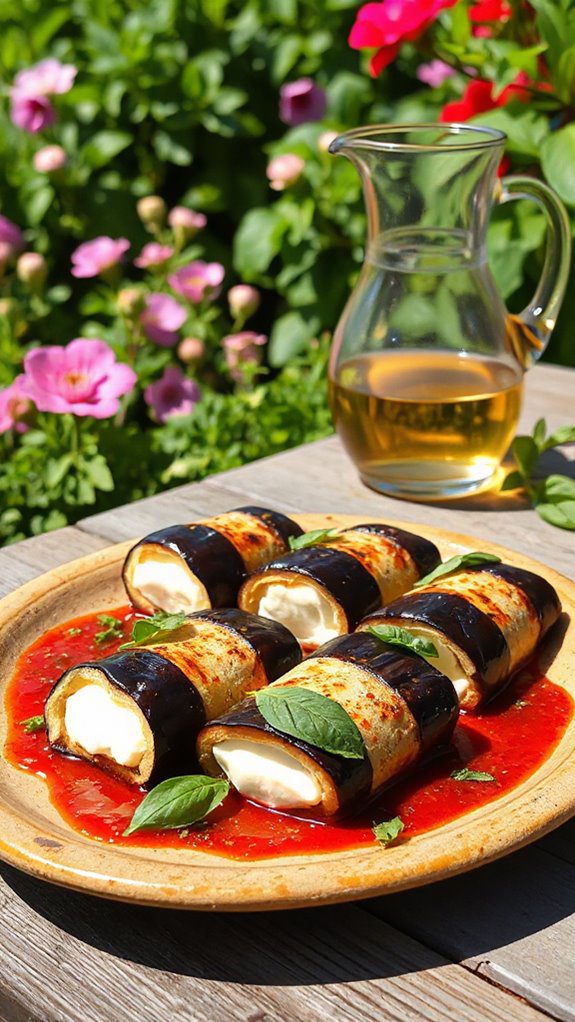
Eggplant Rollatini with Ricotta is a delightful low-carb dish that brings a taste of Italy to your kitchen without the high carbohydrates associated with traditional pasta dishes. This freshly baked recipe features tender roasted eggplant slices filled with a creamy and flavorful ricotta cheese mixture, making it perfect for anyone following a low-carb or ketogenic diet.
Ideal for a summer dinner or as a healthy option for guests, this dish takes approximately 30 minutes of preparation and about 25 minutes to bake.
Ingredients:
- 2 large eggplants
- 15 ounces ricotta cheese
- 1 cup shredded mozzarella cheese
- 1/2 cup grated Parmesan cheese
- 1 large egg
- 1 teaspoon garlic powder
- 1 teaspoon dried basil
- 1 teaspoon dried oregano
- Salt and pepper, to taste
- 2 cups marinara sauce (sugar-free, if desired)
- Fresh basil leaves (for garnish)
Cooking Steps:
1. Prepare the Eggplants: Preheat your oven to 400°F (200°C). Slice the eggplants lengthwise into thin strips, about 1/4 inch thick. Sprinkle salt on both sides of the slices and let them sit for about 15 minutes to draw out moisture. Rinse and pat dry.
2. Roast the Eggplant: Arrange the slices on a baking sheet lined with parchment paper. Brush with olive oil and roast in the preheated oven for about 15 minutes, or until they are tender and slightly browned. Remove from the oven and let cool slightly.
3. Make the Filling****: In a mixing bowl, combine the ricotta cheese, half of the mozzarella, Parmesan cheese, egg, garlic powder, dried basil, dried oregano, salt, and pepper. Mix until well blended.
4. Assemble the Rollatini: Spread a thin layer of marinara sauce on the bottom of a baking dish. Take one eggplant slice, place a spoonful of the ricotta mixture at one end, and roll it up tightly. Place the rolled eggplant seam-side down in the baking dish.
Repeat with the remaining slices and filling.
5. Top and Bake: Once all the rollatini are in the baking dish, cover them with the remaining marinara sauce and sprinkle the remaining mozzarella cheese on top. Cover with foil and bake for 20 minutes. Remove the foil and bake for an additional 5-10 minutes, or until the cheese is melted and bubbly.
6. Serve: Allow to cool for a few minutes before serving. Garnish with fresh basil leaves.
Variations and Tips:
- Vegetable Add-Ins: You can add finely chopped spinach or mushrooms to the ricotta filling for extra flavor and nutrition.
- Different Cheeses: Swap out ricotta for cottage cheese or add goat cheese for a tangy twist.
- Spicy Kick: Add red pepper flakes to the filling for some heat.
- Make Ahead: You can prepare the rollatini in advance, cover with foil, and refrigerate until ready to bake. Just add a few extra minutes to the baking time if baking from cold.
- Zucchini Alternative: For a different flavor and texture, try using zucchini slices instead of eggplant!
Enjoy this flavorful and satisfying dish that will keep you aligned with your low-carb goals throughout the summer!
Cold Shrimp Salad With Dill

This invigorating Cold Shrimp Salad with Dill is a perfect low-carb dish to enjoy during the warm summer months. Packed with succulent shrimp and vibrant flavors, it serves as an excellent light meal or a side dish for gatherings.
With a preparation time of just 15 minutes, it's ideal for those looking for a quick yet delicious and nutritious option.
Ingredients:
- 1 pound cooked shrimp, peeled and deveined
- 1 cup cucumber, diced
- ½ cup cherry tomatoes, halved
- ¼ cup red onion, finely chopped
- ½ cup Greek yogurt
- 2 tablespoons fresh dill, chopped
- 1 tablespoon lemon juice
- Salt and pepper to taste
- Optional: Mixed greens for serving
Cooking Steps:
- In a large mixing bowl, combine the cooked shrimp, diced cucumber, halved cherry tomatoes, and chopped red onion.
- In a separate bowl, mix the Greek yogurt, fresh dill, lemon juice, salt, and pepper until well combined.
- Pour the yogurt dressing over the shrimp mixture and gently toss until all the ingredients are evenly coated.
- Taste and adjust seasoning if needed, adding more salt, pepper, or lemon juice to your preference.
- Serve immediately on a bed of mixed greens, or refrigerate for about 30 minutes to allow the flavors to meld before serving.
Variations & Tips:
- For an extra crunch, add diced bell peppers or sliced radishes.
- Experiment with other herbs like parsley or cilantro in place of dill for a different flavor profile.
- If you prefer a spicy kick, consider adding chopped jalapeños or a dash of hot sauce.
- This salad can be made ahead of time; just keep the dressing separate until ready to serve to avoid sogginess.
- Pair the salad with avocado slices or serve it as a filling in lettuce wraps for a delightful low-carb option.
Roasted Beet and Goat Cheese Salad
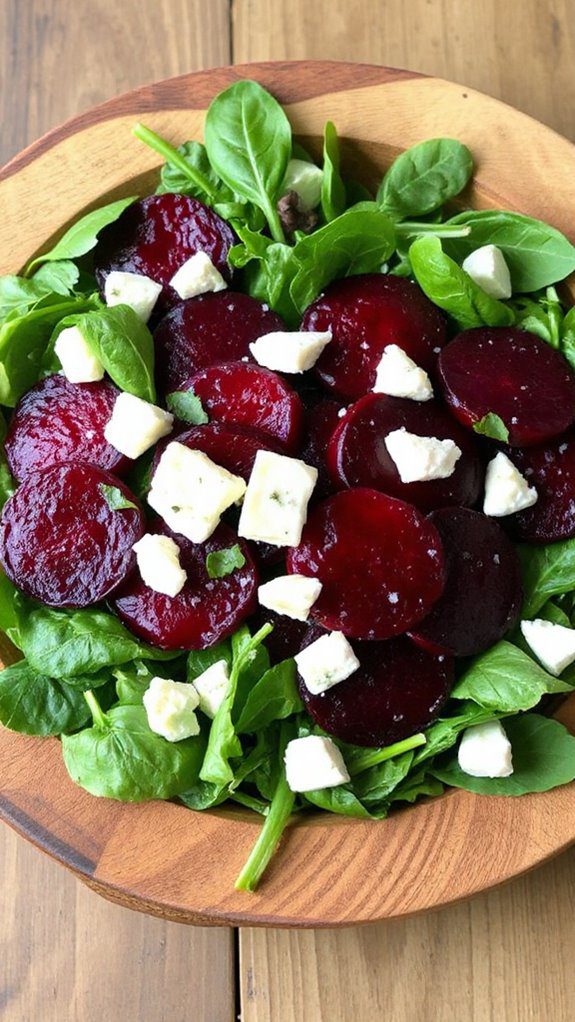
The Roasted Beet and Goat Cheese Salad is a delightful and invigorating dish that combines earthy beets with the tangy creaminess of goat cheese, making it a perfect choice for those following a low-carb diet.
This salad is ideal for summer barbecues, casual lunch gatherings, or as a light dinner option. With a preparation time of about 30 minutes, it's both quick and easy to prepare while being rich in flavor and nutrients.
Ingredients:
- 3 medium-sized beets, washed and trimmed
- 4 cups arugula or mixed salad greens
- ½ cup goat cheese, crumbled
- ¼ cup walnuts or pecans, chopped (optional)
- 2 tablespoons olive oil
- 1 tablespoon balsamic vinegar
- Salt and pepper to taste
- Fresh herbs (such as dill or parsley) for garnish (optional)
Cooking Steps:
- Preheat your oven to 400°F (200°C).
- Wrap each beet individually in aluminum foil and place them on a baking sheet. Roast in the oven for about 45-60 minutes, or until tender. You can check doneness by inserting a fork; it should easily pierce the beet.
- Once cooked, remove the beets from the oven and let them cool slightly. Carefully unwrap the foil and peel the skins off – you can use a paper towel to help with this process if needed.
- Slice the roasted beets into wedges or rounds.
- In a large bowl, combine the arugula or mixed greens with the sliced beets.
- Drizzle the olive oil and balsamic vinegar over the salad, and toss gently to combine. Season with salt and pepper to taste.
- Top the salad with crumbled goat cheese and nuts, if using, and garnish with fresh herbs for added flavor.
Variations and Tips:
- You can substitute goat cheese with feta cheese for a different taste.
- If you're looking for additional protein, consider adding grilled chicken or chickpeas to the salad.
- For a sweeter twist, sprinkle some pomegranate seeds or dried cranberries on top.
- This salad can be made ahead of time; just keep the dressing separate until you're ready to serve to avoid soggy greens.
- Consider roasting extra beets to enjoy in other dishes, as they store well in the refrigerator for up to a week.
Chicken Avocado Salad
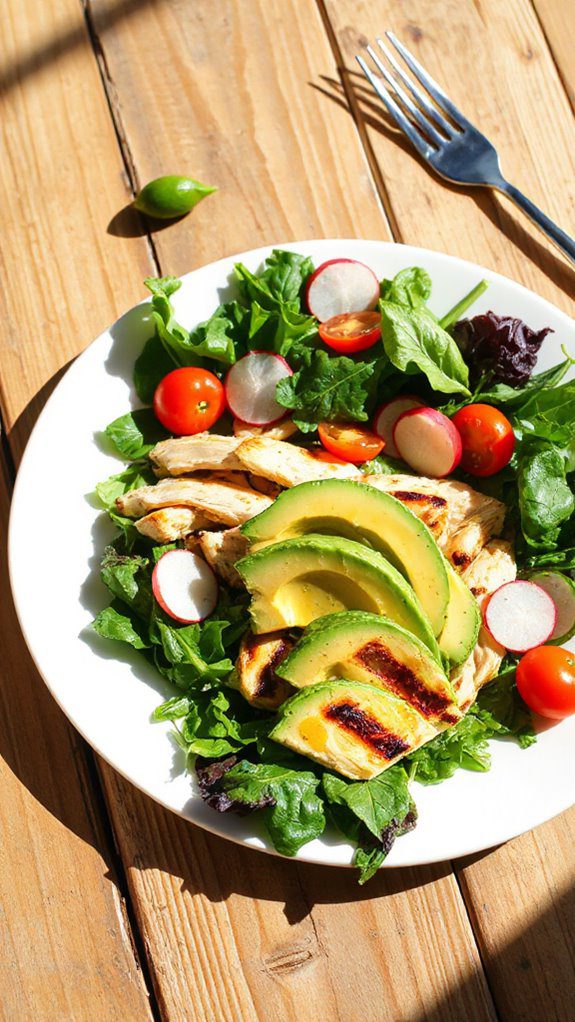
Chicken Avocado Salad is a revitalizing and nutritious dish perfect for those following a low-carb diet, making it ideal for anyone looking to maintain a healthy lifestyle while enjoying delightful flavors.
This salad is not only packed with protein from the chicken but also features healthy fats from the avocados, making it both satisfying and nourishing. Preparation time is minimal, taking about 15 minutes, making it a quick and easy option for lunch or a light dinner, especially during the warm summer months.
Ingredients:
- 2 cups cooked chicken breast, shredded or chopped
- 1 ripe avocado, diced
- 1 small red onion, finely chopped
- 1 cup cherry tomatoes, halved
- 1/2 cup cilantro, chopped
- Juice of 1 lime
- 2 tablespoons olive oil
- Salt and pepper to taste
- Optional: 1 jalapeño, diced (for a spicy kick)
Cooking Steps:
- In a large bowl, combine the shredded or chopped chicken breast with the diced avocado to create a base for your salad.
- Add the finely chopped red onion, halved cherry tomatoes, and chopped cilantro to the bowl.
- In a small bowl, whisk together the lime juice, olive oil, salt, and pepper until well combined. If you like a bit of heat, add the diced jalapeño to the dressing.
- Drizzle the dressing over the salad mixture and gently toss everything together until well coated. Be careful not to mash the avocado.
- Taste and adjust the seasoning, adding more lime juice, salt, or pepper as desired.
- Serve immediately or refrigerate for about 30 minutes to allow the flavors to meld.
Variations and Tips:
- Protein Alternatives: For a different twist, substitute chicken with canned tuna, shrimp, or grilled tofu for a vegetarian option.
- Add Crunch: Include chopped cucumbers or bell peppers for added crunch and freshness.
- Meal Prep: This salad can be made ahead of time and stored in the fridge for up to two days. Just add the avocado just before serving to prevent it from browning.
- Herb Variations: Experiment with different herbs like parsley or basil for a unique flavor profile.
- Extra Creaminess: For creaminess, you can mix in a couple of tablespoons of Greek yogurt or sour cream.
Enjoy this delicious Chicken Avocado Salad as a meal that's both hearty and healthy this summer!
Caesar Salad With Grilled Chicken
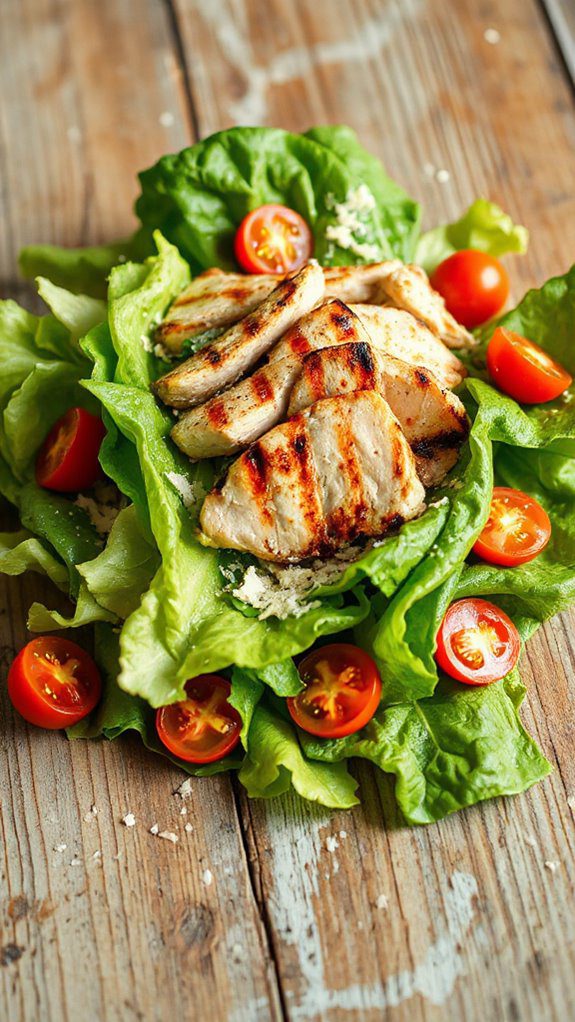
Caesar Salad with Grilled Chicken is a classic dish that combines crisp romaine lettuce, savory grilled chicken, and a creamy dressing, making it a perfect choice for those following a low-carb diet.
This invigorating salad is ideal for summer lunches or dinners and can easily be prepared in about 30 minutes, making it convenient for busy weeknight meals or outdoor gatherings.
Ingredients:
- 2 boneless, skinless chicken breasts
- 4 cups romaine lettuce, chopped
- ½ cup Caesar dressing (homemade or low-carb store-bought)
- ¼ cup grated Parmesan cheese
- ½ cup cherry tomatoes, halved (optional)
- ½ cup croutons (optional, omit for strict low-carb)
- Salt and pepper to taste
- Olive oil for grilling
- Fresh lemon wedges (for serving)
Cooking Instructions:
- Prepare the Chicken: Preheat the grill to medium-high heat. Brush the chicken breasts with olive oil and season with salt and pepper.
- Grill the Chicken: Place the chicken on the grill and cook for about 6-7 minutes on each side, or until the internal temperature reaches 165°F (75°C). Remove from heat and let it rest for 5 minutes before slicing.
- Assemble the Salad: In a large bowl, combine the chopped romaine lettuce, sliced grilled chicken, and cherry tomatoes (if using).
- Dress the Salad: Drizzle the Caesar dressing over the salad and toss gently until all ingredients are well combined. Top with grated Parmesan cheese.
- Serve: Divide the salad onto plates and garnish with fresh lemon wedges. Enjoy immediately.
Variations & Tips:
- For a spicier kick, add some red pepper flakes to the chicken marinade before grilling.
- Substitute chicken with shrimp or salmon for a different protein option.
- If you're looking for extra crunch without carbs, consider adding sliced almonds or sunflower seeds in place of croutons.
- For homemade Caesar dressing, blend mayonnaise, lemon juice, Worcestershire sauce, Dijon mustard, minced garlic, and Parmesan cheese together until smooth. Adjust seasoning to taste.
- To meal prep, grill extra chicken and store it in the fridge for quick salads throughout the week.
Fruit and Nut Energy Bites

Fruit and Nut Energy Bites are a delicious and nutritious snack perfect for anyone looking to maintain a low-carb diet while staying energized throughout the day.
Ideal for busy professionals, students, or anyone needing a quick pick-me-up, these bites are not only easy to make but also versatile and can be packed with your favorite ingredients.
Preparation time is around 15 minutes, and they require no baking, making them a swift addition to your summer snack repertoire.
Ingredients:
- 1 cup almond flour
- 1/2 cup unsweetened shredded coconut
- 1/2 cup nut butter (such as almond or peanut butter)
- 1/4 cup honey or sugar-free syrup
- 1/2 cup mixed nuts (chopped, your choice)
- 1/2 cup dried fruit (such as cranberries or apricots, chopped)
- 1 teaspoon vanilla extract
- A pinch of salt
- Optional: 1/4 cup dark chocolate chips (sugar-free if desired)
Cooking Steps:
- In a large mixing bowl, combine the almond flour and shredded coconut.
- Add the nut butter, honey (or syrup), vanilla extract, and salt to the bowl. Mix well until all ingredients are combined into a sticky dough.
- Fold in the chopped mixed nuts, dried fruit, and optional dark chocolate chips until evenly distributed throughout the mixture.
- With clean hands, scoop out small portions of the mixture and roll them into bite-sized balls (about 1 inch in diameter).
- Place the formed energy bites on a parchment-lined baking sheet or plate.
- Refrigerate for at least 30 minutes to firm up before serving.
- Store leftovers in an airtight container in the refrigerator for up to a week.
Variations and Tips:
- Nut-Free Version: Substitute nut butter with sun butter or soy nut butter for a nut-free alternative.
- Sweetener Alternatives: If you're avoiding honey or sugar completely, consider using powdered erythritol or monk fruit sweetener for a sugar-free option.
- Flavor Variations: Experiment with different types of nuts or seeds, such as pumpkin seeds or chia seeds, to boost nutrition and flavor.
- Mix It Up: Feel free to add spices like cinnamon or cocoa powder to change the flavor profile, creating a new experience with each batch.
- Make a Batch: These energy bites freeze well, so make a larger batch and store some in the freezer for a quick snack later. Just grab and enjoy when you need an energy boost!


