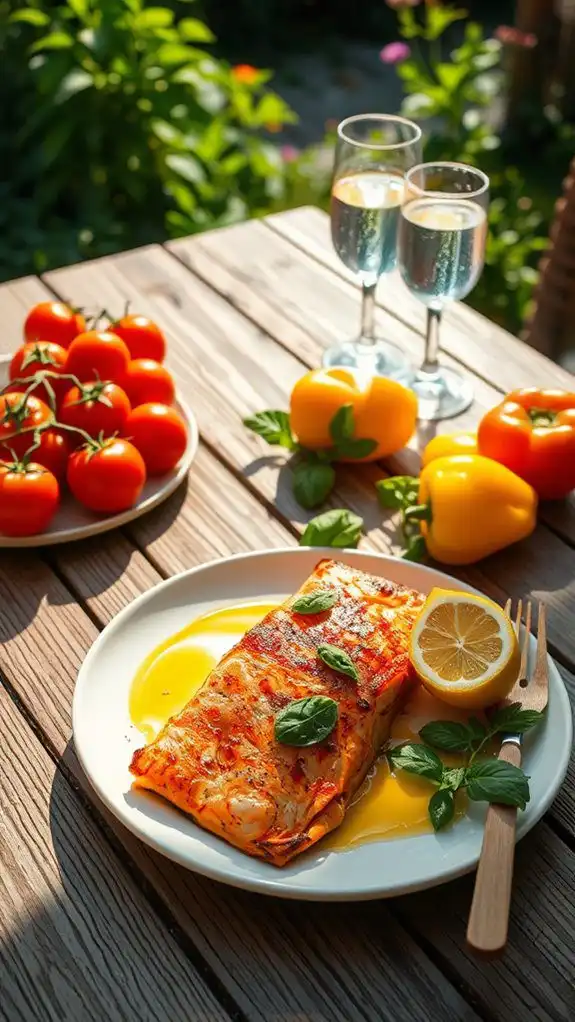
This collection showcases 15 vibrant summer dinner recipes, each requiring just five ingredients. It features delightful options such as Grilled Lemon Herb Chicken, invigorating Tomato and Mozzarella Caprese Salad, and flavorful Shrimp Tacos with Mango Salsa. Also included are Pesto Pasta with Cherry Tomatoes and a quick Beef and Broccoli Stir-Fry. For a no-fuss meal, One-Pan Lemon Garlic Couscous with Veggies and Honey Soy Glazed Tofu stand out. Discover more impressive meals that simplify summer dining.
Grilled Lemon Herb Chicken
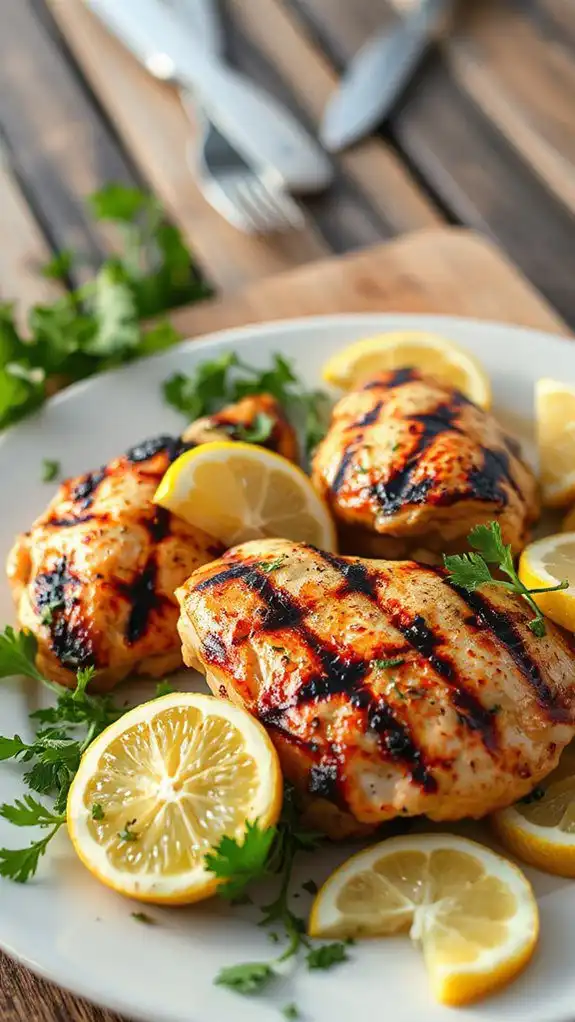
Grilled Lemon Herb Chicken is a flavorful and invigorating dish that captures the essence of summer with its bright citrus notes and aromatic herbs. This dish is perfect for families or gatherings, as it’s easy to prepare and serves as a healthy protein option that can be enjoyed by everyone. The preparation time is approximately 15 minutes, with an additional marinating time of at least 30 minutes, plus about 10-15 minutes for grilling.
Ingredients
- 4 boneless, skinless chicken breasts
- 1/4 cup olive oil
- 1/4 cup fresh lemon juice (about 2 lemons)
- 3 cloves garlic, minced
- 2 tablespoons fresh rosemary, chopped
- 2 tablespoons fresh thyme, chopped
- 1 teaspoon salt
- 1/2 teaspoon black pepper
- Lemon wedges, for serving
- Fresh parsley, for garnish
Cooking Steps
- Marinate the Chicken: In a medium bowl, whisk together the olive oil, lemon juice, minced garlic, chopped rosemary, chopped thyme, salt, and black pepper. Place the chicken breasts in a resealable plastic bag or a shallow dish and pour the marinade over them. Seal the bag or cover the dish and refrigerate for at least 30 minutes (or up to 4 hours for more flavor).
- Preheat the Grill: Preheat your grill to medium-high heat (about 400°F or 200°C). If using a charcoal grill, make sure the coals are hot and have turned white.
- Grill the Chicken: Remove the chicken from the marinade and let any excess marinade drip off. Discard the marinade. Place the chicken on the grill and cook for 6-8 minutes on each side, or until the internal temperature reaches 165°F (75°C) and the chicken has nice grill marks.
- Rest and Serve: Once cooked, remove the chicken from the grill and let it rest for about 5 minutes. This allows the juices to redistribute. Serve with lemon wedges and garnish with fresh parsley.
Variations and Tips
- Variation: For a spicy kick, add 1 teaspoon of red pepper flakes to the marinade.
- Serving Suggestions: Pair the grilled chicken with a fresh salad, grilled vegetables, or a side of quinoa for a complete meal.
- Make it Ahead: Marinate the chicken the night before so it’s ready to grill when you get home.
- Storage: Leftovers can be stored in an airtight container in the refrigerator for up to 3 days. Reheat in the oven or on a grill to maintain texture.
- Grilling Alternative: If you don’t have a grill, you can cook the chicken in a grill pan on the stove or bake it in the oven at 375°F (190°C) for 25-30 minutes until cooked through.
Enjoy your delicious and zesty Grilled Lemon Herb Chicken, perfect for those warm summer evenings!
Tomato and Mozzarella Caprese Salad
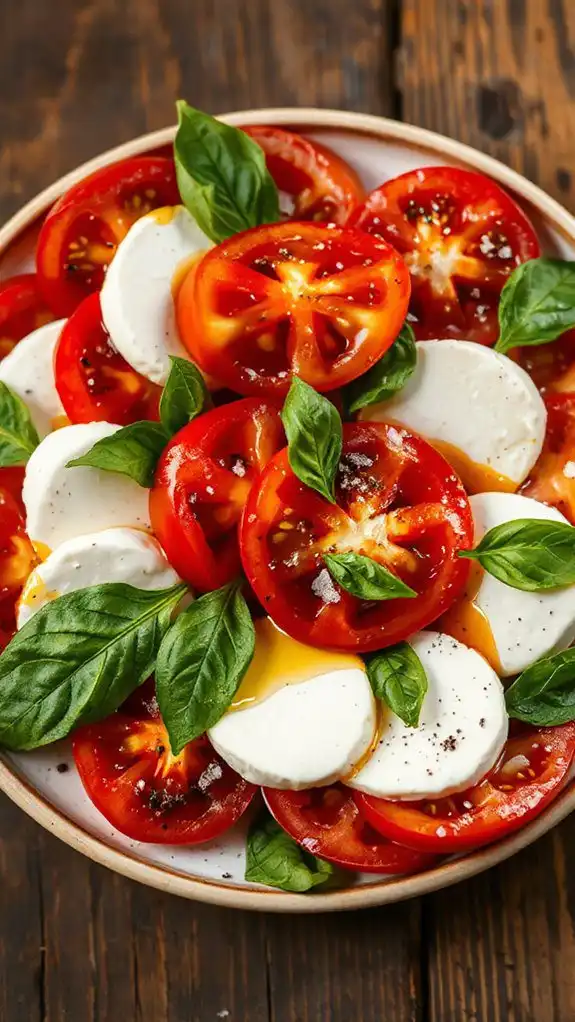
Tomato and Mozzarella Caprese Salad is a fresh and vibrant dish that embodies the essence of summer with its simple yet delicious combination of ripe tomatoes, creamy mozzarella, and fragrant basil.
This salad is perfect for those who appreciate light and healthy meals – great as an appetizer or a side dish. With a total preparation time of about 15 minutes, it’s an ideal choice for busy weeknights or casual gatherings.
Ingredients:
- 4 ripe tomatoes
- 8 oz fresh mozzarella cheese
- Fresh basil leaves
- Extra virgin olive oil
- Balsamic vinegar (optional)
- Salt and pepper to taste
Instructions:
- Begin by washing the tomatoes and basil leaves thoroughly.
- Slice the tomatoes into thick rounds, about 1/4 to 1/2 inch thick.
- Slice the fresh mozzarella cheese into similar thickness rounds.
- On a serving platter, alternate laying out the tomato slices, mozzarella slices, and basil leaves in a circular pattern or in rows.
- Drizzle extra virgin olive oil generously over the assembled salad.
- If desired, drizzle a bit of balsamic vinegar for an added touch of sweetness and acidity.
- Finally, sprinkle salt and pepper to taste over the entire salad.
- Serve immediately, or let it sit for a few minutes to allow the flavors to meld.
Variations and Tips:
- For a twist, try adding avocado slices or a sprinkle of toasted pine nuts for added texture.
- Experiment with different types of tomatoes, such as heirloom or cherry tomatoes, for varied flavor profiles.
- Add a few turns of freshly cracked black pepper or a pinch of red pepper flakes for a bit of heat.
- This salad can be prepared in advance; however, it is best served fresh to enjoy the texture of the mozzarella and tomatoes.
Shrimp Tacos With Mango Salsa
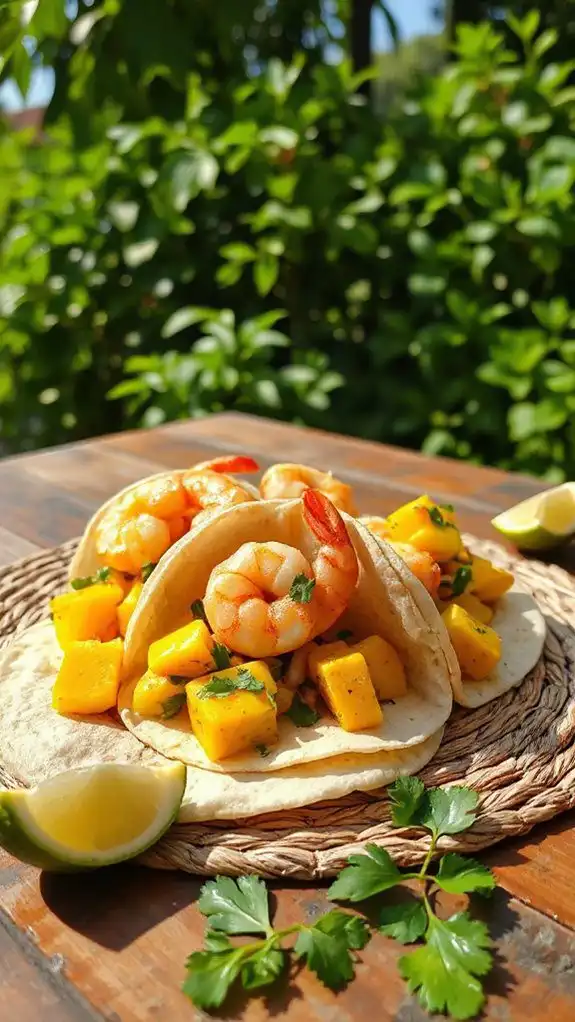
Shrimp tacos with mango salsa are a vibrant and invigorating dish perfect for summer gatherings or a light weeknight dinner. This recipe serves 4 people and takes about 30 minutes to prepare, making it a quick and delicious option for seafood lovers. The combination of succulent shrimp and sweet mango salsa creates a delightful balance of flavors, sure to impress family and friends alike.
Ingredients:
- 1 lb shrimp, peeled and deveined
- 2 tablespoons olive oil
- 1 teaspoon chili powder
- 1 teaspoon cumin
- Salt and pepper, to taste
- 8 small corn or flour tortillas
- 1 ripe mango, diced
- 1/2 red onion, finely chopped
- 1 jalapeño, seeded and minced (optional)
- 1/4 cup fresh cilantro, chopped
- Juice of 1 lime
- Avocado slices (for serving)
- Lime wedges (for serving)
Cooking Steps:
- In a medium bowl, combine the shrimp, olive oil, chili powder, cumin, salt, and pepper. Toss until the shrimp are evenly coated and let marinate for about 10 minutes.
- While the shrimp is marinating, prepare the mango salsa. In a separate bowl, mix the diced mango, red onion, jalapeño (if using), cilantro, and lime juice. Season with a pinch of salt and toss to combine. Set aside.
- Heat a large skillet over medium-high heat. Add the marinated shrimp and cook for about 2-3 minutes on each side, or until the shrimp are pink and opaque. Remove from heat.
- Warm the tortillas in a dry skillet or microwave until pliable.
- To assemble the tacos, place a few shrimp on each tortilla, top with mango salsa, and add avocado slices. Serve with lime wedges on the side.
Variations & Tips:
- For added crunch, consider adding shredded cabbage or radishes to the tacos.
- If you prefer grilled shrimp, skewering them and cooking them on a grill can enhance the flavor.
- Try substituting the mango with pineapple or peach for a different fruity twist.
- For a vegetarian option, replace shrimp with grilled vegetables or tofu.
- Adjust the heat level by adding more or less jalapeño to suit your taste.
Pesto Pasta With Cherry Tomatoes
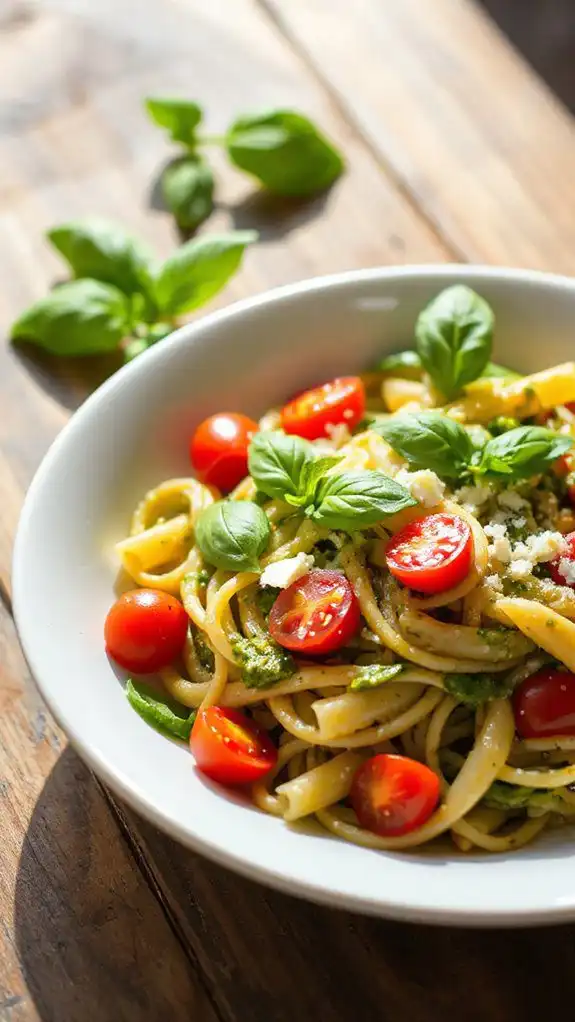
Pesto Pasta with Cherry Tomatoes is a vibrant and flavorful dish that embodies the essence of summer. This recipe is ideal for anyone looking to whip up a quick yet satisfying meal, making it perfect for weeknight dinners or al fresco gatherings.
With a preparation time of just 20 minutes, it’s a delightful option for pasta lovers who want to enjoy fresh, seasonal ingredients without spending hours in the kitchen.
Ingredients:
- 8 oz pasta of your choice (such as spaghetti or penne)
- 1 cup fresh basil pesto
- 1 cup cherry tomatoes, halved
- 1/4 cup grated Parmesan cheese
- 2 tablespoons olive oil
- Salt and pepper to taste
- Fresh basil leaves for garnish (optional)
Cooking Steps:
- Cook the Pasta: In a large pot of boiling salted water, cook the pasta according to package instructions until al dente. Reserve 1/2 cup of pasta water, then drain the pasta and set aside.
- Prepare the Sauce: In the same pot or a large skillet, heat the olive oil over medium heat. Add the halved cherry tomatoes and sauté for about 2-3 minutes until they start to soften.
- Combine: Add the drained pasta back to the pot with the cooked cherry tomatoes. Stir in the pesto and mix well. If the pasta seems dry, add a bit of the reserved pasta water until you reach your desired consistency.
- Season: Toss in the grated Parmesan cheese, and season with salt and pepper to taste. Stir until everything is well combined and heated through.
- Serve: Plate the pasta and garnish with fresh basil leaves and additional Parmesan cheese if desired. Enjoy your delicious, fresh summer dinner!
Variations & Tips:
- Add Proteins: For a heartier dish, consider adding grilled chicken, shrimp, or roasted chickpeas for protein.
- Vegetable Boost: You can include other vegetables like spinach, arugula, or zucchini to enhance nutrition and flavor.
- Nut-Free Option: If you need a nut-free pesto, substitute the pine nuts with sunflower seeds.
- Pasta Suggestions: This dish works well with gluten-free pasta alternatives, ensuring everyone can enjoy it.
- Make Ahead: The pesto can be made in advance and stored in the fridge for up to a week, making preparation even quicker!
Beef and Broccoli Stir-Fry
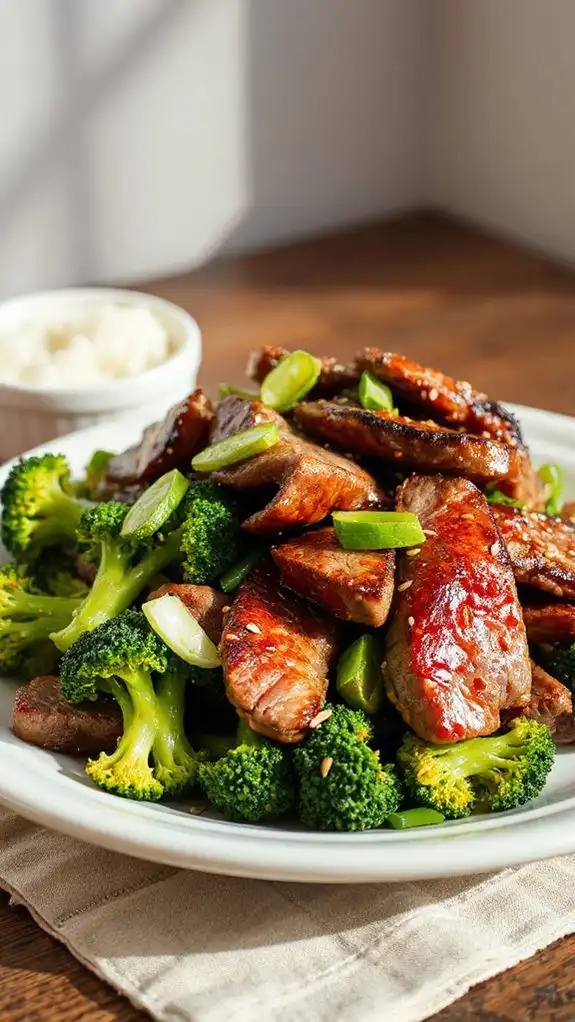
Beef and Broccoli Stir-Fry is a quick and delicious dish that combines tender slices of beef with crisp, green broccoli in a flavorful, savory sauce. This recipe is perfect for busy weeknights or when you’re craving a taste of Asian cuisine.
With a preparation time of around 30 minutes, it’s ideal for families looking for a satisfying meal or anyone wanting to whip up something delicious in a short amount of time.
Ingredients:
- 1 lb flank steak, thinly sliced against the grain
- 2 cups broccoli florets
- 3 tablespoons soy sauce
- 2 tablespoons oyster sauce
- 1 tablespoon cornstarch
- 1 tablespoon vegetable oil
- 2 cloves garlic, minced
- 1 teaspoon fresh ginger, grated
- 1 tablespoon sesame oil
- Cooked rice or noodles (for serving)
- Sesame seeds (for garnish)
- Green onions, sliced (for garnish)
Cooking Instructions:
- In a bowl, combine the sliced beef, soy sauce, oyster sauce, and cornstarch. Toss to coat and let marinate for about 10 minutes.
- While the beef is marinating, bring a pot of water to boil and blanch the broccoli florets for 2-3 minutes, then transfer to an ice bath to stop the cooking process. Drain and set aside.
- Heat the vegetable oil in a large skillet or wok over medium-high heat. Once hot, add the minced garlic and grated ginger, stirring frequently for about 30 seconds until fragrant.
- Add the marinated beef to the pan. Stir-fry for about 3-4 minutes until browned and cooked through.
- Incorporate the blanched broccoli into the skillet with the beef, and drizzle sesame oil over the mixture. Stir-fry for another 2-3 minutes until everything is heated through and well mixed.
- Serve hot over cooked rice or noodles, garnished with sesame seeds and sliced green onions.
Variations and Tips:
- For a spicier version, add red pepper flakes or a splash of chili oil while cooking.
- You can substitute the flank steak with skirt steak, sirloin, or chicken if preferred.
- Feel free to include other vegetables such as bell peppers, snap peas, or carrots to enhance the nutritional value and add color.
- To save time, use pre-cut beef and frozen broccoli florets; just make certain they are thawed before cooking.
- The dish can be prepared ahead of time, and leftovers store well in the fridge for up to 3 days. Reheat gently on the stove to maintain texture.
Zucchini Noodles With Garlic Shrimp
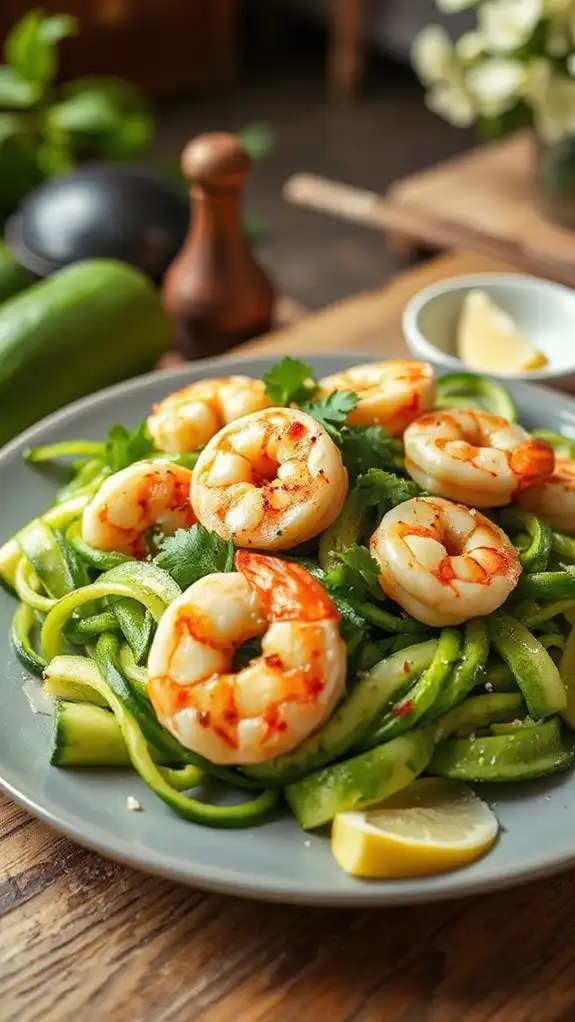
Zucchini Noodles with Garlic Shrimp is a light and nutritious dish that brings together the invigorating taste of summer vegetables and succulent shrimp. This delightful meal is perfect for seafood lovers and those looking for a healthier alternative to traditional pasta.
In just about 30 minutes, you can whip up this flavorful dinner that’s great for family gatherings or a quick weeknight meal.
Ingredients:
- 4 medium zucchinis
- 1 pound large shrimp, peeled and deveined
- 4 cloves garlic, minced
- 2 tablespoons olive oil
- 1/4 teaspoon red pepper flakes (optional)
- Salt and pepper to taste
- 1/4 cup fresh parsley, chopped
- Juice of 1 lemon
- Grated Parmesan cheese for serving (optional)
Cooking Steps:
- Prepare the Zucchini Noodles: Using a spiralizer or a julienne peeler, create noodles from the zucchinis. Set aside.
- Cook the Shrimp: In a large skillet, heat olive oil over medium heat. Add minced garlic and sauté for about 30 seconds until fragrant. Be careful not to burn the garlic.
- Add Shrimp: Introduce the shrimp to the skillet, seasoning with salt, pepper, and red pepper flakes if using. Cook the shrimp for 2-3 minutes on each side, or until they are pink and opaque. Remove the cooked shrimp and set aside.
- Sauté Zucchini Noodles: In the same skillet, add the zucchini noodles and sauté for 2-3 minutes until they are just tender. Avoid overcooking to prevent them from becoming mushy.
- Combine and Serve: Return the cooked shrimp to the skillet, add lemon juice, and toss everything together. Cook for an additional minute to heat through. Sprinkle with fresh parsley before serving and top with grated Parmesan cheese if desired.
Variations and Tips:
- Protein Substitutes: Try substituting shrimp with chicken, tofu, or other seafood like scallops.
- Add Vegetables: Enhance the dish by adding bell peppers, cherry tomatoes, or spinach for extra color and nutrition.
- Pasta Alternative: For a less keto-friendly option, serve over regular pasta or add a handful of whole-grain spaghetti to the dish.
- Store and Reheat: Leftovers can be stored in an airtight container in the refrigerator for up to two days. Reheat gently on the stove to avoid sogginess.
This dish is not only quick to prepare but also allows for plenty of creativity in flavoring and presentation, making it a versatile choice for summer dinners. Enjoy!
Lemon Garlic Roasted Salmon
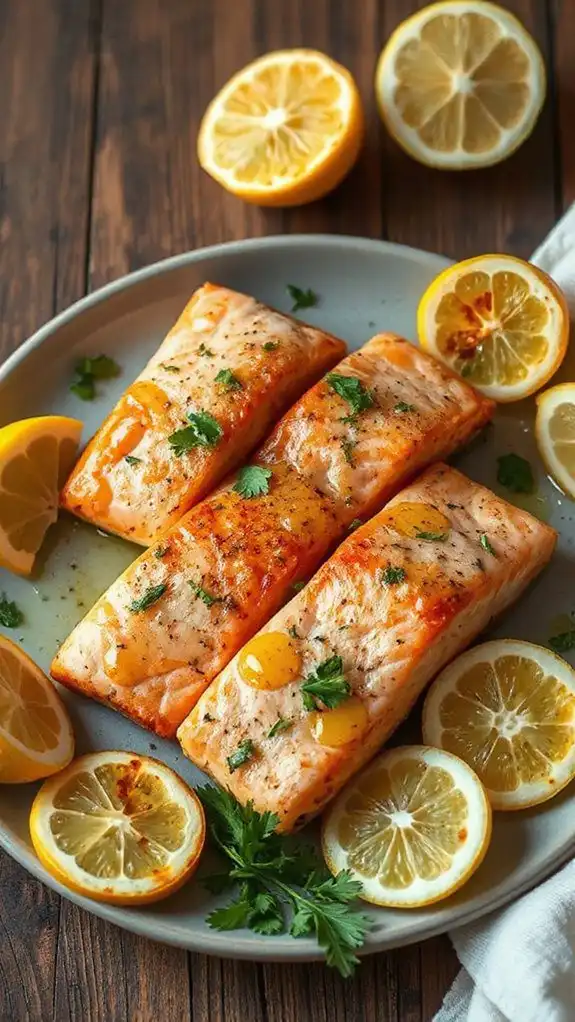
Lemon Garlic Roasted Salmon is a light and flavorful dish that showcases the rich, buttery taste of fresh salmon fillets, perfectly complemented by the zesty brightness of lemon and the aromatic essence of garlic. This dish is ideal for those looking to enjoy a healthy, yet decadent meal, making it perfect for summer dinners with family and friends or an elegant date night at home.
With a preparation time of just 10 minutes and a cooking time of 15 minutes, you can have this delicious entrée ready in under half an hour.
Ingredients:
- 4 salmon fillets (about 6 ounces each)
- 4 tablespoons olive oil
- 4 cloves garlic, minced
- 2 lemons (zested and juiced)
- Salt and pepper, to taste
- Fresh parsley, chopped (for garnish)
- Lemon slices (for serving)
Cooking Steps:
- Preheat the Oven: Preheat your oven to 400°F (200°C).
- Prepare the Marinade: In a small bowl, mix together the olive oil, minced garlic, lemon zest, and lemon juice. Season with salt and pepper to taste.
- Marinate the Salmon: Place the salmon fillets on a lined baking sheet. Pour the lemon garlic mixture over the fillets, ensuring they are well-coated. Let them marinate for about 15 minutes (if time permits) to enhance the flavors.
- Roast the Salmon: Place the baking sheet in the preheated oven and roast the salmon for 12-15 minutes, or until it flakes easily with a fork. The internal temperature should reach 145°F (63°C).
- Serve: Once cooked, remove from the oven and let rest for a couple of minutes. Garnish with fresh parsley and serve with lemon slices on the side.
Variations and Tips:
- Herbs: Experiment by adding other herbs such as dill or thyme to the marinade for a different flavor profile.
- Vegetables: Roast some asparagus, bell peppers, or zucchini on the same baking sheet for a complete meal.
- Grilling Option: Instead of roasting, you can grill the salmon fillets for a smoky flavor. Just make sure to oil the grill grates to prevent sticking.
- Serving Suggestions: Pair with a light salad or quinoa for a wholesome dinner.
- Storage: Leftovers can be stored in an airtight container in the refrigerator for up to 2 days. Reheat gently in the oven or enjoy cold in salads.
Mediterranean Quinoa Bowl
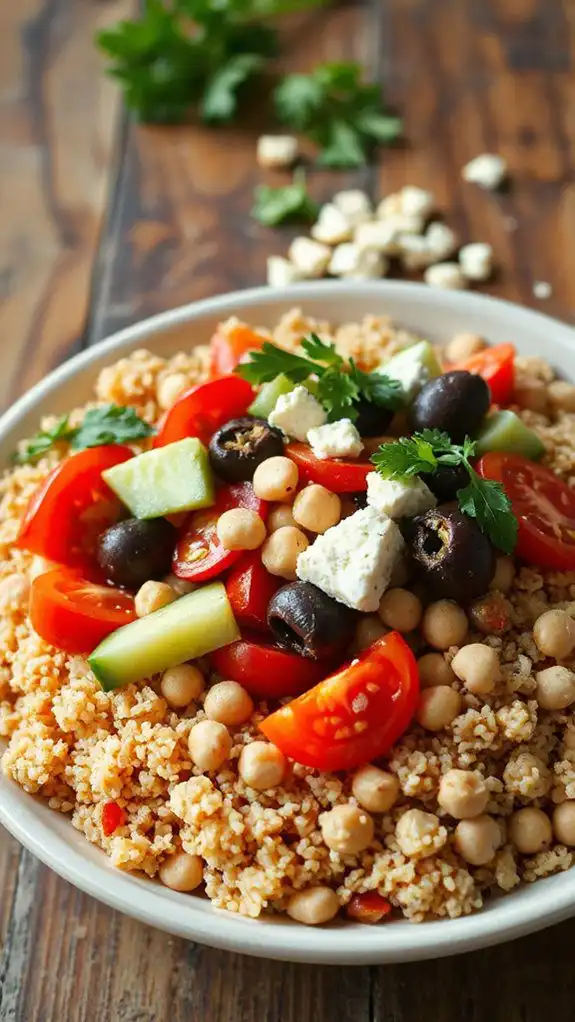
The Mediterranean Quinoa Bowl is a vibrant, nutritious meal that beautifully combines the protein-packed goodness of quinoa with fresh vegetables and bold Mediterranean flavors. This dish is perfect for vegans, vegetarians, and anyone looking for a healthy dinner option, and it can be made in approximately 30 minutes.
It’s not only colorful and delicious but also adjustable to your taste preferences, making it ideal for family dinners or casual gatherings.
Ingredients:
- 1 cup quinoa
- 2 cups water or vegetable broth
- 1 cup cherry tomatoes, halved
- 1 cucumber, diced
- 1 red bell pepper, diced
- 1/2 red onion, finely chopped
- 1 cup canned chickpeas, rinsed and drained
- 1/2 cup Kalamata olives, pitted and sliced
- 1/2 cup feta cheese, crumbled (optional for non-vegan version)
- 1/4 cup fresh parsley, chopped
- 3 tablespoons olive oil
- 2 tablespoons lemon juice
- 1 teaspoon dried oregano
- Salt and pepper to taste
Cooking Steps:
- Rinse the quinoa under cold water in a fine-mesh strainer to remove any bitterness.
- In a medium saucepan, bring the water (or vegetable broth) to a boil. Add the rinsed quinoa, cover, and reduce heat to low. Simmer for about 15 minutes, or until all the liquid is absorbed and the quinoa is fluffy. Remove from heat and let it sit for 5 minutes, then fluff with a fork.
- In a large bowl, combine the cherry tomatoes, cucumber, red bell pepper, red onion, chickpeas, Kalamata olives, and fresh parsley.
- In a small bowl, whisk together the olive oil, lemon juice, oregano, salt, and pepper to create a dressing.
- Once the quinoa has cooled slightly, add it to the vegetable mixture. Pour the dressing over the quinoa bowl and toss gently to combine.
- If desired, sprinkle with crumbled feta cheese before serving.
Variations and Tips:
- For extra protein, consider adding grilled chicken or shrimp if you’re not vegetarian.
- Substitute quinoa with couscous or farro for different textures.
- To enhance flavor, marinate the chickpeas in lemon juice, garlic, and herbs before adding them to the bowl.
- Feel free to add other vegetables like roasted zucchini, steamed asparagus, or spinach based on availability and seasonality.
- This bowl can be served warm or cold, making it great for meal prep or as leftovers. Enjoy it as a standalone meal or pair it with pita bread and hummus for a more filling experience.
Spicy Chickpea and Spinach Stew
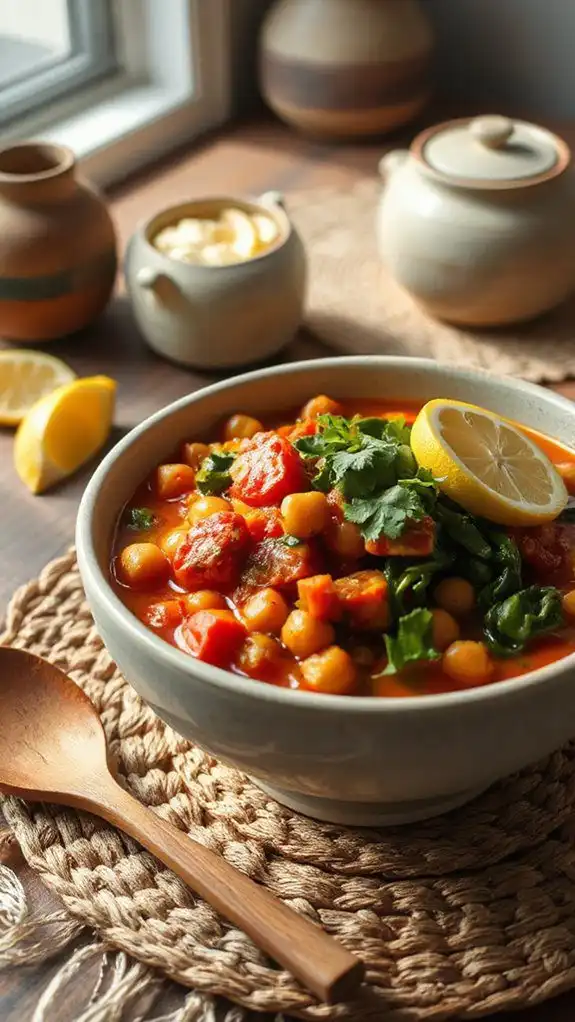
Spicy Chickpea and Spinach Stew is a vibrant and hearty dish that combines the earthiness of chickpeas with the wholesome goodness of spinach, all enhanced by aromatic spices. This stew is perfect for vegetarians or anyone looking to incorporate more plant-based meals into their diet. With a preparation time of just 15 minutes and a cooking time of about 25 minutes, this recipe is not only simple and quick but also ideal for a summer dinner that leaves you feeling nourished and satisfied.
Ingredients:
- 1 can chickpeas, drained and rinsed
- 2 cups fresh spinach, washed and roughly chopped
- 1 medium onion, diced
- 3 cloves garlic, minced
- 1 can diced tomatoes (14.5 oz)
- 2 tablespoons olive oil
- 1 teaspoon cumin
- 1 teaspoon smoked paprika
- 1/2 teaspoon red pepper flakes (adjust to taste)
- Salt and pepper to taste
- Fresh cilantro or parsley for garnish (optional)
- Lemon wedges for serving (optional)
Cooking Steps:
- In a large pot, heat the olive oil over medium heat. Add the diced onion and sauté for about 5 minutes until translucent.
- Stir in the minced garlic, cumin, smoked paprika, and red pepper flakes, cooking for an additional 1 minute until fragrant.
- Add the canned tomatoes (with their juices) and let the mixture simmer for about 5 minutes, allowing the flavors to meld together.
- Incorporate the drained chickpeas and allow the stew to simmer for another 10 minutes, stirring occasionally.
- Just before serving, mix in the fresh spinach until wilted, seasoning with salt and pepper to taste.
- Serve hot, garnished with fresh cilantro or parsley and a squeeze of lemon, if desired.
Variations and Tips:
- For a creamier texture, stir in a splash of coconut milk or a dollop of Greek yogurt before serving.
- You can add other vegetables like bell peppers or zucchini for extra nutrition and flavor.
- To boost the protein content, consider adding grilled chicken or shrimp for a non-vegetarian option.
- Adjust the spice levels by varying the amount of red pepper flakes or using a milder paprika if desired.
- This stew stores well and can be kept in the refrigerator for up to 3 days, making it perfect for meal prep. Reheat gently on the stove before serving.
BBQ Chicken Flatbreads
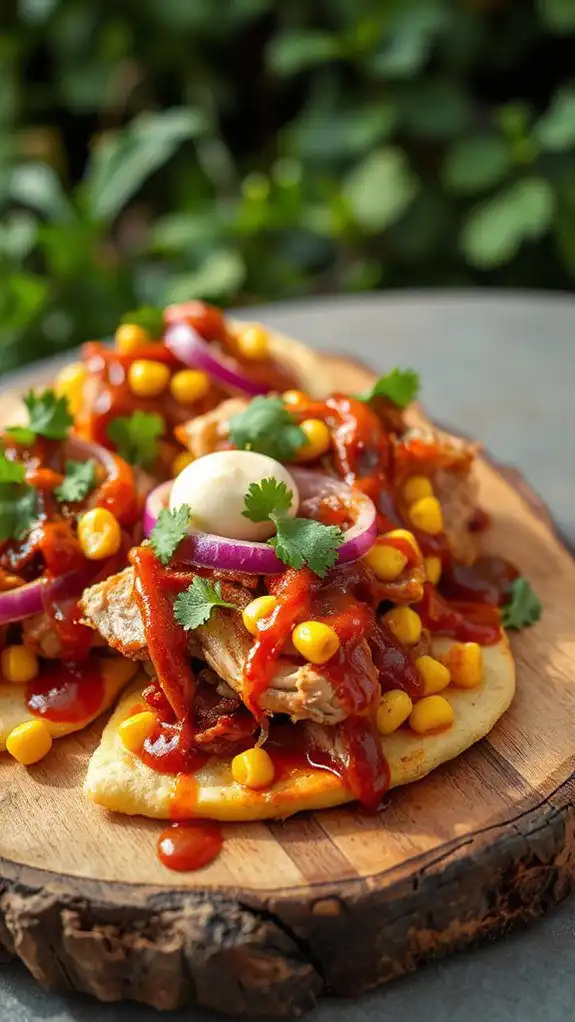
BBQ Chicken Flatbreads are a delicious and easy-to-make dish that combines tender, grilled chicken with smoky barbecue sauce, topped with fresh vegetables and melted cheese, all served on a warm flatbread. This dish is perfect for summer gatherings, family dinners, or a quick weeknight meal.
With a preparation time of about 20 minutes and a cooking time of around 15 minutes, it’s an ideal choice for those looking for a satisfying yet simple meal.
Ingredients:
- 2 cups cooked chicken, shredded
- 1 cup barbecue sauce (your choice of flavor)
- 4 flatbreads or naan
- 1 cup shredded cheese (mozzarella or cheddar)
- 1/2 small red onion, thinly sliced
- 1/2 cup corn (canned or grilled)
- 1/2 cup chopped fresh cilantro (optional)
- Olive oil (for brushing)
- Salt and pepper to taste
Cooking Instructions:
- Preheat your grill or oven to 400°F (200°C).
- In a bowl, mix the shredded chicken with the barbecue sauce until well coated.
- Place the flatbreads on a flat surface and brush each one lightly with olive oil.
- Evenly distribute the BBQ chicken mixture over each flatbread, leaving a small border around the edges.
- Add the sliced red onion and corn on top of the chicken.
- Sprinkle the shredded cheese over the top of each flatbread.
- Grill the flatbreads for about 5-7 minutes, or until the cheese is melted and bubbly. If using an oven, place on a baking sheet and bake for about 10-15 minutes.
- Remove from heat and let cool slightly. Top with fresh cilantro, if desired, and season with salt and pepper to taste.
- Slice into pieces and serve warm.
Variations and Tips:
- Swap out the chicken for shredded pork or beef for a different protein option.
- For a vegetarian version, use grilled vegetables and a plant-based BBQ sauce.
- Add additional toppings like sliced jalapeños, diced bell peppers, or avocado for extra flavor and texture.
- Try using different types of cheese, such as gouda or pepper jack, for a unique twist.
- If you don’t have a grill, you can use a stovetop grill pan or bake the flatbreads in the oven.
Cucumber and Avocado Salad
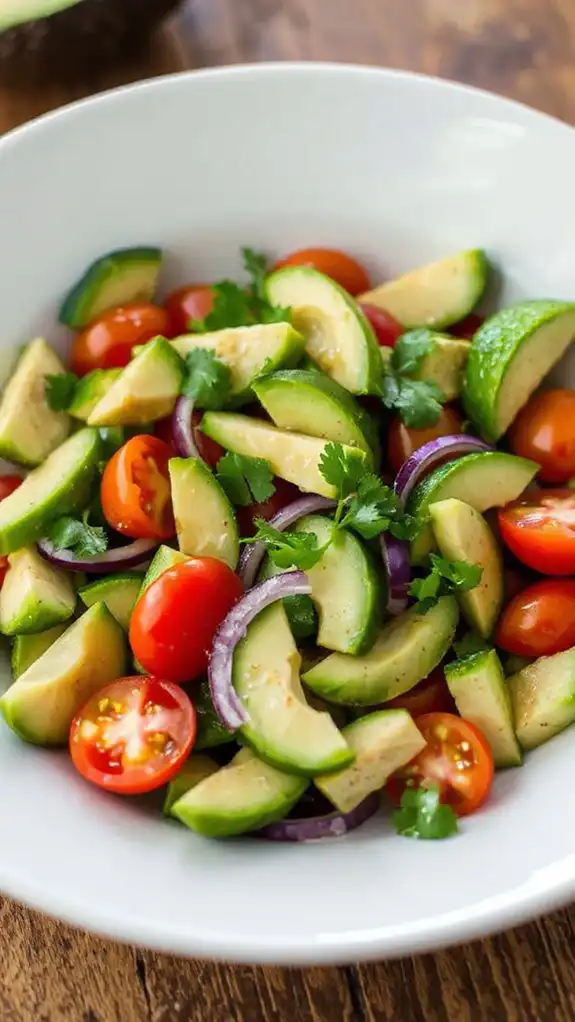
Cucumber and Avocado Salad is a revitalizing and light dish perfect for summer dinners or as a side for barbecues and picnics.
This salad brings together the crispiness of freshly sliced cucumbers and the creamy texture of avocados, all while being bursting with flavors from a zesty dressing.
It’s ideal for health-conscious individuals or anyone looking to enjoy a cool, vegetable-packed meal. Preparation time is just 15 minutes, making it an easy and quick option for a busy evening.
Ingredients:
- 2 large cucumbers
- 2 ripe avocados
- 1/4 red onion, finely sliced
- 1 cup cherry tomatoes, halved
- 1/4 cup fresh cilantro, chopped
- Juice of 1 lime
- 2 tablespoons olive oil
- Salt and pepper to taste
Cooking Steps:
- Start by washing the cucumbers thoroughly. You can peel them if you prefer, but leaving the skin on adds a nice crunch and additional nutrients.
- Slice the cucumbers into thin rounds and place them in a large mixing bowl.
- Cut the avocados in half, remove the pit, and scoop the flesh into the bowl with cucumbers. Make sure to cut the avocados into bite-sized pieces.
- Add the finely sliced red onion and halved cherry tomatoes to the bowl.
- In a small bowl, whisk together the lime juice and olive oil. Season the dressing with salt and pepper to taste.
- Pour the dressing over the salad and gently toss everything together, making sure to coat the ingredients without mashing the avocados.
- For added freshness, sprinkle the chopped cilantro on top and give the salad another light toss before serving.
Variations and Tips:
- For a protein boost, add cooked shrimp or grilled chicken to the salad.
- Incorporate additional vegetables such as bell peppers or radishes for extra crunch and color.
- Add some feta cheese or crumbled goat cheese for a creamy element.
- To enhance the flavors, let the salad sit for about 10 minutes before serving, allowing the ingredients to marinate slightly.
- If you want a spicier kick, consider adding diced jalapeños or a pinch of chili flakes to the dressing.
One-Pan Lemon Garlic Couscous With Veggies
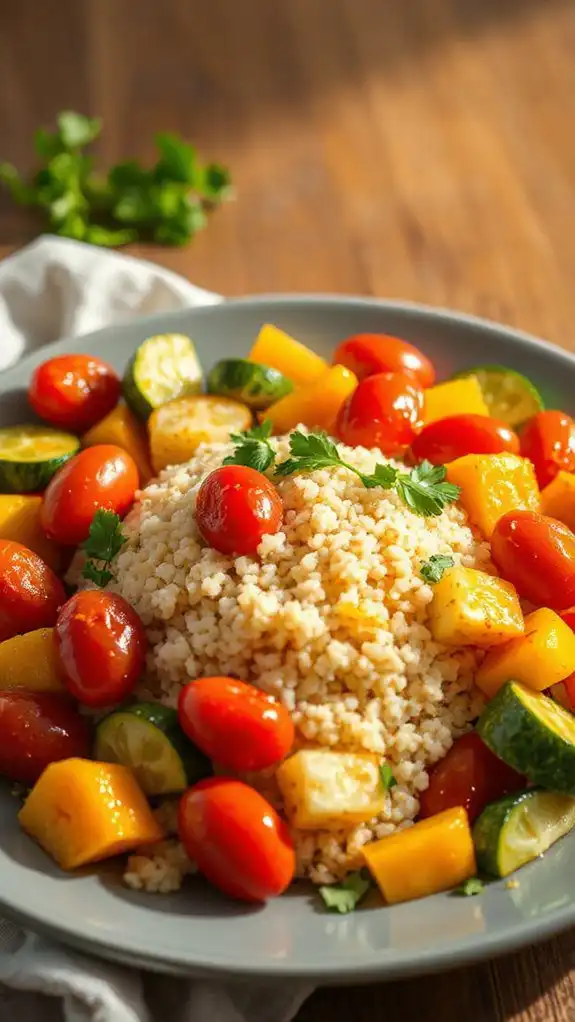
- 1 cup couscous
- 1 3/4 cups vegetable broth (or water)
- 1 tablespoon olive oil
- 3 cloves garlic, minced
- 1 cup bell peppers, chopped (any color)
- 1 cup zucchini, diced
- 1 cup cherry tomatoes, halved
- 1 teaspoon lemon zest
- 2 tablespoons lemon juice
- Salt and pepper to taste
- Fresh parsley or basil for garnish
Cooking Steps:
- In a large skillet or saucepan, heat olive oil over medium heat. Add the minced garlic and sauté for about 1 minute or until fragrant, being careful not to let it burn.
- Add the chopped bell peppers, zucchini, and halved cherry tomatoes to the skillet. Sauté the vegetables for about 5-7 minutes, until they begin to soften.
- Pour in the vegetable broth (or water) and bring to a boil. Stir in the couscous, lemon zest, salt, and pepper.
- Reduce the heat to low, cover the skillet, and let it simmer for about 5 minutes or until the couscous has absorbed the liquid.
- Remove the skillet from the heat and fluff the couscous with a fork. Stir in the lemon juice for an extra burst of flavor.
- Serve warm, garnished with fresh parsley or basil for a revitalizing touch.
Variations and Tips:
- Vegetable Variations: Feel free to swap the vegetables based on your preference or seasonal availability. Broccoli, spinach, or asparagus can add great variety.
- Protein Boost: For a heartier meal, consider adding cooked chickpeas or grilled chicken to the dish before serving.
- Flavor Enhancement: Add a teaspoon of cumin or smoked paprika for a different flavor profile.
- Make it Ahead: This dish can be made in advance and stored in the refrigerator for up to 3 days, making it an excellent meal prep option.
- One-Pan Cleanup: Since this is a one-pan meal, cleanup is a breeze; simply enjoy your dinner without the worry of a messy kitchen!
Honey Soy Glazed Tofu
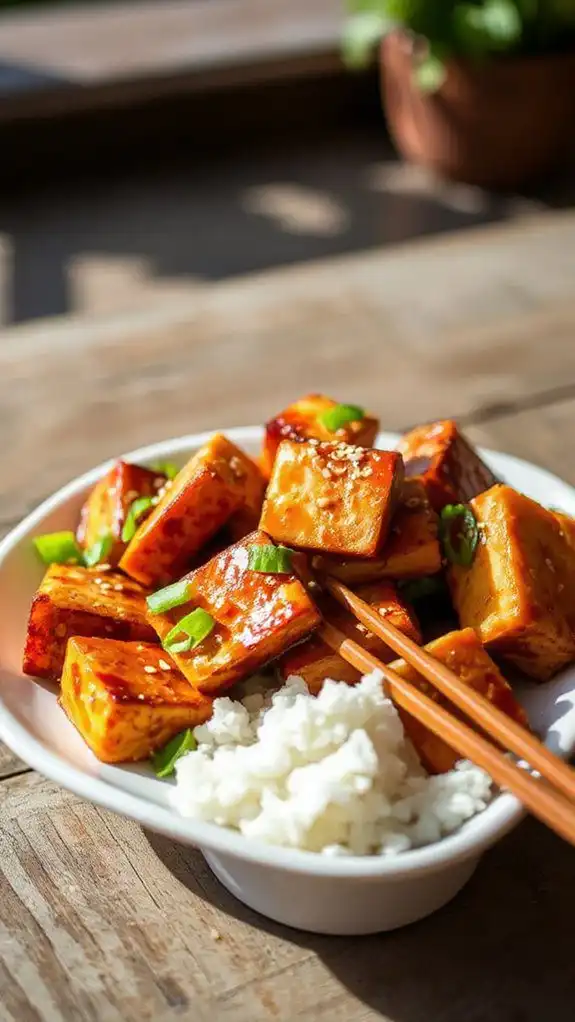
Honey Soy Glazed Tofu is a delightful and savory dish that beautifully marries the sweetness of honey with the umami richness of soy sauce. This versatile recipe is perfect for vegetarians and vegans alike, making it an excellent option for summer gatherings or family dinners. With a total preparation and cooking time of around 30 minutes, it’s quick to whip up, yet impressive enough to serve to guests.
Ingredients:
- 14 oz firm tofu, pressed and cubed
- 2 tablespoons soy sauce
- 2 tablespoons honey (or maple syrup for a vegan version)
- 1 tablespoon sesame oil
- 1 tablespoon rice vinegar
- 1 teaspoon minced garlic
- 1 teaspoon minced ginger
- 2 tablespoons cornstarch
- 2 tablespoons vegetable oil (for frying)
- Sesame seeds (for garnish)
- Chopped green onions (for garnish)
Cooking Steps:
- In a medium bowl, whisk together the soy sauce, honey (or maple syrup), sesame oil, rice vinegar, minced garlic, and minced ginger until well combined.
- Add the cubed tofu into the marinade, stirring gently to coat each piece. Allow the tofu to marinate for at least 15 minutes to absorb the flavors.
- After marinating, sprinkle the cornstarch over the tofu and gently toss to coat, ensuring that each piece is well covered.
- Heat the vegetable oil in a large non-stick skillet over medium heat. Once the oil is hot, carefully add the tofu cubes, spacing them out to avoid overcrowding.
- Fry the tofu for about 4-5 minutes on each side, or until golden brown and crispy, turning gently with a spatula.
- Once the tofu is cooked, drizzle any remaining marinade over the tofu in the pan and cook for an additional 1-2 minutes, allowing the sauce to thicken slightly.
- Remove the pan from heat, transfer the tofu to a serving dish, and garnish with sesame seeds and chopped green onions before serving.
Variations and Tips:
- For an added touch, experiment by adding vegetables such as bell peppers, broccoli, or snap peas during the frying process for a hearty stir-fry.
- If you’re short on time, consider using pre-pressed tofu to skip the pressing step, ensuring it’s ready for marinating right away.
- This dish pairs wonderfully with steamed rice or quinoa, making it a complete meal.
- If you prefer a spicier version, add a dash of chili sauce or red pepper flakes to the marinade for some heat.
- Leftovers can be stored in an airtight container in the fridge for up to 3 days, and reheating in a skillet will help maintain the crispy texture.
Fried Rice With Peas and Carrots
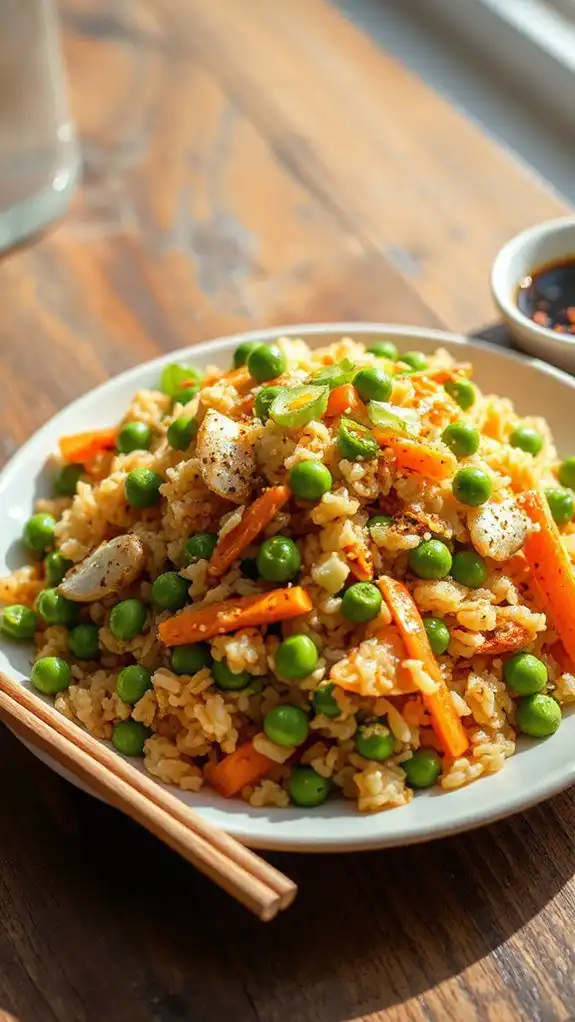
Fried rice with peas and carrots is a delightful and versatile dish that makes for a quick and satisfying summer dinner. This colorful stir-fried rice is perfect for busy weeknights or casual gatherings with friends and family. It takes just about 20-25 minutes to prepare, making it an excellent option for anyone looking for a delicious, easy-to-cook meal that encapsulates the flavors of summer.
Ingredients:
- 3 cups cooked rice (preferably day-old)
- 1 cup frozen peas
- 1 cup diced carrots (fresh or frozen)
- 3 tablespoons vegetable oil
- 2 eggs (beaten)
- 3-4 green onions (sliced)
- 4 tablespoons soy sauce
- 1 teaspoon sesame oil (optional)
- Salt and pepper to taste
Cooking Steps:
- Heat 2 tablespoons of vegetable oil in a large skillet or wok over medium-high heat.
- Add the diced carrots and sauté for about 3-4 minutes until they start to soften.
- Push the carrots to one side of the pan and pour the beaten eggs into the other side. Scramble the eggs until fully cooked, then mix them with the carrots.
- Add the frozen peas and continue to stir-fry for another 2 minutes.
- Add the cooked rice to the skillet and pour in the soy sauce and sesame oil (if using). Stir well to combine and fry for an additional 3-5 minutes until the rice is heated through and slightly crispy.
- Toss in the sliced green onions, season with salt and pepper to taste, and stir everything together for the last minute before serving.
Variations and Tips:
- For added protein, consider incorporating cooked chicken, shrimp, or tofu into the dish.
- Feel free to mix in other vegetables such as bell peppers, corn, or broccoli to customize your fried rice.
- If you prefer a spicier kick, add some crushed red pepper flakes or a dash of sriracha sauce.
- Using day-old rice is ideal, as it is drier and helps prevent the dish from becoming mushy.
- This fried rice can also be served as a side dish to complement grilled meats or as a base for your favorite stir-fried protein. Enjoy!
Corn and Black Bean Salsa With Tortilla Chips
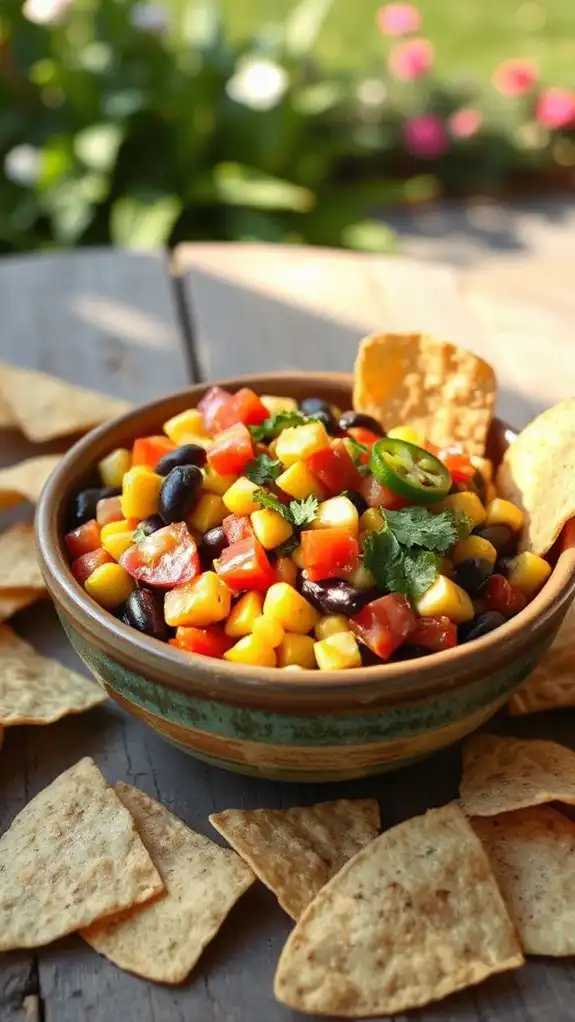
Corn and Black Bean Salsa With Tortilla Chips is a revitalizing and vibrant dish that serves as a perfect appetizer or light summer snack.
This salsa is packed with protein, fiber, and flavor, making it an excellent choice for health-conscious individuals or anyone looking to enjoy a delicious dish on a warm summer evening. Preparation takes about 15 minutes, and it is best served chilled alongside crispy tortilla chips for dipping.
Ingredients:
- 1 can (15 oz) black beans, rinsed and drained
- 1 can (15 oz) corn, drained
- 1 medium red bell pepper, diced
- 1 small red onion, diced
- 2 medium tomatoes, diced
- 1 jalapeño pepper, seeded and minced (optional)
- 1/4 cup fresh cilantro, chopped
- Juice of 2 limes
- 1 teaspoon ground cumin
- Salt and pepper to taste
- Tortilla chips for serving
Instructions:
- In a large mixing bowl, combine the black beans, corn, red bell pepper, red onion, tomatoes, jalapeño (if using), and cilantro.
- Drizzle the lime juice over the mixture, and sprinkle the ground cumin, salt, and pepper. Gently toss everything together until well combined.
- Taste the salsa and adjust seasoning as needed, adding more lime juice, salt, or pepper to suit your preference.
- Cover the bowl with plastic wrap and refrigerate for at least 30 minutes to allow the flavors to meld together.
- Serve the salsa chilled with tortilla chips.
Variations & Tips:
- For a kick of flavor, consider adding diced avocado or a sprinkle of feta cheese before serving.
- To add a smoky flavor, grill the corn on the cob, let it cool, and then cut the kernels off before adding them to the salsa.
- If you like it spicier, leave some seeds in the jalapeño or add a dash of hot sauce.
- This salsa can be stored in an airtight container in the refrigerator for up to 3 days.
- For a heartier meal, serve the corn and black bean salsa over grilled chicken or fish, or use it to top a bed of greens for a invigorating salad.