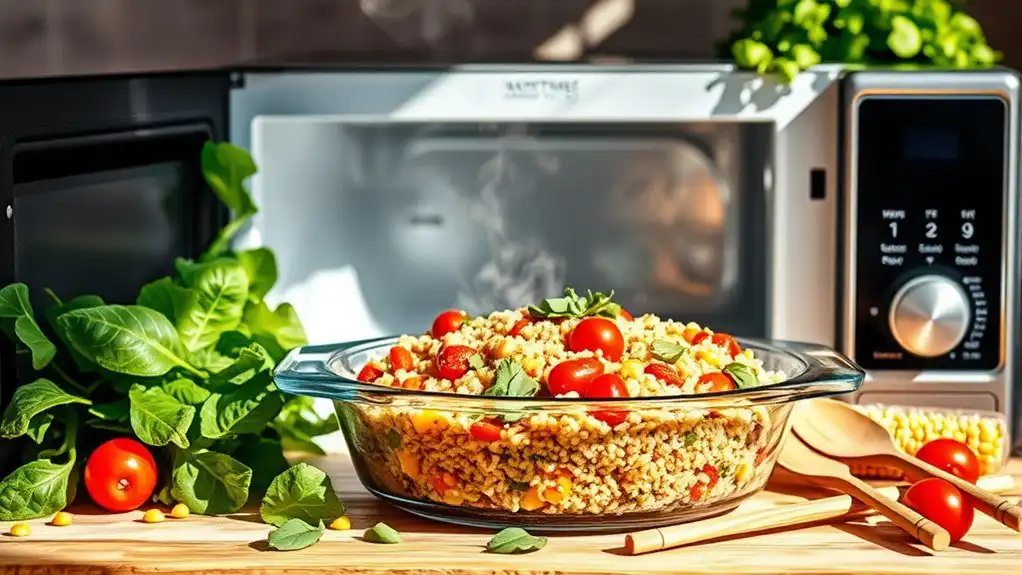
This collection offers 25 vegetarian microwave recipes that are perfect for Meatless Mondays. Dishes like Microwave Vegetable Lasagna and Quinoa and Black Bean Bowl provide quick and nutritious options. Cheesy Broccoli and Rice Casserole and Microwave Eggplant Parmesan cater to comfort food cravings. Each recipe features easy preparation and cooking times, making them ideal for busy weeknights. There are also creative choices like lentil tacos and stuffed peppers, ensuring a variety of flavors and textures to explore.
Microwave Vegetable Lasagna
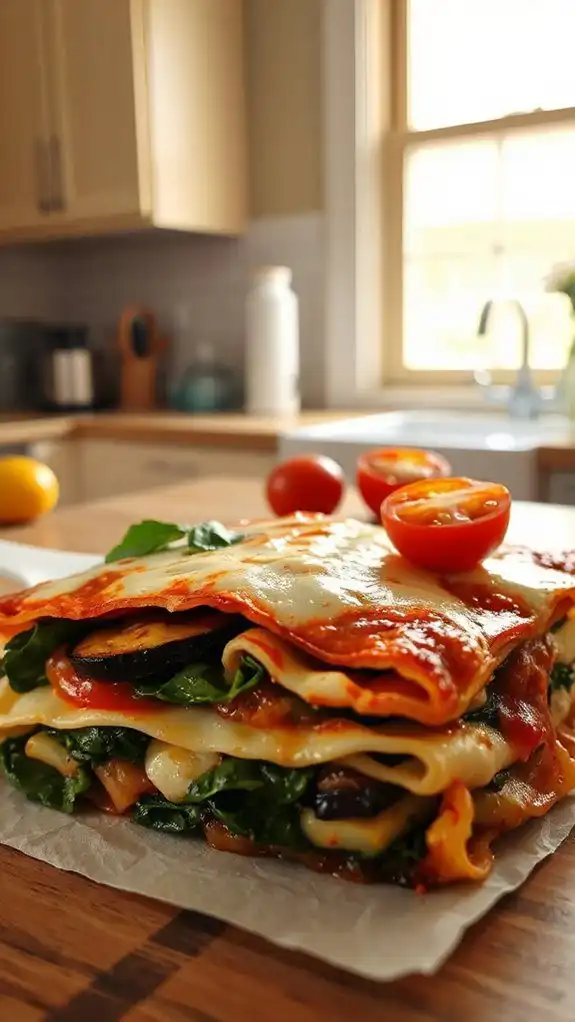
Microwave Vegetable Lasagna is a delicious and quick-to-make dish that caters to vegetarians and those looking to incorporate more vegetables into their meals.
Ideal for busy weeknights or when you want a comforting meal without spending hours in the kitchen, this lasagna is packed with layers of fresh veggies, cheese, and marinara sauce. With a preparation time of just 15 minutes and a cooking time of 10 minutes, you can have this delightful meal ready in no time!
Ingredients:
- 9 lasagna noodles (oven-ready or regular)
- 2 cups marinara sauce
- 1 cup ricotta cheese
- 2 cups shredded mozzarella cheese
- 1 cup fresh spinach
- 1 cup sliced mushrooms
- 1 cup zucchini, thinly sliced
- 1 cup diced bell peppers (any color)
- 1/2 cup grated Parmesan cheese
- Salt and pepper to taste
- Italian seasoning (optional)
Cooking Steps:
- Layer Preparation: In a microwave-safe dish, spread a thin layer of marinara sauce at the bottom to prevent sticking.
- First Layer: Place 3 lasagna noodles over the sauce.
- Spread Cheese: Spoon half of the ricotta cheese over the noodles and sprinkle with a quarter of the mozzarella cheese.
- Vegetable Layer: Evenly distribute half of the spinach, mushrooms, zucchini, and bell peppers over the cheese layer. Season with salt, pepper, and, if desired, Italian seasoning.
- Repeat Layers: Add another layer of noodles, followed by half of the remaining marinara sauce, half of the mozzarella, and the remaining vegetables. Repeat the layering one more time for the top layer, ending with noodles, marinara sauce, and the remaining mozzarella and Parmesan cheese.
- Cover: Cover the dish with a microwave-safe lid or plastic wrap, leaving a small vent for steam to escape.
- Microwave Cooking: Microwave on medium-high power for approximately 10 minutes, or until the cheese is melted and the dish is heated through. (Cooking time may vary depending on your microwave's wattage.)
- Rest: Allow the lasagna to rest for 5 minutes before slicing and serving.
Variations and Tips:
- Cheese Variations: Substitute ricotta with cottage cheese for a different texture, or add a variety of cheeses for additional flavor.
- Veggie Options: Feel free to mix in other vegetables like roasted red peppers, asparagus, or carrots based on your preference or what you have available.
- Protein Boost: Add cooked lentils or chickpeas to the vegetable layers for added protein.
- Leftover Use: This recipe is great for using leftover veggies; simply chop them up and layer them in.
- Storing Leftovers: Store any leftover lasagna in an airtight container in the refrigerator for up to 3 days, or freeze portions for later use.
Quinoa and Black Bean Bowl
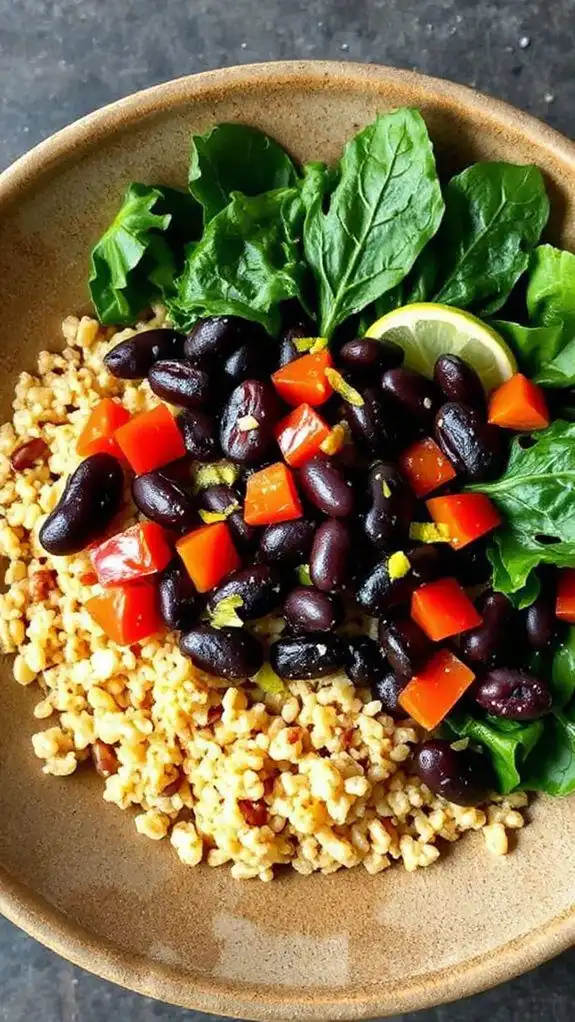
The Quinoa and Black Bean Bowl is a nutritious and hearty dish, perfect for vegetarians, busy professionals, or anyone craving a quick, wholesome meal. This microwave-friendly recipe brings together protein-packed quinoa and fiber-rich black beans, making it an ideal lunch or dinner option, ready in just 15 minutes!
It's great for meal prep, and you can easily customize it with your favorite toppings.
Ingredients:
- 1 cup quinoa
- 2 cups vegetable broth or water
- 1 can (15 oz) black beans, drained and rinsed
- 1 cup corn (fresh, frozen, or canned)
- 1 teaspoon chili powder
- 1 teaspoon cumin
- Salt to taste
- Juice of 1 lime
- Fresh cilantro, chopped (for garnish)
- Avocado, sliced (optional)
- Salsa (optional)
- Greek yogurt or sour cream (optional)
Cooking Steps:
- Rinse the quinoa under cold water in a fine-mesh strainer to remove any bitterness.
- In a microwave-safe bowl, combine the rinsed quinoa and vegetable broth (or water). Cover the bowl with a microwave-safe lid or plate.
- Microwave on high for about 10-12 minutes, or until the quinoa is fluffy and all the liquid is absorbed. Check halfway through and stir to prevent clumping.
- Once cooked, remove from the microwave and let it sit covered for another 5 minutes.
- In a separate microwave-safe bowl, combine the black beans, corn, chili powder, cumin, and salt. Microwave for 1-2 minutes or until heated through.
- Fluff the quinoa with a fork and mix in the black bean and corn mixture. Squeeze fresh lime juice over the top and stir to combine.
- Serve in bowls and garnish with fresh cilantro, avocado slices, and a dollop of yogurt or salsa if desired.
Variations and Tips:
- Add diced bell peppers, tomatoes, or onions before microwaving the black bean mixture for extra flavor and nutrients.
- Swap out or add different beans such as pinto or kidney beans for variety.
- For a spicier kick, mix in some diced jalapeños or chipotle sauce.
- This dish can be easily made in advance and stored in the refrigerator for a quick lunch option during the week.
- Customize the toppings according to your taste – think shredded cheese, fresh lime wedges, or even a sprinkle of nuts for an added crunch.
Cheesy Broccoli and Rice Casserole
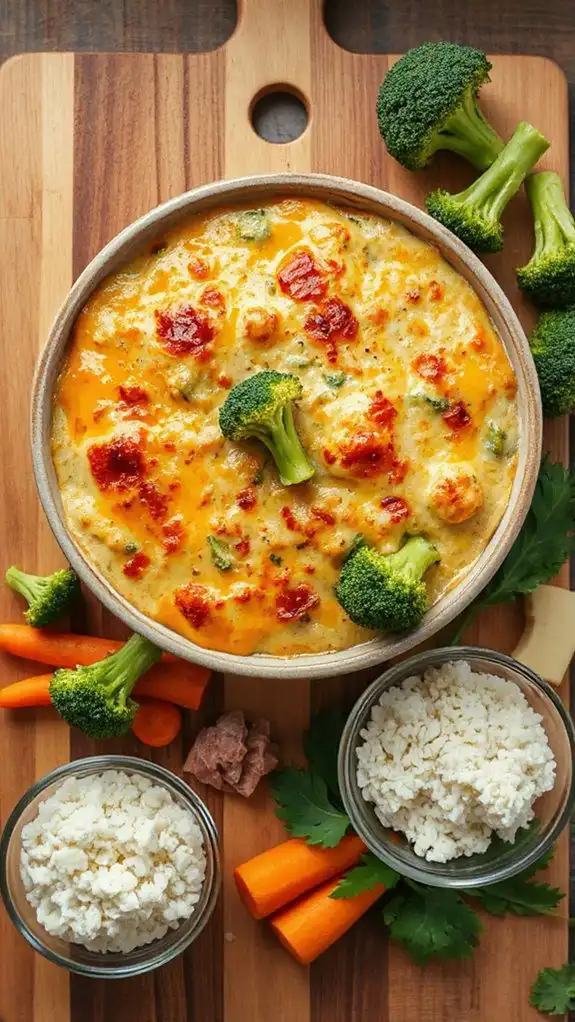
Cheesy Broccoli and Rice Casserole is a delightful vegetarian dish that combines tender broccoli with creamy cheese and fluffy rice, all cooked to perfection in the microwave. This comforting casserole is ideal for busy families, college students, or anyone looking for a quick and satisfying meal. With a preparation time of just 10 minutes and a cooking time of approximately 15 minutes, this dish can be ready in under half an hour.
Ingredients:
- 2 cups broccoli florets (fresh or frozen)
- 1 cup uncooked white rice
- 2 cups vegetable broth or water
- 1 cup shredded cheddar cheese
- 1/2 cup cream of mushroom soup (or a vegetarian alternative)
- 1/2 teaspoon garlic powder
- Salt and pepper to taste
- Optional: 1/2 cup breadcrumbs for topping
Cooking Steps:
- In a large microwave-safe bowl, combine the uncooked rice and vegetable broth (or water). Stir well.
- Add the broccoli florets on top of the rice, without stirring, and cover the bowl with a microwave-safe lid or plate.
- Microwave on high for 10-12 minutes, checking at 10 minutes to ensure the rice is cooked and the liquid is absorbed. If not done, add a minute at a time as needed.
- Carefully remove the bowl from the microwave and stir in the cream of mushroom soup, garlic powder, and half of the shredded cheddar cheese. Add salt and pepper to taste. Mix until fully combined.
- If desired, sprinkle the remaining cheese and breadcrumbs on top of the mixture for an extra crunchy topping.
- Return the bowl to the microwave and cook on high for an additional 3-5 minutes, or until the cheese is melted and bubbling.
- Allow to cool for a few minutes before serving.
Variations and Tips:
- To boost the nutritional value, consider adding other vegetables such as diced carrots, peas, or bell peppers.
- For a different flavor profile, swap out the cheddar cheese for mozzarella or a pepper jack cheese for a bit of spice.
- If you're looking for a gluten-free option, substitute the cream of mushroom soup with a homemade version made from gluten-free ingredients.
- Leftovers can be stored in an airtight container in the refrigerator and reheated in the microwave for a quick meal.
- Feel free to experiment by adding protein sources like chickpeas or black beans for a heartier dish.
Microwave Eggplant Parmesan
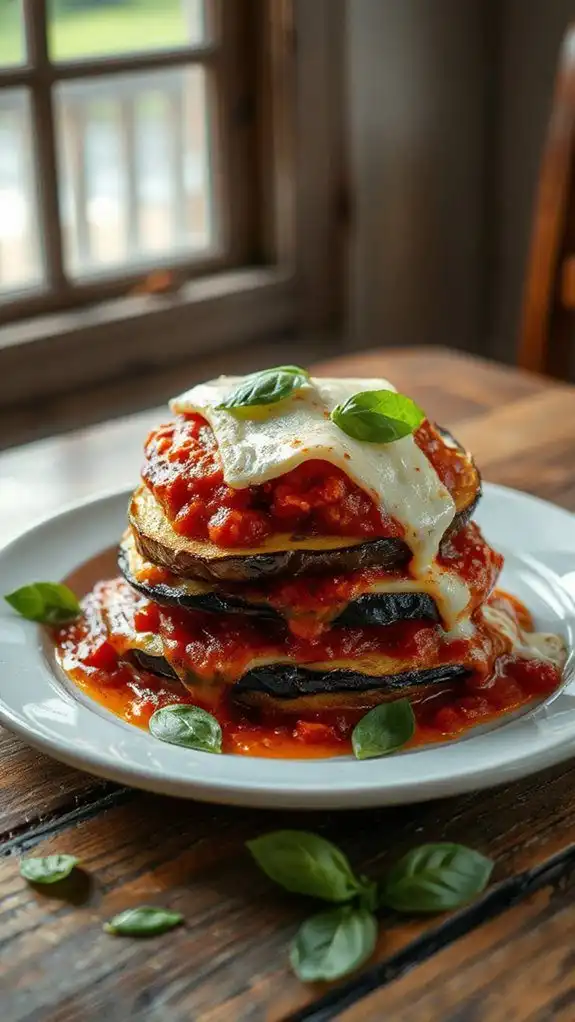
Microwave Eggplant Parmesan is a delectable vegetarian dish that brings the classic flavors of traditional Eggplant Parmesan into a quick and easy format.
Ideal for busy weeknights or when you're craving a comforting meal without the lengthy preparation, this dish can be ready in just 20 minutes.
Perfect for vegetarians and cheese lovers alike, it provides a satisfying and hearty option that is both nutritious and delicious.
Ingredients:
- 1 medium eggplant, sliced into 1/4-inch rounds
- 1 cup marinara sauce
- 1 cup shredded mozzarella cheese
- 1/2 cup grated Parmesan cheese
- 1 cup breadcrumbs (preferably Italian-seasoned)
- 1 tablespoon olive oil
- 1 teaspoon dried basil
- 1 teaspoon garlic powder
- Salt and pepper to taste
- Fresh basil for garnish (optional)
Cooking Steps:
- Prep the Eggplant: Sprinkle the eggplant slices with salt and let them sit for 10 minutes to draw out moisture. Rinse and pat dry with a paper towel.
- Season the Slices: In a bowl, mix the olive oil with garlic powder, dried basil, salt, and pepper. Brush this mixture over both sides of the eggplant slices.
- Microwave the Eggplant: Arrange the eggplant slices in a single layer on a microwave-safe plate. Cover with a microwave-safe lid or wrap. Microwave on high for 4-5 minutes or until the eggplant is tender.
- Layer the Ingredients: In a microwave-safe baking dish, spread a layer of marinara sauce on the bottom. Add a layer of eggplant slices, then sprinkle with mozzarella and Parmesan cheese. Repeat this layering process until all ingredients are used, finishing with a layer of sauce and cheese on top.
- Add Breadcrumbs: Top the final layer of cheese with breadcrumbs for a crunchy finish.
- Final Microwave: Cover the dish loosely with a microwave-safe lid and microwave on high for another 5-7 minutes until the cheese is melted and bubbly.
- Serve: Let the dish sit for a couple of minutes before serving. Garnish with fresh basil if desired and enjoy!
Variations and Tips:
- Add Vegetables: Include other vegetables like zucchini or mushrooms for added flavor and nutrition.
- Spice it Up: Add red pepper flakes to the marinara sauce for a spicy kick.
- Gluten-Free Option: Use gluten-free breadcrumbs to accommodate gluten sensitivities.
- Make-Ahead: Prepare all layers in advance and store in the fridge. When ready to eat, simply microwave until heated through.
- Serving Suggestion: Serve with a side salad for a complete meal.
With this quick and simple recipe, you can enjoy delicious Eggplant Parmesan in no time at all!
Spinach and Feta Stuffed Peppers
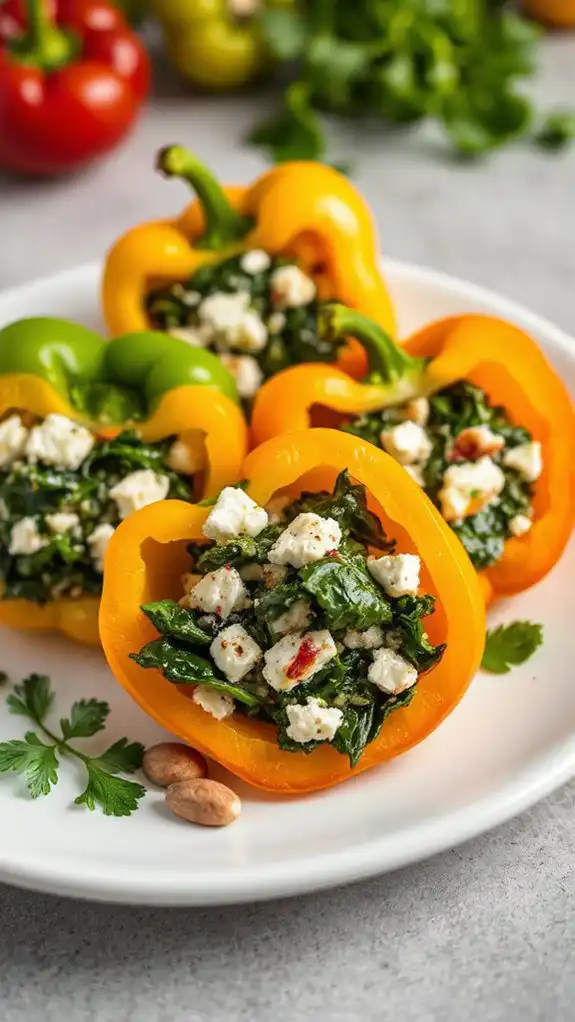
Spinach and Feta Stuffed Peppers are a delightful vegetarian dish that brings together the nutritious goodness of spinach and the tangy flavor of feta cheese, all enveloped in a sweet bell pepper.
This meal is perfect for busy weeknights, providing a quick yet satisfying option for those looking for a healthy dinner. With minimal preparation and cooking time, you'll have these delectable stuffed peppers ready in about 30 minutes.
Ingredients:
- 4 large bell peppers (any color)
- 2 cups fresh spinach, chopped
- 1 cup crumbled feta cheese
- 1 cup cooked quinoa or rice
- 1 small onion, finely chopped
- 2 cloves garlic, minced
- 1 teaspoon olive oil
- 1 teaspoon dried oregano
- Salt and pepper, to taste
- Optional: 1/4 cup diced tomatoes (fresh or canned)
Cooking Steps:
- Begin by preparing the bell peppers. Slice the tops off each pepper and carefully remove the seeds and membranes. Set aside.
- In a microwave-safe bowl, heat the olive oil. Add the chopped onion and minced garlic, and microwave on high for 2-3 minutes until softened.
- Stir in the chopped spinach and microwave for another 1-2 minutes, until wilted.
- In a large bowl, combine the cooked quinoa or rice, feta cheese, oregano, salt, pepper, and the spinach mixture. If using, add the diced tomatoes and mix well.
- Stuff each pepper generously with the spinach and feta mixture. Place the stuffed peppers upright in a microwave-safe dish with a lid.
- Add a splash of water to the bottom of the dish to create steam, then cover the dish with the lid or plastic wrap.
- Microwave on high for 8-10 minutes, or until the peppers are tender. Cooking times may vary based on the wattage of your microwave.
- Carefully remove the dish from the microwave (it will be hot!) and let it sit for a few minutes before serving.
Variations and Tips:
- Substitute the spinach with other leafy greens like kale or Swiss chard.
- For added flavor, mix in herbs like basil or parsley.
- You can make this dish gluten-free by using quinoa instead of rice.
- Serve with a side salad or crusty bread for a complete meal.
- If you like a bit of heat, sprinkle in some red pepper flakes or add jalapeños to the filling.
Caprese Pasta Salad
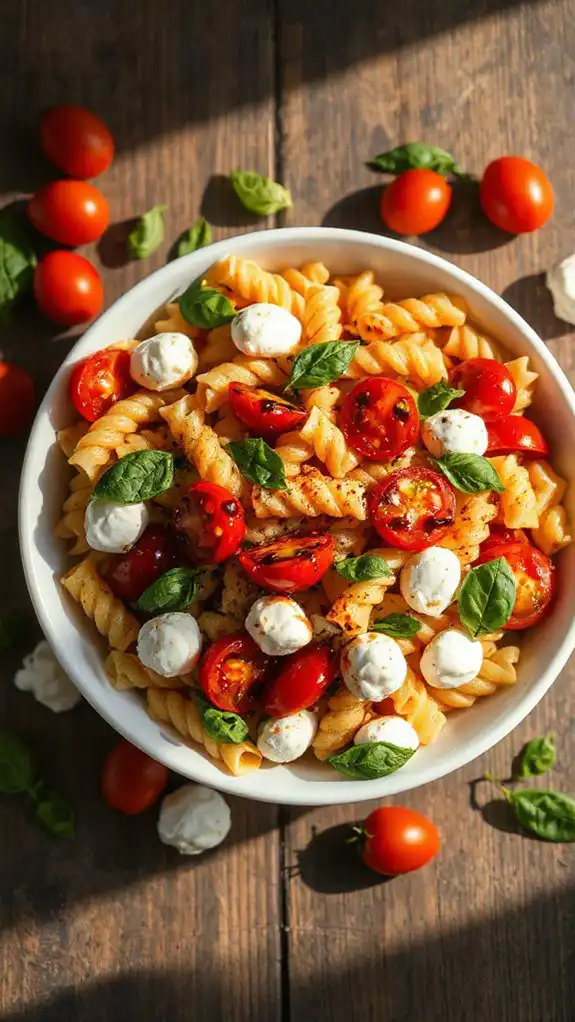
Caprese Pasta Salad is a refreshing and vibrant dish that combines the classic flavors of a Caprese salad—ripe tomatoes, fresh mozzarella, and fragrant basil—with pasta for a satisfying meal. This dish is perfect for vegetarians and anyone looking for a quick, hearty option that can be made in the microwave. With a prep time of just 15 minutes, it's ideal for lunch, dinner, or a picnic.
Ingredients:
- 2 cups cooked pasta (fusilli or penne works well)
- 1 cup cherry tomatoes, halved
- 1 cup mozzarella balls (bocconcini or ciliegine)
- 1/4 cup fresh basil leaves, chopped
- 1/4 cup olive oil
- 2 tablespoons balsamic vinegar
- Salt and pepper to taste
- Optional: 1/4 teaspoon garlic powder or minced garlic (for added flavor)
- Optional: Red pepper flakes (for a kick)
Cooking Steps:
- In a microwave-safe bowl, combine the cooked pasta with cherry tomatoes, mozzarella balls, and chopped basil.
- In a separate small bowl or jar, whisk together the olive oil, balsamic vinegar, salt, pepper, and optional garlic and red pepper flakes.
- Pour the dressing over the pasta mixture and toss until everything is evenly coated.
- Microwave the salad for 1-2 minutes on medium power to warm it slightly, then stir again to integrate the flavors.
- Allow the salad to cool slightly before serving; this also enhances the flavors as they meld.
Variations and Tips:
- For added protein, consider mixing in cooked chickpeas or diced avocado.
- Substitute basil with other herbs like parsley or arugula for a different flavor profile.
- This salad can be made ahead of time and stored in the refrigerator for up to 3 days; just give it a good stir before serving.
- Customize the vegetables by adding diced bell peppers, cucumbers, or olives to enhance the taste and texture.
Sweet Potato and Chickpea Curry
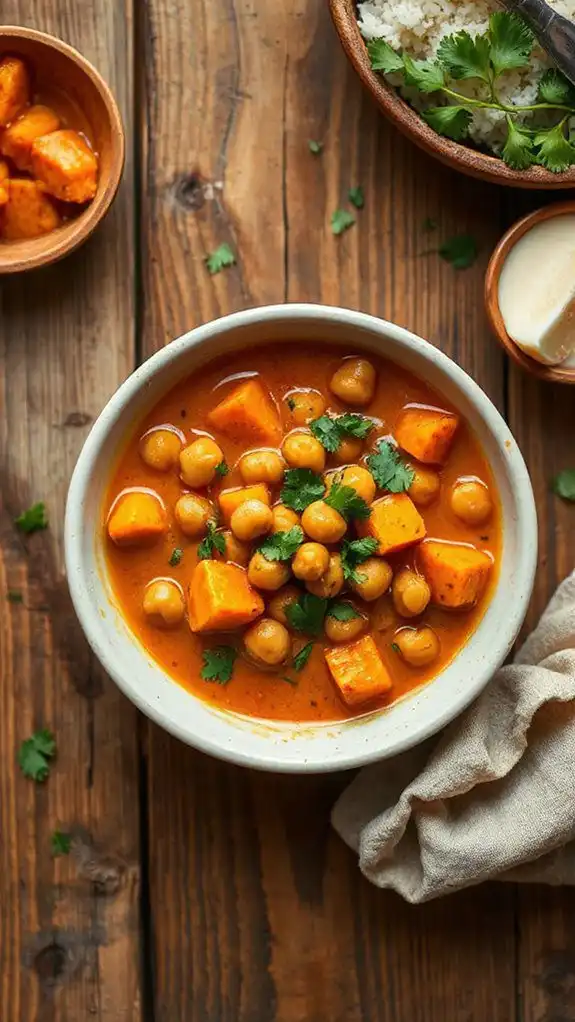
Sweet Potato and Chickpea Curry is a comforting, flavorful dish that marries the sweetness of sweet potatoes with the heartiness of chickpeas. This vegetarian microwave recipe is perfect for busy weeknights or for anyone looking for a nutritious meal that is easy to prepare. With a preparation time of just 10 minutes and a cook time of around 10-15 minutes, you can have a warm, satisfying dinner ready in no time.
Ingredients:
- 1 medium sweet potato, peeled and diced
- 1 can (15 oz) of chickpeas, drained and rinsed
- 1 can (14 oz) of coconut milk
- 1 tablespoon of curry powder
- 1 teaspoon of turmeric
- 1 teaspoon of ginger paste (or fresh grated ginger)
- 1 teaspoon of garlic paste (or minced garlic)
- Salt and pepper, to taste
- Fresh cilantro, for garnish (optional)
Cooking Steps:
- In a large microwave-safe bowl, combine the diced sweet potato with 2 tablespoons of water. Cover the bowl with a microwave-safe lid or a plate to steam the sweet potatoes. Microwave on high for about 5-7 minutes, until the sweet potatoes are tender.
- Add the drained chickpeas, coconut milk, curry powder, turmeric, ginger paste, and garlic paste to the bowl with the cooked sweet potatoes. Stir well to combine all the ingredients.
- Season the mixture with salt and pepper to taste. Cover the bowl again and microwave for an additional 5-8 minutes, or until the curry is heated through and slightly thickened, stirring halfway through the cooking time.
- Once done, carefully remove the bowl from the microwave (it will be hot!) and garnish the curry with fresh cilantro before serving.
Variations & Tips:
- For additional vegetables, consider adding in frozen peas, spinach, or bell peppers for extra nutrition and flavor.
- If you enjoy a bit of heat, add some cayenne pepper or chopped green chilies to the mixture before cooking.
- Serve the curry over rice, quinoa, or with warm naan for a complete meal.
- This recipe can be easily doubled; just ensure your microwave-safe bowl is large enough to accommodate the increased volume.
- Leftovers can be stored in the refrigerator for up to three days and make for a quick lunch the next day!
Microwave Veggie Burrito
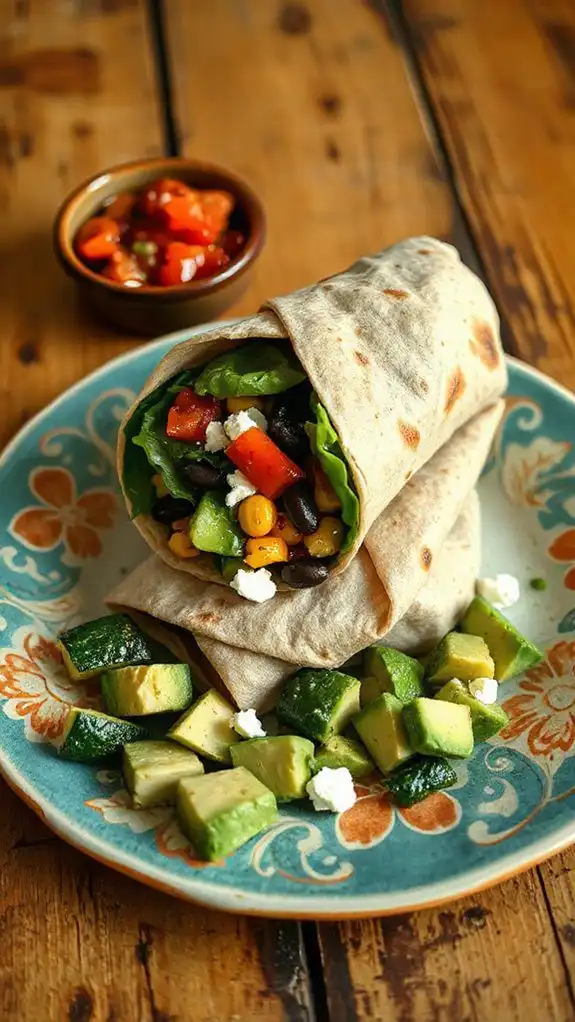
The microwave veggie burrito is a quick and delicious meal perfect for busy individuals or families seeking a healthy vegetarian option. This dish is particularly great for those who are looking for a satisfying lunch or dinner that can be prepared in just 10 minutes.
Whether you're a student, a professional, or anyone needing a hassle-free meal, this burrito will surely hit the spot.
Ingredients:
- 1 large flour tortilla
- 1/2 cup cooked brown rice
- 1/2 cup black beans (canned or cooked)
- 1/4 cup corn (canned or frozen)
- 1/4 cup diced bell peppers
- 1/4 cup shredded cheese (cheddar or mozzarella)
- 2 tablespoons salsa
- 1 tablespoon chopped fresh cilantro (optional)
- Salt and pepper to taste
Cooking Steps:
- Prepare the Filling: In a bowl, combine the cooked brown rice, black beans, corn, diced bell peppers, shredded cheese, salsa, and cilantro. Mix well and season with salt and pepper to taste.
- Assemble the Burrito: Lay the flour tortilla flat on a clean plate. Spoon the veggie filling into the center of the tortilla. Fold the sides over the filling and then roll it tightly from the bottom up to enclose the filling completely.
- Microwave the Burrito: Place the burrito seam-side down on a microwave-safe plate. Microwave on high for about 1 to 1.5 minutes, or until heated through. Check to ensure it is hot all the way through, adding additional time if necessary in 15-second increments.
- Serve: Let it cool for a minute before slicing it in half. Serve with extra salsa or guacamole on the side, if desired.
Variations and Tips:
- Add More Veggies: Feel free to throw in additional vegetables like spinach, zucchini, or mushrooms to enhance the nutrition and flavor.
- Spice It Up: For those who enjoy some heat, consider adding jalapeños or a dash of hot sauce to the filling.
- Make It Freezer-Friendly: You can prepare several burritos in advance, wrap them tightly in foil or plastic wrap, and freeze them. Just defrost them in the fridge overnight and microwave as needed.
- Cheese Alternatives: Use a dairy-free cheese alternative if you're looking for a vegan option.
- Experiment with Grains: Substitute brown rice with quinoa, couscous, or any grain you prefer for a different twist.
With this simple and flavorful microwave veggie burrito recipe, enjoying a delicious and nourishing meal has never been easier!
Creamy Mushroom Risotto
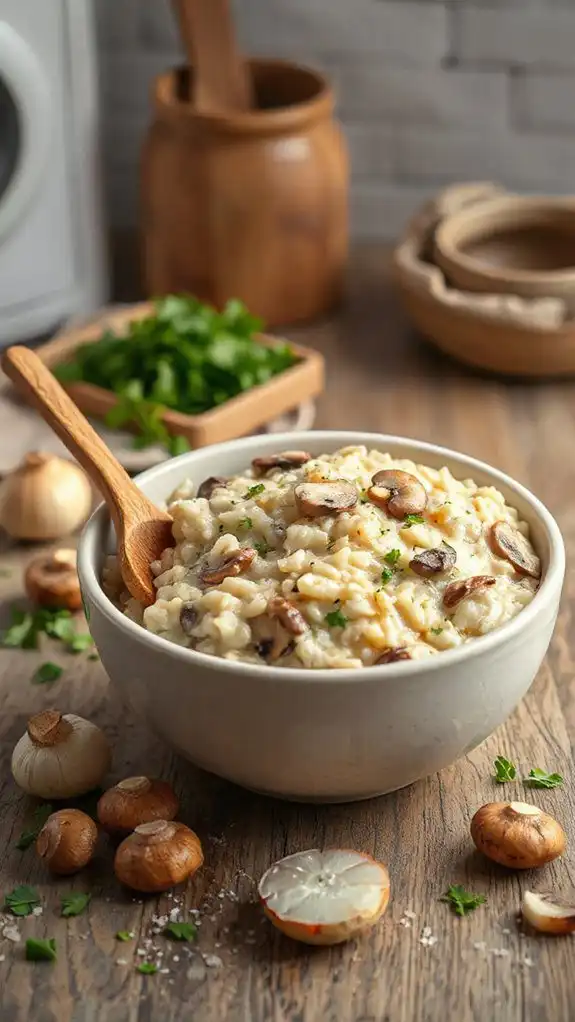
Creamy Mushroom Risotto is a delightful vegetarian dish that showcases the rich flavors of mushrooms combined with creamy Arborio rice. This cozy and comforting meal is ideal for vegetarians and anyone looking for a hearty yet simple dish. It's perfect for a quick weekday dinner or a special gathering, and it can be prepared in just about 30 minutes using the microwave.
Ingredients
- 1 cup Arborio rice
- 2 cups vegetable broth
- 1 cup sliced mushrooms (such as cremini or shiitake)
- 1 medium onion, finely chopped
- 2 cloves garlic, minced
- 1/2 cup grated Parmesan cheese (or nutritional yeast for a vegan option)
- 1/4 cup heavy cream or coconut cream
- 2 tablespoons olive oil
- Salt and pepper to taste
- Fresh parsley, chopped (for garnish)
Cooking Steps
- In a microwave-safe bowl, combine the Arborio rice, chopped onion, minced garlic, and olive oil. Microwave on high for 2 minutes.
- Carefully add in the sliced mushrooms and vegetable broth to the bowl. Stir gently and cover with a microwave-safe lid or plate.
- Microwave on high for 15-18 minutes, pausing to stir halfway through, until the rice is creamy and cooked through. If needed, add a splash of water or broth to keep the risotto from drying out.
- Once cooked, stir in the heavy cream, Parmesan cheese, salt, and pepper. Adjust seasoning to taste.
- Let the risotto sit for a couple of minutes to thicken, then serve immediately garnished with fresh parsley.
Variations and Tips
- For a nutty flavor, add toasted pine nuts or walnuts as a topping.
- Experiment with different types of mushrooms for varied flavors and textures.
- Add in fresh spinach or peas during the last few minutes of cooking for added nutrition.
- For a more decadent feel, substitute half of the vegetable broth with white wine.
- If you prefer a vegan version, ensure to use nutritional yeast and coconut cream instead of cheese and dairy.
Enjoy your microwave-made Creamy Mushroom Risotto, bringing a touch of gourmet dining right to your home!
Thai Peanut Noodle Bowl
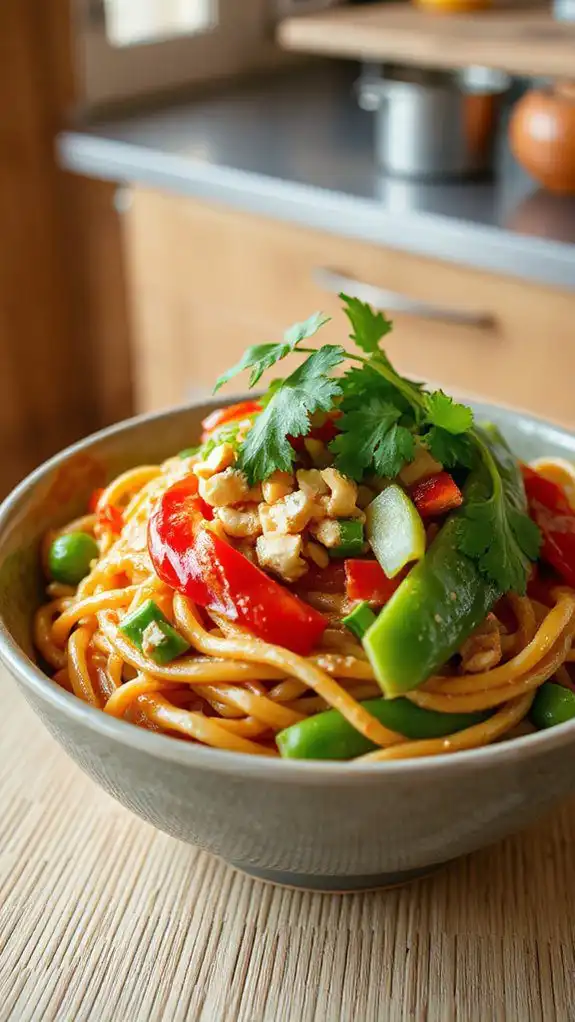
The Thai Peanut Noodle Bowl is a delightful vegetarian dish that combines the bold flavors of Thai cuisine with the comforting texture of noodles. This quick and easy microwave recipe is perfect for busy weeknights or for anyone looking to prepare a healthy meal in under 15 minutes. Ideal for vegetarians and vegans, this dish is both satisfying and packed with nutrients.
Ingredients:
- 8 oz rice noodles
- 1/4 cup peanut butter
- 2 tbsp soy sauce
- 1 tbsp lime juice
- 1 tbsp maple syrup or honey
- 1/2 cup vegetable broth or water
- 1 cup mixed vegetables (such as bell peppers, carrots, and snap peas)
- 2 green onions, sliced
- 1/4 cup chopped peanuts (for garnish)
- Fresh cilantro (for garnish, optional)
- Red pepper flakes (optional, for heat)
Cooking Steps:
- Cook the Noodles: Place the rice noodles in a microwave-safe bowl and cover them with water. Microwave on high for 5-7 minutes, or until the noodles are tender. Drain and set aside.
- Make the Sauce: In a separate bowl, combine the peanut butter, soy sauce, lime juice, maple syrup or honey, and vegetable broth or water. Microwave for about 30 seconds to warm, then stir until smooth.
- Combine Ingredients: In the bowl with the cooked noodles, add the mixed vegetables and pour the peanut sauce over. Toss everything together until the noodles and veggies are well coated in sauce.
- Final Heat: Microwave the combined noodle bowl for another 1-2 minutes, just until the vegetables are heated through.
- Garnish and Serve: Top with sliced green onions, chopped peanuts, and fresh cilantro if desired. Add red pepper flakes for an extra kick if you prefer heat.
Variations and Tips:
- Vegetable Options: Feel free to use any vegetables you have on hand, such as broccoli, zucchini, or spinach. Just be mindful of cooking times; denser vegetables may need a little longer in the microwave.
- Protein Additions: For added protein, consider tossing in some cubed tofu or edamame.
- Noodle Alternatives: You can substitute rice noodles with whole wheat or soba noodles for different textures and flavors.
- Batch Cooking: This recipe can be easily doubled for meal prep. Simply store leftovers in the fridge and reheat them in the microwave for a quick lunch or dinner.
Mediterranean Couscous Salad
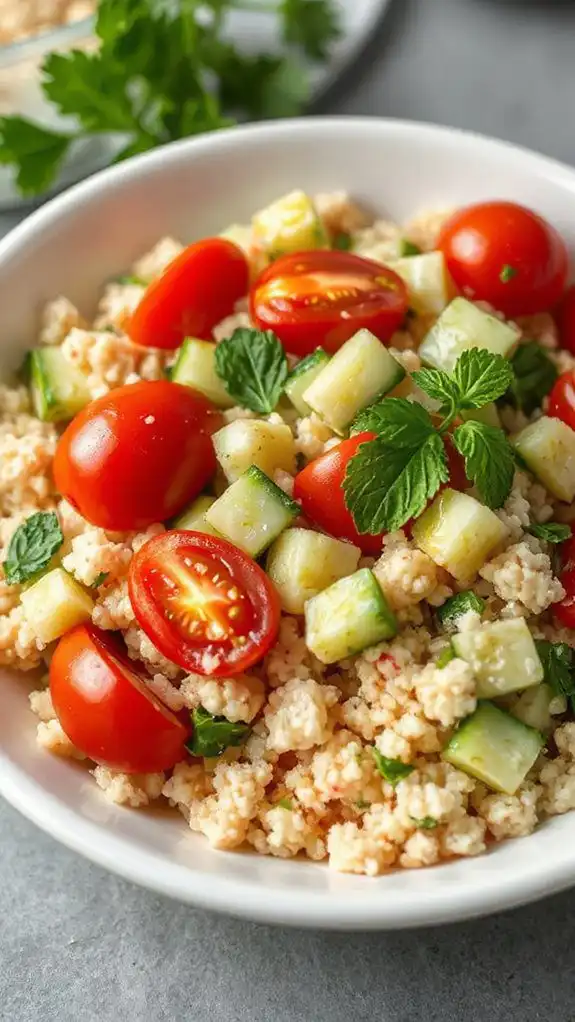
Mediterranean Couscous Salad is a fresh and vibrant dish that combines the flavors of the Mediterranean for a quick and nutritious meal.
Perfect for those embracing a vegetarian lifestyle or anyone seeking a light lunch or side dish, this salad is packed with healthy ingredients and can be prepared in just 15 minutes.
Suitable for meal prep and ideal for gatherings, this dish stands out with its colorful presentation and refreshing taste.
Ingredients:
- 1 cup couscous
- 1 1/4 cups vegetable broth or water
- 1 cup cherry tomatoes, halved
- 1 cucumber, diced
- 1/2 red onion, finely chopped
- 1/2 cup canned chickpeas, drained and rinsed
- 1/4 cup kalamata olives, pitted and sliced
- 1/4 cup feta cheese, crumbled (optional for vegans)
- 1/4 cup fresh parsley, chopped
- 2 tablespoons olive oil
- 1 tablespoon lemon juice
- Salt and pepper to taste
Cooking Steps:
1. In a microwave-safe bowl, combine the couscous and vegetable broth (or water). Cover the bowl with a microwave-safe lid or plate and microwave on high for 3-4 minutes, or until the liquid is absorbed.
Let it sit for 5 minutes, then fluff with a fork.
2. While the couscous cooks, prepare the vegetables: in a large mixing bowl, combine cherry tomatoes, cucumber, red onion, chickpeas, olives, feta cheese (if using), and parsley.
3. Once the couscous is ready, add it to the bowl with the vegetables. Drizzle with olive oil and lemon juice, then season with salt and pepper to taste.
4. Toss all ingredients together until well combined. Adjust seasoning as necessary.
5. Serve immediately or let it chill in the refrigerator for about 30 minutes to enhance flavors.
Variations and Tips:
- For added protein, consider adding quinoa or diced avocado.
- Swap out the chickpeas for black beans or lentils for a different flavor profile.
- Include additional vegetables like bell peppers, radishes, or spinach for extra nutrition.
- For a gluten-free option, substitute couscous with gluten-free grains like quinoa or millet.
- This salad can be made a day in advance; just store it in an airtight container in the refrigerator for the best flavor.
Microwave Veggie Enchiladas
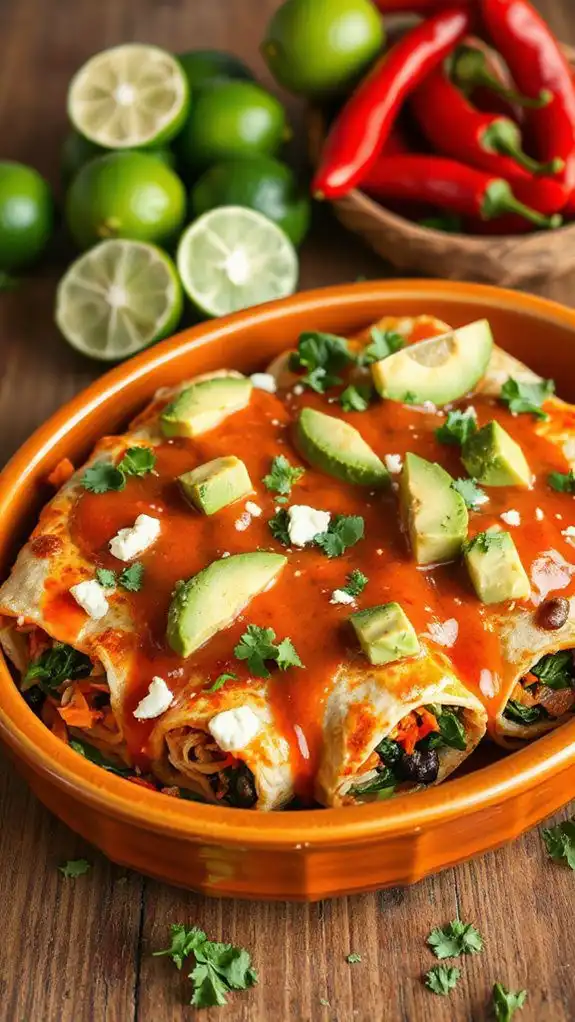
Microwave Veggie Enchiladas are a quick and delightful dish that brings the flavors of Mexico right to your kitchen in minimal time. Ideal for vegetarians, busy families, or anyone looking for a hassle-free meal, these enchiladas can be prepared in just 20 minutes.
Packed with nutritious vegetables and topped with delicious enchilada sauce and cheese, they make for a satisfying dinner option that requires no oven and is sure to please everyone at the table.
Ingredients:
- 4 large flour tortillas
- 1 cup black beans, drained and rinsed
- 1 cup corn kernels (fresh, frozen, or canned)
- 1 green bell pepper, diced
- 1 small zucchini, diced
- 1 cup diced tomatoes (canned or fresh)
- 1 teaspoon chili powder
- 1 teaspoon cumin
- Salt and pepper to taste
- 1 cup shredded cheese (cheddar or Monterey Jack)
- 1 cup enchilada sauce
- Fresh cilantro (for garnish, optional)
Cooking Steps:
- In a large mixing bowl, combine the black beans, corn, bell pepper, zucchini, diced tomatoes, chili powder, cumin, salt, and pepper. Mix until well combined.
- Lay one tortilla flat on a clean surface. Place about 1/4 cup of the veggie filling down the center of the tortilla. Roll it up tightly, then place it seam-side down in a microwave-safe dish. Repeat with the remaining tortillas.
- Pour the enchilada sauce evenly over the rolled enchiladas, ensuring they are well covered.
- Sprinkle the shredded cheese generously on top of the enchiladas.
- Cover the dish with a microwave-safe lid or plastic wrap, leaving a small vent for steam to escape. Microwave on high for 5-7 minutes or until the cheese is melted and the filling is heated through.
- Carefully remove the dish from the microwave and let it sit for a minute before serving. Garnish with fresh cilantro if desired.
Variations and Tips:
- Add Protein: For a heartier meal, feel free to add cooked quinoa, tofu, or tempeh to the veggie filling.
- Different Veggies: Substitute or add vegetables like mushrooms, spinach, or sweet potatoes for variety.
- Sauce Swap: Try using green enchilada sauce or even a spicy salsa for a change in flavor.
- Make Ahead: These enchiladas can be prepared beforehand and stored in the fridge. Just add a few extra minutes to the cooking time when reheating in the microwave.
- Serve with Sides: Pair with a side salad or some guacamole and tortilla chips for a complete meal.
Lentil and Vegetable Stew
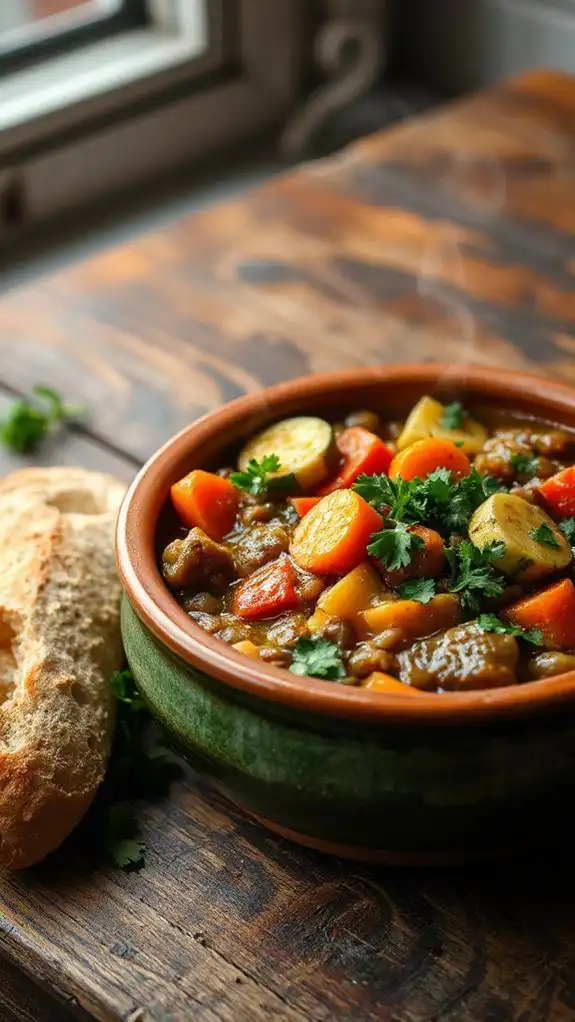
Lentil and Vegetable Stew is a hearty, nutritious dish that's perfect for anyone looking to enjoy a comforting meal without spending hours in the kitchen.
This microwave-friendly recipe is ideal for busy individuals, families, or anyone seeking a quick and healthy vegetarian option. With a preparation time of just 15 minutes and a cooking time of about 15 minutes, you can have a delicious stew ready to enjoy in under half an hour.
Ingredients:
- 1 cup lentils (green or brown)
- 1 medium onion, chopped
- 2 cloves garlic, minced
- 2 medium carrots, diced
- 1 medium zucchini, diced
- 1 red bell pepper, diced
- 1 can (14.5 oz) diced tomatoes with juice
- 4 cups vegetable broth
- 1 teaspoon ground cumin
- 1 teaspoon dried thyme
- Salt and pepper to taste
- 2 tablespoons olive oil
- Fresh parsley for garnish (optional)
Cooking Steps:
- In a large microwave-safe bowl, combine the lentils, chopped onion, minced garlic, diced carrots, diced zucchini, and diced bell pepper.
- Add the can of diced tomatoes (including the juice), vegetable broth, ground cumin, dried thyme, olive oil, salt, and pepper to the bowl. Stir well to combine all ingredients.
- Cover the bowl loosely with microwave-safe plastic wrap, leaving a small vent for steam to escape.
- Microwave on high for 10 minutes. After 10 minutes, stir the stew and check the consistency of the lentils.
- Continue microwaving in 5-minute intervals until the lentils are tender, which usually takes about 15 to 20 minutes in total.
- Once cooked, let the stew sit for a few minutes. Stir well, taste, and adjust seasoning if necessary.
- Serve hot, garnished with fresh parsley if desired.
Variations and Tips:
- For a spicier version, add red pepper flakes or a chopped jalapeño pepper.
- Include other vegetables such as spinach, kale, or peas for added nutrition and color.
- Serve over rice, quinoa, or with crusty bread for a complete meal.
- For extra protein, consider adding a can of drained and rinsed chickpeas during cooking.
- To make it creamier, stir in a splash of coconut milk just before serving.
Zucchini Noodles With Marinara Sauce
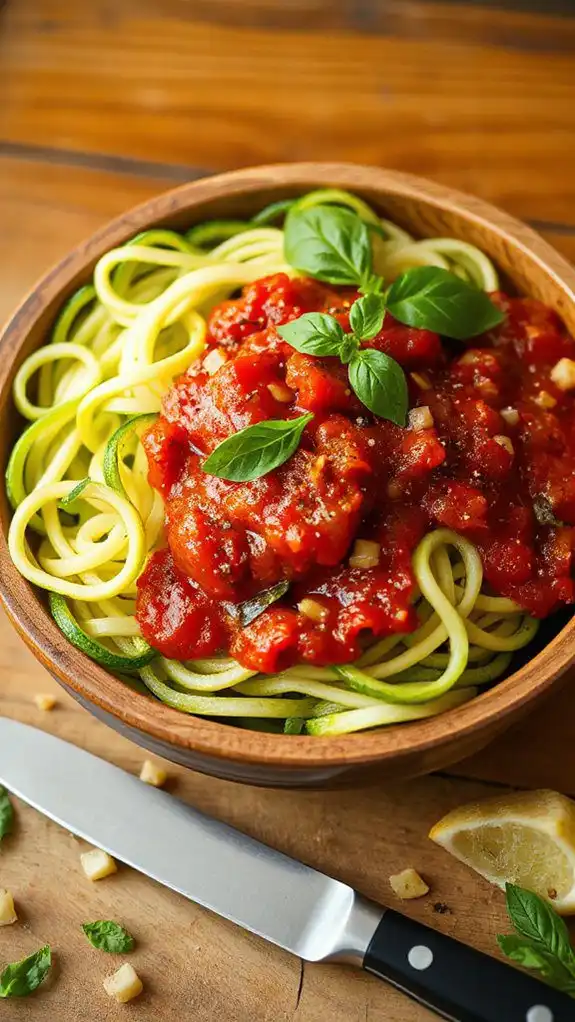
Zucchini Noodles with Marinara Sauce is a delightful vegetarian dish that serves as a healthy and delicious alternative to traditional pasta. Perfect for those looking to reduce their carbohydrate intake or simply incorporate more vegetables into their diet, this dish can be prepared in just 15 minutes.
With the help of your microwave, enjoy a warm and comforting meal that's both satisfying and nutritious.
Ingredients:
- 2 medium zucchinis
- 1 cup marinara sauce
- Salt and pepper, to taste
- 1 tablespoon olive oil (optional)
- Grated Parmesan cheese (optional)
- Fresh basil leaves (optional)
Cooking Steps:
- Prepare the Zucchini: Using a spiralizer or a vegetable peeler, create zucchini noodles. If you don't have a spiralizer, you can simply slice the zucchinis into thin strips.
- Microwave the Noodles: Place the zucchini noodles in a microwave-safe bowl. If using, drizzle with olive oil and season with salt and pepper. Cover the bowl with a microwave-safe lid or plastic wrap, leaving a small vent. Microwave on high for 2-3 minutes, or until the noodles are tender but still slightly crisp.
- Heat the Marinara Sauce: In a separate microwave-safe container, heat the marinara sauce on high for about 1-2 minutes or until heated through.
- Combine: Once the zucchini noodles are cooked, drain any excess liquid from the bowl. Pour the heated marinara sauce over the noodles and toss gently to combine.
- Serve: Transfer your Zucchini Noodles with Marinara Sauce to a plate. If desired, top with grated Parmesan cheese and fresh basil leaves before serving.
Variations and Tips:
- Protein Boost: For added protein, consider mixing in some cooked chickpeas or black beans.
- Spicy Kick: Add crushed red pepper flakes to the marinara sauce for an extra kick.
- Vegetable Medley: Mix in some steamed vegetables like spinach, bell peppers, or mushrooms for added flavor and nutrition.
- Storage: Store leftovers in an airtight container in the refrigerator for up to 2 days. Reheat in the microwave before serving.
Enjoy your healthy and satisfying Zucchini Noodles with Marinara Sauce!
Microwave Cauliflower Cheese
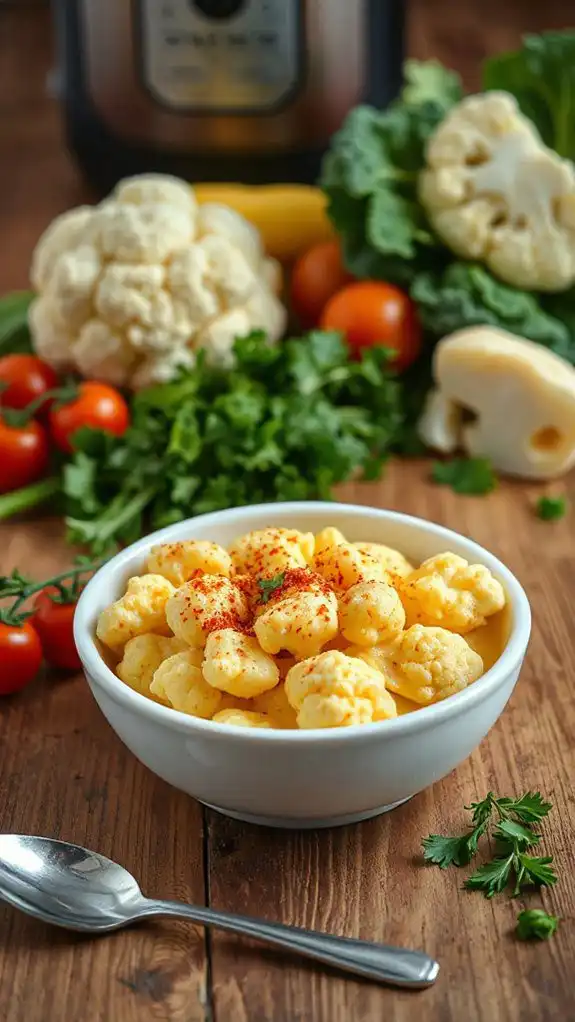
Microwave Cauliflower Cheese is a deliciously creamy dish that combines the wholesome goodness of cauliflower with rich, melty cheese, making it an ideal vegetarian comfort food. Perfect for busy weeknights or as a quick side dish for family gatherings, this recipe can be whipped up in just 15 minutes.
Even better, it accommodates those seeking a quick cooking solution without compromising on flavor.
Ingredients:
- 1 medium head of cauliflower, cut into florets
- 1 cup shredded cheddar cheese
- ½ cup milk (or plant-based milk)
- 2 tablespoons butter
- 1 tablespoon all-purpose flour
- Salt and pepper to taste
- Optional: a sprinkle of paprika or mustard powder for added flavor
Cooking Steps:
- Place the cauliflower florets in a microwave-safe bowl. Add a few tablespoons of water to the bowl and cover it with a microwave-safe lid or plate.
- Microwave the cauliflower on high for about 5-7 minutes, or until tender. Stir halfway through the cooking time.
- While the cauliflower is cooking, in a separate microwave-safe bowl, melt the butter for about 30 seconds in the microwave.
- Once melted, whisk in the flour until forming a smooth paste. Then add the milk gradually, whisking continuously to avoid lumps.
- Continue to microwave the mixture for another 1-2 minutes, stirring every 30 seconds, until it thickens.
- Stir in the shredded cheddar cheese, salt, and pepper, mixing until the cheese is melted and the sauce is smooth.
- Drain any excess water from the cooked cauliflower and pour the cheese sauce over it. Gently mix to combine.
- Optional: For a bit of a kick, add paprika or mustard powder to taste, mixing it into the dish.
- Return the bowl to the microwave for an additional 1-2 minutes to warm everything together.
Variations and Tips:
- Feel free to use a blend of cheeses like Gruyère or mozzarella for diversity in flavor.
- For added texture, top the dish with breadcrumbs or crushed crackers before microwaving for the second time and then microwave it for an additional minute to brown the topping.
- Add cooked broccoli or peas alongside the cauliflower for an extra veggie boost.
- If you prefer a vegan option, substitute cheese and milk with nutritional yeast and unsweetened almond milk, respectively.
- This dish can be served as a main course or a side dish, making it versatile for various meals.
Chickpea Salad Sandwich
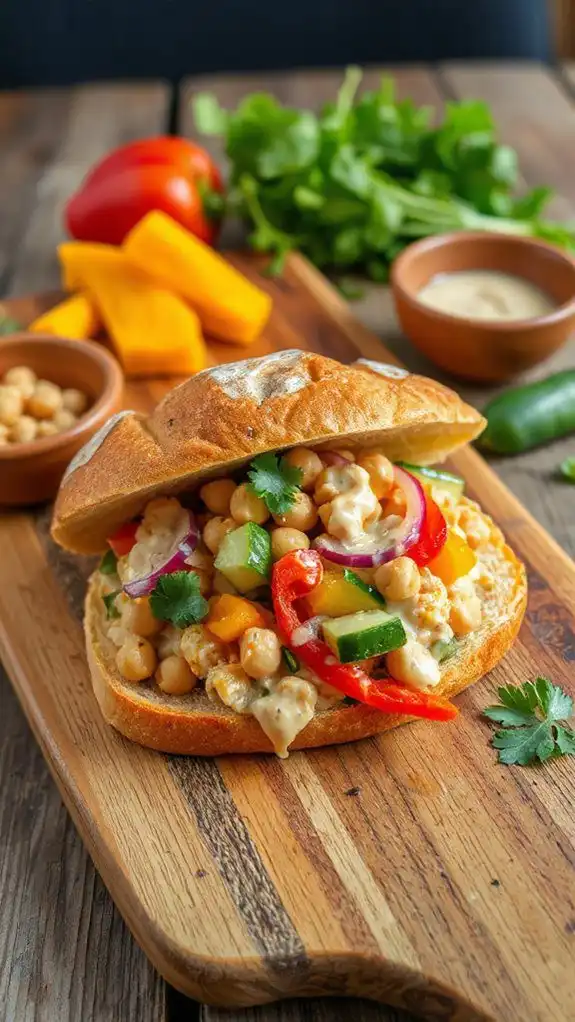
Chickpea salad sandwiches are a nutritious and delicious vegetarian option, perfect for a quick lunch or a light dinner. Rich in protein and fiber, this dish is ideal for those looking for a filling yet healthy meal.
With a preparation time of only 10 minutes, it's perfect for busy individuals or families who need a satisfying meal without spending hours in the kitchen.
Ingredients:
- 1 can chickpeas, drained and rinsed
- 2 tablespoons mayonnaise or vegan mayo
- 1 tablespoon mustard
- 1 celery stalk, finely chopped
- 1/4 red onion, finely chopped
- 1/4 cup pickles, diced
- Salt and pepper to taste
- Whole grain or gluten-free bread
- Lettuce or spinach leaves (optional)
- Slices of tomato (optional)
Cooking Instructions:
- In a microwave-safe bowl, mash the chickpeas using a fork or potato masher until they are slightly chunky.
- Add the mayonnaise, mustard, chopped celery, red onion, and pickles to the mashed chickpeas. Season with salt and pepper to taste.
- Microwave the mixture for 1-2 minutes or until warmed through, stirring halfway for even heating.
- While the chickpea salad is heating, toast the bread if desired.
- Once the chickpea mixture is heated, remove it from the microwave and spoon it onto slices of bread. Top with lettuce or spinach and tomato slices if using.
- Close the sandwich with another slice of bread and serve immediately.
Variations & Tips:
- For added flavor, mix in spices like garlic powder, paprika, or dill before microwaving.
- Substitute Greek yogurt for mayonnaise for a tangy twist.
- Add chopped bell peppers or carrots for extra crunch and nutrition.
- Serve the chickpea salad in a pita pocket instead of between slices of bread for a fun variation.
- If you're preparing this for meal prep, the chickpea salad can be stored in the refrigerator for up to 3 days, allowing for easy packed lunches.
Vegetable Fried Rice
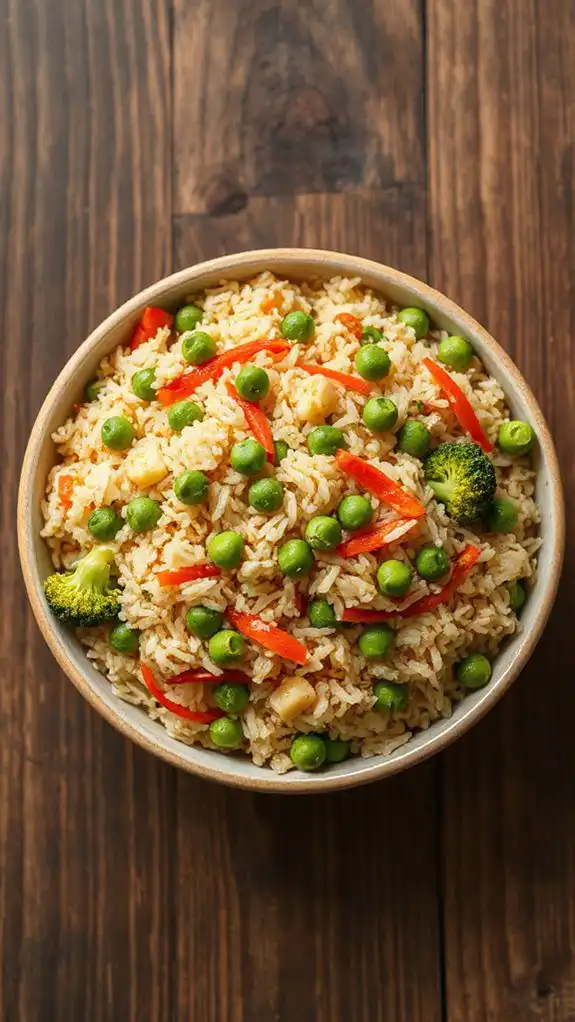
Vegetable Fried Rice is a quick and delicious vegetarian dish that's perfect for busy weeknights or those looking for a simple meal option in under 20 minutes.
It caters especially to vegetarians and vegans who want to enjoy a hearty meal without meat. This microwave recipe is also a great way to use up leftover vegetables and rice, making it both economical and environmentally friendly.
Ingredients:
- 2 cups cooked rice (preferably day-old)
- 1 cup mixed vegetables (peas, carrots, corn, bell peppers)
- 2 tablespoons soy sauce (or tamari for gluten-free)
- 1 tablespoon vegetable oil
- 1 clove garlic, minced
- 1 teaspoon sesame oil (optional)
- Salt and pepper to taste
- Green onions, chopped (for garnish)
Cooking Steps:
- In a large microwave-safe bowl, combine the cooked rice, mixed vegetables, minced garlic, and vegetable oil.
- Add the soy sauce and sesame oil (if using) to the bowl. Mix all the ingredients thoroughly.
- Cover the bowl with a microwave-safe lid or plate, leaving a small gap for steam to escape.
- Microwave on high for 3-4 minutes, stirring halfway through to ensure even cooking. Make sure the vegetables are heated, and the rice is hot throughout.
- After microwaving, season with salt and pepper to taste. Garnish with chopped green onions before serving.
Variations and Tips:
- For a protein boost, consider adding tofu or edamame.
- Feel free to incorporate any leftover vegetables you have on hand, such as broccoli, zucchini, or mushrooms.
- For an added kick, include a splash of hot sauce or sprinkle red pepper flakes on top.
- If you prefer a more aromatic fried rice, consider adding a pinch of ginger or a sprinkle of five-spice powder.
- Always adjust the cooking time based on your microwave's wattage; if the rice and vegetables aren't fully heated, continue microwaving in 30-second increments.
Stuffed Acorn Squash
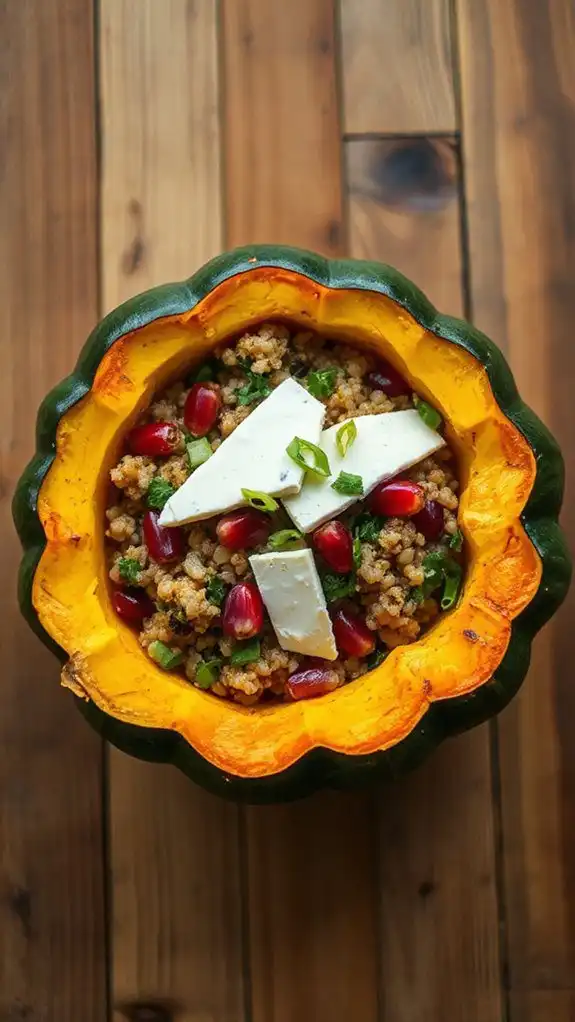
Stuffed acorn squash is a delightful vegetarian dish that features tender, roasted squash filled with a savory mixture, making it perfect as a main course for dinner or a stunning side dish for gatherings.
It is both nutritious and hearty, ideal for vegetarians or anyone looking to incorporate more plant-based meals into their diet. The total preparation and cooking time is approximately 30-40 minutes, making it a quick and delicious option for any night of the week.
Ingredients:
- 2 acorn squashes
- 1 cup cooked quinoa (or rice)
- 1 small onion, diced
- 1 clove garlic, minced
- 1 cup black beans, rinsed and drained
- 1 cup corn (fresh, frozen, or canned)
- 1 teaspoon cumin
- Salt and pepper to taste
- 1/2 cup shredded cheese (optional)
- Fresh cilantro or parsley for garnish
- Olive oil
Cooking Steps:
- Begin by carefully slicing the acorn squashes in half and scoop out the seeds. Drizzle the insides with olive oil, and sprinkle with salt and pepper.
- Place the squash halves cut-side down on a microwave-safe plate and microwave on high for about 10-12 minutes, or until they are tender when pierced with a fork.
- In a microwave-safe bowl, combine the diced onion and minced garlic. Add a splash of olive oil and microwave for 2-3 minutes until the onions are softened.
- In the same bowl, mix in the cooked quinoa (or rice), black beans, corn, cumin, salt, and pepper. Stir it all together until well combined. If you'd like to add cheese, fold it into the mixture.
- Carefully turn the cooked acorn squash halves over. Stuff each half generously with the quinoa mixture, pressing gently to pack it in. If desired, sprinkle additional cheese on top of the stuffing.
- Return the stuffed squashes to the microwave and heat for an additional 3-4 minutes, or until warmed through and the cheese is melted.
- Garnish with fresh cilantro or parsley before serving for a pop of color and flavor.
Variations and Tips:
- Swap out quinoa for other grains like couscous or bulgur for a different texture.
- Add more veggies such as spinach, peppers, or zucchini to the stuffing for added nutrition.
- For a spicier kick, include chopped jalapeños or a pinch of cayenne pepper in the filling.
- This dish can be prepared ahead of time and stored in the fridge before microwaving it, making it a convenient option for meal prep.
- If you prefer a crispy topping, finish the stuffed acorn squash under a broiler for a few minutes after microwaving to get the cheese bubbly and golden.
Caprese Stuffed Avocados
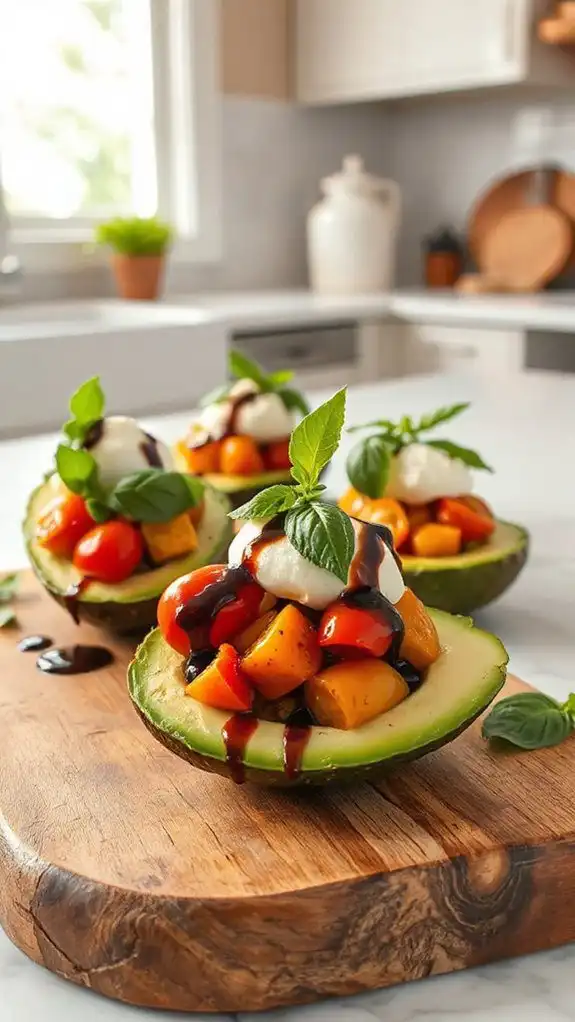
Caprese Stuffed Avocados are a delightful and nutritious dish that combines the rich creaminess of ripe avocados with the fresh flavors of classic Caprese ingredients. Perfect for a light lunch, appetizer, or even a side dish, this meal is ideal for vegetarians, those looking to incorporate more vegetables into their diets, or anyone wanting a quick and healthy option in just about 15 minutes.
The microwave makes this recipe even quicker, allowing you to enjoy a delicious meal in no time.
Ingredients:
- 2 ripe avocados
- 1 cup cherry tomatoes, halved
- 1 cup mozzarella balls, halved
- Fresh basil leaves, chopped (about ¼ cup)
- 2 tablespoons balsamic glaze
- Salt and pepper to taste
Cooking Steps:
- Prepare the Avocados: Cut the avocados in half and remove the pit. If desired, scoop out a small amount of avocado flesh to create more space for the filling.
- Mix the Filling: In a medium bowl, combine the halved cherry tomatoes, mozzarella balls, and chopped basil. Gently stir to mix the ingredients and season with salt and pepper.
- Stuff the Avocados: Spoon the tomato and mozzarella mixture into the hollowed-out avocado halves, filling them generously.
- Microwave: Place the stuffed avocados in a microwave-safe dish. Heat on high for about 1-2 minutes or until the cheese is slightly melted. Check them after 1 minute to avoid overcooking.
- Drizzle and Serve: Once heated, drizzle the stuffed avocados with balsamic glaze before serving. Enjoy warm!
Variations and Tips:
- Add Protein: For a more filling meal, consider adding cooked chickpeas or a scoop of quinoa to the mixture for added protein.
- Spice It Up: Incorporate diced jalapeños or red pepper flakes into the tomato mixture for a spicy kick.
- Herb Options: Experiment with different herbs like oregano or thyme for a unique flavor profile.
- Storage: If you have leftovers, store the filling in an airtight container in the refrigerator for up to a day and assemble the avocados when ready to eat; avoid microwaving the already-stuffed avocados after they've cooled to retain their quality and texture.
- Serve with a Side: Pair your stuffed avocados with a simple green salad or whole-grain crackers for a balanced meal.
Microwave Vegetable Quiche
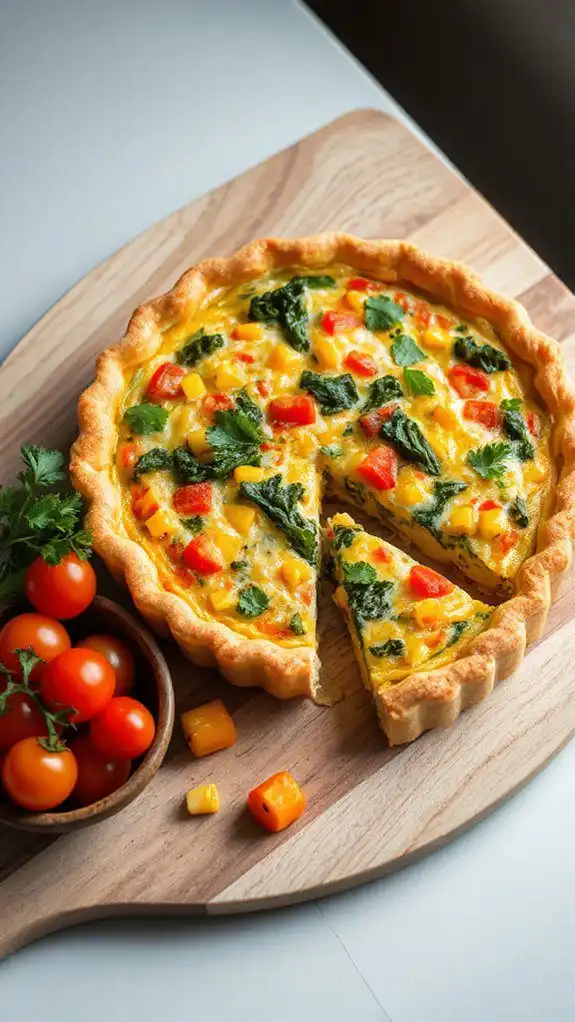
Microwave Vegetable Quiche is a quick and convenient dish that combines the savory goodness of eggs with assorted vegetables, making it a delightful option for breakfast, brunch, or even a light dinner.
This recipe is perfect for vegetarians and anyone looking for a healthy yet satisfying meal. With a preparation time of just about 10 minutes and a cooking time of around 5 minutes, you can whip up this hearty quiche in no time, making it ideal for busy weekdays or last-minute gatherings.
Ingredients:
- 4 large eggs
- 1 cup milk
- 1 cup chopped mixed vegetables (bell peppers, spinach, onions, etc.)
- 1 cup shredded cheese (cheddar, mozzarella, or your choice)
- 1 teaspoon salt
- 1/2 teaspoon black pepper
- 1/2 teaspoon garlic powder (optional)
- 1/2 teaspoon dried herbs (such as oregano or basil, optional)
- 1 pre-made pie crust or microwave-safe bowl (for crustless option)
Cooking Instructions:
- In a large bowl, whisk together the eggs, milk, salt, black pepper, garlic powder, and dried herbs until well combined.
- Stir in the chopped mixed vegetables and cheese, ensuring they are evenly distributed in the egg mixture.
- If using a pie crust, gently pour the egg mixture into the pie crust placed in a microwave-safe dish. If opting for a crustless quiche, simply pour the mixture into a greased microwave-safe bowl.
- Cover the dish with a microwave-safe lid or plate to prevent splattering.
- Microwave on high for 4-5 minutes, checking for doneness. The quiche should be set in the center and slightly puffed.
- Let it sit for 2 minutes in the microwave, then carefully remove and let it cool slightly before slicing.
Variations and Tips:
- Add your favorite vegetables or substitute with leftovers to customize your quiche; zucchini, mushrooms, or broccoli work well.
- For a spicier kick, incorporate diced jalapeños or red pepper flakes into the mixture.
- Experiment with different types of cheese for various flavors, such as feta or goat cheese.
- If you prefer a firmer texture, increase the cooking time in 30-second intervals until fully set.
- Serve the quiche with a side salad or fresh fruit for a well-rounded meal.
Spicy Shakshuka Bowl
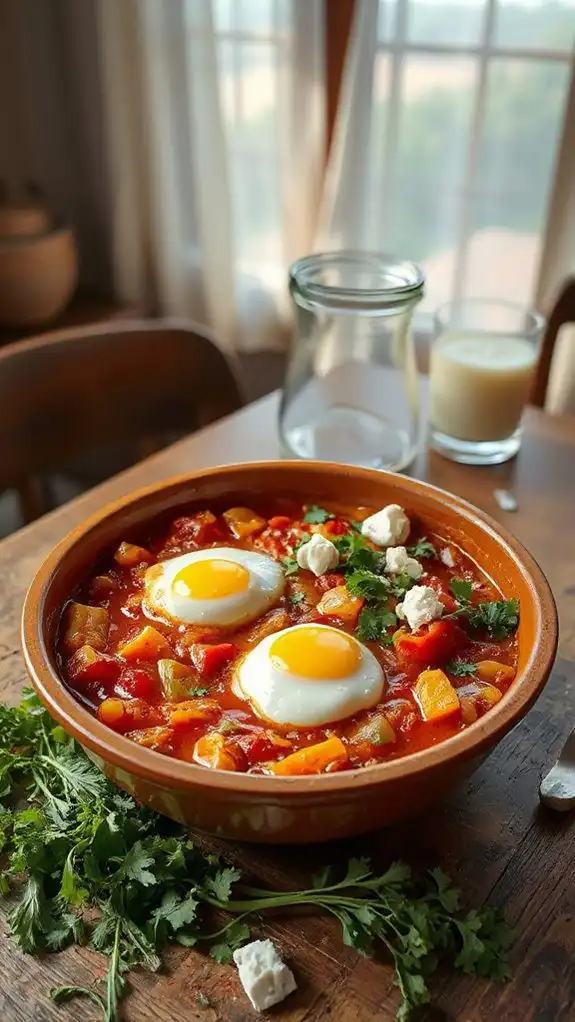
Spicy Shakshuka Bowl is a vibrant and flavorful dish that brings together poached eggs in a spicy, tomato-based sauce, making it a hearty meal that's perfect for breakfast, brunch, or even dinner. This vegetarian delight takes about 20 minutes to prepare and is ideal for those who enjoy bold flavors and a touch of heat.
It's also a wonderful option for meal prep, allowing you to enjoy it throughout the week.
Ingredients:
- 1 can (14 oz) diced tomatoes
- 1 small onion, diced
- 1 bell pepper, diced (red or green)
- 2 cloves garlic, minced
- 1 teaspoon ground cumin
- 1 teaspoon paprika
- 1/2 teaspoon red pepper flakes (adjust to taste)
- 4 large eggs
- Salt and pepper to taste
- Fresh cilantro or parsley, for garnish
- Feta cheese, crumbled (optional)
- Olive oil
Cooking Steps:
- In a microwave-safe bowl or large mug, combine the diced onion, bell pepper, and garlic. Drizzle with a little olive oil, season with salt and pepper, and mix well.
- Microwave the mixture on high for about 2-3 minutes, or until the onions and peppers are soft.
- Stir in the canned diced tomatoes along with ground cumin, paprika, and red pepper flakes. Mix well and microwave for another 2-3 minutes until heated through.
- Using a spoon, create small wells in the tomato mixture and carefully crack one egg into each well.
- Cover the bowl with a microwave-safe lid or plate to prevent splatter and cook on high for 1-2 minutes, or until the eggs are set to your liking (microwave times may vary).
- Once done, remove from the microwave and let it sit for a minute. Sprinkle with fresh cilantro or parsley and crumbled feta cheese, if using.
- Serve warm with crusty bread or over cooked grains for a satisfying meal.
Variations & Tips:
- For a smokier flavor, add a dash of smoked paprika or some diced jalapeño peppers to the sauce.
- You can ease the heat by omitting the red pepper flakes or using milder peppers.
- To boost nutrition, add in some spinach or kale right after microwaving the onion mixture.
- If you prefer a creamier texture, stir in a splash of heavy cream or coconut milk just before adding the eggs.
- Leftovers can be stored in the fridge for a couple of days. Just reheat in the microwave until heated through.
Veggie Sushi Rolls
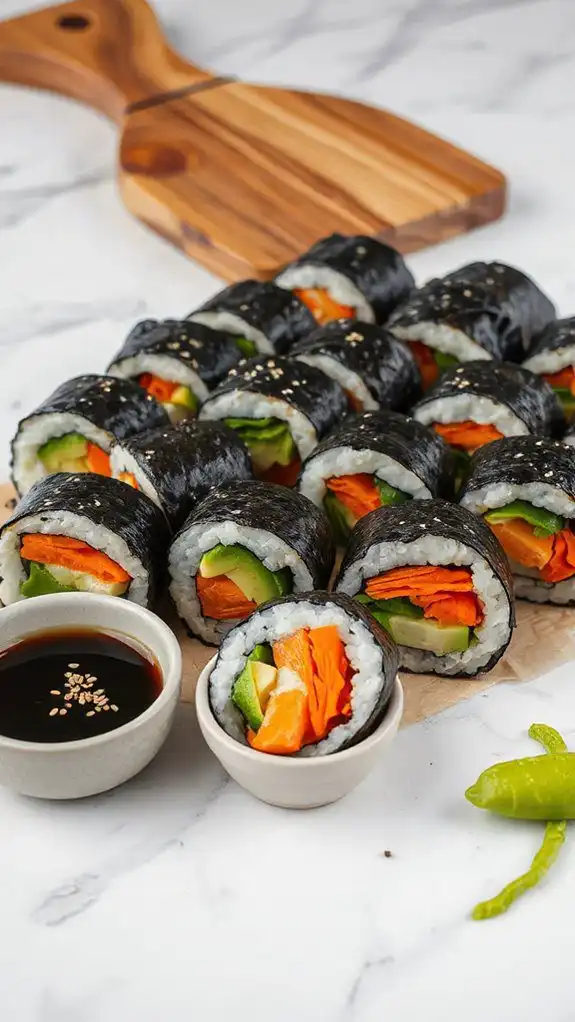
Veggie sushi rolls are a delicious and nutritious option ideal for vegetarians and anyone looking to incorporate more plant-based meals into their diet. These sushi rolls are not only vibrant and colorful, but they're also quick to make—perfect for a speedy lunch, light dinner, or a fun party appetizer.
With a total preparation time of approximately 30 minutes, you'll have a satisfying dish ready to be enjoyed in no time!
Ingredients:
- 1 cup sushi rice
- 1 ¼ cups water
- 4 sheets of nori (seaweed)
- 1 avocado, sliced
- 1 cucumber, julienned
- 1 carrot, julienned
- ¼ cup red bell pepper, sliced
- ¼ cup sprouts (optional)
- Soy sauce (for dipping)
- Pickled ginger (for serving, optional)
- Wasabi (for serving, optional)
Cooking Steps:
- Rinse the sushi rice under cold water until the water runs clear, then combine it with 1 ¼ cups of water in a microwave-safe bowl. Cover with a lid or microwave-safe plate.
- Microwave the rice on high for 5 minutes, then reduce the power to medium and cook for an additional 10 minutes. Allow it to sit in the microwave for 10 minutes, keeping it covered.
- Once the rice is cooked, fluff it with a fork and let it cool slightly. You may want to season it with a small splash of rice vinegar, sugar, and salt for added flavor (optional).
- Place a sheet of nori on a clean, flat surface or a bamboo sushi mat. With wet hands, spread a thin layer of sushi rice evenly across the nori, leaving about 1 inch at the top edge.
- Arrange the avocado, cucumber, carrot, red bell pepper, and sprouts in a line across the rice about 2 inches from the bottom edge.
- Starting at the bottom edge, carefully roll the sushi away from you, tucking in the filling as you go. Continue rolling until you reach the top edge of the nori. Moisten the top edge with a little water to seal the roll.
- Use a sharp knife to slice the roll into bite-sized pieces. Repeat the process with the remaining nori sheets and filling ingredients.
Variations and Tips:
- Feel free to customize the fillings with other vegetables such as zucchini, bell peppers, or even cooked and cooled sweet potatoes.
- For added flavor, you can incorporate ingredients like cream cheese, tofu, or even a spicy mayo mix.
- If you're new to sushi making, practicing rolling with a bamboo mat can make it easier.
- Serve your sushi rolls with soy sauce, pickled ginger, and wasabi on the side for dipping and added flavor.
- Enjoy the sushi rolls fresh, as they are best eaten right after making them. Store any leftovers in an airtight container in the refrigerator for a short period.
Spinach and Mushroom Pasta
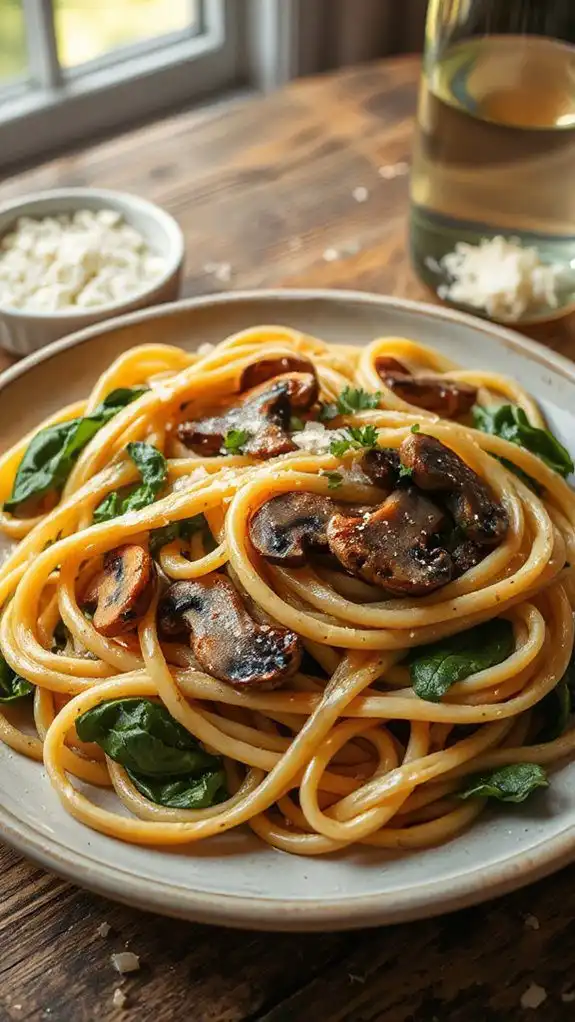
Spinach and Mushroom Pasta is a quick and delicious vegetarian dish that is perfect for busy weeknights or a light lunch option. Packed with nutritious ingredients, this microwave meal brings the comforting flavors of pasta, sautéed mushrooms, and fresh spinach together in a matter of minutes.
Ideal for students, working professionals, or anyone looking for a healthy meal with minimal cooking effort, this recipe can be prepared in just about 15 minutes.
Ingredients:
- 1 cup of pasta (any short variety, such as penne or fusilli)
- 1 cup of fresh spinach, chopped
- 1 cup of mushrooms, sliced
- 2 tablespoons of olive oil
- 2 cloves of garlic, minced
- Salt and pepper to taste
- 1/4 teaspoon of red pepper flakes (optional)
- Grated Parmesan cheese (optional, for serving)
Cooking Steps:
- Cook the Pasta: In a microwave-safe bowl, add the pasta and cover it with water. Ensure there is enough water to submerge the pasta completely. Microwave on high for 8-10 minutes, or until the pasta is tender. Check and stir halfway through to avoid sticking.
- Prepare the Vegetables: While the pasta is cooking, in another microwave-safe bowl, combine the chopped spinach, sliced mushrooms, minced garlic, olive oil, salt, pepper, and red pepper flakes. Mix well.
- Cook the Vegetables: Cover the bowl loosely with a microwave-safe lid or plate, and microwave for 4-5 minutes, until the mushrooms are tender and the spinach is wilted.
- Combine: Once cooked, drain any excess water from the pasta and mix it with the sautéed vegetables in the bowl. Stir well to combine all ingredients.
- Serve: If desired, sprinkle grated Parmesan cheese on top before serving. Enjoy your Spinach and Mushroom Pasta warm!
Variations and Tips:
- Add Protein: Consider adding cooked chickpeas, cannellini beans, or tofu for additional protein.
- Different Greens: You can substitute spinach with kale, Swiss chard, or even frozen peas for variation.
- Make it Creamy: Add a splash of cream or a dollop of Greek yogurt to create a creamier sauce.
- Herb Infusion: Enhance flavor by adding fresh or dried herbs like basil, oregano, or thyme while cooking the vegetables.
- Fiber Boost: Use whole wheat or lentil-based pasta to increase the fiber content of the dish.
Enjoy this quick, nutritious vegetarian delight that highlights the goodness of spinach and mushrooms!
Microwave Grilled Cheese and Tomato Soup

Microwave Grilled Cheese and Tomato Soup is a comforting and classic dish that brings together the gooey goodness of a cheesy sandwich and the warm, rich flavors of tomato soup, all made in a flash using your microwave. Perfect for busy individuals, college students, or anyone in need of a quick and satisfying meal, this dish can be prepared in just 15 minutes or less.
It's an ideal choice for lunch or dinner when you're in the mood for something simple yet delicious.
Ingredients:
- 2 slices of bread (whole wheat or white)
- 1-2 slices of your favorite cheese (cheddar, mozzarella, or American)
- 1 can (about 10 oz) of tomato soup (store-bought)
- Salt and pepper (to taste)
- Optional: herbs or spices (basil, oregano, or garlic powder)
- Butter or margarine (for spreading on bread)
Cooking Steps:
- Prepare the Grilled Cheese:
- Spread butter or margarine on one side of each slice of bread.
- Place one slice of bread, butter side down, on a microwave-safe plate.
- Layer the cheese on top of the bread.
- Place the second slice of bread on top, butter side up.
- Microwave the sandwich on high for 30 seconds.
- Carefully flip the sandwich over and microwave for another 30 seconds, or until the cheese is melted and the bread is golden.
- In a microwave-safe bowl, pour the tomato soup and season with salt, pepper, and any optional herbs or spices to taste.
- Microwave the soup on high for 1-2 minutes, stirring halfway through, until it's heated through.
- Cut the grilled cheese sandwich in half and serve it alongside a bowl of the warm tomato soup. Enjoy your meal!
- For a gourmet twist, consider adding slices of avocado or a smear of pesto to the grilled cheese before microwaving.
- If you're in the mood for a spicy kick, try stirring in a dash of crushed red pepper flakes or hot sauce into the soup.
- Experiment with different types of bread, such as sourdough or rye, to find your perfect combination.
- If you don't have butter, olive oil or cooking spray can also work as a substitute for grilling the bread.
- 1 cup green or brown lentils, rinsed and drained
- 2 cups vegetable broth or water
- 1 teaspoon cumin
- 1 teaspoon chili powder
- 1/2 teaspoon garlic powder
- Salt and pepper, to taste
- 8 small corn or flour tortillas
- 1 avocado, diced
- 1 small tomato, diced
- 1/4 cup red onion, finely chopped
- 1/4 cup cilantro, chopped
- Juice of 1 lime
Variations and Tips:
Lentil Tacos With Avocado Salsa
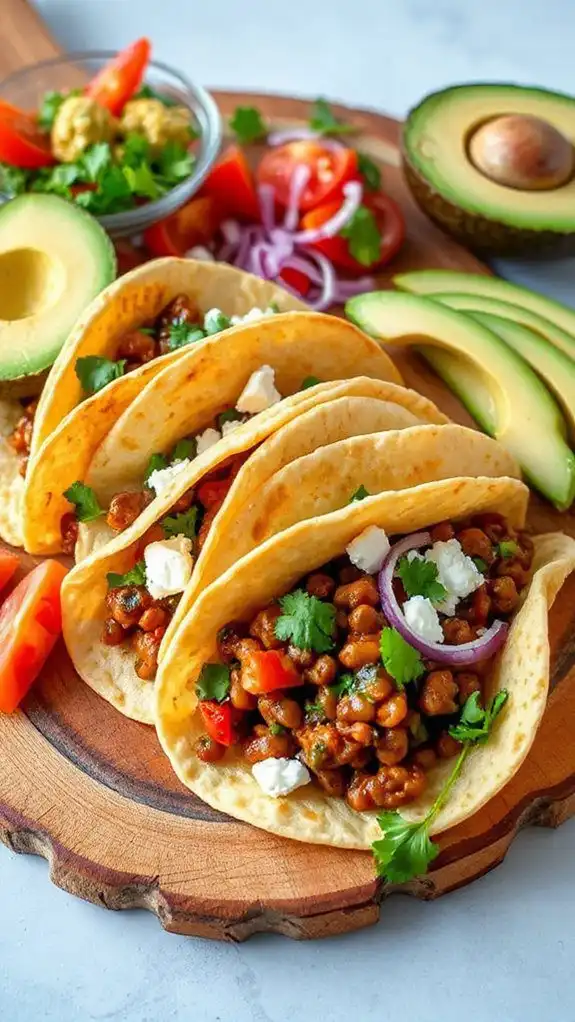
Lentil tacos with avocado salsa are a delicious and healthy vegetarian option perfect for a quick lunch or dinner. This dish is ideal for those looking to incorporate more plant-based meals into their diet without sacrificing flavor. The preparation and cooking time is approximately 30 minutes, making it a convenient option for busy weeknights.
Ingredients:
Cooking Steps:
- In a microwave-safe bowl, combine the lentils and vegetable broth or water. Cover loosely with a lid or microwave-safe plate and cook on high for about 12-15 minutes, or until the lentils are tender. Stir halfway through cooking.
- Once cooked, drain any excess liquid and stir in cumin, chili powder, garlic powder, salt, and pepper. Mix well to combine the flavors.
- While the lentils are cooking, prepare the avocado salsa. In a separate bowl, combine diced avocado, tomato, red onion, cilantro, and lime juice. Gently toss to combine and set aside.
- Warm the tortillas in the microwave for about 30 seconds or until pliable.
- Assemble the tacos by spooning the lentil mixture into the tortillas and topping with the avocado salsa. Serve immediately.
Variations and Tips:
- For added flavor, consider sautéing the onion and garlic before adding the lentils in step 1.
- Customize your tacos by adding other toppings such as shredded lettuce, cheese, or jalapeños.
- If you prefer a spicier kick, include diced jalapeños or a dash of hot sauce in the salsa.
- Leftover lentils can be stored in the refrigerator for up to 4 days and enjoyed in salads or grain bowls.
- Feel free to substitute the tortillas with lettuce wraps for a lower-carb option.