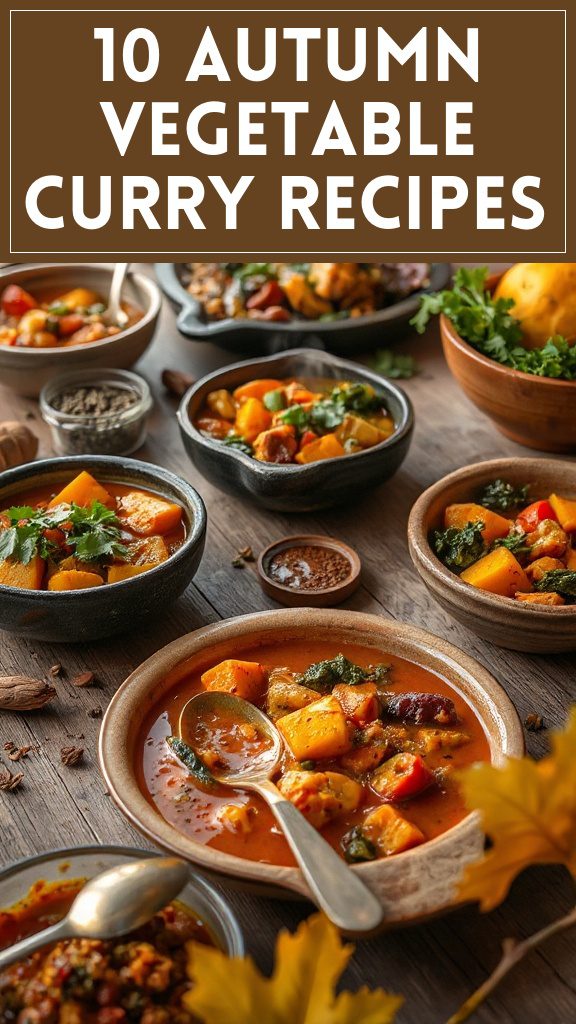
Discover a selection of 15 vegetarian summer dinner recipes that even the most devoted meat-lovers will enjoy. From vibrant Grilled Vegetable Skewers with Chimichurri Sauce to hearty Stuffed Bell Peppers with Quinoa and Black Beans, these dishes offer a range of flavors and textures. Delight in the light Zucchini Noodles with Pesto or the comforting Summer Ratatouille served with crusty bread. Each recipe promises to impress and satisfy; more delectable ideas await for those looking to elevate their summer menus.
Grilled Vegetable Skewers With Chimichurri Sauce

Vegetable skewers are a vibrant and delicious way to enjoy a summer dinner, perfect for vegetarians and anyone looking to incorporate more vegetables into their diet. This dish features a colorful assortment of grilled vegetables threaded onto skewers, complemented by a zesty chimichurri sauce. It’s easy to prepare, taking about 15 minutes of prep time and 10-15 minutes of grilling, making it ideal for barbecues, picnics, or casual weeknight dinners.
Ingredients:
- 1 zucchini, sliced into rounds
- 1 bell pepper (any color), cut into bite-sized pieces
- 1 red onion, cut into wedges
- 1 cup cherry tomatoes
- 1 cup mushrooms, whole or halved
- 1 tablespoon olive oil
- Salt and pepper to taste
- Skewers (wooden or metal)
Chimichurri Sauce:
- 1 cup fresh parsley, finely chopped
- 1/2 cup fresh cilantro, finely chopped
- 3 cloves garlic, minced
- 1/2 teaspoon red pepper flakes (optional)
- 1/2 cup olive oil
- 2 tablespoons red wine vinegar
- Salt and pepper to taste
Cooking Steps:
- If using wooden skewers, soak them in water for about 30 minutes to prevent burning during grilling.
- In a large bowl, combine the zucchini, bell pepper, red onion, cherry tomatoes, and mushrooms. Drizzle with olive oil and season with salt and pepper. Toss well to coat the vegetables evenly.
- Thread the vegetable pieces onto skewers, alternating the types of vegetables for a colorful presentation.
- Preheat the grill to medium-high heat.
- Place the skewers on the grill and cook for around 10-15 minutes, turning occasionally until the vegetables are tender and have grill marks.
- While the skewers are grilling, prepare the chimichurri sauce by mixing together the parsley, cilantro, garlic, red pepper flakes, olive oil, red wine vinegar, salt, and pepper in a bowl. Adjust the seasoning to taste.
- Once the skewers are done, remove them from the grill and serve hot, drizzled with chimichurri sauce.
Variations and Tips:
- Feel free to substitute or add other vegetables such as asparagus, eggplant, or bell peppers for different flavors and textures.
- To add protein, consider including cubes of halloumi cheese or marinated tofu between the vegetable pieces.
- For a smoky flavor, add a dash of smoked paprika to the chimichurri sauce.
- These skewers can also be made ahead of time and stored in the refrigerator until ready to grill, making them an excellent option for meal prep.
- Pair the skewers with a side of quinoa or a fresh salad for a complete meal.
- The Original Pro Chopper - Our superstar veggie slicer has been creating waves on TikTok! Simple to use,...
- Easy Meal Prep with Rust-Resistant Blades - Our vegetable chopper is perfect for anyone who wants to eat...
- 5-Star Design - The soft-grip TPU handle ensures controlled chopping, while the non-skid rubber base...
Zucchini Noodles With Pesto and Cherry Tomatoes

Zucchini Noodles with Pesto and Cherry Tomatoes is a vibrant and invigorating dish that’s perfect for a light summer dinner or as a flavorful side.
This vegetarian recipe showcases spiralized zucchini, often referred to as “zoodles,” tossed in a homemade or store-bought pesto sauce and complemented by juicy, sweet cherry tomatoes.
It’s an excellent option for those looking to enjoy a healthy, low-carb alternative to pasta. The preparation time is quick, taking about 15-20 minutes, making it ideal for busy weeknights or casual gatherings.
Ingredients:
- 4 medium zucchinis
- 1 cup cherry tomatoes, halved
- 1 cup homemade or store-bought pesto
- 2 tablespoons olive oil
- Salt and pepper, to taste
- Grated Parmesan cheese (optional, for serving)
- Fresh basil leaves (optional, for garnish)
Cooking Steps:
1. Prepare the Zoodles: Using a spiralizer or a vegetable peeler, create zucchini noodles from the zucchinis. If you don’t have a spiralizer, you can slice the zucchini thinly into ribbons.
2. Sauté the Zoodles: In a large skillet, heat the olive oil over medium heat. Add the zucchini noodles and sauté for about 2-3 minutes, just until they start to soften.
Be careful not to overcook, as you want them to remain slightly crisp.
3. Add Cherry Tomatoes: Stir in the halved cherry tomatoes and cook for an additional 2 minutes until the tomatoes are warmed and slightly blistered.
4. Mix with Pesto: Remove the skillet from heat and add the pesto sauce to the zucchini and tomatoes. Toss everything together until well combined.
5. Season: Taste and season with salt and pepper, adjusting to your preference.
6. Serve: Plate the zucchini noodles and garnish with grated Parmesan cheese and fresh basil leaves, if desired.
Variations and Tips:
- Protein Boost: To add some protein, consider tossing in cooked chickpeas, white beans, or grilled tofu.
- Nut-Free Pesto: For those with nut allergies, you can make a nut-free pesto using sunflower seeds or omit nuts altogether.
- Adding Greens: For additional nutrients, mix in some baby spinach or arugula while cooking the zucchini for a pop of color and flavor.
- Storing Leftovers: If you have leftovers, store them in an airtight container in the fridge for up to two days. Reheat gently, adding a drizzle of olive oil if necessary to keep the zoodles from getting too watery.
- Makes Everything Simple : Just forget your bagged cheese! Only turn the handle for several times and get...
- Premium Material : All parts of the rotary cheese grater are made of food grade ABS material, no BPA. The...
- Three Option Grater : The parmesan cheese grater finishes food preparation with slicing, shredding and...
Stuffed Bell Peppers With Quinoa and Black Beans
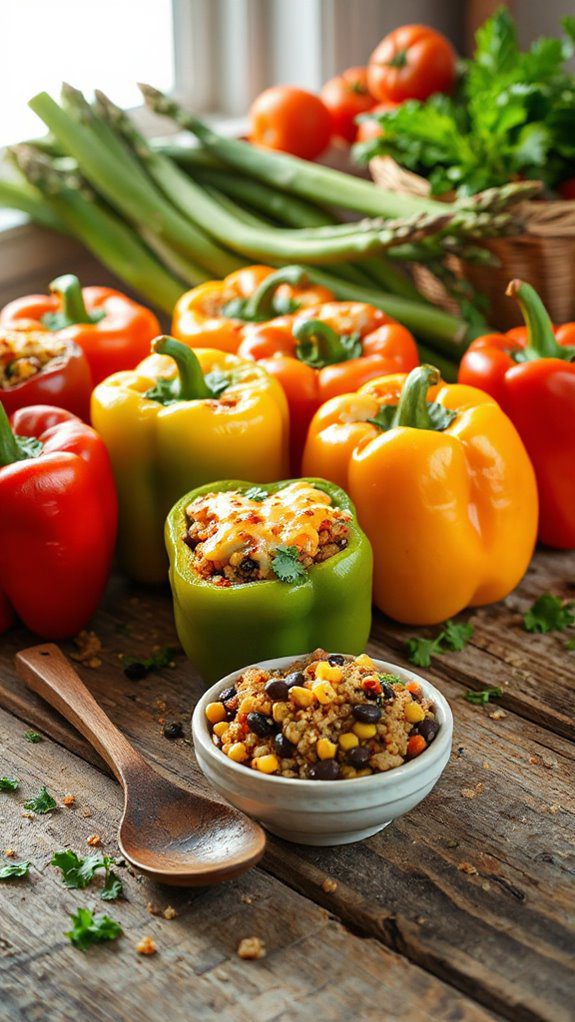
Stuffed bell peppers with quinoa and black beans are a colorful and nutritious vegetarian dish that showcases the vibrant produce of summer. Packed with protein, fiber, and a medley of flavors, these stuffed peppers are ideal for anyone looking to enjoy a satisfying meatless meal.
With a preparation time of about 30 minutes and a cooking time of 30 minutes, these delicious stuffed peppers can be a perfect centerpiece for a family dinner or a casual gathering with friends.
Ingredients:
- 4 large bell peppers (any color)
- 1 cup quinoa, rinsed
- 2 cups vegetable broth (or water)
- 1 can (15 oz) black beans, drained and rinsed
- 1 cup corn (fresh, frozen, or canned)
- 1 cup diced tomatoes (fresh or canned)
- 1 teaspoon cumin
- 1 teaspoon chili powder
- Salt and pepper to taste
- 1 cup shredded cheese (cheddar or your choice, optional)
- Fresh cilantro or parsley for garnish (optional)
Cooking Steps:
- Preheat your oven to 375°F (190°C).
- Cut the tops off the bell peppers and remove the seeds and membranes. Place the peppers upright in a baking dish.
- In a medium saucepan, combine the rinsed quinoa and vegetable broth. Bring to a boil, then reduce heat to low, cover, and simmer for about 15 minutes, or until the quinoa is fluffy and the liquid is absorbed.
- In a large mixing bowl, combine the cooked quinoa, black beans, corn, diced tomatoes, cumin, chili powder, salt, and pepper. Mix until all ingredients are well combined.
- Stuff each bell pepper with the quinoa mixture, packing it down gently. If desired, sprinkle cheese on top of the stuffed peppers.
- Pour a small amount of water into the bottom of the baking dish to create a steaming effect, then cover the dish with foil.
- Bake in the preheated oven for 25 minutes. Remove the foil and bake for an additional 5-10 minutes, until the peppers are tender and the cheese is melted and bubbly if used.
- Remove from the oven, garnish with fresh cilantro or parsley if desired, and serve hot.
Variations and Tips:
- For added spice, include diced jalapeños or a pinch of cayenne pepper in the quinoa mixture.
- Substitute brown rice or farro for quinoa for a different grain flavor and texture.
- You can easily customize the filling by adding other vegetables like zucchini, onions, or spinach.
- To make it more filling, add a diced avocado or even some cooked lentils to the stuffing mix.
- Leftover stuffed peppers can be stored in the refrigerator for up to 3 days and reheated in the oven or microwave.
- 💰 REDUCE WASTE AND SAVE MONEY: Chef Preserve keeps FOOD FRESH 5 TIMES LONGER than non-vacuum storage...
- ✅ POWERFUL, QUICK & EASY TO USE: Simply press the button to start. The device vacuum seals a bag in 5...
- ♻️ REUSABLE & RESEALABLE BAGS: Chef Preserve comes with dishwasher, freezer, refrigerator, and...
Caprese Salad With Fresh Mozzarella and Balsamic Glaze
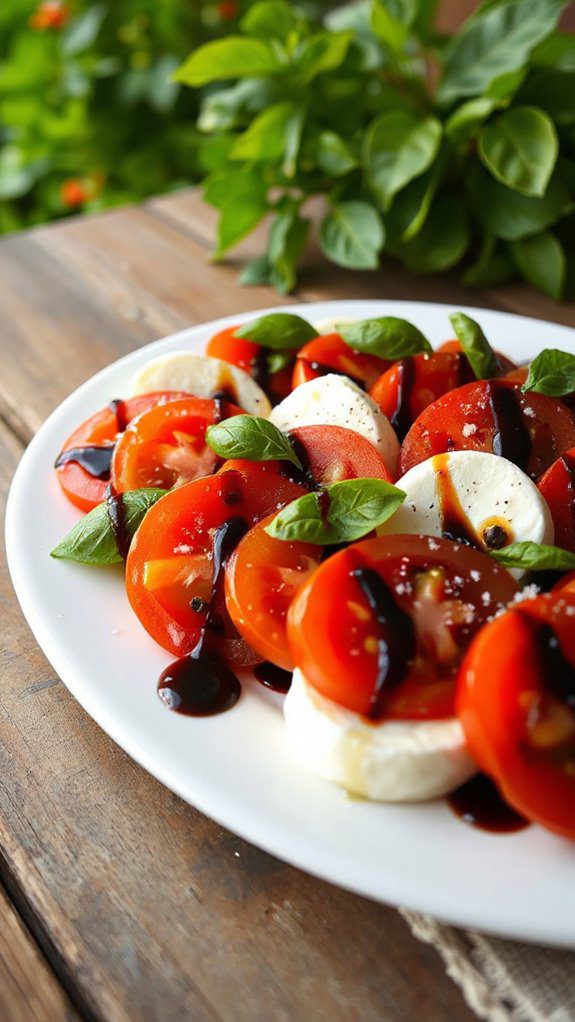
Caprese Salad with Fresh Mozzarella and Balsamic Glaze is a delightful, vibrant dish that captures the essence of summer. Ideal for vegetarians and anyone looking to enjoy a light, invigorating meal, this salad showcases the flavors of ripe tomatoes, creamy mozzarella, and fragrant basil.
With a preparation time of just 15 minutes, it’s perfect for a quick lunch, a starter for dinner, or a picnic delight.
Ingredients:
- 4 ripe tomatoes, sliced
- 8 ounces fresh mozzarella, sliced
- Fresh basil leaves
- 3 tablespoons olive oil
- 2 tablespoons balsamic glaze
- Salt, to taste
- Freshly ground black pepper, to taste
Cooking Steps:
- Arrange the Ingredients: On a large serving platter, alternate slices of fresh mozzarella and tomatoes. Tuck whole basil leaves in between the layers for added color and flavor.
- Season: Drizzle olive oil generously over the arranged salad. Then, drizzle balsamic glaze over the top.
- Add Final Touches: Sprinkle the salad with salt and freshly ground black pepper to taste, enhancing the overall flavor profile.
- Serve: Allow the salad to sit for a couple of minutes before serving to let the flavors meld. This dish is best enjoyed fresh.
Variations and Tips:
- Try using heirloom or cherry tomatoes for different colors and sweet flavors.
- Add sliced avocado for a creamy texture and extra nutrients.
- For a kick, top the salad with a sprinkling of crushed red pepper flakes or a drizzle of spicy olive oil.
- If you’re a fan of nuts, consider adding toasted pine nuts or walnuts for an added crunch.
- This salad pairs beautifully with crusty bread or can be served alongside grilled vegetables for a delicious summer feast.
- Generous Capacity: 7-quart slow cooker that comfortably serves 9+ people or fits a 7-pound roast
- Cooking Flexibility: High or low slow cooking settings, with convenient warm function for ideal serving...
- Convenient: Set it and forget it feature enables you to cook while at work or performing daily tasks
Roasted Chickpea Tacos With Avocado Crema

Roasted Chickpea Tacos with Avocado Crema is a delightful vegetarian dish that’s perfect for warm summer evenings. This meal is not only packed with flavor but also rich in protein and healthy fats, making it an ideal option for both vegetarians and anyone looking to enjoy a lighter meal.
In about 30 minutes, you can prepare these delicious tacos that burst with freshness and vibrant flavors, perfect for casual dinners or gatherings with friends and family.
Ingredients:
- 1 can (15 oz) chickpeas, drained and rinsed
- 1 tablespoon olive oil
- 1 teaspoon smoked paprika
- 1 teaspoon ground cumin
- 1/2 teaspoon garlic powder
- Salt and pepper, to taste
- 8 small corn or flour tortillas
- 1 cup shredded lettuce
- 1 cup diced tomatoes
- 1/2 cup diced red onion
- 1/4 cup fresh cilantro, chopped
- Lime wedges, for serving
For the Avocado Crema:
- 1 ripe avocado
- 1/4 cup plain Greek yogurt or sour cream
- 1 tablespoon lime juice
- Salt, to taste
Cooking Instructions:
- Preheat the oven to 400°F (200°C). Line a baking sheet with parchment paper.
- Prepare the chickpeas: In a bowl, toss the drained chickpeas with olive oil, smoked paprika, cumin, garlic powder, salt, and pepper until well coated. Spread them on the prepared baking sheet in a single layer.
- Roast the chickpeas: Bake in the preheated oven for about 20-25 minutes or until golden and crispy, stirring halfway through.
- Make the avocado crema: In a small bowl, mash the avocado and mix in Greek yogurt (or sour cream), lime juice, and salt until smooth and creamy.
- Warm the tortillas: You can warm the tortillas in a frying pan or directly over a flame for a few seconds on each side until pliable.
- Assemble the tacos: Fill each tortilla with a generous portion of roasted chickpeas, shredded lettuce, diced tomatoes, red onion, and fresh cilantro. Drizzle with avocado crema.
- Serve: Squeeze fresh lime juice over the assembled tacos and enjoy!
Variations and Tips:
- Add protein: For an extra protein boost, consider adding some black beans or quinoa to the tacos.
- Spice it up: Incorporate diced jalapeños or a splash of your favorite hot sauce for some heat.
- Vegetable options: Feel free to add grilled or roasted vegetables like bell peppers, zucchini, or corn for added texture and flavor.
- Make it gluten-free: Use gluten-free tortillas to make this dish suitable for those with gluten intolerance.
These Roasted Chickpea Tacos with Avocado Crema are a versatile, healthy, and mouthwatering option for your summer dinners!
- 100% Leak-proof: Guaranteed no-spill seal and secure latches
- Crystal-clear Tritan Built: Stain-resistant and odor-resistant material for a clear view of contents
- Lightweight & Sturdy: Easy to carry, yet durable for everyday use
Thai Basil Vegetable Stir-Fry
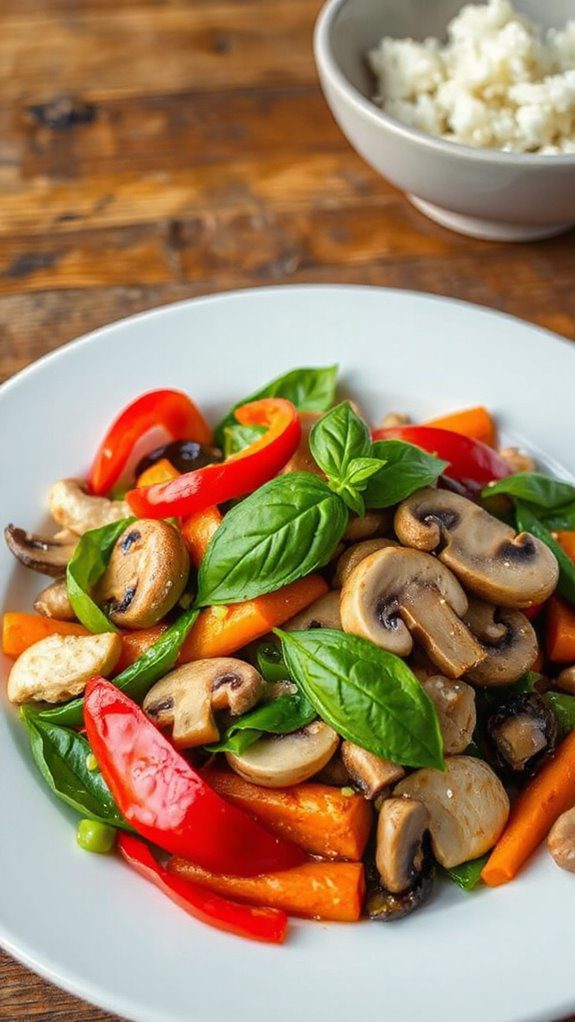
Thai Basil Vegetable Stir-Fry is a vibrant and aromatic dish that showcases the fresh flavors of seasonal vegetables, enhanced by the fragrant notes of Thai basil. This dish is perfect for vegetarians, vegans, and anyone looking to enjoy a healthy and quick meal that comes together in just about 30 minutes. It’s an ideal choice for summer evenings when you want something light yet satisfying, and it pairs wonderfully with rice or noodles.
Ingredients:
- 2 tablespoons vegetable oil
- 1 red bell pepper, sliced
- 1 cup snap peas
- 1 medium carrot, julienned
- 1 cup mushrooms, sliced (shiitake or button)
- 3 cloves garlic, minced
- 1-inch piece ginger, minced
- 2 tablespoons soy sauce
- 1 tablespoon oyster sauce (or vegetarian oyster sauce)
- 1 tablespoon sesame oil
- 1 cup fresh Thai basil leaves
- Salt and pepper to taste
- Cooked rice or noodles for serving
Cooking Instructions:
- Heat the Oil: In a large wok or non-stick skillet, heat the vegetable oil over medium-high heat.
- Sauté Aromatics: Add the minced garlic and ginger, stirring for about 30 seconds until fragrant.
- Add Vegetables: Toss in the sliced bell pepper, snap peas, and julienned carrots. Stir-fry for 3-4 minutes until the vegetables are bright and slightly tender.
- Add Mushrooms: Stir in the sliced mushrooms and continue to cook for another 2-3 minutes until they soften.
- Season the Stir-Fry: Pour in the soy sauce and oyster sauce, mixing to coat the vegetables evenly. Drizzle with sesame oil, and season with salt and pepper to taste.
- Finish with Basil: Remove the skillet from heat, fold in the fresh Thai basil, and let it wilt for a minute.
- Serve: Serve hot over cooked rice or noodles.
Variations & Tips:
- Add Protein: Enhance this stir-fry by adding tofu or tempeh for additional protein. Cube and pan-fry until golden before adding the vegetables.
- Spice It Up: For some heat, add sliced chili peppers or a dash of chili flakes to the stir-fry.
- Different Veggies: Feel free to use whatever seasonal vegetables you have on hand, such as zucchini, broccoli, or baby corn.
- Customize Sauce: Adjust the sauce to your taste by adding more soy sauce or a splash of lime juice for acidity.
- Meal Prep: This stir-fry is great for meal prep. You can chop your vegetables ahead of time and refrigerate them until you’re ready to cook.
Enjoy this deliciously fresh Thai Basil Vegetable Stir-Fry at your next summer dinner!
- 𝗘𝗳𝗳𝗼𝗿𝘁𝗹𝗲𝘀𝘀 𝗪𝗲𝗶𝗴𝗵𝗶𝗻𝗴: Supports 5 units...
- 𝗣𝗿𝗲𝗰𝗶𝘀𝗲 𝗥𝗲𝘀𝘂𝗹𝘁𝘀: Accurately weighs up to 11 lb/5 kg with 1 g...
- 𝗦𝗶𝗺𝗽𝗹𝗲 & 𝗖𝗼𝗺𝗽𝗮𝗰𝘁: The small and sleek scale is a perfect fit for...
Mediterranean Couscous Salad
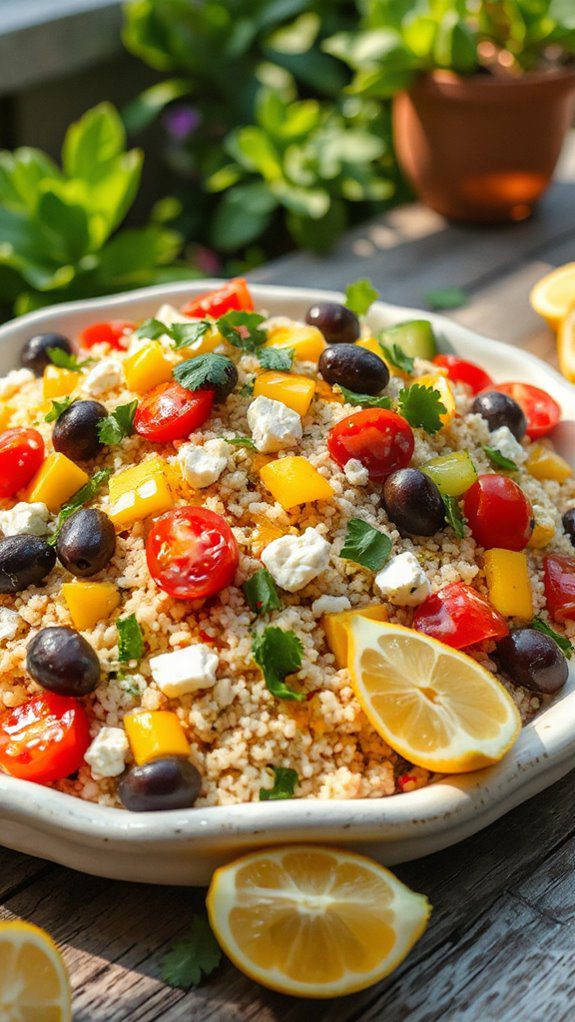
Mediterranean Couscous Salad is a vibrant and invigorating dish perfect for summer dinners or picnics. The combination of fluffy couscous, fresh vegetables, and zesty dressing makes it a light yet satisfying meal, ideal for vegetarians and anyone looking to enjoy a healthy option.
This salad is also great for meal prep and can be served chilled or at room temperature. Preparation time is approximately 20 minutes, making it a quick and easy option for warm weather dining.
Ingredients:
- 1 cup couscous
- 1 ¼ cups vegetable broth or water
- 1 cup cherry tomatoes, halved
- 1 cucumber, diced
- 1 bell pepper (red or yellow), diced
- ½ red onion, finely chopped
- ¼ cup Kalamata olives, pitted and sliced
- ¼ cup feta cheese, crumbled (optional for a vegan version)
- ¼ cup fresh parsley, chopped
- Juice of 1 lemon
- 3 tablespoons olive oil
- Salt and pepper to taste
- 1 teaspoon dried oregano (optional)
Cooking Steps:
- In a medium saucepan, bring the vegetable broth (or water) to a boil. Stir in the couscous, cover, and remove from heat. Let it sit for about 5 minutes, or until the liquid is absorbed.
- Fluff the couscous with a fork and allow it to cool to room temperature.
- In a large bowl, combine the cherry tomatoes, cucumber, bell pepper, red onion, olives, feta cheese (if using), and fresh parsley.
- In a small bowl, whisk together the lemon juice, olive oil, salt, pepper, and dried oregano.
- Add the cooled couscous to the vegetable mixture, pour the dressing over the top, and gently toss everything together until well combined.
- Taste and adjust seasoning if necessary. Serve immediately, or refrigerate for 30 minutes to let the flavors meld before serving.
Variations and Tips:
- You can add other ingredients like artichoke hearts, sun-dried tomatoes, or avocado for extra flavor.
- For a protein boost, consider adding chickpeas or white beans.
- To make this dish gluten-free, substitute couscous with quinoa or a gluten-free grain.
- Adjust the acidity by adding more or less lemon juice according to your taste preference.
- This salad can be made ahead of time and stored in an airtight container in the refrigerator for up to 3 days.
- Instant Read Food Thermometer | Our instant read thermometer features a temperature probe and advanced,...
- Multi-Use | From bbq thermometer to baking thermometer, our digital food thermometer for cooking is...
- Easy-Read Digital Thermometer For Cooking | Large instant thermometer dial with bright blue backlight...
Cauliflower Steaks With Tahini Sauce
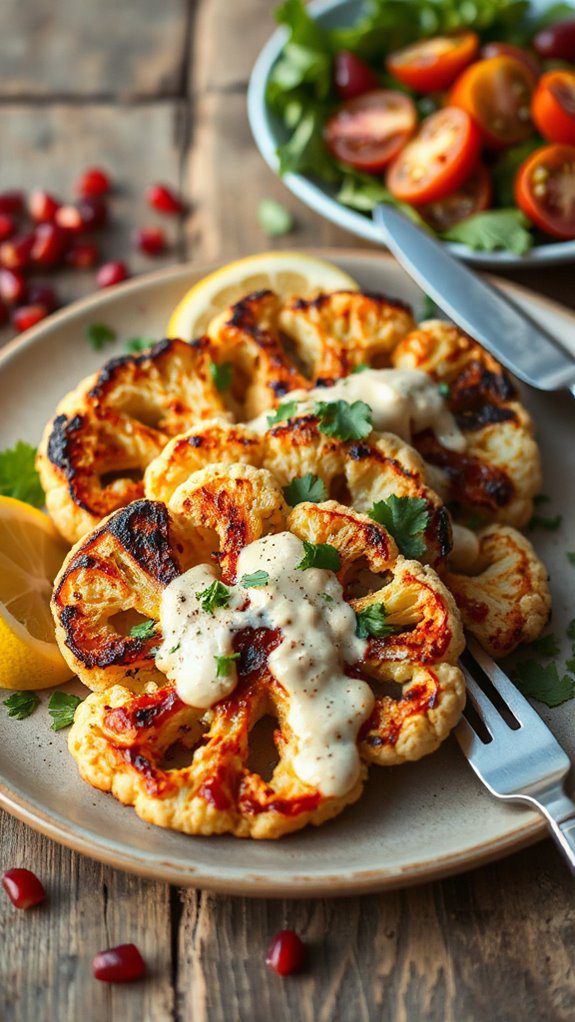
Cauliflower Steaks with Tahini Sauce is a delightful and hearty vegetarian dish designed for those looking to explore plant-based meals without sacrificing flavor or satisfaction.
With its bold flavors and unique textures, it’s perfect for summer dinners, barbecues, or as a side for gatherings. The dish typically takes about 30-40 minutes to prepare and cook, making it a hassle-free yet impressive option for both novice cooks and seasoned chefs alike.
Ingredients:
- 1 large head of cauliflower
- 3 tablespoons olive oil
- 1 teaspoon smoked paprika
- 1 teaspoon garlic powder
- Salt and pepper, to taste
- ½ cup tahini
- 2 tablespoons lemon juice
- 2 tablespoons water (adjust for consistency)
- 1 clove garlic, minced
- Fresh parsley, chopped (for garnish)
- Lemon wedges (for serving)
Cooking Steps:
- Prepare the Cauliflower: Preheat the oven to 425°F (220°C). Remove the leaves from the cauliflower and trim the stem. Slice the cauliflower head into thick steaks, about ¾ inch wide. You should be able to get 2-3 good steaks from the center of the cauliflower. Reserve any leftover florets for another use.
- Season the Cauliflower: In a small bowl, mix the olive oil, smoked paprika, garlic powder, salt, and pepper. Brush the mixture generously over both sides of each cauliflower steak.
- Roast the Steaks: Place the seasoned cauliflower steaks on a baking sheet lined with parchment paper. Roast in the oven for 25-30 minutes, flipping halfway through, until they are golden brown and tender.
- Make the Tahini Sauce: While the cauliflower is roasting, combine tahini, lemon juice, water, minced garlic, and a pinch of salt in a bowl. Whisk until smooth and creamy, adding more water if needed to achieve a drizzle-able consistency.
- Serve: Once the cauliflower steaks are done, remove them from the oven. Drizzle the tahini sauce over the steaks and garnish with fresh parsley. Serve with lemon wedges on the side.
Variations & Tips:
- Add Spices: Experiment with spices such as cumin or coriander in the olive oil mixture for an extra flavor boost.
- Grill Option: For a smoky flavor, you can grill the cauliflower steaks instead of roasting them. Just be sure to brush them with oil and use a grill basket to prevent them from falling through the grates.
- Toppings: Consider adding toppings like pomegranate seeds, diced tomatoes, or sliced olives for added color and flavor.
- Storage: Leftover tahini sauce can be stored in the refrigerator for up to a week. It works well as a dip or spread for other dishes.
- Pairing: This dish pairs beautifully with a fresh salad, crusty bread, or grain like quinoa or couscous for a more complete meal.
- Versatile 54-Piece Collection: Elevate your kitchen with the Home Hero 54-Piece Kitchen Utensil Set, a...
- Durable and Long-Lasting: Crafted from premium stainless steel, these kitchen utensils are designed to...
- Perfect Holiday Gift: Delight your loved ones with this kitchen utensils gift set this festive season....
Eggplant Parmesan With Fresh Basil
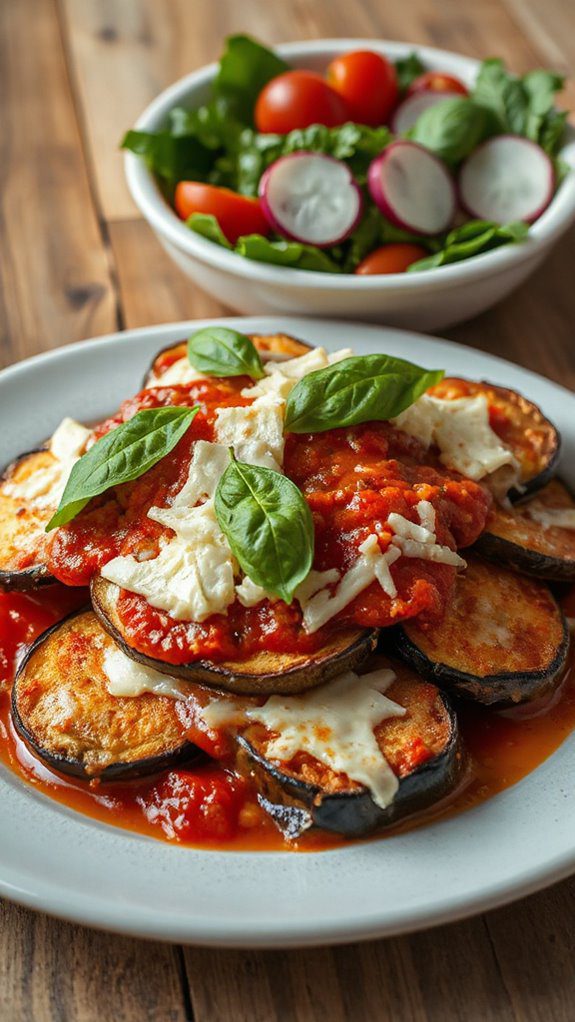
Eggplant Parmesan is a classic Italian dish that combines layers of breaded eggplant, rich marinara sauce, and gooey melted cheese, all topped with a sprinkle of fresh basil.
This hearty vegetarian meal is perfect for summer dinners when eggplants are in season and can be enjoyed by both vegetarians and meat lovers alike. With a preparation time of about 30 minutes and a cooking time of 45 minutes, you’ll have a delicious and comforting dish ready to serve your family or guests.
Ingredients:
- 2 medium eggplants, sliced into 1/4-inch rounds
- Salt (for sweating the eggplant)
- 1 cup all-purpose flour
- 2 large eggs, beaten
- 1 cup breadcrumbs (preferably Italian seasoned)
- 2 cups marinara sauce
- 2 cups shredded mozzarella cheese
- 1 cup grated Parmesan cheese
- 1/2 cup fresh basil leaves, chopped (plus extra for garnish)
- Olive oil (for frying)
- Freshly cracked black pepper (to taste)
Cooking Steps:
- Preheat your oven to 375°F (190°C).
- Start by sprinkling salt on both sides of the eggplant slices and letting them sit for about 30 minutes. This step helps to draw out excess moisture and bitterness.
- Rinse the eggplant slices under cold water and pat them dry with paper towels.
- Set up a breading station: Place flour in one shallow dish, beaten eggs in another, and breadcrumbs in a third dish.
- Dredge each eggplant slice in flour, shaking off any excess, then dip in the beaten eggs, and finally coat with breadcrumbs. Set aside.
- In a large skillet, heat olive oil over medium heat. Fry the eggplant slices in batches until crispy and golden brown, about 3-4 minutes on each side. Remove and drain on paper towels.
- In a baking dish, spread a thin layer of marinara sauce on the bottom. Layer half of the fried eggplant slices over the sauce, followed by half of the mozzarella cheese, half of the Parmesan cheese, and half of the chopped basil.
- Repeat the layers with the remaining ingredients. Finish with a layer of marinara sauce topped with the remaining mozzarella and Parmesan cheeses.
- Bake in the preheated oven for 30-35 minutes, or until the cheese is bubbly and golden brown.
- Let the Eggplant Parmesan sit for about 10 minutes before garnishing with additional fresh basil and serving.
Variations and Tips:
- For a healthier version, you can bake the eggplant slices instead of frying them. Simply place the breaded eggplant on a baking sheet, drizzle with olive oil, and bake in the oven at 375°F (190°C) for about 25-30 minutes, flipping halfway through.
- Add other vegetables like spinach or zucchini to the layers for extra nutrition and flavor.
- If you’re short on time, use store-bought marinara sauce to simplify the preparation.
- Serve with a fresh salad or garlic bread to complete the meal.
- 24-ounce insulated stainless-steel water bottle with a FreeSip spout and push-button lid with lock
- Patented FreeSip spout designed for either sipping upright through the built-in straw or tilting back to...
- Protective push-to-open lid keeps spout clean; convenient carry loop doubles as a lock
Spicy Lentil Burgers With Avocado Salsa
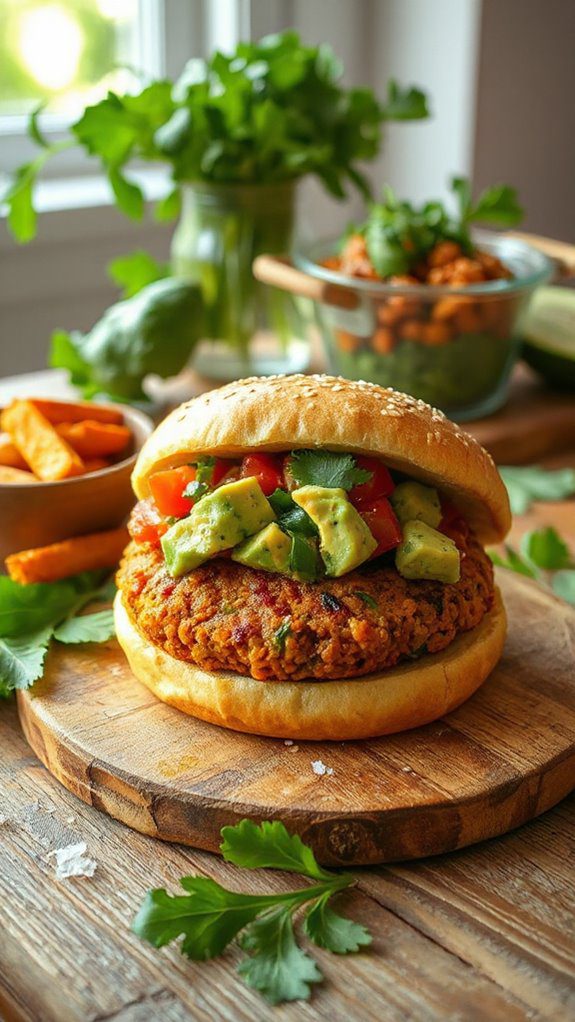
Spicy Lentil Burgers With Avocado Salsa are a delightful vegetarian dish that is perfect for summer barbecues or a quick weeknight dinner.
These hearty, protein-packed burgers are made from lentils, spices, and herbs, delivering a satisfying flavor and texture that even meat-lovers will enjoy. The addition of fresh avocado salsa elevates the dish with creamy, zesty goodness. Preparation time is approximately 30 minutes, making it ideal for those looking for a delicious yet quick meal.
Ingredients:
- 1 cup cooked green or brown lentils
- 1/2 cup breadcrumbs
- 1 small onion, finely chopped
- 2 cloves garlic, minced
- 1 teaspoon cumin
- 1 teaspoon smoked paprika
- 1/2 teaspoon cayenne pepper (adjust to taste)
- Salt and pepper, to taste
- 1 tablespoon olive oil (for cooking)
- 1 avocado, diced
- 1 small tomato, diced
- 1 tablespoon fresh cilantro, chopped
- Juice of 1 lime
- Burger buns, for serving
Cooking Steps:
- In a bowl, mash the cooked lentils using a fork or potato masher until partially smooth, leaving some whole for texture.
- In a skillet, heat a teaspoon of olive oil over medium heat. Add the chopped onion and sauté until softened, about 5 minutes. Add garlic, cumin, smoked paprika, and cayenne pepper, and cook for an additional minute until fragrant.
- Combine the sautéed onion mixture with the mashed lentils in the bowl. Add breadcrumbs, salt, and pepper, then mix well until fully combined. Form the mixture into burger patties, about 4-6 patties depending on your preferred size.
- In the same skillet, heat the remaining olive oil over medium heat and cook the lentil burgers for about 4-5 minutes on each side, or until they are golden brown and heated through.
- Meanwhile, make the avocado salsa: In a separate bowl, mix the diced avocado, tomato, cilantro, and lime juice. Season with salt and pepper to taste.
- Assemble the burgers by placing each lentil patty on a bun and topping with a generous spoonful of avocado salsa.
Variations and Tips:
- Add cheese: For extra flavor, add a slice of cheese on top of the patty during the last minute of cooking to let it melt.
- Spices & herbs: Feel free to experiment with different spices like chili powder or herbs such as parsley or basil for varied flavor profiles.
- Baking option: For a healthier version, you can bake the patties at 375°F (190°C) for about 25-30 minutes, flipping halfway through.
- Serve with sides: These burgers pair wonderfully with a side salad, sweet potato fries, or grilled vegetables for a fully-rounded meal.
Grilled Corn and Avocado Salad
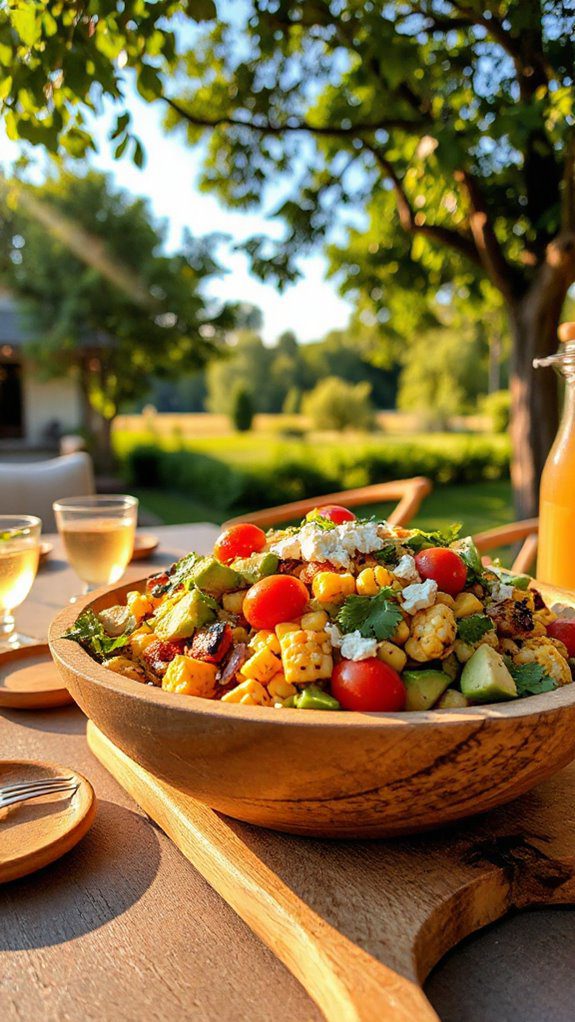
Grilled Corn and Avocado Salad is a rejuvenating and vibrant dish that perfectly captures the flavors of summer. This vegetarian salad is ideal for warm evenings, picnics, or barbecues, and it can serve as a light main course or a side dish that complements grilled meats or other plant-based options.
With a prep time of about 15 minutes and a cooking time of 10 minutes, it’s a quick and easy recipe that brings a taste of the season to your table.
Ingredients:
- 4 ears of corn, husked
- 2 ripe avocados, diced
- 1 cup cherry tomatoes, halved
- 1/4 cup red onion, finely chopped
- 1/4 cup fresh cilantro, chopped
- 2 tablespoons lime juice
- 2 tablespoons olive oil
- Salt and pepper, to taste
- Crumbled feta cheese (optional)
Cooking Steps:
- Preheat your grill to medium-high heat.
- Place the husked corn directly on the grill. Grill for about 10 minutes, turning occasionally, until the corn is slightly charred and cooked through.
- Remove the corn from the grill and allow it to cool slightly. Once cooled, cut the kernels off the cob and place them in a large mixing bowl.
- Add the diced avocados, cherry tomatoes, red onion, and cilantro to the bowl with the corn.
- In a separate small bowl, whisk together lime juice, olive oil, salt, and pepper. Pour this dressing over the salad mixture and gently toss to combine, being careful not to mash the avocados.
- If desired, sprinkle crumbled feta cheese on top before serving.
Variations and Tips:
- For added texture and flavor, consider including black beans, cucumber, or bell peppers.
- Adjust the lime juice and olive oil to suit your taste preferences; adding a little more lime juice can enhance the freshness.
- If you prefer a spicier kick, include chopped jalapeño or a dash of cayenne pepper.
- This salad is best served fresh but can be stored in an airtight container in the refrigerator for up to a day.
Note that the avocado may brown over time, so it’s best to add it right before serving if preparing in advance.
Spinach and Feta Stuffed Portobello Mushrooms
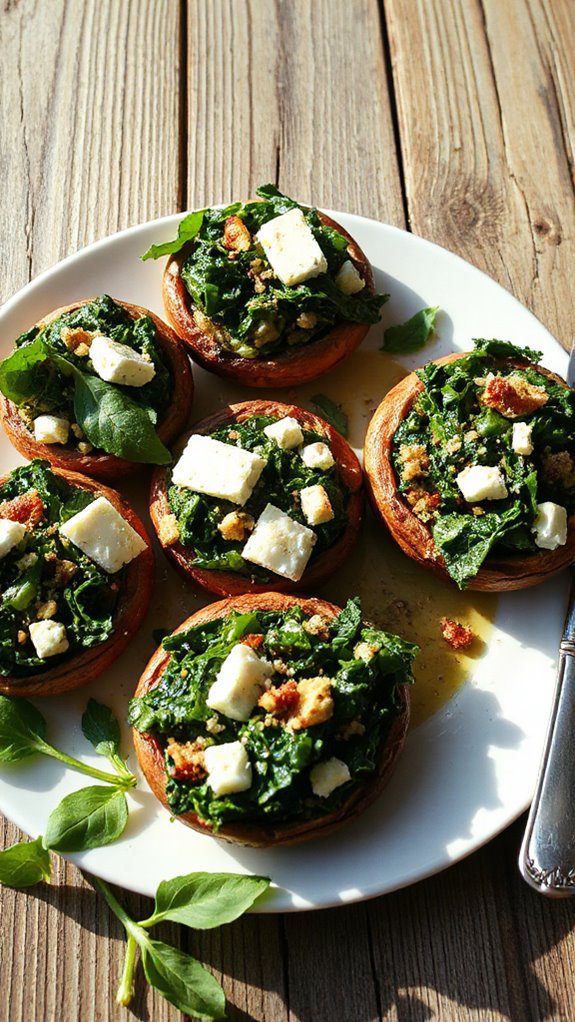
Spinach and Feta Stuffed Portobello Mushrooms make for a delicious and satisfying dish that is perfect for vegetarians or anyone looking to incorporate more plant-based meals into their diet.
Rich in flavor and packed with nutrients, these stuffed mushrooms are an excellent choice for a summer dinner, offering a delightful combination of earthy mushroom taste, creamy feta cheese, and vibrant spinach.
Preparation time is approximately 20 minutes, with an additional 25 minutes for baking, making it a quick yet impressive dish to serve at your next gathering.
Ingredients:
- 4 large portobello mushrooms
- 2 cups fresh spinach, chopped
- 1 cup feta cheese, crumbled
- 1/2 cup breadcrumbs (preferably whole wheat)
- 1/4 cup grated Parmesan cheese
- 2 cloves garlic, minced
- 2 tablespoons olive oil
- 1 teaspoon dried oregano
- Salt and pepper, to taste
- Fresh basil or parsley, for garnish (optional)
Cooking Steps:
- Preheat your oven to 375°F (190°C).
- Clean the portobello mushrooms by gently wiping them with a damp cloth. Remove the stems and scrape out the gills with a spoon.
- In a skillet, heat the olive oil over medium heat. Add the minced garlic and sauté for about 1 minute, or until fragrant.
- Add the chopped spinach to the skillet and cook until wilted, about 2-3 minutes. Remove from heat.
- In a mixing bowl, combine the cooked spinach and garlic with the feta cheese, breadcrumbs, Parmesan cheese, oregano, salt, and pepper. Mix well until all ingredients are combined.
- Stuff each portobello mushroom cap generously with the spinach and feta mixture.
- Place the stuffed mushrooms on a baking sheet lined with parchment paper. Bake in the preheated oven for 20-25 minutes, until the mushrooms are tender and the top is golden.
- Remove from the oven and let them cool slightly before serving. Garnish with fresh basil or parsley if desired.
Variations and Tips:
- For an added kick, consider mixing in some red pepper flakes or chopped sun-dried tomatoes with the stuffing.
- You can substitute the feta cheese with goat cheese or mozzarella for a different flavor profile.
- Add chopped walnuts or pine nuts to the filling for extra crunch and nutrition.
- Serve the stuffed mushrooms with a side salad or grilled vegetables for a complete meal.
- These stuffed mushrooms can be prepared ahead of time and stored in the fridge. Just bake them right before serving for a fresh touch.
Summer Ratatouille With Crusty Bread
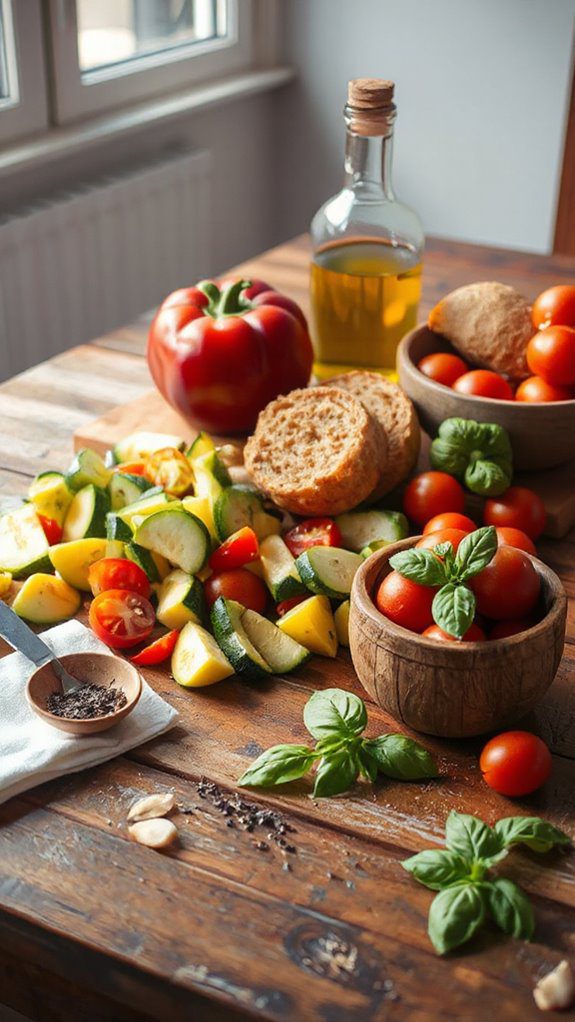
Summer Ratatouille is a delightful and vibrant dish that showcases the bounty of seasonal vegetables. This classic French dish is perfect for vegetarians and anyone looking to enjoy a healthy meal filled with fresh flavors.
Ideal for a light summer dinner, it can be prepared in about 30 minutes and served warm or at room temperature, making it a versatile option for gatherings or family meals. Pair it with some crusty bread to soak up the delicious juices and you’ve got yourself a feast!
Ingredients:
- 1 eggplant, diced
- 1 zucchini, diced
- 1 yellow squash, diced
- 1 bell pepper (any color), diced
- 1 onion, chopped
- 2 cloves garlic, minced
- 4 ripe tomatoes, chopped (or 1 can of diced tomatoes)
- 2 tablespoons olive oil
- 1 teaspoon dried thyme
- 1 teaspoon dried basil
- Salt and pepper to taste
- Fresh basil leaves, for garnish
- Crusty bread, for serving
Cooking Steps:
- Prepare the vegetables: Wash and chop the eggplant, zucchini, yellow squash, bell pepper, onion, and tomatoes.
- Heat the oil: In a large skillet over medium heat, add the olive oil. Once hot, (but not smoking), add the chopped onion and garlic. Sauté for about 2-3 minutes until the onion becomes translucent.
- Add the vegetables: Stir in the diced eggplant, zucchini, yellow squash, and bell pepper. Cook for about 5-7 minutes, stirring occasionally until they begin to soften.
- Incorporate the tomatoes and seasonings: Add the chopped tomatoes (or canned tomatoes), thyme, basil, salt, and pepper. Stir everything together and reduce the heat to low.
- Simmer: Cover the skillet and let the ratatouille simmer for about 15-20 minutes, stirring occasionally until the vegetables are tender and the flavors meld together.
- Serve: Taste and adjust the seasoning if needed. Serve warm or at room temperature, garnished with fresh basil leaves, along with crusty bread on the side.
Variations and Tips:
- Add protein: For a heartier meal, consider adding chickpeas or lentils to the ratatouille.
- Cheesy twist: Sprinkle some crumbled feta or shaved Parmesan on top before serving for added flavor.
- Herb swapping: Feel free to use fresh herbs like rosemary or parsley for a different flavor profile.
- Grill it: For a smoky twist, you can grill the vegetables instead of sautéing them, then combine them with the tomatoes in a large bowl.
- Make ahead: Ratatouille can be made in advance and stored in the fridge for up to 3 days, allowing the flavors to deepen over time. Enjoy it straight from the fridge or reheat for a warm meal.
Vegetable Pad Thai With Peanuts
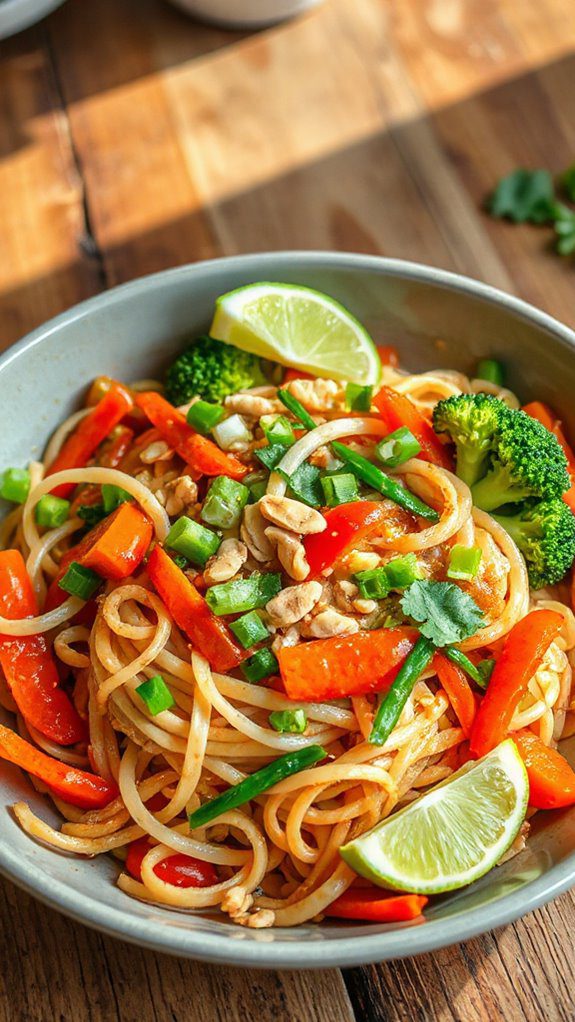
Vegetable Pad Thai With Peanuts is a invigorating, plant-based spin on the traditional Thai dish that is perfect for those looking for a quick and satisfying meal. Ideal for vegetarians, vegans, or anyone wanting to incorporate more vegetables into their diet, this recipe can be prepared in just 30 minutes.
The combination of crunchy vegetables, savory sauce, and crunchy peanuts makes for a delightful and nutritious dinner option that the whole family will enjoy.
Ingredients:
- 8 oz rice noodles
- 2 tablespoons vegetable oil
- 2 cloves garlic, minced
- 1 cup bell peppers, sliced (any color)
- 1 cup carrots, julienned
- 1 cup bean sprouts
- 1 cup broccoli florets
- 3 green onions, chopped
- ¼ cup peanuts, chopped
- 3 tablespoons soy sauce
- 2 tablespoons peanut butter
- 1 tablespoon lime juice
- 1 tablespoon brown sugar
- Optional: cilantro for garnish, lime wedges
Cooking Instructions:
- Cook the rice noodles according to package instructions, then drain and set aside.
- In a large pan or wok, heat the vegetable oil over medium-high heat. Add the minced garlic and sauté for about 30 seconds until fragrant.
- Add the bell peppers, carrots, and broccoli to the pan. Stir-fry the vegetables for 3-5 minutes or until just tender.
- Add the cooked rice noodles to the pan along with the bean sprouts, green onions, soy sauce, peanut butter, lime juice, and brown sugar. Toss everything together and cook for an additional 2-3 minutes until heated through and well combined.
- Remove the pan from heat and serve immediately, garnished with chopped peanuts and cilantro. Provide lime wedges on the side for an added zing.
Variations & Tips:
- For added protein, consider adding tofu or tempeh. Sauté it separately and incorporate it with the noodles.
- You can customize the vegetables based on what you have on hand, such as zucchini, snap peas, or asparagus.
- If you prefer a spicier Pad Thai, add a dash of chili sauce or red pepper flakes during cooking.
- For a gluten-free version, use rice noodles and tamari instead of soy sauce.
- Leftovers can be stored in an airtight container in the refrigerator and reheated on the stovetop or in the microwave.
Watermelon and Feta Salad With Mint
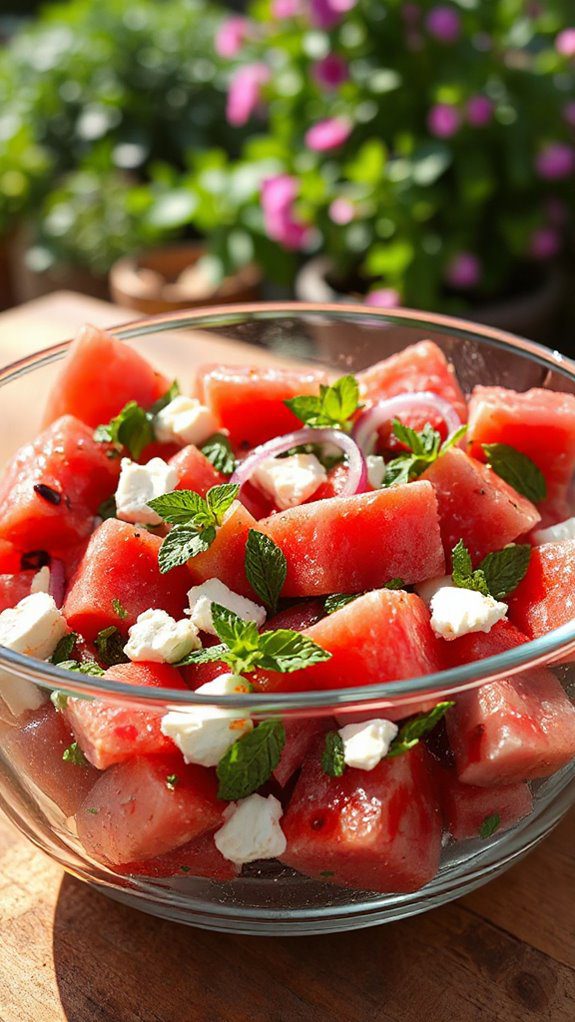
Watermelon and Feta Salad with Mint is a revitalizing summer dish that perfectly balances sweet, salty, and tangy flavors. Ideal for those looking for a light appetizer or side salad, this dish is particularly suited for outdoor barbecues, picnics, or as a complement to any summer meal.
With a prep time of just 15 minutes, it’s an easy and vibrant option to make for warmer weather gatherings.
Ingredients:
- 4 cups watermelon, cubed
- 1 cup feta cheese, crumbled
- 1/2 cup fresh mint leaves, chopped
- 1/4 cup red onion, thinly sliced
- 2 tablespoons olive oil
- 1 tablespoon balsamic vinegar
- Salt and pepper, to taste
Cooking Steps:
- In a large mixing bowl, combine the cubed watermelon, crumbled feta cheese, chopped mint leaves, and thinly sliced red onion.
- In a small bowl, whisk together the olive oil, balsamic vinegar, salt, and pepper to create a dressing.
- Drizzle the dressing over the watermelon salad and gently toss to combine all ingredients. Be careful not to over-mix to keep the watermelon from breaking apart.
- Taste and adjust seasoning if necessary, adding more salt, pepper, or balsamic vinegar to suit your preference.
- Serve immediately or refrigerate for up to 30 minutes to allow flavors to meld.
Variations and Tips:
- For a spicier twist, add a handful of arugula or spinach to the salad.
- Replace feta with goat cheese for a creamier texture and unique flavor.
- Add a sprinkle of chili flakes for a hint of heat.
- Try incorporating a squeeze of fresh lime juice for an extra citrusy kick.
- This salad can be served on skewers for an attractive presentation option at parties. Just cube the watermelon and feta, then alternate them on small skewers along with fresh mint leaves.


