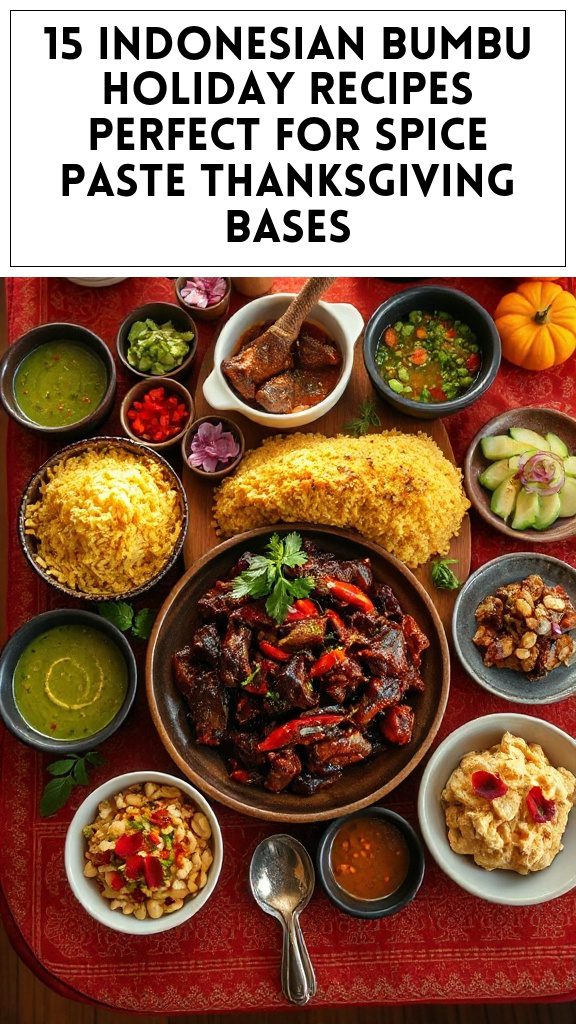
American dinner recipes reflect diverse regional specialties, celebrating unique flavors and traditions. From Southern Shrimp and Grits and Louisiana Jambalaya, to New England Clam Chowder and Chicago Deep-Dish Pizza, each dish tells a cultural story. Tex-Mex favorites like Enchiladas and California Fish Tacos add exciting twists, while Hawaiian Poke Bowls and Maryland Crabcakes offer fresh coastal appeal. These culinary gems promise to tantalize taste buds and warm hearts, leading to even more delightful discoveries ahead.
Southern Shrimp and Grits

Southern Shrimp and Grits is a classic dish rooted in Southern cuisine, showcasing a delightful combination of creamy grits and succulent shrimp. Perfect for a hearty breakfast, brunch, or dinner, this dish is sure to impress guests with its rich flavors and comforting textures.
The preparation time for this recipe is approximately 30-40 minutes, making it an excellent choice for those who want to enjoy a delicious meal without spending all day in the kitchen.
Ingredients:
- 1 cup grits (stone-ground preferred)
- 4 cups water or chicken broth
- 1 pound shrimp, peeled and deveined
- 4 slices bacon, diced
- 1/2 cup onion, finely chopped
- 2 cloves garlic, minced
- 1 teaspoon Cajun seasoning
- 1/2 teaspoon red pepper flakes (optional)
- 1/2 cup heavy cream
- Salt and black pepper to taste
- 2 tablespoons chopped fresh parsley (for garnish)
- 1/2 cup shredded cheese (optional, such as cheddar or Gouda)
Cooking Steps:
- In a medium pot, bring the water or chicken broth to a boil. Slowly whisk in the grits, reduce the heat to low, and cover. Cook according to package directions (usually about 20-30 minutes), stirring occasionally until thick and creamy. If using cheese, stir it in at the end of cooking until melted and smooth.
- In a large skillet over medium heat, cook the diced bacon until crispy. Remove the bacon from the skillet and set aside, leaving the drippings in the pan.
- Add the chopped onion to the skillet and sauté until softened, about 3-4 minutes. Stir in the minced garlic, Cajun seasoning, and red pepper flakes (if using), and cook for an additional minute.
- Add the shrimp to the skillet and cook until they are pink and opaque, about 3-5 minutes. Pour in the heavy cream, stirring to combine. Season with salt and black pepper to taste. Allow it to simmer for a couple of minutes to thicken slightly.
- To serve, spoon the creamy grits onto plates and top with the shrimp mixture. Sprinkle the crispy bacon and chopped parsley over the top for garnish.
Variations and Tips:
- For a smokier flavor, consider adding smoked sausage along with the shrimp.
- Customize the spiciness by adjusting the amount of Cajun seasoning and red pepper flakes to your liking.
- You can substitute the heavy cream with milk for a lighter version.
- Pair this dish with a side of coleslaw or sautéed greens for a complete meal.
- Leftover shrimp and grits can be stored in an airtight container in the refrigerator for up to 3 days. Reheat gently on the stovetop or microwave before serving.

- The Original Pro Chopper - Our superstar veggie slicer has been creating waves on TikTok! Simple to use,...
- Easy Meal Prep with Rust-Resistant Blades - Our vegetable chopper is perfect for anyone who wants to eat...
- 5-Star Design - The soft-grip TPU handle ensures controlled chopping, while the non-skid rubber base...
New England Clam Chowder

New England Clam Chowder is a rich and creamy soup that embodies the flavors of the Atlantic coast. This hearty dish is perfect for a family dinner or a cozy gathering, providing warmth and comfort on chilly days.
With a preparation time of approximately 30 minutes and a cooking time of about 30 minutes, you can enjoy this classic dish in under an hour.
Ingredients:
- 4 slices of bacon, diced
- 1 cup onion, chopped
- 1 cup celery, chopped
- 1 cup potato, cubed
- 1 cup clam juice
- 2 cups heavy cream
- 2 cans (6.5 oz) chopped clams, with juice
- Salt and pepper to taste
- 1 teaspoon thyme (optional)
- Fresh parsley, chopped (for garnish)
Cooking Steps:
- In a large pot over medium heat, add the diced bacon and cook until crispy. Remove the bacon and set aside, leaving the drippings in the pot.
- Add the chopped onion and celery to the pot with the bacon drippings. Sauté until the vegetables are tender, about 5 minutes.
- Stir in the cubed potatoes and clam juice, then bring to a boil. Reduce the heat to low and simmer until the potatoes are tender, about 10-15 minutes.
- Add the heavy cream and chopped clams (with their juice) to the pot. Stir well and heat through without boiling.
- Season with salt, pepper, and thyme (if using). Serve hot, garnished with reserved crispy bacon and fresh parsley.
Variations and Tips:
- For a thicker chowder, mash some of the cooked potatoes or add cornstarch mixed with a bit of water.
- Substitute half-and-half for a lighter version of the chowder.
- You can add sweet corn or diced carrots for additional flavor and texture.
- If you prefer a seafood-chowder combo, feel free to mix in shrimp or scallops.
- Serve with crusty bread or oyster crackers for a delightful pairing.

- Makes Everything Simple : Just forget your bagged cheese! Only turn the handle for several times and get...
- Premium Material : All parts of the rotary cheese grater are made of food grade ABS material, no BPA. The...
- Three Option Grater : The parmesan cheese grater finishes food preparation with slicing, shredding and...
Tex-Mex Enchiladas

Tex-Mex Enchiladas are a delicious and hearty dish that blends the flavors of Mexican cuisine with a hint of American flavors.
This dish is perfect for families and gatherings, as it can easily feed a crowd while providing a warm and comforting meal.
With a preparation time of about 30 minutes and a cook time of approximately 25 minutes, you can enjoy a satisfying dinner on a busy weeknight or impress guests at a weekend gathering.
Ingredients:
- 10 corn tortillas
- 2 cups shredded cooked chicken (or beef)
- 1 can (15 oz) enchilada sauce
- 1 cup shredded cheese (cheddar or Monterey Jack)
- 1 cup black beans, drained and rinsed
- 1 cup corn (frozen or canned)
- 1 small onion, diced
- 2 cloves garlic, minced
- 1 tablespoon olive oil
- 1 teaspoon cumin
- 1 teaspoon chili powder
- Salt and pepper to taste
- Optional toppings: sour cream, avocado, cilantro, chopped green onions
Cooking Instructions:
- Preheat your oven to 375°F (190°C).
- In a skillet over medium heat, add olive oil and sauté the diced onion until translucent, about 3-4 minutes.
- Add minced garlic, cumin, chili powder, salt, and pepper; cook for an additional 1-2 minutes until fragrant.
- Stir in the shredded chicken, black beans, and corn; mix well to combine and heat through for about 5 minutes.
- Pour a small amount of enchilada sauce on the bottom of a 9×13 inch baking dish to prevent sticking.
- In a separate pan or on a skillet, lightly toast each corn tortilla for about 10-15 seconds on each side to make them more pliable.
- Fill each tortilla with a generous scoop of the chicken mixture, roll them up, and place seam-side down in the prepared baking dish.
- Once all tortillas are filled and placed in the baking dish, pour the remaining enchilada sauce over the top and sprinkle with shredded cheese.
- Bake in the preheated oven for 20-25 minutes, or until the cheese is bubbly and slightly golden.
- Remove from the oven and let cool for a few minutes before serving.
- Top with optional toppings like sour cream, avocado, cilantro, or green onions if desired.
Variations & Tips:
- For a vegetarian option, substitute the chicken with sautéed bell peppers and mushrooms or use your favorite plant-based protein.
- Spice up the enchiladas by adding diced jalapeños into the filling or using a spicier enchilada sauce.
- To make ahead, you can assemble the enchiladas, cover them tightly, and store them in the refrigerator for up to 24 hours before baking.
- If you prefer a saucier enchilada, add more enchilada sauce both in between layers and on top before baking.
- Serve with a side of Mexican rice or a fresh salad for a complete meal.

- 💰 REDUCE WASTE AND SAVE MONEY: Chef Preserve keeps FOOD FRESH 5 TIMES LONGER than non-vacuum storage...
- ✅ POWERFUL, QUICK & EASY TO USE: Simply press the button to start. The device vacuum seals a bag in 5...
- ♻️ REUSABLE & RESEALABLE BAGS: Chef Preserve comes with dishwasher, freezer, refrigerator, and...
Chicago Deep-Dish Pizza

Chicago Deep-Dish Pizza is a hearty, satisfying dish known for its rich, buttery crust that is both thick and flaky, allowing it to hold generous amounts of cheese, meat, vegetables, and a chunky tomato sauce.
This iconic pizza is perfect for family gatherings or a cozy night in, offering a comforting meal that can satisfy a crowd.
Although it takes some time to prepare — about 2 hours, including baking — the delicious result is well worth the wait.
Ingredients:
- 2 ½ cups all-purpose flour
- 1 cup cornmeal
- 1 ½ teaspoons salt
- 1 tablespoon sugar
- 1 packet (2 ¼ teaspoons) active dry yeast
- 1 cup warm water (110°F)
- ½ cup unsalted butter (melted)
- 2 cups shredded mozzarella cheese
- 1 pound Italian sausage (cooked and crumbled)
- 1 cup sliced mushrooms
- 1 green bell pepper (diced)
- 1 can (28 ounces) crushed tomatoes
- 1 teaspoon dried oregano
- 1 teaspoon dried basil
- ½ teaspoon black pepper
- Grated Parmesan cheese (for topping)
Cooking Steps:
- Prepare the Dough: In a large bowl, combine the flour, cornmeal, salt, sugar, and yeast. Gradually mix in the warm water and melted butter. Knead the dough until smooth and elastic, about 5-7 minutes.
- Cover with a cloth and let it rise in a warm place for 1 hour or until doubled in size.
- Prepare the Filling: In a skillet, cook the Italian sausage until browned, then set aside.
- In the same skillet, sauté the mushrooms and bell pepper until softened, about 5 minutes.
- Mix the crushed tomatoes with oregano, basil, and black pepper in a bowl, then set aside.
- Assemble the Pizza: Preheat the oven to 450°F (230°C). Once the dough has risen, punch it down and divide it into two balls—one larger for the base and another smaller for the top crust.
- Roll out the larger piece into a circle and press it into a greased 14-inch deep-dish pizza pan, covering the sides.
- Layer Ingredients: Start layering by placing half of the mozzarella cheese on the dough, followed by the cooked sausage, sautéed vegetables, and a generous layer of the tomato sauce mixture.
- Sprinkle remaining mozzarella cheese on top.
- Add the Top Crust: Roll out the second dough ball and place it over the toppings.
- Crimp the edges of the top crust to seal it and make a few slits in the top to allow steam to escape.
- Bake: Bake in the preheated oven for 30-35 minutes, or until the crust is golden brown.
- Remove from the oven and let it cool for about 10 minutes before slicing.
- Serve: Top with grated Parmesan cheese and serve hot, garnishing with fresh basil if desired.
Variations and Tips:
- Cheese Varieties: Experiment with different types of cheeses for a flavor twist, such as provolone or cheddar.
- Meat Options: You can substitute Italian sausage with pepperoni, ham, or even grilled chicken for variety.
- Vegetarian Option: Omit the meat and add more vegetables like spinach, zucchini, or eggplant.
- Crust Texture: For a crunchier crust, bake it for an extra 5-10 minutes or place a baking sheet on the bottom rack to catch drips.
- Make Ahead: Prepare the dough in advance and store it in the fridge. Let it come to room temperature before rolling it out.
Enjoy your homemade Chicago Deep-Dish Pizza, a crowd-pleasing classic that's sure to become a favorite!

- Generous Capacity: 7-quart slow cooker that comfortably serves 9+ people or fits a 7-pound roast
- Cooking Flexibility: High or low slow cooking settings, with convenient warm function for ideal serving...
- Convenient: Set it and forget it feature enables you to cook while at work or performing daily tasks
California Fish Tacos

California Fish Tacos are a vibrant and delicious dish that brings the fresh flavors of the coast straight to your plate. Ideal for seafood lovers and anyone looking for a light, healthy meal, these tacos can be prepared in about 30 minutes, making them perfect for busy weeknights or casual gatherings.
With crispy fish and a colorful array of toppings, they offer a delightful crunch and zest that will impress family and friends alike.
Ingredients:
- 1 lb white fish fillets (such as cod, tilapia, or halibut)
- 1 cup all-purpose flour
- 1 cup cornmeal
- 1 teaspoon paprika
- 1 teaspoon garlic powder
- 1 teaspoon cumin
- Salt and pepper to taste
- 1 cup buttermilk (or milk with 1 tablespoon vinegar)
- 8 small corn or flour tortillas
- 1 cup shredded cabbage
- 1 avocado, sliced
- 1 tomato, diced
- Fresh cilantro leaves, for garnish
- Lime wedges, for serving
- Optional: hot sauce
Cooking Instructions:
- Prepare the Fish: Start by cutting the fish into strips. This will make them easier to handle and fit into the tacos. Pat them dry with paper towels and season with salt and pepper.
- Dredge the Fish: Set up a dredging station by placing the flour, cornmeal, paprika, garlic powder, cumin, and a pinch of salt and pepper in a shallow dish. In another dish, pour the buttermilk. Dip each fish strip into the buttermilk first and then coat it in the flour mixture, pressing lightly to adhere.
- Cook the Fish: Heat a large skillet over medium-high heat and add enough oil to cover the bottom of the pan. Once the oil is hot, add the fish strips in batches, being careful not to overcrowd the pan. Fry for about 3-4 minutes on each side or until golden and crispy. Remove and place on a paper towel-lined plate to drain excess oil.
- Warm the Tortillas: In a separate skillet or directly over a gas flame, warm the tortillas for about 30 seconds on each side until pliable and slightly toasted.
- Assemble the Tacos: To assemble the tacos, place a few pieces of crispy fish on each tortilla. Top with a handful of shredded cabbage, slices of avocado, diced tomatoes, and fresh cilantro. Squeeze fresh lime juice over the top and drizzle with hot sauce if desired.
- Serve and Enjoy: Serve your California Fish Tacos immediately with lime wedges on the side for an extra zing.
Variations and Tips:
- Fish Alternatives: For a healthier option, you can bake the fish instead of frying it. Preheat the oven to 425°F (220°C), place the coated fish on a baking sheet, and bake for about 15-20 minutes until cooked through.
- Add More Toppings: Feel free to customize your tacos by adding pickled red onions, jalapeños, or a mango salsa for a fruity twist.
- Gluten-Free: Substitute the flour with a gluten-free flour mix or almond flour for a gluten-free option.
- Creamy Sauce: For a creamier taco, you can add a drizzle of cilantro lime crema made by mixing sour cream, lime juice, and finely chopped cilantro together.
- Make Ahead: You can prepare the fish coating ahead of time and keep it refrigerated until you are ready to cook, saving time during dinner preparation.
Enjoy your flavorful California Fish Tacos!

- 100% Leak-proof: Guaranteed no-spill seal and secure latches
- Crystal-clear Tritan Built: Stain-resistant and odor-resistant material for a clear view of contents
- Lightweight & Sturdy: Easy to carry, yet durable for everyday use
Louisiana Jambalaya

Louisiana Jambalaya is a flavorful, one-pot dish that hails from the Creole cuisine of Louisiana. This hearty meal combines rice with a variety of meats and seafood, seasoned to perfection with a medley of spices.
Ideal for family gatherings or a cozy dinner party, it serves as a filling and comforting meal that can be customized to suit different tastes. Preparation time is approximately 20 minutes, with a cooking time of around 40 minutes, making it perfect for a weekday dinner or a weekend feast.
Ingredients:
- 1 pound andouille sausage, sliced
- 1 pound chicken thighs, diced
- 1 pound shrimp, peeled and deveined
- 1 bell pepper, diced (green or red)
- 1 onion, diced
- 2 stalks celery, diced
- 3 cloves garlic, minced
- 1 can (14.5 ounces) diced tomatoes, undrained
- 1 cup long-grain white rice
- 4 cups chicken broth
- 2 teaspoons Cajun seasoning
- 1 teaspoon dried thyme
- 1 teaspoon paprika
- 2 bay leaves
- Salt and pepper to taste
- 2 tablespoons olive oil
- Chopped green onions and parsley for garnish
Cooking Steps:
- Heat the olive oil in a large pot or Dutch oven over medium heat. Add the sliced andouille sausage and cook until browned, about 5 minutes. Remove the sausage from the pot and set aside.
- In the same pot, add the diced chicken thighs and cook until browned and cooked through, about 7-10 minutes. Remove the chicken and set aside with the sausage.
- Add the bell pepper, onion, celery, and garlic to the pot. Sauté until the vegetables are softened, about 5 minutes.
- Stir in the diced tomatoes, rice, chicken broth, Cajun seasoning, thyme, paprika, bay leaves, and season with salt and pepper. Bring the mixture to a boil.
- Reduce heat to low, cover the pot, and simmer for about 20 minutes, or until the rice is tender and has absorbed most of the liquid.
- Add the shrimp to the pot during the last 5 minutes of cooking, mixing well. Cook until the shrimp are pink and opaque.
- Remove the bay leaves and serve the jambalaya hot, garnished with chopped green onions and parsley.
Variations and Tips:
- For a vegetarian version, substitute the meats with a variety of vegetables like zucchini, mushrooms, and bell peppers, and use vegetable broth instead of chicken broth.
- You can adjust the spice level by adding more or less Cajun seasoning or incorporating hot sauce.
- Feel free to mix and match proteins by including other seafood like scallops or fish, or using turkey sausage instead of andouille.
- Leftover jambalaya can be stored in an airtight container in the refrigerator for up to three days, or can be frozen for longer storage. Reheat on the stovetop with a splash of broth to revive its texture.

- 𝗘𝗳𝗳𝗼𝗿𝘁𝗹𝗲𝘀𝘀 𝗪𝗲𝗶𝗴𝗵𝗶𝗻𝗴: Supports 5 units...
- 𝗣𝗿𝗲𝗰𝗶𝘀𝗲 𝗥𝗲𝘀𝘂𝗹𝘁𝘀: Accurately weighs up to 11 lb/5 kg with 1 g...
- 𝗦𝗶𝗺𝗽𝗹𝗲 & 𝗖𝗼𝗺𝗽𝗮𝗰𝘁: The small and sleek scale is a perfect fit for...
New York-Style Bagels With Lox

New York-style bagels with lox is a quintessential American dish that beautifully marries the chewy texture of freshly baked bagels with the rich, smoky flavor of lox (cured salmon).
This dish is perfect for brunch, a light lunch, or a special gathering, and can be enjoyed by anyone who relishes a combination of flavors and textures. Preparation generally takes about 30 minutes, although you may want to account for additional time if you're making the bagels from scratch.
Ingredients:
- 4 New York-style bagels (store-bought or homemade)
- 8 ounces lox or smoked salmon
- 4 ounces cream cheese, softened
- 1 small red onion, thinly sliced
- 1 medium tomato, sliced
- 1 small cucumber, thinly sliced
- Capers (optional)
- Fresh dill for garnish (optional)
- Salt and pepper to taste
- Lemon wedges for serving (optional)
Cooking Steps:
- Slice the bagels in half horizontally. If preferred, toast the bagels lightly for added texture and warmth.
- Spread a generous layer of softened cream cheese on each half of the bagel.
- Lay slices of lox over the cream cheese, dividing evenly among the bagel halves.
- Add a few rings of red onion on top of the lox, followed by slices of tomato and cucumber.
- Sprinkle capers over the top if desired, and season with salt and pepper to taste.
- Garnish with fresh dill and serve with lemon wedges on the side for an extra zing.
Variations and Tips:
- For a classic New York experience, try using everything bagels or sesame seed bagels for a bit of added flavor.
- You can substitute regular cream cheese with flavored options like chive or herb for a twist.
- Add avocado slices for creaminess and a nutritional boost.
- If you prefer a lighter option, consider using low-fat cream cheese or a dairy-free alternative.
- For those who love a bit of crunch, consider adding fresh sprouts or arugula.
- Prepare the bagel assembly just before serving to maintain the freshness of the ingredients.

- Instant Read Food Thermometer | Our instant read thermometer features a temperature probe and advanced,...
- Multi-Use | From bbq thermometer to baking thermometer, our digital food thermometer for cooking is...
- Easy-Read Digital Thermometer For Cooking | Large instant thermometer dial with bright blue backlight...
Midwestern Beef and Noodle Casserole

Midwestern Beef and Noodle Casserole is a hearty and comforting dish that combines tender beef, egg noodles, and a creamy sauce, perfect for families and gatherings. This casserole is ideal for feeding a crowd or enjoying as leftovers, and it's especially popular during the colder months. The preparation time is around 15 minutes, with an additional cooking time of about 30 minutes, making it a great choice for a busy weeknight dinner.
Ingredients:
- 1 lb ground beef
- 1 medium onion, diced
- 2 cloves garlic, minced
- 8 oz egg noodles
- 1 can (10.5 oz) cream of mushroom soup
- 1 cup sour cream
- 1 cup shredded cheddar cheese
- 1 tsp Worcestershire sauce
- Salt and pepper to taste
- 1 cup frozen peas (optional)
- Fresh parsley, chopped (for garnish)
Cooking Instructions:
- Preheat your oven to 350°F (175°C).
- In a large skillet over medium heat, cook the ground beef, diced onion, and minced garlic until the beef is browned and the onions are translucent. Drain excess fat if necessary.
- While the beef is cooking, prepare the egg noodles according to the package directions until al dente. Drain and set aside.
- In a large bowl, combine the cooked beef mixture, egg noodles, cream of mushroom soup, sour cream, Worcestershire sauce, salt, and pepper. Stir until well combined. If using peas, add them to the mixture.
- Pour the beef and noodle mixture into a greased 9×13 inch baking dish. Spread it out evenly.
- Top the casserole with shredded cheddar cheese.
- Bake in the preheated oven for 25-30 minutes, or until the cheese is melted and bubbly.
- Remove from the oven and let it cool for a few minutes before garnishing with chopped parsley. Serve warm.
Variations and Tips:
- For a little extra crunch, top the casserole with breadcrumbs or crushed potato chips before baking.
- Substitute ground turkey or chicken for a lighter version.
- Mix in your favorite vegetables, such as mushrooms or bell peppers, to enhance the dish.
- Store leftovers in an airtight container in the refrigerator for up to 3 days; reheats well in the microwave or oven.
- To make it a complete meal, serve with a side salad or steamed vegetables.

- Versatile 54-Piece Collection: Elevate your kitchen with the Home Hero 54-Piece Kitchen Utensil Set, a...
- Durable and Long-Lasting: Crafted from premium stainless steel, these kitchen utensils are designed to...
- Perfect Holiday Gift: Delight your loved ones with this kitchen utensils gift set this festive season....
Pacific Northwest Salmon With Dill Sauce

Pacific Northwest Salmon With Dill Sauce is a delightful dish that celebrates the rich flavors of fresh salmon, a staple of the region's cuisine. This dish is perfect for seafood lovers, families looking to enjoy a healthy meal, or even for impressing guests at a dinner party.
With a preparation time of about 15 minutes and a cooking time of approximately 20 minutes, you can have this delectable dish on the table in under an hour.
Ingredients:
- 4 salmon fillets (6 ounces each)
- 2 tablespoons olive oil
- Salt and pepper to taste
- Juice of 1 lemon
- 1 cup sour cream
- 2 tablespoons fresh dill, chopped (or 1 tablespoon dried dill)
- 1 tablespoon Dijon mustard
- 1 teaspoon garlic powder
- Optional: lemon wedges for serving
Cooking Steps:
- Preheat your oven to 400°F (200°C).
- Pat the salmon fillets dry with paper towels and place them on a baking sheet lined with parchment paper.
- Drizzle the olive oil over the salmon fillets and season with salt, pepper, and the lemon juice.
- In a small bowl, mix together the sour cream, dill, Dijon mustard, and garlic powder until well combined. Set aside.
- Bake the salmon in the preheated oven for about 15-20 minutes or until it flakes easily with a fork.
- Once cooked, remove the salmon from the oven and serve with a generous dollop of dill sauce on top. Optionally, garnish with lemon wedges.
Variations and Tips:
- For a grill option, preheat the grill to medium-high heat and grill the salmon for 5-7 minutes on each side, brushing the dill sauce on the top while grilling.
- You can also use other herbs like parsley or thyme instead of dill for a different flavor profile.
- If you prefer a spicier kick, add a pinch of cayenne pepper to the dill sauce.
- Serve alongside steamed vegetables, rice, or a fresh salad for a complete meal.
Enjoy your delicious Pacific Northwest Salmon With Dill Sauce!

- 24-ounce insulated stainless-steel water bottle with a FreeSip spout and push-button lid with lock
- Patented FreeSip spout designed for either sipping upright through the built-in straw or tilting back to...
- Protective push-to-open lid keeps spout clean; convenient carry loop doubles as a lock
Appalachian Biscuits and Gravy

Appalachian biscuits and gravy is a hearty, comforting breakfast dish that embodies the rich culinary traditions of the Appalachian region. Typically enjoyed by families and gatherings, this dish features fluffy homemade biscuits smothered in a creamy sausage gravy.
Preparation time is about 30 minutes, making it perfect for a cozy weekend breakfast or brunch with loved ones.
Ingredients:
- 2 cups all-purpose flour
- 1 tablespoon baking powder
- 1/2 teaspoon baking soda
- 1 teaspoon salt
- 1/4 cup unsalted butter, cold and cubed
- 3/4 cup buttermilk
- 1 pound breakfast sausage (pork or turkey)
- 1/4 cup all-purpose flour (for gravy)
- 2 to 3 cups milk (adjust for desired thickness)
- Salt and pepper to taste
- Optional: red pepper flakes or chopped fresh herbs (for garnish)
Cooking Steps:
- Make the Biscuits:
- Preheat your oven to 450°F (230°C).
- In a large bowl, whisk together 2 cups of flour, baking powder, baking soda, and salt.
- Cut in the cold butter with a pastry cutter or your fingers until the mixture resembles coarse crumbs.
- Gradually add the buttermilk, stirring until just combined. Do not overmix.
- Turn the dough out onto a floured surface and gently knead it 2-3 times until it comes together.
- Pat the dough to about 1-inch thickness, then cut out biscuits using a floured round cutter or the rim of a glass.
- Place the biscuits on a baking sheet and bake for 12 to 15 minutes or until golden brown.
- Prepare the Gravy:
- In a large skillet over medium heat, cook the sausage until browned and cooked through, breaking it up as it cooks.
- Once the sausage is browned, sprinkle the additional 1/4 cup of flour over the sausage and stir to coat.
- Slowly pour in the milk, continuously stirring to combine. Start with 2 cups of milk and add more if you desire a thinner gravy.
- Bring to a simmer and cook, stirring often, until thickened, about 5-7 minutes.
- Season with salt, pepper, and optional red pepper flakes for a little heat.
- Serve:
- Split the warm biscuits in half and ladle the sausage gravy over the top.
- Garnish with fresh herbs if desired.
Variations and Tips:
- For a more decadent version, add shredded cheese to the biscuits before baking, or stir in some shredded cheese into the gravy.
- You can substitute the sausage with bacon or a plant-based alternative for a different flavor profile.
- If you like a spicy kick, consider adding some hot sauce into the gravy while it simmers.
- To keep the biscuits warm, cover them with a clean kitchen towel after baking until serving.
Florida Key Lime Pie Chicken

Florida Key Lime Pie Chicken is a delightful dish that brings the invigorating flavors of the famous Key Lime Pie into a savory, zesty chicken recipe. This unique fusion is perfect for family dinners or gatherings, allowing you to impress your guests with a dish that marries sweet and tangy flavors in a succulent, tender chicken breast.
Preparation time is approximately 30 minutes, followed by a cooking time of about 25 minutes, making it a quick yet extraordinary meal option.
Ingredients:
- 4 boneless, skinless chicken breasts
- ½ cup key lime juice
- 1 tablespoon lime zest
- ¼ cup honey
- 2 tablespoons olive oil
- 1 teaspoon garlic powder
- 1 teaspoon onion powder
- ½ teaspoon salt
- ½ teaspoon black pepper
- 1 teaspoon dried oregano
- 1 cup crushed graham crackers
- ½ cup shredded coconut (optional)
- Fresh lime wedges and chopped cilantro for garnish
Cooking Steps:
- Marinate the Chicken: In a medium bowl, whisk together the key lime juice, lime zest, honey, olive oil, garlic powder, onion powder, salt, black pepper, and oregano. Add the chicken breasts to the marinade, making sure they are well coated. Cover and refrigerate for at least 30 minutes, or up to 2 hours for more flavor.
- Prepare the Crust Mixture: In another bowl, combine the crushed graham crackers and shredded coconut (if using). Mix well until combined.
- Preheat the Oven: Preheat your oven to 375°F (190°C).
- Coat the Chicken: Remove the marinated chicken from the refrigerator. Take each piece and dredge it in the graham cracker mixture, pressing gently to make sure it sticks well to the chicken.
- Bake the Chicken: Place the coated chicken breasts on a baking sheet lined with parchment paper. Bake in the preheated oven for about 25 minutes, or until the chicken is cooked through and reaches an internal temperature of 165°F (75°C).
- Serve: Let the chicken rest for a few minutes before slicing. Serve garnished with fresh lime wedges and a sprinkle of chopped cilantro, if desired.
Variations and Tips:
- Spicy Twist: Add a pinch of cayenne pepper to the marinade for an extra kick.
- Grilling Option: Instead of baking, grill the marinated and coated chicken on medium heat for about 6-7 minutes per side, until fully cooked.
- Tropical Flair: Serve with a side of coconut rice or mango salsa to enhance the tropical theme.
- Leftover Ideas: Use any leftover chicken in salads or wraps for a delicious, zesty lunch the next day.
- Storage: Store any leftover chicken in an airtight container in the refrigerator for up to 3 days. Reheat in the oven to maintain the crispy coating.
Hawaiian Poke Bowl

The Hawaiian Poke Bowl is a vibrant and invigorating dish that typically features raw fish, marinated and served over a bed of rice, accompanied by various toppings and sauces. This delightful meal is perfect for sushi lovers and anyone looking to explore a taste of Hawaiian cuisine.
With a preparation time of approximately 30 minutes, this dish can be easily assembled for a quick lunch or a light dinner.
Ingredients:
- 1 cup sushi rice
- 1 ¼ cups water
- 8 oz sushi-grade Ahi tuna, diced
- 2 tablespoons soy sauce
- 1 tablespoon sesame oil
- 1 tablespoon green onions, finely chopped
- 1 teaspoon ginger, grated
- 1 avocado, sliced
- ½ cucumber, thinly sliced
- 1 small carrot, julienned
- 1 radish, thinly sliced
- Seaweed salad (for topping)
- Sesame seeds (for garnish)
- Wasabi (optional)
Cooking Steps:
- Rinse the sushi rice under cold water until the water runs clear. This removes excess starch.
- In a medium saucepan, combine the rinsed sushi rice and water. Bring to a boil over medium heat, then reduce to low, cover, and simmer for 18-20 minutes until the water is absorbed. Remove from heat and let it sit, covered, for another 10 minutes.
- While the rice is cooking, prepare the poke marinade by combining the soy sauce, sesame oil, green onions, and grated ginger in a bowl.
- Add the diced Ahi tuna to the marinade and gently stir to combine. Allow it to marinate for about 10 minutes.
- Once the sushi rice is ready, fluff it with a fork and season with a little more soy sauce if desired.
- Assemble the poke bowl by placing a generous scoop of sushi rice at the bottom of the serving bowl. Top it with the marinated tuna, avocado slices, cucumber, carrot, and radish.
- Add a side of seaweed salad and sprinkle sesame seeds over the top for garnish. Serve with wasabi on the side if desired.
Variations and Tips:
- You can substitute the Ahi tuna with salmon or tofu for a vegetarian option.
- Feel free to add additional toppings like edamame, mango, or pickled ginger for extra flavor and color.
- For a spicy kick, mix sriracha with mayo for a delicious drizzle over the top.
- Prepare your ingredients in advance for a quicker assembly, especially if serving a group.
- For a low-carb alternative, use cauliflower rice instead of sushi rice.
Enjoy your homemade Hawaiian Poke Bowl, a dish that's sure to transport you to the sunny shores of Hawaii!
Maryland Crabcakes

Maryland crabcakes are a classic American seafood dish, celebrated for their delicious blend of succulent crab meat, spices, and seasonings.
With a crispy exterior and a soft, flavorful center, these crabcakes are perfect for seafood lovers and can be served as an appetizer or main course. Preparing Maryland crabcakes takes about 30 minutes, making them a great option for a festive dinner gathering or a casual weekday meal.
Ingredients
- 1 pound lump crabmeat, picked over for shells
- 1/2 cup finely chopped yellow onion
- 1/4 cup finely chopped bell pepper
- 1/4 cup mayonnaise
- 1 large egg
- 1/2 cup breadcrumbs (preferably seasoned)
- 1 tablespoon Dijon mustard
- 2 teaspoons Worcestershire sauce
- 1 teaspoon Old Bay seasoning
- Salt and pepper to taste
- 2 tablespoons olive oil or butter for frying
- Lemon wedges, for serving (optional)
Cooking Instructions
- In a large bowl, gently mix together the lump crabmeat, chopped onion, and bell pepper.
- In a separate bowl, whisk together the mayonnaise, egg, Dijon mustard, Worcestershire sauce, Old Bay seasoning, salt, and pepper.
- Fold the wet ingredients into the crab mixture, being careful not to break up the crab meat too much.
- Gently fold in the breadcrumbs until combined.
- Cover the mixture and refrigerate for at least 30 minutes to help it firm up.
- Heat the olive oil or butter in a large skillet over medium heat.
- Form the chilled crab mixture into patties (about 1/2 cup each) and place them in the skillet. Cook for about 4-5 minutes on each side, or until golden brown and cooked through.
- Remove the crabcakes and place them on a paper towel-lined plate to absorb excess oil. Serve warm with lemon wedges.
Variations and Tips
- For a spicier kick, add diced jalapeños or a dash of hot sauce to the mixture.
- If you're looking to bake instead of fry, preheat your oven to 375°F (190°C) and place the formed crabcakes on a baking sheet lined with parchment paper. Bake for 15-20 minutes or until golden brown.
- You can add additional herbs such as parsley or cilantro for a fresh flavor.
- Serve with a zesty remoulade or tartar sauce for dipping. Enjoy your Maryland crabcakes!
Southwestern Black Bean Soup

Southwestern Black Bean Soup is a hearty and flavorful dish that's perfect for both vegetarians and meat-lovers alike.
Rich in protein and fiber, this vibrant soup is a great option for a cozy weeknight dinner or a healthy lunch. With a preparation time of about 15 minutes and a cooking time of 30 minutes, you'll have a delicious bowl of goodness ready to enjoy in less than an hour!
Ingredients:
- 2 cans (15 oz each) black beans, rinsed and drained
- 1 can (15 oz) diced tomatoes with green chiles
- 1 medium onion, diced
- 2 cloves garlic, minced
- 1 bell pepper (red or green), diced
- 1 cup corn (fresh, frozen, or canned)
- 4 cups vegetable broth
- 1 tablespoon olive oil
- 1 tablespoon ground cumin
- 1 tablespoon chili powder
- ½ teaspoon cayenne pepper (optional)
- Salt and pepper to taste
- Fresh cilantro (for garnish)
- Lime wedges (for serving)
Cooking Steps:
- In a large pot over medium heat, add the olive oil. Once hot, sauté the diced onion and bell pepper until softened, about 3-4 minutes.
- Stir in the minced garlic, cumin, chili powder, and cayenne pepper (if using) and cook for an additional minute until fragrant.
- Add the rinsed black beans, diced tomatoes with green chiles, corn, and vegetable broth to the pot. Stir well to combine.
- Bring the soup to a boil, then reduce the heat and let it simmer uncovered for about 20-25 minutes. Stir occasionally, allowing the flavors to meld together.
- Taste the soup and season it with salt and pepper as needed. For a creamier texture, you can blend a portion of the soup with an immersion blender or regular blender and return it to the pot.
- Serve hot, garnished with fresh cilantro and lime wedges on the side for an extra zing!
Variations and Tips:
- For a spicier kick, adjust the amount of cayenne pepper or add diced jalapeños when sautéing the vegetables.
- If you prefer a meatier version, add cooked diced chicken or sausage to the soup.
- Consider incorporating other vegetables like zucchini or carrots for extra nutrition.
- This soup freezes well, so feel free to make a double batch and store leftovers in airtight containers for up to three months.
- Serve the soup with tortilla chips or over rice for a complete meal option.
Great Plains Bison Burgers

Great Plains Bison Burgers are a delicious and hearty twist on the classic hamburger, perfect for outdoor gatherings, barbecues, or a cozy family dinner. Made from lean bison meat, these burgers are not only flavorful but also packed with protein and lower in fat compared to traditional beef.
With a preparation time of about 20 minutes and a cooking time of approximately 10-15 minutes, these burgers are quick to prepare while still offering a unique and satisfying taste experience.
Ingredients:
- 1 pound ground bison
- 1 tablespoon Worcestershire sauce
- 1 teaspoon garlic powder
- 1 teaspoon onion powder
- 1 teaspoon salt
- ½ teaspoon black pepper
- 4 hamburger buns
- Lettuce, tomato, and onion for toppings
- Optional: cheese slices, pickles, mustard, mayonnaise, or condiments of choice
Cooking Steps:
- In a large mixing bowl, combine the ground bison, Worcestershire sauce, garlic powder, onion powder, salt, and pepper. Mix gently until all ingredients are uniformly combined.
- Divide the mixture into four equal portions and shape them into patties about ¾ inch thick. Make a slight indentation in the center of each patty; this helps them cook evenly and prevents puffing up while grilling.
- Preheat your grill or stovetop skillet over medium-high heat. If using a grill, lightly oil the grates to prevent sticking.
- Place the patties on the grill or skillet and cook for about 5-7 minutes on each side, or until they reach an internal temperature of 160°F (71°C).
- If desired, add cheese slices during the last minute of cooking and cover to allow the cheese to melt.
- Remove the burgers from the heat and let them rest for a few minutes before assembling. Toast the hamburger buns on the grill for added flavor, if desired.
- Assemble the burgers with your favorite toppings such as lettuce, tomato, onion, pickles, mustard, or mayonnaise, and enjoy!
Variations and Tips:
- For an added flavor boost, cook the burgers with a sprinkle of smoked paprika or chili powder.
- Try mixing in diced jalapeños or shredded cheese into the bison mix for a spicy kick.
- If you prefer baking, preheat your oven to 375°F (190°C) and bake for about 15-20 minutes on a baking sheet lined with parchment paper.
- Serve with sweet potato fries or a fresh salad for a delicious, balanced meal.
- Experiment with different kinds of buns, like whole wheat or brioche, for a different taste and texture.