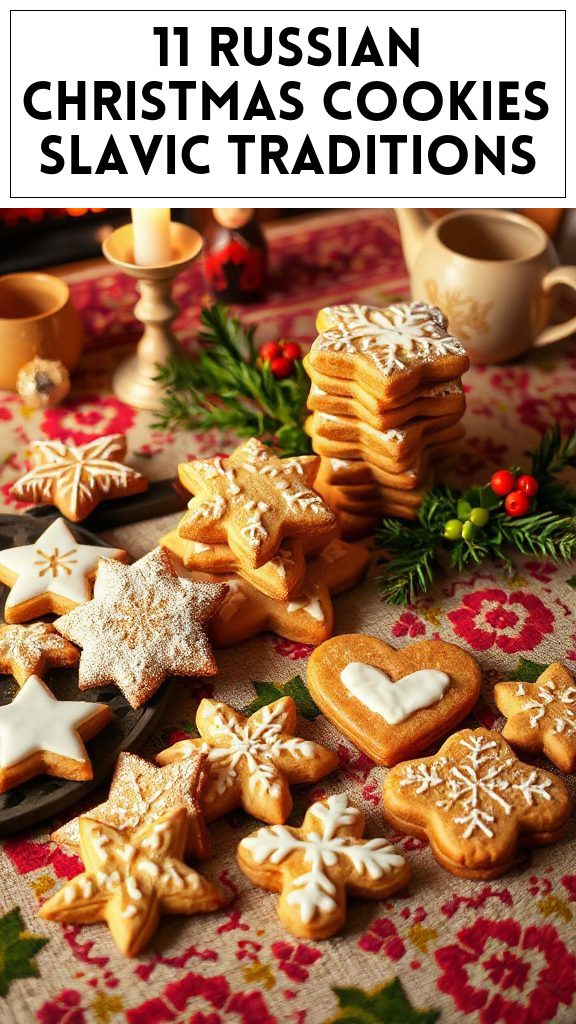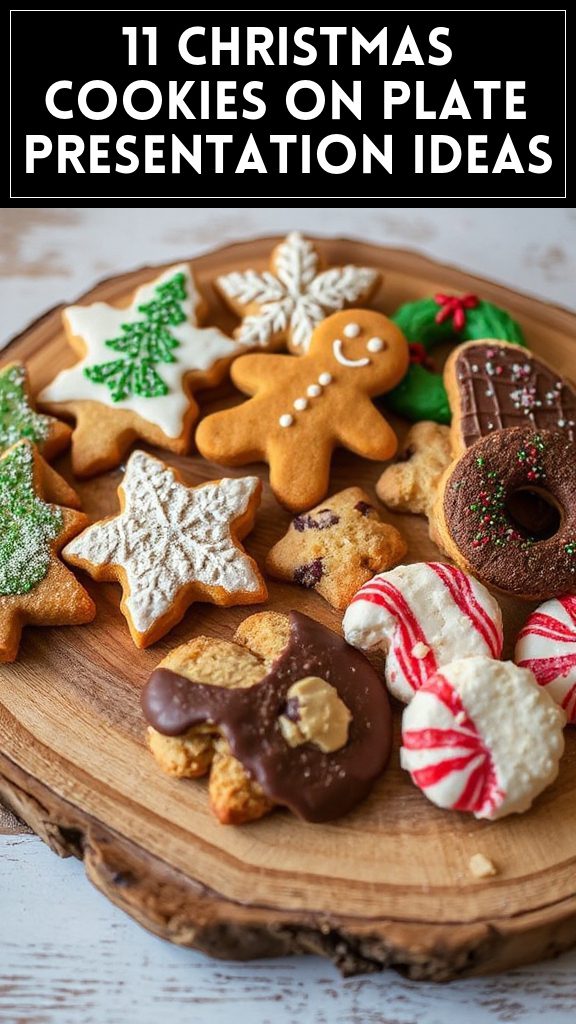
Classic Rustic Charm With Wooden Trays

The perfect way to present your Christmas cookies is by embracing a classic rustic charm that highlights the warmth and comfort of the holiday season. Using wooden trays allows for a beautiful, natural presentation that complements the festive nature of your cookies. With the right cookies and decoration, you can create a stunning display that will impress your guests and elevate your holiday gatherings.
| Ingredients | Quantity |
|---|---|
| Sugar | 2 cups |
| Butter (softened) | 1 cup |
| Eggs | 2 |
| All-purpose flour | 4 cups |
| Baking powder | 1 teaspoon |
| Vanilla extract | 2 teaspoons |
| Salt | 1/2 teaspoon |
| Powdered sugar | For dusting (to taste) |
Cooking Steps:
- Preheat the Oven: Start by preheating your oven to 350°F (175°C), making certain it’s ready for baking your delightful cookies.
- Mix Butter and Sugar: In a large mixing bowl, combine the softened butter and sugar. Using a hand mixer or stand mixer, beat them together on medium speed until the mixture is light and fluffy, which should take about 2-3 minutes.
- Add Eggs and Vanilla: Crack the eggs into the bowl one at a time, mixing well after each addition. Then, pour in the vanilla extract, combining all the ingredients until smooth.
- Combine Dry Ingredients: In a separate bowl, mix the all-purpose flour, baking powder, and salt. Whisk them together to make certain they are evenly distributed.
- Incorporate Dry into Wet: Gradually add the dry ingredient mixture to the wet ingredients. Continue mixing until just blended and no dry flour remains visible. Be careful not to overmix, as this can make the cookies tough.
- Chill the Dough: Cover the dough with plastic wrap and refrigerate for at least 30 minutes. This will help the cookies maintain their shape while baking.
- Shape the Cookies: Once chilled, scoop out tablespoon-sized portions of the dough and roll them into balls. Place them on a parchment-lined baking sheet, spacing them about 2 inches apart.
- Bake the Cookies: Place the baking sheet in your preheated oven and bake for 10-12 minutes, or until the edges are slightly golden. The centers may look a bit underbaked, but they will continue to firm up as they cool.
- Cool the Cookies: Remove the cookies from the oven and let them cool on the baking sheet for about 5 minutes before transferring them to a wire rack to cool completely.
- Dust with Powdered Sugar: Once cooled, lightly dust the cookies with powdered sugar for a festive touch. This adds a beautiful snow-like effect, enhancing the rustic charm.
- Present on Wooden Trays: Finally, arrange your cookies artfully on wooden trays, mixing different types of cookies for a varied display. Add some seasonal embellishments like sprigs of evergreen or small ornaments to complete the rustic aesthetic.
Enjoy your beautifully presented Christmas cookies that embody classic rustic charm, perfect for holiday gatherings!

- The Original Pro Chopper - Our superstar veggie slicer has been creating waves on TikTok! Simple to use,...
- Easy Meal Prep with Rust-Resistant Blades - Our vegetable chopper is perfect for anyone who wants to eat...
- 5-Star Design - The soft-grip TPU handle ensures controlled chopping, while the non-skid rubber base...
2. Colorful Layered Cookie Towers

Colorful layered cookie towers are a delightful and visually stunning treat that showcases festive cookie varieties stacked high, creating a unique presentation perfect for holiday gatherings. These towers not only offer a feast for the eyes but also a variety of flavors and textures, making each bite exciting. Personalize them by using vibrant icing and sprinkles to elevate the festive spirit!
| Ingredients | Quantity |
|---|---|
| Sugar | 2 cups |
| Butter (softened) | 1 cup |
| Eggs | 2 |
| All-purpose flour | 4 cups |
| Baking powder | 1 teaspoon |
| Vanilla extract | 2 teaspoons |
| Salt | 1/2 teaspoon |
| Food coloring (various colors) | As needed |
| Royal icing (prepared) | For decorating |
| Sprinkles | For decorating |
Cooking Steps:
- Preheat the Oven: Preheat your oven to 350°F (175°C) to guarantee it’s ready for baking your colorful cookies.
- Mix Butter and Sugar: In a large mixing bowl, blend softened butter and sugar using a hand mixer or stand mixer on medium speed until the mixture is light and airy, approximately 2-3 minutes.
- Add Eggs and Vanilla: Add the eggs, one at a time, mixing well after each addition until fully incorporated. Stir in the vanilla extract.
- Combine Dry Ingredients: In another bowl, whisk together the all-purpose flour, baking powder, and salt to evenly combine the dry ingredients.
- Incorporate Dry into Wet: Gradually mix the dry ingredients into the wet mixture, stirring until just combined. Avoid overmixing to guarantee the cookies remain soft.
- Divide the Dough: Divide the cookie dough into separate bowls based on the number of colors you want to incorporate.
- Color the Dough: Add a few drops of food coloring to each bowl of dough, mixing until you achieve vibrant colors. Adjust the intensity by adding more food coloring as needed.
- Chill the Dough: Cover each bowl with plastic wrap and place in the refrigerator for at least 30 minutes to help firm up the cookies for easier handling.
- Shape the Cookies: Roll out each colored dough between two pieces of parchment paper until about 1/4 inch thick. Cut out shapes using cookie cutters, and repeat for each color.
- Bake the Cookies: Arrange the cut-out cookies on parchment-lined baking sheets with enough space between them. Bake in the oven for 10-12 minutes, until the edges are lightly golden.
- Cool the Cookies: Once baked, remove the cookies from the oven and let them cool on the baking sheet for about 5 minutes before transferring them to a wire rack to cool completely.
- Assemble the Towers: Once the cookies are cooled, use royal icing to adhere layers of cookies together, stacking them to create colorful towers. Decorate the towers with additional royal icing and sprinkles to enhance their festive appearance.
Enjoy your colorful layered cookie towers as a centerpiece at your holiday celebrations!

- Makes Everything Simple : Just forget your bagged cheese! Only turn the handle for several times and get...
- Premium Material : All parts of the rotary cheese grater are made of food grade ABS material, no BPA. The...
- Three Option Grater : The parmesan cheese grater finishes food preparation with slicing, shredding and...
3. Festive Themed Cookie Jars

Festive themed cookie jars are a charming and interactive way to present an assortment of holiday cookies. These jars not only serve as a wonderful dessert but also make lovely gifts that capture the spirit of Christmas. By layering cookies in a clear jar, you can create a colorful and enticing visual display that delights the eyes and taste buds alike. Consider including a mix of classic and innovative cookie types, each layer adding to the overall festive feel.
| Ingredients | Quantity |
|---|---|
| Sugar | 2 cups |
| Brown sugar | 1 cup |
| Butter | 1 cup (softened) |
| Eggs | 2 |
| All-purpose flour | 4 cups |
| Baking soda | 1 teaspoon |
| Baking powder | 1 teaspoon |
| Vanilla extract | 2 teaspoons |
| Salt | 1/2 teaspoon |
| Chocolate chips | 1 cup |
| Colorful M&M’s | 1 cup |
| Festive sprinkles | For decoration |
| Jar (1 quart or larger) | 1 |
Cooking Steps:
- Preheat the Oven: Begin by preheating your oven to 350°F (175°C). This guarantees that it will be ready for baking the cookies once the dough is prepared.
- Cream Butter and Sugars: In a large mixing bowl, combine the softened butter, sugar, and brown sugar. Use a hand mixer or stand mixer to blend these ingredients together until they are creamy and well mixed, about 3-4 minutes.
- Incorporate Eggs and Vanilla: Add the eggs, one at a time, mixing thoroughly after each addition. Follow by stirring in the vanilla extract until everything is fully combined.
- Combine Dry Ingredients: In a separate bowl, whisk together the all-purpose flour, baking soda, baking powder, and salt until evenly mixed.
- Mix Dry into Wet: Gradually add the dry ingredients to the wet mixture, stirring gently until just combined. Be cautious not to overmix, as it can lead to tough cookies.
- Fold in Extras: Carefully fold in the chocolate chips and colorful M&M’s, making sure they are evenly dispersed throughout the cookie dough.
- Scoop Cookie Dough: Using a tablespoon or cookie scoop, take portions of the cookie dough and drop them onto a parchment-lined baking sheet, leaving some space in between each scoop.
- Bake the Cookies: Place the baking sheet in the preheated oven and bake for about 10-12 minutes, or until the cookies are golden at the edges but still soft in the center.
- Cool Cookies: Once baked, remove the cookies from the oven and allow them to cool on the baking sheet for a few minutes before transferring them to a wire rack to cool completely.
- Layer in the Jar: Once the cookies are fully cooled, begin layering them in a clean, dry jar. Start with a layer of the larger cookies at the bottom, followed by a layer of smaller or broken cookies, and repeat the process until the jar is filled. Top with a sprinkle of festive sprinkles for an extra holiday touch!
- Seal and Gift: Seal the jar with a lid and decorate the outside with a festive ribbon or label. Your festive themed cookie jar is now ready to be enjoyed or gifted to loved ones during the holiday season!

- 💰 REDUCE WASTE AND SAVE MONEY: Chef Preserve keeps FOOD FRESH 5 TIMES LONGER than non-vacuum storage...
- ✅ POWERFUL, QUICK & EASY TO USE: Simply press the button to start. The device vacuum seals a bag in 5...
- ♻️ REUSABLE & RESEALABLE BAGS: Chef Preserve comes with dishwasher, freezer, refrigerator, and...
4. Whimsical Use of Holiday Wrapping

A delightful way to elevate your Christmas cookie presentation is to incorporate whimsical holiday wrapping. This involves using eye-catching materials like festive wrapping paper, ribbons, and themed tags to create a charming and creative presentation of your cookies. Not only does it add visual flair, but it also enhances the gifting experience, making your homemade treats feel extra special. Let’s plunge into a fun recipe for presenting your cookies in a way that is as beautiful as it is delicious.
| Ingredients | Quantity |
|---|---|
| Holiday-themed wrapping paper | 2 sheets |
| Decorative ribbons | 1 spool |
| Gift tags | 10 tags |
| Scissors | – |
| Tape or glue | – |
| Cookies (prepared ahead) | 2 dozen |
Cooking Steps:
- Gather Your Materials: Begin by collecting all the necessary materials needed for your cookie presentation, including the holiday-themed wrapping paper, decorative ribbons, gift tags, scissors, and tape or glue.
- Prepare the Cookies: Verify that your cookies are completely cooled before wrapping. This will prevent any condensation forming inside the wrapping that might affect the texture and taste.
- Cut the Wrapping Paper: Take the holiday wrapping paper and cut two sheets into squares or rectangles, large enough to accommodate your cookie arrangement. Aim for sizes that will allow you to fully wrap the cookies without leaving gaps.
- Position the Cookies: Place a stack of your cookies in the center of one piece of wrapping paper. If desired, you can layer cookies with a parchment paper insert between them to prevent sticking.
- Wrap the Cookies: Bring the edges of the wrapping paper together over the cookies, ensuring that they cover the cookies completely. You can either create a pouch-like bag or fold the paper over the top to fully enclose the cookies.
- Secure with Tape or Glue: Use tape or glue to secure the edges of the wrapping paper. Make sure it is tightly sealed so that your cookies stay fresh and secure inside.
- Add Decorative Ribbon: Cut a length of decorative ribbon and tie it around the wrapped cookies. Create a bow for a festive touch, making sure it’s snug but not so tight that it squishes the cookies.
- Attach Gift Tags: Using a decorative gift tag, write a personal message or label the type of cookies inside. Use tape or string to attach it to the ribbon on the package, adding another layer of charm.
- Display or Gift Your Cookies: Your whimsical holiday-wrapped cookies are now ready to be displayed on a festive table or gifted to loved ones. Enjoy the delighted reactions as you share your beautiful cookie creations!

- Generous Capacity: 7-quart slow cooker that comfortably serves 9+ people or fits a 7-pound roast
- Cooking Flexibility: High or low slow cooking settings, with convenient warm function for ideal serving...
- Convenient: Set it and forget it feature enables you to cook while at work or performing daily tasks
5. Edible Ornament Decor

Edible ornament decor adds a festive flair to your holiday celebrations by allowing you to create beautiful, edible decorations that can be hung on your Christmas tree or used as table centerpieces. These delightful treats combine creativity with deliciousness, transforming simple cookies into stunning works of art. With a little icing and some imaginative designs, you can craft ornaments that your family and friends will adore, and that can also be enjoyed as a tasty treat.
| Ingredients | Quantity |
|---|---|
| Sugar cookie dough | 2 batches |
| Royal icing (various colors) | 3 cups (split into colors) |
| Edible glitter | to taste |
| Food coloring | as needed |
| Cookie cutters (various shapes) | 5-6 different shapes |
| Piping bags | 2-3 bags |
| Lollipop sticks or string | 10 sticks/string |
| Sprinkles | to taste |
Cooking Steps:
- Prepare the Sugar Cookie Dough: Begin by preparing your sugar cookie dough according to your favorite recipe. Roll it out to about 1/4-inch thickness on a floured surface.
- Cut Out Cookie Shapes: Use various cookie cutters to cut out shapes for your ornaments. Popular choices include stars, snowflakes, and holiday-themed designs. Remember to cut a small hole at the top of each cookie to thread your string or lollipop stick later.
- Bake the Cookies: Place the cut-out cookies on a baking sheet lined with parchment paper. Bake according to your recipe instructions or until they are lightly golden around the edges. Allow the cookies to cool completely on wire racks.
- Prepare Your Royal Icing: While the cookies are cooling, prepare your royal icing. If coloring the icing, divide it into bowls and add food coloring to achieve your desired shades. Make sure that you have a stiff consistency for outlines and a flood consistency for filling in designs.
- Decorate with Royal Icing: Using piping bags, outline the edges of your cooled cookies first. After the outlines set slightly, fill in the centers with flood icing using a squeegee or a small spoon. Use toothpicks to spread the icing evenly and remove air bubbles. Let the icing dry completely.
- Add Decorations: Once the base icing has dried, decorate your cookies with additional icing details, edible glitter, and sprinkles. Be as creative as you like! Use contrasting colors to make the designs pop.
- Thread the String or Lollipop Sticks: Once the decorations are fully set and dry, you can thread a piece of string or a lollipop stick through the hole at the top of your cookies. If using sticks, confirm the cookies are sturdy enough to hold it.
- Display or Gift: Hang your edible ornaments on your Christmas tree or arrange them on a platter for a beautiful centerpiece. Alternatively, you can package them in clear gift bags tied with bows for delightful holiday gifts. Enjoy the festive spirit with your edible creations!

- 100% Leak-proof: Guaranteed no-spill seal and secure latches
- Crystal-clear Tritan Built: Stain-resistant and odor-resistant material for a clear view of contents
- Lightweight & Sturdy: Easy to carry, yet durable for everyday use
6. Beautifully Iced Cookie Gift Boxes

Beautifully iced cookie gift boxes are a delightful way to showcase your holiday baking and share sweet treats with loved ones. These charming boxes not only make a thoughtful gift but also provide a canvas for your creativity with decorative icing techniques. Each box can be filled with an assortment of beautifully decorated cookies, making it a perfect addition to any holiday celebration.
| Ingredients | Quantity |
|---|---|
| Sugar cookies (various shapes) | 2 dozen |
| Royal icing (various colors) | 3 cups |
| Edible glitter | To taste |
| Food coloring | As needed |
| Cookie boxes or clear bags | 2-4 boxes |
| Wax paper or tissue paper | For lining |
| Ribbon or string | For decoration |
| Sprinkles | To taste |
Cooking Steps:
- Bake Your Cookies: Start by preparing and baking your sugar cookies according to your favorite recipe. Choose a variety of shapes such as stars, bells, and trees. Allow the cookies to cool completely before decorating.
- Prepare Royal Icing: While the cookies are cooling, mix your royal icing. Divide it into different bowls and add food coloring to create your desired shades. The icing should be at a stiff consistency for outlining and a thinner flood consistency for filling in designs.
- Outline Cookies: Using piping bags, outline the edges of each cooled cookie with the stiff royal icing. Be sure to create a border that will contain the flood icing inside.
- Flood the Cookies: After letting the outline set for a few minutes, fill in the centers of the cookies with the flood icing. Use a toothpick or a small spatula to gently spread the icing and remove any air bubbles. Allow the icing to dry completely (this may take several hours).
- Add Decorative Details: Once the base icing is dry, use contrasting colors of icing to add decorative elements to your cookies. You can create intricate designs, write holiday messages, or even add edible glitter and sprinkles for a festive touch.
- Prepare the Gift Boxes: Line the inside of your cookie boxes with wax paper or tissue paper to protect the cookies and add some flair.
- Fill the Boxes: Carefully place your decorated cookies inside the lined boxes. Arrange them attractively, mixing shapes and colors for visual appeal.
- Seal and Decorate the Boxes: Close the boxes securely. To add a personal touch, tie each box with a ribbon or string. You can also attach a cute holiday tag for a personal message.
- Present Your Gifts: Your beautifully iced cookie gift boxes are now ready to be given to friends, family, or coworkers, spreading joy and sweetness during the holiday season!

- 𝗘𝗳𝗳𝗼𝗿𝘁𝗹𝗲𝘀𝘀 𝗪𝗲𝗶𝗴𝗵𝗶𝗻𝗴: Supports 5 units...
- 𝗣𝗿𝗲𝗰𝗶𝘀𝗲 𝗥𝗲𝘀𝘂𝗹𝘁𝘀: Accurately weighs up to 11 lb/5 kg with 1 g...
- 𝗦𝗶𝗺𝗽𝗹𝗲 & 𝗖𝗼𝗺𝗽𝗮𝗰𝘁: The small and sleek scale is a perfect fit for...
7. Creative Cookie Cones

Creative cookie cones are a fun and innovative way to present your Christmas cookies. These delightful cones, made from cookie dough, hold an assortment of treats like mini cookies, candies, or even decorative frosting. Not only do they serve as an eye-catching centerpiece for your holiday table, but they also provide an interactive experience for guests as they enjoy their sweet creations.
| Ingredients | Quantity |
|---|---|
| Sugar cookie dough | 2 cups |
| Mini chocolate chips | 1 cup |
| Sprinkles | To taste |
| Ice cream cone molds | 2-4 molds |
| Royal icing (for decoration) | 1 cup |
| Edible glitter | To taste |
| Food coloring | Optional |
Cooking Steps:
- Prepare the Cookie Dough: Begin by preparing your sugar cookie dough according to your favorite recipe. Once the dough is ready, allow it to chill in the refrigerator for about 30 minutes for better handling.
- Preheat the Oven: Preheat your oven to 350°F (175°C) to prepare for baking the cookie cones.
- Roll the Dough: Take a portion of chilled cookie dough and roll it out onto a lightly floured surface until it’s about 1/8 inch thick. Use a sharp knife or a pizza cutter to cut the dough into large triangles, approximately 6 inches wide at the base and 8 inches tall.
- Form the Cones: Gently wrap each triangle of dough around the ice cream cone molds, overlapping the edges slightly to create a cone shape. Pinch the seams to seal them carefully. Ascertain that the dough is not too thick to avoid excessive baking time.
- Bake the Cones: Place the cookie cones on a lined baking sheet and bake in the preheated oven for about 8-10 minutes, or until they are golden brown and just set. Keep an eye on them, as baking times may vary.
- Cool the Cones: Once baked, remove the cones from the oven and allow them to cool on the baking sheet for a few minutes. Then carefully remove them from the molds and transfer them to a wire rack to cool completely.
- Prepare the Decorations: While the cones are cooling, prepare the royal icing by mixing your powdered sugar with a small amount of water until it reaches a pipable consistency. If desired, add food coloring to the icing to match your holiday theme.
- Decorate the Cones: Once the cones are completely cooled, use the royal icing to decorate the edges and surfaces. You can pipe intricate designs, create a border, or simply drizzle icing over the cones.
- Fill with Treats: After decorating, fill each cookie cone with mini chocolate chips, candies, or smaller decorated cookies. You can also sprinkle edible glitter and additional sprinkles for a festive touch.
- Serve and Enjoy: Arrange your creative cookie cones on a festive platter, making them a beautiful centerpiece for your holiday gatherings. Watch your guests delight in choosing from these sweet, edible treats!

- Instant Read Food Thermometer | Our instant read thermometer features a temperature probe and advanced,...
- Multi-Use | From bbq thermometer to baking thermometer, our digital food thermometer for cooking is...
- Easy-Read Digital Thermometer For Cooking | Large instant thermometer dial with bright blue backlight...
8. Nature-Inspired Cookie Platters

Nature-inspired cookie platters are a beautiful way to showcase your holiday cookies while bringing a touch of the outdoors into your festive celebrations. These platters not only highlight the natural beauty of the cookies but also incorporate elements from nature, such as fresh greens, berries, and other natural decorations, creating an impressive centerpiece that is bound to delight guests.
| Ingredients | Quantity |
|---|---|
| Assorted cookies | 3-4 dozen |
| Fresh greens (e.g., pine branches, rosemary) | 1-2 bunches |
| Fresh berries (e.g., cranberries, strawberries) | 1-2 cups |
| Edible flowers (optional) | 1 package |
| Parchment paper (for lining) | As needed |
| Decorative platter or wooden board | 1 |
Cooking Steps:
- Select Your Cookies: Choose a variety of cookies to include on your platter. Popular options might include sugar cookies, gingerbread men, peppermint bark, and chocolate chip cookies. Aim for 3-4 dozen cookies to guarantee a full and diverse selection.
- Prepare the Platter: Select a decorative platter or a wooden board to serve as your base. Clean the surface thoroughly before beginning your arrangement.
- Line the Base: Optionally, line the platter with parchment paper to create a neat background for your cookies. This also adds a rustic touch to your presentation.
- Arrange the Cookies: Begin placing your cookies on the platter. Start with the larger cookies and place them at various angles to create visual interest. Fill in the spaces with smaller cookies, making sure to achieve an even distribution across the platter.
- Add Fresh Greens: Take the fresh greens (e.g., pine branches, rosemary) and tuck them in and around the cookies. This will add height and a natural texture to your display. Be sure to evenly space out the greens to create a cohesive look.
- Incorporate Fresh Berries: Scatter fresh berries (like cranberries or sliced strawberries) around the cookies and greens. The bright colors of the berries will contrast beautifully with the cookies and enhance the overall aesthetic of the platter.
- Optional Edible Flowers: If you’re using edible flowers, strategically place them throughout the arrangement to add a pop of color and a touch of elegance. Scatter them atop the cookies or nestle them among the greens and berries for a whimsical effect.
- Final Touches: Step back to evaluate your presentation. Make any necessary adjustments to ascertain that all elements are harmoniously arranged and that the platter looks appealing from all angles.
- Serve and Enjoy: Once your nature-inspired cookie platter is complete, place it on your holiday table as an inviting centerpiece. Encourage guests to indulge in the treats and enjoy the seasonal beauty of your creative presentation!

- Versatile 54-Piece Collection: Elevate your kitchen with the Home Hero 54-Piece Kitchen Utensil Set, a...
- Durable and Long-Lasting: Crafted from premium stainless steel, these kitchen utensils are designed to...
- Perfect Holiday Gift: Delight your loved ones with this kitchen utensils gift set this festive season....
9. Festooned With Fresh Greens and Berries

Festooned with fresh greens and berries, this delightful cookie presentation will transform your festive gathering into a celebration of natural beauty. By incorporating sprigs of different greens along with vibrant berries, your cookie display will not only be visually stunning but will also guarantee your holiday treats with a fresh and inviting atmosphere. This arrangement is perfect for holiday parties or as a centerpiece for your dessert table.
| Ingredients | Quantity |
|---|---|
| Assorted holiday cookies | 3-4 dozen |
| Fresh greens (e.g., pine sprigs, eucalyptus, or rosemary) | 1-2 bunches |
| Fresh berries (e.g., red currants, blueberries, or strawberries) | 2 cups |
| Decorative platter or wooden board | 1 |
| Twine or ribbon (optional) | As needed |
Cooking Steps:
- Choose Your Cookies: Start by selecting a variety of holiday cookies that you plan to showcase. Aim for an assortment that includes different shapes, colors, and flavors, such as iced sugar cookies, rich chocolate cookies, and nutty biscotti.
- Prepare the Platter: Choose a festive platter or a rustic wooden board for your display. Confirm it is clean and dry before you begin arranging the cookies.
- Arrange the Cookies: Begin by placing the larger cookies on the platter first. Space them out evenly and tilt them slightly for visual interest. After the larger cookies are placed, fill in the gaps with smaller cookies, ensuring a balanced look across the platter.
- Add Fresh Greens: Take your fresh greens and trim them to size if needed. Begin tucking the greens into the arrangement, placing sprigs in between the cookies to create a natural and organic flow. You can also use longer sprigs to accentuate specific areas of the platter.
- Incorporate Fresh Berries: Wash and dry your berries thoroughly. Scatter the berries over and around the cookies and the greens, adding pops of color. Arrange them in clusters for a more dynamic look, ensuring they peek out from underneath the greenery for a whimsical effect.
- Optional Decorative Touches: If using twine or ribbon, consider tying a simple bow and placing it around the platter or near the base. This can enhance the festive appeal of your arrangement.
- Final Review: Step back to assess the overall look of your cookie display. Adjust any elements as necessary to guarantee balance and harmony between the cookies, greens, and berries.
- Serve: Once you’re satisfied with the arrangement, place the platter in a prominent spot at your gathering and invite guests to enjoy the beautiful festive display filled with scrumptious treats!

- 24-ounce insulated stainless-steel water bottle with a FreeSip spout and push-button lid with lock
- Patented FreeSip spout designed for either sipping upright through the built-in straw or tilting back to...
- Protective push-to-open lid keeps spout clean; convenient carry loop doubles as a lock
10. Vintage-Inspired Serving Plates

An elegant centerpiece for your Christmas cookie presentation can be achieved with vintage-inspired serving plates. These charming plates not only add a touch of nostalgia but also enhance the aesthetic of your holiday treats. By using an array of beautiful, patterned plates, you can create visual interest and showcase your cookies in a way that is both delightful and memorable for your guests.
| Ingredients | Quantity |
|---|---|
| Vintage serving plates | 3-5 assorted |
| Cloth napkins or doilies | 3-5 |
| Cookie assortment | 3-4 dozen |
| Fresh fruits or nuts | Optional |
| Decorative accents (e.g., small ornaments, candles) | Optional |
Cooking Steps:
- Select Your Vintage Plates: Begin by choosing a variety of vintage serving plates that complement each other in color and pattern. Aim for a mix of sizes and shapes, as this will create an eclectic and visually appealing display.
- Prepare the Cookies: Bake or purchase your assorted holiday cookies in advance. Aim for a delightful mix of flavors, textures, and decorations, ensuring there are enough cookies to fill each plate.
- Layer Your Base with Napkins or Doilies: If desired, place a cloth napkin or decorative doily on each vintage plate. This adds a touch of elegance while also protecting the plates from crumbs and stains. Choose colors that harmonize with the plates for a cohesive look.
- Arrange the Cookies: Start with the largest cookies, placing them strategically on the plates to create height and visual interest. Fill the surrounding spaces with smaller cookies. Remember to mix up the cookie types to create a colorful and enticing display.
- Add Fresh Fruits or Nuts (Optional): For an added touch of charm, include a few fresh fruits or nuts around the cookies. This not only enhances the presentation but also introduces new flavors for guests to enjoy.
- Incorporate Decorative Accents (Optional): If you wish to elevate your display further, consider adding small decorative accents such as festive ornaments, delicate candles, or seasonal decorations on or around the plates.
- Final Touches and Placement: Once you are satisfied with the arrangement on each plate, take a moment to step back and assess the overall look. Adjust the cookie placements as necessary and determine where to display your vintage-inspired serving plates for maximum visibility and impact during your holiday gathering.
11. Interactive Cookie Decorating Stations

Interactive Cookie Decorating Stations are a fun and creative way to bring family and friends together during the holiday season. This interactive experience allows guests to decorate their own cookies using a variety of toppings, icings, and colors. It’s an enjoyable activity for both children and adults, guaranteeing that everyone can express their artistic side while enjoying delicious treats.
| Ingredients | Quantity |
|---|---|
| Sugar cookies (pre-baked) | 3-4 dozen |
| Royal icing (prepared) | 3-4 cups |
| Food coloring (various colors) | 5-7 gel colors |
| Assorted sprinkles | 1-2 cups |
| Mini chocolate chips | 1 cup |
| Candy decorations (e.g., M&Ms, gumdrops) | 1-2 cups |
| Piping bags or squeeze bottles | 5-10 |
| Wax paper or parchment (for easy cleanup) | Several sheets |
Cooking Steps:
- Prepare the Sugar Cookies: Begin by baking a batch of sugar cookies in various shapes. Allow them to cool completely before setting up the decorating station. Make sure to have a variety of shapes to spark creativity among your guests.
- Make the Royal Icing: Prepare royal icing according to your favorite recipe or use a store-bought version. Divide the icing into small bowls, and add a few drops of different food coloring into each bowl to create a colorful selection of icing.
- Prepare the Decorating Station: Lay out a clean table or countertop space and cover it with wax paper or parchment for easy cleanup. Arrange the pre-baked sugar cookies in the center, leaving space around them for decorating supplies.
- Set Up the Icing & Toppings: Use piping bags or squeeze bottles to fill each one with the colored royal icing. Set the icing next to the cookies, along with bowls of assorted sprinkles, mini chocolate chips, and candy decorations for guests to choose from. Make certain everything is easily accessible.
- Instruct Guests: As guests arrive, provide them with a quick demonstration on how to use the piping bags to decorate the cookies. Explain that they can create designs by drizzling, outlining, and filling shapes with icing, and then topping them with their choice of sprinkles and candies.
- Encourage Creativity: Allow each guest to create their own cookie masterpieces. Remind them that there is no right or wrong way to decorate. Encourage everyone to have fun and get creative with their designs.
- Allow to Set: Once the cookies are decorated, set them aside on a tray or a cooling rack and allow them to dry and set for a few hours. This will guarantee the icing hardens and the toppings stay in place.
- Display and Enjoy: Once dried, you can either display the beautifully decorated cookies for guests to admire or package them as take-home treats. Encourage guests to sample their creations or share with others throughout the gathering.
This interactive cookie decorating station not only brings out the joy of baking but also creates lasting memories and delicious treats to enjoy during the holiday season!