Dinner recipes can impress without overwhelming the cook. Dishes like Lemon Garlic Butter Shrimp Pasta offer elegance in under 30 minutes. Creamy Mushroom Risotto boasts rich flavors with simple ingredients. Herb-Crusted Rack of Lamb and Balsamic Glazed Chicken elevate weeknight meals into something special. Vegetarian options, like Stuffed Bell Peppers with Quinoa, balance nutrition and taste effortlessly. These recipes reveal that culinary sophistication is attainable for everyone, and there’s more to explore for delightful dinner ideas.
Lemon Garlic Butter Shrimp Pasta

Lemon Garlic Butter Shrimp Pasta is a delightful and quick dish that combines the rich flavors of garlic and butter with succulent shrimp, all tossed with al dente pasta.
This dish is perfect for a romantic dinner or a weeknight meal when you want something impressive yet easy to prepare. In just under 30 minutes, you can whip up this delicious pasta that serves 2-4 people.
Ingredients:
- 8 oz linguine or spaghetti
- 2 tbsp unsalted butter
- 1 tbsp olive oil
- 1 lb shrimp, peeled and deveined
- 4 cloves garlic, minced
- Juice and zest of 1 lemon
- 1/4 tsp red pepper flakes (optional)
- Salt and pepper, to taste
- Fresh parsley, chopped (for garnish)
- Grated Parmesan cheese (for serving, optional)
Cooking Steps:
1. Cook the pasta: Bring a large pot of salted water to a boil. Add the linguine or spaghetti and cook according to package instructions until al dente.
Reserve 1/2 cup of pasta water, then drain the pasta. Set aside.
2. Sauté the shrimp: In a large skillet over medium heat, add butter and olive oil. Once melted and hot, add the shrimp and cook until pink, about 2-3 minutes per side.
Remove the shrimp from the skillet and set aside.
3. Make the garlic sauce: In the same skillet, add the minced garlic and cook for about 30 seconds until fragrant. Stir in the lemon juice, zest, and red pepper flakes (if using).
Season with salt and pepper.
4. Combine pasta and shrimp: Add the cooked pasta and shrimp back into the skillet. Toss everything to combine, adding reserved pasta water as needed to create a light sauce.
Cook for an additional 1-2 minutes to allow the flavors to meld.
5. Serve: Garnish with fresh parsley and serve immediately with grated Parmesan cheese, if desired.
Variations and Tips:
- Pasta Variations: You can use other types of pasta such as fettuccine or penne.
- Vegetables: Add in some spinach, diced tomatoes, or asparagus for added color and nutrition.
- Herbs: For a fresh twist, try using basil or thyme instead of parsley.
- Spicy Kick: Increase the amount of red pepper flakes or add a splash of hot sauce for extra heat.
- Make Ahead: You can prepare the garlic-lemon butter sauce in advance and store it in the fridge. Just quickly reheat and add the cooked shrimp and pasta when ready to serve.
Enjoy this delightful Lemon Garlic Butter Shrimp Pasta for a meal that is bound to impress!
- The Original Pro Chopper - Our superstar veggie slicer has been creating waves on TikTok! Simple to use,...
- Easy Meal Prep with Rust-Resistant Blades - Our vegetable chopper is perfect for anyone who wants to eat...
- 5-Star Design - The soft-grip TPU handle ensures controlled chopping, while the non-skid rubber base...
Creamy Mushroom Risotto
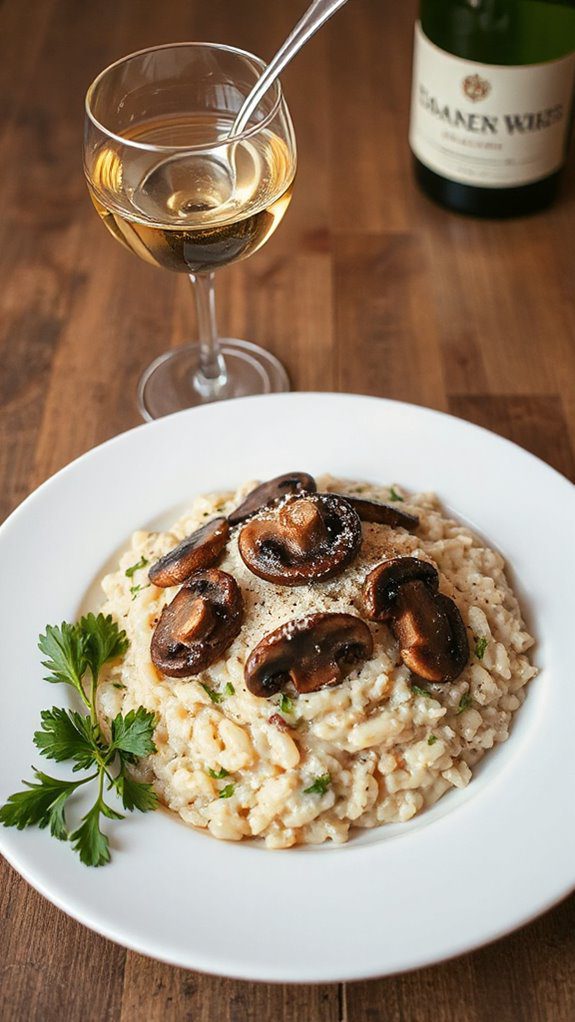
Creamy Mushroom Risotto is a classic Italian dish known for its rich, comforting flavors and creamy texture. Perfect for a cozy dinner at home or a special occasion, this risotto is ideal for mushroom lovers and pairs beautifully with a glass of white wine. The preparation time is approximately 30-40 minutes, making it a great option for those who want a delicious meal without spending all day in the kitchen.
Ingredients:
- 1 cup Arborio rice
- 4 cups vegetable or chicken broth
- 1 cup mushrooms (cremini or button), sliced
- 1 medium onion, finely chopped
- 2 cloves garlic, minced
- 1/2 cup dry white wine (optional)
- 1/2 cup grated Parmesan cheese
- 2 tablespoons unsalted butter
- 2 tablespoons olive oil
- Salt and pepper to taste
- Fresh parsley for garnish (optional)
Cooking Steps:
- In a saucepan, heat the vegetable or chicken broth over low heat to keep warm.
- In a large skillet or saucepan, heat the olive oil and 1 tablespoon of butter over medium heat. Add the chopped onions and sauté until translucent, about 4-5 minutes.
- Add the minced garlic and sliced mushrooms to the pan and cook until the mushrooms are soft and released their juices, around 5-7 minutes.
- Stir in the Arborio rice, allowing it to toast for about 2 minutes and absorb the flavors.
- If using, pour in the white wine and cook until it has evaporated, stirring frequently.
- Begin adding the warm broth one ladle at a time, stirring constantly. Allow the rice to absorb the liquid before adding more broth. Repeat this process until the rice is creamy and al dente, about 18-20 minutes.
- Once the risotto reaches your desired consistency, remove it from the heat. Stir in the remaining butter and grated Parmesan cheese. Season with salt and pepper to taste.
- Serve immediately, garnished with fresh parsley if desired.
Variations & Tips:
- For added flavor, consider incorporating cooked bacon or pancetta.
- You can try different types of mushrooms such as shiitake or portobello for a unique taste.
- To make it vegetarian or vegan, omit the cheese and replace butter with olive oil.
- If you prefer a richer flavor, add a splash of truffle oil just before serving.
- Risotto should be served immediately for the best texture; leftovers can be stored in the refrigerator and reheated with a bit of broth to restore creaminess.
- Makes Everything Simple : Just forget your bagged cheese! Only turn the handle for several times and get...
- Premium Material : All parts of the rotary cheese grater are made of food grade ABS material, no BPA. The...
- Three Option Grater : The parmesan cheese grater finishes food preparation with slicing, shredding and...
Herb-Crusted Rack of Lamb

Herb-Crusted Rack of Lamb is a gourmet dish that showcases tender, flavorful lamb with a fragrant herb crust, ideal for special occasions or a romantic dinner. This elegant main course delights meat lovers and impresses guests, featuring aromatic herbs that complement the rich flavor of the lamb.
With a preparation time of approximately 30 minutes and a cooking time of about 25-30 minutes, this dish can be ready in under an hour, making it a perfect choice for dinner parties or holiday feasts.
Ingredients:
- 1 rack of lamb (approximately 1.5–2 pounds)
- 2 tablespoons Dijon mustard
- 1 cup fresh breadcrumbs
- 1/2 cup fresh parsley, chopped
- 1/4 cup fresh rosemary, chopped
- 1/4 cup fresh thyme, chopped
- 2 cloves garlic, minced
- Salt and pepper, to taste
- 2 tablespoons olive oil
- 1 tablespoon balsamic vinegar (optional)
Cooking Steps:
- Preheat the Oven: Preheat your oven to 400°F (200°C).
- Prepare the Rack of Lamb: Trim any excess fat from the rack of lamb. Pat it dry with a paper towel and season generously with salt and pepper.
- Dijon Mustard Coating: Brush the Dijon mustard evenly over the meat side of the lamb.
- Make the Herb Crust: In a mixing bowl, combine the breadcrumbs, chopped parsley, rosemary, thyme, minced garlic, olive oil, and balsamic vinegar. Mix until well combined.
- Crust the Lamb: Press the herb breadcrumb mixture onto the mustard-coated side of the rack, ensuring an even layer.
- Sear the Lamb: Heat a large oven-proof skillet over medium-high heat. Add a splash of olive oil and sear the rack of lamb crust-side down for 2-3 minutes or until golden brown. Flip the rack and sear the other side for an additional minute.
- Roast in the Oven: Transfer the skillet to the preheated oven and roast for 15-20 minutes for medium-rare (internal temperature of 125°F or 52°C), or until desired doneness.
- Rest and Slice: Remove from the oven and let the lamb rest for 5-10 minutes before slicing into individual chops.
Variations and Tips:
- Flavor Twist: Add grated Parmesan cheese into the herb crust mixture for an extra savory flavor.
- Cooking Method: Try grilling the rack of lamb for a smoky flavor, or marinate it overnight with olive oil, garlic, and herbs for enhanced tenderness and taste.
- Serving Suggestions: Pair the herb-crusted rack of lamb with roasted vegetables, garlic mashed potatoes, or a fresh green salad for a complete meal.
- Leftovers: If you have any leftover lamb, enjoy it cold in a salad or warmed in a sandwich the next day.
Impress your family and friends with this stunning and delicious Herb-Crusted Rack of Lamb at your next dinner gathering!
- 💰 REDUCE WASTE AND SAVE MONEY: Chef Preserve keeps FOOD FRESH 5 TIMES LONGER than non-vacuum storage...
- ✅ POWERFUL, QUICK & EASY TO USE: Simply press the button to start. The device vacuum seals a bag in 5...
- ♻️ REUSABLE & RESEALABLE BAGS: Chef Preserve comes with dishwasher, freezer, refrigerator, and...
Balsamic Glazed Chicken

Balsamic Glazed Chicken is a savory and sweet dish that combines the deep flavors of balsamic vinegar with tender, juicy chicken. Perfect for a cozy weeknight dinner or a special occasion, this recipe takes about 30 minutes from start to finish and serves four people.
The glaze adds a delightful tanginess that pairs beautifully with roasted vegetables or a fresh salad, making this meal not only delicious but also visually appealing.
Ingredients:
- 4 boneless, skinless chicken breasts
- 1/2 cup balsamic vinegar
- 1/4 cup honey or maple syrup
- 2 tablespoons olive oil
- 3 cloves garlic, minced
- Salt and pepper, to taste
- Fresh basil or parsley, for garnish (optional)
Cooking Instructions:
- Prepare the Marinade: In a medium bowl, whisk together the balsamic vinegar, honey (or maple syrup), olive oil, minced garlic, salt, and pepper.
- Marinate the Chicken: Place the chicken breasts in a resealable plastic bag or a shallow dish. Pour the marinade over the chicken, ensuring that all pieces are well coated. Seal the bag or cover the dish and let marinate in the refrigerator for at least 15 minutes, or up to 2 hours for more intense flavor.
- Cook the Chicken: Heat a large skillet over medium-high heat. Remove the chicken from the marinade (reserving the marinade for glazing) and place it in the hot skillet. Cook for 5-7 minutes on each side, or until the chicken is cooked through and has a nice sear.
- Glaze the Chicken: While the chicken cooks, pour the reserved marinade into a small saucepan and bring it to a boil. Reduce it to a simmer and cook for about 5 minutes, until it thickens slightly. Pour the glaze over the chicken in the skillet, allowing it to caramelize for 1-2 minutes.
- Serve: Remove the chicken from the skillet, drizzle with extra glaze, and garnish with fresh basil or parsley, if desired. Serve hot with your choice of side dishes.
Variations & Tips:
- Add Vegetables: You can add vegetables like broccoli, bell peppers, or asparagus to the skillet while cooking the chicken for a complete one-pan meal.
- Use Chicken Thighs: For a richer flavor, substitute chicken breasts with boneless, skinless chicken thighs.
- Make it Spicy: Add a pinch of red pepper flakes to the marinade for a bit of heat.
- Grill Instead of Sear: For a smoky flavor, grill the marinated chicken instead of using a skillet. Brush with the glaze once cooked.
- Storage: Store leftovers in an airtight container in the refrigerator for up to 3 days. Reheat gently before serving.
- Generous Capacity: 7-quart slow cooker that comfortably serves 9+ people or fits a 7-pound roast
- Cooking Flexibility: High or low slow cooking settings, with convenient warm function for ideal serving...
- Convenient: Set it and forget it feature enables you to cook while at work or performing daily tasks
Stuffed Bell Peppers With Quinoa
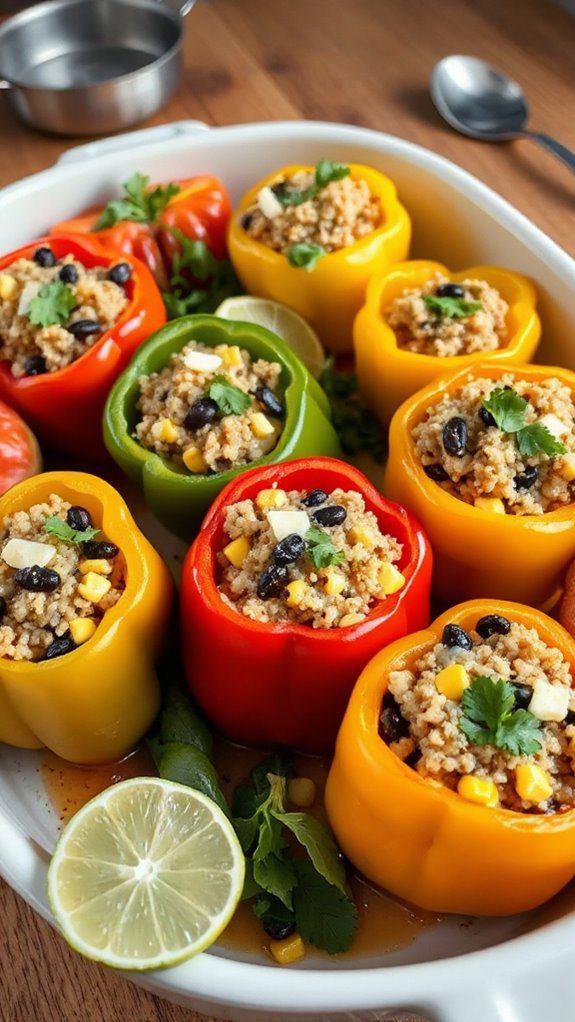
Stuffed bell peppers with quinoa are a nutritious and colorful dish that combines the fresh flavors of bell peppers with the wholesome goodness of quinoa. This dish is perfect for vegetarians or anyone looking for a hearty yet healthy meal. It’s an excellent option for family dinners or meal prep, taking about 30 minutes to prepare and 25 minutes to cook.
Ingredients:
- 4 large bell peppers (any color)
- 1 cup quinoa, rinsed
- 2 cups vegetable broth or water
- 1 cup black beans, drained and rinsed
- 1 cup corn (fresh, canned, or frozen)
- 1 teaspoon cumin
- 1 teaspoon chili powder
- 1 cup diced tomatoes (fresh or canned)
- 1 cup shredded cheese (cheddar or mozzarella)
- Salt and pepper to taste
- Olive oil
Cooking Steps:
- Preheat your oven to 375°F (190°C).
- In a saucepan, combine the quinoa and vegetable broth (or water). Bring to a boil, then reduce heat to low, cover, and let simmer for about 15 minutes or until the quinoa is fluffy and the liquid has been absorbed.
- While the quinoa is cooking, slice the tops off the bell peppers and remove the seeds and membranes. Lightly brush the outside of the peppers with olive oil and set aside.
- In a large mixing bowl, combine the cooked quinoa, black beans, corn, diced tomatoes, cumin, chili powder, and half of the shredded cheese. Season with salt and pepper to taste. Mix everything until well combined.
- Stuff each bell pepper with the quinoa mixture, packing it in gently. Place the stuffed peppers upright in a baking dish.
- Cover the dish with foil and bake in the preheated oven for 20 minutes. After 20 minutes, remove the foil, sprinkle the remaining cheese on top of each pepper, and bake for an additional 5-10 minutes, or until the cheese is melted and bubbly.
- Remove from the oven and let it cool for a few minutes before serving.
Variations and Tips:
- Add diced onions, garlic, or other vegetables to the quinoa filling for added flavor and nutrition.
- For a protein boost, you can include ground turkey or beef in the quinoa mixture, cooking it beforehand.
- Experiment with different types of cheese like feta or pepper jack for a unique twist.
- For a spicier kick, add jalapeños or hot sauce to the filling.
- Leftover stuffed peppers can be refrigerated and enjoyed for up to 3 days, making them an excellent meal prep option.
- 100% Leak-proof: Guaranteed no-spill seal and secure latches
- Crystal-clear Tritan Built: Stain-resistant and odor-resistant material for a clear view of contents
- Lightweight & Sturdy: Easy to carry, yet durable for everyday use
Spinach and Feta Stuffed Salmon

Spinach and Feta Stuffed Salmon is a delightful seafood dish that combines the rich flavors of salmon with a savory spinach and feta cheese filling. This dish is perfect for a family dinner or a special occasion, impressive enough to serve guests yet simple enough to whip up on a weeknight. With a preparation time of about 15 minutes and a cooking time of 20 minutes, you can have a gourmet meal ready in less than an hour.
Ingredients:
- 4 salmon fillets
- 2 cups fresh spinach, chopped
- 1 cup feta cheese, crumbled
- 2 cloves garlic, minced
- 1 tablespoon olive oil
- 1 teaspoon lemon juice
- Salt and pepper, to taste
- 1 teaspoon dried oregano (optional)
- Lemon wedges, for serving
Cooking Instructions:
- Preheat the Oven: Preheat your oven to 400°F (200°C).
- Prepare the Filling: In a skillet over medium heat, add the olive oil and minced garlic. Sauté for about 1 minute until fragrant. Add the chopped spinach and cook until wilted, about 2-3 minutes. Remove from heat and mix in the crumbled feta, lemon juice, salt, pepper, and oregano.
- Prepare the Salmon: While the filling cools slightly, place your salmon fillets skin-side down on a cutting board. Using a sharp knife, create a pocket in each fillet by slicing into the side without cutting all the way through.
- Stuff the Salmon: Generously spoon the spinach and feta filling into each pocket of the salmon fillets, pressing gently to fit as much as possible.
- Bake the Salmon: Place the stuffed fillets on a parchment-lined baking sheet. Sprinkle a little more salt and pepper on top for seasoning. Bake in the preheated oven for 15-20 minutes or until the salmon is cooked through and flakes easily with a fork.
- Serve: Remove from the oven and serve hot with lemon wedges on the side for an added burst of flavor.
Variations and Tips:
- Herbs: You can add fresh herbs like dill or parsley to the filling for extra flavor.
- Cheese Options: Substitute feta cheese with goat cheese or cream cheese if desired.
- Vegetables: Consider adding other vegetables like sun-dried tomatoes or artichokes to the filling for a different taste profile.
- Cooking Method: If you prefer grilling, you can cook the stuffed salmon on a grill over medium heat for about 6-8 minutes on each side.
- Serving Suggestions: Pair the dish with a side of quinoa or a fresh salad to create a well-rounded meal.
Enjoy this flavorful, nutritious dish that is sure to impress everyone at the table!
- 𝗘𝗳𝗳𝗼𝗿𝘁𝗹𝗲𝘀𝘀 𝗪𝗲𝗶𝗴𝗵𝗶𝗻𝗴: Supports 5 units...
- 𝗣𝗿𝗲𝗰𝗶𝘀𝗲 𝗥𝗲𝘀𝘂𝗹𝘁𝘀: Accurately weighs up to 11 lb/5 kg with 1 g...
- 𝗦𝗶𝗺𝗽𝗹𝗲 & 𝗖𝗼𝗺𝗽𝗮𝗰𝘁: The small and sleek scale is a perfect fit for...
Garlic Parmesan Roasted Cauliflower
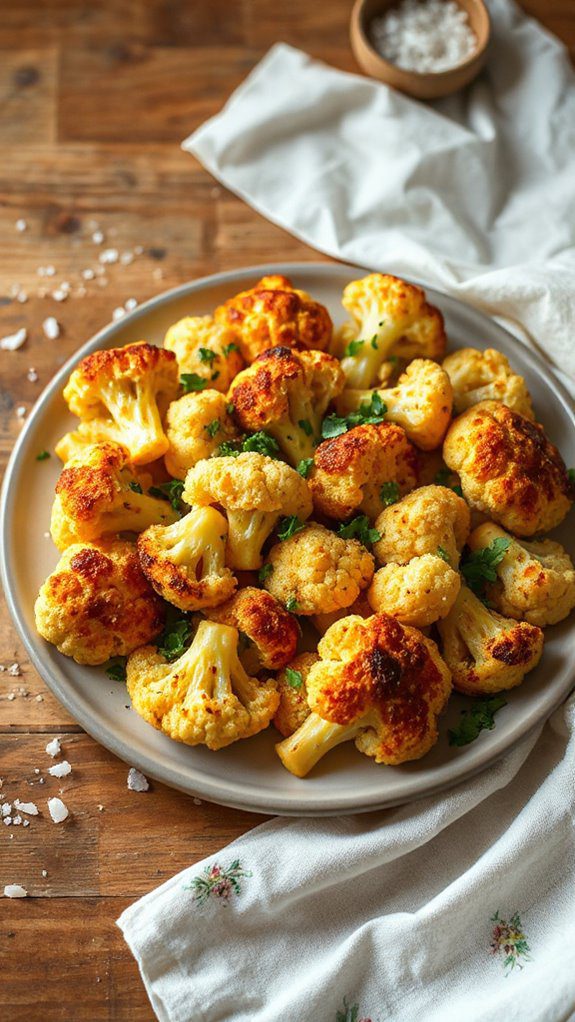
Garlic Parmesan Roasted Cauliflower is a delightful and flavorful side dish that perfectly complements any meal. Its crisp-tender texture and garlicky aroma will appeal to both vegetarians and meat-lovers alike, making it an excellent choice for family dinners, casual gatherings, or holiday feasts.
Preparation takes about 10 minutes, with an additional roasting time of around 25-30 minutes, meaning you can easily whip it up alongside your main course.
Ingredients:
- 1 medium head of cauliflower, cut into florets
- 3 tablespoons olive oil
- 4 cloves garlic, minced
- ½ cup grated Parmesan cheese
- 1 teaspoon salt
- ½ teaspoon black pepper
- 1 teaspoon paprika (optional)
- 2 tablespoons fresh parsley, chopped (for garnish)
Cooking Steps:
- Preheat the Oven: Preheat your oven to 425°F (220°C).
- Prepare the Cauliflower: In a large mixing bowl, toss the cauliflower florets with olive oil, minced garlic, salt, pepper, and paprika until evenly coated.
- Arrange on Baking Sheet: Spread the seasoned cauliflower on a baking sheet lined with parchment paper in a single layer, making sure there’s space between each piece for even roasting.
- Roast the Cauliflower: Bake in the preheated oven for about 25-30 minutes or until the cauliflower is tender and golden brown, tossing halfway through to guarantee even cooking.
- Add Parmesan: In the last 5 minutes of roasting, remove the pan and sprinkle the grated Parmesan cheese over the cauliflower. Return to the oven to allow the cheese to melt and slightly crisp.
- Garnish and Serve: Once done, take the pan out of the oven, sprinkle with fresh parsley, and serve warm.
Variations and Tips:
- Spice it Up: Add some red pepper flakes for a spicy kick or swap out the paprika for chili powder.
- Cheese Alternatives: For a dairy-free option, use nutritional yeast instead of Parmesan, or try other cheeses like feta or cheddar for different flavor profiles.
- Add Other Vegetables: Feel free to mix in other seasonal vegetables like Brussels sprouts or carrots to make it a medley of roasted goodness.
- Meal Prep: You can prepare the cauliflower ahead of time, store it in an airtight container, and roast it just before serving.
- Serving Suggestions: This dish pairs beautifully with grilled meats, pasta, or as part of a robust vegetarian spread.
- Instant Read Food Thermometer | Our instant read thermometer features a temperature probe and advanced,...
- Multi-Use | From bbq thermometer to baking thermometer, our digital food thermometer for cooking is...
- Easy-Read Digital Thermometer For Cooking | Large instant thermometer dial with bright blue backlight...
Prosciutto-Wrapped Asparagus

Prosciutto-wrapped asparagus is a delicious and elegant appetizer that combines the savory flavors of prosciutto with the fresh, earthy taste of asparagus.
This dish is perfect for entertaining guests or as a side dish for a dinner party. With a preparation time of just 10 minutes and a cooking time of 10 minutes, you can whip up this sophisticated treat in no time, making it an ideal addition to both casual and formal gatherings.
Ingredients:
- 1 bunch of fresh asparagus (about 14-16 stalks)
- 6 slices of prosciutto
- Olive oil
- Salt (to taste)
- Black pepper (to taste)
- Lemon wedges (for serving, optional)
Cooking Instructions:
- Preheat your oven to 400°F (200°C).
- Rinse the asparagus under cold water and pat dry with a paper towel. Trim the woody ends of the asparagus by snapping them off or cutting about an inch from the bottom.
- Slice each slice of prosciutto in half lengthwise so you have long, thin strips.
- Take one asparagus stalk and wrap it with a strip of prosciutto, starting at the bottom and spiraling upward. Ascertain that some of the asparagus is visible at the top.
- Repeat the process with the remaining asparagus and prosciutto slices.
- Arrange the wrapped asparagus on a baking sheet lined with parchment paper.
- Drizzle lightly with olive oil and season with salt and black pepper.
- Bake in the preheated oven for 10-12 minutes, or until the prosciutto is crispy and the asparagus is tender yet still firm.
- Remove from the oven and let cool for a few minutes before transferring to a serving platter. Serve warm with lemon wedges on the side, if desired.
Variations and Tips:
- For added flavor, sprinkle grated Parmesan cheese over the asparagus before baking.
- Try using pancetta instead of prosciutto for a different taste.
- If you prefer, this dish can be grilled — just place the wrapped asparagus on a hot grill for about 6-8 minutes, turning occasionally until the prosciutto is crispy.
- Experiment with seasonings like garlic powder, crushed red pepper, or balsamic glaze for an extra kick.
- Store any leftovers in an airtight container in the refrigerator for up to 2 days and reheat gently in the oven or a skillet.
- Versatile 54-Piece Collection: Elevate your kitchen with the Home Hero 54-Piece Kitchen Utensil Set, a...
- Durable and Long-Lasting: Crafted from premium stainless steel, these kitchen utensils are designed to...
- Perfect Holiday Gift: Delight your loved ones with this kitchen utensils gift set this festive season....
One-Pan Lemon Chicken and Veggies
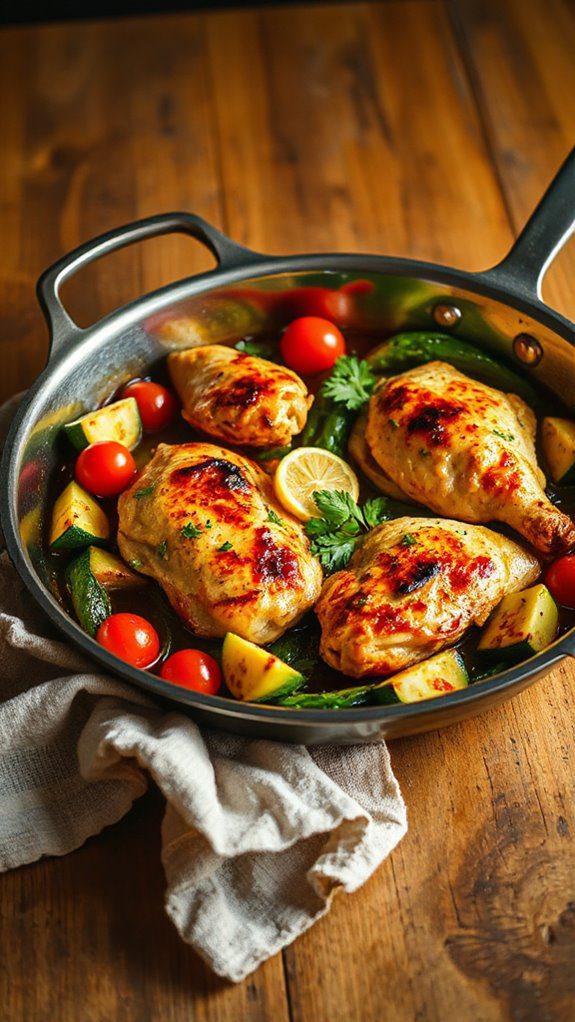
One-Pan Lemon Chicken and Veggies is a bright and flavorful dish that combines tender chicken with vibrant seasonal vegetables, all cooked together in a single pan for easy cleanup.
This recipe is perfect for busy weeknights or a cozy weekend dinner when you want something quick yet satisfying. With a preparation time of just 15 minutes and a cooking time of 35 minutes, you can have a delicious meal ready for your family or guests in under an hour!
Ingredients:
- 4 boneless, skinless chicken breasts
- 2 tablespoons olive oil
- 1 lemon (zested and juiced)
- 4 cloves garlic, minced
- 1 teaspoon dried oregano
- 1 teaspoon salt
- 1/2 teaspoon black pepper
- 1 cup cherry tomatoes, halved
- 1 cup zucchini, sliced
- 1 cup bell peppers, chopped
- Fresh parsley, chopped (for garnish)
Cooking Steps:
- Preheat your oven to 400°F (200°C).
- In a large bowl, combine olive oil, lemon zest, lemon juice, minced garlic, oregano, salt, and pepper to create a marinade.
- Add the chicken breasts to the bowl and toss to coat them evenly with the marinade.
- In a large oven-proof skillet or pan, arrange the marinated chicken breasts in a single layer.
- Scatter the cherry tomatoes, zucchini, and bell peppers around the chicken in the skillet.
- Roast in the preheated oven for 30-35 minutes, or until the chicken is cooked through (internal temperature should reach 165°F or 74°C) and the vegetables are tender.
- Remove from the oven and let it rest for a few minutes. Garnish with chopped fresh parsley before serving.
Variations and Tips:
- Vegetable Choices: Feel free to substitute or add other vegetables such as asparagus, broccoli, or carrots based on your preference or what you have on hand.
- Herb Variation: Experiment with different herbs such as thyme, rosemary, or basil for a unique flavor twist.
- Marinade Time: For enhanced flavor, consider marinating the chicken for a few hours or overnight in the fridge.
- Serving Options: Serve the chicken and vegetables over a bed of rice, quinoa, or with a side of crusty bread to soak up the delicious juices.
- Meal Prep: This dish is great for meal prep; simply store leftovers in airtight containers in the fridge for up to 3 days. Reheat in the microwave or on the stove for a quick meal.
- 24-ounce insulated stainless-steel water bottle with a FreeSip spout and push-button lid with lock
- Patented FreeSip spout designed for either sipping upright through the built-in straw or tilting back to...
- Protective push-to-open lid keeps spout clean; convenient carry loop doubles as a lock
Decadent Chocolate Fondant

Decadent chocolate fondant is a luxurious dessert that is sure to impress anyone with a sweet tooth. This rich, molten chocolate cake is perfect for special occasions or romantic dinners, serving as a splendid finale to any meal. With a preparation time of approximately 20 minutes and a cooking time of 12-15 minutes, you can have this indulgent treat ready in no time, leaving you to savor its gooey chocolate center.
Ingredients:
- 100g dark chocolate (70% cocoa)
- 100g unsalted butter
- 150g powdered sugar
- 2 large eggs
- 2 large egg yolks
- 50g all-purpose flour
- A pinch of salt
- Butter (for greasing ramekins)
- Cocoa powder (for dusting ramekins)
Cooking Steps:
- Preheat your oven to 200°C (390°F). Grease four ramekins with butter and dust with cocoa powder, guaranteeing they are well coated to allow easy release after baking.
- In a heatproof bowl, melt the dark chocolate and unsalted butter over a pot of simmering water (bain-marie) until smooth. Stir occasionally to combine. Once melted, remove from heat and let it cool slightly.
- In a separate bowl, whisk together the powdered sugar, eggs, and egg yolks until the mixture is light and frothy.
- Gently fold the melted chocolate mixture into the egg mixture until combined.
- Sift the flour and pinch of salt into the batter, and carefully fold until fully incorporated. Be careful not to overmix.
- Divide the batter evenly among the prepared ramekins.
- Bake in the preheated oven for 12-15 minutes, until the edges are firm but the center is still soft and jiggly.
- Let the fondants cool for 1 minute, then carefully run a knife around the edges and promptly invert onto serving plates.
- Serve immediately, preferably with a scoop of vanilla ice cream or a dollop of whipped cream.
Variations and Tips:
- For a different flavor profile, try adding a teaspoon of espresso powder or a splash of orange liqueur to the batter.
- Experiment with toppings such as fresh berries, crushed nuts, or a drizzle of caramel sauce for added texture and flavor.
- Confirm you have the right sized ramekins (about 6 oz) for even baking.
- Do not overbake the fondants; the ideal outcome is a gooey center, so keep them underbaked.
- The batter can be prepared a few hours ahead of time and stored in the fridge. Just remember to bring it back to room temperature before baking.
Saffron-Infused Fish Stew
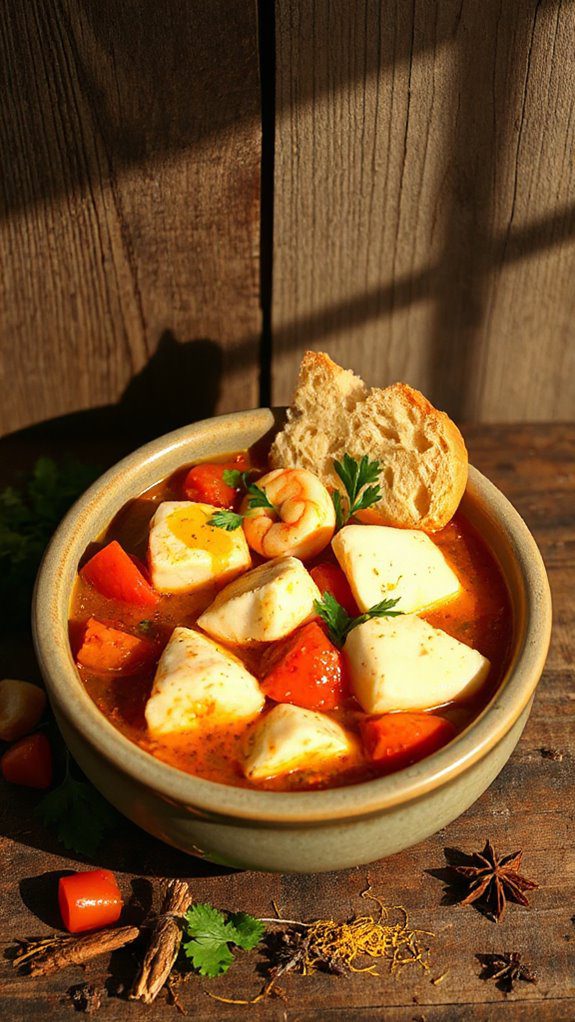
Saffron-Infused Fish Stew is a rich, aromatic dish that combines the delicate flavors of fresh fish with the exotic essence of saffron and other fragrant spices. This comforting stew is perfect for cozy family dinners or impressing guests at a gathering.
Preparation and cooking time takes around 45 minutes, making it a great option for weeknight meals or special occasions.
Ingredients:
- 1 lb (450g) firm white fish (such as cod or halibut), cut into chunks
- 1 lb (450g) shrimp, peeled and deveined
- 1 medium onion, finely chopped
- 2 cloves garlic, minced
- 1 bell pepper, diced
- 1 can (14 oz) diced tomatoes, with juices
- 2 cups fish stock or broth
- 1 cup dry white wine
- 1 tsp saffron threads
- 2 tsp paprika
- 1 tsp dried thyme
- Salt and pepper to taste
- 2 tbsp olive oil
- Fresh parsley for garnish
- Optional: crusty bread for serving
Cooking Instructions:
- In a small bowl, soak the saffron threads in 2 tablespoons of warm water to release their flavor. Set aside.
- In a large pot, heat the olive oil over medium heat. Add the chopped onion, garlic, and bell pepper, sautéing until softened, about 5-7 minutes.
- Stir in the paprika and thyme, cooking for an additional 1-2 minutes until fragrant.
- Pour in the diced tomatoes with their juices, fish stock, and white wine. Add the soaked saffron along with the water it was soaked in. Stir to combine.
- Bring the stew to a simmer, then reduce the heat and let it cook for 10 minutes to allow the flavors to meld.
- Add the fish chunks and shrimp to the pot, stirring gently to coat them in the broth. Season with salt and pepper. Cover and simmer for another 5-7 minutes, or until the fish is cooked through and the shrimp are pink.
- Taste and adjust seasoning as needed. Serve hot, garnished with fresh parsley, alongside crusty bread if desired.
Variations and Tips:
- Feel free to add additional seafood, such as mussels or scallops, for a mixed seafood stew.
- For a spicier kick, consider adding a pinch of red pepper flakes along with the other spices.
- This stew can be made a day in advance; the flavors will deepen overnight.
- If you prefer a heartier stew, add cubed potatoes or chickpeas during the simmering stage.
- To enhance the saffron flavor, you can increase the amount of saffron, but a little goes a long way.
- For a creamy version, stir in some heavy cream or coconut milk during the last few minutes of cooking.
Enjoy this fragrant, delicious Saffron-Infused Fish Stew that encapsulates the essence of coastal cuisine!
Thai Sweet Chili Chicken Tacos

Thai Sweet Chili Chicken Tacos are a delightful fusion dish that marries the bold and vibrant flavors of Thai cuisine with the comforting familiarity of tacos. Perfect for a quick dinner on a busy weeknight or a casual gathering with friends, this recipe takes about 30 minutes to prepare.
The combination of sweet chili sauce, tender chicken, and fresh toppings makes for a delicious meal that both adults and kids will enjoy.
Ingredients:
- 1 pound chicken breast, sliced thinly
- 1/2 cup Thai sweet chili sauce
- 1 tablespoon soy sauce
- 1 tablespoon vegetable oil
- 8 small tortillas (corn or flour)
- 1 cup shredded cabbage
- 1/2 cup sliced cucumbers
- 1/4 cup chopped fresh cilantro
- 1/4 cup chopped green onions
- Lime wedges for serving
- Optional: Sliced jalapeños for heat
Cooking Instructions:
- In a large bowl, combine the sliced chicken, Thai sweet chili sauce, and soy sauce. Toss to coat the chicken thoroughly and let it marinate for about 10 minutes.
- Heat the vegetable oil in a large skillet over medium-high heat. Add the marinated chicken to the skillet, cooking for 6-8 minutes or until the chicken is cooked through and caramelized, stirring occasionally.
- While the chicken is cooking, prepare the toppings. In a separate bowl, combine the shredded cabbage, sliced cucumbers, cilantro, and green onions. Toss them gently and set aside.
- Once the chicken is ready, warm the tortillas in a dry skillet for about 30 seconds on each side or until they are pliable.
- To assemble the tacos, place a generous spoonful of the sweet chili chicken onto each tortilla. Top with the cabbage mixture and finish off with a squeeze of lime juice. If desired, add sliced jalapeños for an extra kick.
- Serve immediately with lime wedges on the side.
Variations and Tips:
- For a vegetarian option, swap the chicken for tofu or jackfruit and follow the same seasoning and cooking steps.
- Add more toppings like avocado, cheese, or sliced radishes for added texture and flavor.
- If you prefer, you can grill or bake the chicken instead of cooking it on the stovetop for a different flavor profile.
- Experiment with different sauces or spices to create your own unique flair—spicy peanut sauce or teriyaki sauce can also work well!
- These tacos can be made ahead of time; simply store the chicken and toppings separately and assemble when ready to serve.
Mediterranean Chickpea Salad

Mediterranean Chickpea Salad is a vibrant and nutritious dish that beautifully combines the hearty texture of chickpeas with fresh vegetables and a zesty dressing. This salad is ideal for anyone looking for a light yet satisfying meal, whether it’s a quick lunch, a side dish for dinner, or a protein-rich snack.
It comes together in just 15 minutes, making it a perfect choice for those busy days when you want something healthy without spending too much time in the kitchen.
Ingredients
- 1 can (15 oz) chickpeas, drained and rinsed
- 1 cup cherry tomatoes, halved
- 1 cucumber, diced
- 1/4 red onion, finely chopped
- 1 bell pepper (any color), diced
- 1/2 cup feta cheese, crumbled
- 1/4 cup Kalamata olives, pitted and sliced
- 1/4 cup fresh parsley, chopped
- 3 tablespoons olive oil
- 2 tablespoons red wine vinegar
- 1 teaspoon dried oregano
- Salt and pepper to taste
- Optional: 1 avocado, diced
Cooking Steps
- In a large mixing bowl, combine the drained chickpeas, cherry tomatoes, cucumber, red onion, bell pepper, feta cheese, marinated olives, and parsley.
- In a separate small bowl, whisk together the olive oil, red wine vinegar, dried oregano, salt, and pepper.
- Pour the dressing over the salad mixture and gently toss until everything is well coated.
- Taste and adjust seasoning if necessary, adding more salt, pepper, or vinegar to suit your preference.
- If using, fold in the diced avocado just before serving to maintain its texture.
- Serve immediately or refrigerate for up to an hour for flavors to meld. This salad can be enjoyed both cold and at room temperature.
Variations and Tips
- For added protein, you can mix in some grilled chicken or shrimp.
- Swap the feta cheese for a vegan alternative or nutritional yeast for a dairy-free option.
- Add a splash of lemon juice for extra freshness.
- To make it more filling, consider serving the salad over cooked quinoa or bulgur.
- This salad keeps well in the fridge for up to 3 days, making it a great make-ahead option.
Butternut Squash Ravioli With Sage Butter

Butternut Squash Ravioli with Sage Butter is a delightful and comforting dish perfect for fall. The sweet and nutty flavor of butternut squash complements the rich, aromatic sage butter, making it an ideal meal for a cozy family dinner or an elegant gathering with friends.
Preparation time is approximately 30 minutes if using store-bought ravioli, or about 1 hour if making the ravioli from scratch.
Ingredients:
- 1 package of butternut squash ravioli (about 12-15 ounces)
- 4 tablespoons unsalted butter
- 8-10 fresh sage leaves
- Salt, to taste
- Freshly ground black pepper, to taste
- Grated Parmesan cheese, for serving
- Optional: Chopped walnuts or pecans for garnish
Cooking Steps:
1. Cook the Ravioli: Bring a large pot of salted water to a boil. Gently add the butternut squash ravioli and cook according to package instructions or until they float to the surface (usually around 3-4 minutes for fresh ravioli).
2. Prepare the Sage Butter: While the ravioli cooks, melt the butter in a large skillet over medium heat.
Once melted, add the sage leaves and sauté for about 2-3 minutes, or until the butter begins to brown and the sage becomes crispy.
3. Combine: Once the ravioli are cooked, carefully drain and add them to the skillet with the sage butter. Toss gently to coat the ravioli evenly in the butter and sage.
4. Season: Season with salt and freshly ground black pepper to taste.
5. Serve: Divide the ravioli among plates, drizzle with additional sage butter if desired, and garnish with grated Parmesan cheese and chopped nuts, if using.
Variations and Tips:
- Homemade Ravioli: If you prefer to make your own ravioli, use a pasta dough recipe and fill it with roasted and mashed butternut squash mixed with ricotta cheese and a pinch of nutmeg.
- Add Vegetables: Consider adding sautéed spinach or kale to the dish for extra nutrition and color.
- Spice It Up: For an added kick, sprinkle some red pepper flakes into the sage butter while cooking.
- Storage: Leftover ravioli can be stored in an airtight container in the fridge for up to 2 days and can also be frozen and cooked from frozen in boiling water.
Enjoy your creamy, savory Butternut Squash Ravioli with Sage Butter for a taste of autumn in every bite!
Caramelized Onion and Goat Cheese Tart
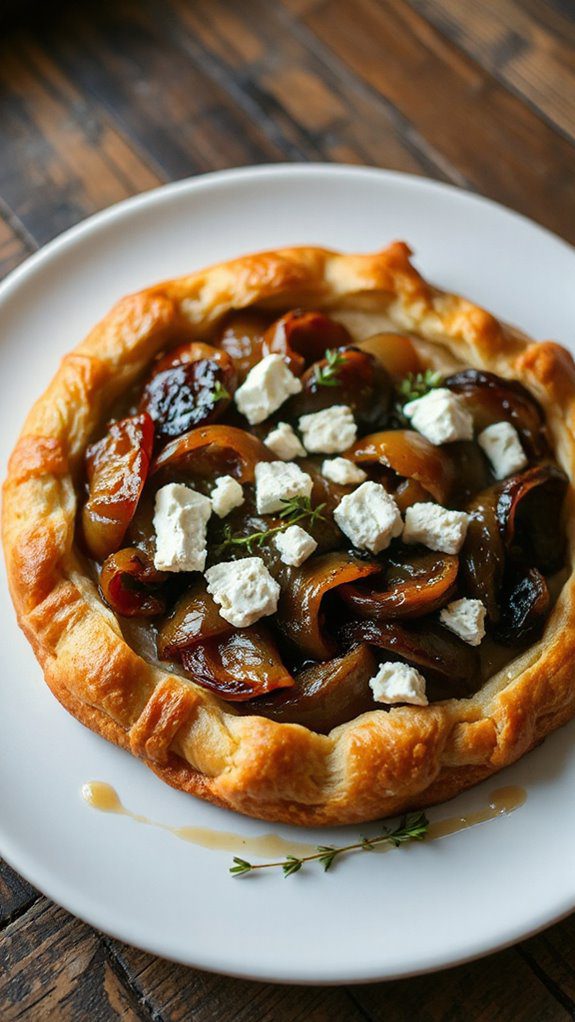
The Caramelized Onion and Goat Cheese Tart is a savory dish that blends the sweetness of caramelized onions with the tangy flavor of goat cheese, all encased in a buttery, flaky pastry.
This tart makes for an elegant starter or a delightful main dish, perfect for entertaining guests or enjoying a cozy dinner at home. With a preparation time of around 30 minutes and a baking time of about 30-35 minutes, this dish is relatively simple yet impressive.
Ingredients
- 1 sheet of puff pastry, thawed
- 2 large onions, thinly sliced
- 2 tablespoons olive oil
- 1 tablespoon butter
- 1 teaspoon sugar
- Salt and pepper to taste
- 4 ounces goat cheese, crumbled
- 1 teaspoon fresh thyme leaves (or ½ teaspoon dried thyme)
- 1 egg, beaten (for egg wash)
- Optional: balsamic reduction for drizzling
Cooking Steps
- Preheat the Oven: Preheat your oven to 400°F (200°C).
- Caramelize the Onions: In a large skillet, heat the olive oil and butter over medium heat. Add the sliced onions, sugar, salt, and pepper. Cook, stirring occasionally, for about 20-25 minutes, until the onions are deep golden brown and caramelized.
- Prepare the Puff Pastry: While the onions are cooking, roll out the puff pastry on a floured surface to fit your tart pan. Carefully place the pastry into the tart pan and trim the edges. Prick the bottom with a fork to prevent bubbling.
- Assemble the Tart: Once the onions are caramelized, spread them evenly over the pastry. Top with crumbled goat cheese and sprinkle with fresh thyme.
- Bake the Tart: Brush the edges of the pastry with the beaten egg. Bake in the preheated oven for 30-35 minutes, or until the pastry is golden and crisp.
- Serve: Allow the tart to cool for a few minutes, then slice and serve. Drizzle with balsamic reduction if desired.
Variations and Tips
- Add Protein: Incorporate cooked bacon or prosciutto for a heartier version.
- Vegetarian Delight: For a unique twist, add roasted red peppers or spinach along with the onions.
- Cheese Alternatives: Substitute goat cheese with feta or ricotta for a different flavor profile.
- Serving Suggestions: This tart pairs beautifully with a light salad or can be served as part of a cheese and charcuterie board.
- Storage: Leftovers can be stored in the refrigerator for up to 2 days; reheat in the oven for crispy pastry.


