Easter desserts offer a delightful array of flavors and creativity. Classic Carrot Cake with Cream Cheese Frosting boasts warm spices, while Chocolate Bunny Cupcakes bring a whimsical touch to celebrations. For a tart sweetness, Lemon Meringue Pie shines with its fluffy topping. Coconut Cream Easter Eggs add a tropical twist, and Raspberry Lemonade Bars provide a revitalizing zing. Each dessert is perfect for sharing and enhancing festive gatherings, inviting exploration into more delectable options ahead.
Classic Carrot Cake With Cream Cheese Frosting
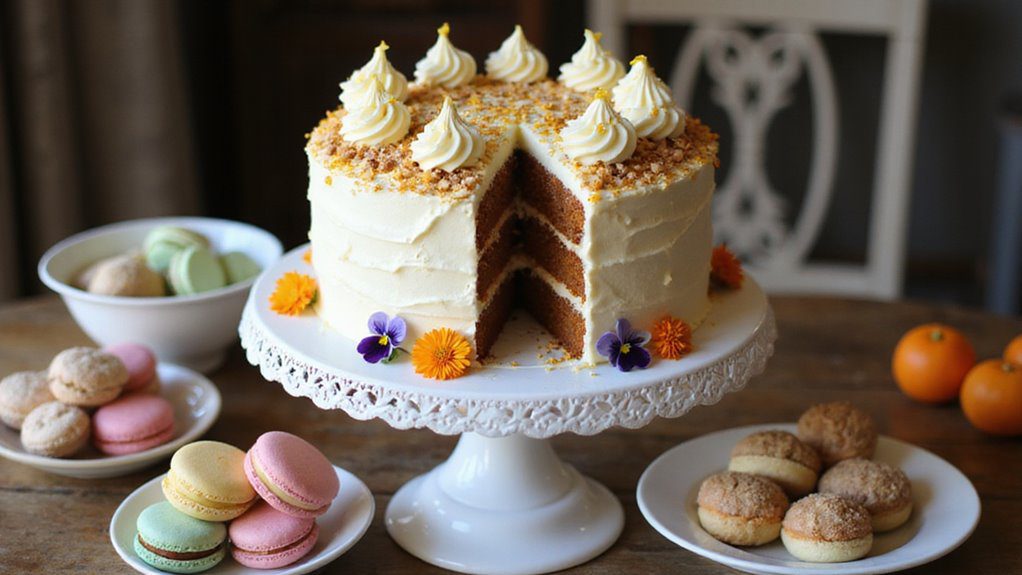
Classic Carrot Cake with Cream Cheese Frosting is a delightful and moist dessert that brings together the warm flavors of cinnamon and nutmeg with the natural sweetness of carrots. This cake is perfect for Easter gatherings, family celebrations, or any occasion where a comforting and homemade treat is needed.
With a preparation time of around 30 minutes and a baking time of about 30-35 minutes, you can have this crowd-pleaser ready to impress in no time!
Ingredients:
- 2 cups all-purpose flour
- 2 cups granulated sugar
- 1 teaspoon baking powder
- 1 teaspoon baking soda
- 1 teaspoon ground cinnamon
- 1/2 teaspoon ground nutmeg
- 1/2 teaspoon salt
- 1 cup vegetable oil
- 4 large eggs
- 3 cups finely grated carrots
- 1 cup crushed pineapple, well-drained
- 1 cup chopped walnuts or pecans (optional)
Instructions:
- Preheat your oven to 350°F (175°C). Grease and flour two 9-inch round cake pans.
- In a large mixing bowl, whisk together the flour, sugar, baking powder, baking soda, cinnamon, nutmeg, and salt until well combined.
- In another bowl, combine the vegetable oil and eggs, whisking until smooth. Add the grated carrots and crushed pineapple, mixing until evenly distributed.
- Gradually add the wet ingredients to the dry ingredients, stirring just until combined. Be careful not to overmix. If using, fold in the chopped nuts.
- Divide the batter evenly between the prepared cake pans. Bake for 30-35 minutes, or until a toothpick inserted in the center comes out clean. Allow the cakes to cool in the pans for 10 minutes before transferring them to a wire rack to cool completely.
- While the cakes cool, prepare the cream cheese frosting by beating together 8 oz of cream cheese, 1/2 cup of unsalted butter (softened), 4 cups of powdered sugar, and 1 teaspoon of vanilla extract until smooth and fluffy.
- Once the cakes are completely cooled, spread a layer of cream cheese frosting on top of one cake layer, place the second layer on top, and then frost the top and sides of the cake. Decorate with additional chopped nuts or grated carrots if desired.
Variations and Tips:
- For a spicier flavor, consider adding 1/2 teaspoon of ground ginger.
- If you prefer a less sweet cake, reduce the sugar to 1.5 cups without compromising the texture.
- You can substitute all-purpose flour with whole wheat flour for a healthier version.
- Make it a layered cake by adding multiple layers and frosting in between each layer.
- The cake can be baked in a 9×13 inch pan for a simple sheet cake version, reducing the baking time by about 5-10 minutes.
- For added decadence, consider drizzling the frosting over the cake instead of spreading it for a different presentation.
Enjoy this deliciously rich Classic Carrot Cake with its irresistible cream cheese frosting as a centerpiece for your Easter celebrations!
- The Original Pro Chopper - Our superstar veggie slicer has been creating waves on TikTok! Simple to use,...
- Easy Meal Prep with Rust-Resistant Blades - Our vegetable chopper is perfect for anyone who wants to eat...
- 5-Star Design - The soft-grip TPU handle ensures controlled chopping, while the non-skid rubber base...
Chocolate Bunny Cupcakes

Chocolate Bunny Cupcakes are a delightful and festive dessert, perfect for celebrating Easter with family and friends. These cupcakes are fluffy and moist, topped with rich chocolate frosting and an adorable chocolate bunny for a whimsical touch that will brighten up any dessert table.
With a preparation time of about 40 minutes (plus additional time for cooling), these treats are ideal for bakers of all skill levels looking to captivate their guests with something sweet and playful.
Ingredients:
- 1 cup all-purpose flour
- 1/2 cup unsweetened cocoa powder
- 1 cup granulated sugar
- 1/2 teaspoon baking soda
- 1/2 teaspoon baking powder
- 1/4 teaspoon salt
- 1/2 cup unsalted butter, softened
- 2 large eggs
- 1/2 cup milk
- 1 teaspoon vanilla extract
- Chocolate frosting (store-bought or homemade)
- Chocolate bunny candies (for decoration)
- Sprinkles (optional)
Instructions:
- Preheat your oven to 350°F (175°C) and line a muffin pan with cupcake liners.
- In a large mixing bowl, whisk together the flour, cocoa powder, sugar, baking soda, baking powder, and salt until well combined.
- Add the softened butter, eggs, milk, and vanilla extract to the dry ingredients. Beat the mixture with an electric mixer on medium speed for about 2 minutes until smooth and well blended.
- Pour the batter evenly into the cupcake liners, filling each about 2/3 full.
- Bake in the preheated oven for 18-20 minutes, or until a toothpick inserted into the center of a cupcake comes out clean.
- Once baked, remove the cupcakes from the oven and let them cool in the pan for 5 minutes before transferring them to a wire rack to cool completely.
- Once the cupcakes are cooled, generously frost each cupcake with chocolate frosting using a spatula or piping bag.
- Top each frosted cupcake with a chocolate bunny candy. For an additional festive touch, sprinkle with colorful sprinkles if desired.
Variations and Tips:
- For a different flavor, try adding espresso powder to the batter for a mocha twist or use vanilla frosting for a classic pairing.
- If you want to make these cupcakes a day ahead, store them unfrosted in an airtight container at room temperature. Frost just before serving to keep the cupcakes fresh.
- To guarantee even baking, rotate the muffin pan halfway through the baking time.
- For a fun surprise, consider adding a mini chocolate egg inside the cupcake before baking. Just place it in the center of the batter and cover it with more batter.
Enjoy these Chocolate Bunny Cupcakes as a charming centerpiece on your Easter celebration!
- Makes Everything Simple : Just forget your bagged cheese! Only turn the handle for several times and get...
- Premium Material : All parts of the rotary cheese grater are made of food grade ABS material, no BPA. The...
- Three Option Grater : The parmesan cheese grater finishes food preparation with slicing, shredding and...
Lemon Meringue Pie
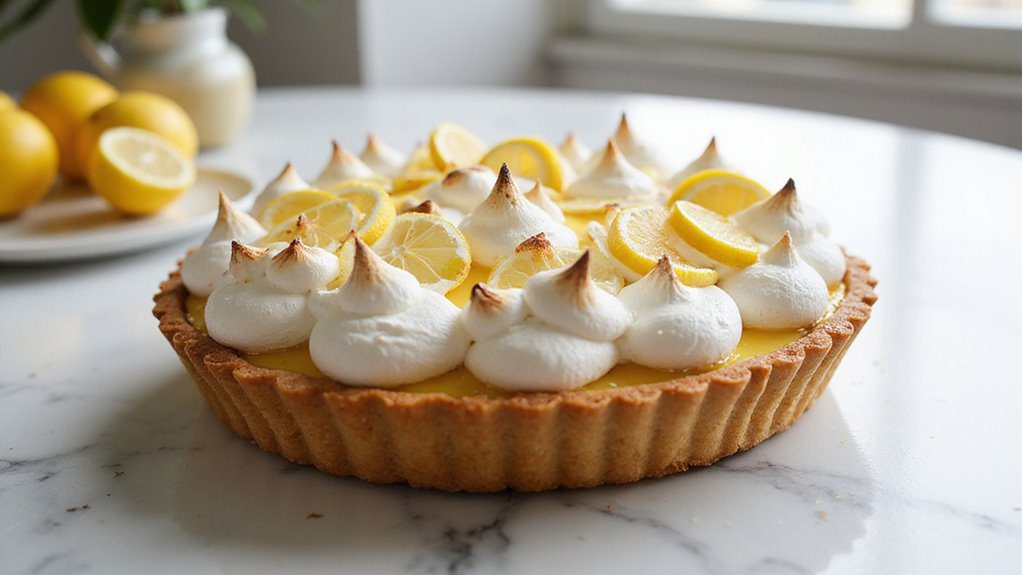
Lemon Meringue Pie is a classic dessert that perfectly balances tart and sweet flavors with a light, fluffy meringue topping.
This delightful dish is ideal for springtime celebrations, such as Easter, and is sure to impress family and friends with its vibrant citrus flavor. The preparation time for this pie is approximately 1.5 to 2 hours, including cooling time, making it a manageable yet impressive addition to your dessert table.
Ingredients:
- 1 pre-made pie crust (or homemade if preferred)
- 1 cup granulated sugar
- 2 tablespoons cornstarch
- 1/4 teaspoon salt
- 1 1/2 cups water
- 3 large egg yolks, beaten
- 1/4 cup fresh lemon juice
- Zest of 1 lemon
- 2 tablespoons unsalted butter
- 1 teaspoon vanilla extract
- 3 large egg whites
- 1/4 teaspoon cream of tartar
- 1/4 cup granulated sugar (for meringue)
Cooking Steps:
1. Pre-bake the Pie Crust: Preheat your oven to 350°F (175°C). Place the pie crust in a 9-inch pie dish and prick the bottom with a fork. Bake for 10-12 minutes or until lightly golden. Remove from the oven and let cool.
2. Make the Lemon Filling: In a medium saucepan, whisk together 1 cup sugar, cornstarch, and salt. Gradually add water while continuously whisking until smooth.
Place the saucepan over medium heat and cook, stirring constantly until the mixture thickens and starts to boil.
3. Add Egg Yolks: In a small bowl, mix the beaten egg yolks with a little of the hot mixture, then slowly stir the egg yolk mixture back into the saucepan. Cook for another minute, then remove from heat.
Stir in the lemon juice, lemon zest, butter, and vanilla extract until fully combined.
4. Pour Filling into Crust: Pour the lemon filling into the pre-baked pie crust, smoothing the top with a spatula.
5. Make the Meringue: In a clean bowl, beat the egg whites until frothy. Add the cream of tartar and continue beating until soft peaks form. Gradually add 1/4 cup sugar, one tablespoon at a time, until stiff peaks form.
6. Top the Pie with Meringue: Spoon the meringue over the lemon filling, spreading it all the way to the edges to seal it. Use the back of a spoon to create peaks and swirls for a decorative finish.
7. Bake the Pie: Return the pie to the oven and bake at 350°F (175°C) for 10-12 minutes or until the meringue is golden brown.
Remove from the oven and let it cool at room temperature.
8. Chill and Serve: Once cooled, refrigerate the pie for at least 2 hours before serving to set the filling. Slice and enjoy!
Variations and Tips:
- For an extra kick of flavor, you can add a pinch of salt to the meringue, which enhances the taste of the egg whites.
- Consider adding a few drops of yellow food coloring to the lemon filling if you desire a more vibrant appearance.
- You can experiment by swapping out lemon juice with other citrus juices, like lime or orange, for different flavor profiles.
- Confirm that no yolk gets mixed with the egg whites to achieve the best meringue consistency.
- Leftover pie can be covered and stored in the refrigerator for up to 3 days.
- 💰 REDUCE WASTE AND SAVE MONEY: Chef Preserve keeps FOOD FRESH 5 TIMES LONGER than non-vacuum storage...
- ✅ POWERFUL, QUICK & EASY TO USE: Simply press the button to start. The device vacuum seals a bag in 5...
- ♻️ REUSABLE & RESEALABLE BAGS: Chef Preserve comes with dishwasher, freezer, refrigerator, and...
Coconut Cream Easter Eggs

Coconut Cream Easter Eggs are a delightful and festive treat perfect for celebrating Easter. These deliciously sweet confections are loved by coconut enthusiasts and make a wonderful addition to any Easter dessert table or springtime gathering.
With a preparation time of about 30 minutes and a chilling time of 1-2 hours, these creamy goodies might just become a new family favorite during the holiday season.
Ingredients:
- 2 cups sweetened shredded coconut
- 1 cup powdered sugar
- 1/2 cup cream cheese, softened
- 1/4 cup unsweetened coconut milk
- 1 teaspoon vanilla extract
- 1 cup chocolate chips (milk, dark, or white chocolate)
- 1 tablespoon coconut oil (optional, for melting chocolate)
- Food coloring (optional for decorative purposes)
Cooking Steps:
- In a mixing bowl, combine the shredded coconut, powdered sugar, cream cheese, coconut milk, and vanilla extract. Mix until well blended and a cohesive mixture forms.
- Using your hands or a cookie scoop, shape the mixture into egg shapes (about 1.5 inches long) and place them on a parchment-lined baking sheet.
- Once all the eggs are shaped, place the baking sheet in the refrigerator for 1-2 hours to allow the eggs to firm up.
- In a microwave-safe bowl, melt the chocolate chips with the coconut oil (if using) in 30-second intervals, stirring in between until completely smooth.
- Dip each chilled coconut egg into the melted chocolate, ensuring it is fully coated. Use a fork to lift it out, allowing excess chocolate to drip off before placing it back on the parchment paper.
- Optional: If desired, you can add a few drops of food coloring to the melted chocolate for a fun twist, or sprinkle them with additional shredded coconut or colorful sprinkles before the chocolate sets.
- Place the coated eggs back in the refrigerator to set for about 30 minutes before serving.
Variations and Tips:
- For a different flavor, consider adding a teaspoon of almond extract instead of vanilla.
- You can create variations by mixing in ingredients like chopped nuts, dried fruit, or even a hint of lime zest.
- If you're short on time, you can use store-bought coconut cream or frosting, mixing it with the shredded coconut for a quicker alternative.
- Store any leftover eggs in an airtight container in the refrigerator for up to one week. They also freeze beautifully for up to 3 months!
- Generous Capacity: 7-quart slow cooker that comfortably serves 9+ people or fits a 7-pound roast
- Cooking Flexibility: High or low slow cooking settings, with convenient warm function for ideal serving...
- Convenient: Set it and forget it feature enables you to cook while at work or performing daily tasks
Raspberry Lemonade Bars

Raspberry Lemonade Bars are a zesty and invigorating dessert that perfectly captures the essence of spring and summer. With their vibrant flavors and beautiful presentation, these bars make an ideal treat for Easter gatherings, picnics, or any sunny day. The preparation time is about 20 minutes, with an additional chilling time of at least 2 hours, making it a relatively quick dessert that will wow your family and friends.
Ingredients:
- 1 cup all-purpose flour
- 1/4 cup powdered sugar
- 1/2 cup unsalted butter, melted
- 1/2 cup granulated sugar
- 2 large eggs
- 1/4 cup fresh lemon juice
- 1 tablespoon lemon zest
- 1 cup fresh raspberries (or frozen, thawed)
- 1/4 teaspoon baking powder
- Pinch of salt
- Additional powdered sugar for dusting
Instructions:
- Preheat the oven to 350°F (175°C). Line an 8×8-inch baking dish with parchment paper, leaving an overhang for easy removal.
- Make the crust: In a medium bowl, combine flour, powdered sugar, and melted butter. Mix until crumbly. Press the mixture evenly into the bottom of the prepared baking dish. Bake for 15 minutes, or until lightly golden.
- Prepare the filling: In a separate bowl, whisk together granulated sugar, eggs, lemon juice, lemon zest, baking powder, and a pinch of salt until smooth. Gently fold in raspberries.
- Pour the filling over the baked crust and spread it evenly. Bake for an additional 20-25 minutes, or until the filling is set and slightly jiggly in the center.
- Cool the bars in the pan for about 10 minutes before transferring to the refrigerator to chill for at least 2 hours.
- Serve: Once fully chilled, lift the bars out of the pan using the parchment overhang. Dust with powdered sugar, slice into squares, and enjoy!
Variations and Tips:
- Add a twist: Try swapping out raspberries for blackberries or blueberries for a different fruity flavor.
- Zest it up: Add extra lemon zest to the filling for a more intense lemon flavor.
- Make it gluten-free: Substitute all-purpose flour with a 1:1 gluten-free baking flour.
- Consider garnishing with whipped cream or a dollop of lemon curd for extra decadence.
- Store leftovers in the refrigerator for up to a week, or freeze for longer storage.
- 100% Leak-proof: Guaranteed no-spill seal and secure latches
- Crystal-clear Tritan Built: Stain-resistant and odor-resistant material for a clear view of contents
- Lightweight & Sturdy: Easy to carry, yet durable for everyday use
Funfetti Easter Cookie Bars

Funfetti Easter Cookie Bars are a delightful and colorful treat that captures the spirit of Easter celebrations.
These festive dessert bars are perfect for family gatherings, Easter egg hunts, or simply to enjoy during the holiday season. Easy to make and even easier to eat, they require about 30 minutes of preparation and yield a soft, chewy texture with a burst of funfetti sprinkles in each bite.
Ingredients:
- 1 cup unsalted butter, softened
- 1 cup granulated sugar
- 1 cup packed brown sugar
- 2 large eggs
- 1 teaspoon vanilla extract
- 2 ½ cups all-purpose flour
- 1 teaspoon baking powder
- ½ teaspoon baking soda
- ½ teaspoon salt
- 1 cup rainbow sprinkles (plus extra for topping)
- Optional: ½ cup white chocolate chips
Cooking Steps:
- Preheat your oven to 350°F (175°C) and grease a 9×13 inch baking pan or line it with parchment paper for easy removal.
- In a large mixing bowl, cream together the softened butter, granulated sugar, and brown sugar until light and fluffy, about 2-3 minutes.
- Add the eggs one at a time, mixing well after each addition. Stir in the vanilla extract.
- In a separate bowl, whisk together the flour, baking powder, baking soda, and salt.
- Gradually add the dry ingredients to the wet mixture, mixing until just combined. Be careful not to overmix.
- Fold in the rainbow sprinkles (and white chocolate chips if using) until evenly distributed throughout the dough.
- Spread the cookie dough evenly into the prepared baking pan and sprinkle extra sprinkles on top if desired.
- Bake in the preheated oven for 20-25 minutes, or until the edges are lightly golden and a toothpick inserted into the center comes out clean.
- Remove from oven and let cool in the pan for at least 10 minutes before slicing into bars.
Variations and Tips:
- Add-Ins: Feel free to mix in chopped nuts, mini marshmallows, or other candies for added flavor and texture.
- Decorating: Top the bars with a simple glaze made of powdered sugar and milk or frosting for an extra sweet touch.
- Storage: Store leftover bars in an airtight container at room temperature for up to 5 days, or refrigerate for a longer shelf life.
- Freezing: These cookie bars can be frozen; cut them individually and wrap each piece in plastic wrap before placing them in a freezer bag.
- Make it Gluten-Free: Substitute all-purpose flour with a gluten-free blend to accommodate dietary restrictions.
- 𝗘𝗳𝗳𝗼𝗿𝘁𝗹𝗲𝘀𝘀 𝗪𝗲𝗶𝗴𝗵𝗶𝗻𝗴: Supports 5 units...
- 𝗣𝗿𝗲𝗰𝗶𝘀𝗲 𝗥𝗲𝘀𝘂𝗹𝘁𝘀: Accurately weighs up to 11 lb/5 kg with 1 g...
- 𝗦𝗶𝗺𝗽𝗹𝗲 & 𝗖𝗼𝗺𝗽𝗮𝗰𝘁: The small and sleek scale is a perfect fit for...
Decadent Chocolate Trifle
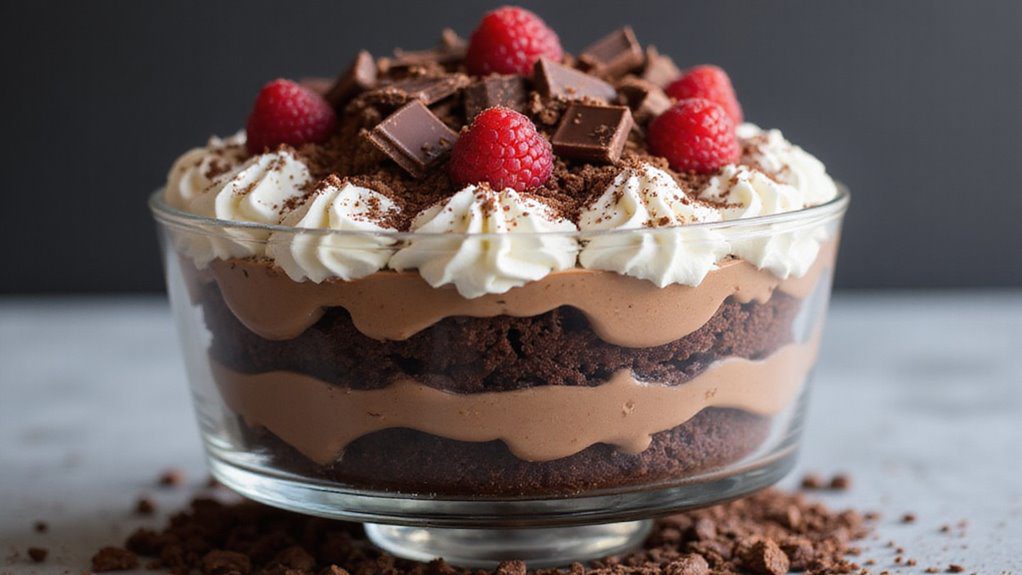
A decadent chocolate trifle is a luxurious dessert that layers rich chocolate cake, velvety chocolate mousse, and fluffy whipped cream, all beautifully presented in a glass bowl or individual cups.
This showstopper is perfect for festivities like Easter, family gatherings, or any special occasion where you want to impress your guests. Preparation time is approximately 30 minutes, but make sure to allow additional time for chilling.
Ingredients:
- 1 box chocolate cake mix (plus ingredients to prepare)
- 2 cups heavy cream
- 1 cup powdered sugar
- 1 cup semi-sweet chocolate chips
- 1 cup chocolate pudding mix
- 3 cups milk (for pudding)
- 1 tsp vanilla extract
- Chocolate shavings or sprinkles (for garnish)
Cooking Steps:
- Bake the Chocolate Cake: Follow the instructions on the box to prepare the chocolate cake. Allow it to cool completely before cutting it into small cubes.
- Prepare the Chocolate Pudding: In a mixing bowl, combine the chocolate pudding mix and 3 cups of milk. Whisk until smooth and sits for about 5 minutes until it thickens.
- Make the Chocolate Ganache: In a microwave-safe bowl, heat the semi-sweet chocolate chips in the microwave in 30-second intervals until melted and smooth. Allow it to cool slightly before proceeding.
- Whip the Cream: In a separate bowl, whip the heavy cream and powdered sugar using a hand mixer until soft peaks form. Add in the vanilla extract.
- Layer the Trifle: In a large glass bowl or individual cups, start by adding a layer of chocolate cake cubes, followed by a layer of chocolate pudding, then a layer of whipped cream. Repeat the layers until all ingredients are used, finishing with whipped cream on top.
- Drizzle the Ganache: Once you've built the final layer, drizzle the slightly cooled chocolate ganache over the top. Finish with chocolate shavings or sprinkles for an extra touch.
- Chill: Cover the trifle with plastic wrap and refrigerate for at least 2 hours to allow the flavors to meld together.
Variations and Tips:
- Flavor Variations: Experiment by adding layers of fruit, such as raspberries or strawberries, between the chocolate layers for a fresh contrast.
- Alcohol Infusion: For an adult version, you can add a splash of coffee liqueur or rum to the whipped cream or cake layers.
- Make-Ahead: This dessert can be prepared a day in advance, making it perfect for parties where you need to save time.
- Presentation: Consider using clear glasses for individual servings to showcase the beautiful layers of the dessert.
Enjoy your decadent chocolate trifle with friends and family this Easter!
- Instant Read Food Thermometer | Our instant read thermometer features a temperature probe and advanced,...
- Multi-Use | From bbq thermometer to baking thermometer, our digital food thermometer for cooking is...
- Easy-Read Digital Thermometer For Cooking | Large instant thermometer dial with bright blue backlight...
Strawberry Shortcake Parfaits
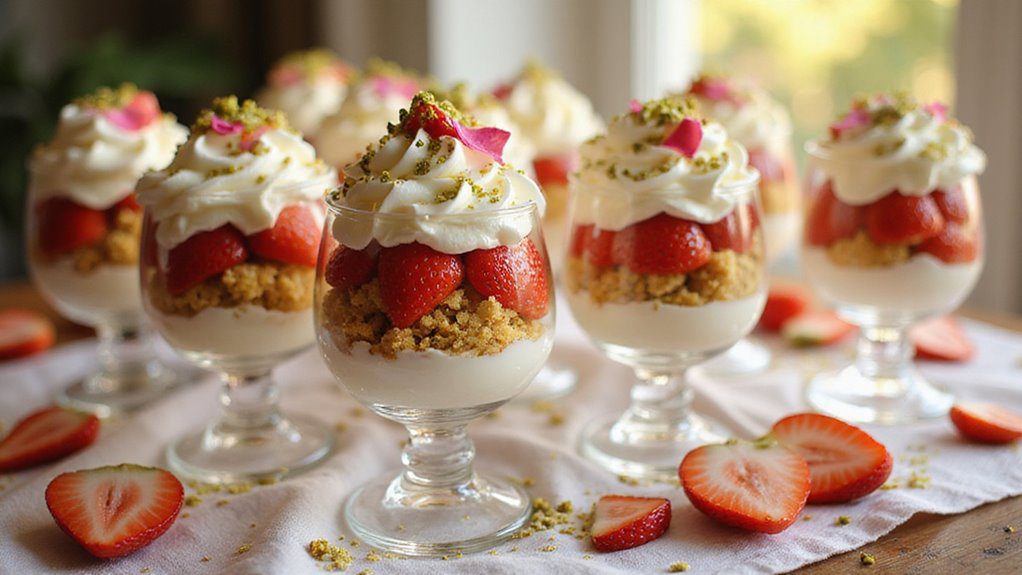
Strawberry Shortcake Parfaits are a delightful and visually appealing dessert that combines layers of fresh strawberries, whipped cream, and soft, buttery shortcake. This elegant treat is perfect for Easter gatherings, spring celebrations, or simply as a revitalizing dessert to enjoy with family and friends.
With a preparation time of about 30 minutes, these parfaits are easy to assemble and can be made ahead of time, allowing you to enjoy your time with loved ones.
Ingredients:
- 1 pound fresh strawberries, hulled and sliced
- 2 tablespoons granulated sugar
- 1 cup heavy whipping cream
- 1 tablespoon powdered sugar
- 1 teaspoon vanilla extract
- 8 shortcake biscuits or sponge cake pieces
- Fresh mint leaves for garnish (optional)
Cooking Steps:
- In a medium bowl, combine the sliced strawberries and granulated sugar. Toss gently and let them sit for about 15 minutes to macerate, allowing the flavors to meld and the strawberries to release their juices.
- In a separate bowl, whip the heavy cream, powdered sugar, and vanilla extract until soft peaks form. Be careful not to overbeat, as you want a light and fluffy texture.
- Prepare the shortcake biscuits or sponge cake by breaking them into bite-sized pieces.
- In serving glasses or bowls, start layering the parfaits by adding a layer of cake at the bottom, followed by a layer of macerated strawberries and a dollop of whipped cream. Repeat the layers until the glasses are filled, finishing with a layer of whipped cream on top.
- Garnish the parfaits with a few strawberry slices and a mint leaf if desired. Serve immediately or refrigerate until ready to serve.
Variations and Tips:
- You can substitute strawberries with other fresh berries, such as raspberries, blueberries, or a mix for a berry medley parfait.
- For a gluten-free version, use gluten-free cake or biscuits.
- Add a layer of lemon curd or yogurt for a tangy twist.
- If you prefer a sweeter treat, consider adding a splash of flavored liqueur, such as strawberry or orange liqueur, to the strawberries.
- Assemble the parfaits just before serving if you're using delicate ingredients, such as cookies or pastries, to keep the layers intact and prevent sogginess.
Enjoy this vibrant dessert that represents the essence of spring!
- Versatile 54-Piece Collection: Elevate your kitchen with the Home Hero 54-Piece Kitchen Utensil Set, a...
- Durable and Long-Lasting: Crafted from premium stainless steel, these kitchen utensils are designed to...
- Perfect Holiday Gift: Delight your loved ones with this kitchen utensils gift set this festive season....
Peep-Topped Brownies
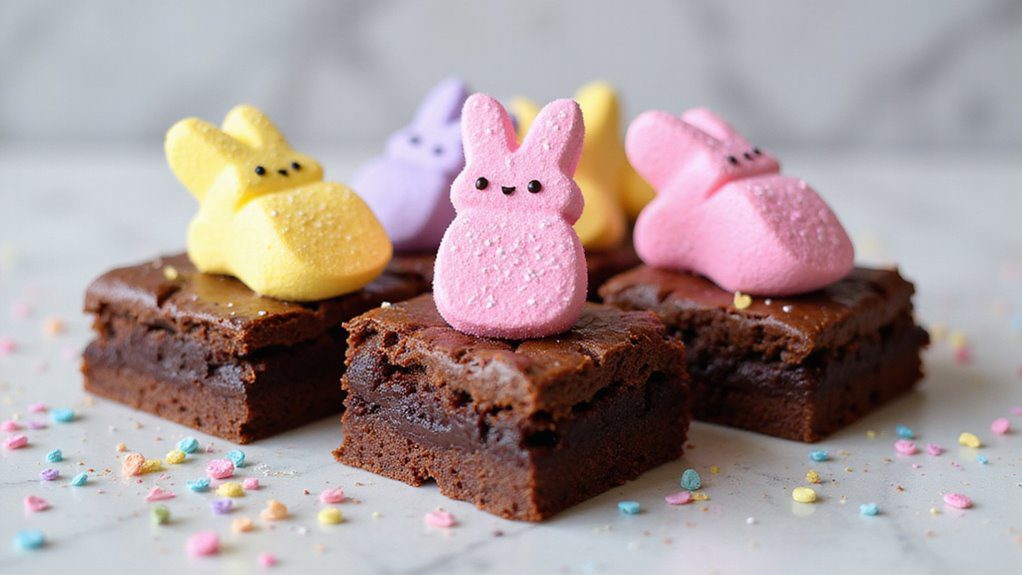
Peep-topped brownies are a delightful and festive treat that combines rich, fudgy brownies with colorful marshmallow Peeps, making them perfect for Easter gatherings or springtime celebrations. This easy-to-make dessert comes together in just under an hour and is sure to please both kids and adults alike.
The combination of chocolatey goodness topped with playful marshmallow bunnies or chicks creates a sweet centerpiece for any holiday table.
Ingredients:
- 1 box of brownie mix (plus ingredients required on the package)
- 1 cup chocolate chips (optional)
- 12-16 Peeps (bunnies or chicks)
- 1 cup powdered sugar (for drizzling)
- 1-2 tablespoons milk (for drizzling)
Cooking Steps:
- Preheat your oven according to the brownie mix package instructions. Prepare an 8×8 inch baking dish by greasing it or lining it with parchment paper.
- In a mixing bowl, combine the brownie mix with the ingredients specified on the box (usually water, oil, and eggs). Stir until just combined. If desired, fold in the chocolate chips for extra richness.
- Pour the brownie batter into the prepared baking dish and spread it evenly. Bake according to package directions, usually around 20-25 minutes, or until a toothpick inserted in the center comes out clean or with a few moist crumbs.
- Remove the brownies from the oven and let them cool for about 10 minutes.
- While the brownies are still warm, arrange the Peeps on top in a fun pattern. You can place them facing up for a colorful look or slightly press them down into the brownies.
- Allow the brownies to cool completely before cutting them into squares.
- For an extra special touch, mix the powdered sugar with milk to create a drizzleable icing. Drizzle over the cooled brownies for a sweet finish.
Variations and Tips:
- Experiment with different flavors of brownies, such as blonde brownies or funfetti mixes, to switch up the base.
- For a crunchier texture, add nuts or toffee bits to the brownie batter.
- If you can't find Peeps, use other edible decorations like chocolate eggs or sprinkles for a festive look.
- Store leftover brownies in an airtight container at room temperature for up to three days, or refrigerate for up to a week for fresher taste. Enjoy!
- 24-ounce insulated stainless-steel water bottle with a FreeSip spout and push-button lid with lock
- Patented FreeSip spout designed for either sipping upright through the built-in straw or tilting back to...
- Protective push-to-open lid keeps spout clean; convenient carry loop doubles as a lock
No-Bake Cheesecake Bunnies
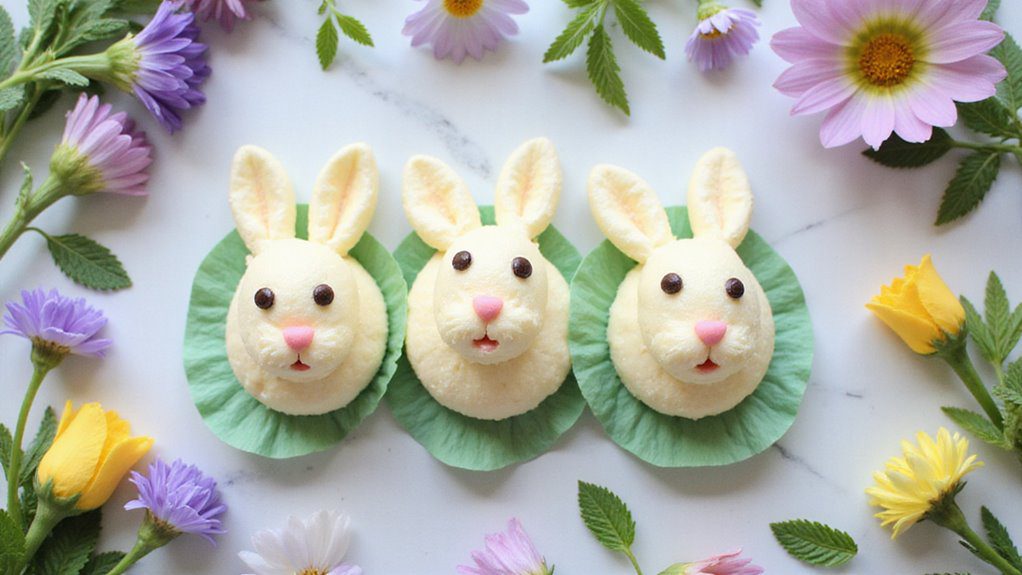
These adorable No-Bake Cheesecake Bunnies are the perfect Easter dessert to bring a smile to both kids and adults alike. They are a light and creamy cheesecake filling nestled in a graham cracker crust, shaped into cute bunny forms.
With no baking required, this dessert is simple to prepare, making it great for busy families or anyone looking to add a festive touch to their Easter celebrations. The preparation time for this delightful treat is approximately 30 minutes, plus chilling time in the refrigerator.
Ingredients:
- 8 oz cream cheese, softened
- 1/2 cup powdered sugar
- 1/2 cup heavy whipping cream
- 1 tsp vanilla extract
- 1/4 cup sour cream
- 1 1/2 cups graham cracker crumbs
- 1/4 cup unsalted butter, melted
- 1/4 cup mini chocolate chips (for bunny eyes)
- Food coloring (optional; pink or blue for ears)
Instructions:
- In a large mixing bowl, combine the softened cream cheese and powdered sugar. Beat with an electric mixer until smooth and creamy.
- Add the heavy whipping cream, vanilla extract, and sour cream to the mixture. Beat again until the mixture is thick and fluffy.
- In a separate bowl, mix the graham cracker crumbs and melted butter until well combined. This will be the base for your bunnies.
- Using bunny-shaped molds or cookie cutters, place a layer of the graham cracker mixture at the bottom to form the crust. Press firmly to set.
- Spoon the cheesecake filling into the bunny-shaped molds on top of the crust. Smooth out the top with a spatula.
- If desired, tint some of the cheesecake mixture with food coloring to create bunny ears. Pour the tinted mixture at the top of the bunny shapes.
- Refrigerate for at least 4 hours, or until fully set.
- Once set, gently remove the cheesecake bunnies from the molds. Decorate each bunny with mini chocolate chips for eyes.
Variations & Tips:
- Consider adding different flavors, such as lemon or orange zest to the cheesecake filling for a fruity twist.
- Instead of chocolate chips, use colored candy melts for eyes or other decorations.
- For a festive touch, serve the bunnies on a platter surrounded by small chocolate eggs or spring-themed candies.
- If you do not have bunny molds, you can use cupcake liners to create individual servings, simply shaping them as best as possible.
- To make this dessert even more playful, consider adding edible glitter for a sparkling presentation.
Enjoy your delightful No-Bake Cheesecake Bunnies this Easter, and have fun decorating them together with family or friends!
Springtime Fruit Tart

A Springtime Fruit Tart is a delightful, invigorating dessert perfect for Easter gatherings or any spring celebration. This vibrant tart features a buttery, flaky crust filled with creamy custard and topped with an array of seasonal fresh fruits. It's an ideal choice for families, friends, or anyone looking to impress their guests with a stunning yet simple dessert.
The preparation time for this tart is approximately 1 hour, with an additional chilling time to guarantee perfect servings.
Ingredients:
- 1 pre-made 9-inch tart crust
- 1 cup heavy cream
- 1/2 cup powdered sugar
- 1 teaspoon vanilla extract
- 1/2 cup mascarpone cheese
- 1 cup mixed seasonal fruits (such as strawberries, blueberries, kiwi, and raspberries)
- Mint leaves for garnish (optional)
- 1 cup fruit glaze (apricot or strawberry) for topping (optional)
Cooking Steps:
- Prepare the Tart Crust: If you are using a pre-made tart crust, place it in a tart pan and press it firmly against the sides. Bake according to package instructions until golden brown. Let it cool completely.
- Make the Cream Filling: In a medium bowl, whip the heavy cream with the powdered sugar and vanilla extract until soft peaks form. Gently fold in the mascarpone cheese until the mixture is smooth and creamy.
- Assemble the Tart: Once the crust has cooled, pour the cream filling into the tart shell and spread it evenly with a spatula.
- Add the Fruit: Decorate the top of the cream filling with an assortment of mixed seasonal fruits, arranging them in a visually appealing pattern.
- Glaze the Tart (optional): If desired, warm the fruit glaze slightly in a saucepan until it becomes liquid. Brush the glaze over the fruit to give it a beautiful shine and help it stay fresh.
- Chill and Serve: Refrigerate the tart for at least 1 hour to allow the flavors to meld and the filling to set. Serve chilled, garnished with mint leaves if desired.
Variations and Tips:
- Fruit Options: Feel free to use any of your favorite fruits, such as peaches, cherries, or bananas, depending on what is in season.
- Gluten-Free Option: Use a gluten-free tart crust or make your own using almond flour and coconut flour.
- Custard Alternative: For a richer custard, replace the mascarpone with vanilla pudding or pastry cream.
- Serving Suggestions: This tart pairs beautifully with a scoop of vanilla ice cream or dollops of whipped cream for added richness.
- Storing: The tart is best enjoyed the day it is made, but you may store any leftovers in the refrigerator for 1-2 days. Keep in mind that the crust may become softer over time.
Pistachio Pudding Dessert

Pistachio pudding dessert is a delightful, creamy treat that brings a touch of elegance to any Easter gathering.
This no-bake dessert is perfect for those who enjoy a light yet flavorful finish to their meal. It features the rich and nutty flavor of pistachios complemented by a velvety pudding texture, making it ideal for both adults and kids alike.
The preparation time is relatively short, taking about 20 minutes, but it requires a few hours to chill in the refrigerator before serving.
Ingredients:
- 1 package (3.4 ounces) instant pistachio pudding mix
- 2 cups cold milk
- 1 cup whipped topping (like Cool Whip)
- 1/2 cup crushed pistachios (plus extra for garnish)
- 1/2 cup mini marshmallows
- 1/4 cup sweetened shredded coconut (optional)
Cooking Steps:
- In a large mixing bowl, whisk together the instant pistachio pudding mix and cold milk until it thickens, about 2 minutes.
- Gently fold in the whipped topping until fully combined.
- Stir in the crushed pistachios, mini marshmallows, and shredded coconut (if using).
- Transfer the mixture into a serving bowl or individual dessert cups.
- Cover with plastic wrap and refrigerate for at least 2-4 hours, or until set.
- Before serving, garnish with extra crushed pistachios on top.
Variations and Tips:
- For a richer taste, substitute half of the milk with heavy cream.
- You can add a layer of chocolate graham cracker crumbs at the bottom of the serving dish for an added crunch.
- For a nut-free version, you can replace crushed pistachios with sunflower seeds or omit them entirely.
- Feel free to experiment with other flavors of pudding; try almond or vanilla for a different twist.
- This dessert can be made a day in advance, making it a perfect choice for busy Easter preparations.
Blueberry Lemon Loaf

Blueberry Lemon Loaf is a delightful dessert that beautifully combines the tartness of lemons with the sweetness of juicy blueberries. This moist and flavorful loaf is perfect for springtime gatherings, brunches, or as a special treat for any occasion.
With a preparation time of about 15 minutes and a baking time of 50-60 minutes, it's an easy yet impressive addition to your Easter dessert table.
Ingredients:
- 1 ½ cups all-purpose flour
- 1 teaspoon baking powder
- ½ teaspoon baking soda
- ¼ teaspoon salt
- ½ cup unsalted butter, softened
- 1 cup granulated sugar
- 2 large eggs
- 1 tablespoon lemon zest
- ¼ cup fresh lemon juice
- ½ teaspoon vanilla extract
- 1 cup fresh or frozen blueberries
- 1 tablespoon all-purpose flour (for coating blueberries)
Cooking Instructions:
- Preheat your oven to 350°F (175°C) and grease a 9×5 inch loaf pan.
- In a medium bowl, whisk together 1 ½ cups of flour, baking powder, baking soda, and salt. Set aside.
- In a large mixing bowl, beat the softened butter and sugar together until light and fluffy, approximately 2-3 minutes.
- Add the eggs one at a time, mixing well after each addition. Incorporate the lemon zest, lemon juice, and vanilla extract into the mixture.
- Gradually add the dry ingredients to the wet ingredients, mixing until just combined.
- Toss the blueberries in 1 tablespoon of flour to coat them, which helps prevent them from sinking during baking. Gently fold the blueberries into the batter.
- Pour the batter into the prepared loaf pan and smooth the top with a spatula.
- Bake for 50-60 minutes, or until a toothpick inserted into the center comes out clean. If the top begins to brown too quickly, cover it loosely with aluminum foil.
- Allow the loaf to cool in the pan for about 10 minutes before transferring it to a wire rack to cool completely.
Variations and Tips:
- For added flavor, consider mixing in a teaspoon of poppy seeds or using vanilla bean instead of extract.
- If using frozen blueberries, do not thaw them prior to mixing to prevent the batter from turning blue.
- Drizzle a simple lemon glaze (made from powdered sugar and lemon juice) over the cooled loaf to enhance the lemon flavor.
- You can substitute Greek yogurt for half of the butter for a lighter version.
- Store the loaf in an airtight container at room temperature for up to 3 days or in the refrigerator for up to a week.
Enjoy!
Almond Joy Cookies
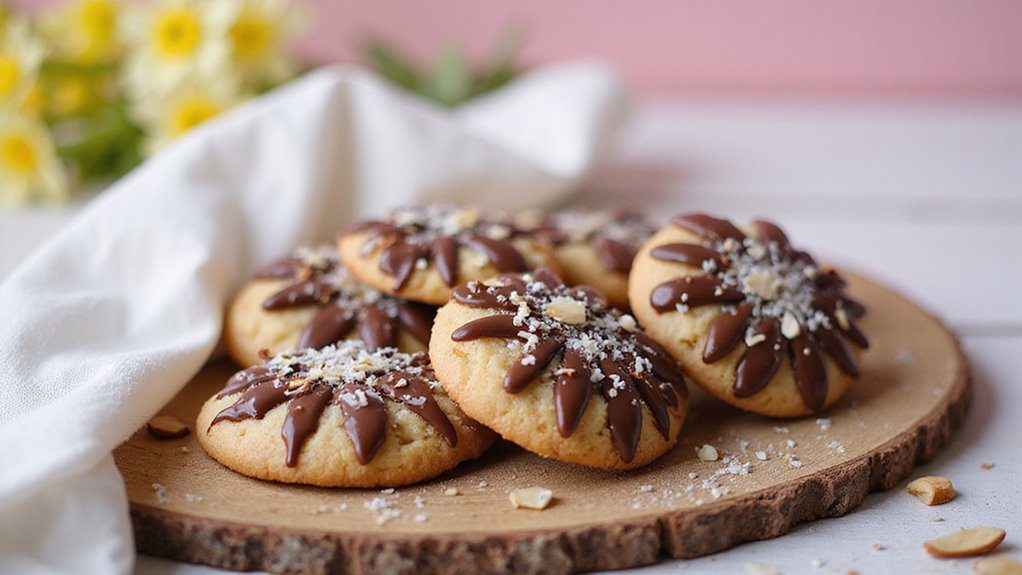
Almond Joy Cookies are delightful treats that combine the rich flavors of chocolate, coconut, and almonds, making them a perfect dessert for Easter gatherings or any celebration.
These cookies are ideal for those who enjoy a sweet and nutty flavor profile, whether for family, friends, or simply as a delightful snack. Preparation takes about 15 minutes, with an additional baking time of 10-12 minutes.
Ingredients:
- 1 cup unsweetened shredded coconut
- 1/2 cup almond flour
- 1/2 cup granulated sugar
- 1/4 cup unsweetened cocoa powder
- 1/2 teaspoon baking powder
- 1/4 teaspoon salt
- 1 large egg
- 1 teaspoon vanilla extract
- 1/2 cup chocolate chips
- 1/2 cup whole almonds
- Optional: 1/4 cup powdered sugar (for dusting)
Cooking Instructions:
- Preheat the Oven: Begin by preheating your oven to 350°F (175°C) and lining a baking sheet with parchment paper.
- Mix Dry Ingredients: In a large mixing bowl, combine the shredded coconut, almond flour, granulated sugar, cocoa powder, baking powder, and salt. Stir well to guarantee all dry ingredients are uniformly mixed.
- Add Wet Ingredients: Add the egg and vanilla extract to the dry mixture. Mix until a sticky dough forms.
- Incorporate Chocolate Chips: Fold in the chocolate chips gently into the dough, ensuring they are evenly distributed.
- Shape Cookies: Use a tablespoon or cookie scoop to portion the dough onto the prepared baking sheet, leaving some space between each cookie. Press a whole almond onto the top of each cookie.
- Bake: Place the cookies in the preheated oven and bake for 10-12 minutes, or until the edges are slightly firm but the centers remain soft.
- Cool: Remove the cookies from the oven and let them cool on the baking sheet for a few minutes before transferring them to a wire rack to cool completely.
- Optional Dusting: If desired, once cooled, lightly dust the cookies with powdered sugar for an extra touch of sweetness.
Variations & Tips:
- For a richer chocolate flavor, substitute half of the granulated sugar with brown sugar.
- Try swapping the chocolate chips for white chocolate or even butterscotch chips for a different flavor profile.
- For those who prefer nut-free treats, feel free to replace almond flour with all-purpose flour (but remember it won't be gluten-free).
- Store any leftovers in an airtight container at room temperature for up to five days. For longer storage, freeze the cookies for up to two months—just make sure they are individually wrapped.
Enjoy these Almond Joy Cookies as a delightful addition to your Easter dessert table or as a special sweet treat any time of the year!
Easter Egg Cheesecakes

Easter Egg Cheesecakes are delightful mini desserts perfect for celebrating the Easter holiday. These small, egg-shaped cheesecakes are not only visually appealing but also rich in flavor, making them an excellent treat for families and gatherings.
With a preparation time of approximately 20 minutes and a chilling time of around 3 hours, these charming cheesecakes can be made ahead of time for your Easter festivities.
Ingredients:
- 16 oz cream cheese, softened
- 3/4 cup granulated sugar
- 1 tsp vanilla extract
- 2 large eggs
- 1/4 cup sour cream
- 1/4 cup heavy cream
- Food coloring (variety of colors)
- 1 cup crushed graham crackers
- 1/2 cup unsalted butter, melted
- Chocolate eggs or candy for decoration
Instructions:
1. Prepare the crust: In a medium-sized bowl, combine the crushed graham crackers with melted butter and mix until well combined. Press the mixture firmly into the bottom of a mini muffin tin lined with paper liners (or silicone molds) to form the crust.
2. Make the cheesecake batter: In a large mixing bowl, beat the softened cream cheese and granulated sugar together until smooth. Add vanilla extract and mix until fully incorporated.
Then, add eggs one at a time, mixing on low speed until just combined. Stir in sour cream and heavy cream until smooth.
3. Color the batter: Divide the batter equally into small bowls and use food coloring to dye each bowl a different color for a vibrant effect. Gently fold the color into the batter until you achieve the desired hue.
4. Fill the molds: Evenly distribute the colored cheesecake batter into the prepared muffin tin, filling each liner about 2/3 full to allow for rising.
5. Bake: Preheat your oven to 325°F (160°C) and bake the mini cheesecakes for 15-18 minutes, or until the edges are set but the centers are still slightly jiggly.
Remove from the oven and allow them to cool at room temperature before transferring to the refrigerator.
6. Chill: Refrigerate the cheesecakes for at least 3 hours, or overnight for best results.
7. Decorate: Once chilled and set, carefully remove the cheesecakes from the muffin tin. Top with chocolate eggs or your choice of candy for a festive touch.
Variations and Tips:
- For a fruity twist, add fruit puree or chopped fruits into the cheesecake batter before baking.
- Experiment with different flavored extracts such as almond or lemon for unique flavors.
- If you don't have muffin tins, consider using small ramekins or silicone molds for individual servings.
- Consider drizzling melted chocolate on top before adding decorations for an extra decadent touch.
- Verify that all dairy products are at room temperature before mixing to prevent lumps and to achieve a smoother consistency.
Chocolate Mint Cake Pops

Chocolate Mint Cake Pops are delightful bite-sized treats that combine the rich flavors of chocolate cake with a rejuvenating hint of mint.
These sweet, indulgent pops are perfect for Easter gatherings, birthday parties, or any special occasion where you want to impress your guests with a fun dessert.
With a preparation time of about 30 minutes (plus chilling time), these delicious cake pops are not only easy to make but also a treat that both kids and adults will enjoy.
Ingredients:
- 1 box chocolate cake mix (plus required ingredients on the mix box)
- 1 cup chocolate frosting
- 1 teaspoon peppermint extract
- Green food coloring (optional)
- 12 oz chocolate chips (dark or milk chocolate)
- 1 tablespoon coconut oil (optional, for thinning chocolate)
- Lollipop sticks
- Sprinkles or crushed peppermint candies (optional, for decoration)
Instructions:
- Bake the Cake: Prepare the chocolate cake mix as directed on the box. Once baked, allow it to cool completely.
- Crumble the Cake: In a large bowl, crumble the cooled cake into fine crumbs.
- Mix in Frosting: Add the chocolate frosting and peppermint extract to the crumbled cake. Mix well until fully combined and the mixture is moldable.
- Form Cake Balls: Using your hands, form small balls (about 1-inch in diameter) with the mixture. Place them on a baking sheet lined with parchment paper.
- Chill: Refrigerate the cake balls for at least 30 minutes, or until they are firm.
- Prepare the Coating: In a microwave-safe bowl, melt the chocolate chips with the coconut oil (if using) in 30-second intervals, stirring in between until smooth.
- Insert Lollipop Sticks: Once chilled, remove the cake balls from the refrigerator. Dip the tip of a lollipop stick into the melted chocolate and insert it into the center of each cake ball. This helps to secure the stick.
- Coat the Cake Pops: Dip each cake pop into the melted chocolate, ensuring they are fully coated. Tap off any excess chocolate.
- Decorate: While the chocolate is still wet, add sprinkles or crushed peppermint candies to the tops for decoration.
- Let Set: Place the cake pops upright in a cake pop stand or styrofoam block to let the chocolate set completely.
Variations and Tips:
- Flavor Variations: You can use vanilla or red velvet cake instead of chocolate for a different flavor profile. Adjust the extract accordingly to match the cake flavor.
- Colorful Coating: Use colored candy melts instead of chocolate for a festive look – perfect for the Easter theme!
- Minty Twist: For an extra minty flavor, consider mixing in crushed mint candies into the cake mixture before rolling into balls.
- Make Ahead: You can prepare the cake balls a day in advance and store them in the refrigerator until you're ready to coat them. Just make sure they are well covered.
- Storage: Keep the cake pops in an airtight container in the refrigerator for up to a week.
Enjoy these Chocolate Mint Cake Pops as a sweet treat that captures the spirit of Easter!
Bunny-Shaped Sugar Cookies

Bunny-shaped sugar cookies are whimsical treats that will bring joy to any Easter celebration. Ideal for families, children, or anyone looking to put a playful twist on their holiday desserts, these cookies are easy to make and fun to decorate.
The preparation time is approximately 30 minutes, and once baked and cooled, you're ready to evoke your creativity with icing and decorations!
Ingredients:
- 2 ¾ cups all-purpose flour
- 1 teaspoon baking soda
- ½ teaspoon baking powder
- 1 cup unsalted butter, softened
- 1 ½ cups white sugar
- 1 egg
- 1 teaspoon vanilla extract
- ½ teaspoon almond extract
- ¼ teaspoon salt
- Colorful frosting (various colors)
- Decorative sprinkles (optional)
- Bunny-shaped cookie cutters
Cooking Steps:
- Preheat your oven to 375°F (190°C).
- In a medium bowl, whisk together the flour, baking soda, baking powder, and salt. Set aside.
- In a large bowl, cream together the softened butter and sugar until smooth. This should take about 2-3 minutes.
- Beat in the egg, vanilla extract, and almond extract until well combined.
- Gradually add the dry ingredients to the wet ingredients, mixing until the dough comes together.
- Roll out the dough on a lightly floured surface to about ¼ inch thickness.
- Use your bunny-shaped cookie cutters to cut out shapes and place them on ungreased baking sheets.
- Bake in the preheated oven for 8 to 10 minutes, or until edges are lightly golden. Remove and let cool on wire racks.
- Once cooled, decorate the cookies with colorful frosting and sprinkles as desired.
Variations & Tips:
- For a softer cookie, you can reduce the baking time slightly.
- To add flavor variations, consider incorporating lemon or orange zest into the dough.
- If you want to make these gluten-free, substitute all-purpose flour with a gluten-free flour blend.
- Experiment with different shapes like carrots or eggs to complement your bunny cookies.
- Store the finished cookies in an airtight container at room temperature for up to a week or freeze for later enjoyment.
Zucchini Bread With Easter Spices
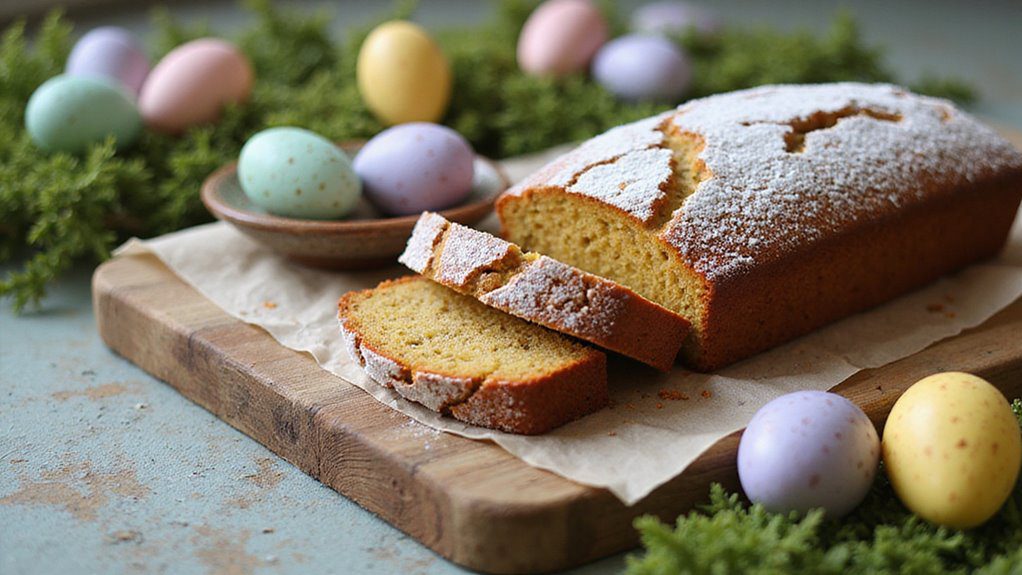
Zucchini Bread With Easter Spices is a delightful and flavorful twist on a classic quick bread, perfect for celebrating the holiday in a unique way. Infused with warm spices such as cinnamon and nutmeg, and the subtle sweetness of zucchini, this bread makes a comforting treat for brunch, dessert, or even as a thoughtful gift during the Easter season.
The preparation time is around 15 minutes, with an additional baking time of about 50 minutes, making it a quick and enjoyable recipe to whip up.
Ingredients:
- 1 ½ cups grated zucchini (about 1 medium zucchini)
- 1 ½ cups all-purpose flour
- 1 cup granulated sugar
- ½ cup vegetable oil
- 2 large eggs
- 1 teaspoon vanilla extract
- 1 teaspoon baking powder
- ½ teaspoon baking soda
- 1 teaspoon ground cinnamon
- ½ teaspoon ground nutmeg
- ½ teaspoon salt
- ½ cup chopped walnuts or pecans (optional)
- ½ cup raisins or chocolate chips (optional)
Cooking Steps:
- Preheat your oven to 350°F (175°C). Grease and flour a 9×5-inch loaf pan or line it with parchment paper.
- In a large bowl, combine the grated zucchini, sugar, vegetable oil, eggs, and vanilla extract, mixing well until all ingredients are incorporated.
- In another bowl, whisk together the flour, baking powder, baking soda, cinnamon, nutmeg, and salt.
- Gradually add the dry ingredients to the wet mixture, stirring just until combined. Avoid over-mixing to keep the bread tender.
- If using, fold in the chopped nuts and raisins or chocolate chips at this stage.
- Pour the batter into the prepared loaf pan. Smooth the top with a spatula.
- Bake for 45-55 minutes, or until a toothpick inserted into the center comes out clean. Allow the bread to cool in the pan for about 10 minutes before transferring it to a wire rack to cool completely.
Variations & Tips:
- For a healthier twist, substitute half of the all-purpose flour with whole wheat flour.
- You can add a splash of orange juice or a teaspoon of orange zest for a citrusy flavor that pairs wonderfully with the spices.
- If you prefer a sweeter bread, increase the sugar by ¼ cup or use a sugar substitute.
- To make it more festive, consider topping the bread with a light glaze of powdered sugar mixed with lemon juice.
- Store the cooled zucchini bread in an airtight container at room temperature for up to a week, or freeze it for longer storage.
Vanilla Bean Panna Cotta With Berry Sauce

Vanilla Bean Panna Cotta with Berry Sauce is a luxurious, creamy Italian dessert that's both elegant and simple to prepare. This delightful dish is perfect for Easter celebrations or any special occasion, impressing guests with its silky texture and rich flavor. The preparation time is about 20 minutes, with an additional chilling time of at least 4 hours, making it a great make-ahead dessert.
Ingredients:
- 2 cups heavy cream
- 1 cup whole milk
- 1/2 cup granulated sugar
- 1 1/2 teaspoons vanilla bean paste (or seeds from 1 vanilla bean)
- 2 1/2 teaspoons unflavored gelatin
- 3 tablespoons cold water
- 1 cup mixed berries (such as strawberries, blueberries, raspberries)
- 2 tablespoons lemon juice
- 2 tablespoons powdered sugar (for the berry sauce)
Cooking Steps:
- In a medium saucepan, combine the heavy cream, whole milk, granulated sugar, and vanilla bean paste. Heat the mixture over medium heat, stirring occasionally, until the sugar has dissolved and the mixture is hot but not boiling.
- While the cream mixture is heating, sprinkle the gelatin over the cold water in a small bowl and let it bloom for about 5 minutes.
- Once the cream mixture is hot, remove it from the heat and stir in the bloomed gelatin until fully dissolved.
- Pour the panna cotta mixture into individual serving glasses or molds. Cover with plastic wrap and refrigerate for at least 4 hours, or until set.
- To prepare the berry sauce, combine the mixed berries, lemon juice, and powdered sugar in a small saucepan. Cook over medium heat, gently mashing the berries until they release their juices and the mixture thickens slightly, about 5-7 minutes. Remove from heat and let cool.
- Once the panna cotta has set, carefully unmold if using molds, or simply serve in the glasses. Drizzle the berry sauce over the top and garnish with additional whole berries if desired.
Variations and Tips:
- For a tropical twist, substitute coconut milk for half of the heavy cream and omit the vanilla bean, instead adding a splash of coconut extract.
- If you prefer a flavored panna cotta, add a few tablespoons of coffee or chocolate syrup to the cream mixture before adding the gelatin.
- Make sure to refrigerate the panna cotta for at least 4 hours; overnight is even better for flavor development.
- Serve with a sprinkle of fresh mint or a dusting of powdered sugar for a touch of color and freshness.
Mini Lemon Curd Tarts

Mini lemon curd tarts are delightful bite-sized desserts that burst with a revitalizing citrus flavor, making them perfect for spring celebrations like Easter.
These tarts are ideal for lemon lovers and serve as a light and zesty ending to any meal. The preparation time is approximately 30 minutes, with an additional chilling time of about 2 hours, allowing the flavors to meld beautifully.
Ingredients:
- 1 cup all-purpose flour
- 1/4 cup powdered sugar
- 1/2 cup unsalted butter, softened
- 1/2 teaspoon vanilla extract
- 1/4 teaspoon salt
- 1 cup lemon juice (freshly squeezed)
- 1 cup granulated sugar
- 3 large eggs
- Zest of 2 lemons
- 1/4 cup unsalted butter (for the lemon curd)
Cooking Instructions:
1. Prepare the Tart Shells**: In a medium bowl, mix the all-purpose flour, powdered sugar, and salt. Add the softened butter and vanilla extract, and blend until the mixture** resembles coarse crumbs.
Press the mixture firmly into the bottom and up the sides of a mini tart pan or muffin tin to form tart shells. Prick the bottoms with a fork to prevent puffing.
2. Bake the Tart Shells: Preheat your oven to 350°F (175°C). Bake the tart shells for about 15-20 minutes or until lightly golden. Remove from the oven and let them cool completely.
3. Make the Lemon Curd: In a medium saucepan, whisk together the lemon juice, granulated sugar, eggs, and lemon zest over medium heat. Continuously stir until the mixture thickens enough to coat the back of a spoon (about 8-10 minutes).
Remove from heat and stir in the butter until fully melted and combined.
4. Fill the Tart Shells: Pour the lemon curd into the cooled tart shell. Cool to room temperature and then refrigerate for at least 2 hours to set.
5. Serve: Once set, remove from the fridge, garnish with additional lemon zest or fresh berries, and serve chilled.
Variations and Tips:
- Crust Variation: For a different flavor, substitute some of the all-purpose flour with almond flour or crushed graham crackers for a graham crust.
- Citrus Curd: You can mix lemon juice with other citrus juices like lime or orange for a unique twist.
- Make Ahead: These tarts can be made a day ahead—prepare the shells and curd, fill just before serving to maintain freshness.
- Serving Suggestions: Top with whipped cream or meringue for an extra special presentation.
Decorated Easter Egg Cupcakes

Decorated Easter Egg Cupcakes are delightful treats that perfectly capture the spirit of Easter. These whimsical cupcakes are not only delicious but also visually appealing, making them an ideal dessert for family gatherings, Easter brunches, or children's parties.
With a preparation time of about 1 hour and a baking time of 20 minutes, these cupcakes can be made ahead of time and decorated just before serving to impress your guests.
Ingredients:
- 1 ½ cups all-purpose flour
- 1 cup granulated sugar
- ½ cup unsalted butter (softened)
- 2 large eggs
- ½ cup milk
- 1 ½ teaspoons baking powder
- 1 teaspoon vanilla extract
- ¼ teaspoon salt
- 2 cups frosting (store-bought or homemade)
- Assorted food coloring
- Edible decorations (sprinkles, chocolate eggs, fondant shapes)
Instructions:
- Preheat your oven to 350°F (175°C) and line a muffin tin with cupcake liners.
- In a large mixing bowl, cream together the softened butter and sugar until light and fluffy.
- Add the eggs one at a time, mixing well after each addition. Stir in the vanilla extract.
- In a separate bowl, whisk together the flour, baking powder, and salt.
- Gradually add the dry ingredients to the wet mixture, alternating with the milk. Mix until just combined and smooth.
- Divide the batter equally among the prepared cupcake liners, filling each about two-thirds full.
- Bake in the preheated oven for 18-20 minutes or until a toothpick inserted into the center comes out clean.
- Allow the cupcakes to cool completely on a wire rack.
- Once cooled, use an offset spatula or piping bag to frost each cupcake with your preferred frosting.
- Divide the frosting into small bowls and tint each with different colors of food coloring.
- Using a piping bag fitted with various tips or simply spread with a knife, create textured designs to mimic Easter eggs on top of the cupcakes.
- Decorate with edible decorations like sprinkles or place small chocolate eggs on top for a springtime touch.
Variations and Tips:
- For a chocolate version, substitute 1/3 cup of the all-purpose flour with unsweetened cocoa powder.
- Experiment with flavor by adding a tablespoon of lemon or almond extract to the batter.
- Use coconut flakes for a "nest" effect and add candy eggs on top.
- To make the decorating process easier, consider using pre-made fondant decorations.
- Store decorated cupcakes in an airtight container at room temperature for up to 2 days or refrigerate for longer freshness.
Chocolate-Covered Pretzel Nests

Chocolate-Covered Pretzel Nests are a delightful no-bake treat that combines sweet and salty flavors in a fun, festive way.
Ideal for Easter celebrations or as a whimsical treat for kids and adults alike, these chocolate-covered pretzel nests are perfect for those who enjoy quick and easy dessert recipes.
With a preparation time of just 15 minutes, you can whip these up in no time and have them ready to impress your family and friends.
Ingredients:
- 2 cups pretzel sticks
- 1 cup semi-sweet chocolate chips
- 1 cup candy eggs (Easter-themed candy-coated chocolates)
- 1 tablespoon coconut oil (optional for smooth melting)
- Sea salt (optional, for a sprinkle on top)
Cooking Steps:
1. Begin by melting the semi-sweet chocolate chips. You can do this using a microwave-safe bowl in 30-second intervals, stirring in between until fully melted. If you prefer, you can add the coconut oil to make the chocolate smoother.
2. Once the chocolate is melted, add the pretzel sticks to the bowl and stir until they are evenly coated with chocolate.
3. Line a baking sheet with parchment paper. Using your hands, take small handfuls of the chocolate-covered pretzels and shape them into nest-like circles on the parchment paper.
Make sure to create a small hollow in the center to hold the candy eggs.
4. While the chocolate is still soft, place a few candy eggs in the center of each nest.
5. If desired, sprinkle a tiny pinch of sea salt on top for a sweet and salty contrast.
6. Refrigerate the nests for about 30 minutes or until the chocolate is fully set.
7. Once set, carefully remove the nests from the parchment paper and arrange them on a serving platter.
Variations and Tips:
- For added flavor, you can mix in some crushed nuts or shredded coconut with the pretzel sticks before coating them in chocolate.
- If you want to create a different look, use white chocolate instead of semi-sweet chocolate, and top with colorful sprinkles.
- For an even easier version, use pre-made chocolate bark instead of melting chocolate chips.
- Make sure the chocolate is not too hot when mixing with pretzels to avoid making them soggy.
- Feel free to adjust the size of the nests depending on your preference, but smaller nests tend to hold together better.
Poppy Seed Cake With Lemon Glaze
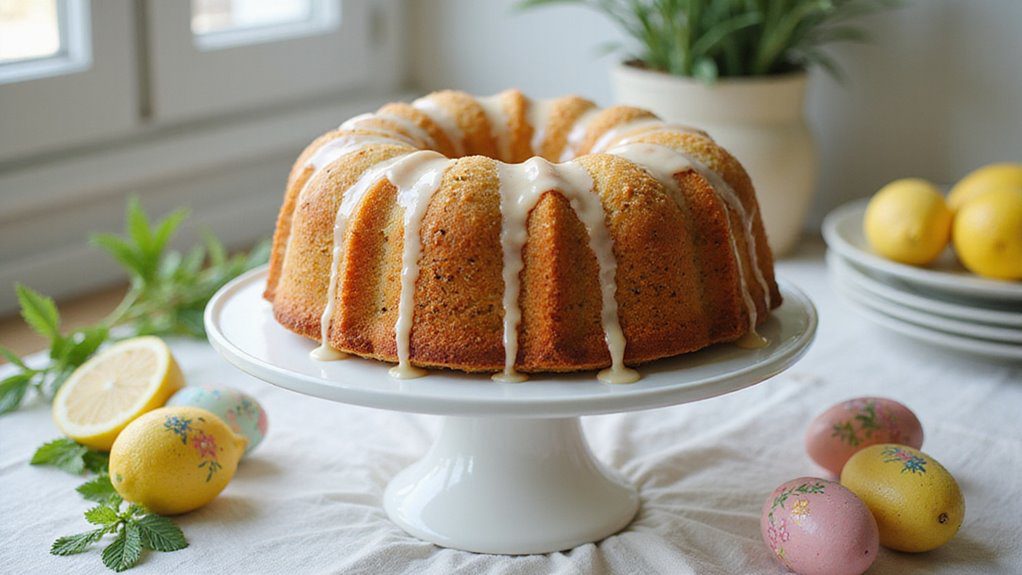
Poppy Seed Cake with Lemon Glaze is a delightful and moist dessert that beautifully balances the nutty flavor of poppy seeds with the bright, zesty notes of lemon.
This cake is perfect for Easter celebrations, spring gatherings, or simply a sweet treat to savor with afternoon tea. With a total preparation time of about 1 hour and 15 minutes, this recipe offers a quick yet impressive option for bakers of all skill levels.
Ingredients:
- 2 cups all-purpose flour
- 1 cup granulated sugar
- 1/2 cup unsalted butter, softened
- 1 cup buttermilk
- 4 large eggs
- 1 tablespoon poppy seeds
- 1 teaspoon baking powder
- 1 teaspoon baking soda
- 1/2 teaspoon salt
- 1 teaspoon vanilla extract
- Zest of 1 lemon
Cooking Steps:
- Preheat your oven to 350°F (175°C). Grease and flour a 9×5-inch loaf pan or a 9-inch round cake pan.
- In a large bowl, beat the softened butter and sugar together until light and fluffy.
- Add the eggs one at a time, beating well after each addition. Mix in the vanilla extract and lemon zest.
- In a separate bowl, whisk together the flour, baking powder, baking soda, salt, and poppy seeds.
- Gradually add the dry ingredients to the butter mixture, alternating with the buttermilk. Start and end with the flour mixture, mixing until just combined.
- Pour the batter into the prepared pan and bake for 45-50 minutes, or until a toothpick inserted into the center comes out clean.
- Remove from the oven and let the cake cool in the pan for about 10 minutes, then transfer to a wire rack to cool completely.
Lemon Glaze:
- In a small bowl, mix together 1 cup powdered sugar and 2-3 tablespoons fresh lemon juice until smooth and pourable.
- Drizzle the glaze over the cooled cake and let it set before slicing.
Variations & Tips:
- For added flavor, consider folding in some fresh blueberries or chopped nuts into the batter.
- If you prefer a richer glaze, substitute cream cheese for some of the powdered sugar for a cream cheese lemon glaze.
- This cake can also be made ahead; it stays moist for several days when wrapped tightly in plastic wrap.
- Serve with a side of whipped cream or a scoop of vanilla ice cream for an extra indulgent dessert.
Enjoy the invigorating taste of this Poppy Seed Cake with Lemon Glaze, perfect for celebrating the joys of spring!
Cherry Almond Dessert Bars
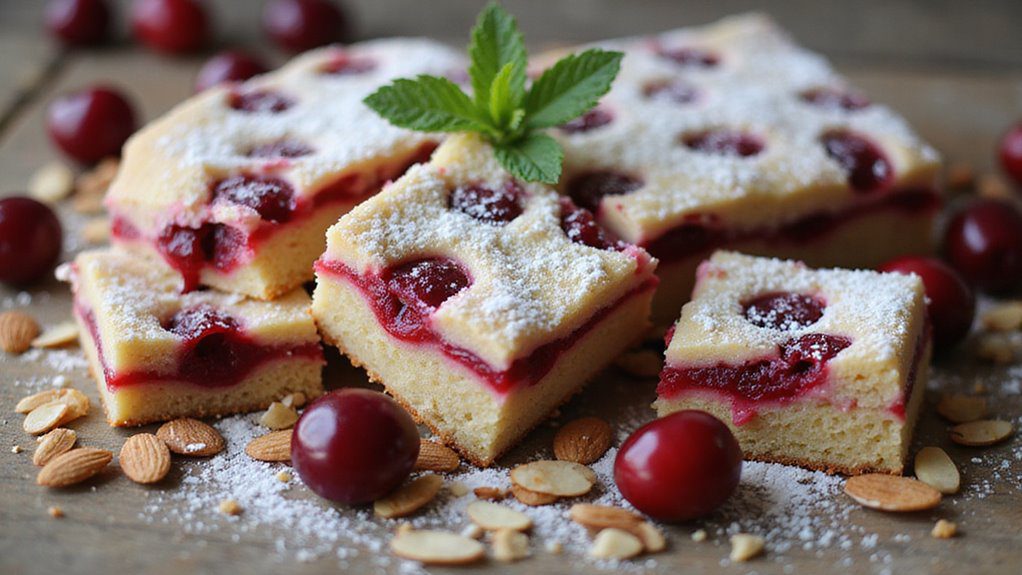
Cherry Almond Dessert Bars are a delightful treat that bring together the sweet and tart flavors of cherries with the nutty essence of almonds, creating a perfect dessert for Easter celebrations or any spring gathering.
These bars are great for families or gatherings, as they can easily be cut into squares for sharing. With a preparation time of about 20 minutes and a baking time of 30 minutes, these dessert bars are a quick and satisfying addition to any festive table.
Ingredients:
- 1 cup all-purpose flour
- 1/2 cup almond flour
- 1/2 cup granulated sugar
- 1/2 cup brown sugar, packed
- 1/2 cup unsalted butter, softened
- 1 large egg
- 1 teaspoon vanilla extract
- 1 teaspoon almond extract
- 1/2 teaspoon baking powder
- 1/4 teaspoon salt
- 1 cup cherry pie filling
- Sliced almonds for topping (optional)
- Powdered sugar for dusting (optional)
Cooking Steps:
- Preheat your oven to 350°F (175°C). Grease an 8×8-inch baking pan or line it with parchment paper for easy removal.
- In a mixing bowl, combine the all-purpose flour, almond flour, granulated sugar, brown sugar, baking powder, and salt. Mix well.
- In another bowl, cream together the softened butter, egg, vanilla extract, and almond extract until smooth and fluffy.
- Gradually add the dry ingredients to the wet mixture, mixing until just combined.
- Spread half of the batter evenly into the prepared pan, pressing it down to form a bottom layer.
- Spoon the cherry pie filling over the first layer of batter, spreading it evenly.
- Drop spoonfuls of the remaining batter over the cherry filling. It's okay if some of the filling is showing.
- If desired, sprinkle sliced almonds on top for added crunch and flavor.
- Bake in the preheated oven for 30-35 minutes, or until the top is lightly golden and a toothpick inserted in the center comes out clean.
- Allow the bars to cool in the pan for about 15-20 minutes before transferring to a wire rack to cool completely.
- Once cooled, dust with powdered sugar if desired, then cut into squares and serve.
Variations and Tips:
- For an additional flavor twist, consider adding lemon zest to the batter for a citrusy note.
- Feel free to substitute the cherry pie filling with other fruit fillings like raspberry, blueberry, or peach to suit your taste.
- For a nut-free version, you can omit the almond flour and replace it with an extra half cup of all-purpose flour.
- These bars can be stored in an airtight container at room temperature for up to 3 days or refrigerated for up to a week.
Vanilla Easter Egg Sugar Cookies

Vanilla Easter Egg Sugar Cookies are a delightful treat that perfectly embodies the spirit of Easter celebrations. These soft and sweet cookies, shaped like eggs, are ideal for families, kids, and anyone looking to add a festive touch to their dessert table.
With a preparation time of about 30 minutes and an additional 10-12 minutes for baking, these cookies are both easy to make and sure to impress guests during holiday gatherings or as an enjoyable activity with the kids.
Ingredients:
- 2 3/4 cups all-purpose flour
- 1 teaspoon baking soda
- 1/2 teaspoon baking powder
- 1 cup unsalted butter, softened
- 1 1/2 cups white sugar
- 1 egg
- 1 teaspoon vanilla extract
- 1/2 teaspoon almond extract (optional)
- 1/4 teaspoon salt
- Colored sugar or sprinkles for decoration
- Royal icing (optional, for decorating)
Directions:
- Preheat your oven to 375°F (190°C). In a small bowl, stir together the flour, baking soda, baking powder, and salt; set aside.
- In a large bowl, cream together the softened butter and sugar until smooth. Beat in the egg, vanilla extract, and almond extract (if using). Gradually blend in the dry ingredients.
- Roll rounded teaspoonfuls of dough into balls, and place them onto ungreased cookie sheets. Flatten the balls slightly while shaping them into egg shapes.
- Sprinkle colored sugar or sprinkles on top of each cookie for decoration.
- Bake 8 to 10 minutes in the preheated oven, or until golden. Let them cool on the cookie sheets for a few minutes before transferring them to wire racks to cool completely.
- If desired, use royal icing to decorate the cooled cookies, adding an extra festive touch.
Variations and Tips:
- Flavor Variations: Experiment with different extracts, such as coconut or orange, for unique flavor profiles.
- Chill the Dough: If the dough is too sticky, chill it in the refrigerator for about 30 minutes before shaping to make it easier to work with.
- Creative Decorating: Use edible markers, additional icing, or edible glitter to personalize your cookies for your kids or guests.
- Make Ahead: The dough can be made ahead and stored in the refrigerator for up to 3 days or frozen for up to 1 month. Just thaw and proceed with baking when you're ready.
Enjoy your Vanilla Easter Egg Sugar Cookies with friends and family, making sweet memories together!


