For a romantic dinner for two, consider dishes like Creamy Garlic Tuscan Pasta and Honey Glazed Salmon With Asparagus. Caprese Stuffed Chicken Breast and Shrimp Scampi with Lemon Butter Sauce add festive flair. Vegetarian options such as Spinach and Feta Stuffed Pork Tenderloin and Vegetable Stuffed Peppers provide delightful variety. Each recipe combines simplicity with special touches, ensuring a memorable meal. Exploring these easy recipes will reveal even more delectable ideas to create a perfect dining experience.
Creamy Garlic Tuscan Pasta
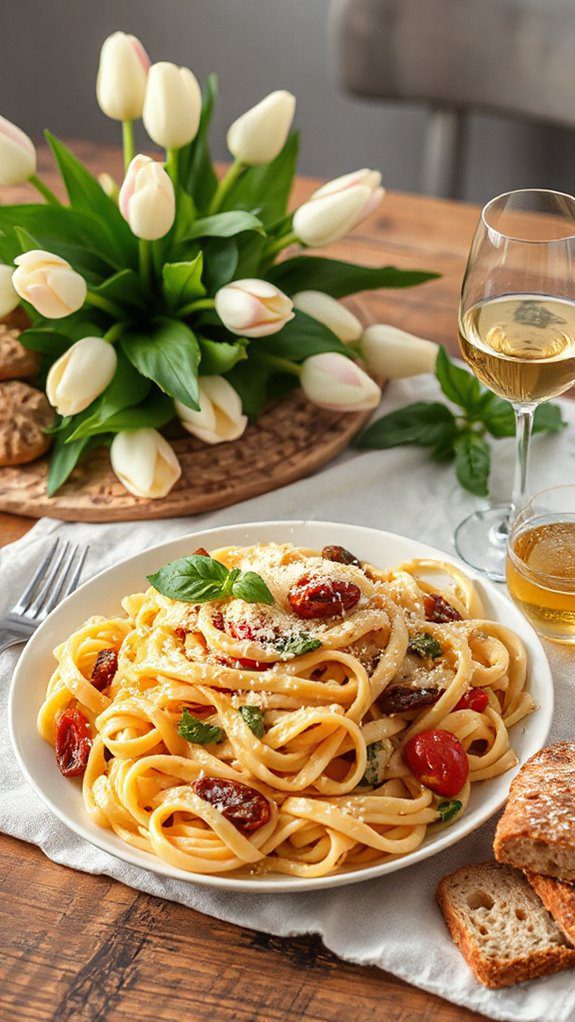
Ingredients:
- 200g spaghetti or fettuccine
- 1 tablespoon olive oil
- 3 cloves garlic, minced
- 1 cup cherry tomatoes, halved
- 1/2 cup sun-dried tomatoes, chopped
- 1 cup heavy cream
- 1/2 cup grated parmesan cheese
- 1 teaspoon dried basil
- Salt and pepper to taste
- Fresh basil leaves for garnish
Cooking Steps:
- Cook the pasta: In a large pot of salted boiling water, cook the spaghetti or fettuccine according to package instructions until al dente. Reserve 1/2 cup of pasta water, then drain and set aside.
- Sauté garlic: In a large skillet, heat the olive oil over medium heat. Add the minced garlic and sauté for about 30 seconds, or until fragrant.
- Add tomatoes: Stir in the cherry tomatoes and sun-dried tomatoes, cooking for 3-4 minutes until the cherry tomatoes start to soften.
- Make the sauce: Reduce the heat to low and pour in the heavy cream, stirring to combine. Gradually add the parmesan cheese, continuing to stir until melted and smooth.
- Combine pasta and sauce: Add the cooked pasta to the skillet, tossing to coat the noodles in the creamy sauce. If the pasta seems dry, add a little reserved pasta water to reach the desired consistency.
- Season: Stir in the dried basil and season with salt and pepper to taste.
- Serve: Plate the pasta and garnish with fresh basil leaves and additional parmesan cheese if desired.
Variations and Tips:
- For added protein, consider adding grilled chicken or shrimp.
- You can substitute heavy cream with half-and-half for a lighter version.
- For a kick of spice, add a pinch of red pepper flakes while cooking the garlic.
- Feel free to experiment with different vegetables like spinach or mushrooms for added flavor and nutrition.
- The Original Pro Chopper - Our superstar veggie slicer has been creating waves on TikTok! Simple to use,...
- Easy Meal Prep with Rust-Resistant Blades - Our vegetable chopper is perfect for anyone who wants to eat...
- 5-Star Design - The soft-grip TPU handle ensures controlled chopping, while the non-skid rubber base...
Honey Glazed Salmon With Asparagus
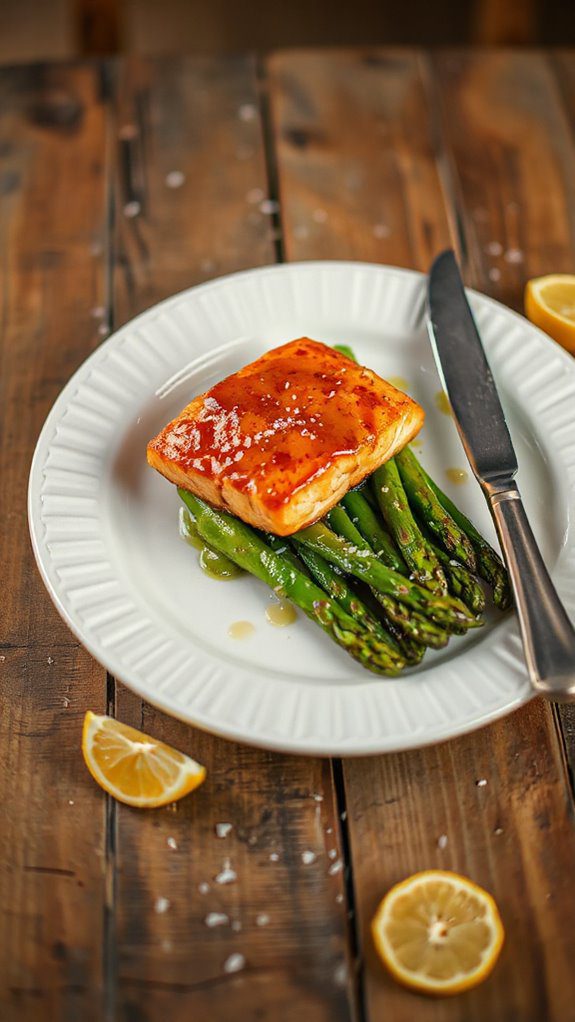
Honey Glazed Salmon with Asparagus is a delightful and healthy dinner option that's perfect for two people. This dish combines the rich flavor of salmon with the crispness of asparagus, all elevated by a sweet and tangy honey glaze.
It's not only quick to prepare, taking about 30 minutes from start to finish, but also comes together with minimal cleanup, making it ideal for a romantic dinner or a weeknight meal.
Ingredients:
- 2 salmon fillets
- 1 tablespoon honey
- 1 tablespoon soy sauce
- 1 tablespoon Dijon mustard
- 1 tablespoon olive oil
- Salt and pepper, to taste
- 1 bunch asparagus, trimmed
- Lemon wedges, for serving (optional)
- Fresh parsley, chopped (for garnish, optional)
Cooking Steps:
- Preheat the Oven: Preheat your oven to 400°F (200°C).
- Prepare the Honey Glaze: In a small bowl, mix the honey, soy sauce, Dijon mustard, olive oil, salt, and pepper until well combined.
- Arrange Asparagus: On a baking sheet, arrange the trimmed asparagus and drizzle with olive oil, tossing to coat. Season with salt and pepper.
- Add Salmon: Place the salmon fillets on the same baking sheet alongside the asparagus. Pour the honey glaze over the salmon fillets.
- Bake: Bake in the preheated oven for about 12-15 minutes, or until the salmon is cooked through and flakes easily with a fork. The asparagus should be tender but still crisp.
- Serve: Remove from the oven and let it cool for a minute. Serve the salmon and asparagus on plates, garnished with fresh parsley and lemon wedges if desired.
Variations and Tips:
- Herbs: Add fresh herbs such as thyme or dill to the glaze for an additional layer of flavor.
- Honey Substitute: Maple syrup can be used instead of honey for a different sweetness.
- Add More Veggies: Consider adding other seasonal vegetables like cherry tomatoes or bell peppers to the baking sheet for extra color and nutrition.
- Grilling Option: This dish can also be prepared on a grill. Use a grilling basket for the asparagus and keep an eye on the salmon to prevent it from falling through the grates.
- Serving Suggestion: Pair with a light salad or quinoa for a complete meal.
Enjoy your quick and tasty Honey Glazed Salmon with Asparagus!
- Makes Everything Simple : Just forget your bagged cheese! Only turn the handle for several times and get...
- Premium Material : All parts of the rotary cheese grater are made of food grade ABS material, no BPA. The...
- Three Option Grater : The parmesan cheese grater finishes food preparation with slicing, shredding and...
Caprese Stuffed Chicken Breast
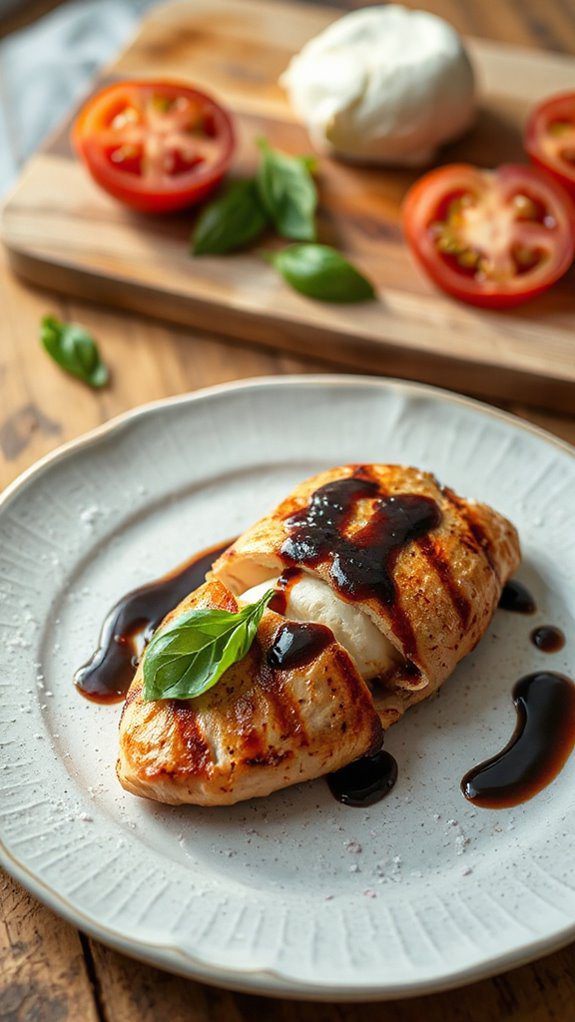
Caprese Stuffed Chicken Breast is a flavorful and visually appealing dish that combines the classic Italian flavors of Caprese salad with tender chicken breast. This dish is perfect for a romantic dinner for two or a cozy weeknight meal, taking approximately 30-40 minutes to prepare and cook. Stuffed with fresh basil, mozzarella cheese, and ripe tomatoes, it's a delightful way to impress your loved one while satisfying your taste buds.
Ingredients:
- 2 boneless, skinless chicken breasts
- 1 cup fresh mozzarella cheese, diced
- 1 cup cherry tomatoes, halved
- 1/4 cup fresh basil leaves, chopped
- 2 tablespoons balsamic glaze
- 2 tablespoons olive oil
- Salt and pepper, to taste
- 1 teaspoon garlic powder
- 1 teaspoon Italian seasoning
Cooking Instructions:
- Preheat your oven to 375°F (190°C).
- In a medium bowl, combine the diced mozzarella cheese, halved cherry tomatoes, and chopped basil. Stir in 1 tablespoon of balsamic glaze, and season with salt, pepper, and Italian seasoning. Mix well and set aside.
- Take each chicken breast and use a sharp knife to create a slit along the side, forming a pocket. Be careful not to cut all the way through.
- Stuff each chicken breast with the Caprese mixture, evenly distributing the filling between the two breasts.
- Season the outside of the chicken with salt, pepper, and garlic powder. Drizzle olive oil over the chicken breasts.
- Heat a large oven-safe skillet over medium-high heat. Once hot, carefully place the stuffed chicken breasts in the skillet and sear for about 3-4 minutes on each side until golden brown.
- Transfer the skillet to the preheated oven and bake for 20-25 minutes, or until the chicken is cooked through (internal temperature of 165°F or 75°C).
- Remove from the oven and let rest for 5 minutes. Drizzle the remaining balsamic glaze over the stuffed chicken before serving.
Variations and Tips:
- For added flavor, consider adding sun-dried tomatoes or pesto to the filling mixture.
- If you prefer a lighter version, you can substitute the mozzarella with a low-fat cheese or skip the cheese entirely for a dairy-free option.
- Serve with a side salad or garlic bread to complete the meal.
- Feel free to experiment with different herbs, such as oregano or thyme, to suit your taste.
- 💰 REDUCE WASTE AND SAVE MONEY: Chef Preserve keeps FOOD FRESH 5 TIMES LONGER than non-vacuum storage...
- ✅ POWERFUL, QUICK & EASY TO USE: Simply press the button to start. The device vacuum seals a bag in 5...
- ♻️ REUSABLE & RESEALABLE BAGS: Chef Preserve comes with dishwasher, freezer, refrigerator, and...
Shrimp Scampi With Lemon Butter Sauce
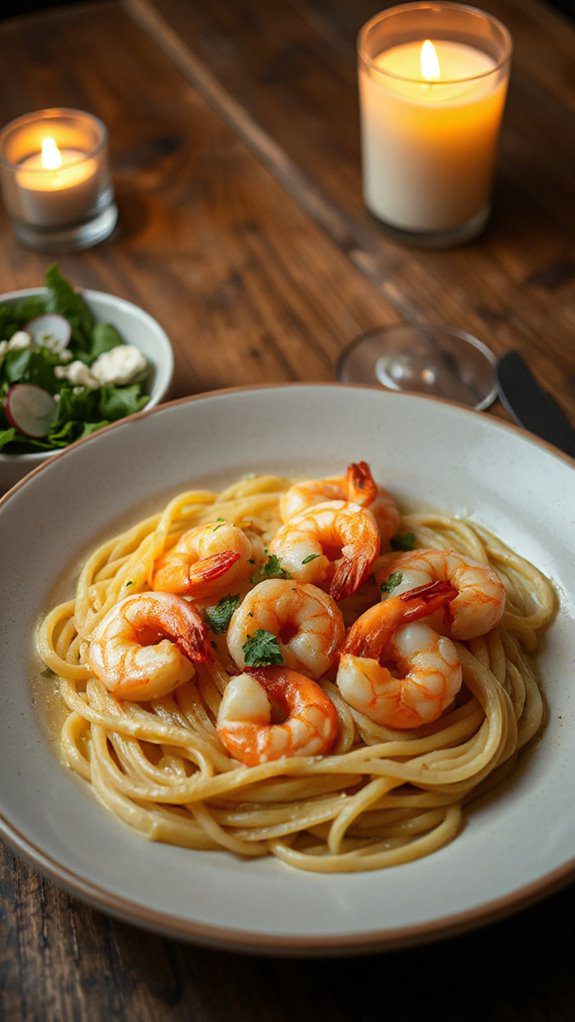
Shrimp Scampi with Lemon Butter Sauce is a classic Italian dish that brings together succulent shrimp sautéed with garlic, butter, and a hint of lemon, creating a revitalizing and savory entrée.
Perfect for a romantic dinner for two or a special weeknight meal, this dish comes together in just about 30 minutes, making it both quick and delicious.
Ingredients:
- 1 pound large shrimp, peeled and deveined
- 4 tablespoons unsalted butter
- 3 tablespoons olive oil
- 4 cloves garlic, minced
- 1/2 teaspoon red pepper flakes (optional)
- Zest of 1 lemon
- Juice of 1 lemon
- Salt and freshly ground black pepper, to taste
- 1/4 cup fresh parsley, chopped
- Cooked pasta or crusty bread, for serving
Cooking Steps:
- In a large skillet, heat the olive oil and 2 tablespoons of butter over medium-high heat.
- Add the minced garlic and red pepper flakes (if using) to the pan, and sauté for about 1 minute until fragrant, but not browned.
- Add the shrimp to the skillet, seasoning them with salt and pepper. Cook for approximately 2-3 minutes on one side until they turn pink, then flip them over and cook for another 1-2 minutes.
- Once the shrimp are cooked through, lower the heat and add the remaining butter, lemon zest, and lemon juice. Stir well to combine and let everything simmer for another minute.
- Remove from heat, add the chopped parsley, and give it one final stir before serving.
- Serve the shrimp scampi over your choice of cooked pasta or with slices of crusty bread to soak up the delectable sauce.
Variations & Tips:
- For added richness, consider tossing in a splash of white wine after cooking the garlic and before adding the shrimp.
- If you prefer a lighter version, you can substitute half of the butter with additional olive oil.
- To make it a complete meal, toss in some vegetables like cherry tomatoes or spinach while the shrimp are cooking.
- Adjust the amount of red pepper flakes to your desired spice level, or omit them completely for a milder flavor.
- If you have leftovers, this dish can be easily reheated on the stove over low heat; just be careful not to overcook the shrimp.
- Generous Capacity: 7-quart slow cooker that comfortably serves 9+ people or fits a 7-pound roast
- Cooking Flexibility: High or low slow cooking settings, with convenient warm function for ideal serving...
- Convenient: Set it and forget it feature enables you to cook while at work or performing daily tasks
Spinach and Feta Stuffed Pork Tenderloin
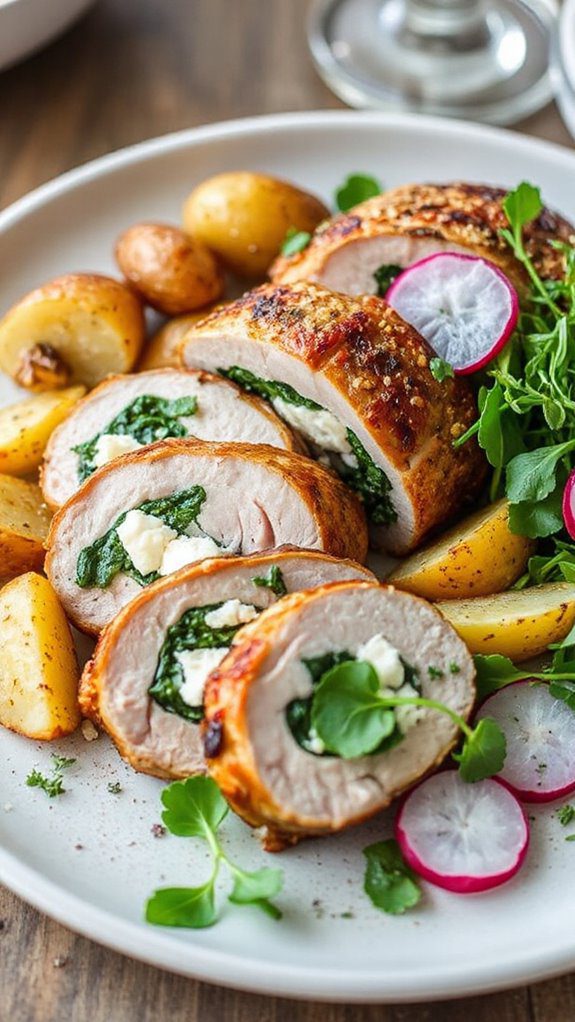
Spinach and Feta Stuffed Pork Tenderloin is a delectable main dish that features a juicy pork tenderloin filled with a savory mixture of fresh spinach, creamy feta cheese, and aromatic herbs. This elegant yet simple recipe is perfect for a romantic dinner for two or an intimate gathering.
With a preparation time of approximately 20 minutes and a cooking time of 25-30 minutes, it's an easy dish to whip up without spending all evening in the kitchen.
Ingredients:
- 1 pork tenderloin (about 1 pound)
- 1 cup fresh spinach, chopped
- 1/2 cup feta cheese, crumbled
- 1/4 cup cream cheese, softened
- 2 cloves garlic, minced
- 1 teaspoon dried oregano
- 1 teaspoon olive oil
- Salt and pepper, to taste
- Cooking twine (for tying the tenderloin)
Cooking Steps:
- Prepare the Filling: In a medium bowl, combine the chopped spinach, feta cheese, cream cheese, minced garlic, and dried oregano. Mix until well combined, then season with salt and pepper to taste.
- Prepare the Pork Tenderloin: Preheat your oven to 400°F (200°C). Carefully slice the pork tenderloin lengthwise down the center, creating a pocket without cutting all the way through. Open the tenderloin like a book and gently pound it to an even thickness, if necessary.
- Stuff the Tenderloin: Spoon the spinach and feta filling evenly into the pocket of the pork tenderloin. Fold the tenderloin back over to encase the filling. Use cooking twine to tie the tenderloin at intervals to secure the filling inside.
- Sear the Tenderloin: Heat the olive oil in an oven-safe skillet over medium-high heat. Place the stuffed tenderloin in the skillet and sear on all sides until browned, about 3-4 minutes per side.
- Roast in Oven: Transfer the skillet to the preheated oven and roast for 25-30 minutes, or until the internal temperature reaches 145°F (63°C). Remove from the oven and let it rest for 5 minutes before slicing.
- Serve: Slice the pork tenderloin into medallions and serve with your choice of sides, such as roasted vegetables or a crisp salad.
Variations & Tips:
- Herb Options: You can substitute dried oregano with other herbs, such as thyme or basil, according to your preference.
- Cheese Alternatives: If feta isn't your favorite, try using goat cheese or mozzarella for a different flavor profile.
- Add Nuts: For added texture, consider incorporating chopped walnuts or pine nuts into the stuffing mixture.
- Cooking Method: This stuffed pork tenderloin can also be grilled instead of roasted for a slightly smoky flavor.
- Serving Suggestions: Pair this dish with a light white wine, such as Sauvignon Blanc, to complement the flavors.
Enjoy this mouthwatering Spinach and Feta Stuffed Pork Tenderloin as a delightful centerpiece for your dinner for two!
- 100% Leak-proof: Guaranteed no-spill seal and secure latches
- Crystal-clear Tritan Built: Stain-resistant and odor-resistant material for a clear view of contents
- Lightweight & Sturdy: Easy to carry, yet durable for everyday use
Beef Stroganoff With Egg Noodles
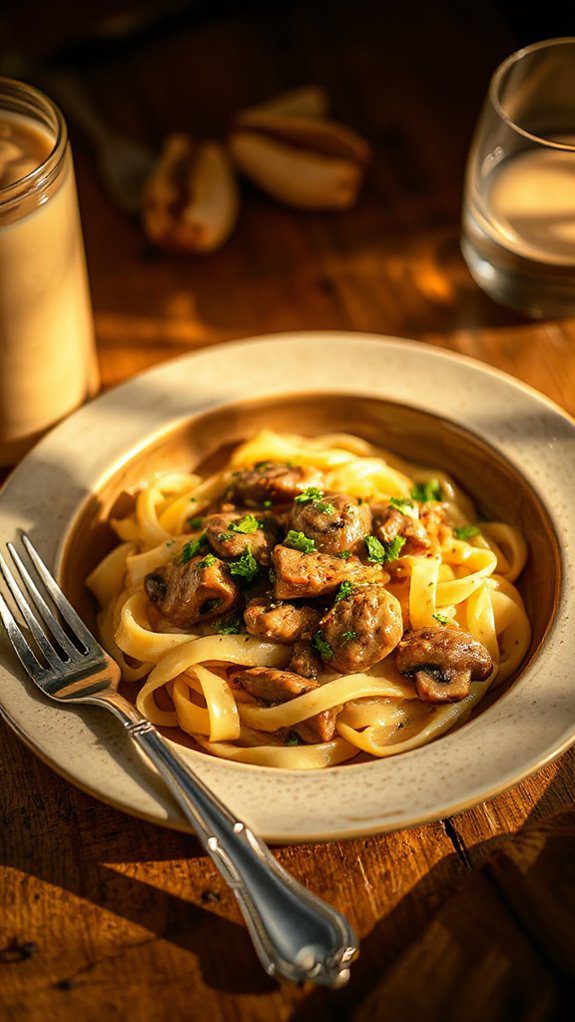
Beef Stroganoff with Egg Noodles is a classic dish known for its creamy sauce and tender beef, making it a perfect choice for cozy dinners for two. This hearty meal combines sautéed strips of beef, mushrooms, and onions in a rich, savory sauce served over a bed of egg noodles. Not only is it delicious, but it can also be prepared in about 30 minutes, making it ideal for weeknight meals when you want something quick yet comforting.
Ingredients:
- 1/2 pound beef sirloin, thinly sliced
- 1 cup egg noodles
- 1 cup mushrooms, sliced
- 1/2 onion, finely chopped
- 1 clove garlic, minced
- 1 cup beef broth
- 1/2 cup sour cream
- 2 tablespoons flour
- 2 tablespoons Worcestershire sauce
- 2 tablespoons olive oil
- Salt and pepper to taste
- Fresh parsley, chopped (for garnish)
Cooking Steps:
- Cook the egg noodles: In a large pot of salted boiling water, cook the egg noodles according to package instructions until al dente. Drain and set aside.
- Sauté the beef: In a large skillet over medium-high heat, add 1 tablespoon of olive oil. Once hot, add the sliced beef, seasoning with salt and pepper. Cook for about 2-3 minutes until browned. Remove the beef from the skillet and set aside.
- Cook the vegetables: In the same skillet, add the remaining tablespoon of olive oil. Sauté the chopped onions and garlic until translucent. Add the sliced mushrooms and continue to cook until they are tender and browned, about 5 minutes.
- Make the sauce: Sprinkle the flour over the vegetables in the skillet and stir well to combine, cooking for another minute. Slowly pour in the beef broth and Worcestershire sauce, stirring constantly until the sauce begins to thicken.
- Combine beef and sauce: Reduce the heat to low and stir in the sour cream, mixing until well combined. Return the sautéed beef to the skillet and heat through for about 2 minutes.
- Serve: Place a serving of cooked egg noodles on each plate and top generously with the beef stroganoff mixture. Garnish with chopped fresh parsley before serving.
Variations and Tips:
- Protein Swap: Substitute beef with chicken or turkey for a lighter version.
- Vegetarian Option: Use sautéed mushrooms and tofu or tempeh instead of beef for a vegetarian dish.
- Extra Flavor: Add a splash of white wine to the sauce for added depth.
- Creaminess Adjustments: Adjust the amount of sour cream according to your preference for creaminess.
- Serving Suggestion: Pair with a side salad or garlic bread to round out the meal.
Enjoy your cozy dinner with this classic Beef Stroganoff served over egg noodles!
- 𝗘𝗳𝗳𝗼𝗿𝘁𝗹𝗲𝘀𝘀 𝗪𝗲𝗶𝗴𝗵𝗶𝗻𝗴: Supports 5 units...
- 𝗣𝗿𝗲𝗰𝗶𝘀𝗲 𝗥𝗲𝘀𝘂𝗹𝘁𝘀: Accurately weighs up to 11 lb/5 kg with 1 g...
- 𝗦𝗶𝗺𝗽𝗹𝗲 & 𝗖𝗼𝗺𝗽𝗮𝗰𝘁: The small and sleek scale is a perfect fit for...
Mediterranean Quinoa Salad With Grilled Chicken
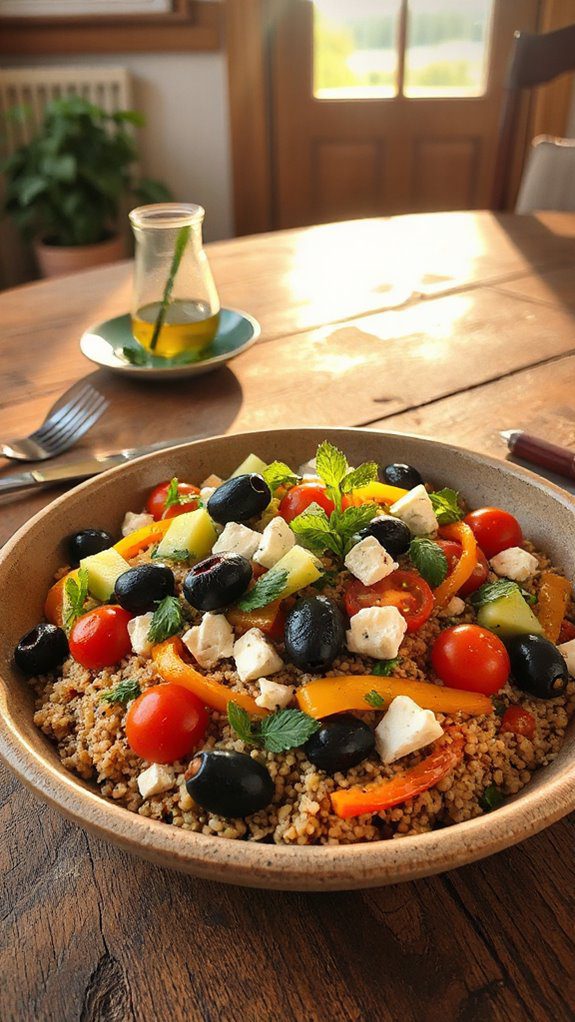
This Mediterranean Quinoa Salad with Grilled Chicken is a vibrant and nutritious dish perfect for a light dinner for two. Bursting with flavors from fresh vegetables, herbs, and a zesty dressing, this salad is not only satisfying but also packed with protein and fiber.
It takes about 30 minutes to prepare, making it an ideal option for busy weeknights or a delightful meal to impress your dinner guest.
Ingredients:
- 1 cup quinoa
- 2 cups water or vegetable stock
- 2 boneless, skinless chicken breasts
- 1 tablespoon olive oil
- Salt and pepper to taste
- 1 cup cherry tomatoes, halved
- 1 cucumber, diced
- ½ red onion, finely chopped
- 1 bell pepper (red or yellow), diced
- ½ cup feta cheese, crumbled
- ¼ cup kalamata olives, pitted and halved
- ¼ cup fresh parsley, chopped
- Juice of 1 lemon
- 2 tablespoons balsamic vinegar
- 1 teaspoon dried oregano
Cooking Steps:
- Rinse the quinoa under cold water in a fine mesh strainer. In a medium saucepan, combine the rinsed quinoa and water (or vegetable stock) and bring to a boil.
- Reduce heat to low, cover, and simmer for 15 minutes, or until the quinoa is fluffy and the liquid has been absorbed. Once cooked, remove from heat and let it sit covered for 5 minutes, then fluff with a fork.
- While the quinoa is cooking, preheat a grill pan or outdoor grill over medium-high heat. Coat the chicken breasts with olive oil, and season with salt and pepper.
- Grill each chicken breast for 6-7 minutes on each side, or until fully cooked and the internal temperature reaches 165°F. Remove from the grill and let it rest for a few minutes before slicing.
- In a large bowl, combine the cooked quinoa, cherry tomatoes, cucumber, red onion, bell pepper, feta cheese, olives, and parsley.
- In a small bowl, whisk together the lemon juice, balsamic vinegar, olive oil, and oregano. Pour the dressing over the quinoa salad and gently mix until everything is well combined.
- Slice the grilled chicken and serve it on top of the quinoa salad or mix it in for a more integrated dish.
Variations and Tips:
- For a vegetarian option, substitute grilled chicken with chickpeas or roasted vegetables.
- Add additional protein by including beans like cannellini or black beans to the salad.
- Feel free to mix in other Mediterranean ingredients, such as artichoke hearts or sun-dried tomatoes, for extra flavor.
- This salad can be enjoyed warm, at room temperature, or chilled.
- It can be made ahead of time and stored in the refrigerator for up to 2 days, making it a great option for meal prep.
- Instant Read Food Thermometer | Our instant read thermometer features a temperature probe and advanced,...
- Multi-Use | From bbq thermometer to baking thermometer, our digital food thermometer for cooking is...
- Easy-Read Digital Thermometer For Cooking | Large instant thermometer dial with bright blue backlight...
Teriyaki Chicken Stir-fry

Teriyaki Chicken Stir-fry is a vibrant and flavorful dish that combines succulent pieces of chicken with colorful vegetables in a sweet and savory teriyaki sauce. This quick and easy meal, perfect for two, takes only about 30 minutes to prepare, making it ideal for a romantic dinner or a cozy weeknight meal.
It's a versatile dish that can be modified based on your dietary preferences or what you have on hand.
Ingredients:
- 1 lb chicken breast, thinly sliced
- 2 tablespoons vegetable oil
- 1 cup broccoli florets
- 1 red bell pepper, sliced
- 1 cup snap peas
- 2 cloves garlic, minced
- 1-inch piece of ginger, grated
- 1/4 cup teriyaki sauce
- Cooked rice or noodles, for serving
- Sesame seeds and chopped green onions, for garnish (optional)
Cooking Steps:
- Prepare the Ingredients: Start by slicing the chicken breast and chopping the vegetables. Make sure all ingredients are ready to go, as stir-frying is a quick cooking method.
- Cook the Chicken: In a large skillet or wok, heat 1 tablespoon of vegetable oil over medium-high heat. Add the sliced chicken and stir-fry for about 5-7 minutes, or until browned and cooked through. Remove the chicken from the skillet and set aside.
- Stir-fry the Vegetables: In the same skillet, add the remaining tablespoon of vegetable oil. Toss in the minced garlic and grated ginger, cooking for about 30 seconds until fragrant. Add the broccoli, red bell pepper, and snap peas. Stir-fry for 3-5 minutes until the vegetables are tender yet crisp.
- Combine and Stir-fry: Return the cooked chicken to the skillet with the vegetables. Pour the teriyaki sauce over the mixture and stir to combine. Let it all cook together for an additional 2-3 minutes, allowing the flavors to meld.
- Serve: Serve the teriyaki chicken stir-fry over a bed of cooked rice or noodles. Garnish with sesame seeds and chopped green onions if desired.
Variations and Tips:
- Vegetarian Option: Substitute the chicken with tofu or a mix of your favorite vegetables like mushrooms and zucchini.
- Spice It Up: For a spicy kick, add red pepper flakes or Sriracha to the stir-fry.
- Meal Prep: You can prepare the chicken and vegetables ahead of time and store them in the refrigerator until you're ready to cook.
- Storage: Leftovers can be stored in an airtight container in the fridge for up to 3 days. Reheat on the stovetop or in the microwave before serving.
- Versatile 54-Piece Collection: Elevate your kitchen with the Home Hero 54-Piece Kitchen Utensil Set, a...
- Durable and Long-Lasting: Crafted from premium stainless steel, these kitchen utensils are designed to...
- Perfect Holiday Gift: Delight your loved ones with this kitchen utensils gift set this festive season....
Butternut Squash Risotto
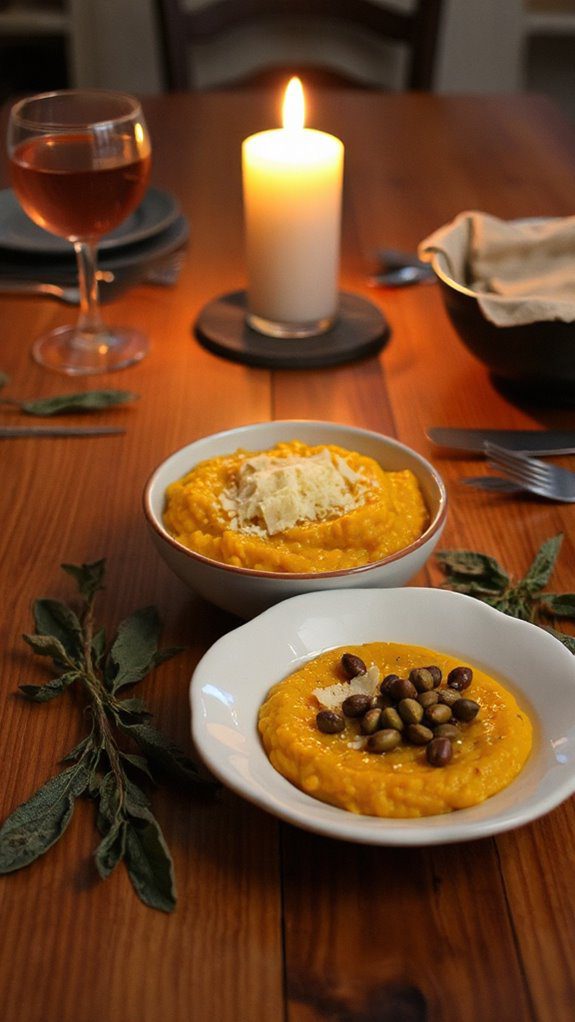
Butternut Squash Risotto is a creamy, comforting dish that beautifully balances the sweetness of roasted butternut squash with the savory notes of Arborio rice and savory broth.
This dish is ideal for couples looking for a romantic dinner or anyone wanting to indulge in a hearty, but elegant meal. The preparation time is about 15 minutes, with an additional 30-35 minutes of cooking, making it quick enough for a weeknight yet sophisticated for a special occasion.
Ingredients:
- 1 cup Arborio rice
- 2 cups butternut squash, peeled and diced
- 1 small onion, finely chopped
- 2 cloves garlic, minced
- 4 cups vegetable or chicken broth
- 1/2 cup dry white wine (optional)
- 1/2 cup grated Parmesan cheese
- 2 tablespoons olive oil
- Salt and pepper to taste
- Fresh sage or thyme leaves for garnish (optional)
Cooking Steps:
- Roast the Squash: Preheat your oven to 400°F (200°C). Toss the diced butternut squash with 1 tablespoon of olive oil, salt, and pepper. Spread it on a baking sheet and roast for about 20-25 minutes, or until tender and caramelized, stirring halfway through.
- Prepare the Broth: In a medium saucepan, bring the vegetable or chicken broth to a gentle simmer over low heat. Keep it warm throughout the cooking process.
- Sauté Aromatics: In a large frying pan or pot, heat the remaining tablespoon of olive oil over medium heat. Add the chopped onion and cook until translucent, about 3-4 minutes.
- Add the minced garlic and cook for another minute until fragrant.
- Toast the Rice: Add the Arborio rice to the pan and stir for 1-2 minutes, allowing it to toast slightly and absorb the flavors.
- Add Wine (Optional): If using, pour in the white wine, stirring constantly until it is mostly absorbed by the rice.
- Cook the Risotto: Begin adding the warm broth one ladleful at a time, stirring frequently. Allow each addition to be absorbed before adding the next. This process should take about 18-20 minutes, or until the rice is creamy and al dente.
- Combine and Serve: Once the rice is cooked, gently fold in the roasted butternut squash and Parmesan cheese. Season with salt and pepper to taste. Remove from the heat and let it rest for a minute before serving.
- Garnish and Enjoy: Plate the risotto and garnish with fresh sage or thyme leaves, if desired.
Variations and Tips:
- For a vegan version, substitute the Parmesan with nutritional yeast or a vegan cheese alternative.
- You can add extra veggies like spinach or peas for added nutrition and color.
- For a richer flavor, replace part of the broth with unsweetened coconut milk.
- If you prefer a bit of crunch, sprinkle some toasted pumpkin seeds over the top before serving.
- Leftover risotto can be chilled, formed into patties, and pan-fried for a delightful lunch or snack.
Enjoy your delicious, homemade Butternut Squash Risotto!
- 24-ounce insulated stainless-steel water bottle with a FreeSip spout and push-button lid with lock
- Patented FreeSip spout designed for either sipping upright through the built-in straw or tilting back to...
- Protective push-to-open lid keeps spout clean; convenient carry loop doubles as a lock
Chicken Piccata With Mashed Potatoes
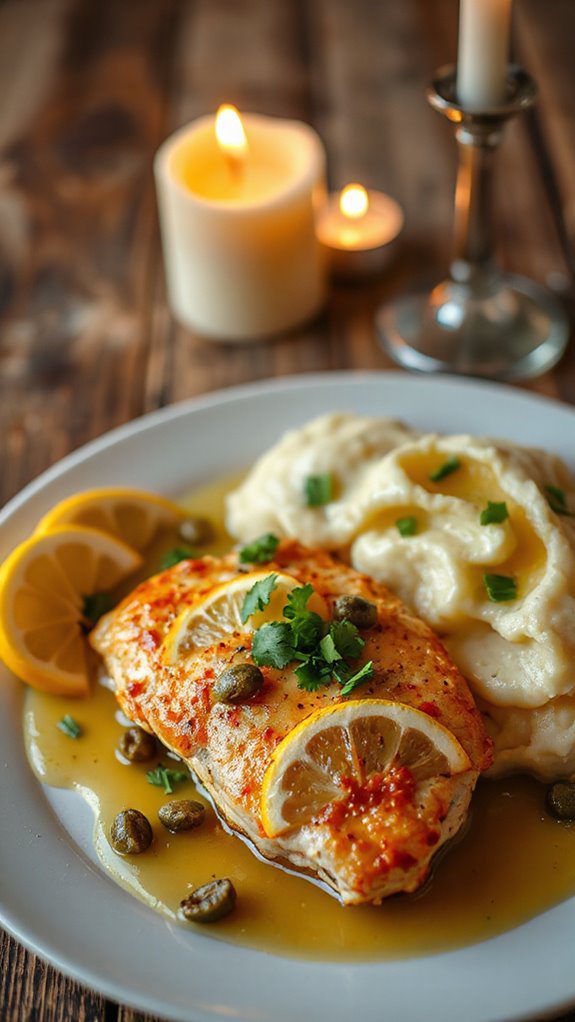
Chicken Piccata is a delightful Italian-inspired dish that features tender chicken breasts cooked to perfection in a lemony caper sauce.
This dish is ideal for a cozy dinner for two, crafted to impress your loved one without requiring hours in the kitchen. The bright flavors of the piccata sauce pair beautifully with creamy mashed potatoes, making this meal a comforting and romantic option for any evening.
Preparation time is about 30 minutes, with an additional 15 minutes to prepare the mashed potatoes.
Ingredients:
- 2 boneless, skinless chicken breasts
- Salt and pepper, to taste
- 1/2 cup all-purpose flour (for dredging)
- 2 tablespoons olive oil
- 2 tablespoons unsalted butter
- 1/4 cup fresh lemon juice
- 1 cup chicken broth
- 2 tablespoons capers
- 2 tablespoons fresh parsley, chopped
- 2 medium-sized potatoes (for mashed potatoes)
- 1/4 cup milk (for mashed potatoes)
- 2 tablespoons butter (for mashed potatoes)
- Optional: garlic powder, to taste (for mashed potatoes)
Cooking Steps:
1. Start by preparing the potatoes for mashing. Peel and chop the potatoes into even-sized chunks.
Place them in a pot of cold salted water and bring to a boil over high heat. Reduce the heat and simmer until tender, about 15-20 minutes. Drain and set aside.
2. While the potatoes cook, season the chicken breasts with salt and pepper on both sides. Dredge each piece in the flour, shaking off any excess.
3. In a large skillet, heat the olive oil and 1 tablespoon of butter over medium-high heat. Once hot, add the chicken breasts and sauté until golden brown and cooked through, about 5-7 minutes per side.
Remove the chicken from the skillet and keep warm.
4. In the same skillet, add the lemon juice, chicken broth, and capers. Bring to a simmer, scraping up any browned bits from the bottom of the pan.
Cook for about 2-3 minutes until the sauce slightly thickens.
5. Add the remaining tablespoon of butter to the sauce, stirring until melted. Return the chicken to the pan, spooning the sauce over it.
Sprinkle with chopped parsley before serving.
6. For the mashed potatoes, return them to the pot, add the remaining butter, and milk.
Mash until smooth and creamy. Season with salt, pepper, and optional garlic powder to taste.
7. Serve the chicken piccata alongside a generous scoop of mashed potatoes, drizzling additional sauce over both for extra flavor.
Variations and Tips:
- For a healthier version, you can use skinless chicken thighs instead of breasts.
- Feel free to add sautéed vegetables, like spinach or asparagus, alongside the chicken for added nutrition and color.
- If you prefer a thicker sauce, mix a teaspoon of cornstarch with a tablespoon of water and add it to the skillet while simmering the sauce.
- For a twist, consider using white wine instead of chicken broth for an enhanced flavor profile.
- Prepare the mashed potatoes ahead of time and reheat them while cooking the chicken for a quicker meal.
Lobster Tails With Garlic Herb Butter
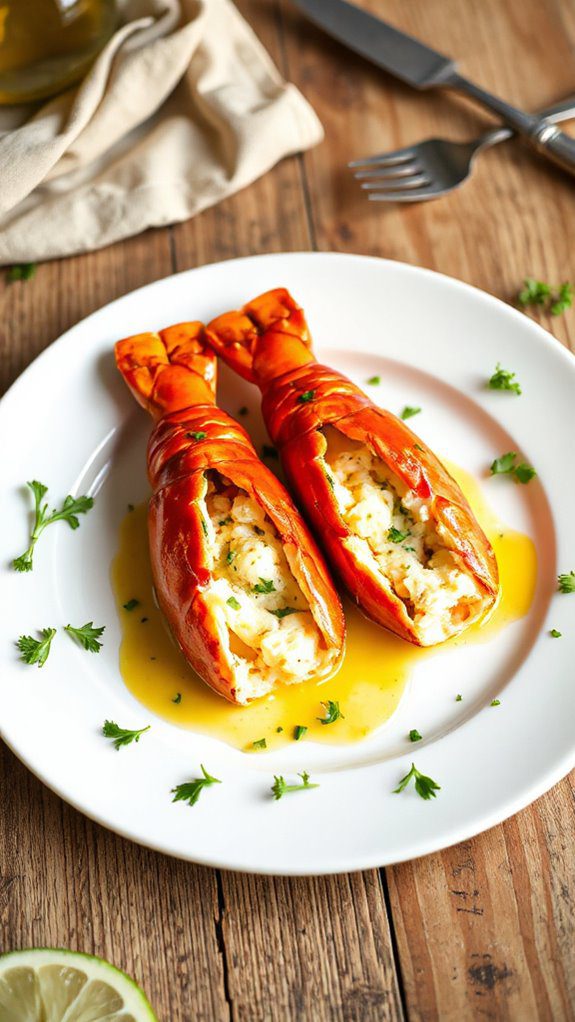
Lobster tails with garlic herb butter is a decadent seafood dish that makes for an impressive yet simple dinner for two. Perfect for special occasions or a romantic evening at home, this dish is not only delicious but also visually stunning.
With a preparation time of about 10 minutes and a cooking time of 15-20 minutes, you can easily whip up a gourmet meal in no time.
Ingredients:
- 2 lobster tails
- 4 tablespoons unsalted butter
- 2 cloves garlic, minced
- 1 tablespoon fresh parsley, chopped
- 1 teaspoon fresh lemon juice
- Salt, to taste
- Pepper, to taste
- Lemon wedges, for serving
Cooking Instructions:
- Preheat your oven to 425°F (220°C).
- Using kitchen shears, carefully cut down the top of the lobster tail to expose the meat. Gently pull the meat out and place it on top of the shell, keeping it attached at the base.
- In a small saucepan, melt the butter over medium heat. Add the minced garlic and sauté for about 1 minute until fragrant, being careful not to burn it.
- Remove from heat and stir in chopped parsley, lemon juice, salt, and pepper.
- Brush the garlic herb butter generously over the lobster meat. Reserve some butter for basting during cooking if desired.
- Place the prepared lobster tails on a baking sheet and bake in the preheated oven for about 15-20 minutes, or until the meat is opaque and tender.
- Baste the lobster tails with the reserved garlic herb butter halfway through cooking for added flavor and moisture.
- Once cooked, remove from the oven and serve immediately with lemon wedges.
Variations and Tips:
- For an extra twist, add a pinch of red pepper flakes to the garlic butter for some heat.
- Consider grilling the lobster tails instead of baking them for a smoky flavor; simply follow the same butter preparation and grill for about 6-8 minutes, or until cooked through.
- If you prefer a richer herb flavor, you can also mix in fresh thyme or tarragon with the parsley for a more complex dressing.
- Make sure to check that the lobster meat is fully cooked; it should be firm and white, with no translucent areas remaining.
- Serve with a side of steamed asparagus or a fresh salad to complete your meal.
Vegetable Stuffed Peppers
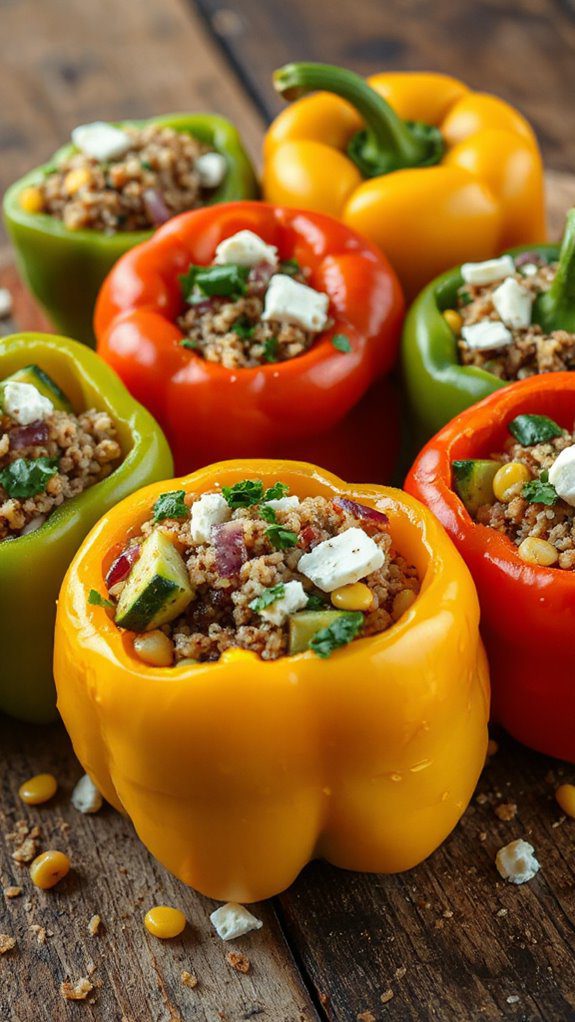
Vegetable stuffed peppers are a vibrant and nutritious dish that highlights a medley of fresh vegetables, grains, and spices all tucked into sweet bell peppers.
This dish is perfect for couples looking to enjoy a healthy yet delightful dinner without a lot of fuss. With a total preparation and cooking time of about 30-40 minutes, it makes for an easy weeknight meal or a cozy dinner for two.
Ingredients:
- 2 large bell peppers (any color)
- 1 cup cooked quinoa or rice
- 1 cup diced tomatoes (canned or fresh)
- 1 small zucchini, diced
- 1 small onion, finely chopped
- 1 clove garlic, minced
- 1 teaspoon olive oil
- 1 teaspoon dried oregano
- 1 teaspoon paprika
- Salt and pepper to taste
- ½ cup shredded cheese (optional)
- Fresh herbs for garnish (optional)
Cooking Steps:
- Preheat your oven to 375°F (190°C).
- Cut the tops off the bell peppers and remove the seeds and membranes. Lightly brush the outsides with olive oil and place them in a baking dish.
- In a skillet over medium heat, warm the olive oil. Add the chopped onion and minced garlic, sautéing until the onion becomes translucent.
- Stir in the diced zucchini and cook for another 3-4 minutes until softened.
- Add the cooked quinoa or rice to the skillet, followed by the diced tomatoes, oregano, paprika, salt, and pepper. Mix well and allow to cook for an additional 2-3 minutes to heat through.
- Carefully spoon the filling into the hollowed-out bell peppers, packing it well. If desired, sprinkle shredded cheese on top for a cheesy finish.
- Cover the baking dish with foil and bake in the preheated oven for 20 minutes. Remove the foil for the last 5-10 minutes to allow the cheese to melt and turn golden if used.
- Remove from the oven, let cool briefly, and garnish with fresh herbs before serving.
Variations/Tips:
- Feel free to swap out the vegetables based on your preferences—spinach, corn, or mushrooms work great as well.
- For a protein boost, add black beans or chickpeas to the filling mix.
- If you prefer a spicier kick, consider adding jalapeños or chili flakes to the filling.
- Store any leftovers in an airtight container in the refrigerator for up to 3 days, and reheat in the oven or microwave.
Balsamic Glazed Brussels Sprouts and Steak
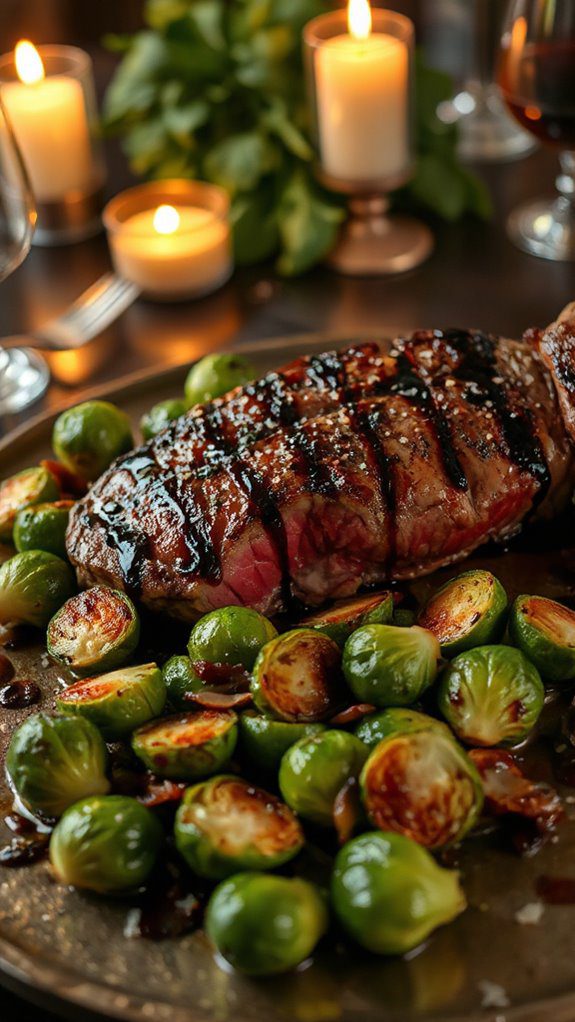
This Balsamic Glazed Brussels Sprouts and Steak dish is a perfect combination of savory and sweet, offering a delightful contrast to the hearty flavor of steak paired with the nutty bitterness of Brussels sprouts. Ideal for a cozy dinner for two, this meal can be prepared in about 30 minutes, making it perfect for a weeknight or special occasion.
The balsamic glaze adds a rich depth to the dish, enhancing the overall flavor profile without requiring extensive cooking time.
Ingredients
- 2 ribeye steaks (about 6-8 ounces each)
- Salt and pepper, to taste
- 2 cups Brussels sprouts, trimmed and halved
- 2 tablespoons olive oil
- 1/4 cup balsamic vinegar
- 1 tablespoon honey (or maple syrup)
- 1 garlic clove, minced
- 1 teaspoon Dijon mustard
- Fresh parsley, chopped, for garnish
Cooking Steps
1. Prepare the Brussels Sprouts: In a medium bowl, combine the halved Brussels sprouts with 1 tablespoon of olive oil, salt, and pepper. Toss to coat.
2. Roast Brussels Sprouts: Preheat your oven to 425°F (220°C). Spread the Brussels sprouts evenly on a baking sheet and roast for 20-25 minutes, stirring halfway through, until they are golden brown and tender.
3. Season the Steak: While the Brussels sprouts are roasting, season the ribeye steaks with salt and pepper on both sides.
4. Cook the Steak: Heat a medium-sized skillet over medium-high heat. Add the remaining tablespoon of olive oil. Once hot, sear the steaks for 4-5 minutes on each side for medium-rare, or until they reach your desired doneness. Remove from the skillet and let rest for a few minutes.
5. Make the Balsamic Glaze: In the same skillet, lower the heat to medium and add the minced garlic. Sauté for about 30 seconds until fragrant.
Stir in the balsamic vinegar, honey, and Dijon mustard, then bring to a simmer. Allow to cook for 2-3 minutes until the sauce thickens slightly.
6. Combine and Serve: Slice the steak against the grain and arrange it on plates with the roasted Brussels sprouts. Drizzle the balsamic glaze over the steak and sprouts. Garnish with chopped parsley before serving.
Variations and Tips
- For a slightly smoky flavor, consider grilling the steak instead of pan-searing.
- If you're not a fan of Brussels sprouts, feel free to substitute them with green beans or asparagus.
- To add a crunchy texture, sprinkle toasted nuts, such as pecans or walnuts, over the Brussels sprouts before serving.
- Pair the meal with a light salad or a side of mashed potatoes for a more filling dinner.
- Confirm the steak rests after cooking to retain its juices, making for a more flavorful bite.
Classic Margherita Pizza

Classic Margherita Pizza is a simple yet delicious dish that highlights the flavors of fresh ingredients. This Italian favorite is perfect for a cozy dinner for two, taking only about 30 minutes from preparation to the first slice.
The combination of a crispy crust, fresh tomatoes, creamy mozzarella, fragrant basil, and a drizzle of olive oil makes this pizza a delightful treat that is sure to impress your partner or guest.
Ingredients:
- 1 pre-made pizza dough (store-bought or homemade)
- 1 cup canned San Marzano tomatoes (or fresh cherry tomatoes)
- 8 ounces fresh mozzarella cheese, sliced
- Fresh basil leaves
- Extra virgin olive oil
- Salt and pepper
- Cornmeal (optional, for dusting)
Cooking Steps:
- Preheat your oven to the highest temperature (usually around 475°F or 245°C). If you have a pizza stone, place it in the oven to heat up as well.
- If using canned tomatoes, crush them by hand or with a fork in a bowl to create a rustic sauce. If using fresh cherry tomatoes, halve them and toss them with a pinch of salt and pepper.
- On a lightly floured surface, roll out the pizza dough into your desired shape, aiming for about 10-12 inches in diameter. If you prefer a thicker crust, leave it slightly thicker around the edges.
- If using, sprinkle a little cornmeal on a baking sheet or pizza peel. This helps the pizza slide easily if you're transferring it to a stone.
- Transfer the rolled-out dough to the prepared baking sheet or pizza peel. Spread the crushed tomatoes evenly over the dough, leaving a small border for the crust.
- Place the slices of fresh mozzarella evenly over the tomato sauce. Add salt and pepper to taste.
- Bake in the preheated oven for about 10-12 minutes, or until the crust is golden and the cheese is bubbling.
- Once done, remove the pizza from the oven and immediately scatter fresh basil leaves on top. Drizzle with extra virgin olive oil before slicing.
Variations and Tips:
- For a spicy kick, add a sprinkle of red pepper flakes on top before baking.
- If you enjoy a bit of tanginess, consider adding a few cherry tomatoes cut in half for additional freshness.
- Feel free to experiment with toppings like artichokes, olives, or prosciutto, while keeping the Margherita classic's simplicity in mind.
- To achieve a crispier crust, bake the pizza directly on the preheated pizza stone instead of a baking sheet.
- Serve with a side salad or garlic bread for an even more satisfying meal!
Chocolate Fondue for Two

Chocolate Fondue for Two is a decadent and romantic dessert perfect for couples celebrating a special occasion or simply enjoying a cozy night in together. This indulgent dish allows for a fun and interactive dining experience, as you dip an assortment of fruits, marshmallows, and other treats into warm, melted chocolate.
With a prep time of just 10 minutes and a cooking time of approximately 10 minutes, you can have this sweet delight ready to share in almost no time.
Ingredients:
- 6 oz semi-sweet chocolate or dark chocolate, chopped
- 1/2 cup heavy cream
- 1 teaspoon vanilla extract
- Fresh strawberries, cut into halves
- Banana slices
- Marshmallows
- Pretzels
- Cubed pound cake or brownie bites
- Skewers or fondue forks for dipping
Cooking Steps:
- Melt the Chocolate: In a small saucepan over low heat, combine the chopped chocolate and heavy cream. Stir continuously until the chocolate is melted and the mixture is smooth.
- Add Flavor: Remove from heat and stir in the vanilla extract until well combined.
- Transfer to Fondue Pot: Pour the melted chocolate into a fondue pot or a heatproof bowl. If using a fondue pot, keep it warm on a low setting.
- Prepare Dipping Items: Arrange your choice of dippables (strawberries, bananas, marshmallows, pretzels, and cake) on a platter around the fondue pot.
- Start Dipping: Use skewers or fondue forks to dip your selected items into the warm chocolate. Enjoy each bite!
Variations and Tips:
- Chocolate Variations: Experiment with different types of chocolate, such as white chocolate or milk chocolate, depending on your preference. You can also add a pinch of sea salt or a splash of liqueur for additional flavor.
- Fruit Choices: Other delicious fruits to contemplate include apple slices, pineapple chunks, and pears, as they all complement chocolate wonderfully.
- Make it a Meal: To make the experience even more robust, try adding small bites of cheese like Brie or Gouda for a sweet and savory combination.
- Leftover Fondue: If you have leftover chocolate, pour it into a mold to create chocolate treats or chill it until it solidifies for use in future fondues.


