For those seeking quick and satisfying meals, microwave mug recipes are a great choice beyond mac and cheese. One can prepare Cheesy Broccoli and Rice, which combines cooked rice, broccoli, and cheese for comfort in minutes. Other options include Spicy Thai Peanut Noodles and BBQ Chicken Nachos, all designed for efficiency and flavor. With a few ingredients and creativity, it's possible to enjoy a variety of savory delights in mere minutes. More exciting mug recipes await exploration.
Cheesy Broccoli and Rice

Cheesy Broccoli and Rice is a quick, comforting dish that's perfect for busy individuals or students looking for a satisfying meal in minutes.
This microwave mug recipe combines wholesome broccoli with fluffy rice and melty cheese for a deliciously creamy experience. With a preparation time of just about 10 minutes, it's an ideal option for a quick lunch or a cozy dinner.
Ingredients:
- ½ cup cooked rice (white or brown)
- ½ cup broccoli florets (fresh or frozen)
- ¼ cup shredded cheese (cheddar or your choice)
- ¼ cup milk
- 1 tablespoon butter
- ¼ teaspoon garlic powder
- Salt and pepper to taste
- Optional: red pepper flakes for spice
Cooking Instructions:
- In a microwave-safe mug, combine the cooked rice and broccoli florets.
- Add the butter, milk, garlic powder, salt, and pepper. Mix until well combined.
- Microwave the mug on high for 2 minutes. Check to see if the broccoli is tender; if not, microwave in 30-second increments until cooked through.
- Remove the mug from the microwave carefully (it will be hot!) and stir in the shredded cheese until melted and creamy.
- If desired, sprinkle some red pepper flakes for an extra kick. Enjoy your cheesy broccoli and rice straight from the mug!
Variations and Tips:
- For added protein, mix in cooked chicken or tofu.
- Use different vegetables like peas or spinach to switch up the flavor.
- Experiment with different types of cheese, such as mozzarella, gouda, or pepper jack for a different taste profile.
- To increase flavor, consider adding a splash of hot sauce or a squeeze of lemon juice before serving.
- The Original Pro Chopper - Our superstar veggie slicer has been creating waves on TikTok! Simple to use,...
- Easy Meal Prep with Rust-Resistant Blades - Our vegetable chopper is perfect for anyone who wants to eat...
- 5-Star Design - The soft-grip TPU handle ensures controlled chopping, while the non-skid rubber base...
Spicy Thai Peanut Noodles

Spicy Thai Peanut Noodles are a quick and flavorful dish that captures the vibrant essence of Thai cuisine. Perfect for students, busy professionals, or anyone in need of a speedy meal, this recipe takes only about 10 minutes from start to finish. The combination of creamy peanut butter, savory soy sauce, and a kick of spice makes it a satisfying option for lunch or dinner, and it can easily be customized to suit individual tastes.
Ingredients:
- 1 cup instant noodles
- 2 tablespoons peanut butter
- 2 tablespoons soy sauce
- 1 teaspoon sriracha (or more to taste)
- 1 teaspoon lime juice
- 1 teaspoon brown sugar
- 1/4 cup water
- 1 green onion, sliced
- Optional toppings: crushed peanuts, cilantro, lime wedges, sesame seeds
Cooking Steps:
- In a microwave-safe mug, add the instant noodles and cover with water. Microwave on high for 3-4 minutes or until the noodles are cooked. Drain any excess water carefully.
- In the same mug, add the peanut butter, soy sauce, sriracha, lime juice, brown sugar, and water. Stir well to combine until the sauce is smooth and well mixed.
- Return the mug to the microwave and heat for an additional 30 seconds to 1 minute, mixing halfway through, until everything is warmed through and nicely coated.
- Stir in the sliced green onion and any optional toppings you prefer, such as crushed peanuts for added crunch or cilantro for freshness. Enjoy your quick and delicious meal!
Variations & Tips:
- For added protein, consider mixing in cooked chicken, shrimp, or tofu before microwaving the sauce.
- If you like more vegetables, toss in some frozen mixed veggies or snap peas during the initial cooking step and microwave until heated.
- Adjust the spiciness by varying the amount of sriracha or adding a sprinkle of chili flakes to taste.
- Substitute almond butter or sunflower seed butter for a nut-free option, while still maintaining a creamy texture.
- Makes Everything Simple : Just forget your bagged cheese! Only turn the handle for several times and get...
- Premium Material : All parts of the rotary cheese grater are made of food grade ABS material, no BPA. The...
- Three Option Grater : The parmesan cheese grater finishes food preparation with slicing, shredding and...
BBQ Chicken Nachos

BBQ Chicken Nachos are a fun and delicious microwave mug recipe that brings a burst of flavor to any snack time or casual gathering. This dish is perfect for anyone looking for a quick and easy meal option, whether it's for yourself during a busy day or a late-night treat with friends.
With a preparation time of just 10 minutes, these nachos will satisfy your cravings without requiring a lot of effort.
Ingredients:
- 1 cup tortilla chips
- 1/2 cup cooked chicken, shredded
- 1/4 cup BBQ sauce
- 1/2 cup shredded cheese (cheddar or Monterey Jack)
- 2 tablespoons sliced jalapeños (optional)
- 2 tablespoons chopped green onions (for garnish)
- Sour cream (for serving, optional)
Instructions:
- In a microwave-safe mug, layer half of the tortilla chips at the bottom.
- In a small bowl, mix the shredded chicken with BBQ sauce until well-coated.
- Spread half of the BBQ chicken mixture over the tortilla chips in the mug.
- Sprinkle half of the shredded cheese on top of the chicken.
- Repeat the layering process with the remaining tortilla chips, BBQ chicken, and cheese.
- If using, sprinkle jalapeños on top of the final cheese layer.
- Microwave on high for 1-2 minutes, or until the cheese is melted and bubbly. Check at the 1-minute mark to avoid overcooking.
- Carefully remove the mug from the microwave (it will be hot!) and garnish with chopped green onions.
- Serve with a dollop of sour cream on the side, if desired.
Variations and Tips:
- For a vegetarian option, replace the chicken with black beans or refried beans.
- Add other toppings like diced tomatoes, black olives, or corn for extra flavor and texture.
- Experiment with different types of cheese for a unique twist.
- If you prefer your nachos extra crispy, consider lightly toasting the tortilla chips in the microwave before layering.
- Always adjust the microwave timing based on the wattage of your appliance to avoid burnt or undercooked food.
- 💰 REDUCE WASTE AND SAVE MONEY: Chef Preserve keeps FOOD FRESH 5 TIMES LONGER than non-vacuum storage...
- ✅ POWERFUL, QUICK & EASY TO USE: Simply press the button to start. The device vacuum seals a bag in 5...
- ♻️ REUSABLE & RESEALABLE BAGS: Chef Preserve comes with dishwasher, freezer, refrigerator, and...
Loaded Baked Potato Soup

Loaded Baked Potato Soup is a comforting and hearty dish that brings together the flavors of a classic baked potato in a creamy soup form, perfect for a quick lunch or a cozy dinner.
Ideal for those who love the rich taste of baked potatoes topped with all the fixings, this recipe can be prepared in just around 10-12 minutes with minimal cleanup, making it perfect for busy weeknights or when you're simply craving something warm and satisfying.
Ingredients:
- 1 medium-sized potato, peeled and diced
- 1 cup of vegetable or chicken broth
- 1/2 cup of milk
- 1/4 cup of shredded cheese (cheddar works well)
- 2 tablespoons of sour cream
- 2 tablespoons of cooked bacon bits (optional)
- 2 tablespoons of chopped green onions
- Salt and pepper, to taste
Cooking Steps:
- Cook the Potato: In a microwave-safe mug, add the diced potato and cover it with the broth. Microwave on high for about 5-6 minutes, or until the potato is soft.
- Add Milk and Cheese: Once the potato is cooked, carefully remove the mug (it may be hot). Mash the potato slightly with a fork, then stir in the milk and shredded cheese until combined and creamy.
- Mix in Toppings: Add the sour cream, bacon bits (if using), and green onions. Stir everything together and season with salt and pepper to taste.
- Final Heating: Return the mug to the microwave and heat for another 1-2 minutes, or until the soup is heated through and creamy.
- Serve: Top with extra cheese or green onions if desired and enjoy your loaded baked potato soup straight from the mug!
Variations and Tips:
- Add More Veggies: Consider adding chopped broccoli or carrots for added nutrition.
- Spicy Kick: Incorporate a dash of hot sauce or cayenne pepper for a spicy variation.
- Creamier Texture: Substitute half and half for more creaminess instead of milk.
- Different Cheeses: Try using different cheeses like Gouda or pepper jack for varied flavor.
- To Serve with Crusty Bread: If you have a slice of crusty bread or a roll, serve it on the side for dipping!
- Generous Capacity: 7-quart slow cooker that comfortably serves 9+ people or fits a 7-pound roast
- Cooking Flexibility: High or low slow cooking settings, with convenient warm function for ideal serving...
- Convenient: Set it and forget it feature enables you to cook while at work or performing daily tasks
Mexican Street Corn Dip

Mexican Street Corn Dip is a flavorful and creamy dish that captures the essence of the beloved street food found in Mexico. This dip is perfect for gatherings, game day, or simply a cozy night in when you want to indulge in something delicious.
The preparation time is about 10 minutes, and with a quick microwave step, you can serve it warm in no time, making it a convenient option for anyone looking for a tasty appetizer.
Ingredients:
- 1 cup canned corn, drained
- 1/2 cup cream cheese, softened
- 1/2 cup mayonnaise
- 1/2 cup sour cream
- 1/2 cup shredded cheddar cheese
- 1/2 cup crumbled feta or cotija cheese
- 1 tablespoon lime juice
- 1 teaspoon chili powder
- 1/2 teaspoon garlic powder
- 1/4 teaspoon salt
- 1/4 teaspoon black pepper
- Chopped cilantro, for garnish (optional)
- Tortilla chips, for serving
Cooking Steps:
- In a microwave-safe mug or bowl, combine the cream cheese, mayonnaise, and sour cream. Mix until smooth and creamy.
- Add the drained corn, cheddar cheese, feta or cotija cheese, lime juice, chili powder, garlic powder, salt, and black pepper. Stir until all the ingredients are well combined.
- Microwave the dip on high for 1-2 minutes, or until heated through and the cheeses are melted. Stir halfway through for even heating.
- Once heated, remove it from the microwave carefully (it will be hot!) and garnish with chopped cilantro, if desired.
- Serve immediately with tortilla chips for dipping.
Variations and Tips:
- For a spicier kick, add diced jalapeños or a dash of hot sauce to the mixture before microwaving.
- You can substitute the corn with frozen corn (thawed) or fresh corn that's been cooked and cut off the cob for a more authentic taste.
- Try adding in other ingredients such as diced red onion, bell peppers, or avocado for added texture and flavor.
- If you prefer a lighter version, consider using Greek yogurt instead of sour cream or mayonnaise.
- This dip can be made ahead of time and stored in the refrigerator; simply reheat in the microwave before serving.
- 100% Leak-proof: Guaranteed no-spill seal and secure latches
- Crystal-clear Tritan Built: Stain-resistant and odor-resistant material for a clear view of contents
- Lightweight & Sturdy: Easy to carry, yet durable for everyday use
Creamy Mushroom Risotto
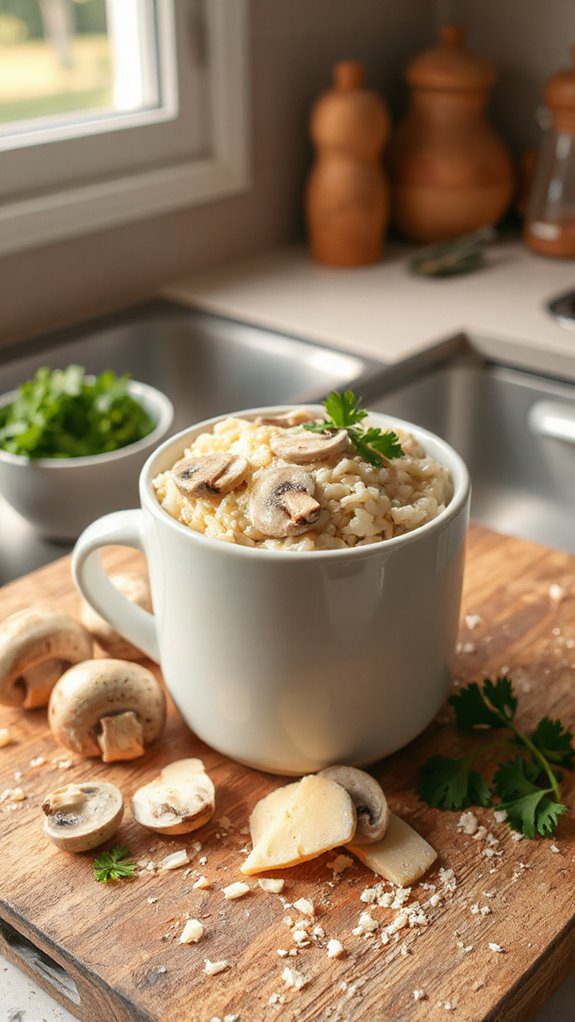
Creamy Mushroom Risotto is a comforting and luxurious dish that typically requires a lot of attention and stirring on the stovetop. However, this microwave mug version makes it accessible for busy individuals or those living in small spaces.
Perfect for a quick dinner or a satisfying lunch, this recipe takes about 15 minutes from start to finish, allowing you to enjoy a delicious risotto without the fuss.
Ingredients:
- 1/4 cup Arborio rice
- 1 cup vegetable or chicken broth
- 1/4 cup mushrooms, diced (such as cremini or button)
- 2 tablespoons onion, finely chopped
- 2 tablespoons Parmesan cheese, grated
- 1 tablespoon butter
- Salt and pepper, to taste
- Fresh parsley, chopped (for garnish, optional)
Instructions:
- In a large microwave-safe mug or bowl, combine the Arborio rice, diced mushrooms, and chopped onions.
- Pour in the vegetable or chicken broth, making certain all the rice is submerged.
- Microwave on high for 5 minutes, then stir the mixture to confirm even cooking.
- Microwave for an additional 3-5 minutes, watching closely to prevent overflow, until the rice is tender and has absorbed most of the broth.
- Once cooked, stir in the butter and Parmesan cheese until creamy. Season with salt and pepper to taste.
- If desired, garnish with fresh parsley before serving.
Variations and Tips:
- For added flavor, sauté the mushrooms and onions in a little olive oil before adding them to the mug.
- Swap out the mushrooms for other veggies like spinach, peas, or asparagus.
- Experiment with different cheeses such as feta or goat cheese for varying flavor profiles.
- Adjust the consistency by adding more broth if the risotto seems too dry.
- Feel free to add cooked protein like chicken or shrimp for a heartier meal.
- 𝗘𝗳𝗳𝗼𝗿𝘁𝗹𝗲𝘀𝘀 𝗪𝗲𝗶𝗴𝗵𝗶𝗻𝗴: Supports 5 units...
- 𝗣𝗿𝗲𝗰𝗶𝘀𝗲 𝗥𝗲𝘀𝘂𝗹𝘁𝘀: Accurately weighs up to 11 lb/5 kg with 1 g...
- 𝗦𝗶𝗺𝗽𝗹𝗲 & 𝗖𝗼𝗺𝗽𝗮𝗰𝘁: The small and sleek scale is a perfect fit for...
Teriyaki Chicken and Quinoa

Microwave Mug Teriyaki Chicken and Quinoa is a quick and nutritious dish, perfect for busy individuals or students looking for a satisfying meal in under 15 minutes.
This single-serving recipe combines tender chicken, fluffy quinoa, and a sweet and savory teriyaki sauce, making it an ideal option for lunch or dinner when time is of the essence.
With minimal prep and clean-up, you can enjoy a delicious and healthy meal in a mug!
Ingredients:
- 1/2 cup cooked quinoa
- 1/2 cup diced cooked chicken (rotisserie works well)
- 2 tablespoons teriyaki sauce
- 1/4 cup frozen mixed vegetables (peas, carrots, corn)
- 1 tablespoon green onions, sliced
- Sesame seeds for garnish (optional)
Cooking Instructions:
- In a microwave-safe mug, combine the cooked quinoa, diced chicken, teriyaki sauce, and frozen mixed vegetables. Stir well to mix all the ingredients evenly.
- Place the mug in the microwave and heat on high for 1-2 minutes, or until everything is heated through and the vegetables are tender.
- Carefully remove the mug from the microwave (it will be hot!). Stir the mixture again, then top with sliced green onions and sesame seeds if desired.
- Enjoy your Teriyaki Chicken and Quinoa straight from the mug or transfer it to a bowl if you prefer.
Variations and Tips:
- Swap the chicken for tofu or cooked shrimp for a different protein option.
- You can use brown rice or cauliflower rice instead of quinoa for a low-carb variation.
- Add a splash of soy sauce or a squeeze of lime for an extra burst of flavor.
- If you like it spicy, consider stirring in a dash of sriracha or red pepper flakes before microwaving.
- For added texture, top with chopped nuts or crispy fried onions before serving.
- Instant Read Food Thermometer | Our instant read thermometer features a temperature probe and advanced,...
- Multi-Use | From bbq thermometer to baking thermometer, our digital food thermometer for cooking is...
- Easy-Read Digital Thermometer For Cooking | Large instant thermometer dial with bright blue backlight...
Spinach and Feta Omelette

The Spinach and Feta Omelette is a quick and nutritious dish that makes for an excellent breakfast or light lunch. Packed with protein and greens, it's perfect for anyone looking to start their day off right or needing a healthy meal option in a hurry.
This microwave mug recipe is incredibly easy to prepare, taking just about 5 minutes from start to finish. It's not only suitable for busy individuals but also a great dish for beginners in the kitchen.
Ingredients:
- 2 large eggs
- 2 tablespoons fresh spinach, chopped
- 2 tablespoons feta cheese, crumbled
- 1 tablespoon milk (optional)
- Salt and pepper, to taste
- A pinch of crushed red pepper flakes (optional)
Cooking Instructions:
- In a microwave-safe mug, crack the eggs and add the milk (if using). Whisk until well combined using a fork.
- Stir in the chopped spinach, crumbled feta cheese, and season with salt, pepper, and red pepper flakes, if desired.
- Microwave the mug on high for 30-45 seconds. Check for doneness—if the eggs are still runny, continue microwaving in 15-second intervals until fully cooked.
- Let it cool for a minute before serving to avoid burns. Enjoy your Spinach and Feta Omelette directly from the mug!
Variations and Tips:
- Add Different Veggies: Feel free to include other vegetables like bell peppers, tomatoes, or mushrooms for additional flavors and nutrients.
- Cheese Alternatives: If feta isn't your preference, you can swap it for shredded cheddar, Monterey Jack, or any cheese of your choice.
- Herbs and Spices: Enhance your omelette with fresh herbs like basil or dill, or add spices like garlic powder or onion powder for extra flavor.
- Serving Suggestions: This omelette goes beautifully with whole-grain toast or atop a fresh salad for a balanced meal.
- Versatile 54-Piece Collection: Elevate your kitchen with the Home Hero 54-Piece Kitchen Utensil Set, a...
- Durable and Long-Lasting: Crafted from premium stainless steel, these kitchen utensils are designed to...
- Perfect Holiday Gift: Delight your loved ones with this kitchen utensils gift set this festive season....
Savory Quiche Lorraine

Ingredients:
- 1 large egg
- 2 tablespoons milk
- 2 tablespoons shredded cheese (Swiss or cheddar)
- 2 tablespoons cooked and crumbled bacon
- 1 tablespoon diced onion
- Salt and pepper to taste
- Fresh parsley or chives for garnish (optional)
Cooking Steps:
1. In a microwave-safe mug, whisk together the egg and milk until well combined.
2. Stir in the shredded cheese, crumbled bacon, diced onion, and season with salt and pepper to taste.
3. Microwave the mug on high for about 1 minute.
Check the doneness; if the egg is still slightly undercooked, microwave in 10-15 second intervals until fully set.
4. Allow the quiche to cool for a minute, garnish with fresh parsley or chives if desired, and enjoy!
Variations and Tips:
- For a vegetarian version, replace bacon with sautéed vegetables such as spinach, bell peppers, or mushrooms.
- Experiment with different cheeses like feta or mozzarella for varied flavors.
- Add a pinch of herbs like thyme or oregano for additional seasoning.
- Confirm your mug is large enough (at least 12 oz) to prevent overflowing during cooking.
- This quiche keeps well in the fridge for up to 2 days, making it a great meal prep option.
- 24-ounce insulated stainless-steel water bottle with a FreeSip spout and push-button lid with lock
- Patented FreeSip spout designed for either sipping upright through the built-in straw or tilting back to...
- Protective push-to-open lid keeps spout clean; convenient carry loop doubles as a lock
Beef Stroganoff
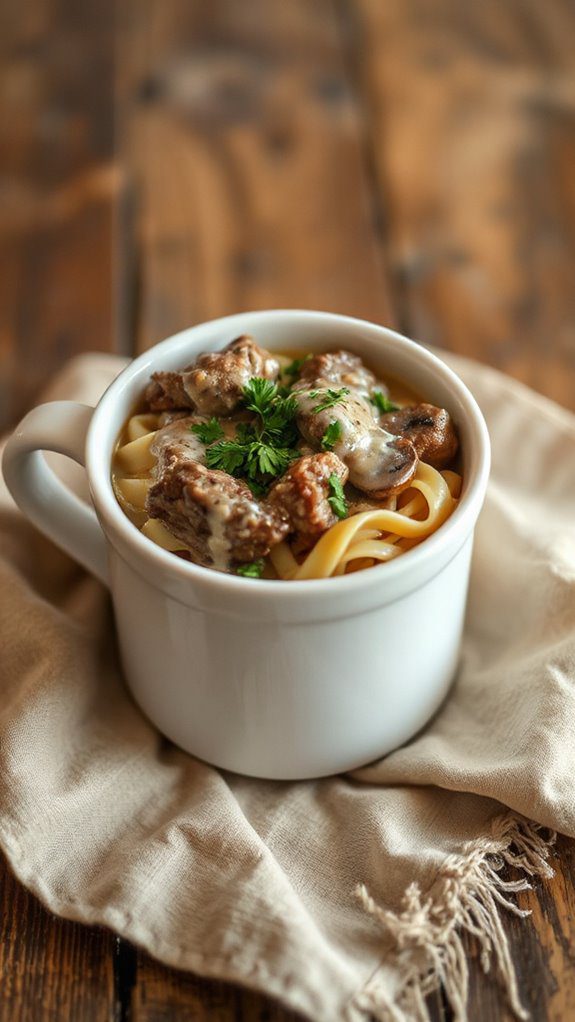
Beef Stroganoff is a creamy, savory dish that originates from Russia, typically featuring tender beef strips, mushrooms, and a rich sauce.
Cooking this delectable dish in a microwave mug is perfect for individuals who want a quick, satisfying meal without the fuss of traditional stove-top preparation. It takes about 10-15 minutes from start to finish, making it ideal for busy weeknights or a comforting lunch.
Ingredients:
- 1/2 cup beef strips (thinly sliced)
- 1/4 cup onion (finely chopped)
- 1/4 cup mushrooms (sliced)
- 1 tablespoon olive oil
- 1/4 cup beef broth
- 1/4 cup sour cream
- 1 teaspoon Worcestershire sauce
- 1/2 teaspoon garlic powder
- Salt and pepper (to taste)
- Fresh parsley (for garnish, optional)
Cooking Instructions:
- In a microwave-safe mug, combine the olive oil, beef strips, chopped onion, and sliced mushrooms. Microwave on high for 2-3 minutes, or until the beef is cooked through and the onions are translucent.
- Carefully remove the mug from the microwave. Add the beef broth, Worcestershire sauce, garlic powder, salt, and pepper. Stir well to combine all the ingredients.
- If desired, add the sour cream and mix until the sauce is creamy and well combined. Microwave for an additional 1-2 minutes to heat through.
- Once cooked, let it cool for a minute and top with fresh parsley if using. Serve warm.
Variations and Tips:
- Pasta Addition: For a heartier meal, add a few spoonfuls of cooked egg noodles or rice before microwaving the beef mixture.
- Vegetable Variants: Feel free to include other vegetables, like bell peppers or spinach, for added nutrition.
- Spice It Up: Add a pinch of red pepper flakes or a dash of hot sauce for a bit of heat.
- Beef Substitute: For a lighter option, use chicken or turkey strips instead of beef.
- Storage Tips: If you have leftovers, store them in the fridge for up to 2 days. Reheat in the microwave before serving.
With this simple and delicious microwave mug recipe for Beef Stroganoff, you can enjoy this classic dish in no time!
Garlic Parmesan Polenta

Garlic Parmesan Polenta is a creamy, savory dish that elevates simple polenta with the bold flavors of garlic and Parmesan cheese. Perfect as a side dish or light meal, this quick and easy recipe is ideal for busy weeknights or for impressing guests with minimal effort.
The entire process takes about 10 minutes, making it a fantastic option for anyone looking for a comforting yet sophisticated dish in a flash.
Ingredients
- 1/2 cup cornmeal (polenta)
- 2 cups water
- 1 clove garlic, minced
- 1/2 cup grated Parmesan cheese
- 1 tablespoon butter
- Salt and pepper to taste
- Chopped fresh parsley (optional, for garnish)
Cooking Steps
- In a microwave-safe mug, combine the cornmeal and water. Stir until the cornmeal is fully incorporated.
- Microwave the mixture on high for 2-3 minutes, stirring every minute to prevent clumping. The polenta should start to thicken.
- Once it reaches desired consistency, carefully remove the mug from the microwave.
- Add the minced garlic, butter, and grated Parmesan cheese to the polenta. Stir well until the cheese melts and everything is nicely combined.
- Season with salt and pepper to taste. If desired, stir in chopped fresh parsley for an extra touch of flavor and color.
- Return the mug to the microwave for an additional 30 seconds to make sure everything is heated through, then enjoy!
Variations and Tips
- For a spicier kick, add a pinch of red pepper flakes or a dash of hot sauce.
- Try substituting the Parmesan with other cheeses like feta or goat cheese for a different flavor profile.
- Add cooked vegetables such as mushrooms or spinach to the polenta before microwaving for an extra nutrition boost.
- If you prefer a creamier texture, use half water and half milk when preparing the polenta.
Lemon Herb Couscous

Lemon Herb Couscous is a bright and invigorating dish that makes for a perfect side or light entrée.
Ideal for those looking for a quick and nutritious meal, this dish can be prepared in just 10 minutes—perfect for busy weeknights or when you're short on time.
The combination of lemon and fresh herbs adds a lovely zesty flavor, making it a delightful accompaniment to grilled meats or vegetables.
Ingredients:
- 1/2 cup couscous
- 1 cup vegetable broth or water
- 1 tablespoon olive oil
- Juice of 1/2 lemon
- Zest of 1/2 lemon
- 1 tablespoon chopped fresh parsley
- 1 tablespoon chopped fresh basil
- Salt and pepper to taste
Cooking Steps:
- In a microwave-safe mug, combine the couscous and vegetable broth or water.
- Add the olive oil, lemon juice, and lemon zest to the mug, stirring to combine.
- Cover the mug with a microwave-safe plate or wrap it with a paper towel.
- Microwave on high for 1-2 minutes until the liquid is absorbed and the couscous is fluffy. Check after 1 minute to verify it doesn't overflow.
- Remove the mug from the microwave (it will be hot!) and use a fork to fluff the couscous.
- Stir in the chopped parsley and basil, then season with salt and pepper to taste.
- Enjoy your Lemon Herb Couscous warm, or let it cool and use it in a salad!
Variations and Tips:
- For a heartier dish, add cooked chickpeas or grilled chicken for protein.
- Feel free to experiment with different herbs such as cilantro or dill based on your preferences.
- If you like heat, add a pinch of red pepper flakes for an extra kick!
- This couscous can be served warm or chilled, making it versatile for meal prep or potlucks.
- Store any leftovers in an airtight container in the fridge for up to three days. Reheat before serving or enjoy cold as a salad!
Mediterranean Orzo Salad

Mediterranean Orzo Salad is a vibrant, reviving dish that combines tender orzo pasta with a medley of colorful vegetables and classic Mediterranean flavors.
It's perfect for a light lunch, a side dish at a barbecue, or a healthy snack. This dish takes about 15 minutes to prepare and can be served warm or cold, making it versatile for any occasion.
Ingredients:
- 1 cup orzo pasta
- 1 cup cherry tomatoes, halved
- 1/2 cup cucumber, diced
- 1/2 cup red onion, finely chopped
- 1/2 cup feta cheese, crumbled
- 1/4 cup Kalamata olives, pitted and sliced
- 1/4 cup fresh parsley, chopped
- 3 tablespoons olive oil
- 1 tablespoon red wine vinegar
- Salt and pepper to taste
Cooking Steps:
- In a microwave-safe mug, combine 1 cup of water and 1 cup of orzo pasta. Cover it with a microwave-safe lid or plate and microwave on high for 4-5 minutes or until the orzo is al dente.
- Once cooked, drain any excess water from the orzo and allow it to cool slightly.
- Add the cherry tomatoes, cucumber, red onion, feta cheese, Kalamata olives, and parsley to the mug with the orzo.
- In a small bowl, whisk together the olive oil, red wine vinegar, salt, and pepper. Pour the dressing over the salad ingredients in the mug and toss to combine.
- Taste for seasoning and adjust salt and pepper if necessary.
Variations and Tips:
- Feel free to add protein, such as grilled chicken or chickpeas, to make it a complete meal.
- For a gluten-free version, substitute the orzo with quinoa or gluten-free pasta.
- You can also incorporate other vegetables like bell peppers or artichoke hearts to enhance the flavor.
- This salad stores well in the refrigerator and can be made ahead of time, allowing the flavors to meld together for a more delicious experience.
Buffalo Cauliflower Wrap

Buffalo Cauliflower Wraps are a flavorful and satisfying dish that combines the spicy zing of buffalo sauce with the crunchy texture of roasted cauliflower, all wrapped in a soft tortilla.
This recipe is perfect for a quick lunch or a light dinner, especially for those looking for a plant-based option that doesn't skimp on taste. With a preparation time of just 10 minutes and a cooking time of about 5 minutes in the microwave, these wraps are ideal for busy individuals craving a nutritious bite.
Ingredients:
- 1 cup cauliflower florets
- 2 tablespoons buffalo sauce
- 1 tablespoon olive oil
- Salt and pepper to taste
- 1 large tortilla (whole wheat, flour, or gluten-free)
- ¼ cup shredded lettuce
- ¼ cup diced tomatoes
- 2 tablespoons ranch or blue cheese dressing (optional)
- 2 tablespoons shredded cheese (optional)
Cooking Steps:
- Prepare Cauliflower: In a microwave-safe bowl, combine the cauliflower florets, olive oil, buffalo sauce, and season with salt and pepper. Toss well to coat.
- Cook: Cover the bowl with a microwave-safe lid or plate and microwave on high for about 5 minutes, or until the cauliflower is tender.
- Assemble Wrap: Lay the tortilla flat and place the cooked cauliflower mixture in the center. Top with shredded lettuce, diced tomatoes, and dressing if using.
- Wrap It Up: Fold in the sides of the tortilla and roll it tightly from the bottom to the top to enclose the filling.
- Serve: Enjoy your Buffalo Cauliflower Wrap right away for the best texture!
Variations & Tips:
- Spice Level: Adjust the amount of buffalo sauce according to your heat preference. You can mix in some honey or agave to balance the heat if needed.
- Extra Veggies: Add sliced cucumbers, shredded carrots, or bell peppers for an additional crunch and nutrients.
- Protein Boost: For added protein, consider mixing in some cooked chickpeas or adding tofu.
- Cheesy Flavor: Opt for vegan cheese if you want a dairy-free option, or add feta or goat cheese for a tangy flavor.
- Meal Prep: You can prepare the cauliflower mixture in advance and store it in the fridge. Assemble the wraps just before eating for a quick meal.
Sweet and Sour Shrimp
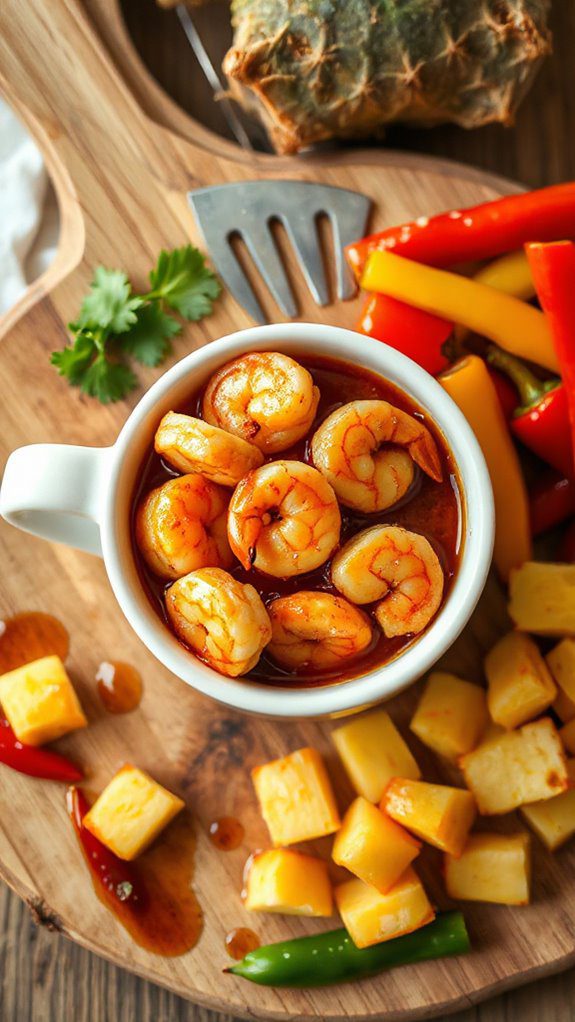
Sweet and Sour Shrimp is a delightful dish that brings together the zesty and tangy flavors of a classic sweet and sour sauce with succulent shrimp.
It's perfect for seafood lovers and is an excellent option for a quick and satisfying meal that can be made in under 15 minutes. Whether you're serving it for a fun family dinner or impressing friends with a tasty dish, this microwave mug recipe is simple to prepare and guarantees a delicious outcome.
Ingredients:
- 1 cup shrimp, peeled and deveined
- 2 tablespoons sweet and sour sauce
- 1 tablespoon soy sauce
- 1 cup mixed bell peppers, chopped
- 1 tablespoon green onions, sliced
- 1 teaspoon sesame oil (optional)
- Cooked rice or noodles for serving (optional)
Cooking Steps:
- In a microwave-safe mug, combine the shrimp, sweet and sour sauce, and soy sauce. Stir well to coat the shrimp evenly.
- Add the chopped bell peppers and green onions to the mug, mixing them lightly with the shrimp and sauce.
- Cover the mug with a microwave-safe lid or plate and microwave on high for 2-3 minutes. Check for doneness, as cooking times may vary based on your microwave's wattage.
- Once cooked, carefully remove the mug from the microwave (it will be hot!). If using, drizzle the sesame oil on top for added flavor.
- Serve the sweet and sour shrimp over cooked rice or noodles if desired, and enjoy your quick and flavorful meal!
Variations and Tips:
- For a vegetarian version, substitute shrimp with tofu or your choice of vegetables.
- Experiment by adding pineapple chunks or snap peas for additional sweetness and texture.
- If you prefer a spicier kick, include a dash of chili sauce or red pepper flakes.
- Ascertain the shrimp are fresh or properly thawed for the best texture and flavor.
Veggie Fried Rice
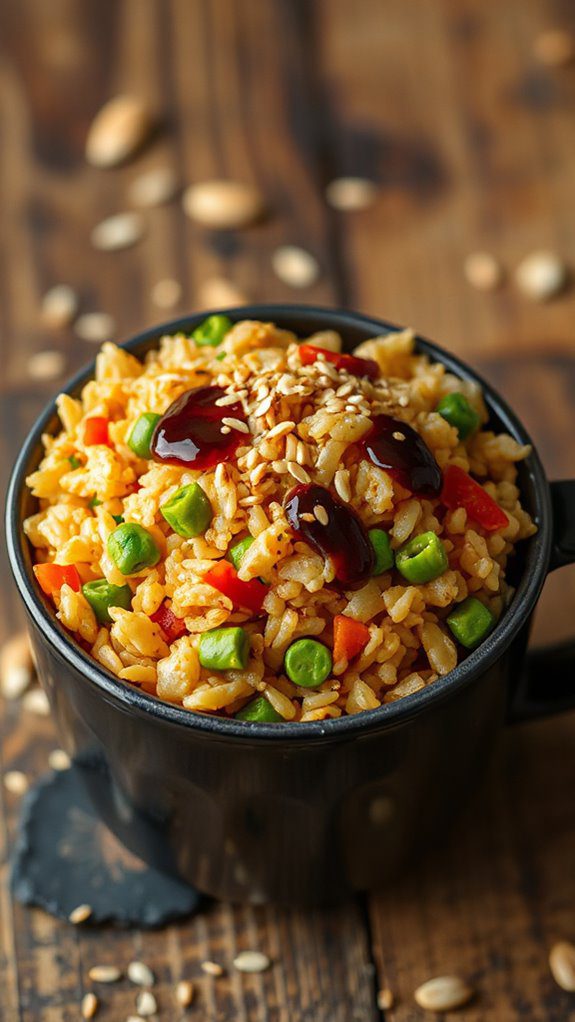
Veggie Fried Rice is a quick and easy dish that packs a punch of flavor and nutrition, making it perfect for vegetarians, busy professionals, or anyone craving a comforting meal.
With a preparation time of just 10 minutes and minimal cleanup required, this microwave mug recipe is ideal for single servings and can be ready in under 5 minutes. It's versatile, allowing you to toss in your favorite vegetables and adapt it to whatever you have on hand.
Ingredients:
- 1 cup cooked rice (preferably cold)
- 1/2 cup mixed frozen vegetables (carrots, peas, corn, etc.)
- 1 tablespoon soy sauce
- 1/2 teaspoon sesame oil (optional)
- 1/4 teaspoon garlic powder
- 1/4 teaspoon black pepper
- 1 green onion, thinly sliced (for garnish)
- Optional: 1 egg (beaten) or tofu for added protein
Cooking Instructions:
- In a microwave-safe mug, combine the cooked rice and frozen mixed vegetables.
- Add the soy sauce, sesame oil (if using), garlic powder, and black pepper. Stir well to mix all the ingredients thoroughly.
- If you're adding an egg or tofu, you can pour it into the mug now and mix until combined.
- Microwave on high for 1-2 minutes, or until the vegetables are heated through and the rice is steaming hot. If you've added an egg, verify it is fully cooked.
- Remove from the microwave (careful, it will be hot!) and garnish with sliced green onion.
Variations & Tips:
- Feel free to switch up the vegetables based on personal preference or what's available in your fridge – bell peppers, broccoli, or spinach work well too.
- For extra flavor, consider adding a dash of sriracha or chili sauce to give it some heat.
- If using leftover rice, verify it's completely cooled before mixing, as fresh rice may become mushy when microwaved.
- This recipe can easily be doubled; just use a larger mug or dish and increase the cooking time as necessary.
- For extra protein, incorporate diced chicken, shrimp, or tempeh, adjusting cooking time as needed to confirm protein is properly cooked.
Caprese Pasta Salad
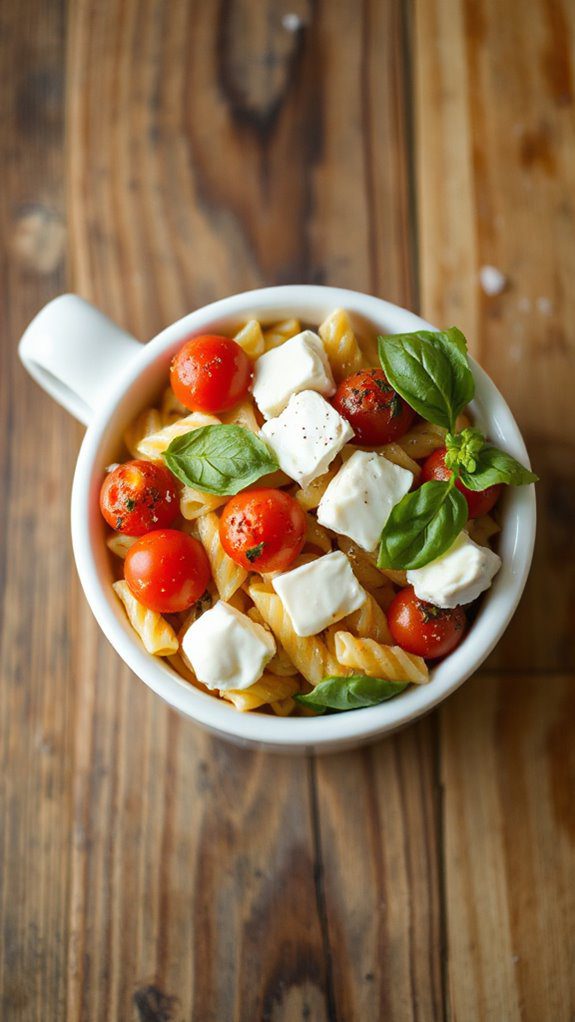
Caprese Pasta Salad
Caprese Pasta Salad is a delightful and invigorating dish that combines the classic flavors of a Caprese salad with pasta, making it a perfect option for a quick lunch or side dish.
This microwave-friendly recipe is ideal for busy individuals or families who want a tasty meal ready in just 15 minutes. Whether you're looking for a light meal on a warm day or a colorful side for a barbeque, this Caprese Pasta Salad can cater to your needs.
Ingredients:
- 1 cup uncooked pasta (such as fusilli or rotini)
- 1 cup cherry tomatoes, halved
- 1 cup fresh mozzarella balls, halved
- 1 cup fresh basil leaves, torn
- 2 tablespoons olive oil
- 1 tablespoon balsamic vinegar
- Salt and pepper to taste
Cooking Steps:
- In a microwave-safe mug, combine the uncooked pasta with 2 cups of water and a pinch of salt. Microwave on high for about 4-5 minutes, or until the pasta is al dente. Stir halfway through cooking.
- Carefully remove the mug from the microwave (it will be hot) and drain any excess water if necessary.
- Add the cherry tomatoes, mozzarella, and basil to the mug with the cooked pasta.
- Drizzle the olive oil and balsamic vinegar over the salad and stir to combine.
- Season with salt and pepper to taste.
- Enjoy your Caprese Pasta Salad warm, or let it cool for an invigorating cold dish.
Variations and Tips:
- For added protein, consider mixing in cooked chicken, shrimp, or chickpeas.
- You can substitute the fresh mozzarella with feta or goat cheese for a different twist.
- Add diced cucumbers or bell peppers for extra crunch and flavor.
- Experiment with different types of pasta such as whole wheat or gluten-free varieties.
- If you prefer a warm salad, serve immediately after preparation; if you like it cold, let it cool for a bit before refrigerating for later.
- This dish can be made ahead of time and stored in the fridge for up to 2 days, making it great for meal prep.
Chili Lime Black Bean Bowl
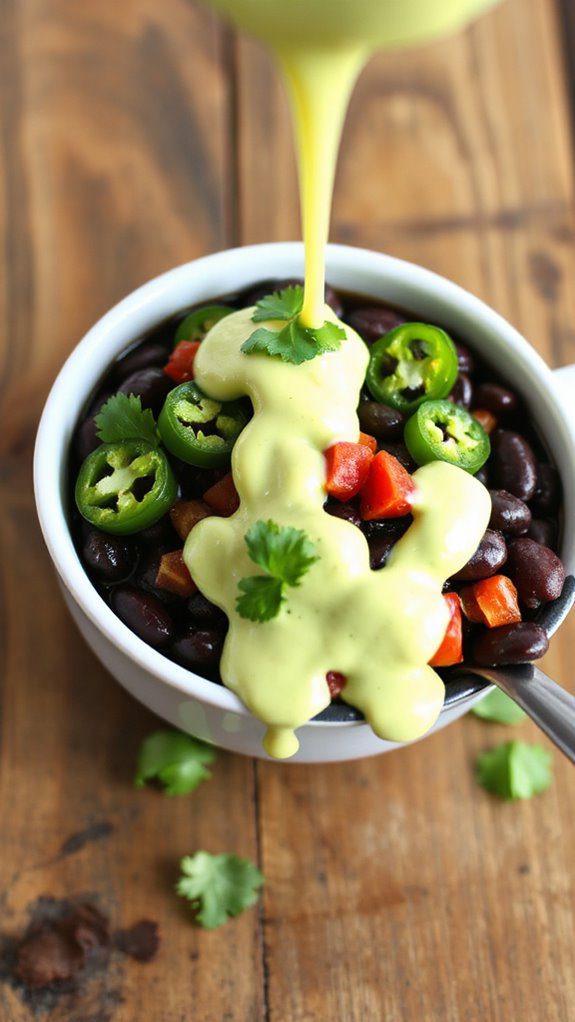
The Chili Lime Black Bean Bowl is a quick, nutritious, and flavorful dish perfect for busy individuals or families seeking a healthy meal option.
This microwave mug recipe takes only about 10 minutes from start to finish, making it an excellent choice for a speedy lunch or a light dinner. The combination of chili, lime, and black beans makes for a zesty and vibrant flavor profile that can be enjoyed on its own or paired with your favorite toppings.
Ingredients:
- 1 cup canned black beans, rinsed and drained
- 1/2 cup cooked rice (white, brown, or cauliflower rice)
- 1/4 cup corn (canned or frozen)
- 1/4 cup diced tomatoes (fresh or canned)
- 1 tablespoon lime juice
- 1 teaspoon chili powder
- 1/2 teaspoon cumin
- Salt and pepper to taste
- Optional toppings: avocado, cilantro, shredded cheese, sour cream, hot sauce
Cooking Steps:
- In a microwave-safe mug, combine the black beans, cooked rice, corn, and diced tomatoes.
- Add the lime juice, chili powder, cumin, salt, and pepper to the mix. Stir well to uphold all ingredients are evenly distributed.
- Microwave the mug on high for 2-3 minutes, or until heated through. Stir halfway through to promote even cooking.
- After microwaving, let the mug sit for 1 minute. This allows flavors to meld and cool slightly.
- Top with your favorite optional ingredients such as sliced avocado, chopped cilantro, shredded cheese, a dollop of sour cream, or a drizzle of hot sauce.
Variations and Tips:
- For a vegetarian protein boost, mix in some quinoa or chopped cooked chicken.
- Swap out the black beans for chickpeas or kidney beans to change up the flavor.
- If you prefer a bit of heat, consider adding diced jalapeños or a sprinkle of cayenne pepper.
- Experiment by tossing in any leftover vegetables you have on hand for added nutrition and flavor.
- Make a larger batch in a bigger microwave-safe bowl and serve as a family meal, adjusting cooking time accordingly.
One-Pot Lentil Curry
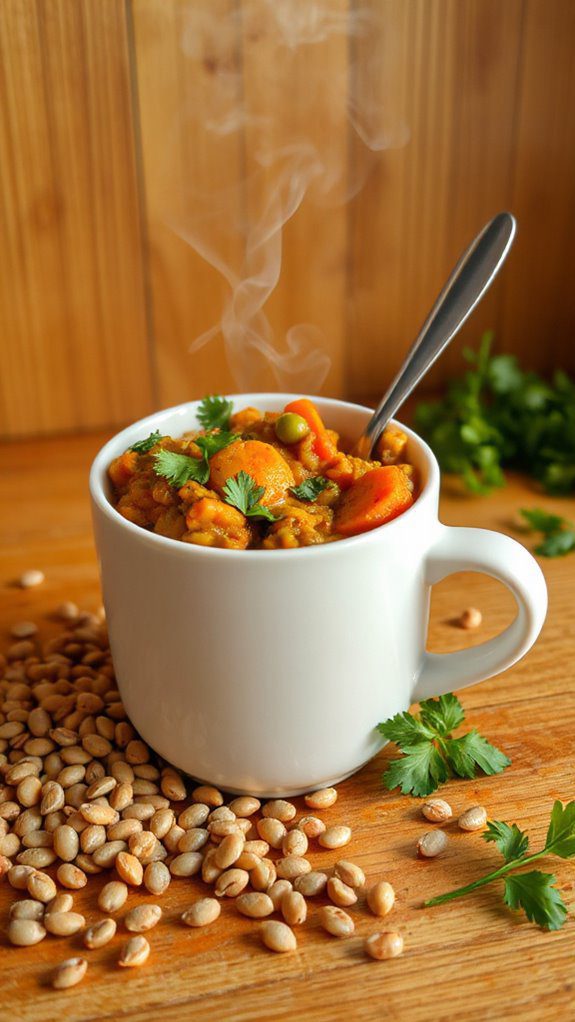
One-Pot Lentil Curry is a delicious and nutritious dish that brings comfort and warmth to any meal. This vegan-friendly recipe is perfect for those who are short on time but still want to enjoy a hearty and satisfying meal. In just under 20 minutes, you can whip up this flavorful curry that serves as an excellent source of plant-based protein and fiber, making it ideal for busy weeknights or meal prep.
Ingredients:
- 1 cup red lentils, rinsed
- 1 cup vegetable broth
- 1 medium onion, diced
- 2 cloves garlic, minced
- 1 tablespoon curry powder
- 1 teaspoon ground ginger
- 1/2 teaspoon cayenne pepper (optional)
- 1 can (14 oz) diced tomatoes
- 1 can (14 oz) coconut milk
- 1 cup spinach (fresh or frozen)
- Salt, to taste
- Pepper, to taste
- Fresh cilantro (for garnish, optional)
Cooking Instructions:
- In a microwave-safe mug or bowl, combine the diced onion and minced garlic. Add a splash of vegetable broth and microwave on high for 2 minutes, or until the onions are translucent.
- Stir in the rinsed red lentils, remaining vegetable broth, curry powder, ground ginger, and cayenne pepper (if using). Mix well.
- Microwave the mixture on high for 6 minutes, stirring halfway through. Keep an eye on it to avoid overflow.
- Once the lentils are cooked, add the diced tomatoes and coconut milk. Stir to combine and microwave for an additional 2-3 minutes until heated through.
- Gently fold in the spinach, and season with salt and pepper to taste. Microwave for another 1-2 minutes until the spinach is wilted.
- Serve hot, garnished with fresh cilantro if desired.
Variations and Tips:
- You can add vegetables such as bell peppers, zucchini, or peas for extra nutrition and flavor.
- If you prefer a thicker curry, let it sit for a couple of minutes after microwaving to thicken up.
- For a bit of extra zest, add a squeeze of lime juice before serving.
- This curry pairs well with rice, quinoa, or naan bread, making it versatile for any meal.
- Feel free to experiment with different spice levels by adjusting the amount of cayenne pepper or adding some chili flakes.
Pesto Zoodle Bowl
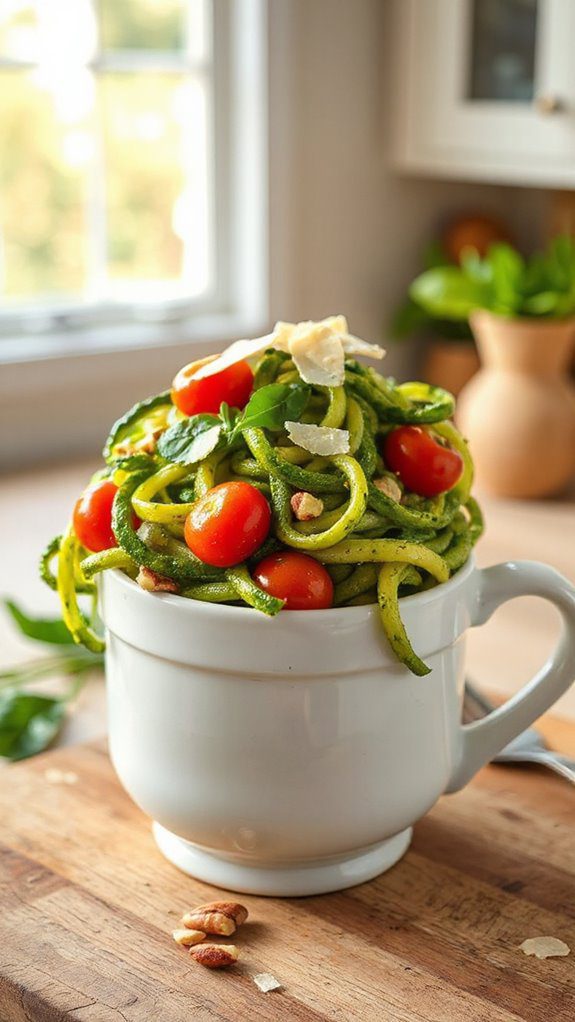
The Pesto Zoodle Bowl is a quick and healthy dish perfect for those looking to enjoy a low-carb meal packed with flavor. Ideal for lunch or a light dinner, this vibrant dish is ready in just 10 minutes, making it a fantastic option for busy individuals or anyone wanting a fresh and nutritious bite without the fuss of elaborate cooking.
With the delightful combination of zucchini noodles and rich pesto, this recipe provides a satisfying and delicious alternative to traditional pasta.
Ingredients:
- 2 medium zucchinis
- 1/2 cup pesto (store-bought or homemade)
- 1/2 cup cherry tomatoes, halved
- 1/4 cup grated Parmesan cheese
- Salt and pepper, to taste
- Optional toppings: pine nuts, fresh basil, red pepper flakes
Cooking Steps:
- Prepare the Zoodles: Use a spiralizer or a vegetable peeler to create zucchini noodles (zoodles) from the zucchinis. If you don't have these tools, simply julienne the zucchinis into thin strips.
- Combine Ingredients: In a microwave-safe mug or bowl, combine the zoodles, pesto, and halved cherry tomatoes.
- Microwave Cooking: Microwave the mixture on high for 2-3 minutes, or until the zoodles are slightly tender but still have a bit of crunch. Stir halfway through cooking to guarantee even heating.
- Add Cheese and Season: Carefully remove from the microwave and stir in the grated Parmesan cheese, adding salt and pepper to taste. If desired, top with pine nuts, fresh basil, or red pepper flakes for an extra boost of flavor.
- Serve: Enjoy your Pesto Zoodle Bowl warm, either in the mug itself or transferred to a plate.
Variations & Tips:
- Protein Boost: Add cooked chicken, shrimp, or chickpeas for added protein.
- Vegetable Add-ins: Feel free to toss in other veggies like spinach, bell peppers, or mushrooms for extra nutrition and flavor.
- Spiciness: For a kick, mix in some chopped jalapeños or sprinkle red pepper flakes on top before serving.
- Storing Leftovers: If you have leftovers, store them in an airtight container in the refrigerator for up to 2 days. When reheating, add a splash of olive oil to keep the zoodles from drying out.
Chicken Fajita Rice

Chicken Fajita Rice is a quick and convenient dish perfect for busy weeknights or a satisfying lunch. This dish combines tender chicken, colorful bell peppers, and spicy fajita seasonings on a bed of fluffy rice, all made in just a few minutes using your microwave.
It's ideal for individuals, couples, or small families looking for a tasty meal without the hassle of extensive cooking. Total preparation and cooking time is approximately 15 minutes.
Ingredients:
- 1 cup cooked rice (white or brown)
- 1 cup cooked chicken, shredded or diced
- 1/2 cup bell peppers, sliced (mixed colors)
- 1/4 cup onion, sliced
- 1 tablespoon fajita seasoning
- 1/4 cup chicken broth (or water)
- Salt and pepper to taste
- Optional toppings: shredded cheese, sour cream, avocado, cilantro
Cooking Steps:
- In a microwave-safe mug or bowl, combine the cooked rice and chicken.
- Add the sliced bell peppers and onions to the mixture.
- Sprinkle the fajita seasoning evenly over the ingredients. Add salt and pepper to taste.
- Pour the chicken broth (or water) over the mixture to guarantee everything heats up evenly.
- Stir everything well to combine and coat the ingredients with the seasoning.
- Cover the mug or bowl with a microwave-safe lid or plate (be careful not to seal it too tightly).
- Microwave on high for 2-3 minutes, or until heated through and the vegetables are tender.
- Carefully remove from the microwave (it will be hot!) and stir again.
- Top with your choice of shredded cheese, sour cream, avocado, or chopped cilantro before serving.
Variations and Tips:
- For a vegetarian version, replace chicken with black beans or extra vegetables.
- Feel free to experiment with different vegetables, such as corn, zucchini, or spinach.
- If you prefer more heat, add diced jalapeños or a sprinkle of cayenne pepper.
- To enhance flavor, marinate the chicken in lime juice or additional spices before cooking.
- Always make certain to keep an eye on your mug while it's in the microwave to prevent overflow.
Eggplant Parmesan

Eggplant Parmesan is a delicious Italian dish that layers slices of breaded and fried eggplant with marinara sauce and melted cheese. This microwave mug version is perfect for a quick meal for one or a satisfying snack. The dish is vegetarian-friendly and can be prepared in under 15 minutes, making it an ideal option for busy weeknights or when you're craving comfort food without the fuss.
Ingredients:
- 1 small eggplant, sliced thinly
- 1/4 cup marinara sauce
- 1/4 cup shredded mozzarella cheese
- 2 tablespoons grated Parmesan cheese
- 1/4 cup breadcrumbs
- 1 tablespoon olive oil
- 1 teaspoon Italian seasoning
- Salt and pepper to taste
- Cooking spray or additional olive oil for greasing the mug
Cooking Instructions:
- Prepare your microwave-safe mug by lightly greasing the inside with cooking spray or a little olive oil to prevent sticking.
- In a small mixing bowl, combine the breadcrumbs, Italian seasoning, salt, and pepper. Mix well.
- Dip each slice of eggplant in olive oil, then coat them in the breadcrumb mixture, pressing gently to guarantee an even coating.
- Layer half of the breaded eggplant slices in the bottom of the mug.
- Spoon half of the marinara sauce over the eggplant, followed by half of the mozzarella and Parmesan cheese.
- Repeat the layering process with the remaining eggplant, sauce, and cheese.
- Cover the mug with a microwave-safe lid or plate, and microwave on high for about 5-8 minutes, or until the eggplant is tender and the cheese is melted and bubbly. Cooking time may vary depending on your microwave's wattage.
- Once done, let it sit for a minute before enjoying your Eggplant Parmesan straight from the mug.
Variations & Tips:
- For added flavor, consider folding in some sautéed garlic or chopped fresh herbs like basil or parsley into the layers.
- If you prefer a crunchier topping, you can toast the breadcrumbs in a small pan before using them.
- This recipe can be made with zucchini instead of eggplant for a different twist.
- Feel free to mix up the cheeses by adding ricotta or provolone for additional creaminess and flavor.
- Pair with a side salad for a complete meal or serve with crusty bread to soak up the delicious sauce.
Ham and Cheese Breakfast Bowl

The Ham and Cheese Breakfast Bowl is a quick and delicious microwave recipe that's perfect for busy mornings. With just a few simple ingredients, you can create a hearty breakfast in under 5 minutes, making it an ideal choice for anyone from college students to working professionals.
This recipe serves one, but it's easy to scale up for multiple servings.
Ingredients:
- 1 large egg
- 1 tablespoon milk
- 2 tablespoons diced ham
- 2 tablespoons shredded cheese (cheddar or your choice)
- Salt and pepper, to taste
- Optional: chopped green onions or bell peppers
Cooking Steps:
- In a microwave-safe mug, crack the egg and add the milk. Whisk together with a fork until well combined.
- Stir in the diced ham and cheese. Season with salt and pepper to taste. If you wish, add any optional ingredients like green onions or bell peppers for extra flavor.
- Microwave the mug on high for about 1 minute. Check the mixture; if the egg is not fully set, continue microwaving in 10-second intervals until cooked to your desired consistency.
- Carefully remove the mug from the microwave (it will be hot!) and let it sit for a minute. Give it a gentle stir before enjoying straight from the mug.
Variations and Tips:
- Cheese Options: Experiment with different types of cheese like mozzarella, Swiss, or pepper jack for varied flavors.
- Add Veggies: Feel free to mix in veggies such as spinach, tomatoes, or mushrooms for a healthier option.
- Herbs and Spices: Enhance the dish with herbs like parsley or spices like paprika for additional flavor.
- Meal Prep: Prepare the ingredients ahead of time and store them in separate containers. In the morning, simply combine in the mug and microwave.
- Don't Overcook: Keep a close eye on the mug while microwaving to prevent the egg from overcooking and becoming rubbery. Adjust the cooking time based on your microwave's wattage.
Thai Green Curry Ramen

Thai Green Curry Ramen is a delightful fusion dish that combines the comforting elements of ramen noodles with the rich, aromatic flavors of Thai green curry. This dish is perfect for a quick lunch or dinner, especially when you're craving something spicy and vibrant without spending too much time in the kitchen.
With just a microwave and a few ingredients, you can whip up a satisfying meal in about 10-15 minutes.
Ingredients:
- 1 package of instant ramen noodles (discard the seasoning packet)
- 1 cup coconut milk
- 1-2 tablespoons green curry paste
- 1 cup mixed vegetables (frozen bell peppers, broccoli, carrots, etc.)
- 1 tablespoon soy sauce
- 1 teaspoon lime juice
- Fresh cilantro for garnish (optional)
- Lime wedges for serving (optional)
Cooking Instructions:
- In a microwave-safe mug, combine the coconut milk and green curry paste. Stir well until the curry paste is fully dissolved into the coconut milk.
- Add the mixed vegetables to the mug, stirring to incorporate them into the coconut curry mixture.
- Place the mug in the microwave and heat on high for 2-3 minutes, or until the mixture is hot and bubbly.
- While it's heating, prepare the ramen noodles in a separate bowl according to package instructions (usually boiling water for 3-4 minutes). Once cooked, drain any excess water.
- Once the curry mixture is hot, carefully remove the mug from the microwave and add the cooked ramen noodles to the curry. Stir well to combine.
- Add soy sauce and lime juice, mixing thoroughly. Taste and adjust seasoning if necessary.
- Garnish with fresh cilantro and serve with lime wedges on the side.
Variations and Tips:
- For a protein boost, add cooked chicken, shrimp, or tofu into the mix along with the vegetables.
- Adjust the spice level by using less green curry paste or adding sliced chili peppers.
- For a vegetarian option, verify the green curry paste does not contain shrimp paste.
- If you want more texture, try adding crushed peanuts as a topping before serving.
- This recipe is highly customizable; feel free to use whatever vegetables you have on hand!
Tuscan Chickpea Stew
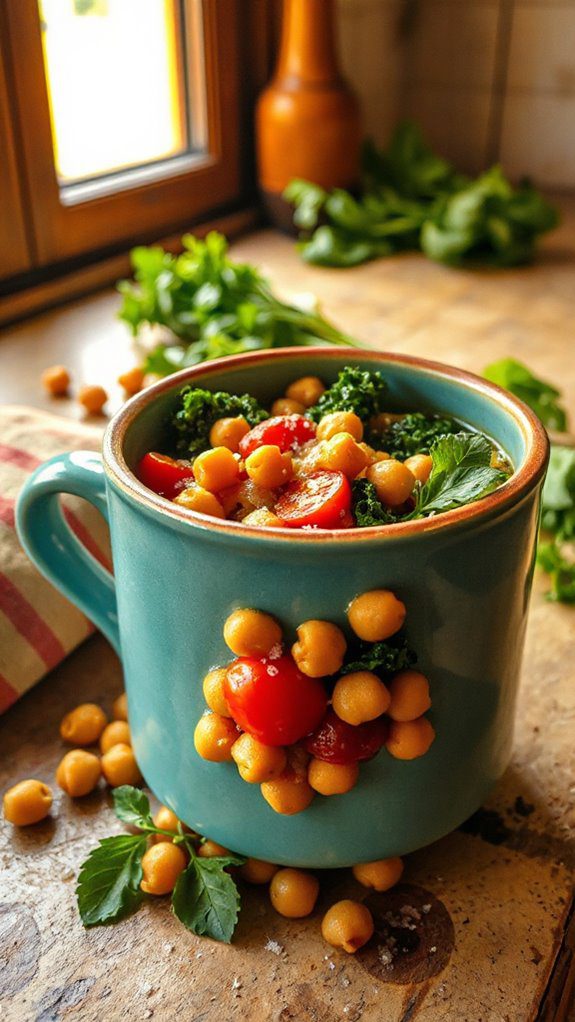
Tuscan Chickpea Stew is a hearty and flavorful dish that brings the essence of Italian cuisine into a quick and easy microwave mug recipe. Perfect for busy individuals or families seeking a wholesome vegetarian meal, this dish can be prepared in just 10 minutes.
It combines the nuttiness of chickpeas with savory vegetables and spices, making it a nutritious choice for a cozy dinner or a satisfying lunch.
Ingredients:
- 1 cup canned chickpeas, drained and rinsed
- 1/2 cup diced tomatoes (canned or fresh)
- 1/4 cup diced onion
- 1/4 cup diced bell pepper
- 1/4 cup vegetable broth or water
- 1 clove garlic, minced
- 1 teaspoon Italian seasoning
- Salt and pepper to taste
- Fresh spinach (optional, for added nutrition)
- Grated Parmesan cheese (optional, for serving)
Cooking Steps:
- In a large microwave-safe mug, combine the chickpeas, diced tomatoes, onion, bell pepper, vegetable broth, minced garlic, and Italian seasoning. Stir well to combine everything thoroughly.
- Season the mixture with salt and pepper to taste.
- Microwave on high for 2-3 minutes, or until the vegetables are tender and the stew is hot. Be sure to cover the mug with a microwave-safe lid or a plate to avoid splattering.
- If using fresh spinach, stir it into the stew after it has finished microwaving, allowing it to wilt for about 30 seconds.
- Once ready, carefully remove the mug from the microwave (it will be hot) and stir the stew.
- Garnish with grated Parmesan cheese if desired before serving.
Variations and Tips:
- For a spicier kick, add a pinch of red pepper flakes or a few dashes of hot sauce to the mixture before cooking.
- Feel free to toss in other vegetables, such as zucchini or mushrooms, for added texture and flavor.
- If you prefer a creamier stew, stir in a spoonful of coconut milk or cream cheese after microwaving.
- Serve the stew with crusty bread or over a bed of rice for a heartier meal.
- Leftovers can be stored in the refrigerator for up to 2 days, making it a great meal prep option!


