Summer BBQs and family gatherings are perfect occasions for delightful desserts. Options include a Fresh Berry Trifle, Grilled Peach Sundaes, and a revitalizing Watermelon Sorbet. For a twist, try Lemonade Pie or classic S’mores Bars. No-Bake Cheesecake Cups provide a creamy alternative, while Chocolate Banana Ice Cream Sandwiches cater to frozen cravings. Finally, add a Patriotic Fruit Salad or Pineapple Upside-Down Cake for a fun twist. Explore these sweet ideas and discover even more tempting treats.
Fresh Berry Trifle
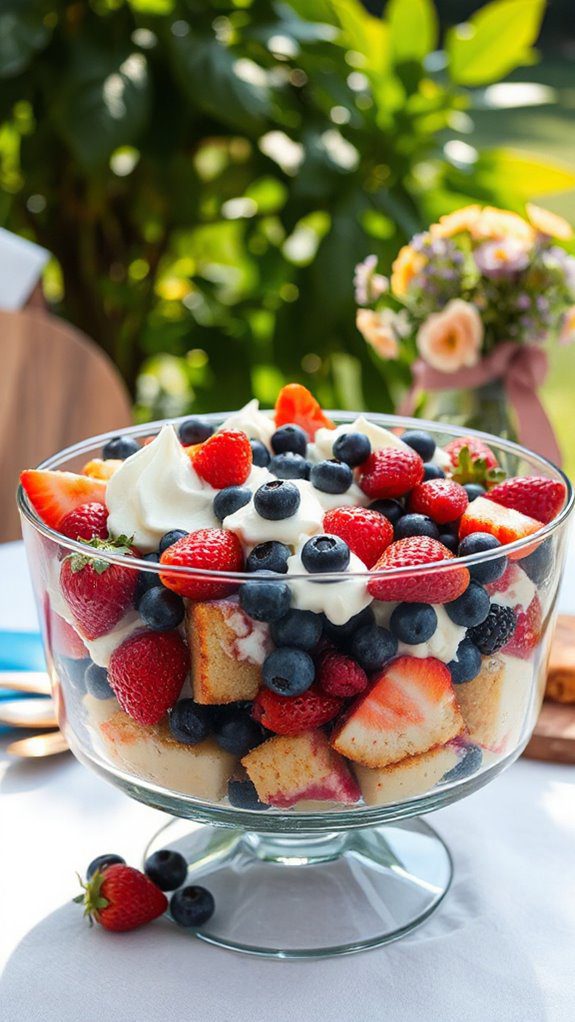
A fresh berry trifle is a delightful and visually stunning dessert that’s perfect for summer BBQs, potlucks, or any gathering. This layered treat combines luscious custard, whipped cream, and vibrant fresh berries, making it both invigorating and indulgent.
It’s an ideal dessert for families, friends, and berry lovers alike. The preparation time for this delightful dish is approximately 20 minutes, plus chilling time.
Ingredients:
- 2 cups mixed fresh berries (strawberries, blueberries, raspberries, and blackberries)
- 1 pound pound cake, cut into cubes
- 2 cups vanilla pudding or custard
- 2 cups whipped cream (store-bought or homemade)
- 1 teaspoon vanilla extract
- Fresh mint leaves for garnish (optional)
Instructions:
- Prepare the berries: Rinse the fresh berries under cold water and gently pat them dry. If using strawberries, slice them into halves or quarters, depending on their size.
- Layer the trifle: In a clear glass bowl or individual serving cups, start by placing a layer of pound cake cubes at the bottom. Follow this with a layer of vanilla pudding or custard.
- Add berries: Gently add a layer of mixed berries on top of the pudding.
- Repeat layers: Continue the layering process by adding another layer of cake, then custard, followed by more berries.
- Repeat until you’ve filled the bowl, ensuring that the top layer is a colorful mix of berries and a generous dollop of whipped cream.
- Top it off: Finish with a layer of whipped cream, and scatter a few additional berries and mint leaves on top for garnish.
- Chill: Cover the trifle with plastic wrap and let it chill in the refrigerator for at least 2 hours before serving. This allows the flavors to meld together beautifully.
Variations & Tips:
- Flavor twists: You can add a splash of liqueur, such as Grand Marnier or raspberry liqueur, to the pudding for an adult version.
- Fruit alternatives: Substitute berries with other fruits like peaches, mangoes, or bananas if you prefer.
- Make it lighter: Use low-fat pudding and whipped cream or Greek yogurt for a healthier alternative.
- Assembly tip: For a layered look, use clear dessert cups instead of a bowl, so each layer is visible and appealing.
- Serving suggestion: For extra crunch, add layers of granola or crushed cookies between the pudding and fruit layers.
This fresh berry trifle is not only a feast for the eyes but also an explosion of flavor that’s sure to impress your guests at any summer gathering. Enjoy!
- The Original Pro Chopper - Our superstar veggie slicer has been creating waves on TikTok! Simple to use,...
- Easy Meal Prep with Rust-Resistant Blades - Our vegetable chopper is perfect for anyone who wants to eat...
- 5-Star Design - The soft-grip TPU handle ensures controlled chopping, while the non-skid rubber base...
Grilled Peach Sundaes
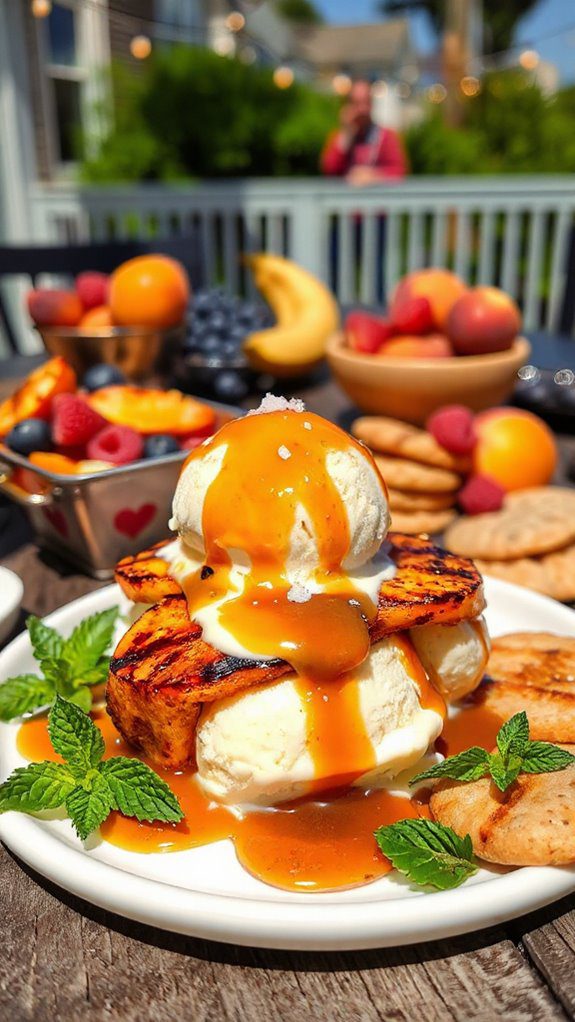
Grilled Peach Sundaes are a delightful summer dessert that combines the natural sweetness of ripe peaches with the smoky flavor from the grill, making it a perfect treat for outdoor barbeques and gatherings.
This dish is suitable for anyone who loves the combination of warm fruit and cold ice cream, and it can be prepared in about 15 minutes, making it a quick and impressive finale to any meal.
Ingredients
- 4 ripe peaches, halved and pitted
- 2 tablespoons olive oil
- 1 teaspoon brown sugar
- 1 teaspoon cinnamon
- 4 scoops vanilla ice cream (or your favorite flavor)
- 1/4 cup caramel sauce
- Chopped nuts (optional, for garnish)
- Fresh mint leaves (optional, for garnish)
Cooking Steps
- Preheat the grill to medium heat.
- In a small bowl, mix together the olive oil, brown sugar, and cinnamon.
- Brush the cut sides of the peaches generously with the mixture.
- Place the peaches cut-side down on the grill. Cook for about 4-5 minutes or until grill marks appear and the peaches are tender.
- Remove the peaches from the grill and let them cool slightly.
- Prepare serving plates by placing a grilled peach half on each plate, cut side up.
- Add a scoop of vanilla ice cream on top of each peach half.
- Drizzle caramel sauce over the ice cream and peaches.
- If desired, sprinkle chopped nuts for added texture and garnish with fresh mint leaves.
Variations and Tips
- Flavor Enhancements: You can experiment with different ice cream flavors such as caramel, butter pecan, or even a scoop of raspberry sorbet for a fruity twist.
- Nut Alternative: If you’re allergic to nuts or prefer a different texture, substitute with granola or crushed cookies on top.
- Grilling Alternative: If you don’t have a grill, you can roast the peach halves in an oven at 400°F for about 10-12 minutes.
- Add Spice: For a kick, consider adding a sprinkle of cayenne pepper to the olive oil mixture to create a spicy-sweet contrast.
- Serving Size: This recipe can easily be scaled up or down depending on the number of guests, just remember one half peach per serving.
Enjoy these Grilled Peach Sundaes as a delightful and invigorating end to your summer BBQ!
- Makes Everything Simple : Just forget your bagged cheese! Only turn the handle for several times and get...
- Premium Material : All parts of the rotary cheese grater are made of food grade ABS material, no BPA. The...
- Three Option Grater : The parmesan cheese grater finishes food preparation with slicing, shredding and...
Lemonade Pie
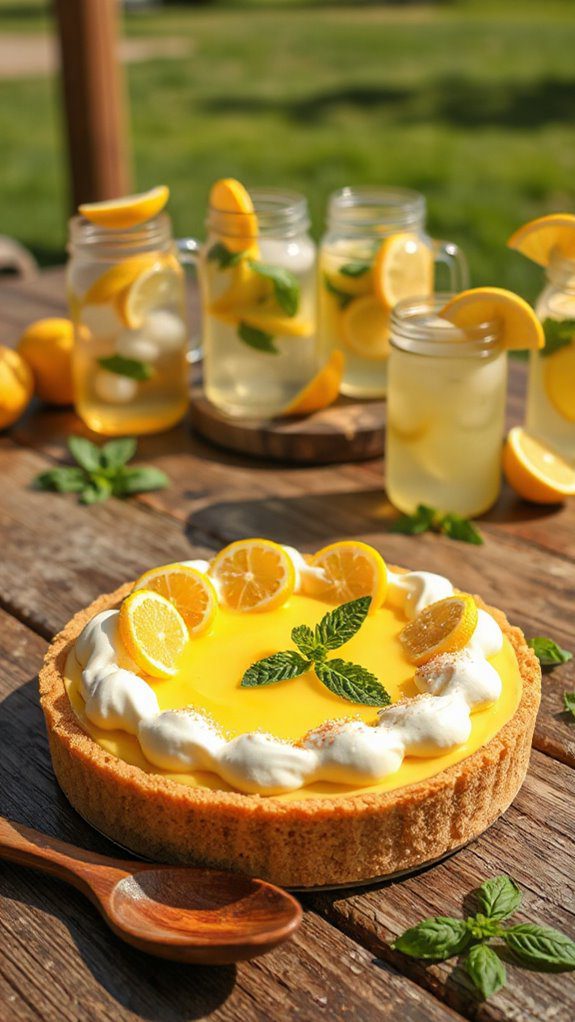
Lemonade Pie is a revitalizing and zesty dessert that perfectly complements summer BBQs. This no-bake pie is light and creamy, making it an ideal treat for hot summer days and great for serving to family and friends. With a preparation time of just 15 minutes and an optional chilling time of around 4 hours, you can whip this delightful dessert up quickly to impress your guests!
Ingredients:
- 1 pre-made graham cracker pie crust
- 1 cup lemonade (frozen concentrate, thawed)
- 1 cup sweetened condensed milk
- 1 cup heavy whipping cream
- 1 tablespoon lemon zest (optional, for garnish)
- Lemon slices (optional, for garnish)
Cooking Steps:
- In a medium bowl, combine the thawed lemonade and sweetened condensed milk, mixing well until smooth.
- In a separate large bowl, whip the heavy cream until stiff peaks form.
- Gently fold the whipped cream into the lemonade mixture until fully incorporated. Be careful not to deflate the whipped cream too much.
- Pour the filling into the pre-made graham cracker pie crust and spread it evenly.
- Optional: garnish the top with lemon zest and/or lemon slices for added decoration and a pop of color.
- Cover the pie with plastic wrap and refrigerate for at least 4 hours or until set. For an even firmer texture, chill overnight.
- Serve cold, slicing into wedges for everyone to enjoy.
Variations and Tips:
- Flavor Variations: Try substituting the lemonade with other fruit concentrates such as limeade or orange juice for a different flavor profile.
- Make it Citrus Zesty: Add a little bit of lime or orange zest to the filling for an extra citrus kick.
- Serving Suggestion: Serve with whipped cream or a dollop of Greek yogurt on top for added creaminess.
- Make Ahead: This pie can be made a day in advance, making it a great option for hosting BBQs, picnics, or potlucks. Just keep it refrigerated until serving.
- 💰 REDUCE WASTE AND SAVE MONEY: Chef Preserve keeps FOOD FRESH 5 TIMES LONGER than non-vacuum storage...
- ✅ POWERFUL, QUICK & EASY TO USE: Simply press the button to start. The device vacuum seals a bag in 5...
- ♻️ REUSABLE & RESEALABLE BAGS: Chef Preserve comes with dishwasher, freezer, refrigerator, and...
Watermelon Sorbet
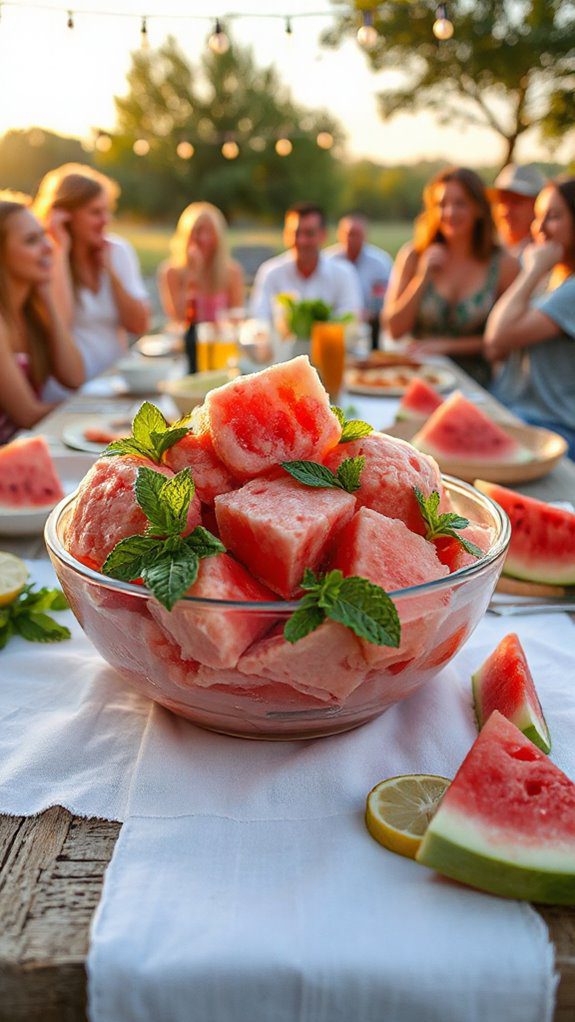
Watermelon sorbet is a rejuvenating, light dessert perfect for summer BBQs and gatherings. It’s an ideal treat for both kids and adults alike, making it the perfect ending to a sunny day filled with outdoor fun.
This delightful treat takes about 10 minutes to prepare, but you’ll need to freeze the mixture for several hours before serving, so plan ahead for a frozen delight that will cool you down during hot summer nights.
Ingredients:
- 4 cups of seedless watermelon, cubed and frozen
- 1/4 cup of granulated sugar (adjust to taste)
- 1 tablespoon of fresh lime juice
- Pinch of salt
- Mint leaves for garnish (optional)
Cooking Steps:
- In a food processor, combine the frozen watermelon cubes, granulated sugar, lime juice, and a pinch of salt.
- Blend until the mixture is smooth and creamy, scraping down the sides as needed.
- Taste the sorbet and adjust the sweetness or tartness by adding more sugar or lime juice, if desired.
- Transfer the mixture into a shallow container or an airtight container, smoothing it into an even layer.
- Cover and freeze for at least 4-6 hours, or until solid.
- Before serving, let the sorbet sit at room temperature for about 5 minutes to soften slightly, making it easier to scoop.
- Serve in bowls or cones and optionally garnish with fresh mint leaves.
Variations & Tips:
- For a twist, consider adding fresh berries (like strawberries or blueberries) to the watermelon before blending for added flavor and color.
- You can also blend in a splash of coconut water to enhance the tropical vibe of the sorbet.
- Substitute the lime juice with lemon juice or even a splash of orange juice for a different citrus twist.
- If you want a creamier texture, blend in a little coconut cream or Greek yogurt before freezing.
- Generous Capacity: 7-quart slow cooker that comfortably serves 9+ people or fits a 7-pound roast
- Cooking Flexibility: High or low slow cooking settings, with convenient warm function for ideal serving...
- Convenient: Set it and forget it feature enables you to cook while at work or performing daily tasks
S’mores Bars
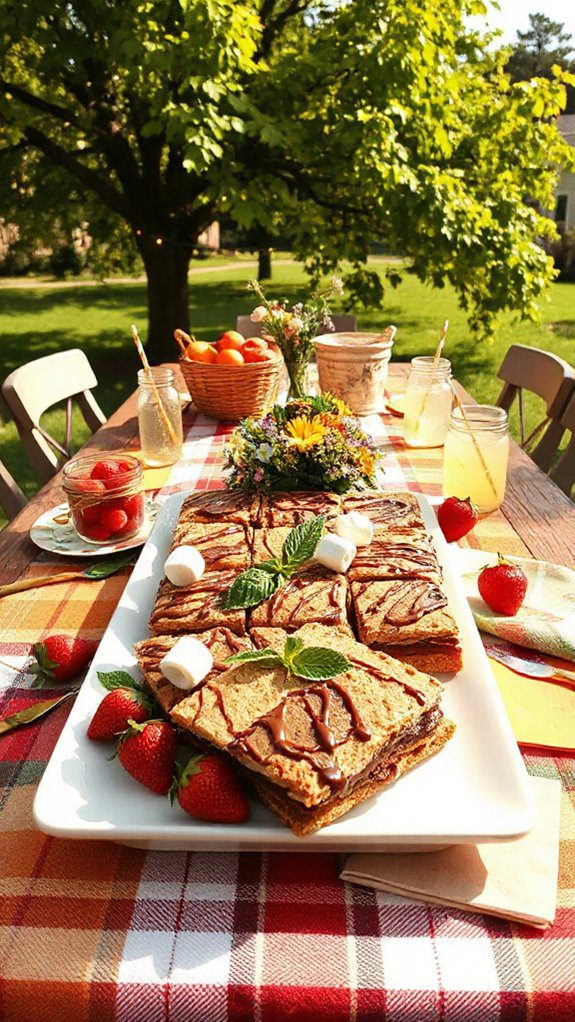
S’mores Bars are a delicious and convenient twist on the classic campfire treat that everyone loves. Perfect for summer BBQs, picnics, or family gatherings, these bars encapsulate the essence of s’mores in a portable form.
With gooey marshmallows, rich chocolate, and a graham cracker crust, they are sure to please both kids and adults alike. Prep time is minimal, taking about 15 minutes, with an additional 30 minutes baking time, making them a quick and delightful dessert for your next outdoor feast.
Ingredients:
- 1 ½ cups graham cracker crumbs
- ½ cup granulated sugar
- ½ cup unsalted butter, melted
- 2 cups mini marshmallows
- 1 ½ cups semisweet chocolate chips
- ½ teaspoon vanilla extract
- ½ cup additional graham cracker crumbs (for topping)
Cooking Steps:
- Preheat your oven to 350°F (175°C) and line a 9×13 inch baking dish with parchment paper, leaving some overhang for easy removal.
- In a mixing bowl, combine the graham cracker crumbs, granulated sugar, and melted butter. Mix until crumbly but well combined.
- Press the graham cracker mixture firmly into the bottom of the prepared baking dish to form an even layer.
- Bake the crust in the preheated oven for about 10 minutes or until lightly golden. Remove and let cool slightly.
- Sprinkle the chocolate chips evenly over the crust, followed by the mini marshmallows.
- In a small bowl, combine the remaining graham cracker crumbs with the vanilla extract and sprinkle this mixture over the marshmallows.
- Return the baking dish to the oven and bake for an additional 15-20 minutes, until the marshmallows are puffed and golden.
- Allow the S’mores Bars to cool completely in the pan for about 30 minutes before lifting them out using the parchment paper and cutting them into squares.
Variations and Tips:
- For a darker chocolate flavor, use dark chocolate chips instead of semisweet.
- Add a drizzle of caramel sauce over the bars before serving for an extra indulgent touch.
- Experiment with flavored marshmallows, such as those with chocolate or strawberry, for a unique flavor profile.
- If you prefer nuts, add chopped walnuts or almonds to the crust for added crunch.
- These bars can be stored in an airtight container at room temperature for up to a week, making them perfect for future BBQs!
- 100% Leak-proof: Guaranteed no-spill seal and secure latches
- Crystal-clear Tritan Built: Stain-resistant and odor-resistant material for a clear view of contents
- Lightweight & Sturdy: Easy to carry, yet durable for everyday use
Strawberry Shortcake Skewers

Strawberry Shortcake Skewers are a delightful and invigorating dessert perfect for summer BBQs. These bite-sized treats feature layers of sweet strawberries and fluffy shortcake, drizzled with whipped cream for a fun and easy-to-eat dessert that both kids and adults will love.
With a preparation time of about 20 minutes, they’re a quick and appealing addition to your outdoor gatherings, making them a favorite choice for anyone looking to satisfy their sweet tooth without much hassle.
Ingredients:
- 1 pound fresh strawberries, hulled and quartered
- 1 pound pre-made shortcake or pound cake, cut into cubes
- 1 cup heavy whipping cream
- 2 tablespoons powdered sugar
- 1 teaspoon vanilla extract
- Skewers (wooden or metal)
- Optional: mint leaves for garnish
Cooking Steps:
- Prepare the Whipped Cream: In a mixing bowl, combine the heavy whipping cream, powdered sugar, and vanilla extract. Beat with an electric mixer until soft peaks form. Set aside.
- Assemble the Skewers: On each skewer, alternate threading pieces of strawberry and shortcake. For example, start with a strawberry, followed by a cube of shortcake, then another strawberry, and repeat until the skewer is filled, leaving some space at the ends for handling.
- Serve with Whipped Cream: Arrange the skewers on a platter and serve them with a generous dollop of whipped cream on the side for dipping. If desired, garnish with fresh mint leaves for an extra touch of elegance.
Variations & Tips:
- Flavor Twists: Experiment with adding a layer of sliced bananas or peaches along with the strawberries for a mixed fruit flavor.
- Shortcake Alternatives: Use store-bought or homemade biscuit-style shortcakes, or switch it with angel food cake for a lighter option.
- Make it Fun: For a colorful presentation, use a mix of strawberries, blueberries, and even raspberries to create a patriotic theme for July 4th celebrations.
- DIY Whipped Cream: If you’re short on time, replace homemade whipped cream with store-bought whipped topping.
- Chill Before Serving: For an invigorating experience, prepare the skewers ahead of time and refrigerate them until you’re ready to serve. This keeps the strawberries and cream cool during the BBQ.
- 𝗘𝗳𝗳𝗼𝗿𝘁𝗹𝗲𝘀𝘀 𝗪𝗲𝗶𝗴𝗵𝗶𝗻𝗴: Supports 5 units...
- 𝗣𝗿𝗲𝗰𝗶𝘀𝗲 𝗥𝗲𝘀𝘂𝗹𝘁𝘀: Accurately weighs up to 11 lb/5 kg with 1 g...
- 𝗦𝗶𝗺𝗽𝗹𝗲 & 𝗖𝗼𝗺𝗽𝗮𝗰𝘁: The small and sleek scale is a perfect fit for...
Coconut Lime Rice Pudding
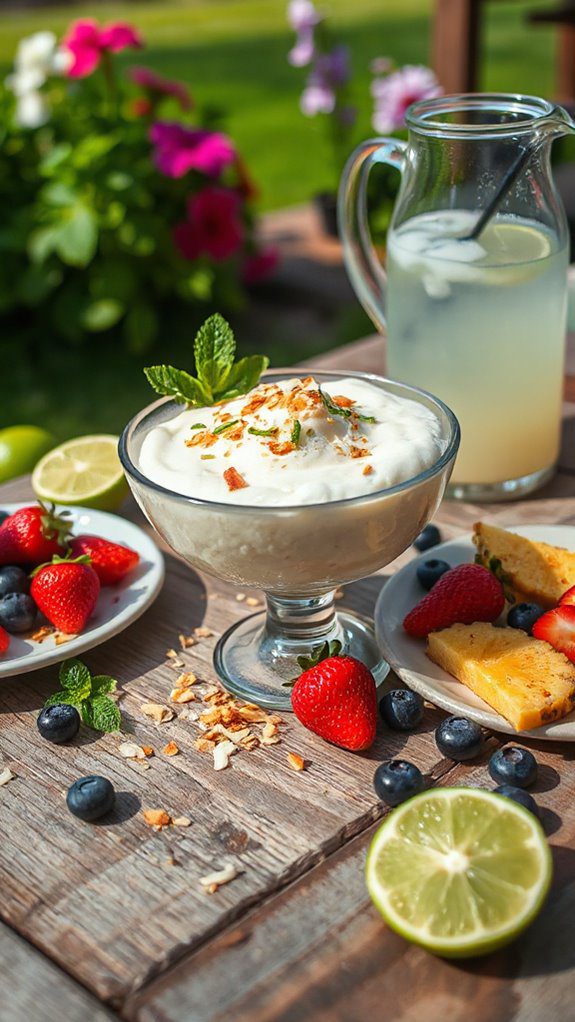
Coconut Lime Rice Pudding is a delightful and invigorating dessert that perfectly complements any summer BBQ. This creamy and tropical dish boasts a luscious coconut flavor paired with zesty lime, making it an ideal treat for both family and friends. With a preparation time of just 15 minutes and a cooking time of 25 minutes, you can whip up this delicious pudding in no time, leaving you free to enjoy the festivities.
Ingredients:
- 1 cup arborio rice
- 4 cups coconut milk (canned)
- 1 cup water
- 1/2 cup sugar
- 1/4 teaspoon salt
- Zest of 1 lime
- Juice of 2 limes
- 1 teaspoon vanilla extract
- 1/2 cup sweetened shredded coconut (optional, for garnish)
- Lime slices (for garnish)
Cooking Steps:
- In a medium saucepan, combine the arborio rice, coconut milk, water, sugar, and salt. Stir well to combine.
- Bring the mixture to a gentle boil over medium heat. Once boiling, reduce the heat to low and cover the saucepan, letting it simmer for about 20-25 minutes. Stir occasionally to prevent sticking.
- After the rice has absorbed most of the liquid and is creamy, remove the saucepan from heat.
- Stir in the lime zest, lime juice, and vanilla extract until well combined.
- Allow the pudding to cool slightly, then transfer it to serving bowls or a large dish. Chill in the refrigerator for at least 1 hour before serving.
- Before serving, garnish with shredded coconut and lime slices, if desired.
Variations and Tips:
- For an extra tropical flair, add diced mango or pineapple as a topping.
- Substitute part of the coconut milk with almond milk for a lighter version.
- If you prefer a sweeter pudding, adjust the sugar according to your taste.
- For a crunchier texture, you can toast the shredded coconut before adding it as a garnish.
- Serve the rice pudding warm for a comforting dessert or cold for an energizing treat on a hot day.
- Instant Read Food Thermometer | Our instant read thermometer features a temperature probe and advanced,...
- Multi-Use | From bbq thermometer to baking thermometer, our digital food thermometer for cooking is...
- Easy-Read Digital Thermometer For Cooking | Large instant thermometer dial with bright blue backlight...
No-Bake Cheesecake Cups
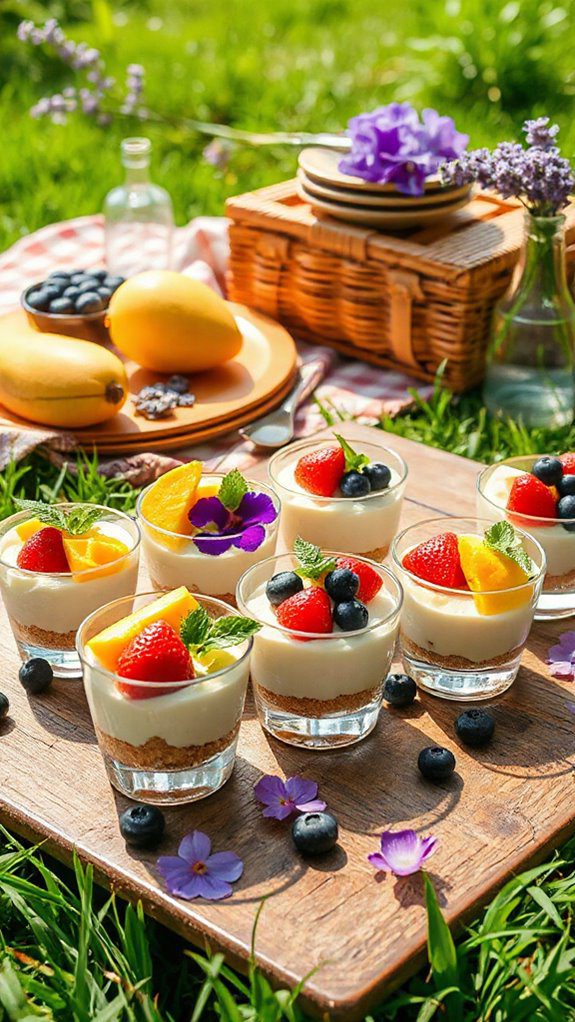
No-Bake Cheesecake Cups are a delightful and invigorating dessert perfect for summer BBQs and gatherings. These individual servings of creamy cheesecake are lightened up with fresh fruits, making them a hit among both kids and adults alike.
With minimal preparation, you can have these cups ready in just about 30 minutes, plus chilling time. They offer a wonderful no-fuss option for those looking to impress without turning on the oven.
Ingredients:
- 8 oz cream cheese, softened
- 1 cup powdered sugar
- 1 teaspoon vanilla extract
- 1 cup heavy whipping cream
- 1 cup graham cracker crumbs
- 4 tablespoons unsalted butter, melted
- Fresh fruits for topping (such as strawberries, blueberries, or raspberries)
- Extra mint leaves for garnish (optional)
Cooking Steps:
- In a medium mixing bowl, beat the softened cream cheese with a hand mixer until smooth.
- Gradually add the powdered sugar and vanilla extract, mixing until well combined and fluffy.
- In another bowl, whip the heavy cream until it forms stiff peaks.
- Gently fold the whipped cream into the cream cheese mixture until no white streaks remain, being careful not to deflate the whipped cream.
- In a separate bowl, mix the graham cracker crumbs with the melted butter until the crumbs are evenly coated.
- Spoon a layer of the graham cracker mixture into the bottom of serving cups or jars.
- Add a layer of the cream cheese filling over the crumbs, smoothing the top with a spatula.
- Repeat the layers until the cups are filled, finishing with a layer of the cream cheese mixture on top.
- Refrigerate the cups for at least 2 hours (or up to overnight) to allow the flavors to meld and to set.
- Before serving, top each cheesecake cup with fresh fruit and a mint leaf for a beautiful presentation.
Variations and Tips:
- Flavor Variations: Experiment by adding lemon juice and zest for a tangy lemon cheesecake, or fold in some melted chocolate for a chocolate cheesecake flavor.
- Fruit Compote: Instead of fresh fruit, you can prepare a quick fruit compote by simmering berries with a little sugar until they burst and thicken.
- Graham Cracker Alternatives: Try using crushed Oreos or ginger snaps instead of graham crackers for a different flavor profile.
- Individual Sizes: If you don’t have cups or jars, you can layer the ingredients in a large bowl and serve family-style.
- Make Ahead: These cups can be prepared a day in advance, making them a great option for busy BBQ days. Just keep them covered in the refrigerator until serving.
- Versatile 54-Piece Collection: Elevate your kitchen with the Home Hero 54-Piece Kitchen Utensil Set, a...
- Durable and Long-Lasting: Crafted from premium stainless steel, these kitchen utensils are designed to...
- Perfect Holiday Gift: Delight your loved ones with this kitchen utensils gift set this festive season....
Chocolate Banana Ice Cream Sandwiches

Chocolate Banana Ice Cream Sandwiches are a delightful and invigorating summer dessert that combines the sweet, rich flavors of chocolate and banana with creamy ice cream, making them a hit at any BBQ. This treat is perfect for all ages—kids will love the fun presentation, while adults will appreciate the indulgence.
The preparation time is minimal, taking about 15 minutes, plus a few hours to freeze before serving. These delicious sandwiches can be made ahead of time, making them an excellent choice for backyard gatherings.
Ingredients:
- 2 ripe bananas
- 1 cup of chocolate chips (dark or milk chocolate)
- 1 pint of your favorite ice cream (e.g., vanilla, chocolate, or strawberry)
- 1 tablespoon of coconut oil (optional, for melting chocolate)
- Sea salt (optional, for sprinkling)
Instructions:
- Prepare the bananas: Peel the bananas and cut them into 1-inch thick slices.
- Melt the chocolate: In a microwave-safe bowl, combine the chocolate chips and coconut oil (if using) and microwave in 30-second intervals, stirring until smooth and melted.
- Assemble the sandwiches: Take a slice of banana and scoop a small amount of ice cream onto it. Top it with another banana slice to create a sandwich. Repeat this process for all banana slices.
- Dip the sandwiches: Carefully dip each banana sandwich into the melted chocolate, allowing any excess to drip off. You can also drizzle more chocolate on top if desired.
- Sprinkle with salt: If using, sprinkle a pinch of sea salt over the chocolate-dipped sandwiches for a burst of flavor.
- Freeze: Place the assembled sandwiches on a parchment-lined baking sheet and freeze them for at least 3-4 hours, or until the chocolate is set and the ice cream is firm.
Variations and Tips:
- Flavor combinations: Experiment with different ice cream flavors or add toppings like nuts, sprinkles, or crushed cookies before freezing.
- Presentation: To make it more fun, serve the sandwiches on skewers or in cups with additional toppings on the side.
- Healthier option: For a healthier version, replace the ice cream with yogurt or a fruit-based sorbet.
- Make-ahead: These sandwiches can be made a day in advance, making them a convenient make-ahead option for your BBQ festivities.
Serve these delicious and easy-to-make Chocolate Banana Ice Cream Sandwiches at your next summer gathering, and watch everyone enjoy this scrumptious treat!
- 24-ounce insulated stainless-steel water bottle with a FreeSip spout and push-button lid with lock
- Patented FreeSip spout designed for either sipping upright through the built-in straw or tilting back to...
- Protective push-to-open lid keeps spout clean; convenient carry loop doubles as a lock
Patriotic Fruit Salad
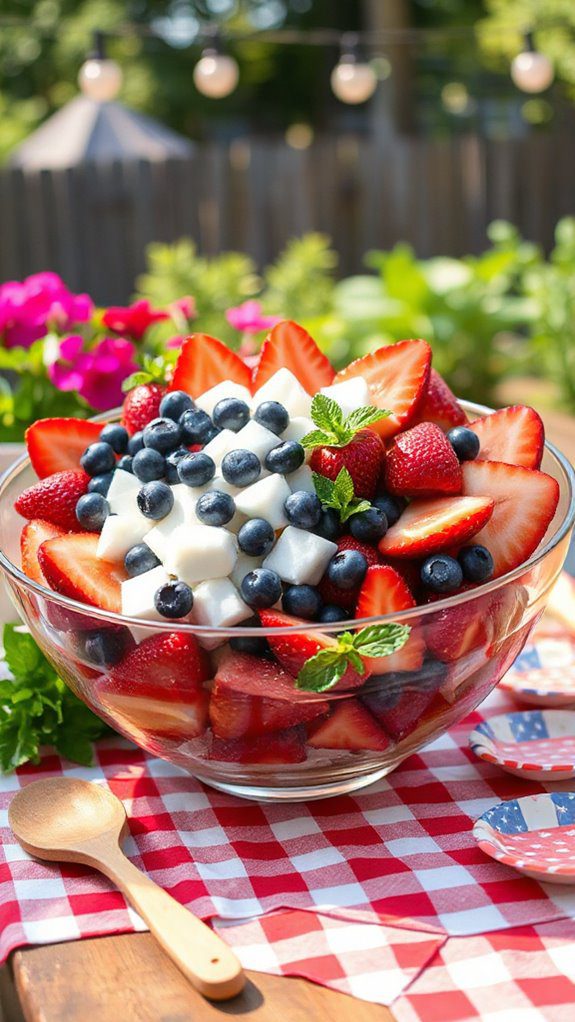
Patriotic Fruit Salad is a vibrant and invigorating dessert that captures the essence of summer with its red, white, and blue theme, making it ideal for festive BBQs, especially around Independence Day or Memorial Day.
This dessert is not only visually appealing but also a healthy option for those looking to enjoy something sweet while keeping it nutritious. Preparation time for this delightful salad is about 15 minutes, making it a quick and easy dish for any gathering.
Ingredients:
- 2 cups strawberries, hulled and sliced
- 2 cups blueberries
- 1 cup bananas, sliced
- 1 cup mini marshmallows (optional)
- 1 cup whipped cream or cool whip
- Fresh mint leaves for garnish (optional)
- 1 tablespoon honey or maple syrup (optional, for sweetness)
Cooking Steps:
- Begin by washing the strawberries and blueberries thoroughly. Remove the stems from the strawberries and slice them into thin pieces.
- In a large mixing bowl, combine the sliced strawberries, blueberries, and sliced bananas.
- If using, add the mini marshmallows and gently fold them into the fruit mixture.
- In a separate bowl, whip the cream until soft peaks form. If you prefer a sweeter taste, add honey or maple syrup to the whipped cream and mix until combined.
- Gently fold the whipped cream into the fruit mixture until everything is coated evenly.
- Transfer the salad to a serving bowl or individual cups. Garnish with fresh mint leaves for an added touch of color and freshness.
Variations & Tips:
- For a twist, consider adding other fruits such as raspberries, kiwi, or pineapple to enhance the flavor and color.
- To make it vegan, use a plant-based whipped topping instead of regular whipped cream.
- If you want to prepare the salad a little ahead of time, keep the whipped cream separate and combine it just before serving to maintain the freshness of the fruit.
- For extra crunch, add a handful of granola or chopped nuts.
- Serve the fruit salad in clear cups or jars for a visually appealing presentation.
Pineapple Upside-Down Cake
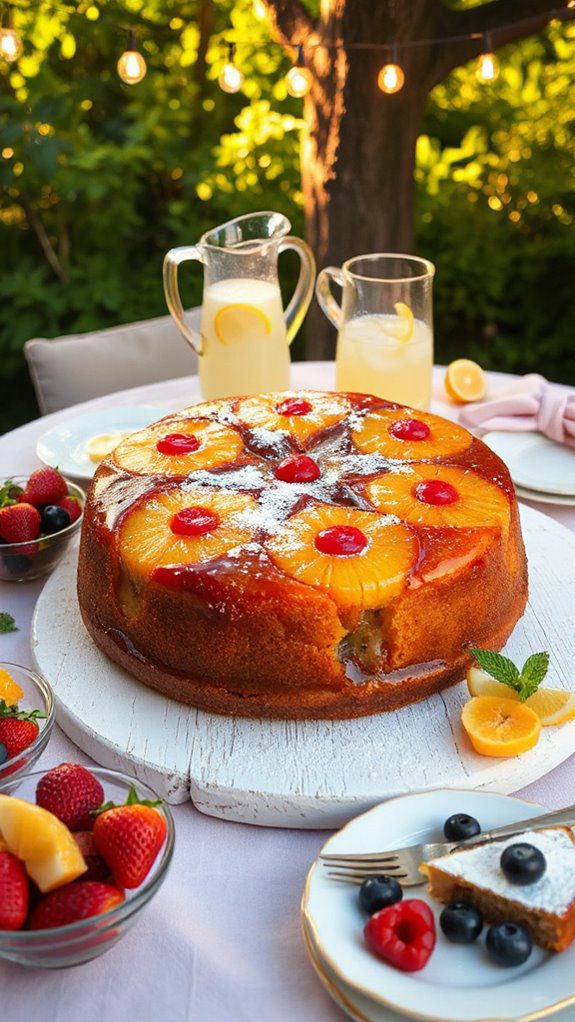
Pineapple Upside-Down Cake is a classic dessert that brings a tropical flair to any summer BBQ. This delight features a golden cake topped with sweet, caramelized pineapple slices and maraschino cherries, making it both visually stunning and delicious.
Ideal for large gatherings, this cake serves about 10 to 12 people. With a preparation time of around 20 minutes and a baking time of 40 minutes, you’ll have a crowd-pleaser ready in no time.
Ingredients:
- 1/4 cup unsalted butter
- 1 cup packed brown sugar
- 1 can (20 oz) sliced pineapple in juice, drained
- Maraschino cherries
- 1 1/2 cups all-purpose flour
- 2 tsp baking powder
- 1/2 tsp salt
- 1/2 cup granulated sugar
- 1/2 cup vegetable oil
- 2 large eggs
- 1 tsp vanilla extract
- 1/2 cup pineapple juice (reserved from canned pineapple)
Instructions:
- Preheat your oven to 350°F (175°C).
- In a 9-inch round cake pan, melt the butter in the oven as it preheats. Once melted, sprinkle the brown sugar evenly over the melted butter.
- Arrange the pineapple slices on top of the brown sugar mixture, and place a maraschino cherry in the center of each pineapple slice.
- In a mixing bowl, whisk together the flour, baking powder, and salt.
- In another bowl, whisk together the granulated sugar, vegetable oil, eggs, vanilla extract, and reserved pineapple juice until smooth.
- Gradually mix the dry ingredients into the wet ingredients just until combined; be careful not to overmix.
- Pour the batter over the pineapples in the cake pan and spread it evenly.
- Bake in the preheated oven for 40 to 45 minutes, or until a toothpick inserted in the center comes out clean.
- Allow the cake to cool for about 10 minutes, then run a knife around the edges before inverting it onto a serving plate.
Variations & Tips:
- For a tropical twist, add shredded coconut to the batter or sprinkle it over the top after inverting the cake.
- Substitute the pineapple with peach slices or cherries for a different flavor profile.
- For a richer flavor, consider adding 1/2 tsp of cinnamon or nutmeg to the batter.
- Serve with whipped cream or vanilla ice cream for an extra indulgent treat.
- Make sure to work quickly when inverting the cake to keep the caramelized pineapple intact.
Enjoy this dazzling Pineapple Upside-Down Cake at your next BBQ, and watch your guests come back for seconds!


