Summer ricotta desserts offer a delicious Italian twist. Delight in a Lemon Ricotta Cake, or refresh with Ricotta Strawberry Parfaits. For a savory option, try Peach and Ricotta Crostini. Indulge in a No-Bake Ricotta Cheesecake or a decadent Ricotta Chocolate Mousse. Cool off with Ricotta and Honey Semifreddo, or a Watermelon and Ricotta Salad. Pistachio Ricotta Ice Cream adds flair, while Ricotta Stuffed Zucchini Blossoms provide a unique touch. More delightful recipes await exploration.
Lemon Ricotta Cake
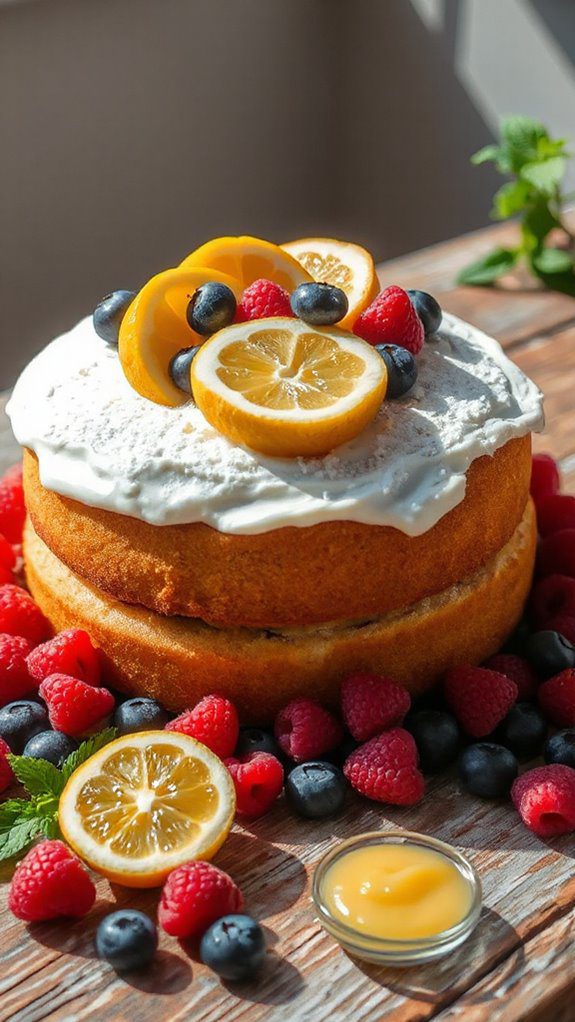
Lemon Ricotta Cake is a delightful, moist dessert that features the wonderful flavors of fresh lemons and creamy ricotta cheese. This cake is perfect for summer gatherings, light brunches, or as a revitalizing end to a meal.
With a preparation time of about 15 minutes and a baking time of around 30-35 minutes, this dish is both quick and easy to make, making it ideal for anyone wanting to impress their guests with minimal effort.
Ingredients:
- 1 cup ricotta cheese
- 1 cup granulated sugar
- 3 large eggs
- Zest of 2 lemons
- 1/2 cup fresh lemon juice
- 1 teaspoon vanilla extract
- 1 1/2 cups all-purpose flour
- 1 teaspoon baking powder
- 1/2 teaspoon baking soda
- 1/4 teaspoon salt
- Powdered sugar (for dusting)
Instructions:
- Preheat your oven to 350°F (175°C). Grease and flour a 9-inch round cake pan or line it with parchment paper.
- In a large mixing bowl, combine the ricotta cheese and granulated sugar, mixing until smooth and creamy.
- Add the eggs, lemon zest, lemon juice, and vanilla extract to the ricotta mixture and whisk until well incorporated.
- In a separate bowl, sift together the flour, baking powder, baking soda, and salt. Gradually add the dry ingredients to the wet mixture, stirring gently until just combined.
- Pour the batter into the prepared cake pan, smoothing the top with a spatula.
- Bake in the preheated oven for 30-35 minutes, or until a toothpick inserted into the center comes out clean.
- Allow the cake to cool in the pan for about 10 minutes, then transfer it to a wire rack to cool completely.
- Once cooled, dust the top with powdered sugar before slicing and serving.
Variations and Tips:
- For added flavor, try incorporating poppy seeds into the batter.
- Experiment with different citrus fruits, such as orange or lime, for a unique twist.
- Serve the cake with a dollop of whipped cream or a scoop of lemon sorbet for a rejuvenating touch.
- To enhance the lemon flavor, consider making a simple lemon glaze by mixing powdered sugar with lemon juice and drizzling it over the cooled cake.
- Store any leftovers in an airtight container in the refrigerator for up to 3 days. The flavors will continue to develop and the cake may even taste better the following day!
- The Original Pro Chopper - Our superstar veggie slicer has been creating waves on TikTok! Simple to use,...
- Easy Meal Prep with Rust-Resistant Blades - Our vegetable chopper is perfect for anyone who wants to eat...
- 5-Star Design - The soft-grip TPU handle ensures controlled chopping, while the non-skid rubber base...
Ricotta Strawberry Parfait
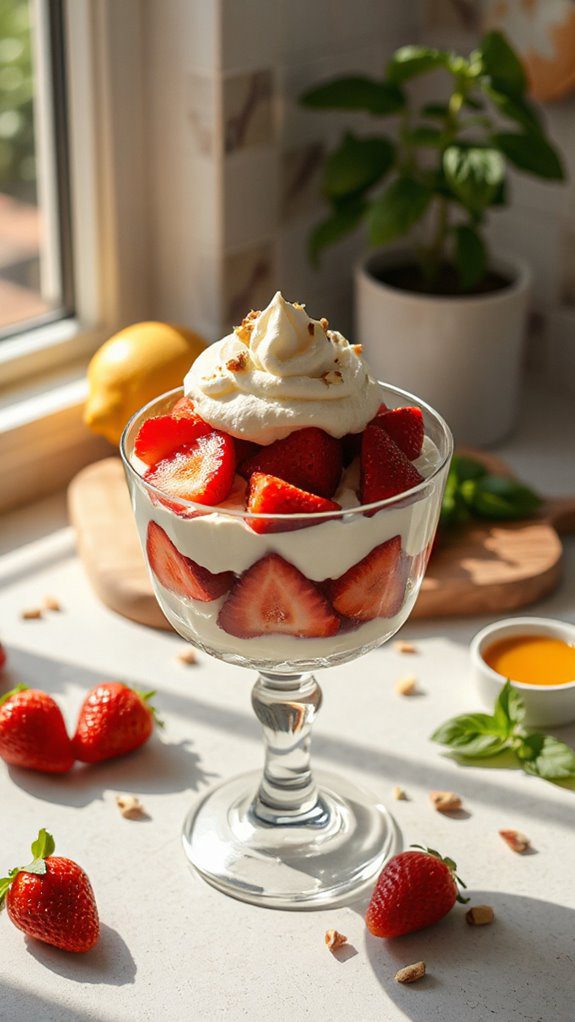
The Ricotta Strawberry Parfait is a revitalizing and delightful summer dessert that combines the creamy richness of ricotta cheese with the natural sweetness of fresh strawberries.
This dish is ideal for those who are looking for a light yet indulgent treat, perfect for warm weather gatherings, brunches, or simply to satisfy a sweet craving without the guilt.
With a preparation time of just 15 minutes, this parfait is quick and easy to assemble, making it accessible for both novice cooks and seasoned chefs alike.
Ingredients
- 1 cup ricotta cheese
- 2 tablespoons honey or maple syrup
- 1 teaspoon vanilla extract
- 2 cups fresh strawberries, hulled and sliced
- 1 cup granola
- Fresh mint leaves for garnish (optional)
Instructions
- In a mixing bowl, combine the ricotta cheese, honey (or maple syrup), and vanilla extract. Mix until smooth and well incorporated.
- In serving glasses or bowls, layer the ingredients starting with a spoonful of the ricotta mixture at the bottom.
- Add a layer of sliced strawberries on top of the ricotta.
- Sprinkle a layer of granola over the strawberries.
- Repeat the layers until the glasses are full, finishing with a layer of strawberries and a sprinkle of granola on top.
- Garnish with fresh mint leaves if desired. Serve immediately or refrigerate for up to an hour before serving.
Variations & Tips
- Fruit Variations: Swap out strawberries for other berries like blueberries, raspberries, or diced peaches to suit your taste or the season.
- Sweetness Adjustments: Adjust the amount of honey or maple syrup according to your preference for sweetness. You can also add a sprinkle of powdered sugar if desired.
- Nutty Crunch: For added texture, consider adding chopped nuts such as almonds or walnuts with the granola.
- Flavor Enhancements: Mix in a pinch of cinnamon or lemon zest to the ricotta for an added flavor twist.
- Make Ahead: Prepare the ricotta mixture and slice the strawberries a few hours in advance for quicker assembly when serving. Keep the granola separate until just before serving to maintain its crunchiness.
- Makes Everything Simple : Just forget your bagged cheese! Only turn the handle for several times and get...
- Premium Material : All parts of the rotary cheese grater are made of food grade ABS material, no BPA. The...
- Three Option Grater : The parmesan cheese grater finishes food preparation with slicing, shredding and...
Peach and Ricotta Crostini

Peach and Ricotta Crostini is a delightful summer appetizer that combines the creamy richness of ricotta cheese with the sweet, juicy flavor of fresh peaches.
It’s a light and invigorating dish perfect for summer gatherings, picnics, or as a starter for a warm-weather meal.
With a total preparation time of about 15 minutes, this easy-to-make crostini can impress your guests or satisfy your family with minimal effort.
Ingredients:
- Baguette, sliced into ½-inch rounds
- Olive oil
- Fresh ricotta cheese
- Ripe peaches, sliced thinly
- Honey
- Fresh basil leaves, torn
- Sea salt
- Black pepper
Cooking Steps:
- Preheat your oven to 400°F (200°C).
- Arrange the baguette slices on a baking sheet and brush them lightly with olive oil on both sides.
- Bake the baguette slices in the preheated oven for about 6-8 minutes, or until they are golden and crisp.
- While the baguette is toasting, prepare your toppings by slicing fresh peaches and tearing fresh basil leaves.
- Once the bread is done, let it cool slightly before spreading a generous layer of fresh ricotta cheese on each crostini.
- Top the ricotta with a few slices of peach.
- Drizzle honey over the peaches and sprinkle with a pinch of sea salt and black pepper.
- Finish with torn basil leaves for an added burst of flavor.
- Serve immediately and enjoy the fresh, vibrant taste!
Variations and Tips:
- For additional flavor, consider adding a few drops of balsamic glaze on top of the crostini.
- Try different fruits based on the season, such as plums, strawberries, or figs, for a unique twist.
- If you want a savory option, add prosciutto or a sprinkle of crushed red pepper flakes.
- Use whole grain or gluten-free bread options for a healthier alternative.
- Prepare the crostini just before serving to maintain the crispness of the bread.
- 💰 REDUCE WASTE AND SAVE MONEY: Chef Preserve keeps FOOD FRESH 5 TIMES LONGER than non-vacuum storage...
- ✅ POWERFUL, QUICK & EASY TO USE: Simply press the button to start. The device vacuum seals a bag in 5...
- ♻️ REUSABLE & RESEALABLE BAGS: Chef Preserve comes with dishwasher, freezer, refrigerator, and...
No-Bake Ricotta Cheesecake
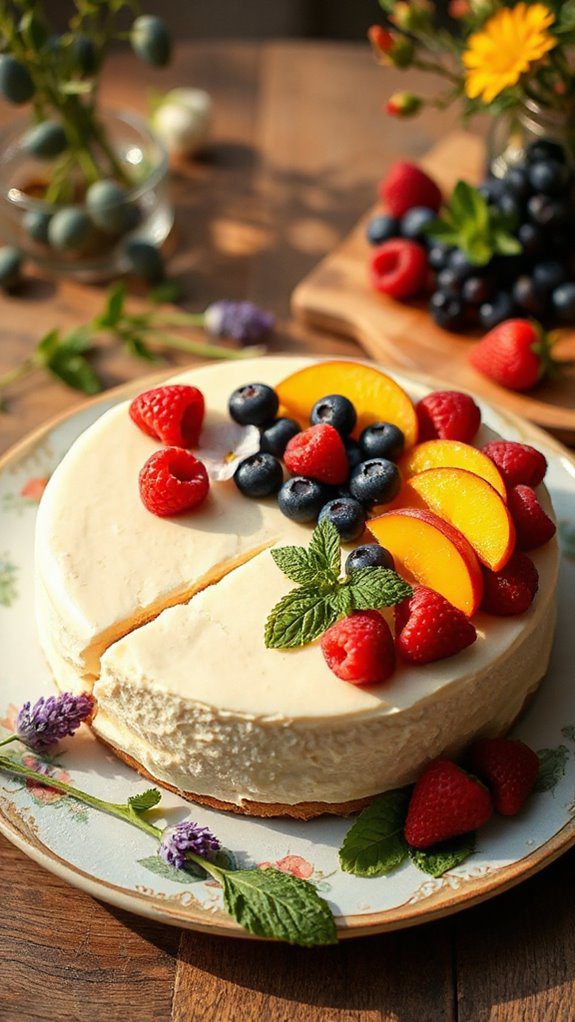
No-Bake Ricotta Cheesecake is a delightful and creamy dessert that comes together effortlessly, making it an ideal choice for warm summer days when you want something sweet but invigorating without turning on the oven.
This light yet indulgent cheesecake is perfect for gatherings, picnics, or simply as a soothing treat to enjoy at home. With a prep time of just 20 minutes (followed by chilling time), you can whip this up quickly and impress your family and friends with its rich flavor and texture.
Ingredients:
- 2 cups ricotta cheese
- 1 cup cream cheese, softened
- ¾ cup powdered sugar
- 1 teaspoon vanilla extract
- 1 tablespoon lemon juice
- 1 teaspoon lemon zest
- 1 ½ cups graham cracker crumbs
- ½ cup unsalted butter, melted
- Fresh berries or fruit for topping (optional)
Instructions:
- Prepare the crust: In a medium bowl, combine the graham cracker crumbs and melted butter. Mix until the crumbs are well-coated. Press the mixture evenly into the bottom of a 9-inch springform pan to form the crust. Set aside.
- Make the filling: In a large mixing bowl, use an electric mixer to beat the ricotta cheese and cream cheese together until smooth and creamy. Add the powdered sugar, vanilla extract, lemon juice, and lemon zest. Mix until everything is well combined and the mixture is fluffy.
- Assemble the cheesecake: Pour the ricotta filling over the crust in the springform pan, spreading it evenly. Cover the top with plastic wrap or aluminum foil.
- Chill: Refrigerate for at least 4 hours, or overnight if possible, to allow the cheesecake to set properly.
- Serve: Once set, carefully remove the sides of the springform pan. Top with fresh berries or additional fruit if desired before slicing and serving.
Variations and Tips:
- For a chocolate twist, fold in melted chocolate or cocoa powder to the filling mixture.
- Combine and layer different flavors by adding extracts such as almond or almond extract to the filling.
- If you enjoy a hint of spice, try adding a pinch of cinnamon or nutmeg to the crust mixture.
- To enhance sweetness or tanginess, adjust the amount of powdered sugar or lemon juice according to your taste.
- This cheesecake also pairs wonderfully with a fruit compote or a drizzle of honey or chocolate sauce before serving.
Enjoy your No-Bake Ricotta Cheesecake, the perfect treat that captures the essence of summer!
- Generous Capacity: 7-quart slow cooker that comfortably serves 9+ people or fits a 7-pound roast
- Cooking Flexibility: High or low slow cooking settings, with convenient warm function for ideal serving...
- Convenient: Set it and forget it feature enables you to cook while at work or performing daily tasks
Ricotta Chocolate Mousse
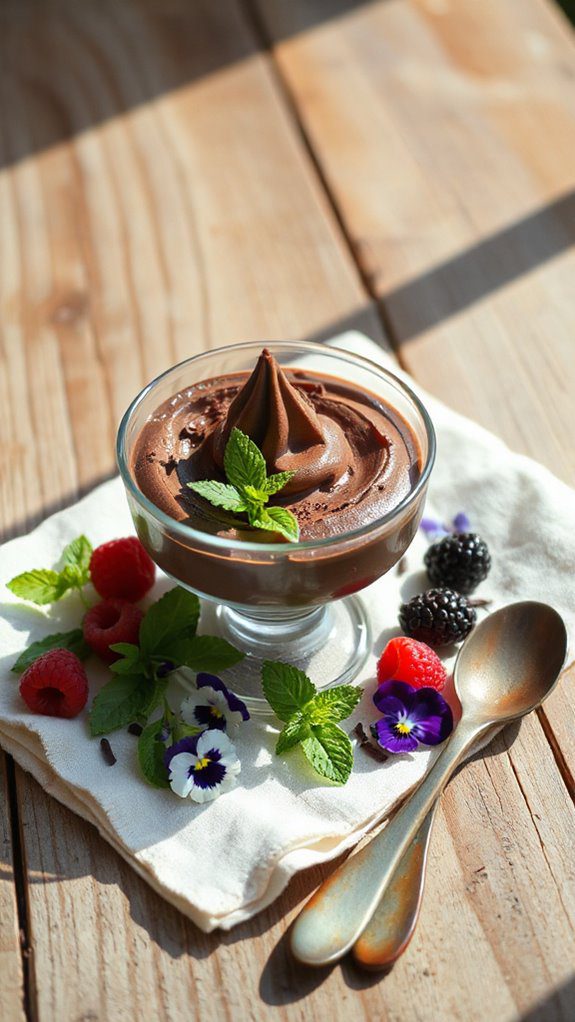
Ricotta Chocolate Mousse is a delightful and creamy dessert that combines the richness of chocolate with the light, airy texture of ricotta cheese. This dish is perfect for those looking to impress their guests with a sophisticated, yet deceptively simple dessert. Ideal for summer gatherings, dinner parties, or a sweet treat for family, this recipe takes about 20 minutes to prepare, with a chilling time of at least 2 hours for the mousse to set.
Ingredients:
- 1 cup ricotta cheese
- 1 cup heavy cream
- 1/2 cup semisweet chocolate chips (melted)
- 1/4 cup powdered sugar
- 1 teaspoon vanilla extract
- A pinch of salt
- Optional: Dark chocolate shavings or fresh berries for garnish
Cooking Steps:
- Begin by melting the semisweet chocolate chips. You can do this using a microwave in short bursts (about 30 seconds at a time), stirring in between, or on a double boiler until smooth. Allow it to cool slightly.
- In a mixing bowl, combine the ricotta cheese, powdered sugar, vanilla extract, and a pinch of salt. Mix until smooth and creamy, ensuring there are no lumps. You can use an electric mixer for a fluffier texture.
- In a separate bowl, whip the heavy cream until it forms stiff peaks. This will give your mousse its lightness.
- Gently fold the melted chocolate into the ricotta mixture until fully incorporated. Be careful to maintain the airy texture.
- Next, fold in the whipped cream, one-third at a time, being cautious not to deflate the mixture.
- Once everything is combined, spoon the mousse into serving dishes or glasses. Cover with plastic wrap and refrigerate for at least 2 hours, or until set.
- Before serving, garnish with dark chocolate shavings or fresh berries, if desired.
Variations and Tips:
- For a different flavor, try adding a tablespoon of espresso or coffee liqueur to the chocolate mixture for a mocha twist.
- If you prefer a sweeter mousse, you can add an additional tablespoon of powdered sugar.
- To make this dessert keto-friendly, consider using a sugar substitute for the powdered sugar.
- Feel free to swap the semisweet chocolate for dark chocolate or white chocolate for a unique flavor profile.
- This mousse can be made a day in advance, making it a great make-ahead dessert for busy hosts.
- 100% Leak-proof: Guaranteed no-spill seal and secure latches
- Crystal-clear Tritan Built: Stain-resistant and odor-resistant material for a clear view of contents
- Lightweight & Sturdy: Easy to carry, yet durable for everyday use
Berry Ricotta Tart

The Berry Ricotta Tart is a delightful summer dessert that combines the creamy richness of ricotta cheese with fresh, luscious berries and a crisp tart crust. It’s perfect for gatherings, picnics, or any occasion that calls for a light and invigorating sweet treat.
The preparation time for this dish is approximately 30 minutes, plus an additional 30 minutes for chilling before serving, making it a relatively quick and straightforward dessert that even novice bakers can master.
Ingredients:
- 1 pre-made tart shell (9-inch)
- 1 cup ricotta cheese
- 1/2 cup powdered sugar
- 1 teaspoon vanilla extract
- 1/2 teaspoon lemon zest
- 1 cup mixed berries (such as strawberries, blueberries, raspberries, and blackberries)
- Fresh mint leaves for garnish (optional)
- Additional powdered sugar for dusting (optional)
Cooking Steps:
1. Prepare the Ricotta Filling: In a medium mixing bowl, combine the ricotta cheese, powdered sugar, vanilla extract, and lemon zest. Use a spatula or whisk to blend the mixture until it is smooth and creamy.
Taste it and adjust the sweetness if desired by adding more powdered sugar.
2. Assemble the Tart: Spoon the ricotta filling into the pre-made tart shell, spreading it evenly with a spatula to cover the entire base.
3. Top with Berries: Arrange the mixed berries on top of the ricotta filling in a decorative pattern.
You can help to create a beautiful presentation by grouping the berries by type or color, or you can scatter them more casually.
4. Chill the Tart: Cover the tart with plastic wrap and refrigerate it for at least 30 minutes to allow the flavors to meld and the filling to firm up slightly.
5. Serve: Prior to serving, garnish the tart with fresh mint leaves, if desired, and dust with additional powdered sugar for a touch of elegance.
Slice into wedges and enjoy!
Variations and Tips:
- Flavor Infusions: For added flavor, consider incorporating a tablespoon of lemon juice or almond extract into the ricotta filling.
- Berry Options: Feel free to swap out the berries for seasonal fruits like peaches, nectarines, or cherries, depending on what’s available.
- Nut Crust Variation: For a gluten-free option, use a nut-based crust made with ground almonds or walnuts mixed with butter and a bit of honey.
- Whipped Cream Addition: For an even creamier texture, fold in 1 cup of whipped cream into the ricotta mixture before spreading it into the tart shell.
- Serving Suggestion: Pair with a scoop of vanilla ice cream or a dollop of whipped cream on the side for an extra indulgent treat.
- 𝗘𝗳𝗳𝗼𝗿𝘁𝗹𝗲𝘀𝘀 𝗪𝗲𝗶𝗴𝗵𝗶𝗻𝗴: Supports 5 units...
- 𝗣𝗿𝗲𝗰𝗶𝘀𝗲 𝗥𝗲𝘀𝘂𝗹𝘁𝘀: Accurately weighs up to 11 lb/5 kg with 1 g...
- 𝗦𝗶𝗺𝗽𝗹𝗲 & 𝗖𝗼𝗺𝗽𝗮𝗰𝘁: The small and sleek scale is a perfect fit for...
Citrus Ricotta Panna Cotta

Citrus Ricotta Panna Cotta is a light and invigorating dessert that combines the creamy texture of ricotta cheese with the zesty flavors of citrus, making it a perfect treat for hot summer days.
This elegant Italian dessert is ideal for gatherings, dinner parties, or simply to enjoy on a warm afternoon. The preparation time for this dish is approximately 20 minutes, with a chilling time of at least 4 hours, allowing the panna cotta to set beautifully.
Ingredients:
- 1 cup ricotta cheese
- 1 cup heavy cream
- 1/2 cup sugar
- 2 teaspoons gelatin powder
- 2 tablespoons cold water
- Zest of 1 lemon
- Zest of 1 orange
- 1 teaspoon vanilla extract
- Pinch of salt
- Fresh citrus segments (for garnish)
- Mint leaves (for garnish)
Cooking Steps:
- In a small bowl, sprinkle the gelatin powder over the cold water and let it bloom for about 5 minutes.
- In a medium saucepan, combine the heavy cream, sugar, lemon zest, orange zest, vanilla extract, and a pinch of salt. Heat over medium heat until the mixture is warm but not boiling, stirring until the sugar dissolves.
- Remove the saucepan from heat and stir in the bloomed gelatin until fully dissolved.
- In a separate bowl, whisk the ricotta cheese until smooth. Gradually add the warm cream mixture to the ricotta, whisking continuously until well combined and smooth.
- Pour the mixture into individual serving cups or ramekins. Cover with plastic wrap and refrigerate for at least 4 hours, or until set.
- To serve, carefully run a knife around the edges of the panna cotta, then invert onto a plate if desired. Garnish with fresh citrus segments and mint leaves.
Variations and Tips:
- For a fruitier twist, try adding pureed fruits like strawberries or passion fruit to the ricotta mixture before chilling.
- You can substitute the citrus zest with other flavors such as coconut or vanilla for a different profile.
- Consider using flavored syrup, like elderflower or lavender, drizzled over the panna cotta for added aroma and sweetness.
- If you prefer a dairy-free option, use coconut cream instead of heavy cream and a dairy-free ricotta substitute.
- Make certain the panna cotta is properly chilled for the perfect creamy texture before serving.
- Instant Read Food Thermometer | Our instant read thermometer features a temperature probe and advanced,...
- Multi-Use | From bbq thermometer to baking thermometer, our digital food thermometer for cooking is...
- Easy-Read Digital Thermometer For Cooking | Large instant thermometer dial with bright blue backlight...
Ricotta and Honey Semifreddo

Ricotta and Honey Semifreddo is a delightful frozen dessert that embodies the essence of summer with its light, creamy texture and sweet honey flavor. Ideal for those looking to impress guests or treat themselves to a luxurious end to a warm meal, this semifreddo offers a wonderful balance between rich ricotta cheese and the natural sweetness of honey.
The preparation time is approximately 20 minutes, plus freezing time, making it an accessible yet elegant dessert perfect for warm evenings.
Ingredients:
- 2 cups ricotta cheese
- 1 cup heavy cream
- 3/4 cup honey
- 1 teaspoon vanilla extract
- Pinch of salt
- Zest of 1 lemon (optional for added flavor)
- Fresh fruit (for serving, optional)
Cooking Steps:
- In a large mixing bowl, combine the ricotta cheese, honey, vanilla extract, and lemon zest (if using). Use a hand mixer or a whisk to blend until smooth and creamy.
- In a separate bowl, whip the heavy cream until stiff peaks form. Be careful not to over-whip.
- Gently fold the whipped cream into the ricotta mixture. This will help maintain the airy texture of the semifreddo.
- Pour the mixture into a loaf pan or a freezer-safe dish, smoothing the top with a spatula.
- Cover the dish with plastic wrap and place it in the freezer for at least 4 hours, or until set.
- Once set, remove from the freezer and let it sit at room temperature for about 10 minutes to soften slightly, making it easier to slice.
- Serve in slices topped with fresh fruit or additional drizzles of honey, if desired.
Variations and Tips:
- For a chocolate twist, fold in some cocoa powder or melted dark chocolate into the ricotta mixture before adding the whipped cream.
- You can substitute honey with maple syrup or agave nectar for a different flavor profile.
- Experiment with different citrus zests, like orange or lime, to customize the taste.
- Add crushed nuts or your favorite berries to the mixture for a delightful crunch or burst of flavor.
- Store leftovers wrapped tightly in plastic wrap in the freezer for up to a month.
- Versatile 54-Piece Collection: Elevate your kitchen with the Home Hero 54-Piece Kitchen Utensil Set, a...
- Durable and Long-Lasting: Crafted from premium stainless steel, these kitchen utensils are designed to...
- Perfect Holiday Gift: Delight your loved ones with this kitchen utensils gift set this festive season....
Watermelon and Ricotta Salad

Watermelon and Ricotta Salad is a revitalizing, light dish perfect for summer gatherings or as a delightful side for a barbecue. Combining the juicy sweetness of watermelon with the creamy richness of ricotta, this salad is ideal for those looking for a healthy and delicious way to cool down on a hot day.
Preparation time is approximately 15 minutes, making it a quick and easy addition to any meal.
Ingredients:
- 4 cups of seedless watermelon, cubed
- 1 cup of fresh ricotta cheese
- 1/4 cup of fresh mint leaves, chopped
- 1 tablespoon of honey (optional)
- 1 tablespoon of balsamic glaze (optional)
- Salt and pepper to taste
- Lime or lemon juice (to taste)
Cooking Instructions:
- In a large mixing bowl, combine the cubed watermelon and chopped mint.
- Gently fold in the ricotta cheese to distribute it evenly without breaking up the watermelon cubes.
- Drizzle the honey over the mixture if using, along with a squeeze of lime or lemon juice for brightness.
- Season with salt and pepper to taste, and gently mix everything together.
- Transfer the salad to a serving platter or individual bowls.
- Drizzle with balsamic glaze just before serving for a touch of sweetness and visual appeal.
Variations and Tips:
- For an extra layer of flavor, consider adding crumbled feta cheese or goat cheese alongside ricotta.
- You can enhance the salad by incorporating other fruits like cucumber or berries for a colorful medley.
- To make it a more substantial dish, add grilled shrimp or chicken for protein.
- Serve chilled for the best experience, particularly on hot summer days.
- Experiment with different herbs such as basil or parsley if mint is not available.
- 24-ounce insulated stainless-steel water bottle with a FreeSip spout and push-button lid with lock
- Patented FreeSip spout designed for either sipping upright through the built-in straw or tilting back to...
- Protective push-to-open lid keeps spout clean; convenient carry loop doubles as a lock
Ricotta Stuffed Zucchini Blossoms

Ricotta stuffed zucchini blossoms are a delightful and elegant dish perfect for summer entertaining or as a special appetizer at any gathering. These delicate flowers are not only a feast for the eyes but also a treat for the taste buds, filled with creamy ricotta cheese and herbs. They can be served warm or at room temperature and delight both vegetarians and meat-lovers alike.
Preparation time for this dish is approximately 30 minutes, making it a quick yet impressive addition to your menu.
Ingredients
- 12 fresh zucchini blossoms
- 1 cup ricotta cheese
- 1/2 cup grated Parmesan cheese
- 1 egg
- 2 tablespoons fresh basil, chopped
- 2 tablespoons fresh parsley, chopped
- Salt and pepper to taste
- Olive oil for frying
- Flour for dusting
- Lemon wedges, for serving
Cooking Steps
- Prepare the Zucchini Blossoms: Gently rinse the zucchini blossoms under cold water and carefully remove the stamen from inside each blossom. Pat them dry with a paper towel.
- Make the Filling: In a bowl, combine the ricotta cheese, grated Parmesan cheese, egg, chopped basil, chopped parsley, salt, and pepper. Mix until well combined.
- Stuff the Blossoms: Using a small spoon or piping bag, fill each zucchini blossom with the ricotta cheese mixture, being careful not to overstuff them, as the blossoms can tear.
- Dust the Blossoms: Lightly dust the stuffed blossoms with flour to help the batter adhere if you choose to fry them.
- Heat the Oil: In a large skillet, heat about 1/2 inch of olive oil over medium heat. You can test if the oil is hot enough by dropping a small piece of bread into it; it should sizzle immediately.
- Fry the Blossoms: Carefully place the stuffed blossoms in the hot oil, a few at a time, to avoid overcrowding. Fry for about 2-3 minutes on each side until they are golden and crispy.
- Drain and Serve: Remove the blossoms from the skillet and drain on a plate lined with paper towels. Serve immediately with lemon wedges on the side for squeezing.
Variations and Tips
- Batter-Dipped: For a crunchy exterior, you can dip the stuffed blossoms in a light tempura batter before frying.
- Herb Variations: Feel free to switch up the herbs according to your preference—thyme or chives can add a wonderful flavor.
- Oven-Baked Option: For a lighter version, you can bake the stuffed blossoms at 375°F (190°C) for about 15-20 minutes until they are golden brown.
- Make Ahead: You can prepare the filling in advance and stuff the blossoms just before frying to save time.
- Presentation: Serve on a nice platter, drizzled with a balsamic reduction for added flavor and visual appeal.
Enjoy your delicious ricotta stuffed zucchini blossoms, a true taste of summer!
Pistachio Ricotta Ice Cream
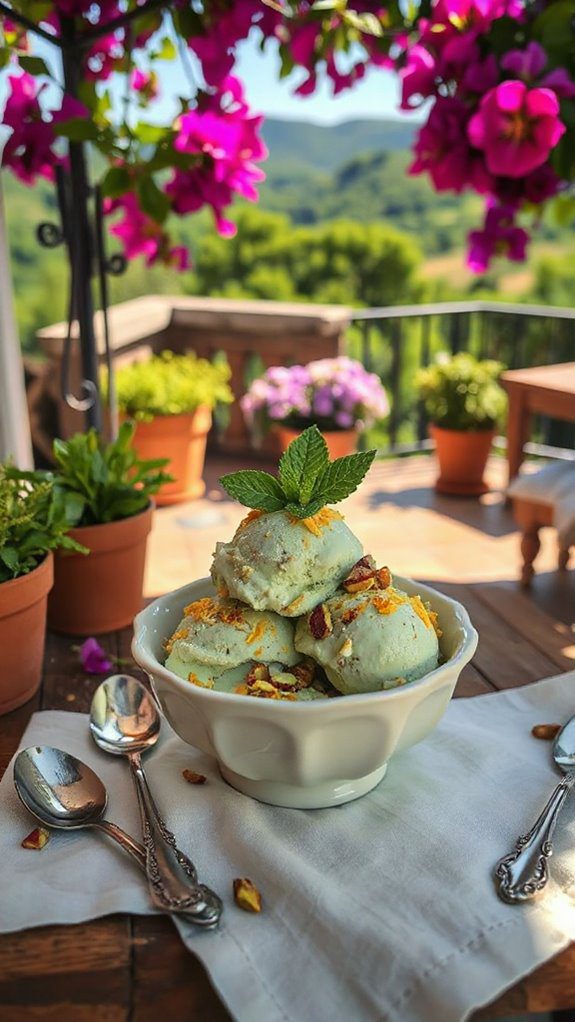
Pistachio Ricotta Ice Cream is a delightful and creamy frozen dessert that brings together the rich flavor of pistachios with the smooth, slightly tangy taste of ricotta cheese. This sophisticated treat is perfect for anyone looking to cool off during the hot summer months or impress guests at a dinner party.
With a preparation time of about 30 minutes plus a few hours of chilling, this ice cream is relatively easy to make and requires no special equipment, making it accessible for home cooks of all skill levels.
Ingredients:
- 1 cup ricotta cheese
- 1 cup heavy cream
- 1/2 cup whole milk
- 1/2 cup granulated sugar
- 1/2 cup unsalted pistachios, shelled and finely chopped
- 1 teaspoon vanilla extract
- 1/4 teaspoon salt
- Optional: additional crushed pistachios for garnish
Instructions:
- In a mixing bowl, combine the ricotta cheese, heavy cream, whole milk, and granulated sugar. Use a whisk to blend the mixture until it is smooth and creamy, ensuring there are no lumps from the ricotta.
- Stir in the vanilla extract and salt. Mix well to incorporate.
- Gently fold in the finely chopped pistachios until evenly distributed throughout the mixture.
- Pour the mixture into an ice cream maker and churn according to the manufacturer’s instructions. This usually takes about 20-25 minutes, or until the ice cream reaches a soft-serve consistency.
- Once churned, transfer the ice cream to an airtight container. Press a piece of plastic wrap directly onto the surface of the ice cream to prevent ice crystals from forming, then seal with a lid.
- Freeze for at least 4 hours, or until firm.
- When ready to serve, let the ice cream sit at room temperature for about 5-10 minutes to soften slightly for easier scooping. Scoop into bowls or cones and garnish with additional crushed pistachios, if desired.
Variations & Tips:
- Nut Substitutions: For a different flavor twist, try substituting pistachios with almonds or hazelnuts.
- Sweetness Adjustment: Feel free to adjust the amount of sugar based on your preference for sweetness.
- Flavor Add-ins: For additional flavor, consider mixing in a tablespoon of almond or rose water.
- No Ice Cream Maker?: If you don’t have an ice cream maker, pour the mixture into a shallow dish and freeze it. Stir vigorously with a fork every 30 minutes for the first 2-3 hours to break up ice crystals until smooth and creamy.
- Serving Suggestions: This pistachio ricotta ice cream pairs well with fresh fruit, chocolate sauce, or can be served alongside a slice of warm cake.


