Summer brings a variety of delightful detox desserts that support wellness goals. Options like the Berry Bliss Smoothie Bowl and Coconut Chia Seed Pudding offer crispness and nutrition. Avocado Chocolate Mousse provides a rich and guilt-free treat, while Tropical Fruit Popsicles and Lemon Basil Sorbet are perfect for hot days. Light dishes like Green Detox Smoothie and Watermelon Mint Salad keep things invigorating. For those seeking indulgence, Zucchini Brownies and Cashew Cream Fruit Tart are satisfying choices worth exploring further.
Berry Bliss Smoothie Bowl
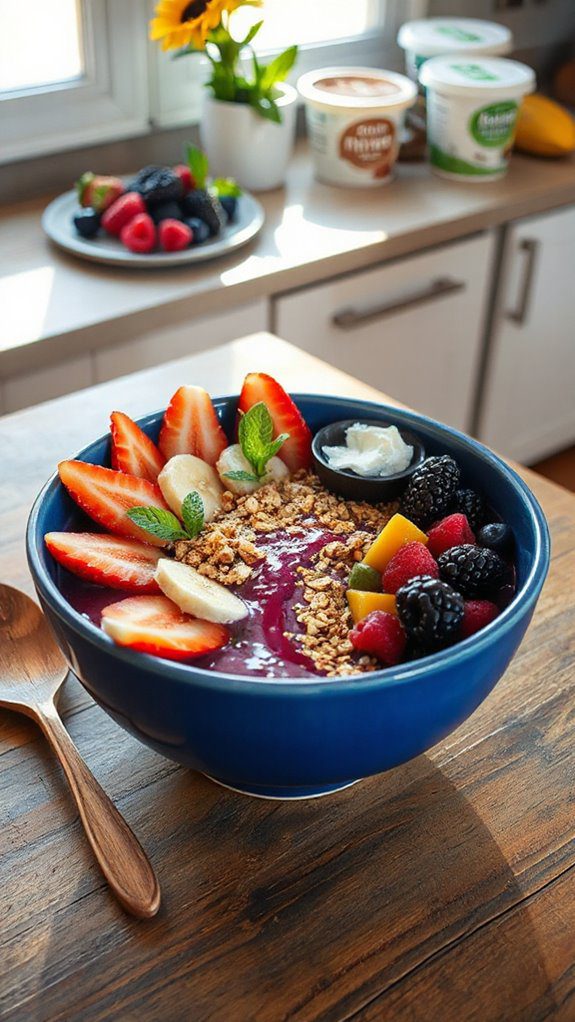
The Berry Bliss Smoothie Bowl is a vibrant, nutrient-packed dish that serves as a perfect breakfast or afternoon snack for anyone looking to nourish their bodies while satisfying their sweet tooth.
This delightful bowl is not only visually appealing but also loaded with antioxidants, fiber, and vitamins, making it an ideal choice for health-conscious individuals or those on a detox journey.
Prep time is just 10 minutes, making it a quick and easy option that doesn’t compromise on flavor or health benefits.
Ingredients:
- 1 cup frozen mixed berries (strawberries, blueberries, raspberries)
- 1 banana (preferably frozen)
- 1/2 cup unsweetened almond milk (or any non-dairy milk of your choice)
- 1 tablespoon chia seeds
- 1 tablespoon almond butter (or any nut butter)
- Toppings (optional): fresh berries, sliced banana, granola, shredded coconut, nuts, or seeds
Instructions:
- In a blender, combine the frozen mixed berries, banana, almond milk, chia seeds, and almond butter. Blend until smooth and creamy, adjusting the amount of almond milk to reach your desired consistency.
- Once blended, pour the smoothie mixture into a bowl.
- Add your desired toppings such as fresh berries, sliced banana, granola, shredded coconut, and/or nuts for added texture and flavor.
- Serve immediately and enjoy with a spoon!
Variations and Tips:
- For a greens boost, add a handful of spinach or kale to the blender.
- If you prefer a sweeter smoothie bowl, consider adding a splash of maple syrup or a date before blending.
- To enhance the protein content, mix in a scoop of your favorite plant-based protein powder.
- If you don’t have almond butter, peanut butter or sunflower seed butter can be great alternatives.
- Get creative with your toppings; experiment with different fruits, seeds, or even nut-based granola to discover your favorite combinations.
- The Original Pro Chopper - Our superstar veggie slicer has been creating waves on TikTok! Simple to use,...
- Easy Meal Prep with Rust-Resistant Blades - Our vegetable chopper is perfect for anyone who wants to eat...
- 5-Star Design - The soft-grip TPU handle ensures controlled chopping, while the non-skid rubber base...
Coconut Chia Seed Pudding
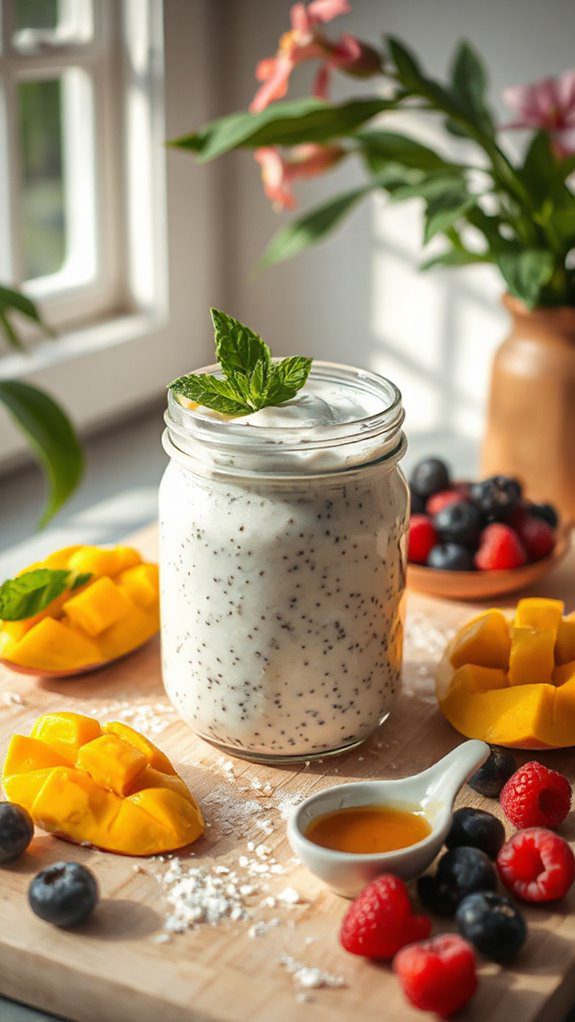
Coconut Chia Seed Pudding is a creamy and nutritious dessert that’s perfect for those looking to indulge in a healthy yet satisfying treat. This pudding is vegan, gluten-free, and loaded with omega-3 fatty acids, making it an ideal choice for individuals aiming to boost their wellness goals while still enjoying something sweet.
With a prep time of just 10 minutes, plus a chilling time of 2-4 hours (or overnight), it’s an easy and quick dessert to prepare, perfect for busy individuals or families.
Ingredients:
- 1 cup coconut milk (canned or carton)
- 1/4 cup chia seeds
- 2 tablespoons maple syrup or honey (optional)
- 1 teaspoon vanilla extract
- Pinch of salt
- Fresh fruits (berries, mango, etc.) for topping
- Shredded coconut for garnish (optional)
Cooking Steps:
- In a mixing bowl, combine the coconut milk, chia seeds, maple syrup or honey (if using), vanilla extract, and a pinch of salt. Stir well to combine.
- Let the mixture sit for about 5 minutes, then stir again to prevent clumping of the chia seeds.
- Cover the bowl and refrigerate for at least 2 hours or overnight. This will allow the chia seeds to expand and create a pudding-like texture.
- Once chilled, give the pudding a good stir. If it’s too thick for your liking, you can add a little more coconut milk to achieve your desired consistency.
- Serve in individual bowls or jars, and top with your choice of fresh fruits and shredded coconut if desired.
Variations & Tips:
- Flavor Additions: Experiment with flavors by adding cocoa powder, matcha powder, or spices like cinnamon or nutmeg to the base mixture.
- Nut Milk Alternative: If you’re not a fan of coconut milk, you can substitute it with almond milk, cashew milk, or any other preferred non-dairy milk.
- Sweetener Options: Adjust sweetness to taste; you can use agave syrup, stevia, or any sweetener of your choice.
- Make it a Parfait: Layer the chia pudding with granola and fruits for a beautiful parfait that adds texture and flavor.
- Storage: This pudding can be stored in the refrigerator for up to 5 days, making it a great make-ahead option for healthy snacks or breakfasts.
- Makes Everything Simple : Just forget your bagged cheese! Only turn the handle for several times and get...
- Premium Material : All parts of the rotary cheese grater are made of food grade ABS material, no BPA. The...
- Three Option Grater : The parmesan cheese grater finishes food preparation with slicing, shredding and...
Avocado Chocolate Mousse
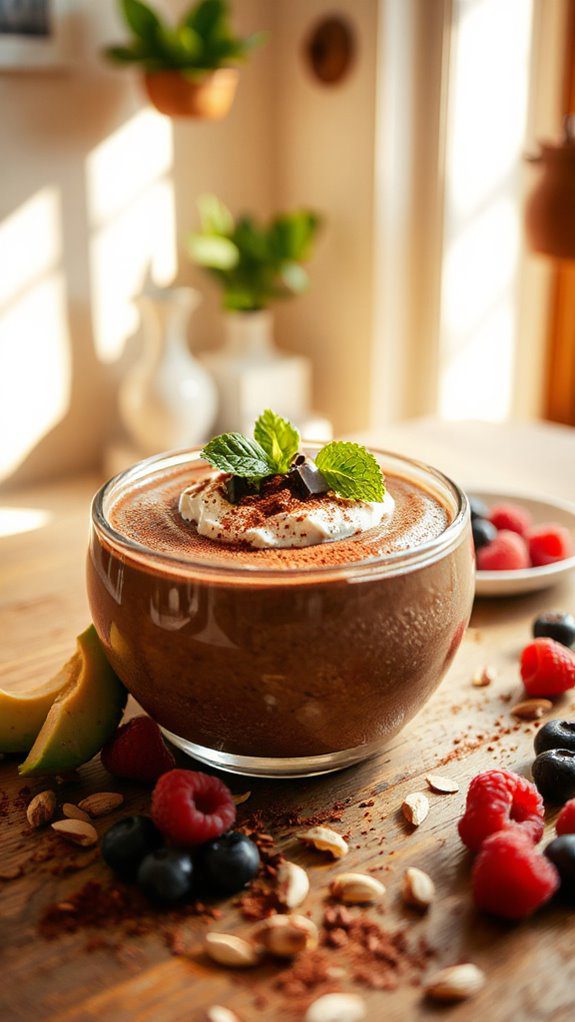
Avocado Chocolate Mousse is a rich and creamy dessert that satisfies your chocolate cravings while being packed with healthy fats and nutrients. This delightful treat is perfect for anyone looking to indulge guilt-free, especially those who are health-conscious or following a plant-based diet.
With a preparation time of just 10 minutes, this mousse is not only simple to make but also provides a quick and satisfying way to fulfill your wellness goals.
Ingredients:
- 2 ripe avocados
- 1/4 cup unsweetened cocoa powder
- 1/4 cup pure maple syrup (adjust to taste)
- 1/4 cup almond milk (or any plant-based milk)
- 1 teaspoon vanilla extract
- A pinch of salt
- Optional toppings: fresh berries, chopped nuts, or coconut flakes
Cooking Steps:
- Cut the ripe avocados in half, remove the pit, and scoop the flesh into a blender or food processor.
- Add the unsweetened cocoa powder, maple syrup, almond milk, vanilla extract, and a pinch of salt to the blender.
- Blend on high speed until the mixture is smooth and creamy, scraping down the sides as needed to ascertain all ingredients are well combined.
- Taste the mousse and adjust sweetness if necessary by adding more maple syrup.
- Once blended to a silky texture, transfer the mousse into serving bowls or glasses.
- Chill in the refrigerator for at least 30 minutes to allow the flavors to meld and the texture to firm up slightly.
- Serve chilled and top with fresh berries, chopped nuts, or coconut flakes as desired.
Variations and Tips:
- For a richer flavor, you can add a tablespoon of almond butter or peanut butter to the mixture before blending.
- If you prefer a sweeter mousse, increase the amount of maple syrup or consider using agave syrup.
- Experiment with different flavorings by adding a dash of cinnamon or a shot of espresso for a mocha mousse twist.
- To make it even more indulgent, consider folding in whipped coconut cream before chilling for a lighter, airy texture.
- Store any leftovers in an airtight container in the refrigerator for up to 2 days.
Enjoy this guilt-free Avocado Chocolate Mousse as a delicious dessert or a nourishing snack that aligns with your wellness goals!
- 💰 REDUCE WASTE AND SAVE MONEY: Chef Preserve keeps FOOD FRESH 5 TIMES LONGER than non-vacuum storage...
- ✅ POWERFUL, QUICK & EASY TO USE: Simply press the button to start. The device vacuum seals a bag in 5...
- ♻️ REUSABLE & RESEALABLE BAGS: Chef Preserve comes with dishwasher, freezer, refrigerator, and...
Tropical Fruit Popsicles

Tropical Fruit Popsicles are a revitalizing and healthy treat that combines the vibrant flavors of fresh tropical fruits while offering a nutritious boost.
Ideal for anyone looking to indulge their sweet tooth without compromising on health, these popsicles are perfect for warm weather or as a post-workout snack.
Plus, they are easy to prepare and take just about 15 minutes of active time, although they’ll require some freezing time afterwards.
Ingredients:
- 2 cups of fresh pineapple chunks
- 1 cup of ripe mango chunks
- 1 ripe banana
- 1 cup of coconut water or fresh orange juice
- 1 tablespoon of honey or agave syrup (optional)
- A handful of fresh mint leaves (optional, for garnish)
Cooking Steps:
- In a blender, add the pineapple chunks, mango chunks, banana, and coconut water or orange juice.
- Blend on high speed until smooth and creamy. If you’d like to add a little sweetness, include honey or agave syrup at this point, and blend again until combined.
- Taste the mixture; adjust the sweetness if necessary and blend again.
- Pour the blended fruit mixture into popsicle molds, leaving a little space at the top as it will expand when frozen.
- Insert popsicle sticks into the molds and place them in the freezer.
- Freeze for at least 4-6 hours or until completely solid.
- To release the popsicles, run warm water over the outside of the mold for a few seconds and gently pull out the popsicles.
Variations and Tips:
- For a creamier texture, blend in a cup of yogurt or coconut cream.
- Add extra nutrients by tossing in a handful of spinach or kale before blending; the vibrant fruit flavors will mask the greens.
- Experiment with other tropical fruits like papaya or passion fruit to create unique flavors.
- Serve the popsicles with fresh mint leaves for added freshness or pair them with a drizzle of dark chocolate for a decadent treat.
- Generous Capacity: 7-quart slow cooker that comfortably serves 9+ people or fits a 7-pound roast
- Cooking Flexibility: High or low slow cooking settings, with convenient warm function for ideal serving...
- Convenient: Set it and forget it feature enables you to cook while at work or performing daily tasks
Lemon Basil Sorbet

Lemon Basil Sorbet is a invigorating and light dessert perfect for warm days or as a palate cleanser between courses. It’s ideal for those looking for a healthy treat that satisfies a sweet craving while incorporating natural flavors.
The preparation time is about 15 minutes, but allow at least 4 hours for freezing, making it the perfect make-ahead dessert for gatherings or a simple weeknight treat.
Ingredients
- 1 cup fresh lemon juice (about 4-6 lemons)
- 1 cup water
- 3/4 cup honey or agave syrup
- 1/4 cup fresh basil leaves, chopped
- Zest of 2 lemons
- Pinch of salt
Cooking Steps
- In a medium saucepan, combine the water and honey (or agave syrup). Heat over medium heat until the mixture begins to simmer, stirring occasionally to dissolve the sweetener completely. Remove from heat and let it cool.
- Once the syrup has cooled, stir in the fresh lemon juice, lemon zest, chopped basil, and a pinch of salt. Mix well to combine the flavors.
- Pour the mixture into a shallow dish or a freezer-safe container. Cover and place in the freezer for about 4 hours or until solid.
- Every 30 minutes, use a fork to scrape the mixture and break up any ice that forms. This step helps achieve a light and fluffy texture.
- When ready to serve, remove the sorbet from the freezer and let sit for a few minutes to soften slightly before scooping into bowls.
Variations and Tips
- For a fruitier variation, add pureed strawberries or raspberries to the mixture before freezing.
- You can also replace the fresh basil with other herbs like mint or rosemary for different flavor profiles.
- If you prefer a creamier texture, consider adding a splash of coconut milk or yogurt before freezing.
- To enhance the presentation, garnish with additional fresh basil or a slice of lemon when serving.
- 100% Leak-proof: Guaranteed no-spill seal and secure latches
- Crystal-clear Tritan Built: Stain-resistant and odor-resistant material for a clear view of contents
- Lightweight & Sturdy: Easy to carry, yet durable for everyday use
Raw Cacao Energy Bites
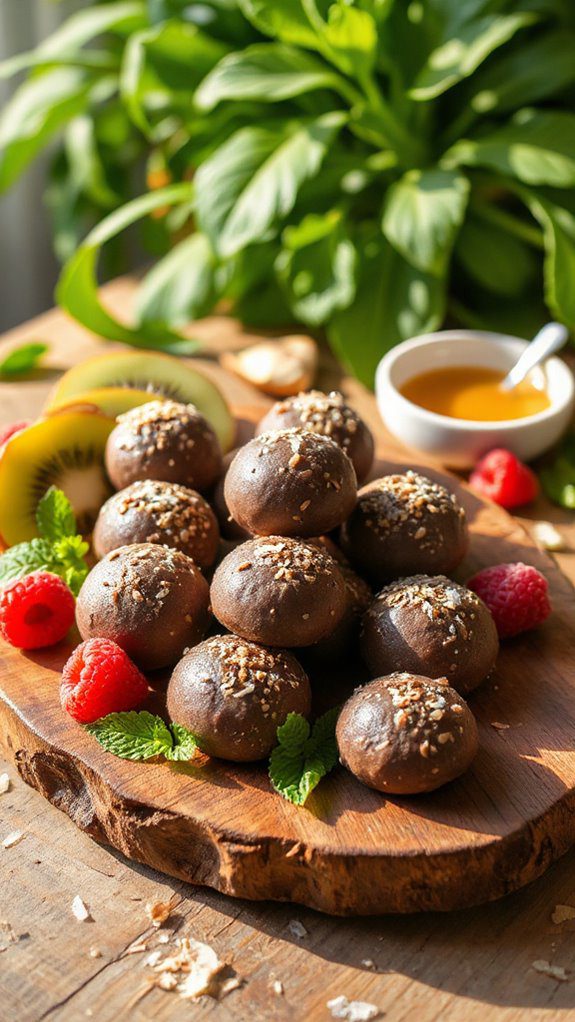
Raw Cacao Energy Bites are nutritious, no-bake treats that provide a perfect blend of energy and health benefits, making them ideal for anyone looking to satisfy their sweet cravings while staying aligned with wellness goals.
These bites are packed with antioxidants from raw cacao, are quick to prepare, and can be made in just 15 minutes, making them a great snack for busy individuals or families.
Ingredients:
- 1 cup medjool dates, pitted
- 1 cup raw almonds or walnuts
- 1/2 cup unsweetened raw cacao powder
- 1/4 cup almond butter or peanut butter
- 1/4 cup shredded coconut (unsweetened)
- 1 tsp vanilla extract
- A pinch of sea salt
- Optional: 1/4 cup chia seeds or hemp seeds for extra nutrition
Instructions:
- In a food processor, combine the pitted medjool dates and raw nuts. Pulse until they form a crumbly mixture.
- Add the raw cacao powder, almond butter, shredded coconut, vanilla extract, and sea salt. If using, add chia or hemp seeds for additional nutrients.
- Pulse the mixture again until all ingredients are well combined and the mixture starts to stick together. If it’s too crumbly, you can add a teaspoon of water or more nut butter as needed.
- Scoop out tablespoon-sized portions and roll them into balls using your hands.
- For extra texture, you can roll the bites in shredded coconut, cacao powder, or chopped nuts.
- Place the energy bites on a parchment-lined tray and refrigerate for at least 20-30 minutes to firm them up.
- Once chilled, transfer the bites to an airtight container and enjoy them as a quick snack or dessert!
Variations and Tips:
- Flavor Variations: You can add different flavorings such as cinnamon, matcha powder, or a few drops of peppermint extract to change up the taste.
- Nuts and Seeds: Feel free to substitute the almonds or walnuts with your favorite nuts or seeds, such as pecans, cashews, or sunflower seeds.
- Storage: Store the energy bites in an airtight container in the fridge for up to two weeks or freeze them for longer storage.
- Sweetness Adjustment: If you prefer a sweeter bite, add a bit of maple syrup or honey when mixing the ingredients.
- Serving Size: These bites are very filling, so remember that a little goes a long way!
- 𝗘𝗳𝗳𝗼𝗿𝘁𝗹𝗲𝘀𝘀 𝗪𝗲𝗶𝗴𝗵𝗶𝗻𝗴: Supports 5 units...
- 𝗣𝗿𝗲𝗰𝗶𝘀𝗲 𝗥𝗲𝘀𝘂𝗹𝘁𝘀: Accurately weighs up to 11 lb/5 kg with 1 g...
- 𝗦𝗶𝗺𝗽𝗹𝗲 & 𝗖𝗼𝗺𝗽𝗮𝗰𝘁: The small and sleek scale is a perfect fit for...
Mango Coconut Parfait
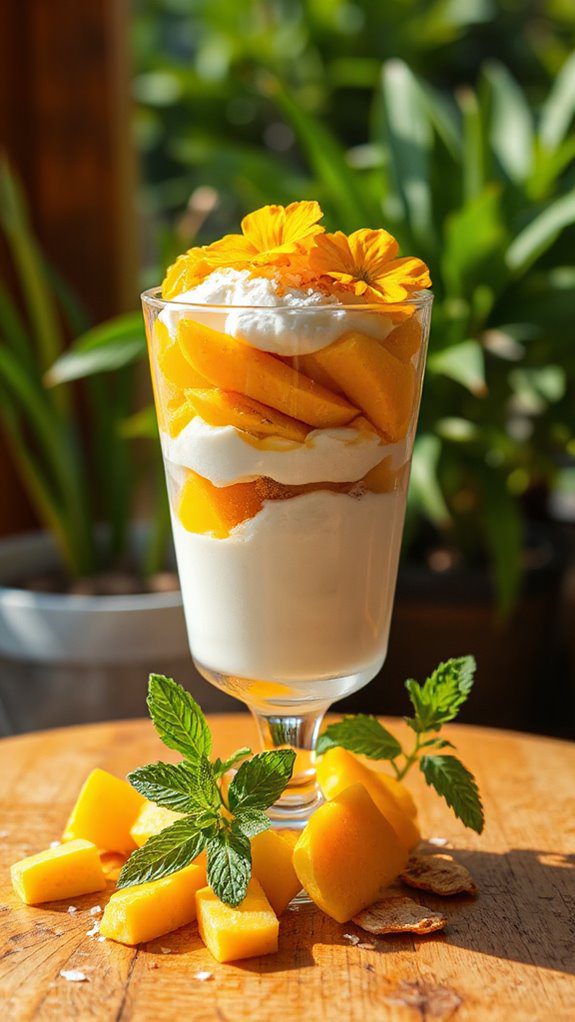
The Mango Coconut Parfait is a rejuvenating, healthy dessert that embodies the essence of tropical flavors. Ideal for those seeking a light and nutritious treat, it’s perfect for anyone who wants to indulge their sweet tooth while staying on track with wellness goals.
The preparation time is about 15 minutes, making it a quick and delightful option for breakfast, a snack, or a healthy dessert.
Ingredients:
- 2 ripe mangoes, diced
- 1 cup coconut yogurt (unsweetened)
- 1 cup granola (preferably low-sugar)
- 1 tablespoon honey or maple syrup (optional, to taste)
- 1/4 cup shredded coconut (unsweetened)
- Fresh mint leaves for garnish (optional)
Cooking Steps:
- Start by peeling the mangoes and cutting them into small cubes. Set aside.
- In a mixing bowl, combine the coconut yogurt with honey or maple syrup if you prefer a sweeter taste. Mix well until smooth.
- Take your serving glasses or bowls and begin layering your parfait. Start with a layer of coconut yogurt at the bottom.
- Add a layer of diced mango on top of the yogurt, followed by a layer of granola.
- Repeat the layers until you reach the top of the glass, finishing with a layer of mango and a sprinkle of shredded coconut.
- Garnish with fresh mint leaves if desired, and serve immediately.
Variations and Tips:
- Fruits: Feel free to substitute or add other tropical fruits like pineapple, kiwi, or bananas for more variety.
- Yogurt: You can use Greek yogurt for added protein or swap the coconut yogurt with any plant-based yogurt to cater to dietary needs.
- Granola: Experiment with different types of granola, such as nut-based or seed-based, to enhance the texture and nutritional profile.
- Chill Time: For an extra chilled treat, prepare the parfait in advance and let it chill in the refrigerator for 30 minutes before serving.
- Serving Size: Adjust the ingredient quantities based on how many servings you need—this recipe easily multiplies.
Enjoy your vibrant and healthy Mango Coconut Parfait as part of your wellness journey!
- Instant Read Food Thermometer | Our instant read thermometer features a temperature probe and advanced,...
- Multi-Use | From bbq thermometer to baking thermometer, our digital food thermometer for cooking is...
- Easy-Read Digital Thermometer For Cooking | Large instant thermometer dial with bright blue backlight...
Green Detox Smoothie
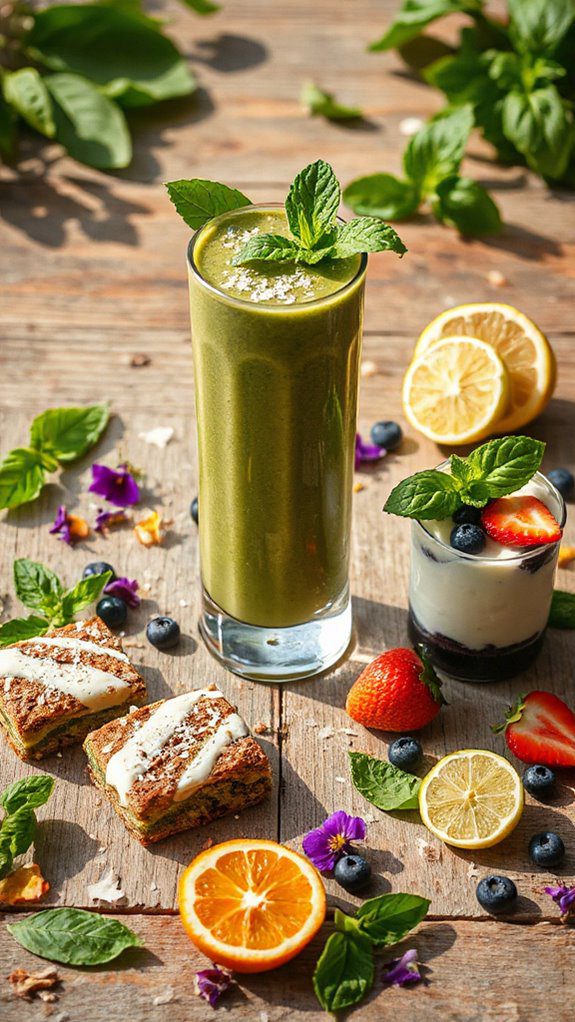
The Green Detox Smoothie is a vibrant, nutrient-packed beverage that’s perfect for anyone looking to boost their overall wellness and energy levels.
Ideal for mornings or as an invigorating afternoon snack, this smoothie is quick to prepare, taking only about 10 minutes from start to finish. Packed with leafy greens, fruits, and a splash of healthy fats, it serves as a great way to detoxify your body while satisfying your taste buds.
Ingredients:
- 1 cup spinach leaves (fresh)
- 1 ripe banana
- 1/2 cup pineapple chunks (fresh or frozen)
- 1/2 avocado
- 1 tablespoon chia seeds
- 1 cup coconut water (or almond milk)
- 1 tablespoon honey (optional)
- Ice cubes (optional)
Instructions:
- Rinse the spinach leaves thoroughly under cold water to remove any dirt or grit.
- In a blender, combine the spinach, banana, pineapple, avocado, and chia seeds.
- Pour in the coconut water (or almond milk) and add honey if using for sweetness.
- Blend on high until smooth and creamy; if you prefer a colder smoothie, add a few ice cubes and blend again until frosty.
- Taste the smoothie and adjust sweetness if necessary by adding more honey.
- Pour into a glass and enjoy immediately for the maximum health benefits.
Variations and Tips:
- Substitute kale for spinach for a different flavor and additional nutrients.
- For a protein boost, consider adding a scoop of your favorite protein powder or Greek yogurt.
- Experiment with other fruits like mango, green apple, or berries for a different taste.
- If you’re looking for more fiber, include oats or flaxseeds.
- To make your smoothie even more filling, add a handful of nuts or seeds.
- Versatile 54-Piece Collection: Elevate your kitchen with the Home Hero 54-Piece Kitchen Utensil Set, a...
- Durable and Long-Lasting: Crafted from premium stainless steel, these kitchen utensils are designed to...
- Perfect Holiday Gift: Delight your loved ones with this kitchen utensils gift set this festive season....
Watermelon Mint Salad
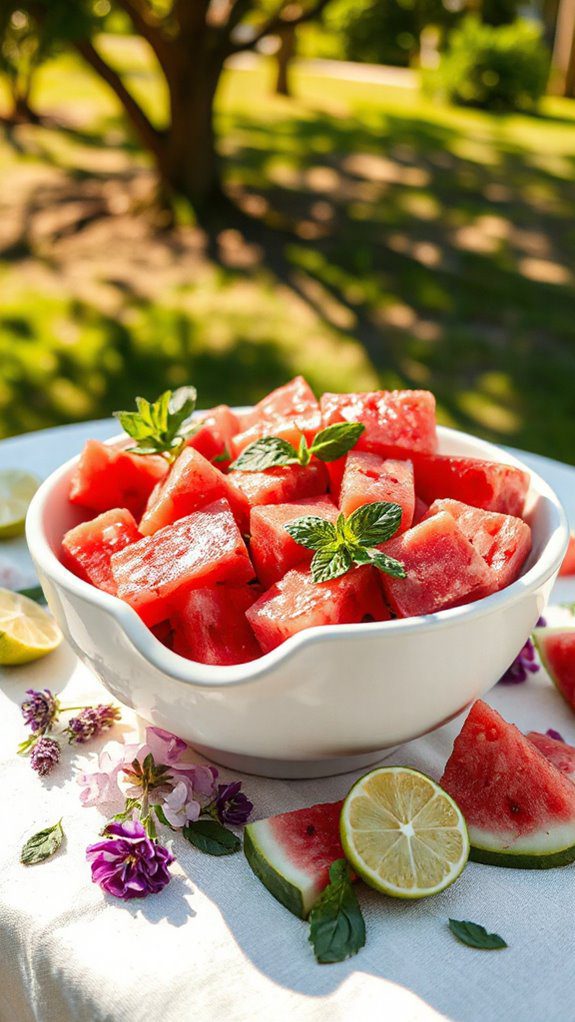
Watermelon Mint Salad is a revitalizing and hydrating dish that perfectly embodies a balance of sweet and zesty flavors. Ideal for those seeking a healthy dessert option or a light side dish during warm weather, this salad is perfect for summer gatherings or a quiet evening at home. The preparation time is quick and easy, taking about 15 minutes from start to finish.
Ingredients:
- 4 cups of fresh watermelon, cubed
- 1 cup of fresh mint leaves, chopped
- Juice of 1 lime
- 1 tablespoon of honey (optional)
- Pinch of salt
- Feta cheese (optional, for topping)
Cooking Steps:
- Start by cutting the watermelon into bite-sized cubes and place them in a large bowl.
- Rinse and chop the fresh mint leaves, then add them to the bowl with the watermelon.
- Squeeze the juice of one lime over the watermelon and mint mixture.
- If desired, drizzle the honey over the salad to enhance the sweetness. This is optional, as watermelon is already quite sweet.
- Sprinkle a pinch of salt to bring out the flavors and mix everything gently to combine.
- If you’re using feta cheese, crumble it over the top for a savory touch.
- Serve immediately or refrigerate for about 30 minutes to let the flavors meld before serving.
Variations & Tips:
- For added texture, consider mixing in other fruits like cucumber or berries.
- Replace mint with fresh basil or cilantro for a different flavor profile.
- This salad can be served as a standalone dish or paired with grilled meats for a balanced meal.
- Experiment with other citrus juices, like orange or lemon, for a unique twist on the dressing.
- Store leftovers in an airtight container in the refrigerator for up to 2 days, but consume quickly as the watermelon can become mushy.
- 24-ounce insulated stainless-steel water bottle with a FreeSip spout and push-button lid with lock
- Patented FreeSip spout designed for either sipping upright through the built-in straw or tilting back to...
- Protective push-to-open lid keeps spout clean; convenient carry loop doubles as a lock
Zucchini Brownies
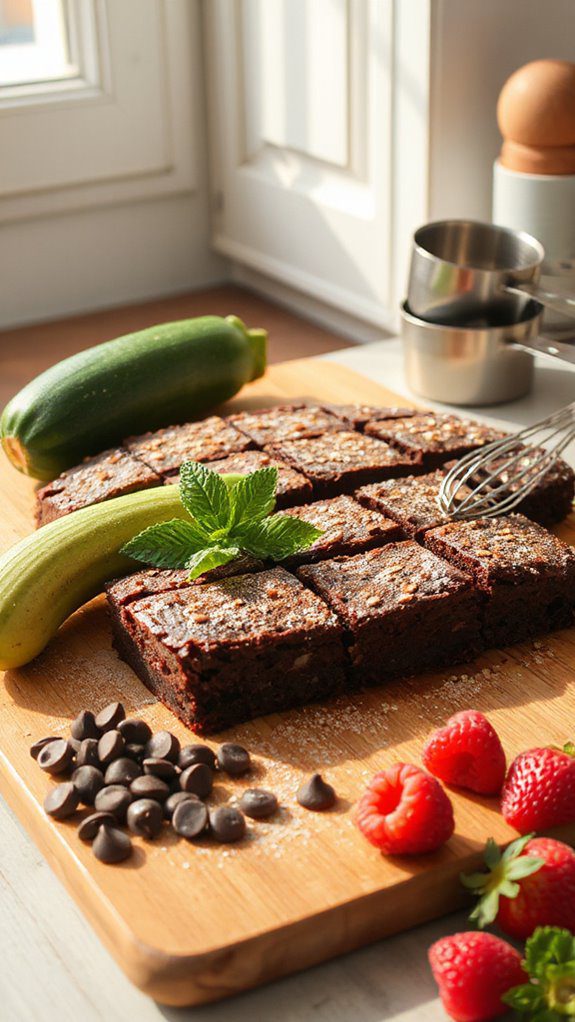
Zucchini brownies are a wonderfully indulgent yet nutritious dessert that allows you to satisfy your sweet tooth while sneaking in some veggies.
Perfect for those seeking to incorporate healthier options into their dessert repertoire, these brownies are moist, fudgy, and rich in flavor.
This recipe is ideal for anyone trying to reach wellness goals without sacrificing taste or texture. Preparation time is approximately 15 minutes, with an additional baking time of 25-30 minutes.
Ingredients:
- 1 cup finely grated zucchini (about 1 medium zucchini, excess water squeezed out)
- ½ cup unsweetened cocoa powder
- ½ cup whole wheat flour (or almond flour for a gluten-free option)
- ½ cup honey or maple syrup
- ¼ cup coconut oil, melted
- 2 large eggs
- 1 teaspoon vanilla extract
- ½ teaspoon baking soda
- ¼ teaspoon salt
- ¼ cup dark chocolate chips (optional)
Cooking Steps:
- Preheat your oven to 350°F (175°C) and grease an 8×8-inch baking pan or line it with parchment paper.
- In a large mixing bowl, combine the melted coconut oil, honey (or maple syrup), eggs, and vanilla extract. Whisk until smooth.
- In another bowl, mix together the whole wheat flour, cocoa powder, baking soda, and salt.
- Gradually add the dry ingredients to the wet mixture, stirring until just combined. Be careful not to overmix.
- Fold in the grated zucchini and chocolate chips, if using, until evenly distributed.
- Pour the brownie batter into the prepared pan and spread it out evenly.
- Bake in the preheated oven for 25-30 minutes, or until a toothpick inserted in the center comes out with a few moist crumbs (not wet batter).
- Allow the brownies to cool in the pan for about 10 minutes before transferring them to a wire rack to cool completely. Cut into squares and enjoy!
Variations and Tips:
- For an extra boost of nutrition, consider adding chopped nuts, such as walnuts or pecans, for added crunch and healthy fats.
- You can spice up the flavor profile by adding a teaspoon of cinnamon or a pinch of cayenne for a unique twist.
- These brownies can also be made vegan by substituting the eggs with flax eggs (1 tablespoon ground flaxseed mixed with 2.5 tablespoons water for each egg, let sit for 5 minutes to thicken).
- Store leftover brownies in an airtight container for up to a week, or freeze them for longer storage.
Cashew Cream Fruit Tart

The Cashew Cream Fruit Tart is a delightful and nutritious dessert perfect for those looking to enjoy a wholesome sweet treat while adhering to wellness goals. This vegan and gluten-free dessert combines a rich, creamy cashew filling with an array of fresh fruits, making it an ideal offering for parties, family gatherings, or a simple indulgence at home.
With a preparation time of approximately 30 minutes (plus chilling time), this tart is both easy to make and a beautiful centerpiece for any occasion.
Ingredients
- 1 cup raw cashews, soaked for at least 4 hours
- 1/4 cup maple syrup
- 1/4 cup coconut milk
- 2 tablespoons coconut oil, melted
- 1 teaspoon vanilla extract
- 1 cup almond flour (for the crust)
- 1/4 cup coconut oil, melted (for the crust)
- 2 tablespoons maple syrup (for the crust)
- A pinch of salt
- Assorted fresh fruits (strawberries, blueberries, kiwi, mango, etc.) for topping
Cooking Steps
- Prepare the Crust: In a mixing bowl, combine the almond flour, melted coconut oil, maple syrup, and salt. Mix until the mixture resembles wet sand and can be pressed together.
- Form the Crust: Press the mixture evenly into the bottom and up the sides of a tart pan. Use your fingers or the back of a measuring cup to compact it firmly.
- Pre-Bake the Crust: Preheat your oven to 350°F (175°C). Once ready, bake the crust for about 10-12 minutes, or until it is lightly golden. Allow it to cool completely.
- Make the Cashew Cream: Drain the soaked cashews and add them to a blender or food processor along with the maple syrup, coconut milk, melted coconut oil, and vanilla extract. Blend until smooth and creamy, scraping down the sides as needed.
- Assemble the Tart: Pour the cashew cream filling into the cooled tart crust, spreading it evenly.
- Chill the Tart: Place the assembled tart in the refrigerator for at least 2 hours, allowing the cream to set.
- Top with Fresh Fruits: Once the tart is set, arrange your choice of fresh fruits on top of the cashew cream in an artistic pattern.
- Serve: Slice and serve chilled, enjoying the revitalizing flavors and textures.
Variations and Tips
- Fruit Choices: Feel free to mix and match fruits based on the season or your personal preferences. Other excellent options include raspberries, peaches, or figs.
- Flavor Options: For a chocolate twist, blend in a couple of tablespoons of cocoa powder into the cashew cream or drizzle melted dark chocolate on top after assembling.
- Nut-Free Version: Substitute the almond flour with oats or a gluten-free cookie crumb for the crust.
- Serving Suggestions: Pair with a revitalizing herbal tea or a light sparkling water to enhance the dessert experience.
- Storage: Keep the tart covered in the refrigerator for up to 3 days. The crust may soften over time due to moisture from the fruit, so it’s best enjoyed within the first couple of days for peak texture.


