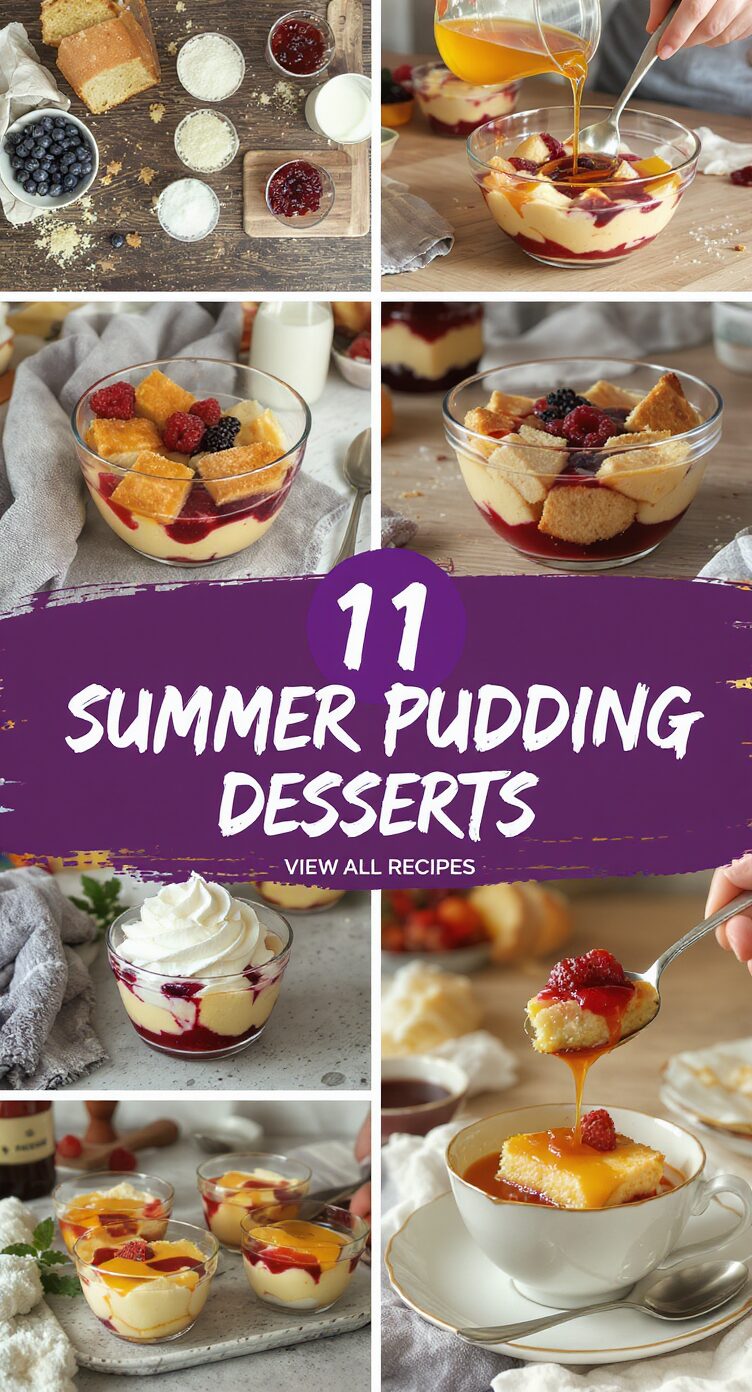
Summer pudding desserts are ideal for afternoon tea, brimming with fresh, vibrant flavors. One can enjoy classic British summer pudding, berry pavlova topped with fresh whipped cream, or a no-bake strawberry cheesecake. For a reviving treat, raspberry ripple sorbet and light lemon blueberry tart are perfect choices. Other delightful options include peach melba trifle, tropical fruit salad cups, and watermelon cake. Each dessert offers unique textures and tastes, perfect for a summer gathering. Discover more delightful options ahead.
Classic British Summer Pudding

Classic British Summer Pudding is a delightful and traditional dessert that celebrates the bounty of summer berries.
This dish is not only visually appealing with its vibrant colors but also offers a rejuvenating and fruity flavor that’s perfect for warm weather gatherings. Ideal for serving at family picnics, barbecues, or dinner parties, this pudding is simple to prepare and requires only about 30 minutes of hands-on time, though it should be refrigerated for at least 6 hours or overnight to set properly.
Ingredients:
- 300g (10.5 oz) raspberries
- 300g (10.5 oz) strawberries, hulled and halved
- 300g (10.5 oz) blackberries
- 300ml (10 fl oz) apple juice
- 400g (14 oz) white sliced bread (preferably a day or two old)
- 100g (3.5 oz) granulated sugar
- Fresh mint leaves, for garnish (optional)
Cooking Steps:
- In a medium saucepan, combine the raspberries, strawberries, and blackberries. Add the granulated sugar and apple juice, and gently cook over medium heat for about 5-7 minutes until the berries soften and release their juices. Stir occasionally.
- Once the berries are cooked, remove the saucepan from the heat and strain the mixture through a fine sieve, reserving the juice and the fruit separately.
- Take a 1-liter (1.75-pint) pudding basin or bowl and line it with plastic wrap, leaving enough overhang to cover the top of the pudding.
- Cut the crusts off the sliced bread. Dip each slice quickly in the reserved berry juice, making certain they soak up the liquid but don’t become too soggy. Line the base and sides of the pudding basin with the soaked bread, overlapping the slices as needed.
- Add a layer of the reserved mixed berries into the lined bowl, pressing gently to pack them down. Continue layering with more soaked bread slices and berries until the bowl is filled, finishing with a layer of soaked bread on top.
- Fold the plastic wrap over the top of the pudding to cover it. Place a plate on top with some weights (like canned goods) to help the pudding set compactly. Refrigerate for at least 6 hours, preferably overnight.
- To serve, carefully unwrap the pudding and invert it onto a serving plate, peeling off the plastic wrap. You can garnish with fresh mint leaves if desired. Serve slices with extra whipped cream or clotted cream for a delicious accompaniment.
Variations and Tips:
- Substitute or mix in fruits such as blueberries or cherries for a different flavor profile.
- For adults, consider adding a splash of berry liqueur to the berry mixture for an added depth of flavor.
- If you prefer a healthier option, substitute the granulated sugar with honey or maple syrup.
- This pudding can be made ahead of time, making it an excellent choice for entertaining.
- Make certain the bread is stale for better absorption of the juices; if you don’t have stale bread, lightly toast it before soaking.

- The Original Pro Chopper - Our superstar veggie slicer has been creating waves on TikTok! Simple to use,...
- Easy Meal Prep with Rust-Resistant Blades - Our vegetable chopper is perfect for anyone who wants to eat...
- 5-Star Design - The soft-grip TPU handle ensures controlled chopping, while the non-skid rubber base...
Berry Pavlova With Whipped Cream

Berry Pavlova with Whipped Cream is a delightful summer dessert that showcases a crisp meringue base topped with a luscious combination of seasonal berries and rich, fluffy whipped cream.
This light and airy dish is perfect for summer gatherings, picnics, or any special occasion where you want to impress your guests with both presentation and flavor.
The preparation time is about 1 hour, with an additional resting time of about 2 hours, making it a beautiful, yet simple dessert to master.
Ingredients:
- 4 large egg whites
- 1 cup granulated sugar
- 1 teaspoon white vinegar
- 1 teaspoon cornstarch
- 1 teaspoon vanilla extract
- 1 cup heavy whipping cream
- 2 tablespoons powdered sugar
- 1 teaspoon vanilla extract (for whipped cream)
- 2 cups mixed fresh berries (such as strawberries, blueberries, raspberries, and blackberries)
Cooking Steps:
- Preheat the oven: Preheat your oven to 275°F (135°C) and line a baking sheet with parchment paper. Draw a 9-inch circle on the parchment to use as a guide for the meringue.
- Prepare the meringue: In a clean, dry mixing bowl, whisk the egg whites on medium speed until soft peaks form. Gradually add the granulated sugar, continuing to whisk until stiff peaks form and the mixture is glossy.
- Add the vinegar and cornstarch: Gently fold in the vinegar, cornstarch, and vanilla extract with a spatula until combined. Be careful not to deflate the meringue.
- Shape the pavlova: Spoon the meringue mixture onto the prepared baking sheet, using the circle drawn as a guide. Create a slight dip in the center to hold the filling later.
- Bake the meringue: Bake the pavlova in the preheated oven for 1 hour. After the hour is up, turn off the oven and leave the pavlova inside to cool completely, which will help it maintain its structure and prevent cracking.
- Prepare the whipped cream: In a medium mixing bowl, beat the heavy cream until soft peaks form. Gradually add the powdered sugar and vanilla extract, continuing to whisk until stiff peaks form.
- Assemble the pavlova: Once the meringue has cooled completely, gently transfer it to a serving platter. Spoon the whipped cream into the center and top generously with mixed fresh berries.
- Serve: Serve immediately and enjoy the delicious combination of crunchy meringue, soft cream, and juicy berries.
Variations and Tips:
- Fruit options: Feel free to substitute or add other fruits like kiwi, mango, or peach for a different flavor profile.
- Flavored cream: Experiment with flavored extracts (like almond or citrus) in the whipped cream for a twist!
- Make ahead: You can prepare the meringue a day in advance and store it in an airtight container. Assemble with whipped cream and fruit shortly before serving to keep the pavlova crispy.
- Storage: Leftover pavlova will lose its crispness and is best eaten the same day it’s assembled. Store any leftover components separately in the fridge for up to 2 days.

- Makes Everything Simple : Just forget your bagged cheese! Only turn the handle for several times and get...
- Premium Material : All parts of the rotary cheese grater are made of food grade ABS material, no BPA. The...
- Three Option Grater : The parmesan cheese grater finishes food preparation with slicing, shredding and...
No-Bake Strawberry Cheesecake

No-Bake Strawberry Cheesecake is a delightful summer dessert that showcases the vibrant flavor of fresh strawberries. This light and creamy cheesecake, set atop a buttery biscuit base, is ideal for gatherings, picnics, or simply enjoying at home on a warm day.
With a preparation time of about 20 minutes, this no-bake treat is perfect for those who want to impress their guests without spending hours in the kitchen.
Ingredients:
- 200g digestive biscuits
- 100g unsalted butter, melted
- 400g cream cheese, softened
- 100g powdered sugar
- 1 teaspoon vanilla extract
- 300ml heavy cream
- 250g fresh strawberries, hulled and sliced
- Additional strawberries for decoration
Cooking Steps:
1. Prepare the Biscuit Base: In a food processor, pulse the digestive biscuits until they resemble fine crumbs.
In a mixing bowl, combine the biscuit crumbs with melted butter and mix until fully combined. Press the mixture firmly into the bottom of a 20cm (8 inch) springform pan to create an even base.
Place the pan in the refrigerator to set while preparing the filling.
2. Make the Cheesecake Filling****: In a large bowl, beat the softened cream cheese, powdered sugar, and vanilla extract until smooth and well-combined.
In another bowl, whip the heavy cream until soft peaks form. Gently fold the whipped cream into the cream cheese mixture until well incorporated.
3. Add Strawberries: Fold the sliced strawberries into the cheesecake filling, reserving a few for topping later.
4. Assemble the Cheesecake: Spoon the cheesecake filling over the chilled biscuit base, spreading it evenly.
Smooth the top with a spatula. Cover the cheesecake with plastic wrap and refrigerate for at least 4 hours, or overnight if time allows.
5. Serve: Once set, remove the cheesecake from the springform pan.
Decorate the top with additional fresh strawberries. Slice and serve chilled.
Variations and Tips:
- Fruit Variations: Feel free to replace or mix strawberries with other berries such as blueberries, raspberries, or blackberries for a mixed berry cheesecake.
- Flavored Cream Cheese: Try using flavored cream cheese, such as strawberry or vanilla, for an added twist.
- Dietary Adjustments: For a lighter version, substitute low-fat cream cheese and Greek yogurt for part of the cream cheese.
- Serving Suggestion: Serve with a drizzle of berry sauce or a sprinkle of crushed biscuits on top for added texture and flavor.
Enjoy your summery, no-bake strawberry cheesecake that’s sure to be a hit at any gathering!

- 💰 REDUCE WASTE AND SAVE MONEY: Chef Preserve keeps FOOD FRESH 5 TIMES LONGER than non-vacuum storage...
- ✅ POWERFUL, QUICK & EASY TO USE: Simply press the button to start. The device vacuum seals a bag in 5...
- ♻️ REUSABLE & RESEALABLE BAGS: Chef Preserve comes with dishwasher, freezer, refrigerator, and...
Raspberry Ripple Sorbet

Raspberry Ripple Sorbet is a rejuvenating and delightful dessert perfect for summer gatherings or a sweet treat on a warm day. The vibrant flavor of raspberries combined with a creamy, smooth texture makes it an ideal choice for fruit lovers and those seeking a lighter dessert option. This recipe is relatively simple and requires about 30 minutes of active preparation time, plus several hours for freezing.
Ingredients
- 2 cups fresh raspberries
- 1 cup granulated sugar
- 1/2 cup water
- 1 tablespoon lemon juice
- 1 cup coconut milk (or regular milk for non-dairy option)
- 1 teaspoon vanilla extract
- Optional: mint leaves for garnish
Cooking Steps
- Prepare the Raspberry Puree: In a blender or food processor, combine the fresh raspberries, 1/4 cup of sugar, and lemon juice. Blend until smooth. Strain the mixture through a fine mesh sieve into a bowl to remove the seeds. Set aside in the refrigerator to chill.
- Make the Sugar Syrup: In a small saucepan, combine the remaining 3/4 cup of sugar and water. Heat over medium heat, stirring occasionally, until the sugar has completely dissolved. Remove from heat and let it cool to room temperature.
- Mix the Ingredients: In a large bowl, mix the cooled sugar syrup, coconut milk (or regular milk), and vanilla extract until well combined.
- Combine the Raspberry Puree: Pour the raspberry puree into the milk mixture and stir gently to create a ripple effect—do not fully blend it in; you want to see distinct swirls of raspberry.
- Freeze the Sorbet: Pour the mixture into an ice cream maker and churn according to the manufacturer’s instructions until it reaches a soft-serve consistency. If you don’t have an ice cream maker, pour the mixture into a shallow dish and place it in the freezer. Stir every 30 minutes for about 4-5 hours, ensuring that the sorbet freezes evenly.
- Serve: Once the sorbet is firm, scoop it into bowls or cones, garnish with mint leaves if desired, and enjoy!
Variations and Tips
- Berry Mix: You can substitute or add other berries like strawberries, blueberries, or blackberries for a mixed berry sorbet.
- Sweetness Adjustment: Depending on the tartness of the raspberries, feel free to adjust the amount of sugar in the recipe.
- Alcoholic Twist: For an adult version, add a splash of raspberry liqueur or vodka before freezing for a boozy flavor.
- Storage: Store any leftover sorbet in an airtight container in the freezer for up to a week. Let it sit at room temperature for a few minutes to soften before serving.
Enjoy your rejuvenating Raspberry Ripple Sorbet, the perfect culmination of summer’s sweetness!

- Generous Capacity: 7-quart slow cooker that comfortably serves 9+ people or fits a 7-pound roast
- Cooking Flexibility: High or low slow cooking settings, with convenient warm function for ideal serving...
- Convenient: Set it and forget it feature enables you to cook while at work or performing daily tasks
Lemon Blueberry Tart

Lemon Blueberry Tart is a delightful summer dessert that combines the bright, zesty flavor of lemon with the natural sweetness of blueberries, resulting in an invigorating treat that’s sure to please any crowd.
This tart is perfect for summer gatherings, picnics, or a simple family dinner. The preparation time is approximately 30 minutes, plus an additional one hour for chilling, making it a relatively easy dessert to whip up for any occasion.
Ingredients
- 1 pre-made tart crust (9-inch)
- 1 cup fresh blueberries
- 1/2 cup granulated sugar
- 2 large eggs
- 1/3 cup fresh lemon juice (about 2-3 lemons)
- 1 tablespoon lemon zest
- 1/4 cup heavy cream
- 1 tablespoon cornstarch
- Pinch of salt
Cooking Steps
- Preheat your oven to 350°F (175°C).
- In a mixing bowl, combine the blueberries with 2 tablespoons of sugar and gently toss to coat. Spread the blueberries evenly in the bottom of the pre-made tart crust.
- In another bowl, whisk together the remaining sugar, eggs, lemon juice, lemon zest, heavy cream, cornstarch, and a pinch of salt until smooth and well combined.
- Pour the lemon mixture over the blueberries in the tart crust.
- Bake the tart in the preheated oven for about 30-35 minutes, or until the filling is set and the top is lightly golden.
- Remove from the oven and let cool at room temperature for about 20 minutes. Then refrigerate for at least one hour before serving.
- Serve chilled, optionally garnished with more fresh blueberries or a dollop of whipped cream.
Variations and Tips
- For an added texture, consider adding a layer of almond or coconut flakes to the blueberry base before pouring the lemon mixture.
- If you prefer a sweeter dish, increase the sugar in the filling to 3/4 cup.
- Use frozen blueberries if fresh ones are out of season; just make sure they are fully thawed and drained before use.
- For a gluten-free option, substitute the pre-made tart crust with a gluten-free crust option.
- Garnish with mint leaves or edible flowers for an elegant presentation.
Enjoy this tart as the perfect ending to a summer meal, or simply as a sweet treat on a warm day!

- 100% Leak-proof: Guaranteed no-spill seal and secure latches
- Crystal-clear Tritan Built: Stain-resistant and odor-resistant material for a clear view of contents
- Lightweight & Sturdy: Easy to carry, yet durable for everyday use
Cherry Clafoutis

Cherry Clafoutis is a delightful French dessert that beautifully showcases the flavor of ripe cherries embedded in a custard-like batter. This charming dish is perfect for summer gatherings or a cozy evening at home, especially for lovers of fruit-based desserts.
With a preparation time of just 15 minutes and a baking time of about 45 minutes, you can serve this warm, rustic treat to family and friends with ease.
Ingredients:
- 2 cups fresh cherries, pitted and halved
- 3 large eggs
- 1 cup whole milk
- 1/2 cup granulated sugar
- 1 teaspoon vanilla extract
- 1/2 teaspoon almond extract (optional)
- 1/4 teaspoon salt
- 1/2 cup all-purpose flour
- Butter (for greasing the baking dish)
- Powdered sugar (for serving, optional)
Cooking Instructions:
- Preheat your oven to 350°F (175°C). Grease a 9-inch round pie dish or a similar-sized baking dish with butter.
- In a large mixing bowl, whisk together the eggs and granulated sugar until well combined and slightly frothy.
- Add the milk, vanilla extract, almond extract (if using), and salt to the egg mixture, whisking until smooth.
- Gradually sift in the flour, whisking until the batter is lump-free and has a pourable consistency.
- Arrange the pitted cherries evenly in the greased baking dish, then pour the batter over the cherries, ensuring they are well submerged.
- Bake in the preheated oven for about 40-45 minutes, or until the clafoutis is puffed, set in the center, and slightly golden around the edges. A toothpick inserted into the center should come out clean.
- Once baked, remove from the oven and let it cool for about 10 minutes before serving. Dust with powdered sugar if desired.
Variations and Tips:
- Fruit Options: While cherries are traditional, you can substitute with other fruits like blueberries, raspberries, or sliced peaches for a different flavor.
- Serving Suggestions: Serve it warm on its own or with a scoop of vanilla ice cream or a dollop of whipped cream for added indulgence.
- Storage: Leftovers can be covered and stored in the refrigerator for up to 2 days. Reheat gently before serving, if desired.
- Gluten-Free Option: Substitute all-purpose flour with a gluten-free blend to make this dessert gluten-free.
Enjoy the light, fruity flavors of this classic Cherry Clafoutis – a perfect end to any summer meal!

- 𝗘𝗳𝗳𝗼𝗿𝘁𝗹𝗲𝘀𝘀 𝗪𝗲𝗶𝗴𝗵𝗶𝗻𝗴: Supports 5 units...
- 𝗣𝗿𝗲𝗰𝗶𝘀𝗲 𝗥𝗲𝘀𝘂𝗹𝘁𝘀: Accurately weighs up to 11 lb/5 kg with 1 g...
- 𝗦𝗶𝗺𝗽𝗹𝗲 & 𝗖𝗼𝗺𝗽𝗮𝗰𝘁: The small and sleek scale is a perfect fit for...
Mixed Berry Eton Mess

Mixed Berry Eton Mess is a delightful summer dessert that combines the freshness of berries with the airy lightness of whipped cream and crunchy meringue. This indulgent, yet simple dish is perfect for gatherings, barbecues, or a sweet ending to a casual family dinner. With a preparation time of just 20 minutes, this recipe is a quick and easy way to impress your guests or indulge yourself during the warmer months.
Ingredients:
- 2 cups mixed berries (strawberries, raspberries, blueberries, blackberries)
- 1 tablespoon sugar (adjust based on berry sweetness)
- 1 cup heavy whipping cream
- 1 teaspoon vanilla extract
- 2-3 meringue nests, crushed
- Fresh mint leaves for garnish (optional)
Cooking Steps:
- Prepare the Berries: In a bowl, combine the mixed berries with sugar. Gently toss and let them sit for about 10 minutes to macerate, allowing the berries to release their juices.
- Whip the Cream: In a separate bowl, whip the heavy cream and vanilla extract until soft peaks form. Be careful not to over-whip, as you want it light and airy.
- Combine: Fold the macerated berries into the whipped cream gently, being careful not to deflate the cream.
- Add Meringue: Carefully fold in the crushed meringue nests until just combined. This will add a delightful crunch to the dessert.
- Serve: Spoon the mixture into individual serving glasses or bowls. Top with extra berries and a sprig of mint for garnish.
- Chill (optional): If desired, you can chill the Eton Mess in the refrigerator for about 20 minutes before serving to let the flavors meld.
Variations and Tips:
- Berries: Feel free to customize the berry selection based on your preference or seasonal availability. Peaches and nectarines can also be great substitutions or additions.
- Flavor Enhancements: Experiment with additional flavorings like lemon zest, almond extract, or even a splash of liqueur for an adult twist.
- Make Ahead: You can prepare the components (whipped cream and berries) ahead of time, but it’s best to combine just before serving to maintain the meringue’s crunch.
- Healthier Option: For a lighter version, consider using low-fat yogurt or crème fraîche instead of heavy cream.
- Vegan Alternative: Substitute the whipped cream with coconut cream, and use store-bought or homemade vegan meringue for an equally satisfying vegan dessert.
Enjoy this delicious Mixed Berry Eton Mess, perfect for those hot summer days!

- Instant Read Food Thermometer | Our instant read thermometer features a temperature probe and advanced,...
- Multi-Use | From bbq thermometer to baking thermometer, our digital food thermometer for cooking is...
- Easy-Read Digital Thermometer For Cooking | Large instant thermometer dial with bright blue backlight...
Peach Melba Trifle

Peach Melba Trifle is a delightful and elegant dessert that marries the flavors of ripe peaches and rich cream, layered beautifully for a stunning presentation.
This dish is perfect for summer gatherings, dinner parties, or as a invigorating treat to impress your guests. Preparation time is roughly 30 minutes, with an additional chilling time of at least 2 hours to allow the flavors to meld together.
Ingredients:
- 4 ripe peaches, peeled and sliced
- 1 cup fresh raspberries
- 2 cups vanilla pudding (store-bought or homemade)
- 2 cups whipped cream
- 1 cup ladyfinger cookies or sponge cake, broken into pieces
- 2 tablespoons almond extract
- Fresh mint leaves for garnish
Cooking Instructions:
- In a medium bowl, combine the sliced peaches with almond extract and half of the raspberries. Gently toss them to coat the fruits evenly and set aside.
- In a large trifle dish or individual cups, layer half of the broken ladyfingers or sponge cake at the bottom.
- Spoon half of the peach and raspberry mixture over the ladyfingers.
- Add a layer of vanilla pudding, smoothing it out evenly over the fruit.
- Follow with a layer of whipped cream, spreading it gently to cover the entire layer of pudding.
- Repeat the layers by adding the remaining ladyfingers, followed by the remaining peach and raspberry mixture, vanilla pudding, and finishing with whipped cream.
- Top your trifle with the remaining fresh raspberries and garnish with mint leaves.
- Cover gently with plastic wrap and refrigerate for at least 2 hours to set and develop flavors.
Variations & Tips:
- For a boozy twist, add a splash of peach schnapps or brandy to the fruit mixture.
- You can substitute the peaches with nectarines or apricots for a different flavor profile.
- For a lighter version, use Greek yogurt instead of vanilla pudding and whipped cream.
- Consider adding a layer of shavings or a drizzle of chocolate on top for added indulgence.
- Make sure to use ripe, but firm peaches to avoid them turning mushy during layering.
Enjoy your delightful Peach Melba Trifle, perfect for cooling down on a hot summer day!

- Versatile 54-Piece Collection: Elevate your kitchen with the Home Hero 54-Piece Kitchen Utensil Set, a...
- Durable and Long-Lasting: Crafted from premium stainless steel, these kitchen utensils are designed to...
- Perfect Holiday Gift: Delight your loved ones with this kitchen utensils gift set this festive season....
Tropical Fruit Salad Cups

Tropical Fruit Salad Cups are a rejuvenating and vibrant dessert perfect for any summer gathering, picnic, or even as a light snack.
This dish is ideal for fruit lovers and anyone looking to beat the heat with a colorful, delicious treat. With a preparation time of just 15 minutes, it’s an easy-to-make option that requires minimal cooking and can be customized with your favorite tropical fruits.
Ingredients:
- 1 cup diced pineapple
- 1 cup diced mango
- 1 cup diced kiwi
- 1 cup diced strawberries
- 1 cup diced papaya
- 1 lime (juiced)
- 2 tablespoons honey (or agave syrup for a vegan option)
- Fresh mint leaves for garnish (optional)
Instructions:
- In a large mixing bowl, combine the diced pineapple, mango, kiwi, strawberries, and papaya.
- In a small bowl, whisk together the lime juice and honey until well combined.
- Pour the lime and honey mixture over the fruit in the large bowl and gently toss to coat all the fruit evenly.
- Allow the fruit salad to chill in the refrigerator for about 10 minutes to let the flavors meld.
- Serve the tropical fruit salad in individual cups or bowls and garnish with fresh mint leaves if desired.
Variations and Tips:
- Feel free to get creative by adding other tropical fruits such as passionfruit, coconut, or dragon fruit.
- For an extra crunch, incorporate chopped nuts like macadamia nuts or almonds.
- To enhance flavors, consider adding a sprinkle of coconut flakes or a dollop of yogurt on top before serving.
- If you prefer, you can substitute the honey with maple syrup or skip the sweetener altogether for a fruit-only option.
- To make it even more festive, serve the fruit salad in halved coconut shells or hollowed-out pineapples for a tropical presentation.

- 24-ounce insulated stainless-steel water bottle with a FreeSip spout and push-button lid with lock
- Patented FreeSip spout designed for either sipping upright through the built-in straw or tilting back to...
- Protective push-to-open lid keeps spout clean; convenient carry loop doubles as a lock
Watermelon Cake

Watermelon cake is a invigorating and fun dessert that celebrates the essence of summer! This vibrant and visually stunning dish is perfect for warm-weather gatherings, barbecues, and birthday parties, making it ideal for those looking for a healthy yet indulgent treat.
Preparation time is minimal, taking about 15-20 minutes to assemble, and it is a fantastic option for those who want to impress without spending hours in the kitchen.
Ingredients:
- 1 large seedless watermelon
- 1 cup of whipped cream or coconut whipped cream
- 1 cup of mixed berries (strawberries, blueberries, raspberries)
- ¼ cup of unsweetened shredded coconut (optional)
- Fresh mint leaves for garnish
- Optional toppings (sliced fruits, chocolate shavings, or nuts)
Instructions:
- Start by slicing the watermelon into thick round slices, approximately 2-3 inches in thickness. You can trim the ends to create a base if desired.
- Place a slice on a serving platter; this serves as the “cake” base.
- Spread a generous layer of whipped cream evenly over the top of the watermelon slice.
- Add a mix of fresh berries on top of the whipped cream, decorating as desired.
- Place another slice of watermelon on top and repeat the layers of whipped cream and berries, stacking as high as you prefer.
- Finish off with a final layer of whipped cream on the top and sprinkle with shredded coconut (if using) for added texture.
- Garnish with fresh mint leaves and any additional toppings you choose.
- Chill in the refrigerator for about 30 minutes before serving to allow the flavors to meld and the cake to firm up.
Variations and Tips:
- For a vegan option, use coconut whipped cream or a dairy-free whipped topping.
- Get creative with your toppings—consider adding granola, yogurt, or even a drizzle of honey for extra flavor.
- You can create mini watermelon cakes by using small circular cookie cutters to cut out smaller rounds from the watermelon slices.
- If you’re making this cake for a crowd, consider adding layers of different fruits or even incorporating a layer of fruit puree between layers for added flavor and color.
- Always serve the watermelon cake cold, as it tastes best when chilled, especially on hot summer days.
Coconut Rice Pudding With Mango

Coconut rice pudding with mango is a delightful and creamy dessert that blends the rich flavors of coconut milk and tender rice, creating a sumptuous base that perfectly complements the sweetness of ripe mangoes.
This dish is ideal for tropical summer gatherings or a satisfying treat to enjoy at home. With a preparation time of approximately 30 minutes and a chilling time of at least 1 hour, it’s an easy yet impressive dessert that will charm both family and friends.
Ingredients:
- 1 cup Arborio rice
- 2 cups coconut milk
- 1 cup water
- 1/4 cup sugar
- 1/2 teaspoon vanilla extract
- 1/4 teaspoon salt
- 1 ripe mango, diced
- Fresh mint leaves for garnish (optional)
Cooking Instructions:
- In a medium saucepan, combine Arborio rice, coconut milk, water, sugar, vanilla extract, and salt. Stir well to combine.
- Bring the mixture to a gentle boil over medium heat, then reduce the heat to low. Cover the saucepan and let it simmer for about 20 minutes, stirring occasionally, until the rice is cooked and the mixture becomes creamy.
- Remove the saucepan from heat and allow the pudding to cool slightly. Once cooled, transfer the pudding into individual serving bowls or a large dish.
- Refrigerate the pudding for at least 1 hour to allow it to thicken further and chill.
- Before serving, top each portion with diced mango and garnish with fresh mint leaves, if desired.
Variations & Tips:
- For added flavor, consider incorporating a touch of lime zest or a splash of lime juice with the coconut milk.
- Swap the mango with other fruits like pineapple, berries, or bananas for different flavor profiles.
- To make this dessert vegan, verify that your sugar is free from bone char (some brands process it with animal products).
- For an extra creamy texture, replace half of the water with more coconut milk.
- Serve warm or cold based on your preference—both options are equally delicious!