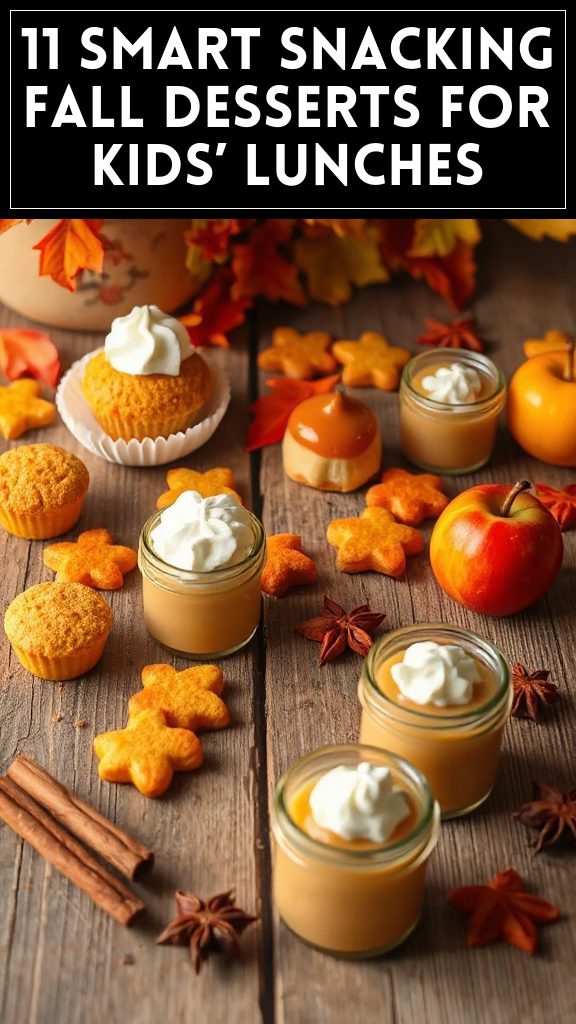
The 11 golden hour summer dessert boards combine vibrant flavors and stunning visuals. These include the Fresh Fruit Fiesta Board, featuring seasonal fruits, and the Chocolate Lovers Delight Board, showcasing an array of chocolate treats. Other options like the Nutty Granola and Yogurt Board and the Elegant Pastry Platter Board add variety. Each board is crafted for quick assembly and elegant presentation, ensuring delightful summer gatherings. Explore these creative ideas for the perfect outdoor celebration.
Fresh Fruit Fiesta Board
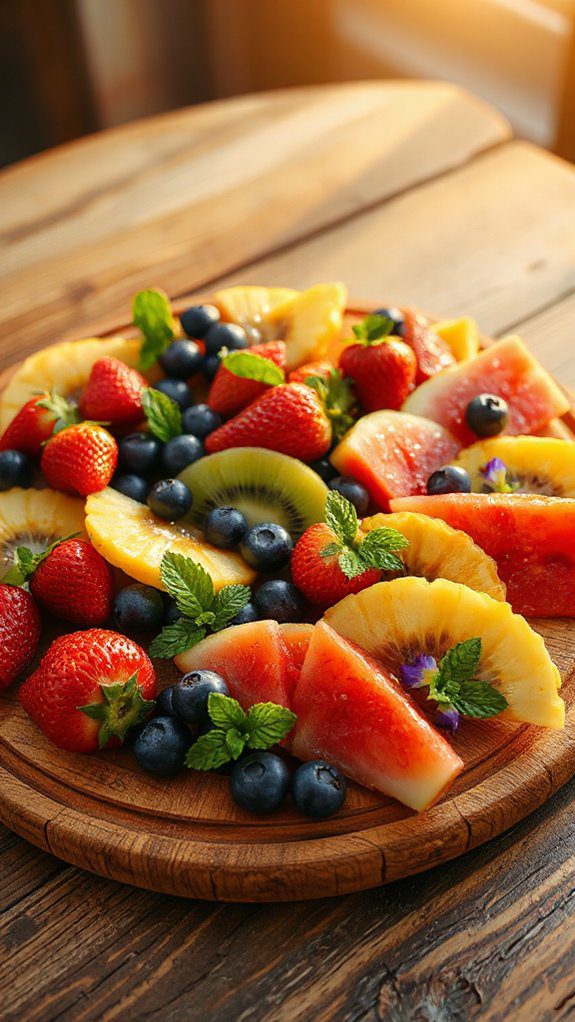
The Fresh Fruit Fiesta Board is a vibrant, inviting dessert option that celebrates the bounty of summer fruits in a playful and colorful spread. Ideal for hot summer days, picnics, and gatherings with family or friends, this board allows everyone to indulge in invigorating, naturally sweet treats. It only takes about 15 minutes to prepare, making it a quick and enjoyable addition to any summer celebration.
Ingredients:
- 1 cup strawberries, hulled and halved
- 1 cup blueberries
- 1 cup raspberries
- 1 cup blackberries
- 1 cup grapes (red or green)
- 2 ripe peaches, sliced
- 1 cup pineapple, cubed
- 1 mango, diced
- Fresh mint leaves (for garnish)
- Honey or agave syrup (optional, for drizzling)
- Lime wedges (for serving)
Cooking Steps:
- Prep the Fruits: Thoroughly wash all the berries and grapes. Hull the strawberries and slice them in half, slice the peaches, and cube the pineapple and mango. Arrange all the fruits on a large serving platter or wooden board in clusters for a colorful presentation.
- Garnish: Place fresh mint leaves around the fruits to add a pop of green and freshness.
- Drizzle and Serve: If desired, drizzle honey or agave syrup lightly over the fruits for added sweetness. Add a few lime wedges on the side to give guests the option to sprinkle lime juice over the fruits for a zesty kick.
- Display: Serve immediately after preparing to maintain the fruits’ freshness and vibrancy. Encourage guests to dig in and mix and match their favorite combinations!
Variations and Tips:
- Seasonal Swap: Feel free to swap any of the fruits for seasonal alternatives such as cherries, watermelon, or kiwi depending on what’s fresh and available.
- Add Protein: Consider adding a small bowl of yogurt or cottage cheese to the board for a creamy complement to the fruits. You can also include nuts or granola for a crunch.
- Presentation Tip: Use a mixed assortment of bowls or small containers for the fruits to create a more dynamic visual appeal, or use individual serving cups for a fun twist.
- Keep it Cool: If serving outdoors, keep the board in a cooler or a shaded area to maintain the freshness of the fruits throughout the gathering.
Enjoy the delightful colors and flavors of summer with this irresistible Fresh Fruit Fiesta Board!
- The Original Pro Chopper - Our superstar veggie slicer has been creating waves on TikTok! Simple to use,...
- Easy Meal Prep with Rust-Resistant Blades - Our vegetable chopper is perfect for anyone who wants to eat...
- 5-Star Design - The soft-grip TPU handle ensures controlled chopping, while the non-skid rubber base...
Chocolate Lovers Delight Board
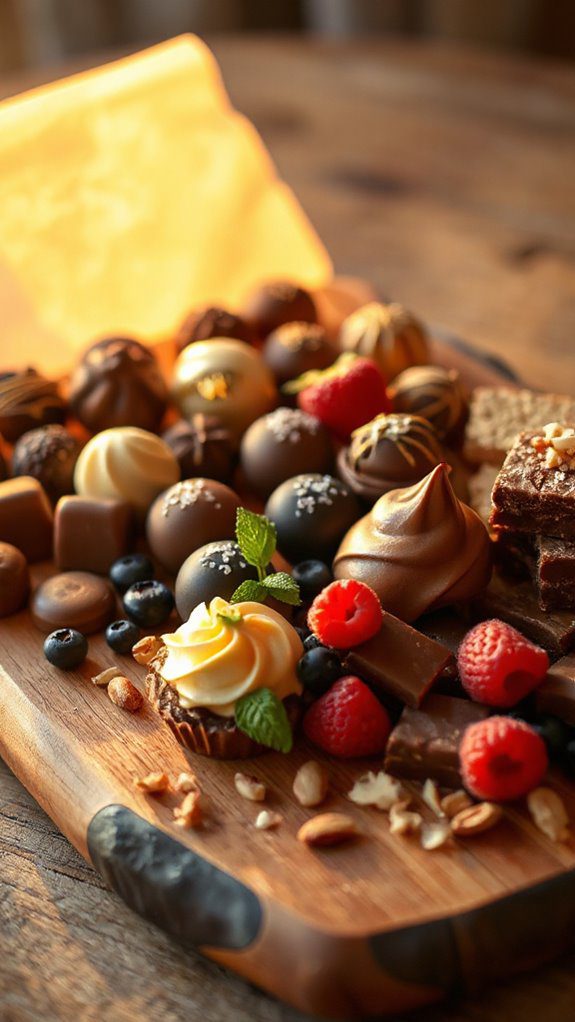
The Chocolate Lovers Delight Board is an exquisite dessert presentation designed for true chocolate enthusiasts.
Perfect for gatherings, parties, or simply an indulgent evening at home, this dessert board showcases an array of chocolate treats that will satisfy any sweet tooth.
Preparation takes about 30 minutes, making it a quick yet impressive option for entertaining friends and family.
Ingredients:
- Assorted dark chocolate bars (70% cacao or higher)
- Milk chocolate bars
- White chocolate bars
- Chocolate truffles (various flavors)
- Chocolate-covered strawberries
- Mini chocolate brownies
- Chocolate ganache or fondue
- Chocolate cookies (Oreos, chocolate chip, etc.)
- Fresh fruits (bananas, raspberries, or blueberries for garnish)
- Nuts (almonds, walnuts, or hazelnuts)
- Decorative edible flowers (optional)
Instructions:
- Start by selecting a large wooden board or platter to serve as the base for your chocolate display.
- Unwrap and neatly arrange the assorted chocolate bars in different sections on the board, placing the darker chocolates in one area and the milk and white chocolates in another for contrast.
- Position the chocolate truffles strategically around the chocolate bars, creating a delightful visual appeal with different colors and textures.
- If using chocolate-covered strawberries, place them in a separate section to keep them fresh and vibrant. They also add a pop of color to the board.
- Cut mini brownies into bite-sized squares and arrange them close to the chocolate cookies, allowing guests to mix and match.
- In a small bowl, pour your chocolate ganache or fondue and place it in the center of the board for dipping. This adds an interactive element to the dessert experience.
- Fill in any empty spaces with fresh fruits, nuts, and chocolate-covered treats for added variety and color.
- To elevate the presentation, add decorative edible flowers around the board, creating a stunning visual that’s ready to impress.
- Serve the chocolate board with small plates and skewers for easy enjoyment.
Variations and Tips:
- For a different flavor profile, incorporate flavored chocolate bars (mint, chili, sea salt) for a unique twist.
- Include a variety of chocolate-covered pretzels or popcorn for added crunch and saltiness.
- Consider including a selection of dessert dips, such as caramel or peanut butter, to offer guests more options for dipping.
- If you want a themed board, try coordinating the colors of the chocolates and fruits to match a specific occasion or season.
- Remember to store any leftover chocolates in an airtight container to keep them fresh for later enjoyment.
- Makes Everything Simple : Just forget your bagged cheese! Only turn the handle for several times and get...
- Premium Material : All parts of the rotary cheese grater are made of food grade ABS material, no BPA. The...
- Three Option Grater : The parmesan cheese grater finishes food preparation with slicing, shredding and...
Summer Berry Bliss Board
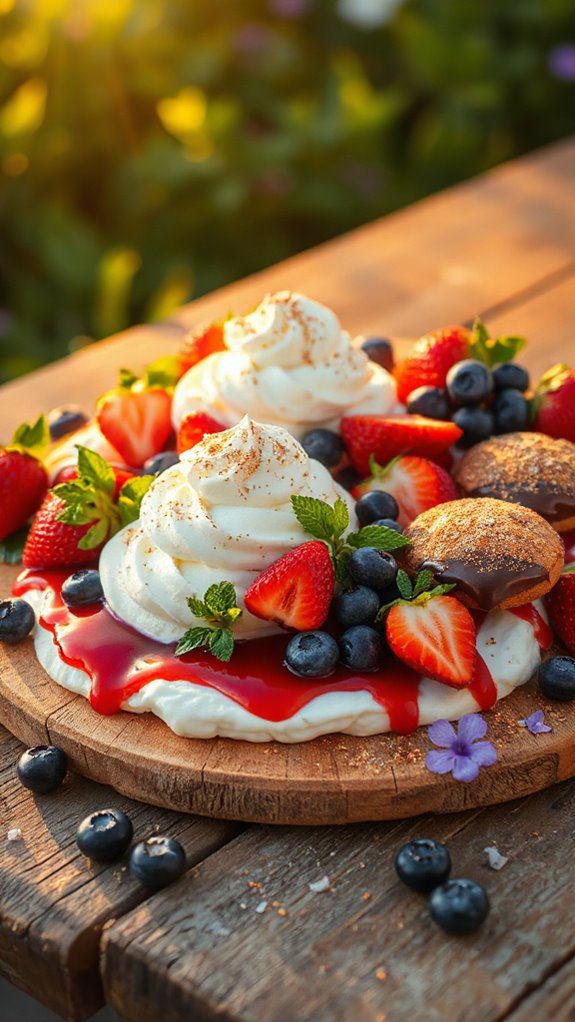
The Summer Berry Bliss Board is a delightful, visually stunning dessert perfect for warm weather gatherings, picnics, or simply indulging in the deliciousness of seasonal fruits.
Ideal for fruit lovers and those looking to impress friends and family with an easy, yet elegant presentation, this board allows you to highlight a rainbow of fresh berries, paired with sweet accompaniments. Preparation takes about 15-20 minutes, making it a quick and satisfying option for any occasion.
Ingredients:
- Fresh strawberries, hulled and halved
- Fresh blueberries
- Fresh raspberries
- Fresh blackberries
- Whipped cream or whipped topping
- Mini chocolate chips or chocolate shavings
- Honey or maple syrup (for drizzling)
- Fresh mint leaves (for garnish)
- Assorted cookies (like shortbread or vanilla wafers)
- Optional: coconut flakes or granola for added texture
Instructions:
- Begin by thoroughly rinsing all the berries under cool running water and gently patting them dry with a paper towel.
- Arrange the berries on a large, flat serving platter or wooden board, creating a colorful pattern with the strawberries, blueberries, raspberries, and blackberries.
- In a small bowl, whip the cream until soft peaks form, or use pre-made whipped topping for convenience. Spoon the whipped cream into a small dish and place it on the board as a dip for the berries.
- Scatter mini chocolate chips or chocolate shavings around the board to add a touch of sweetness and texture.
- Drizzle honey or maple syrup over the selected sections of berries or serve it in a small dish for guests to add to their liking.
- Garnish the board with fresh mint leaves for a pop of color and an added layer of briskness.
- Place assorted cookies around the edge of the board for a crunchy contrast to the juicy fruits. You may also sprinkle some coconut flakes or granola for additional texture, if desired.
- Serve immediately, encouraging guests to take their favorite berries and pair them with whipped cream and cookies for the ultimate summer treat.
Variations, Tips:
- Fruits: Feel free to swap or add other summer fruits like peaches, nectarines, or cherries for a vibrant twist.
- Sweeteners: You can use flavored syrups (like lavender or vanilla) instead of honey or maple syrup for a unique pairing.
- Serving Suggestions: This board works well with sparkling water or iced tea for a revitalizing drink combination.
- Make Ahead: Prepare the berries a few hours ahead and cover them with plastic wrap to keep them fresh. Assemble the board shortly before serving to maintain the presentation.
- Dietary Adjustments: Substitute dairy whipped cream with coconut cream or a plant-based whipped topping for a dairy-free option.
Enjoy the vibrant flavors and colors of summer with this invigorating Summer Berry Bliss Board!
- 💰 REDUCE WASTE AND SAVE MONEY: Chef Preserve keeps FOOD FRESH 5 TIMES LONGER than non-vacuum storage...
- ✅ POWERFUL, QUICK & EASY TO USE: Simply press the button to start. The device vacuum seals a bag in 5...
- ♻️ REUSABLE & RESEALABLE BAGS: Chef Preserve comes with dishwasher, freezer, refrigerator, and...
Tropical Paradise Board
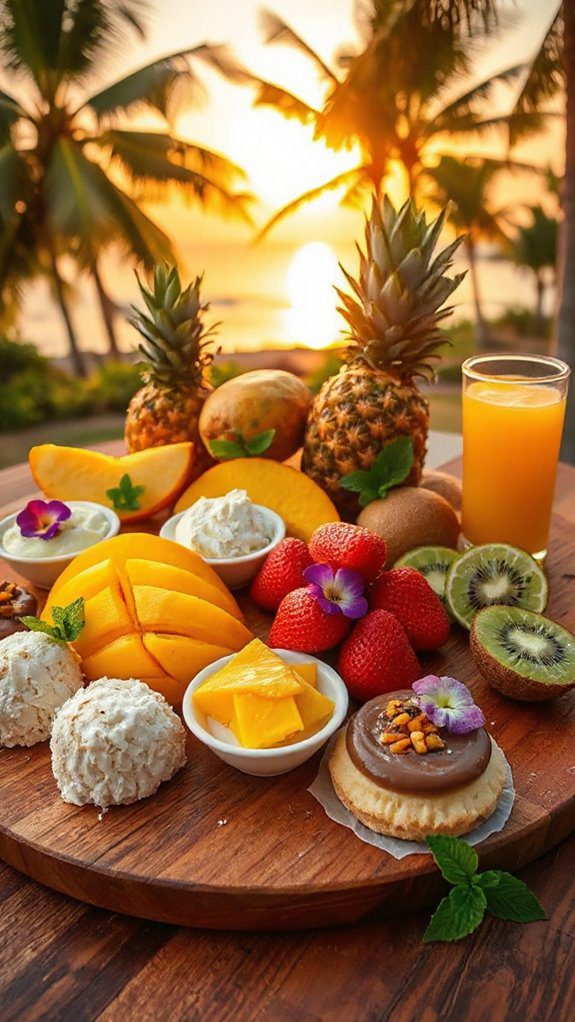
The Tropical Paradise Board is a vibrant and colorful dessert display that captures the essence of summer with an assortment of tropical fruits, sweet treats, and island-inspired flavors.
This delightful board is perfect for gatherings, barbecues, or simply a fun family dessert night. With a preparation time of just 30 minutes, it allows you to bring a taste of the tropics to your table with minimal effort, allowing you to enjoy the sunshine and good company.
Ingredients:
- 1 pineapple, cut into chunks
- 2 mangoes, diced
- 1 papaya, sliced
- 1 cup strawberries, hulled and halved
- 1 cup blueberries
- 1 cup mini marshmallows
- 1 cup coconut yogurt (or regular yogurt)
- 1/2 cup shredded coconut
- 1/4 cup honey or agave syrup
- Fresh mint leaves for garnish
- Bamboo skewers (optional)
Instructions:
- Start by preparing all the fruit by peeling, cutting, and slicing as needed. Arrange the fruits in clusters on a large serving board or platter, creating a colorful pattern.
- In a small bowl, mix the coconut yogurt with honey or agave syrup to add a touch of sweetness. This will serve as a delicious dip for the fruits.
- Add the mini marshmallows around the fruits to fill in any gaps on the board and provide a fun, fluffy addition.
- Sprinkle the shredded coconut generously over the fruits and dip for a tropical flair.
- Garnish the board with fresh mint leaves for a pop of green and a revitalizing aroma.
- Optionally, thread some fruit onto bamboo skewers to create easy-to-eat fruit kabobs for serving.
- Serve immediately and enjoy this delightful tropical feast!
Variations and Tips:
- Feel free to substitute any fruits with seasonal options, such as kiwis, bananas, or passionfruit, to customize your board to your liking.
- For an extra flavor boost, drizzle some lime juice over the fruits for added zest.
- If you want to enhance the tropical theme further, consider adding sweet treats such as fruit-based gummy candies, chocolate-covered almonds, or tropical-flavored macarons.
- Chill your fruit ahead of time for an extra invigorating treat, especially on hot summer days.
- Generous Capacity: 7-quart slow cooker that comfortably serves 9+ people or fits a 7-pound roast
- Cooking Flexibility: High or low slow cooking settings, with convenient warm function for ideal serving...
- Convenient: Set it and forget it feature enables you to cook while at work or performing daily tasks
S’mores Night Under the Stars Board
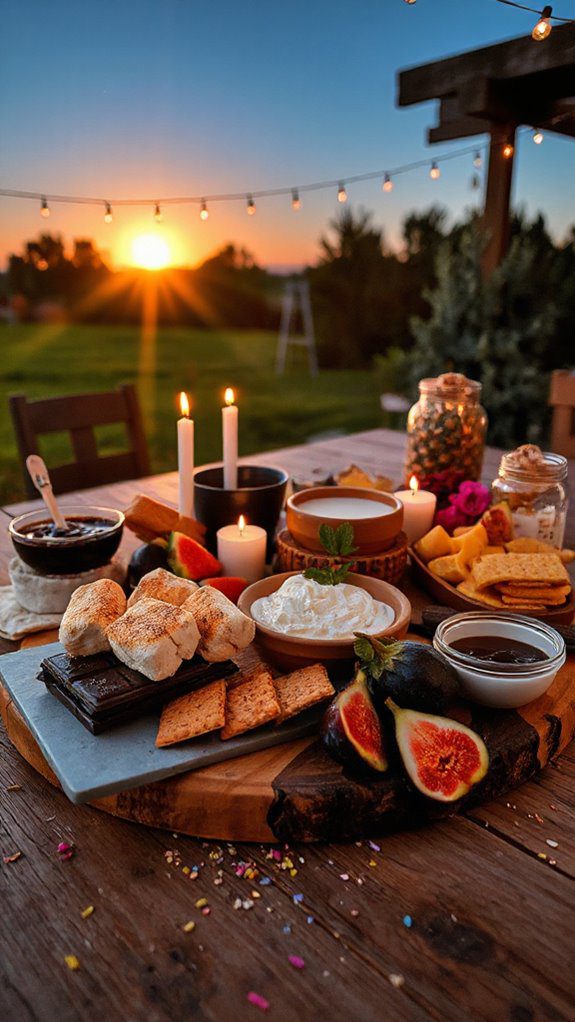
A S’mores Night Under the Stars Board is a delightful and interactive dessert experience perfect for summer nights spent with family and friends. This charming assembly invites everyone to participate in building their own s’mores while enjoying the warm ambiance of an evening under the stars. Preparation takes approximately 20 minutes, with a few extra minutes for roasting marshmallows, making it a quick and easy dessert option that sets the stage for fun and laughter.
Ingredients:
- Graham crackers
- Marshmallows
- Dark chocolate or milk chocolate bars
- Mini chocolate candies (optional, for added flavor)
- Caramel sauce (optional, for a twist)
- Fruit (strawberries, bananas, or apples for dipping)
- Skewers or roasting sticks
- Assorted toppings (crushed nuts, sprinkles, sea salt)
Cooking Steps:
- Set up your outdoor space: Choose a spot with ample seating and a safe area for roasting marshmallows. Lay out a large cutting board or platter as your base for the s’mores board.
- Prepare the ingredients: Break the graham crackers in half and arrange them on the board. Place the chocolate bars in sections beside the crackers. If using, scatter mini chocolate candies around for extra indulgence.
- Add the marshmallows: Arrange the marshmallows in a bowl or on the board for easy access. Make sure to include extra skewers or roasting sticks for each participant to use while roasting.
- Prepare the fruit (if using): Cut the fruit into bite-sized pieces and place them in a small bowl or scatter around the board for dipping in melted chocolate or caramel sauce.
- Set out the toppings: Create small piles or bowls of assorted toppings like crushed nuts, sprinkles, and sea salt, allowing people to customize their s’mores creations.
- Fire it up: If you’re using an outdoor fire pit, set it up safely and get the fire going. Alternatively, use a portable indoor s’mores maker if outdoors isn’t an option.
- Enjoy assembling: As guests gather, encourage them to roast their marshmallows to desired doneness, layer their s’mores with crackers and chocolate, and add any extra toppings they desire.
Variations and Tips:
- For a different flavor profile, try using flavored marshmallows, such as vanilla, strawberry, or chocolate-dipped marshmallows.
- Swap out traditional graham crackers for flavored or gluten-free crackers to accommodate dietary preferences.
- Consider making a s’mores-themed charcuterie board by including a variety of treats like cookies, cake slices, or chocolate-dipped pretzels to enhance the experience.
- Use a kitchen torch for indoor roasting, allowing for controlled caramelization without the need for a fire pit.
- To make clean-up easy, provide a few plates and napkins so guests can enjoy their creations without the mess.
- 100% Leak-proof: Guaranteed no-spill seal and secure latches
- Crystal-clear Tritan Built: Stain-resistant and odor-resistant material for a clear view of contents
- Lightweight & Sturdy: Easy to carry, yet durable for everyday use
Ice Cream Sundae Station Board
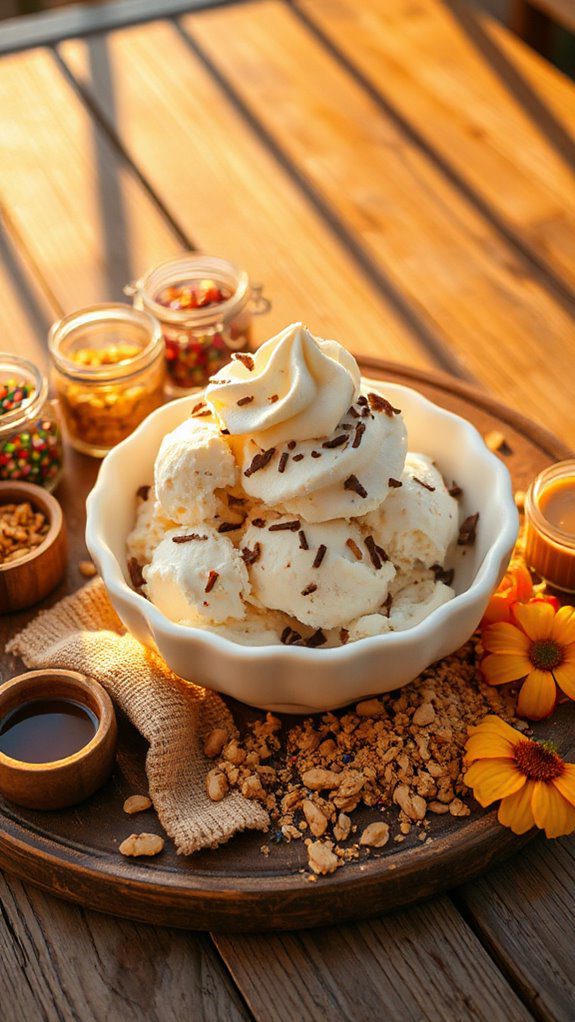
An Ice Cream Sundae Station Board is a fun and interactive dessert option perfect for summer gatherings, birthday parties, and family get-togethers. This dessert board allows guests to build their own sundaes with a variety of ice creams, toppings, and sauces, making it suitable for all ages.
Preparation time is approximately 30 minutes, which includes setting up the ingredients and decorative elements to create an appealing presentation.
Ingredients:
- 3-4 flavors of ice cream (e.g., vanilla, chocolate, strawberry, mint chocolate chip)
- Assorted toppings such as:
- Chocolate chips
- Sprinkles
- Crushed nuts (e.g., walnuts, almonds)
- Mini marshmallows
- Fresh fruit (e.g., sliced strawberries, bananas, blueberries)
- Whipped cream
- Caramel sauce
- Hot fudge
- Cookie crumbles (e.g., Oreos, graham crackers)
- Maraschino cherries for garnish
- Ice cream cones or cups
Instructions:
- Set Up the Board: Choose a large wooden board or platter for a rustic look. Arrange the ice cream flavors in the center, using small bowls to contain each flavor and ice cream scoops nearby.
- Create Borders with Toppings: Arrange the assorted toppings around the ice cream, creating sections for each kind of topping. Make sure to leave some space for easy access.
- Add Sauces: Place small jars or bowls for sauces like hot fudge and caramel in easy reach. You can use squeeze bottles for the sauces for a fun and easy dispensing method.
- Garnish with Fruit and Cherries: Add fresh fruit and a bowl of maraschino cherries for those who want an extra special touch. This adds brightness and freshness to the board.
- Provide Serving Ware: Add a few cups or cones on one side of the board, along with spoons and napkins.
- Keep it Cool: If the gathering is outdoors or the weather is particularly warm, consider placing the ice cream in a cooler with ice packs until you’re ready to serve, to prevent melting.
Variations and Tips:
- Themed Boards: Customize toppings based on a theme, such as tropical fruits and coconut for a beach vibe, or chocolate and nuts for a café experience.
- Dietary Options: Include dairy-free or low-sugar ice cream options to cater to guests with dietary restrictions.
- Mini Sundae Cups: Provide small cups for guests who want to sample a variety of sundaes without overindulging.
- Presentation: Use colorful bowls and decorative spoons for an eye-catching layout. You can even incorporate fresh flowers or themed décor around the serving area to elevate the aesthetic.
- Interactive Fun: Encourage guests to create their unique sundae combinations, making it a fun activity during the gathering.
- 𝗘𝗳𝗳𝗼𝗿𝘁𝗹𝗲𝘀𝘀 𝗪𝗲𝗶𝗴𝗵𝗶𝗻𝗴: Supports 5 units...
- 𝗣𝗿𝗲𝗰𝗶𝘀𝗲 𝗥𝗲𝘀𝘂𝗹𝘁𝘀: Accurately weighs up to 11 lb/5 kg with 1 g...
- 𝗦𝗶𝗺𝗽𝗹𝗲 & 𝗖𝗼𝗺𝗽𝗮𝗰𝘁: The small and sleek scale is a perfect fit for...
Rustic Cheesecake Sampler Board
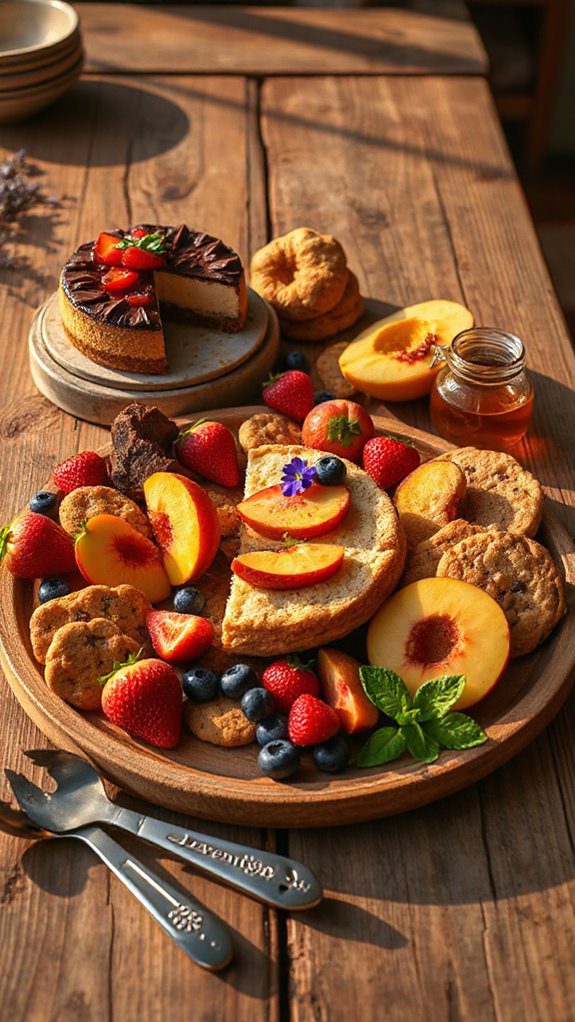
A Rustic Cheesecake Sampler Board is a delightful and visually stunning dessert platter that features an array of mini cheesecakes in various flavors, all beautifully arranged for a casual yet elegant presentation. This board is perfect for summer gatherings, picnics, or dessert parties, delighting both adults and children with its variety. The preparation time for this board is approximately 2 hours, including chilling time for the cheesecakes.
Ingredients:
- 1 ½ cups graham cracker crumbs
- ½ cup unsalted butter, melted
- 1 cup cream cheese, softened
- ½ cup granulated sugar
- 1 teaspoon vanilla extract
- 2 large eggs
- 1 tablespoon all-purpose flour
- ½ cup sour cream
- Fruit toppings (berries, sliced peaches, or cherries)
- Caramel sauce
- Chocolate ganache
- Mint leaves for garnish
Cooking Steps:
- Prepare the Crust: In a mixing bowl, combine the graham cracker crumbs and melted butter. Mix until the crumbs are evenly coated. Press the mixture firmly into the bottom of individual mini cheesecake molds (or a large mold if preferred) to form the crust.
- Make the Cheesecake Filling: In another bowl, beat the softened cream cheese until smooth. Gradually add in the granulated sugar and continue to mix until combined. Add vanilla extract, eggs, and flour; mix until the batter is smooth and creamy. Fold in sour cream for added richness.
- Fill the Molds: Pour the cheesecake filling over the crust in each mold, filling them about ¾ full to allow room for expansion.
- Bake: Preheat your oven to 325°F (160°C). Place the cheesecake molds in a water bath (a larger pan filled with water) to prevent cracking. Bake for about 25-30 minutes, or until the edges are set but the center still has a slight jiggle.
- Cool and Chill: Turn off the oven and let the cheesecakes cool inside for about an hour. Remove from the water bath and refrigerate for at least 1-2 hours, or until fully chilled.
- Assemble the Board: Once the cheesecakes are chilled and set, carefully remove them from the molds. Arrange them artistically on a large wooden board or platter. Use fruit toppings, caramel sauce, and chocolate ganache for decoration. Add mint leaves for a pop of color.
Variations and Tips:
- Flavor Variations: You can prepare different cheesecake flavors by adding lemon zest, cocoa powder, or various extracts (like almond or hazelnut) to the filling.
- Topping Ideas: Get creative with toppings—use crushed cookies, whipped cream, or different fruits for each mini cheesecake to diversify flavors and textures.
- Presentation: For a rustic look, use parchment paper pieces for each mini cheesecake, providing a quaint and charming touch to the display.
- Serving Suggestions: Serve with coffee or tea for a perfect dessert pairing, or let guests customize their slices with their favorite toppings.
Creating a Rustic Cheesecake Sampler Board is not only a delicious way to satisfy sweet cravings but also acts as a beautiful centerpiece for your summer gatherings. Enjoy!
- Instant Read Food Thermometer | Our instant read thermometer features a temperature probe and advanced,...
- Multi-Use | From bbq thermometer to baking thermometer, our digital food thermometer for cooking is...
- Easy-Read Digital Thermometer For Cooking | Large instant thermometer dial with bright blue backlight...
Elegant Pastry Platter Board

An Elegant Pastry Platter Board is the perfect showstopper for any summer gathering, whether it’s a picnic, garden party, or an afternoon tea. This delightful arrangement features an assortment of pastries, including flaky croissants, creamy éclairs, and decadent tarts, all artfully displayed to create an enticing centerpiece.
Preparing this board takes about 30 minutes, making it a quick and easy yet impressive dessert option to delight guests of all ages.
Ingredients
- Assorted pastries (croissants, éclairs, macarons, tarts)
- Fresh berries (strawberries, blueberries, raspberries)
- Whipped cream or crème fraîche
- Chocolate sauce or melted chocolate
- Fresh mint leaves for garnish
- Edible flowers (optional for decoration)
- Powdered sugar for dusting
Cooking Steps
- Select Your Pastries: Choose a variety of pastries that offer different textures and flavors. Consider flaky croissants, rich chocolate éclairs, delicate macarons, and colorful fruit tarts for a delightful assortment.
- Prepare the Board: Use a large, clean wooden or marble board for an elegant presentation. Start by placing larger items, like the croissants and tarts, near the center of the board.
- Arrange Pastries: Neatly arrange the pastries on the board, leaving some space between each item to avoid a cluttered look. Vary the placement to create height and depth, such as stacking one or two croissants.
- Add Fresh Fruits: Scatter fresh berries around the pastries for a burst of color. They will not only add visual interest but also provide a revitalizing contrast to the pastries.
- Incorporate Dips: In small bowls or ramekins, serve whipped cream or crème fraîche for dipping. Drizzle chocolate sauce over the board or let it flow into one of the dips for extra indulgence.
- Finalize the Presentation: Garnish the board with fresh mint leaves and edible flowers, if using. Dust powdered sugar over the pastries for a touch of sweetness and elegance.
- Serve: Present the platter to your guests as they gather, allowing them to enjoy the beautiful arrangement and choose their favorites!
Variations & Tips
- Mix and match seasonally available fruits to enhance freshness and color.
- Consider using themed pastries based on the occasion, such as mini fruit tarts for a summer celebration.
- Create different flavor profiles by including pastries filled with fruit compote, custard, or chocolate ganache.
- For a more interactive experience, provide guests with customizable options like a variety of sauces and toppings.
- Make use of small, elegant plates or napkins for guests to easily serve themselves and navigate the board.
Enjoy sharing this stunning platter with friends and family—it’s sure to become a beloved summer tradition!
- Versatile 54-Piece Collection: Elevate your kitchen with the Home Hero 54-Piece Kitchen Utensil Set, a...
- Durable and Long-Lasting: Crafted from premium stainless steel, these kitchen utensils are designed to...
- Perfect Holiday Gift: Delight your loved ones with this kitchen utensils gift set this festive season....
Nutty Granola and Yogurt Board

A Nutty Granola and Yogurt Board is a delightfully customizable dessert that serves as a perfect breakfast or snack for anyone looking to enjoy a balanced yet indulgent treat.
Ideal for gatherings or weekday brunches, this dish can be prepared in about 15 minutes and can easily serve 4-6 people. With its vibrant display of colors and textures, it’s a feast for the eyes and the palate, with layers of creamy yogurt, crunchy granola, and an assortment of fresh fruits and nuts.
Ingredients:
- 2 cups of Greek yogurt (plain or flavored)
- 1 ½ cups of granola (store-bought or homemade)
- 1 cup of mixed nuts (almonds, walnuts, pecans, etc.)
- 2 cups of fresh fruit (berries, bananas, peaches, etc.)
- ¼ cup of honey or maple syrup
- Optional toppings: chia seeds, coconut flakes, chocolate chips, or dried fruit
Cooking Steps:
- Prepare the Yogurt Base: In a bowl, scoop out the Greek yogurt and spread it evenly on a large serving board or platter, creating a smooth layer.
- Add Granola: Generously sprinkle the granola over one half of the yogurt layer, allowing some granola to cascade off the side for an appealing look.
- Layer with Nuts: Scatter the mixed nuts artistically over the other half of the yogurt, giving a pleasant crunch and nutty aroma.
- Arrange Fresh Fruit: Slice or arrange your choice of fresh fruits around the yogurt, granola, and nuts, creating a colorful and inviting display.
- Drizzle and Serve: Finish by drizzling honey or maple syrup over the board, and sprinkle optional toppings like chia seeds or coconut flakes for added texture. Serve immediately.
Variations and Tips:
- Custom Granola: Try making your own granola by combining oats, nuts, seeds, honey, and some spices, then baking until golden brown.
- Flavor it Up: Consider using flavored yogurts such as vanilla, honey, or berry for additional taste.
- Fruit Combinations: You can personalize the fruit selection based on what’s in season or your personal favorites—think mango, kiwi, or apple slices.
- Dietary Preferences: For a dairy-free option, substitute Greek yogurt with coconut yogurt or almond yogurt, and make sure the granola is also dairy-free.
- Presentation: Use a large wooden board or a colorful platter for presentation; simple changes in arrangement can elevate the dish’s visual appeal.
Enjoy this easy-to-make Nutty Granola and Yogurt Board at your next gathering, and let your guests customize their servings for a delightful, healthy experience!
- 24-ounce insulated stainless-steel water bottle with a FreeSip spout and push-button lid with lock
- Patented FreeSip spout designed for either sipping upright through the built-in straw or tilting back to...
- Protective push-to-open lid keeps spout clean; convenient carry loop doubles as a lock
Mini Tart and Cookie Collection Board
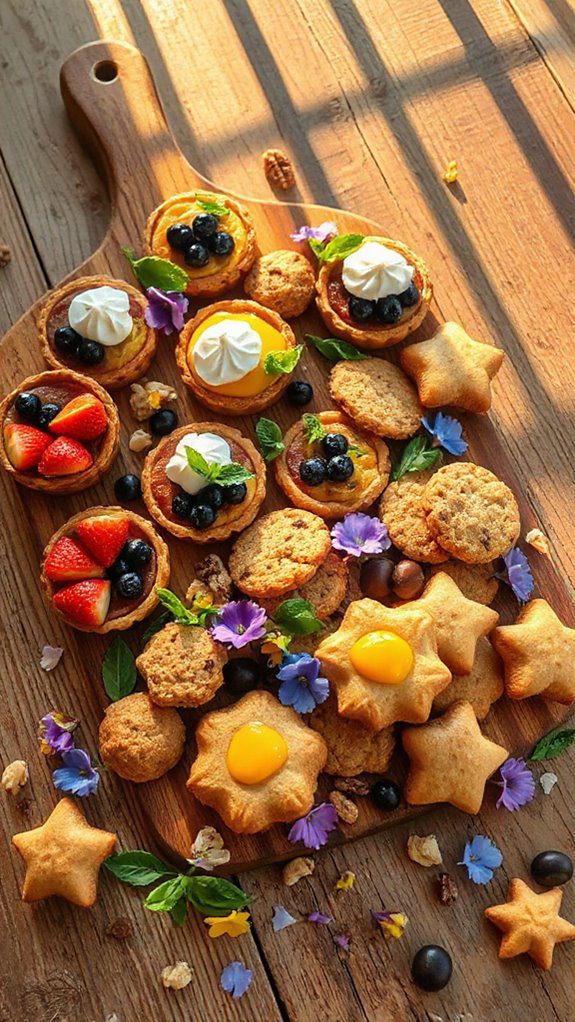
Summer Dessert Boards are a delightful way to present an assortment of bite-sized treats that are perfect for gatherings, picnics, or even a cozy night in. The Mini Tart and Cookie Collection Board features a colorful variety of mini tarts filled with sweet creams, fruits, and jams, alongside a selection of cookies that cater to different tastes. This dish is ideal for entertaining friends, impressing family, or simply indulging in a personal dessert experience.
Preparation time takes approximately 1 hour and 30 minutes, making it a fun yet manageable project to undertake.
Ingredients
- For Mini Tarts:
- 1 cup all-purpose flour
- 1/4 cup powdered sugar
- 1/2 cup unsalted butter, softened
- 1 egg yolk
- 1 teaspoon vanilla extract
- 1/2 cup pastry cream or flavored yogurt
- Fresh fruits (berries, kiwi, etc.)
- Fruit preserves or jams (optional)
- For Cookies:
- 1 cup all-purpose flour
- 1/2 teaspoon baking powder
- 1/4 teaspoon salt
- 1/2 cup unsalted butter, softened
- 1/2 cup granulated sugar
- 1/4 cup brown sugar
- 1 egg
- 1 teaspoon vanilla extract
- 1 cup chocolate chips or nuts (optional)
Cooking Steps
- Prepare the Tart Shells:
- In a mixing bowl, combine flour and powdered sugar. Add the softened butter and mix until the mixture resembles coarse crumbs.
- Add egg yolk and vanilla extract, mixing until the dough comes together. If too dry, add a teaspoon of cold water.
- Press the dough into mini tart pans, ensuring it covers the bottom and sides. Prick the bottoms with a fork to prevent bubbling.
- Chill the tart shells in the refrigerator for about 30 minutes.
- Bake the Tart Shells:
- Preheat the oven to 350°F (175°C).
- Remove the tart shells from the refrigerator and bake for 12-15 minutes, or until they turn golden brown. Allow them to cool completely on a wire rack.
- Prepare the Cookie Dough:
- In a bowl, whisk together flour, baking powder, and salt. Set aside.
- In a separate bowl, cream the softened butter, granulated sugar, and brown sugar until light and fluffy.
- Add the egg and vanilla extract, mixing until well blended. Gradually add the flour mixture, stirring until combined. Fold in chocolate chips or nuts if desired.
- Bake the Cookies:
- Preheat the oven to 350°F (175°C) if not already on.
- Drop tablespoon-sized scoops of cookie dough onto lined baking sheets, leaving some space between each.
- Bake for 10-12 minutes, or until the edges are golden brown. Allow to cool on the baking sheet for a few minutes before transferring to a wire rack to cool completely.
- Assemble the Dessert Board:
- Fill each cooled tart shell with pastry cream or yogurt, and top with fresh fruits. If desired, add a dollop of fruit preserves on top.
- Arrange the tarts and cookies on a large serving board, mixing colors and textures for eye appeal.
Variations and Tips
- Flavor Options for Tarts: You can experiment with different fillings, such as lemon curd, chocolate ganache, or whipped cream with chocolate shavings.
- Cookie Variations: Consider different types of cookies, such as oatmeal raisin, sugar cookies decorated with icing, or gluten-free alternatives to cater to various dietary preferences.
- Decorative Touches: Sprinkle edible flowers, mint leaves, or additional fruit around the board for a more vibrant presentation.
- Serving Suggestion: Provide small tongs or dessert forks for easy serving, making everyone feel welcome to indulge.
Enjoy creating and sharing this delightful Mini Tart and Cookie Collection Board at your next summer gathering!
Refreshing Gelato and Sorbet Board
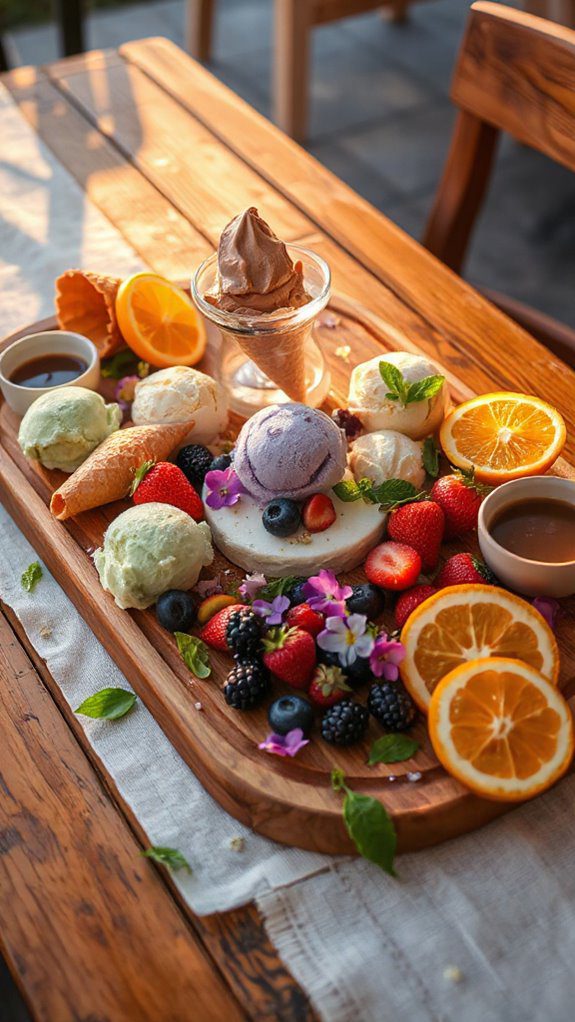
A revitalizing gelato and sorbet board is an enticing dessert spread perfect for summer gatherings, celebrations, or simply treating yourself to something cool and delightful.
This no-cook dish showcases an assortment of colorful gelato and sorbet flavors, paired with various toppings and accompaniments. Ideal for families, friends, or as a centerpiece for parties, this board can be prepared in just 20 minutes, allowing you to prioritize fun and socializing over complicated cooking.
Ingredients
- 4 pints of assorted gelato (e.g., vanilla, chocolate, pistachio, strawberry)
- 4 pints of assorted sorbet (e.g., lemon, raspberry, mango, coconut)
- Fresh fruits (e.g., berries, sliced peaches, kiwi, pineapple)
- Waffle cones or bowls
- Mini brownie bites or cookies
- Nuts (e.g., almonds, pistachios, walnuts)
- Chocolate or caramel sauce (for drizzling)
- Fresh mint leaves (for garnish)
Instructions
1. Prepare the Board: Start by selecting a large wooden or marble cutting board as your base.
Arrange the pints of gelato and sorbet in a visually appealing pattern, leaving space in between for toppings.
2. Add Toppings: Fill in the gaps with fresh fruits, brownie bites, and cookies.
Sprinkle the nuts around the board for added crunch and texture.
3. Include Drizzles: Place small bowls of chocolate or caramel sauce on the board, or drizzle directly over the gelato and sorbet for an attractive finish.
4. Garnish: Add fresh mint leaves scattered throughout the board for a touch of freshness and color.
5. Serve: Allow guests to scoop their favorite flavors, mix and match with toppings, and enjoy their creation in waffle cones or bowls.
Variations and Tips
- Flavor Combinations: Mix traditional flavors (like chocolate and vanilla) with unique choices (like lavender or green tea gelato) for an adventurous experience.
- Presentation: Use a variety of heights by including small serving dishes or differing sizes of toppings, making the board visually engaging.
- Keep It Cool: If planning to serve outdoors on a warm day, consider placing the board on a tray filled with ice to keep the gelato and sorbet cold.
- Dietary Options: Include dairy-free or vegan gelato and sorbet options to accommodate varying dietary preferences.
- Personal Touches: Encourage guests to be creative by providing a variety of toppings and sauces, allowing them to customize their dessert experience.


